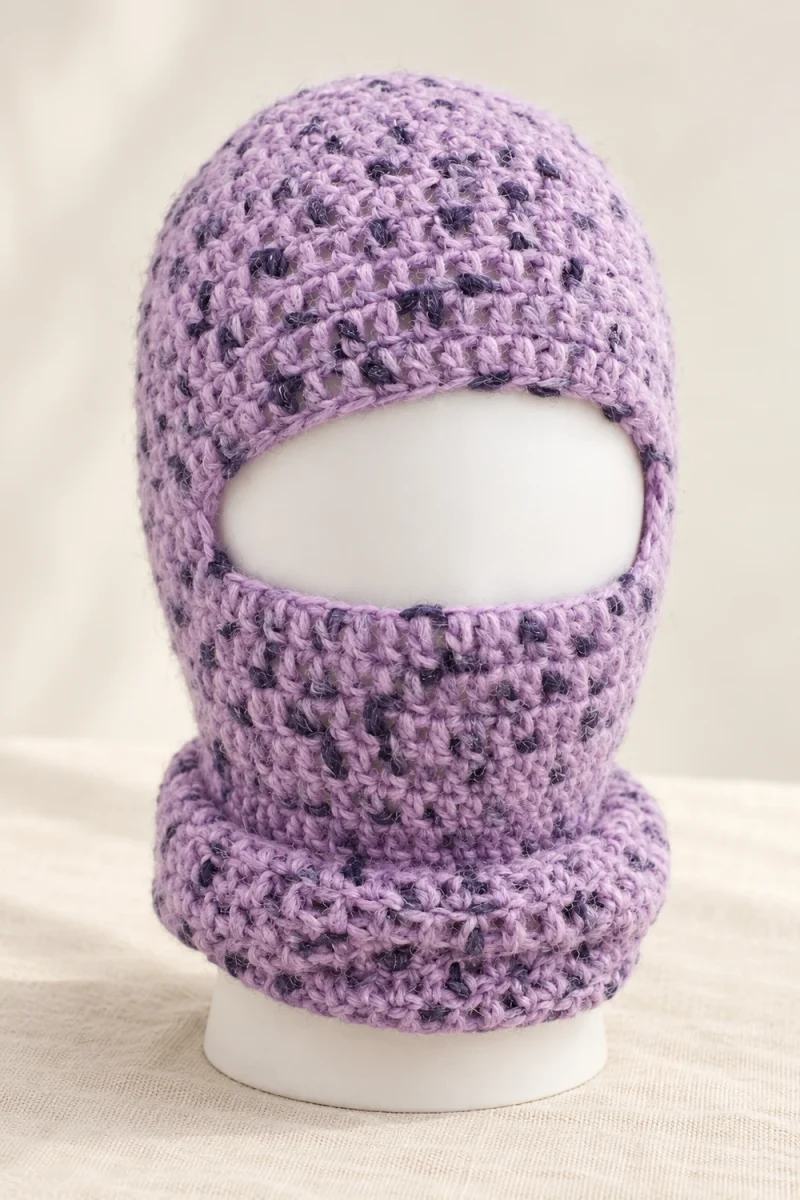
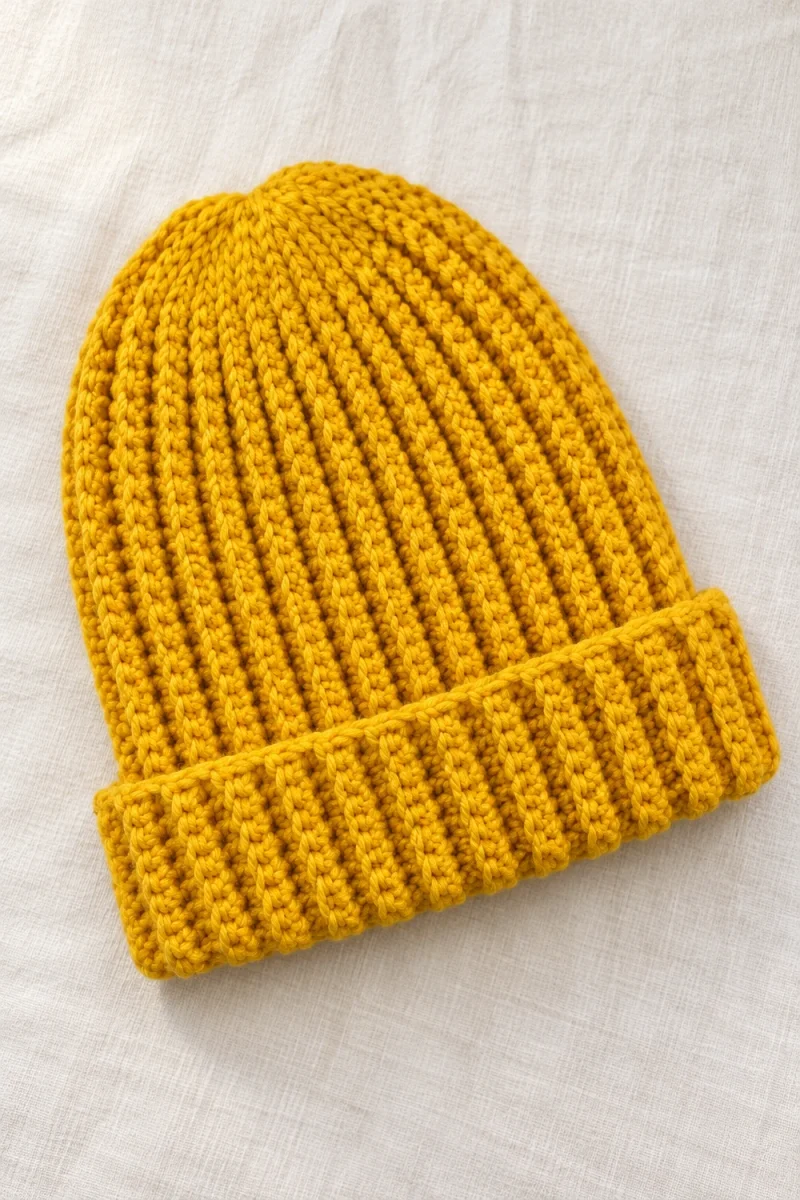
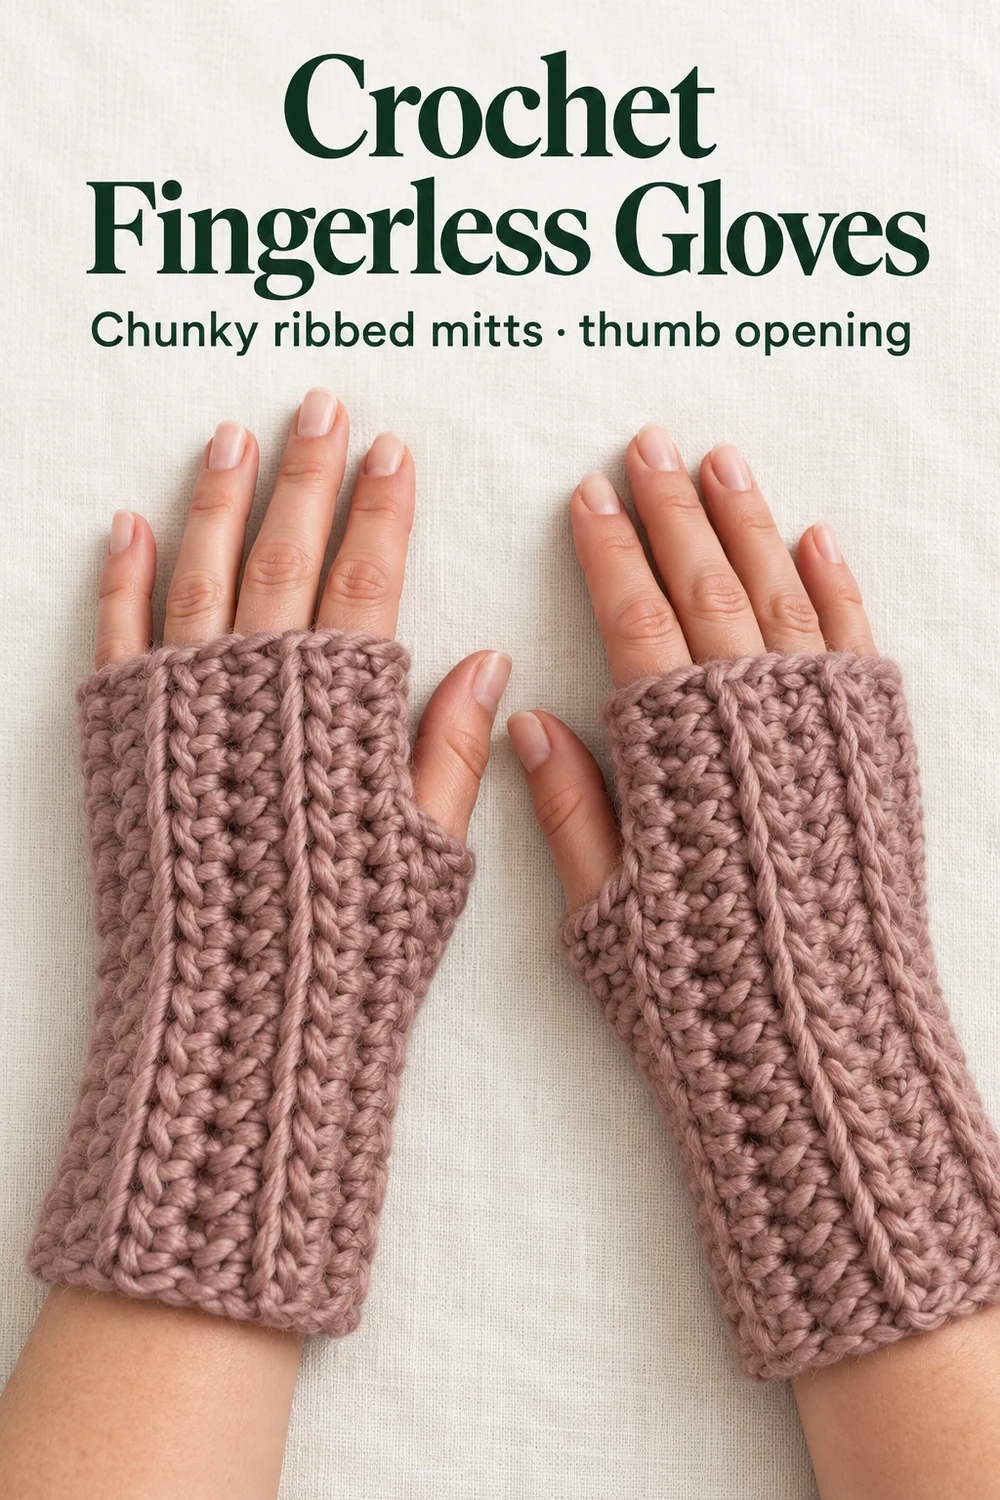
These crochet fingerless gloves start as one flat ribbed rectangle that is folded and sewn into a sleeve, with a small gap left for the thumb. The creator works it in 100% bulky wool with a 9 mm hook, so every ridge and stitch is thick enough to read clearly in the photos. Her panel is 18 stitches long and 12 rows wide, which she gives as roughly 16 by 17 cm before sewing, and she sizes the rows to her wrist rather than to a fixed glove size.
Before you start these crochet fingerless gloves
The on-screen materials list gives 100% wool yarn in a bulky weight (class 5), about 60 g, and a 9 mm hook. You will also need scissors, a few stitch markers, a measuring tape and a tapestry needle with a large eye. The video demonstrates with one dusty-rose wool from start to finish, so the yarn in the photos is the yarn the finished gloves are made from.
These instructions use US terms. ch is chain, hdc is half double crochet (the creator’s “mezza maglia alta”), and back loop means the loop of the stitch farthest from you. Working into the back loop only is what builds the ribbed ridges across the fabric.
The video does not give yardage, gauge, a size chart or a second size. Everything here is the creator’s single worked example: 18 chains for the length and 12 rows for the width. She does say the idea is one row repeated, so you can change the chain count and the row count to suit your own hand.
How the fingerless gloves are built
There are only two numbers to decide. The foundation chain sets how long the glove is, and the number of rows sets how wide the panel is, which becomes the distance around the wrist. The creator picked her chain by measuring from about 3 to 4 cm above her wrist up to the base of her fingers, and she stopped adding rows when the panel was as wide as her wrist.
The first row goes into the chain. Every later row is worked in the back loops only, which makes the ridges. When the panel is wide enough, you fold it, sew the two long edges together and leave two stitches open. Because the fabric is elastic and the gloves will go on and off many times, she advises measuring the wrist rather than the palm, since the stitches relax a little with wear.
Make the ribbed panel and seam your crochet fingerless gloves
Work through the steps in order. Each small action has its own photo, so you can compare your stitches and your seam with the creator’s as you go.
-
Gather the yarn and tools
- Yarn · 100% wool, bulky · about 60 g
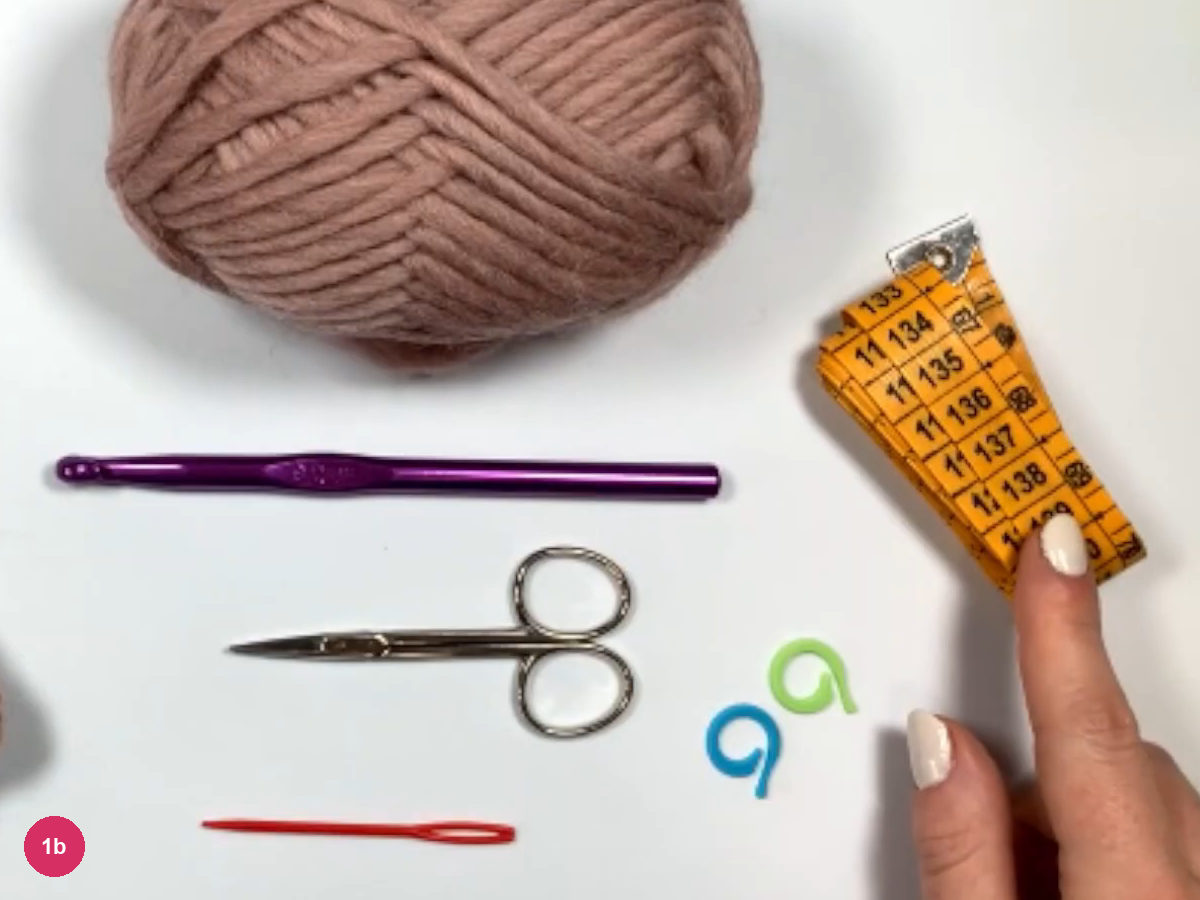
The on-screen materials list starts with 100% wool yarn in a bulky weight, about 60 g. The creator works in one dusty-rose shade from start to finish, so every photo here shows the same yarn.
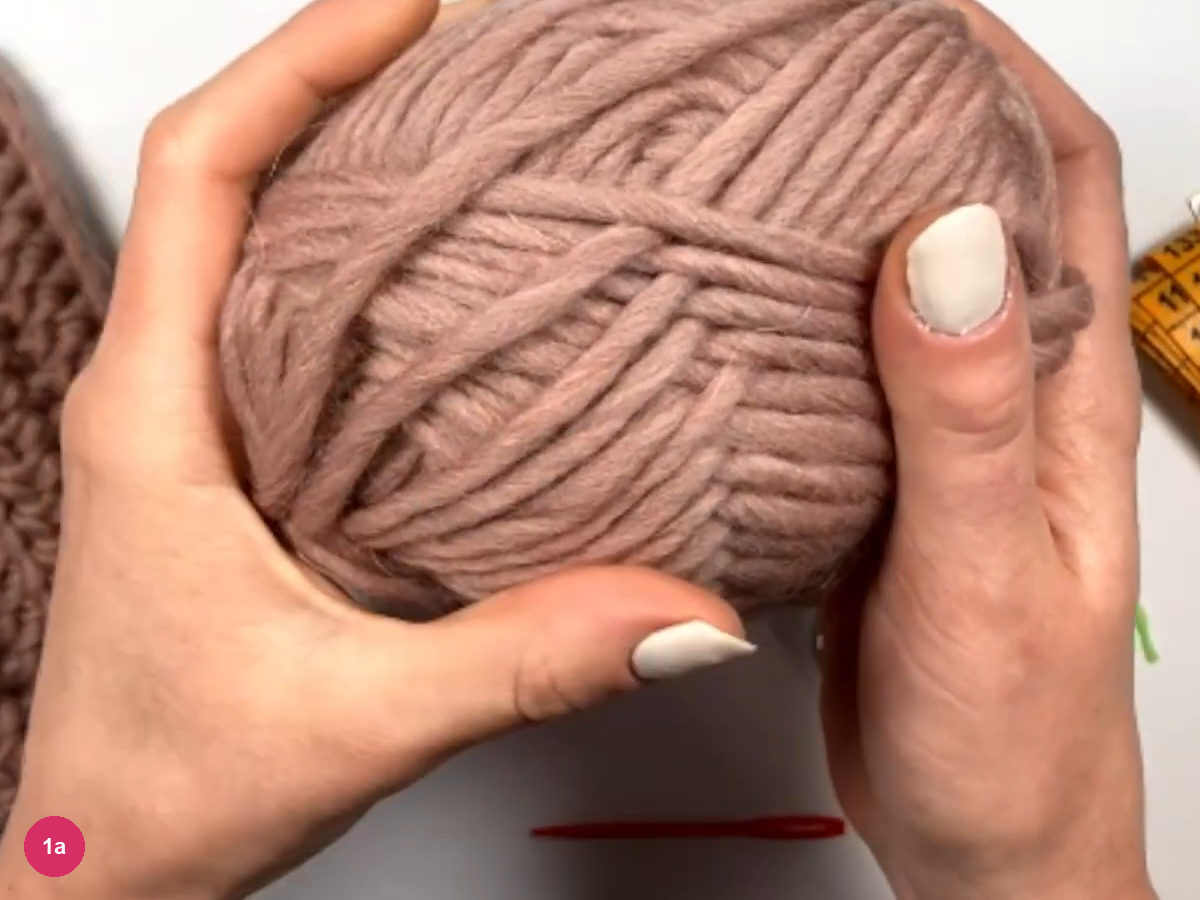
Step 1a: the bulky wool yarn used for the whole project. - Hook · 9 mm
You also need a 9 mm hook, scissors, a few stitch markers, a measuring tape and a tapestry needle with a large eye. The photo shows the hook, scissors, markers, tape and needle laid out beside the yarn.
Step 1b: hook, scissors, markers, tape and needle. -
Make the foundation chain
- Slip knot
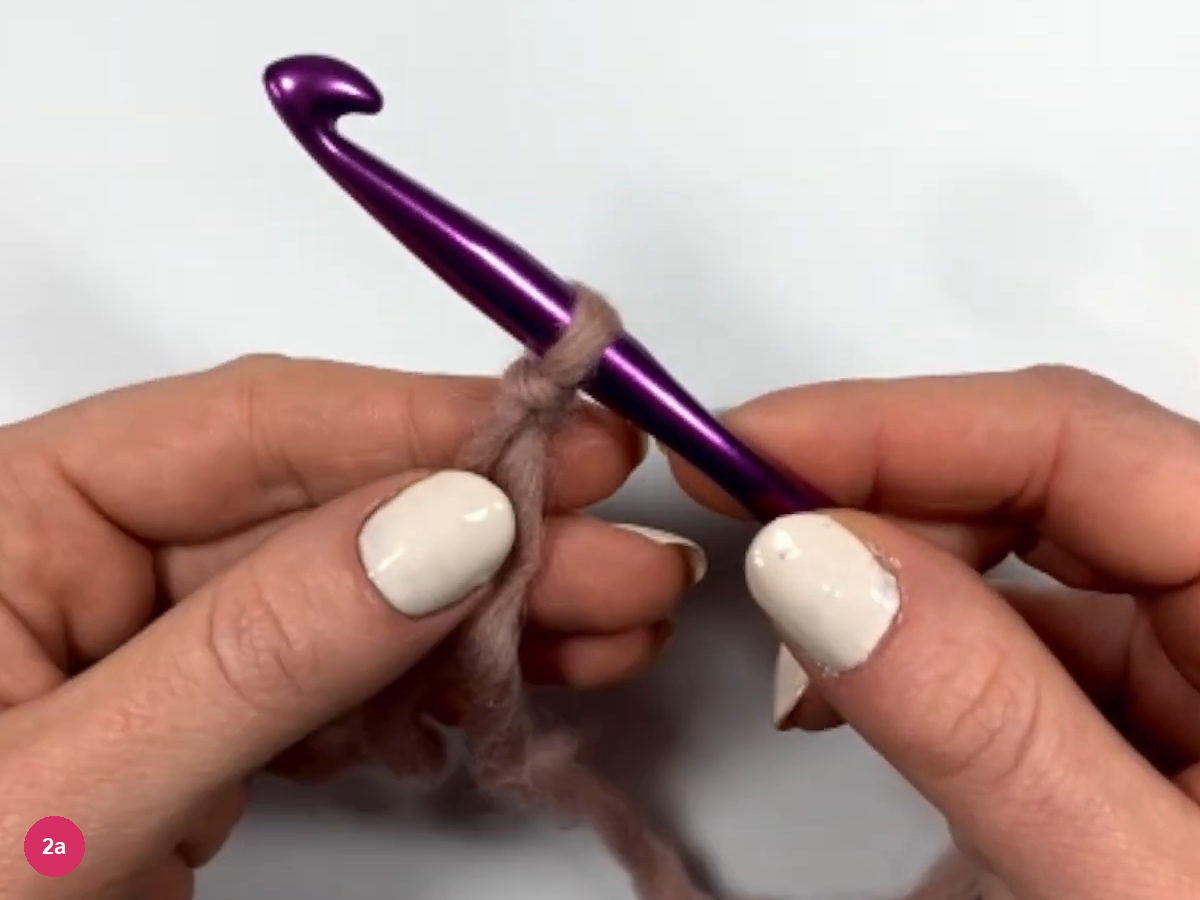
Make a slip knot with a fairly long tail on your right and slide it onto the 9 mm hook. The creator keeps this tail to sew with later.
Step 2a: slip knot on the hook. - Foundation chain
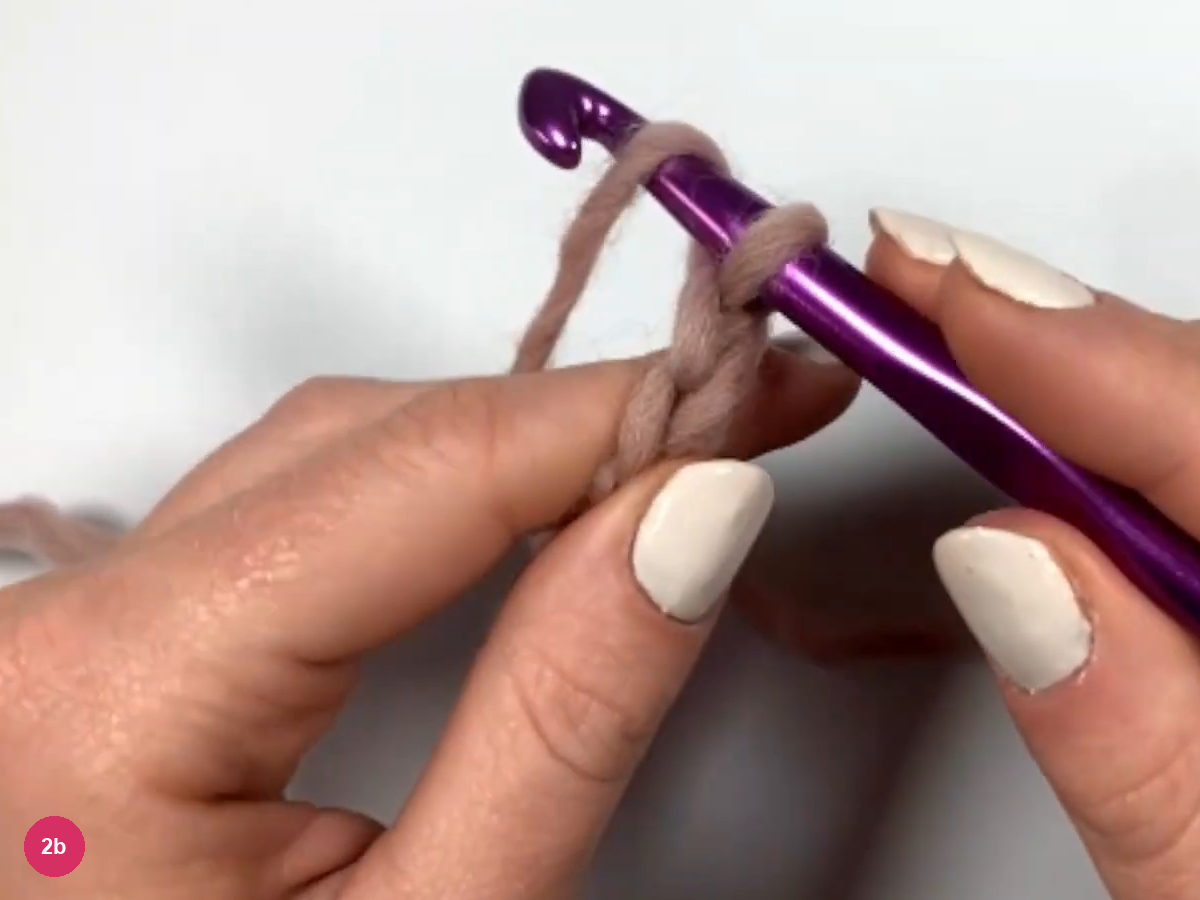
Yarn over and pull through to make the first chain, then repeat to build the chain one stitch at a time.
Step 2b: the first chains on the hook. - Foundation chain · 18 ch · about 16 cm
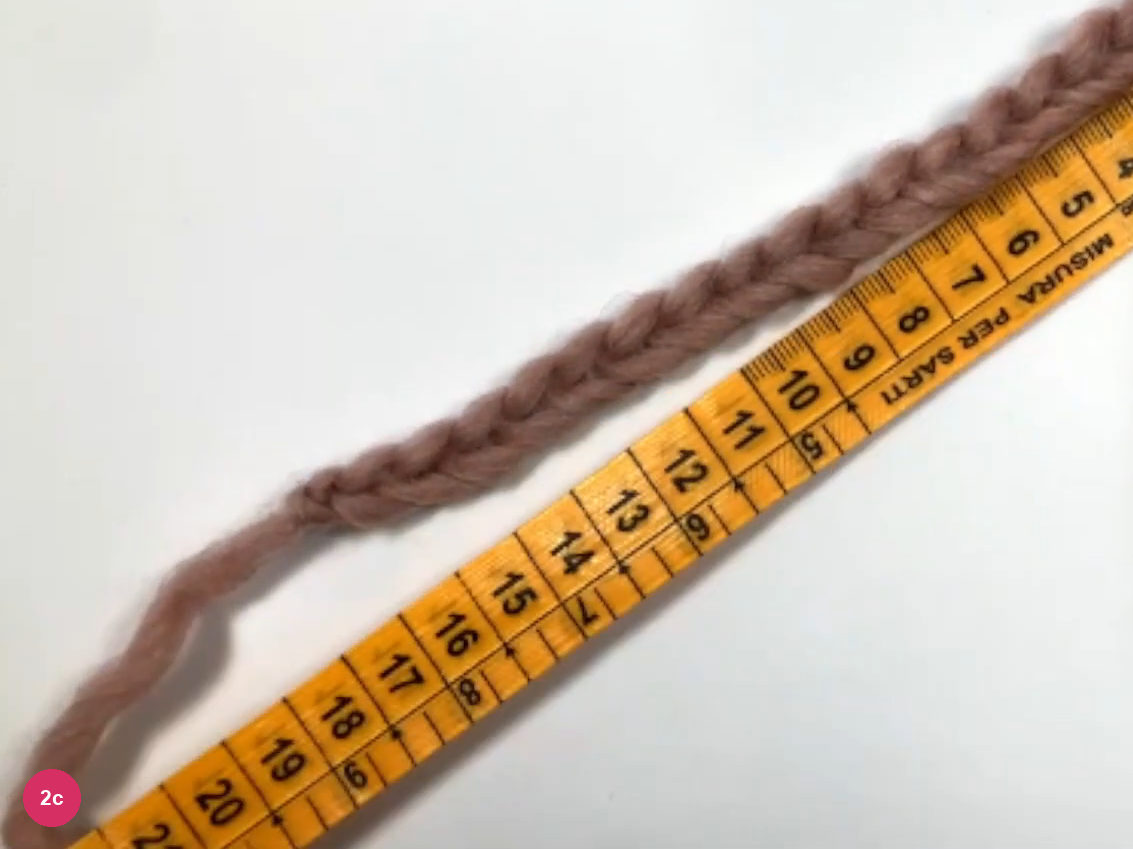
Make 18 chains in total. The creator gives this chain as about 16 cm, which she chose as the length from roughly 3 to 4 cm above the wrist up to the base of the fingers, and lays it along a tape to show it.
Step 2c: the foundation chain laid along the tape. -
Work row 1 along the chain
- Row 1 · ch 1, then hdc
Chain 1 for height, then work a half double crochet into the second chain from the hook: yarn over, insert the hook into the chain and draw up a loop, which leaves three loops on the hook.
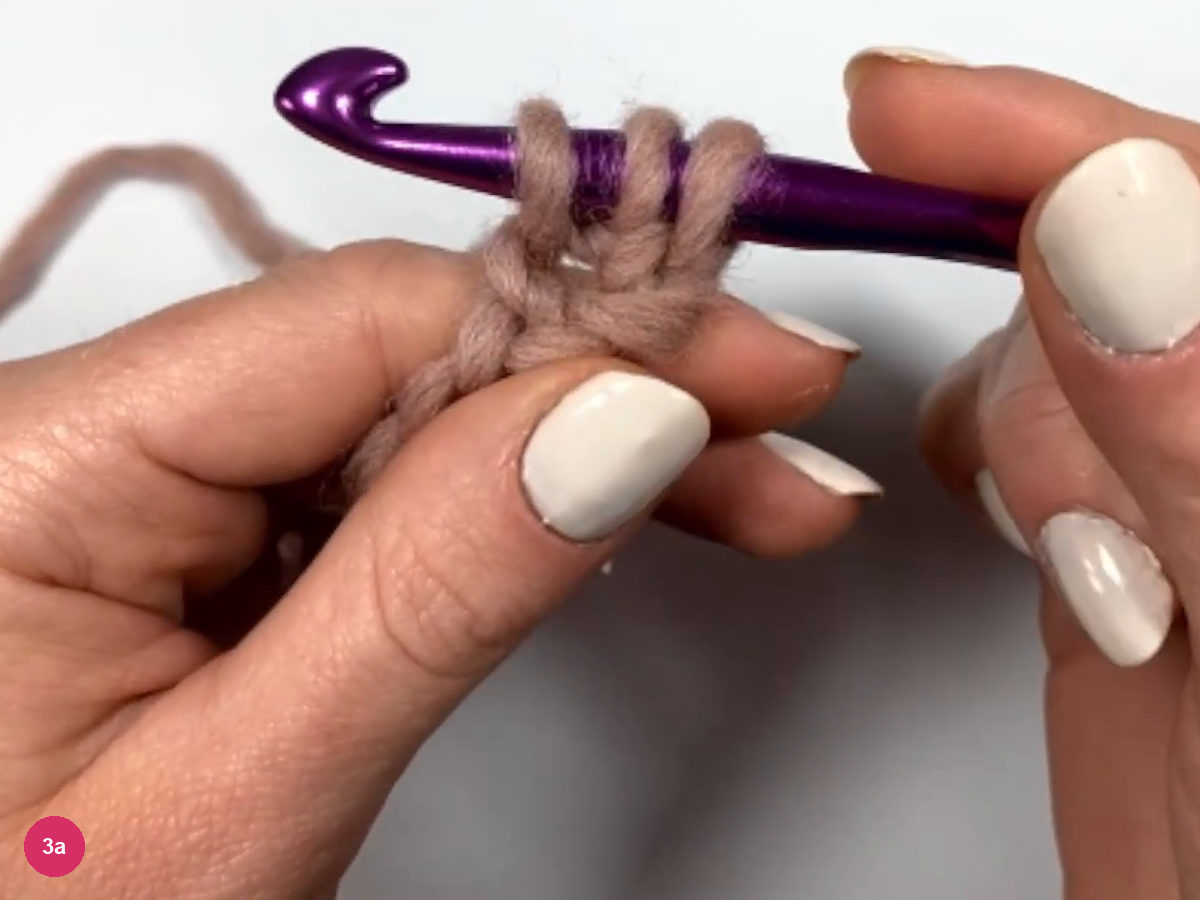
Step 3a: three loops on the hook for the first hdc. - Marker in the first stitch
Yarn over and pull through all three loops to finish the stitch. Mark this first stitch with a stitch marker so that you can recognise it later.
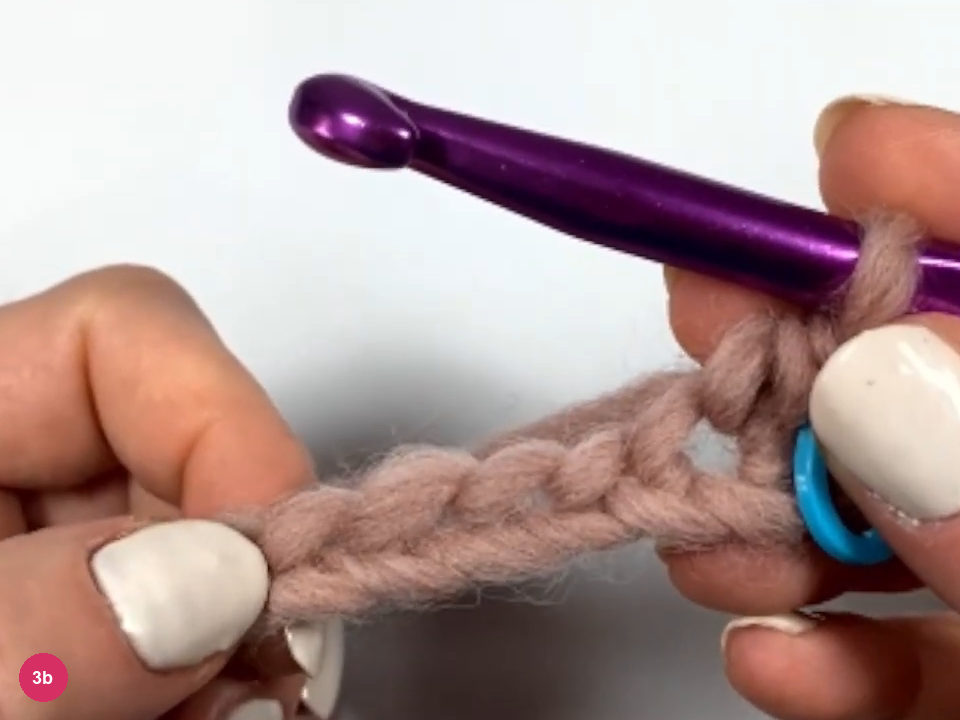
Step 3b: the first stitch finished and marked. - Row 1 · hdc in each chain
Work one hdc into every chain along the row, repeating yarn over, insert, pull up a loop and close all three loops each time.
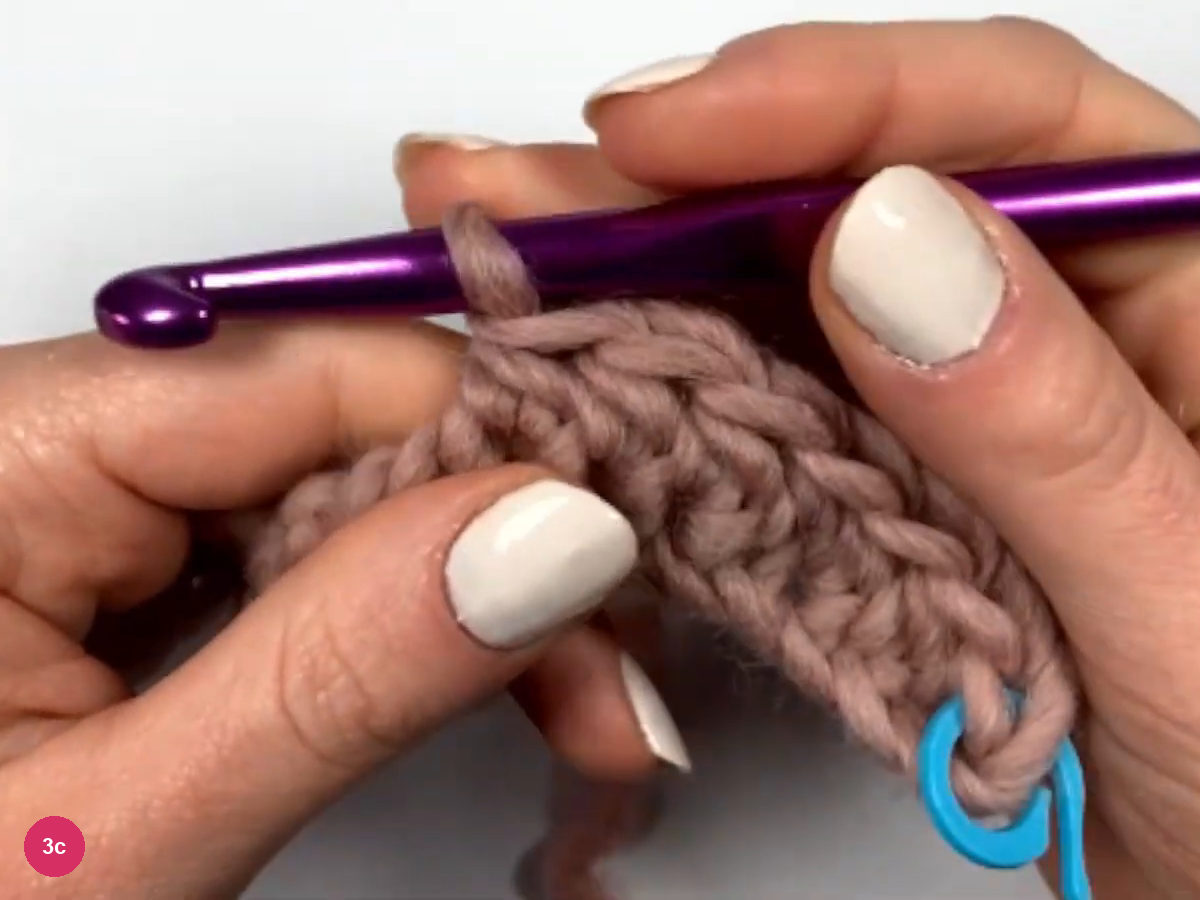
Step 3c: hdc stitches along the chain. - Row 1 · 18 hdc
Finish with the last hdc in the last chain. The on-screen note says row 1 has as many stitches as the chain, so here that is 18, and the row lies flat as a long strip.
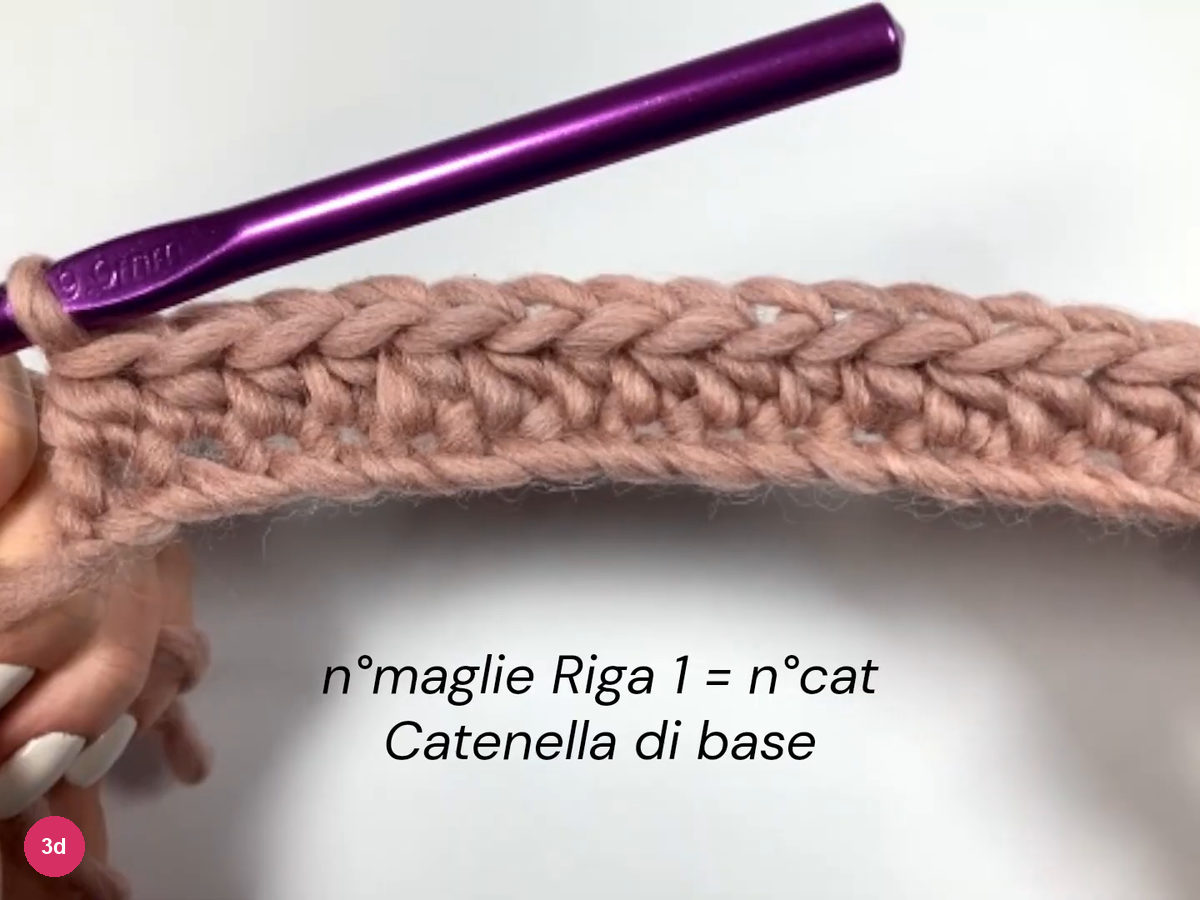
Step 3d: the finished first row. -
Work row 2 in the back loops
- Row 2 · ch 1, turn
Chain 1, which does not count as a stitch, and turn the work around.
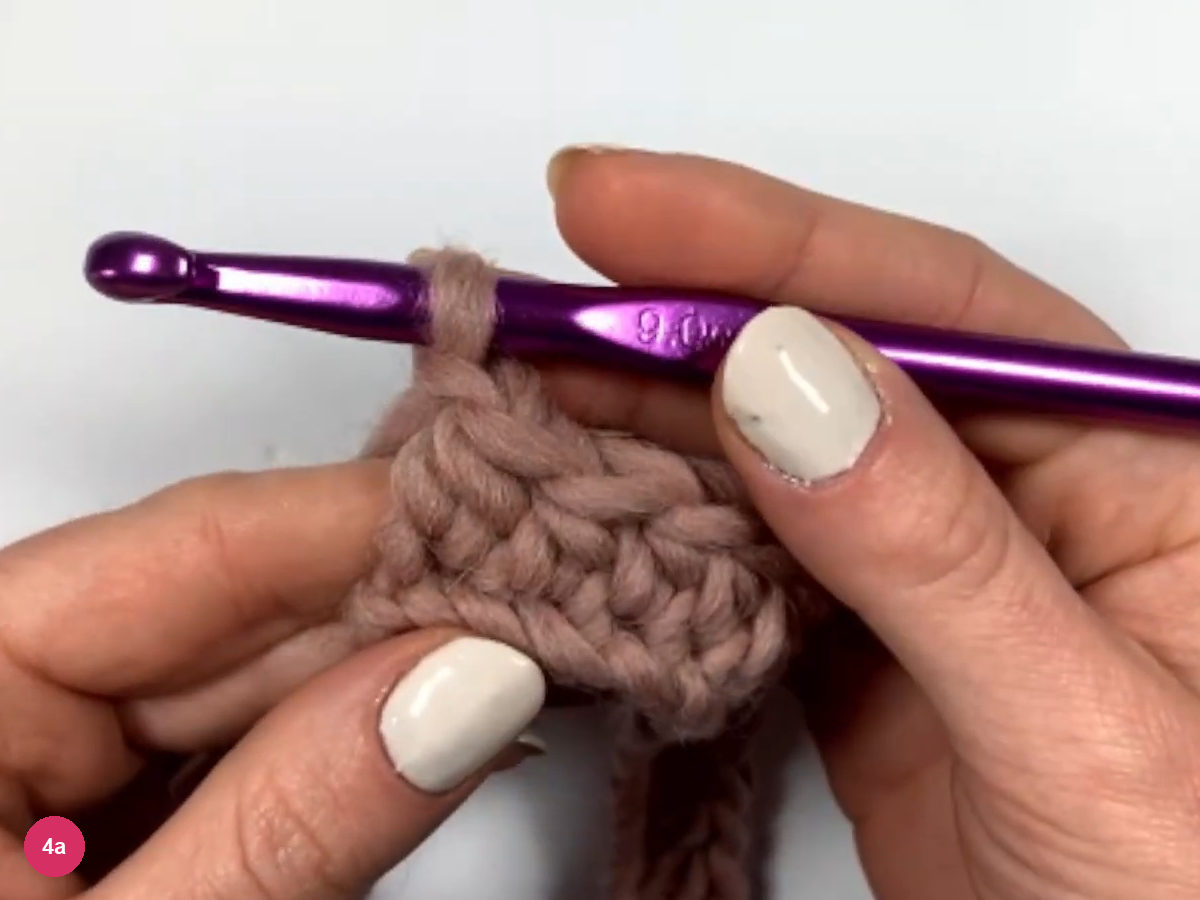
Step 4a: chain 1 and turn. - Row 2 · hdc in back loop
The top of each stitch is a V of two loops. Insert the hook under only the back loop, the one farther from you, and work a hdc into the first stitch.
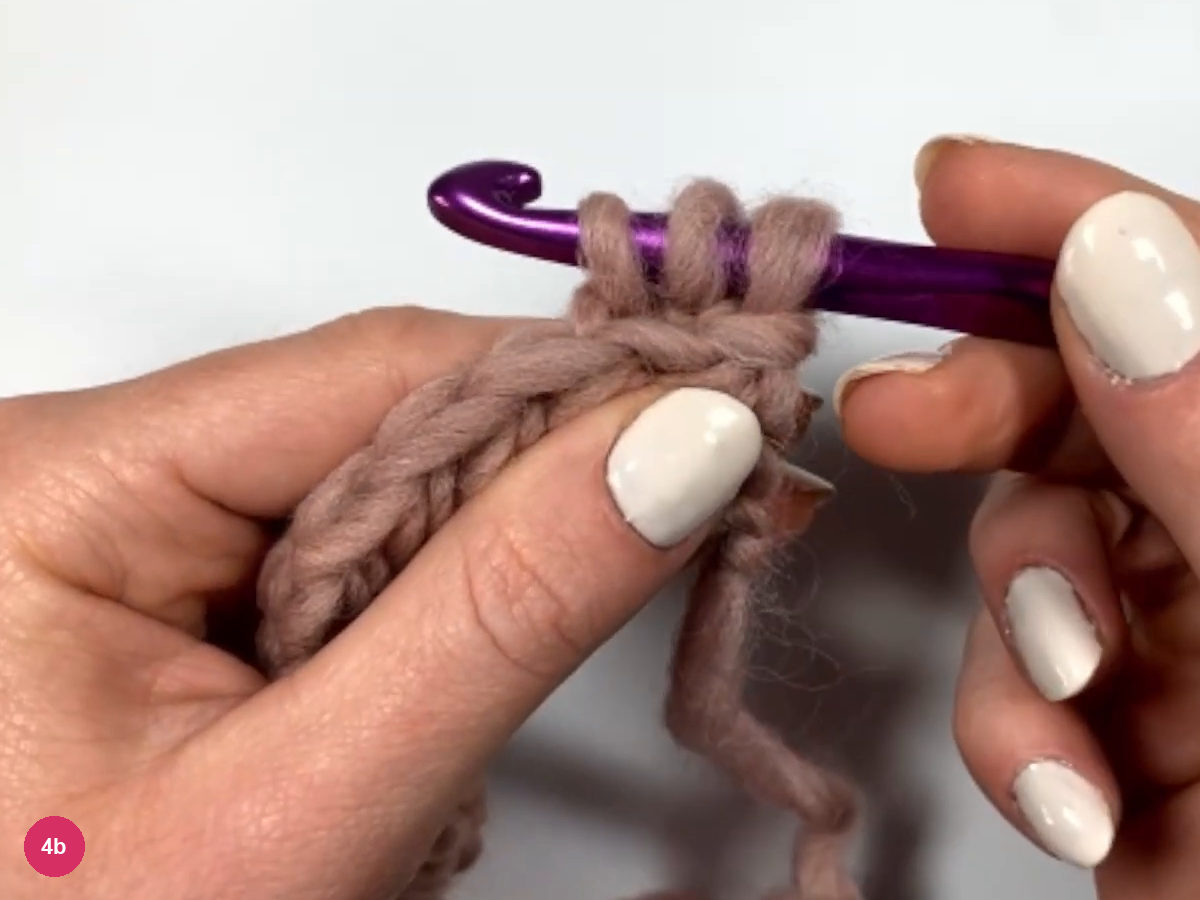
Step 4b: the first hdc worked in the back loop. - Row 2 · hdc in back loop of each stitch
Keep making one hdc in the back loop of every stitch, with a marker on the first stitch of the row. The ridge left by the unworked front loops starts to show.
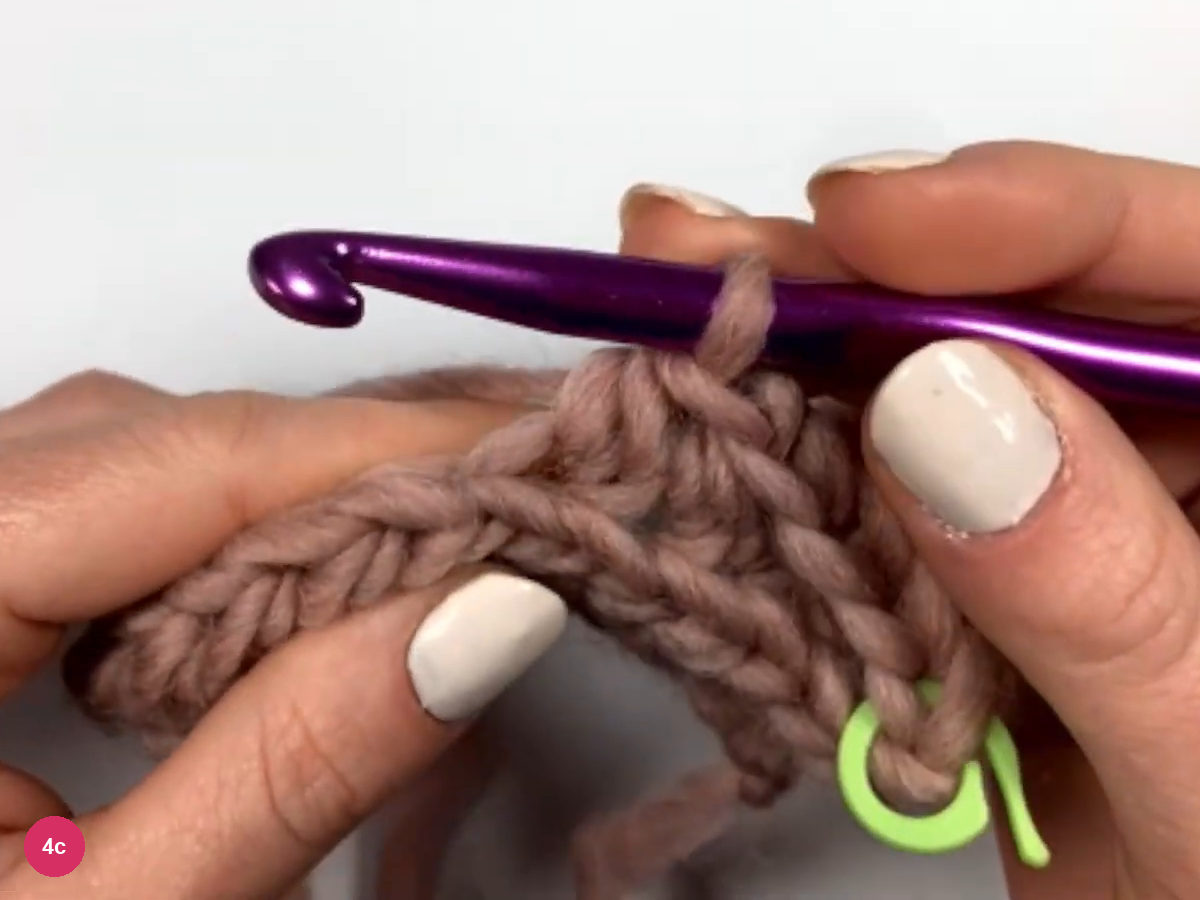
Step 4c: working across row 2. - Row 2 · last hdc in the marked stitch
At the end of the row remove the marker and work the last hdc into the back loop of that marked stitch.
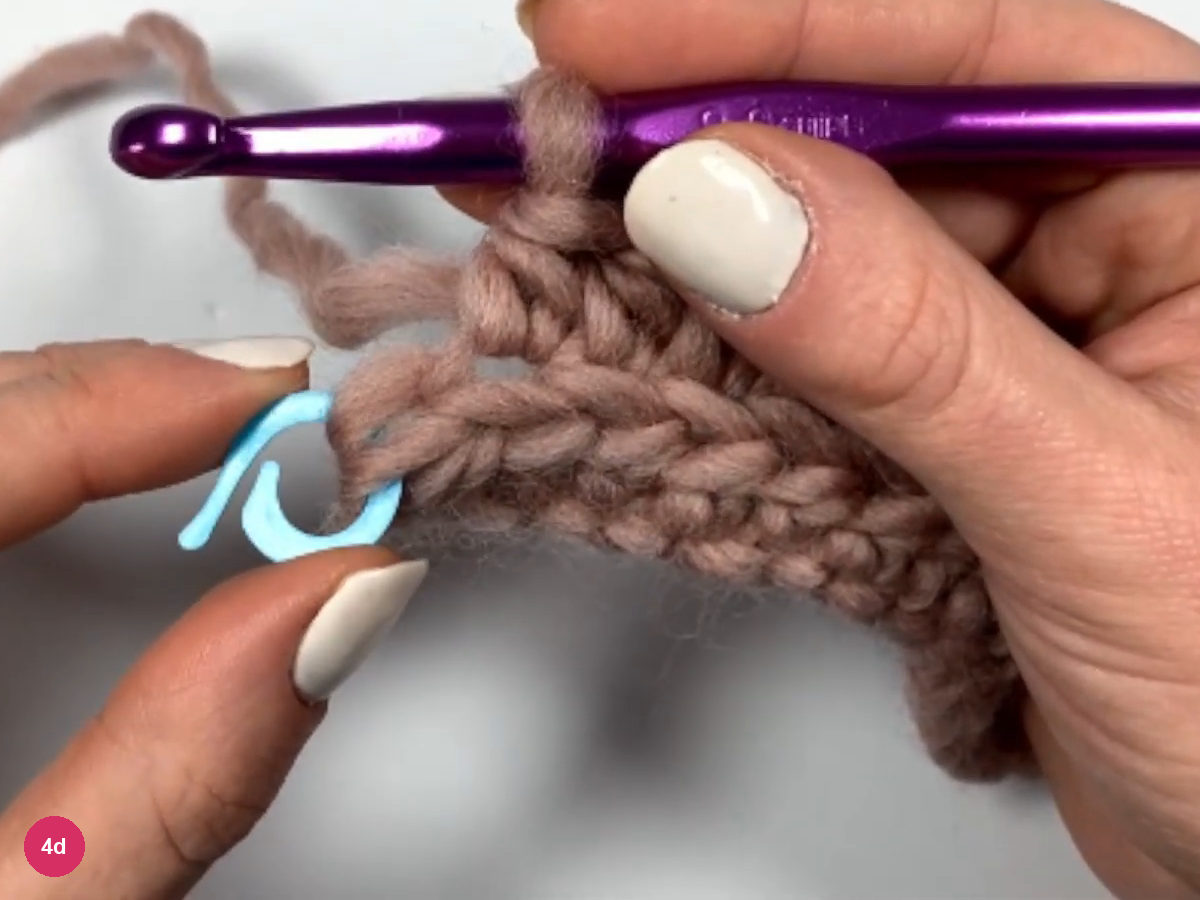
Step 4d: the last stitch of row 2. -
Repeat the row to match your wrist
- Row 3 · ch 1, turn, hdc in back loops
Row 3 is worked exactly like row 2: chain 1, turn, and make a hdc in the back loop of every stitch, marking the first stitch again.
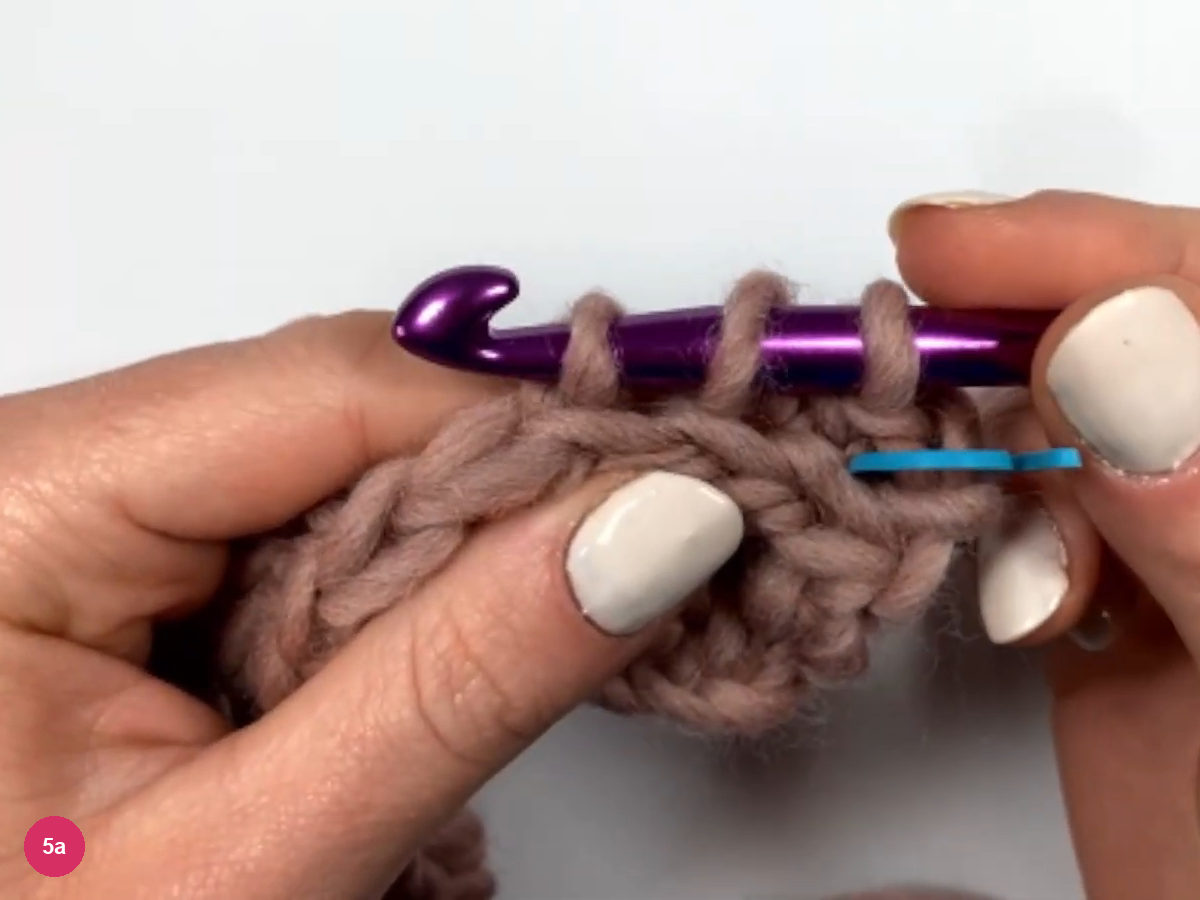
Step 5a: working row 3. - Rows 3 to 12 · repeat row 3
Repeat row 3 until the panel is as wide as your wrist. Every back-loop row leaves a ridge, so you can count the ridges to keep track of your rows.
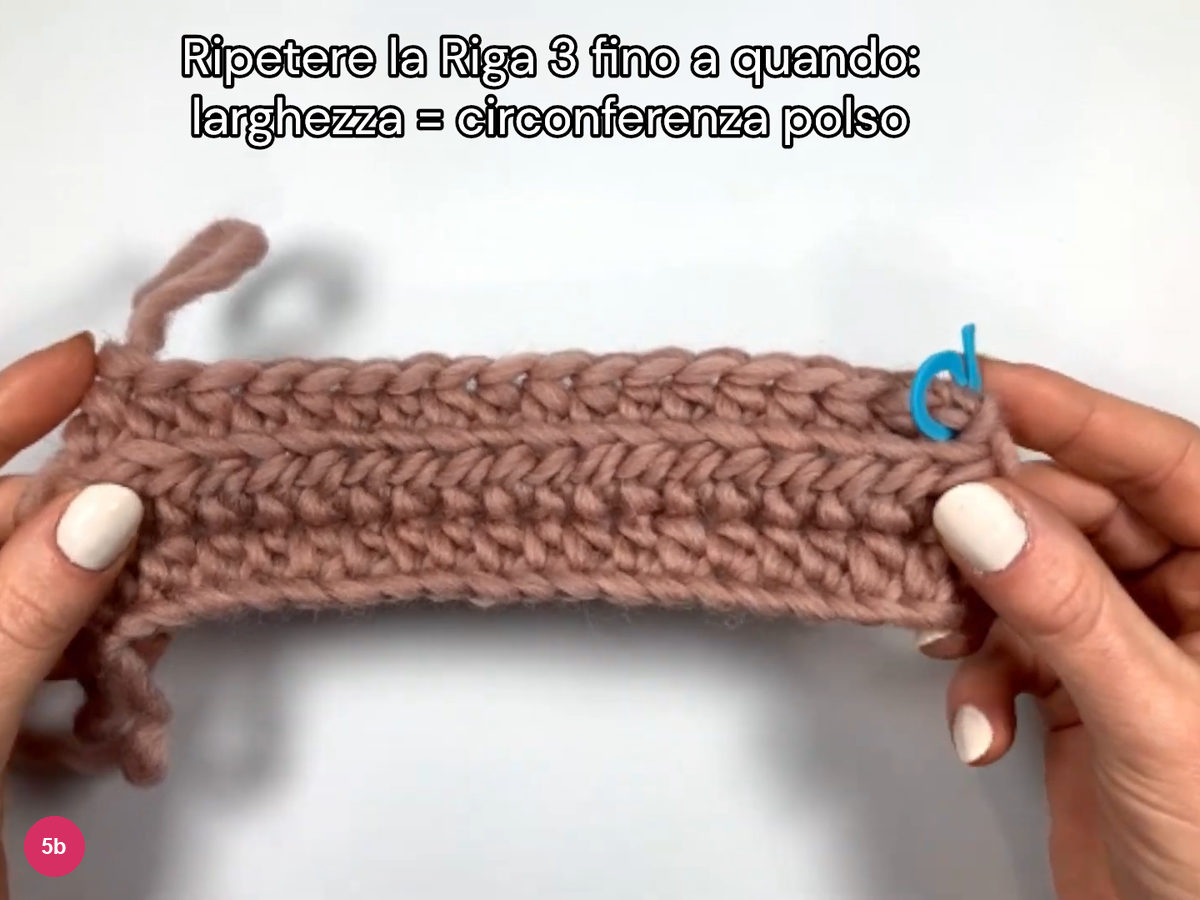
Step 5b: the panel growing row by row. - Check against your wrist
Wrap the panel around your wrist from time to time. The creator uses wrist circumference rather than palm width as the reference, because the stretchy fabric loosens a little each time the gloves go on and off.
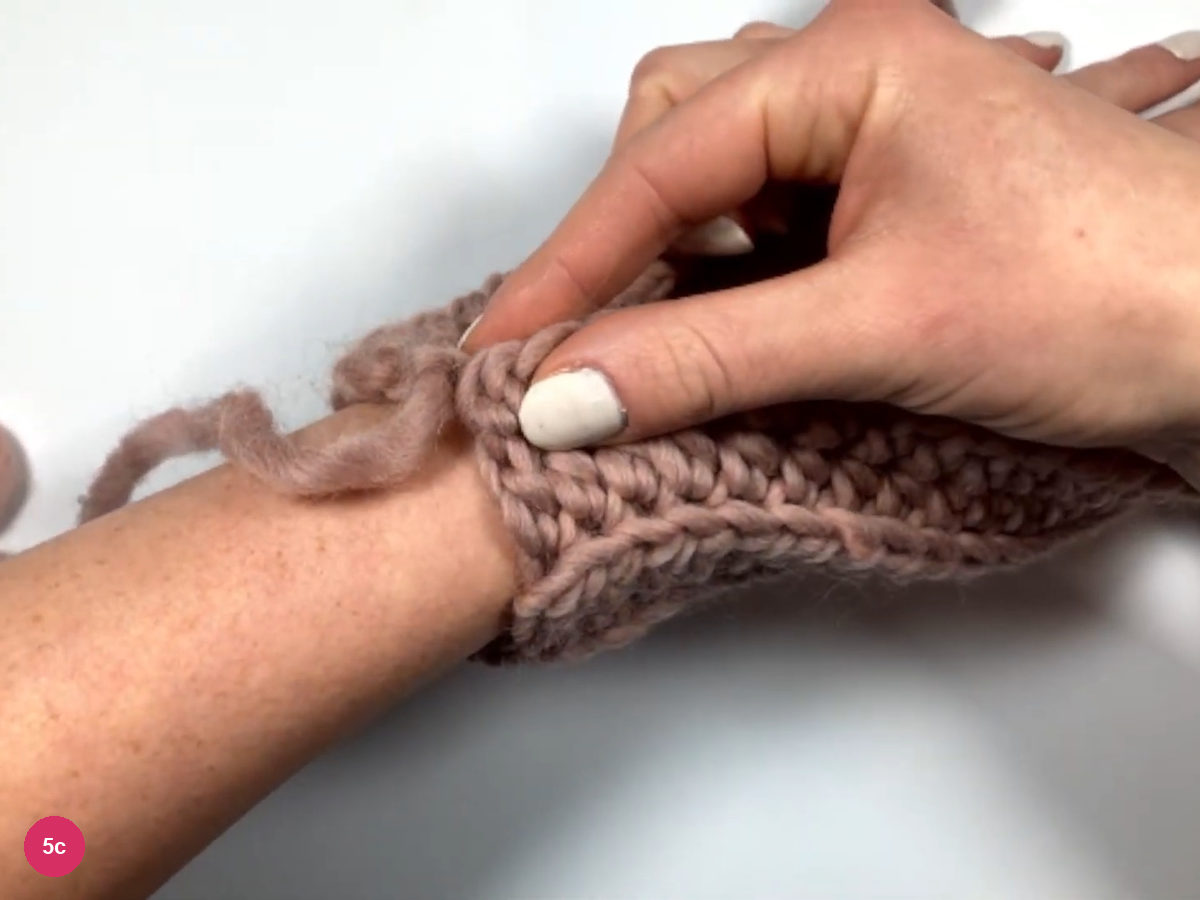
Step 5c: the panel wrapped around the wrist. - 12 rows · 17 cm
Here the creator stops at 12 rows, which she gives as 17 cm across, and lays a tape over the panel to check. That is her wrist size, so your own wrist decides your row count.
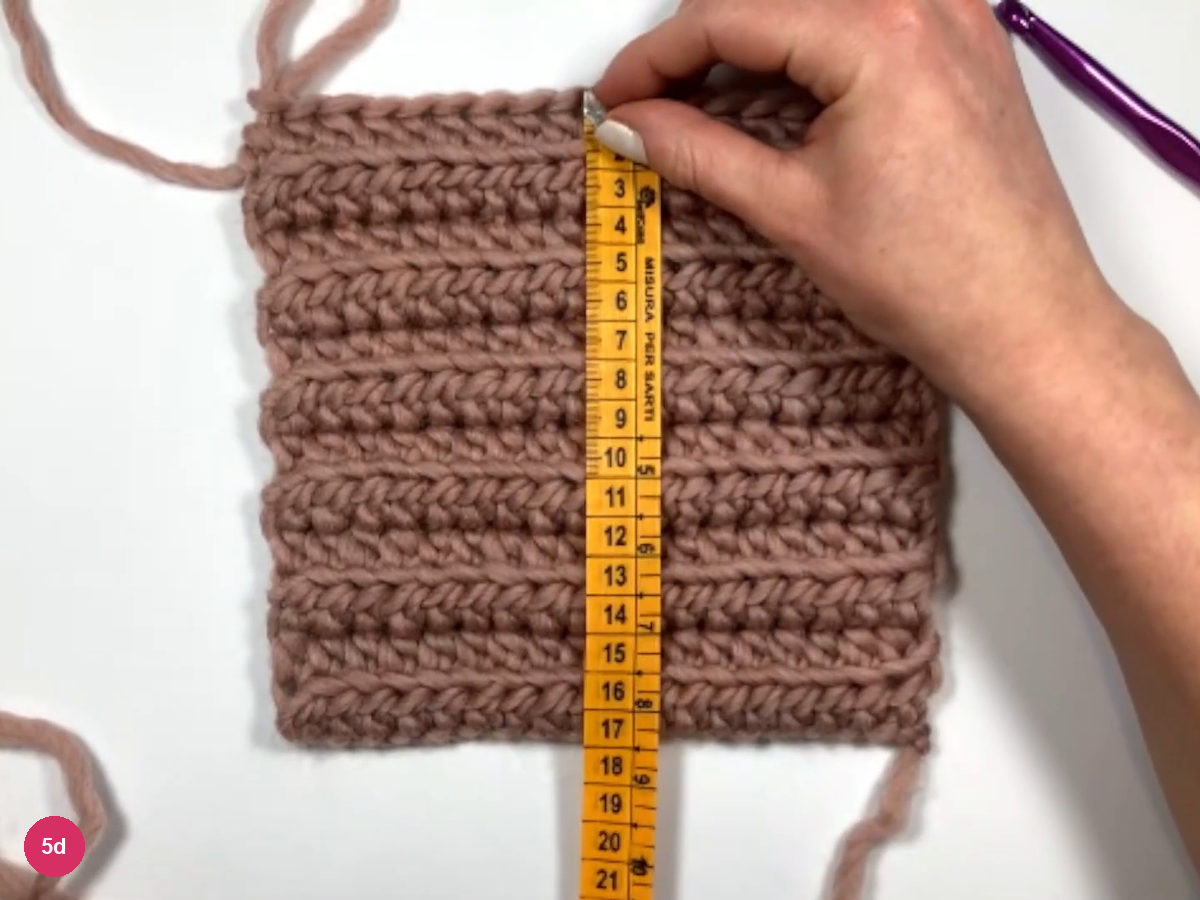
Step 5d: the panel with the tape laid over it. -
Fasten off
- Ch 1 · cut yarn, leave a long tail
Chain 1 to fix the last stitch, then cut the yarn, leaving a tail long enough to sew the seam, and pull the end through the loop. The photo shows the finished panel with the cut tail at the top.
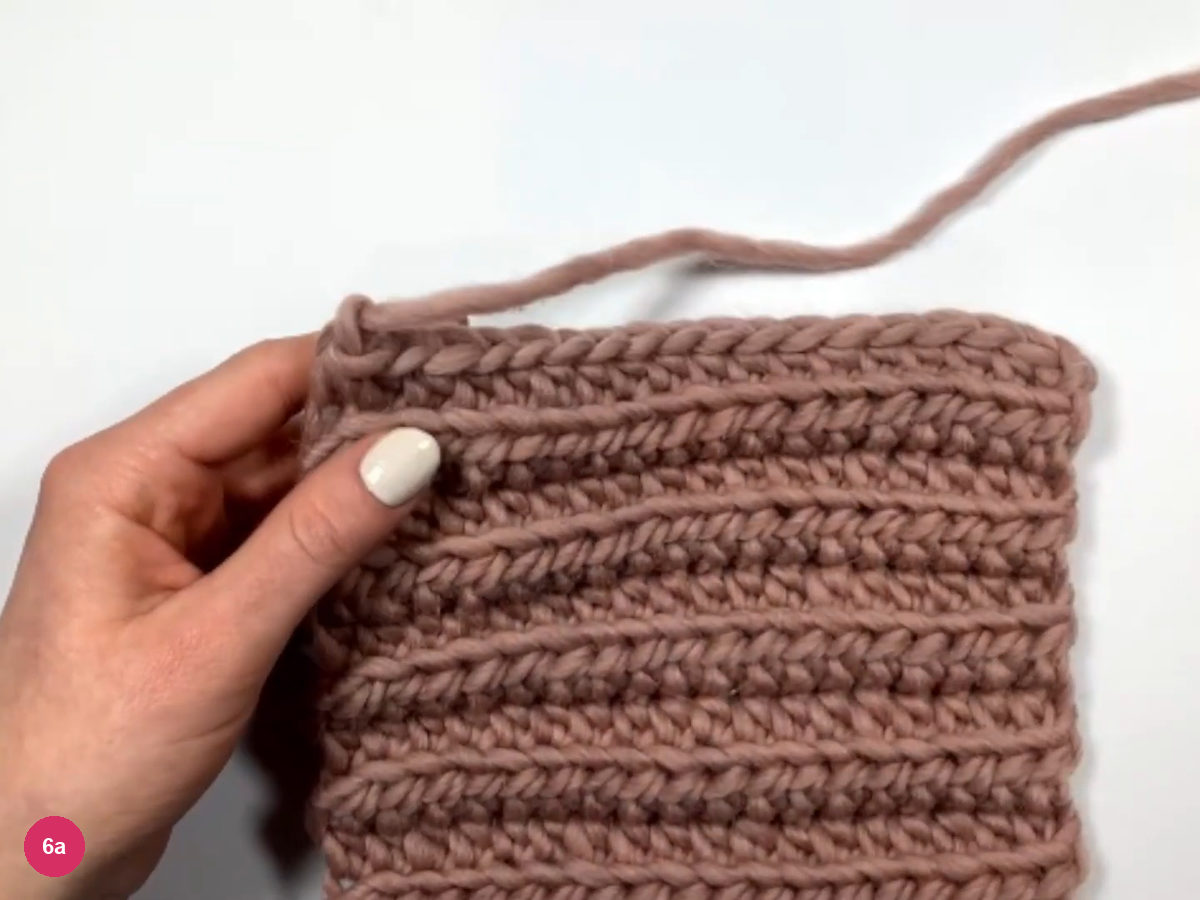
Step 6a: the finished panel with the yarn cut and a long tail. -
Sew the first side of the seam
- Tail on the tapestry needle
Thread the long tail onto the tapestry needle.
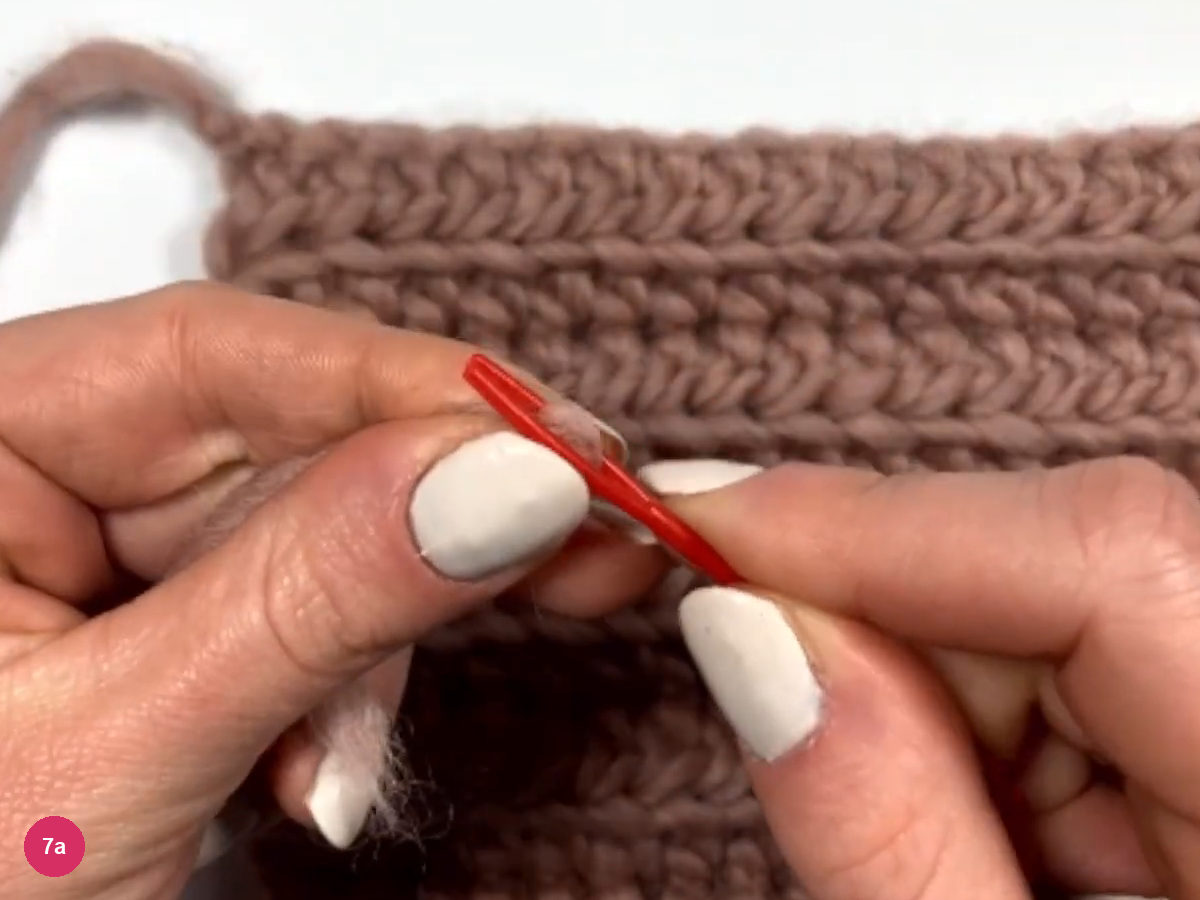
Step 7a: the tail threaded on the needle. - Seam · first pair of edges
Bring the two side edges together. One edge is a row of hdc and the other is the foundation chain. Take the needle under both loops of the first hdc and through the first chain, pull the yarn through, and pass through that first pair a second time to make the start stronger.
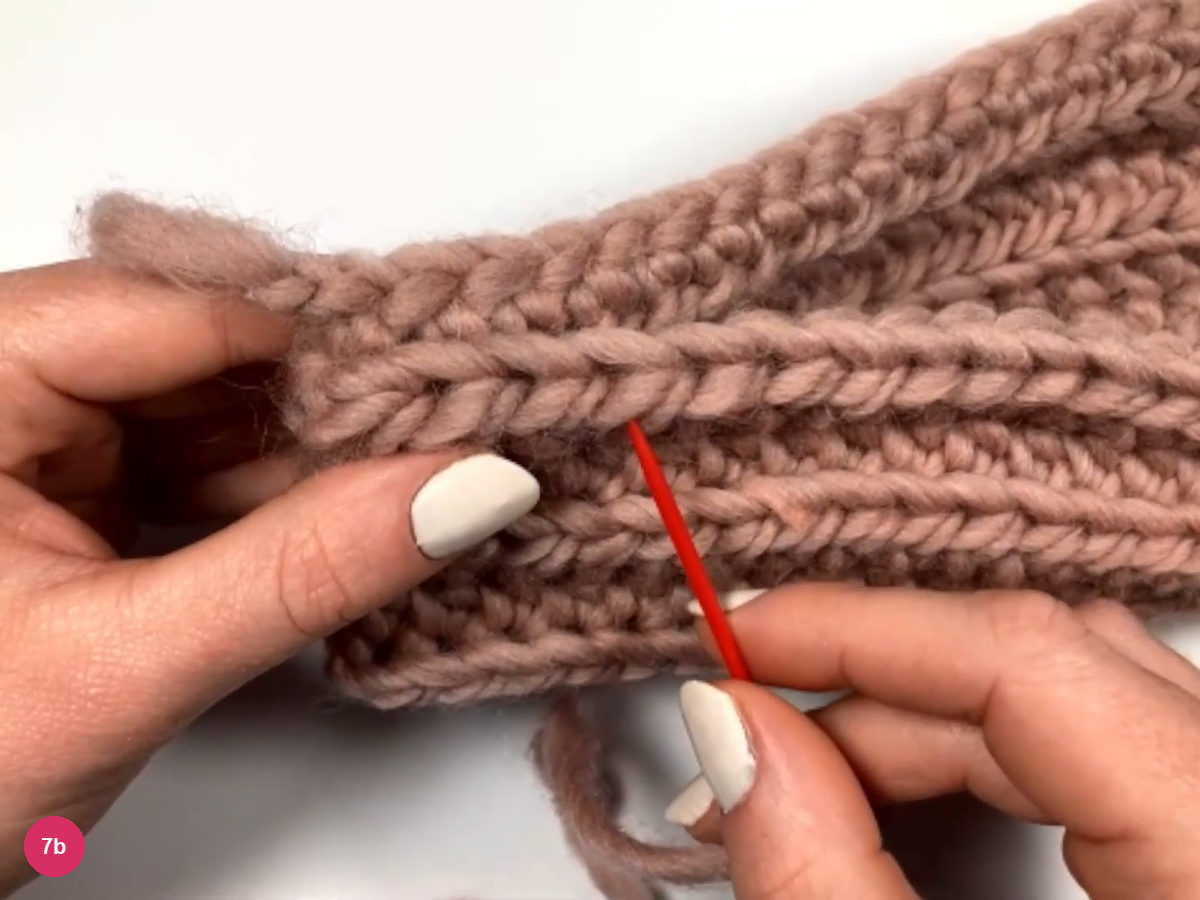
Step 7b: the first stitch of the seam. - Seam · pair by pair
Repeat for each following pair, one stitch of the hdc edge to one chain of the other edge, pulling the yarn through as you go.
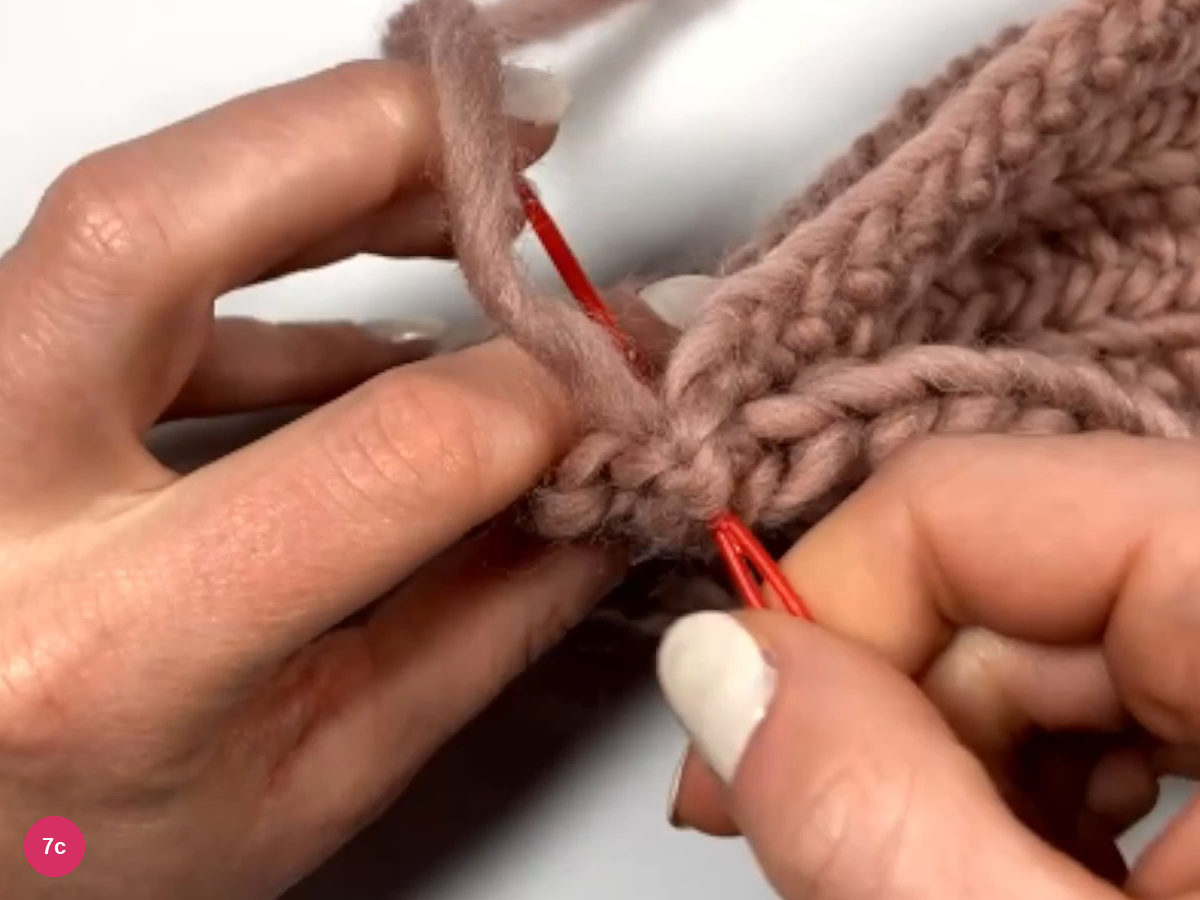
Step 7c: sewing the seam pair by pair. - Try it on
Slip your hand into the sleeve while you sew to find the exact height where the thumb will sit.
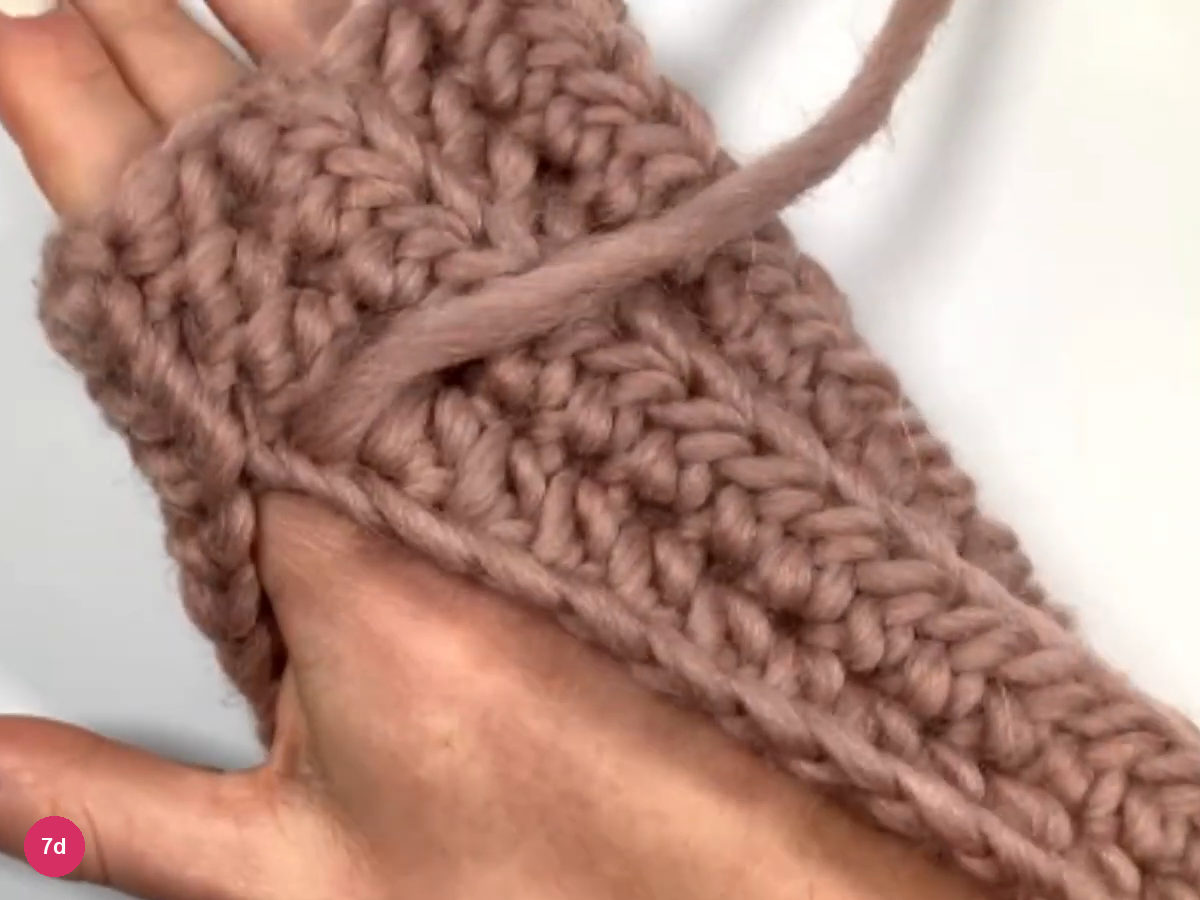
Step 7d: trying the sleeve on to find the thumb height. - Secure the end
When you reach the thumb height, stop, pass the yarn through the last stitch a second time and tie a small knot.
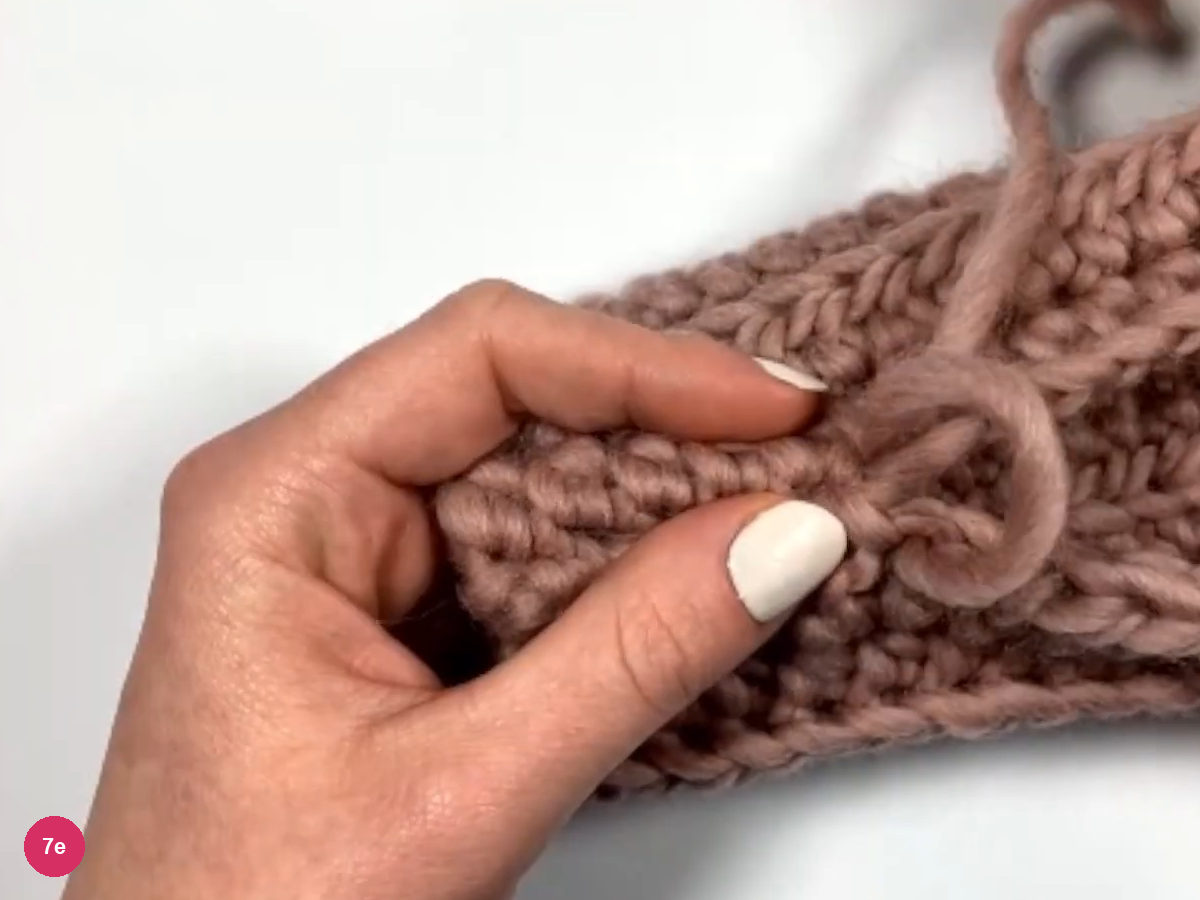
Step 7e: the seam secured with a knot. - Hide the tail
Weave the end in under a few stitches so that it does not show.
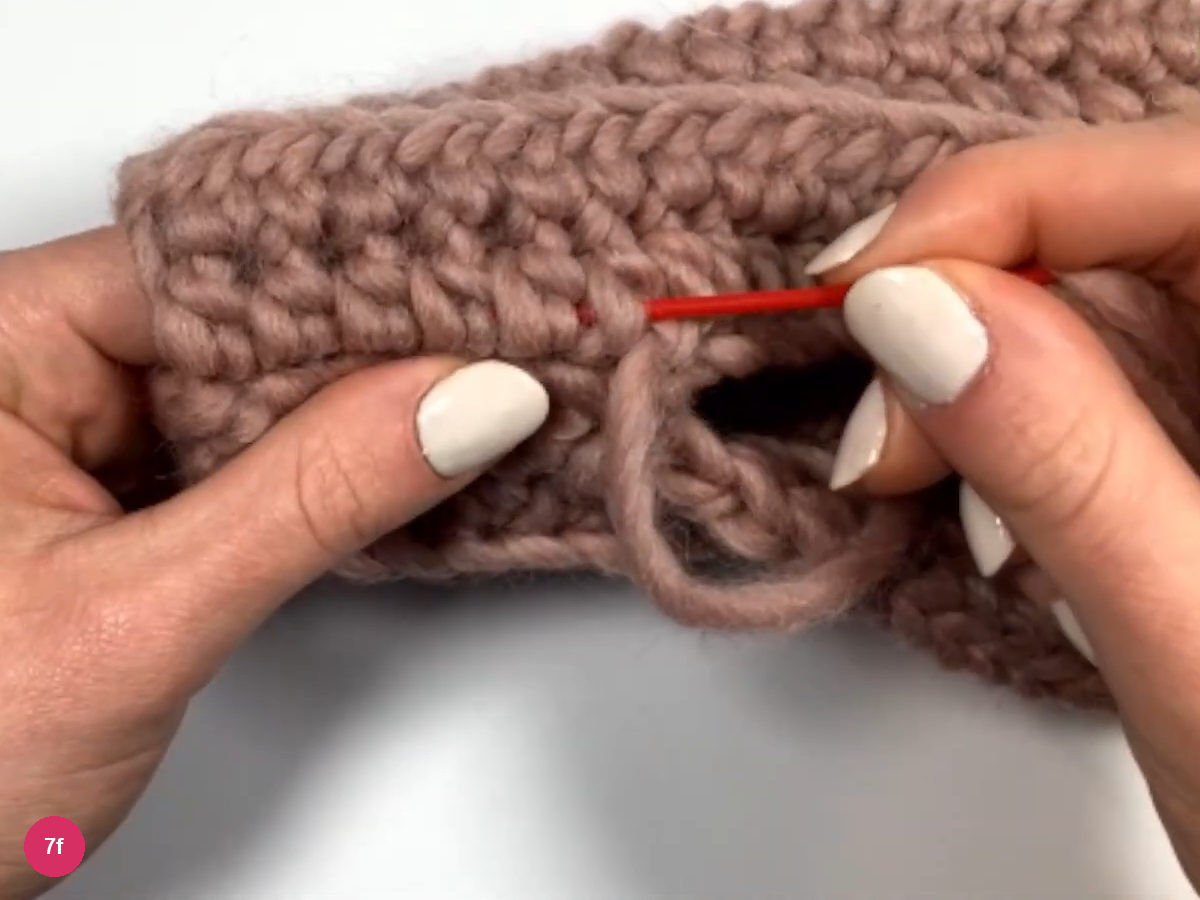
Step 7f: the tail hidden under stitches. -
Sew the second side and leave the thumb gap
- Other tail on the needle
Thread the other tail onto the needle. This side is worked the other way round, so the first edge is the foundation chain and the second is the row of hdc.
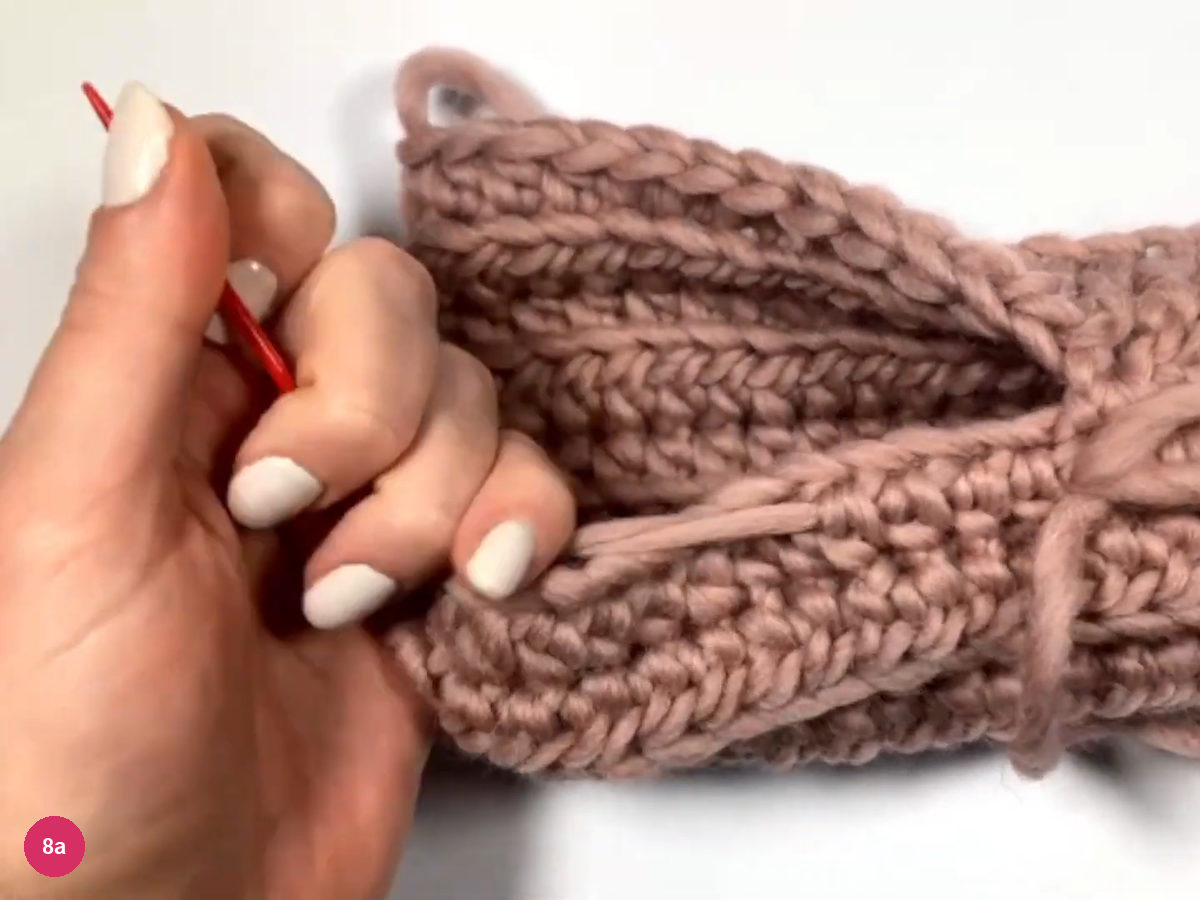
Step 8a: the other tail on the needle, ready for the second side. - Seam · pair by pair, second side
Go into the first chain, then under both loops of the first hdc, pull through and pass a second time through that pair. Carry on pair by pair as before.
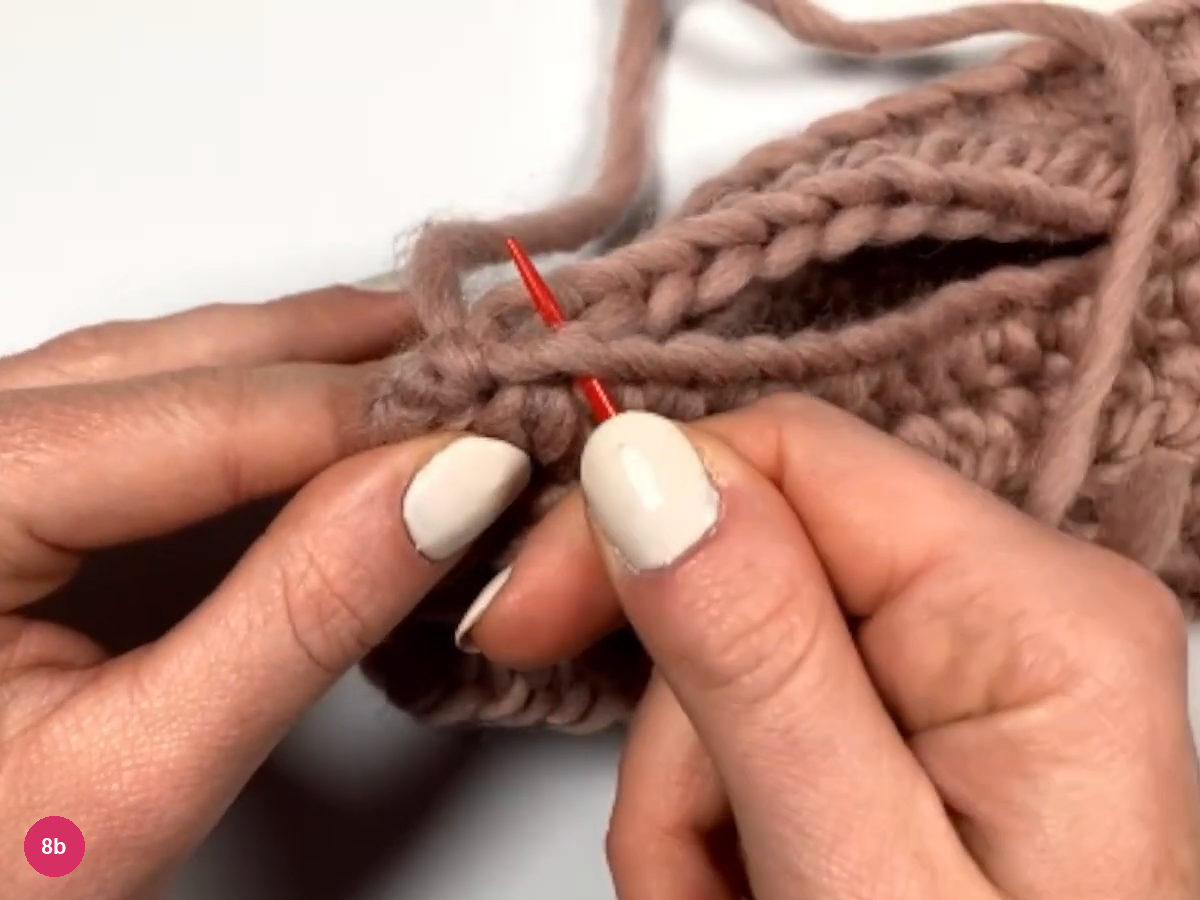
Step 8b: sewing the second side. - 10 stitches sewn · 2 open for the thumb
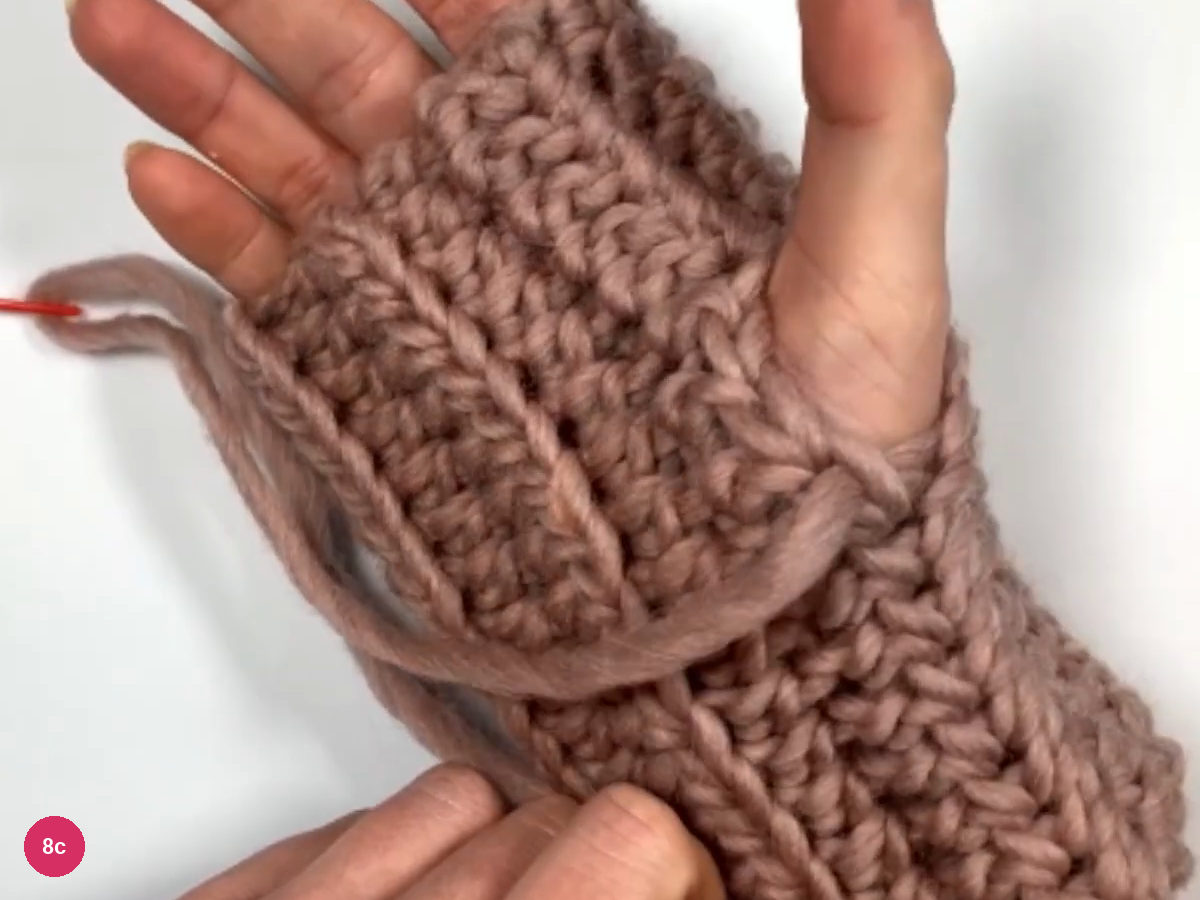
On this side the creator sews 10 stitches, which leaves only two stitches open for the thumb, and tries the glove on to check that it fits.
Step 8c: trying the glove on with the thumb gap. - Knot and hide the tail
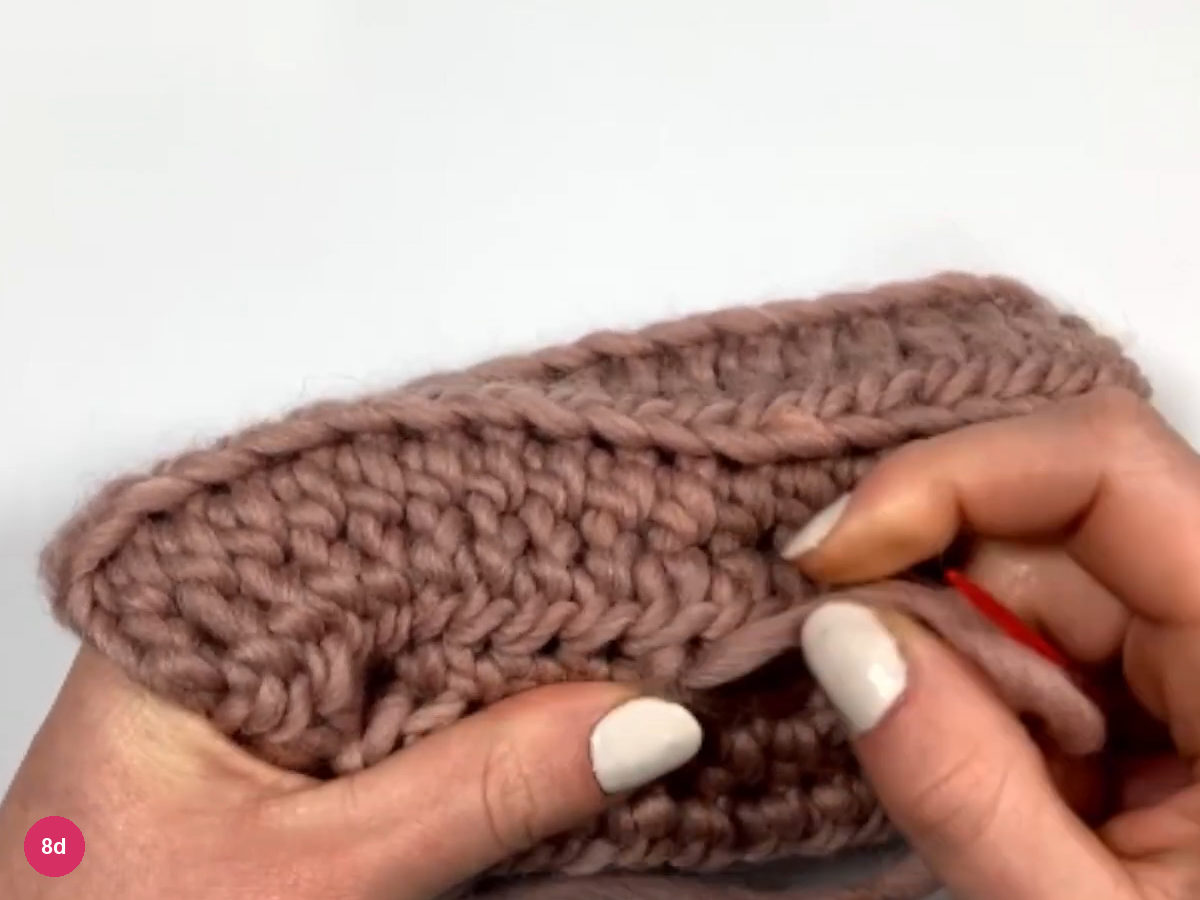
Pass the yarn through the last stitch a second time, tie a small knot and hide the end in the work.
Step 8d: the end secured and hidden. -
Turn it right side out and make the pair
- Finished glove
Turn the sleeve right side out. The finished glove has ribbed ridges running along the hand and a small opening for the thumb.
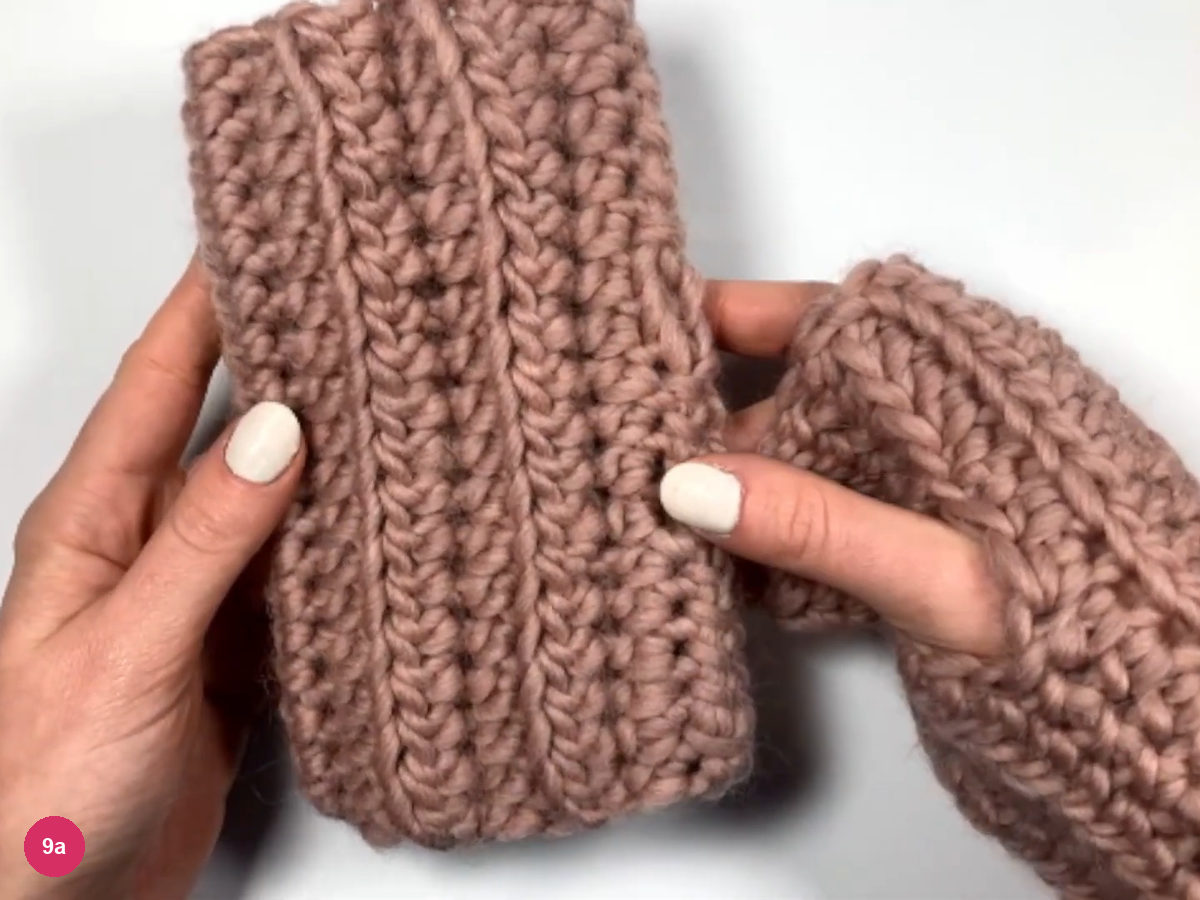
Step 9a: the finished glove beside its twin. - Second glove · same rows and stitches
Work the second glove with exactly the same number of stitches and rows so that the two match. The creator then puts a glove on her hand, with the thumb out through the small opening.
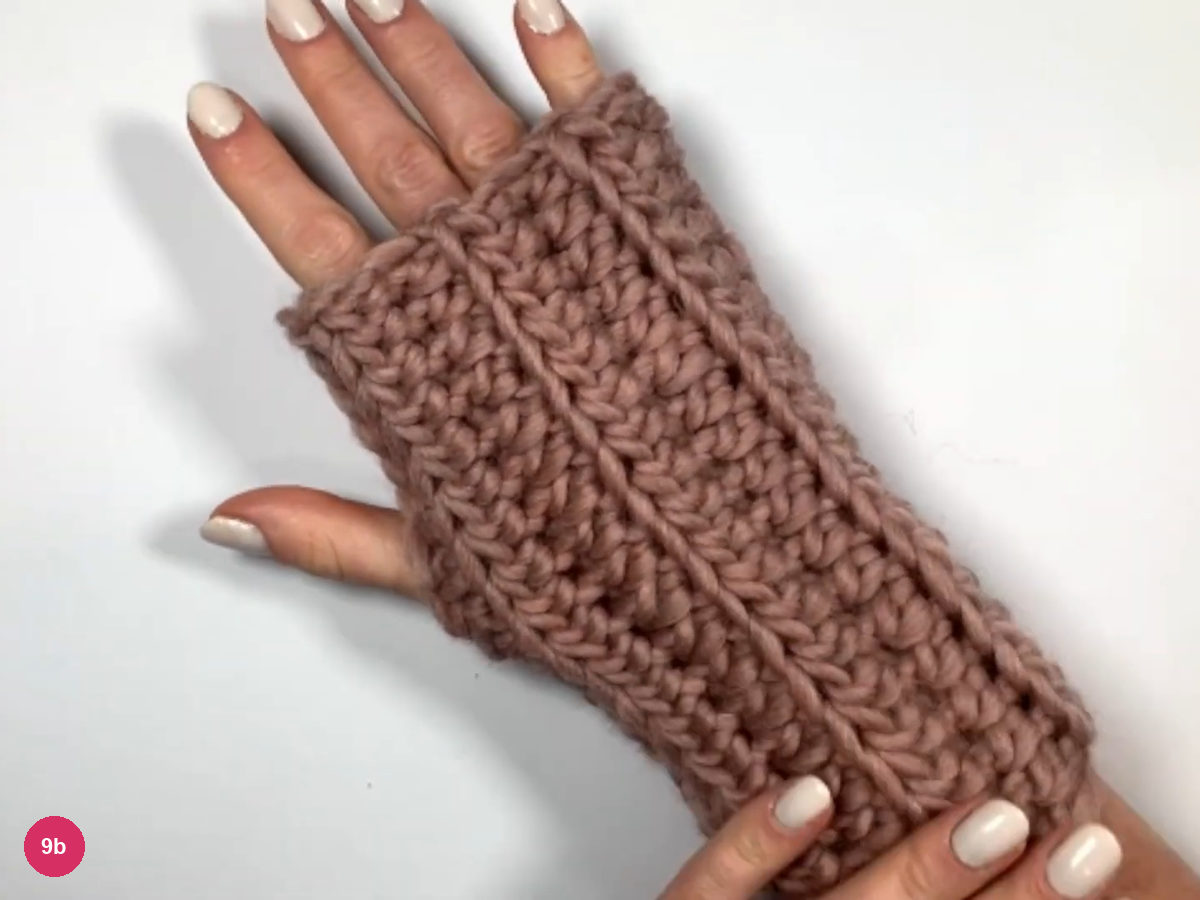
Step 9b: a finished glove worn, thumb through the opening.
Check the fit of your fingerless gloves
Once the seams are finished, slip a glove on and look at three things. The sleeve should reach from just above your wrist to the base of your fingers, the thumb should come through the small opening, and the ridges should run along the hand. The creator checks the wrist width several times while the panel grows and tries the sleeve on while she sews.
If the glove is too long or too short, the chain count is the number to change. If it is too loose or too snug around the wrist, change the number of rows. In the video both numbers come from the creator’s own measurements, and she says the second glove must use the same number of rows and stitches so that the pair matches.
Count your rows and stitches
Troubleshooting the ribbed panel and seam
The ridges do not show: check that you work into the back loop only, the loop farthest from you, on every row after row 1. The video works every row after row 1 this way.
The panel is wider or narrower than your wrist: wrap it around your wrist now and then, as the creator does, and add or stop rows to match. The fabric stretches a little, so it should be snug rather than loose.
The seam does not line up: one edge is a row of stitches and the other is the foundation chain, so you take the needle under both loops of one stitch and through the matching chain each time, one pair at a time. Passing through the very first pair twice gives the seam a firmer start.
The thumb opening is too tight or too loose: the creator tries the glove on while sewing to decide where to stop, and on the second side she sews 10 stitches, which leaves two stitches open. The video gives no other thumb sizes, so try the glove on as you sew and decide where to stop.
Final checklist
- The foundation chain is 18 stitches and about 16 cm long, or the length you chose for your hand.
- Row 1 has one hdc in every chain and the rows after it are worked in the back loop only.
- The panel has 12 rows and is as wide as your wrist; the creator gives 17 cm.
- Both seams are sewn pair by pair and the ends are knotted and hidden.
- Two stitches are left open on one side for the thumb, and the second glove matches the first.
Looking for more winter accessories to match? Try the crochet beanie or the crochet scarf, or work another ribbed project with the twisted ribbed crochet headband. Other crochet fingerless gloves use different constructions, so match the video you follow.
Inspired by Teia Crochet’s video tutorial.

Save this pattern for later
Pin it to one of your boards so it’s ready when you have a free evening and the right yarn.