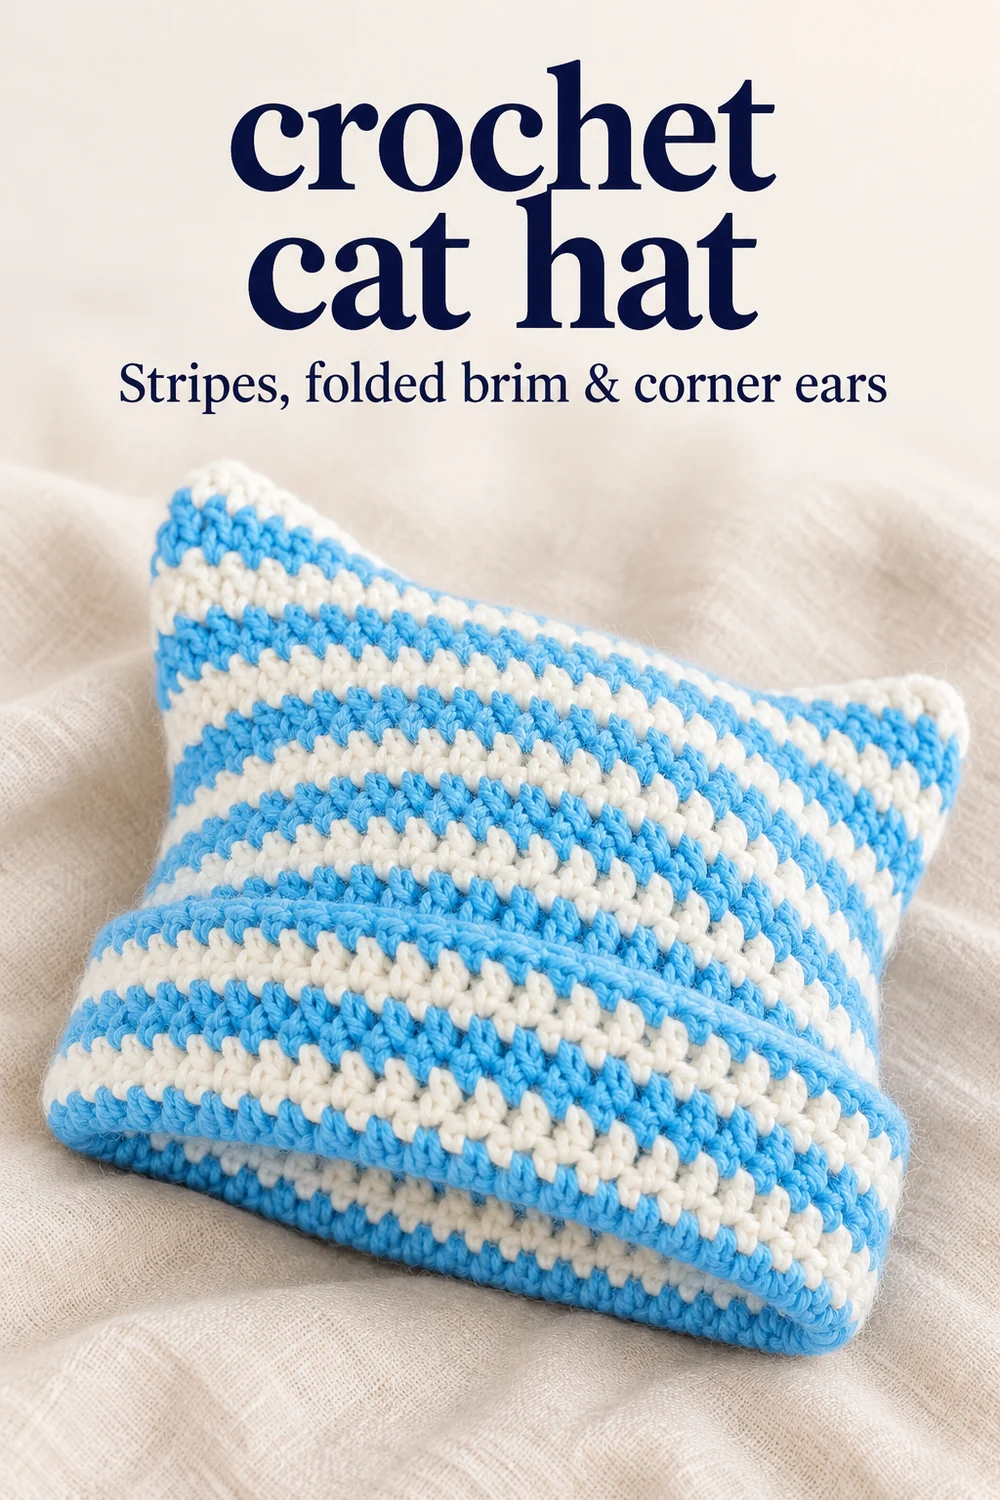
This crochet cat hat has blue-and-white stripes, a folded brim and pointed corners formed by a straight top seam. The demonstrated adult version fits a 56 cm head and has a 25 cm body before the brim is folded. Its ears need no separate pieces, although the top of the hat is sewn closed.
Before you start your crochet cat hat
The foundation goes around the head, and the rounds build upward from it. This is a different shape from a rounded-crown crochet beanie: the open top is flattened and sewn straight across. That construction matters more to the ears than adding extra stitches at the corners.
- Blue and white yarn. The video does not state its fiber, weight, yardage or total amount, so there is no verified yarn quantity to copy.
- A 6 mm crochet hook for the foundation and a 4 mm hook for the body.
- Scissors, a yarn needle and a way to measure the intended head circumference and body depth.
US terms are used here: ch means chain, sl st means slip stitch and dc means double crochet. A dc uses a yarn over before insertion, followed by two pull-throughs through two loops each. The source uses a ch-2 start as a counted stitch; keep that convention consistent when you check each round.
No gauge swatch measurement is supplied. The example chain is measured with a little stretch, and its 66-chain count belongs to that yarn and tension. The 25 cm depth includes fabric that will become the folded brim; the final height after folding is not specified.
Make the striped body and corner ears
-
Make a foundation that fits
- Example head · 56 cm
- Example foundation · 66 ch
With the 6 mm hook, twist the blue yarn into the starting loop shown here. Keep the loop able to slide along the hook shaft, rather than tightening it against the narrow hook tip; this helps the first chains stay flexible.
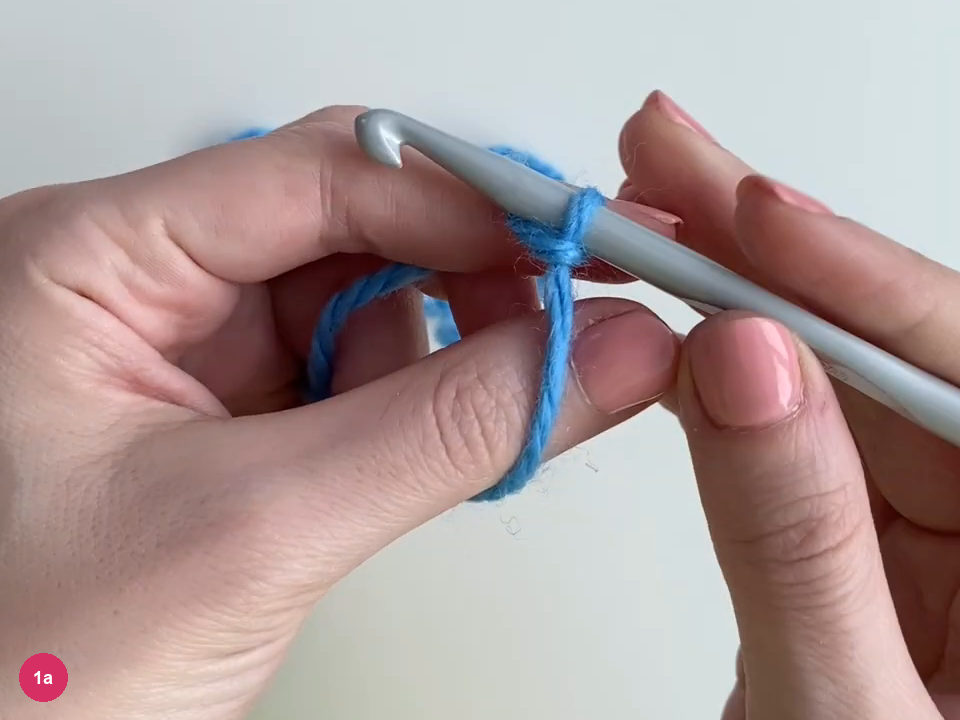
Step 1a: form the starting loop in blue yarn. Catch the working yarn and pull it through the loop on the hook to make a chain, then repeat. The short chain should show separate links below the active loop, with enough room for the smaller hook to enter them later.
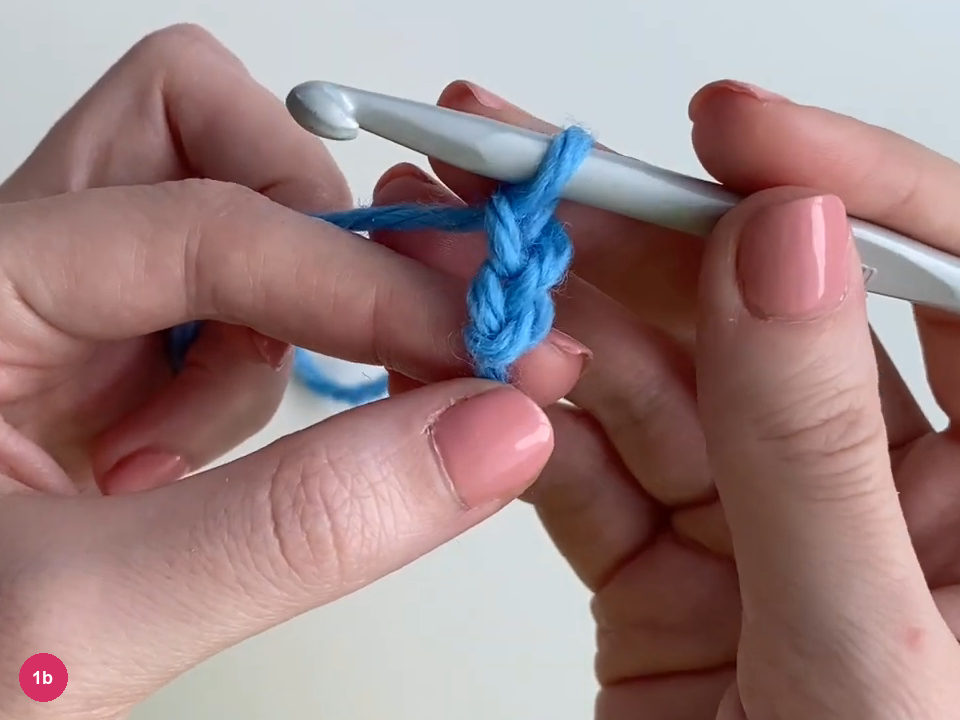
Step 1b: build a loose foundation chain. Continue until the chain reaches your head circumference when given a slight, gentle stretch. The demonstrated adult measurement is 56 cm; the example uses 66 chains, but the fit measurement takes priority when your yarn or tension differs.
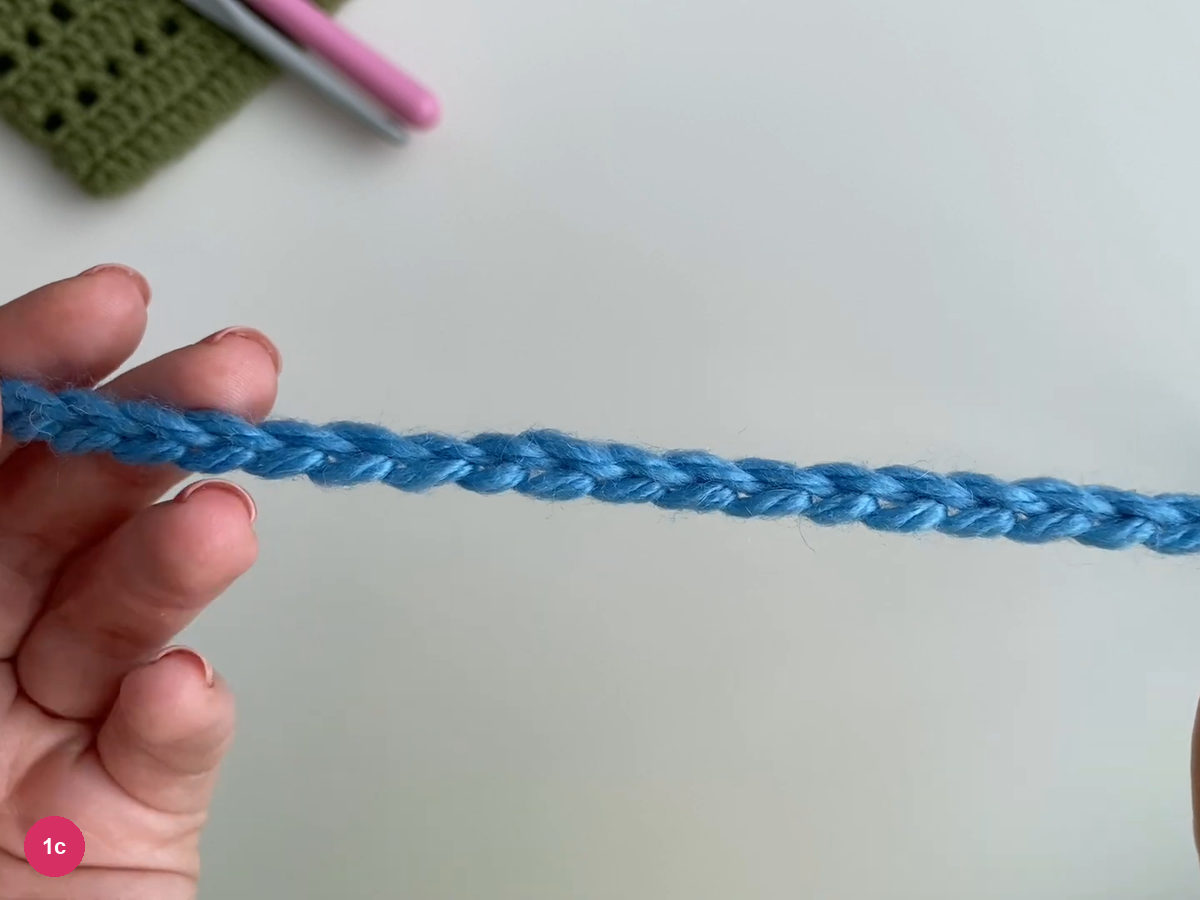
Step 1c: check the flexible chain length. -
Join the chain without twisting
- Starting chain · ch 2 counts as dc
Transfer the active loop to the 4 mm hook and bring the chain ends together. Follow the chain links around the loop before joining, keeping their faces aligned so that the hat opening will be a flat ring instead of a twisted band.
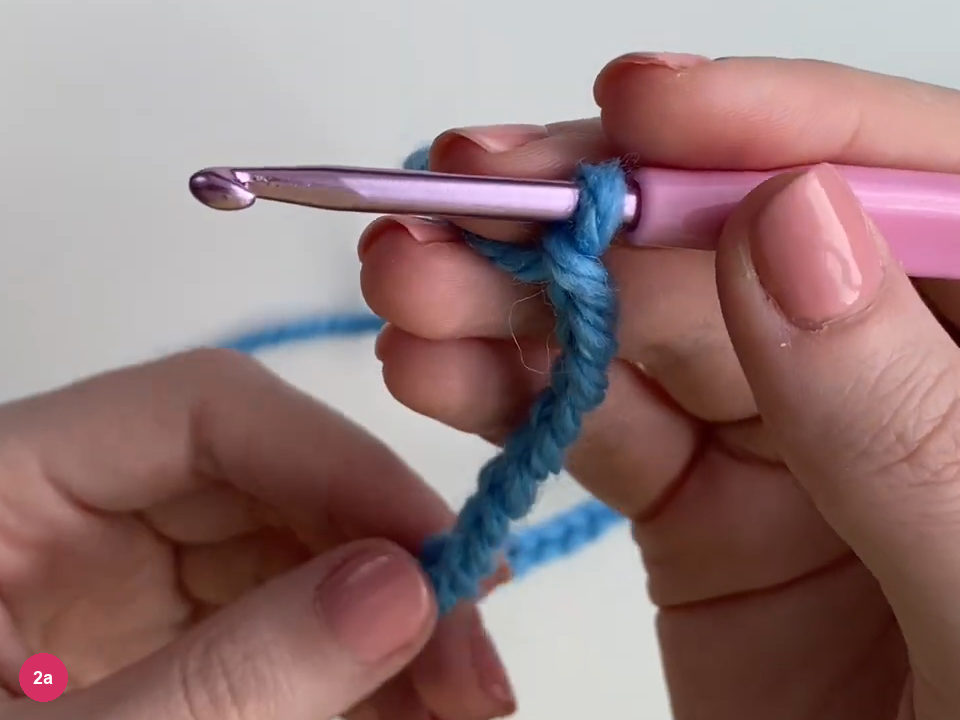
Step 2a: change hooks and align the chain. Insert the hook into the first chain, catch the working yarn and pull it through that chain and the active loop. This slip stitch closes the foundation; pause to check the ring once more before adding height, because a twist becomes harder to spot later.
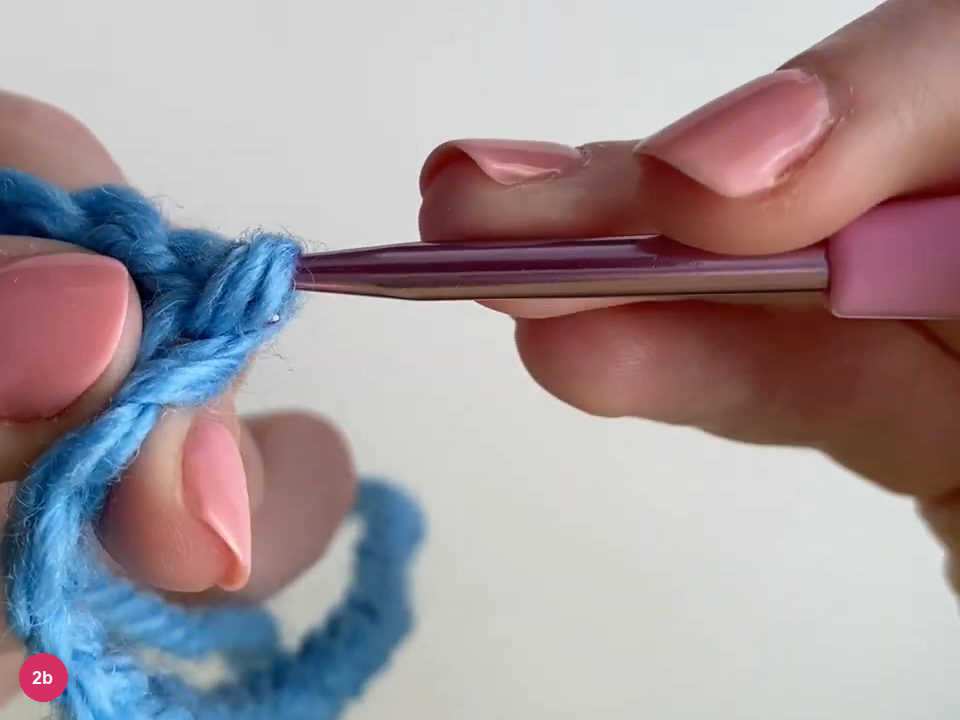
Step 2b: close the foundation with a slip stitch. Chain 2 to start the first round. In this particular crochet cat beanie, that starting chain counts as a double crochet, so keep track of it as a stitch position rather than adding an extra double crochet beside it.
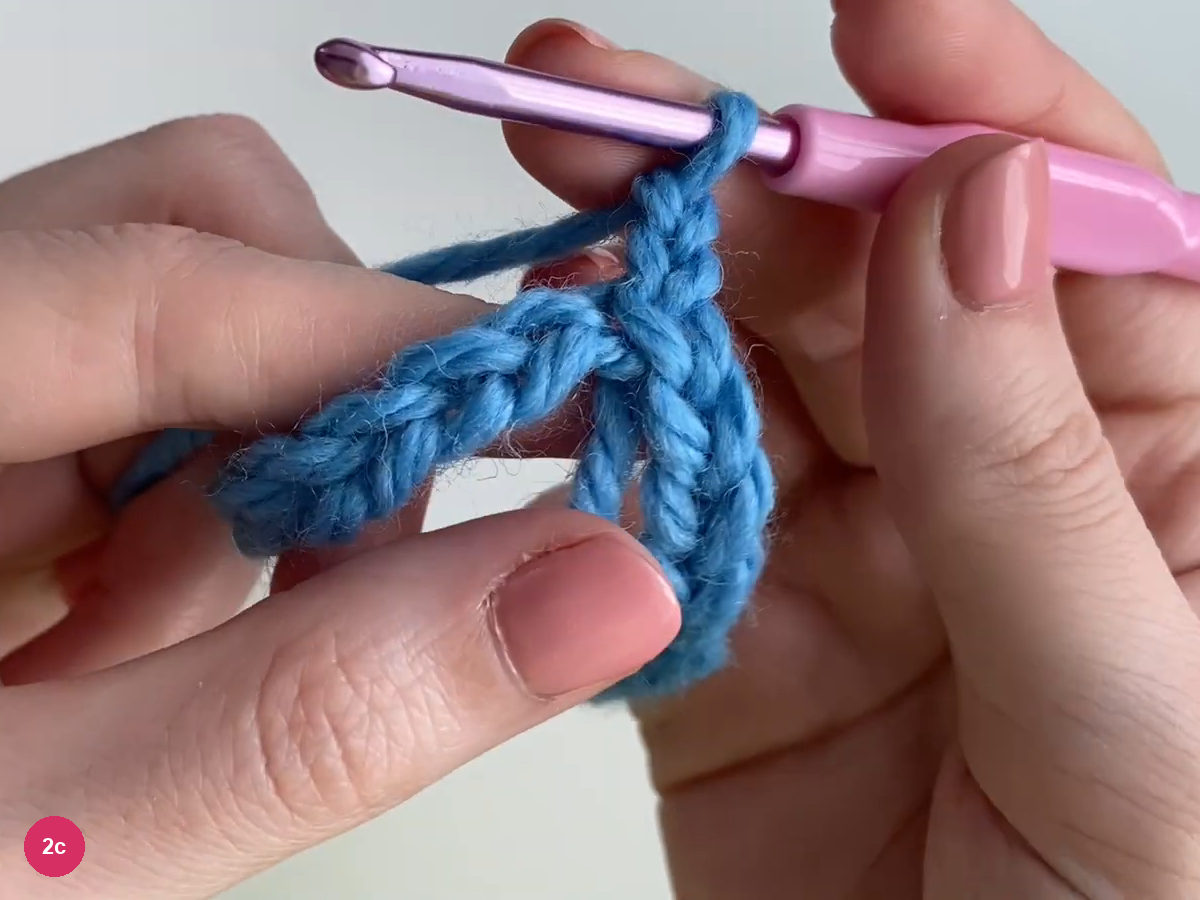
Step 2c: raise the start of the first round. -
Work the blue double crochet round
- Example round · 66 stitch positions
Yarn over the hook, then enter the next available foundation chain after the position represented by the starting chain. Hold the chain near the insertion point so it stays open, while leaving the hook tip and the link you are using visible.
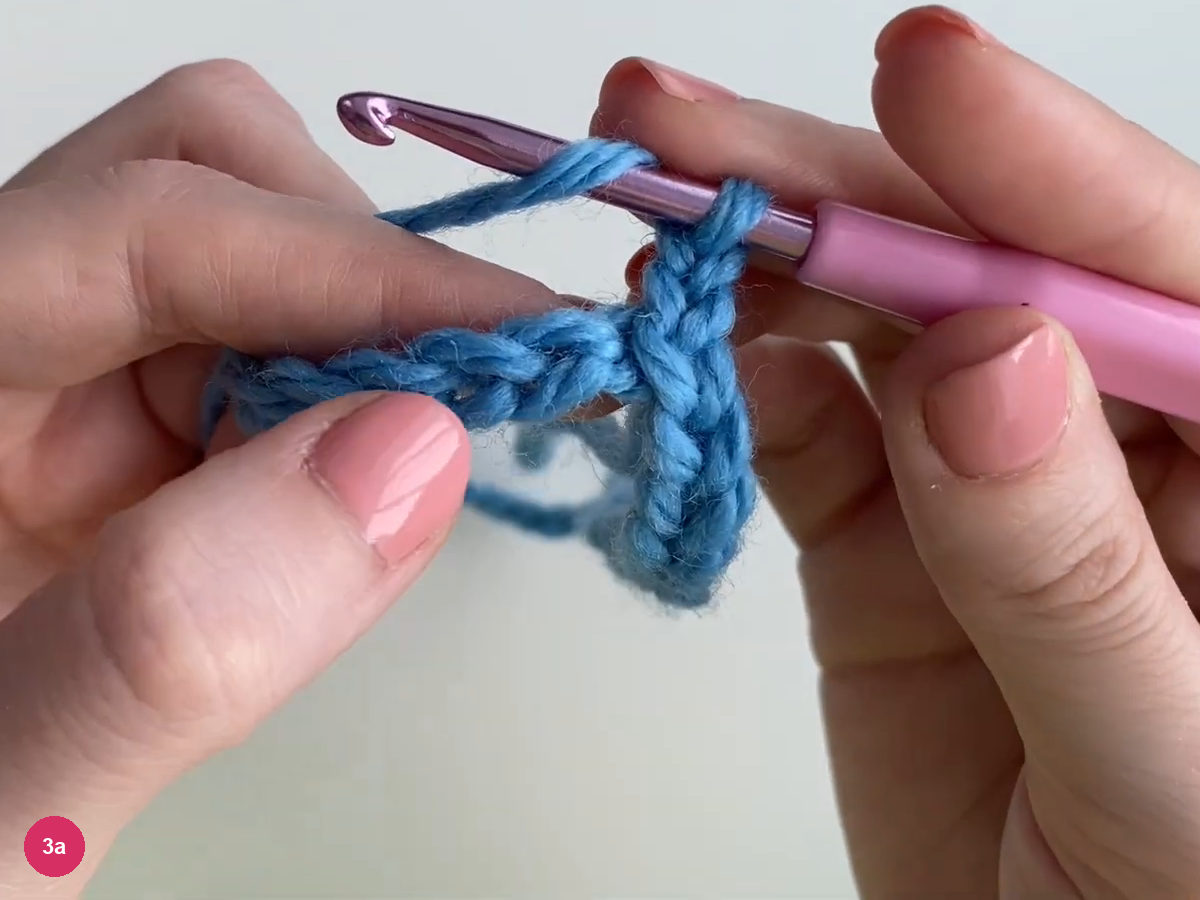
Step 3a: prepare the next double crochet. Catch the blue yarn and draw a loop through the chain, bringing the hook to 3 loops. Keep the drawn-up loop at a comfortable height beside the starting column; squeezing it tight here can make the first round feel stiff around the opening.
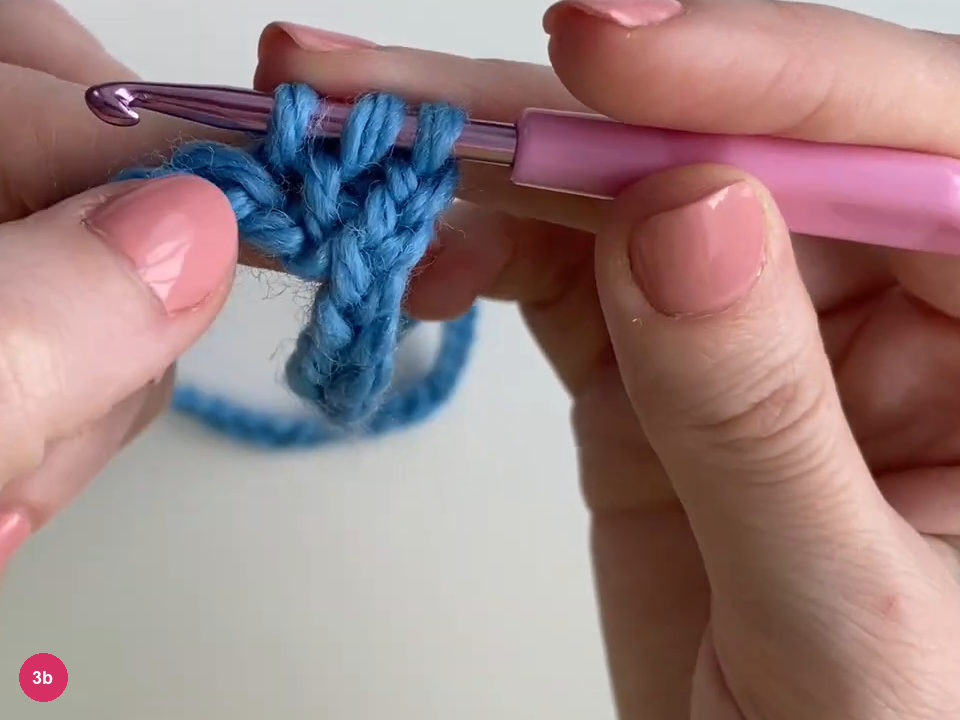
Step 3b: draw up the double crochet loop. Yarn over and pull through the first 2 loops, leaving 2 loops on the hook. Let the hook head turn slightly downward as it passes through, while holding the stitch base steady so the foundation does not pull up with it.
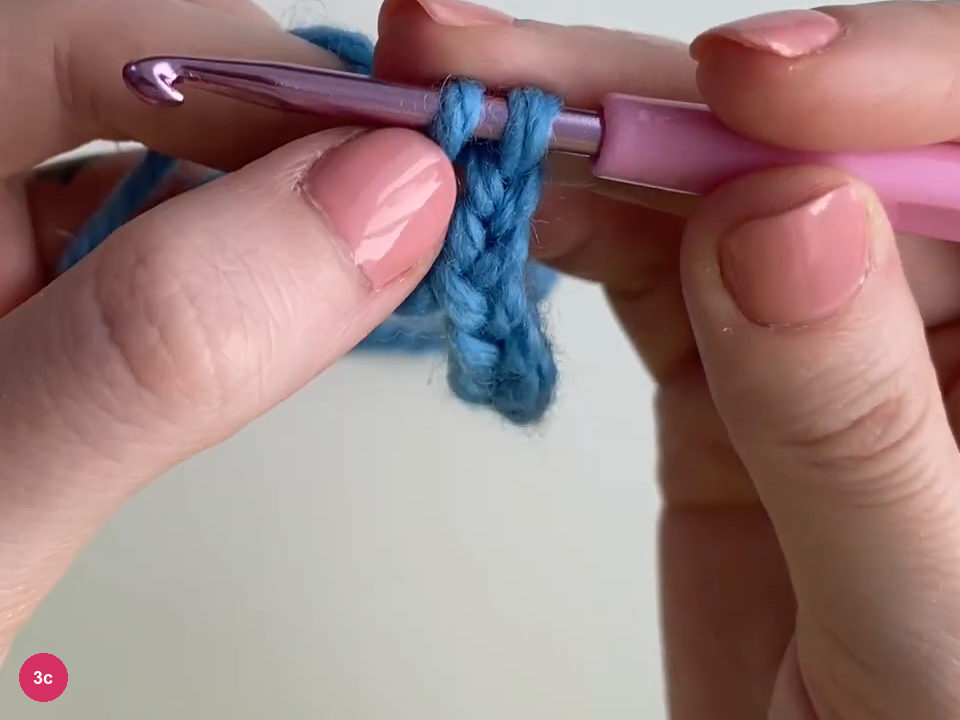
Step 3c: work the first pull-through. Yarn over and pull through the remaining 2 loops to complete the double crochet. Repeat into successive chains around the ring; the demonstrated round has 66 stitch positions including its starting chain, so count that chain once when checking the total.
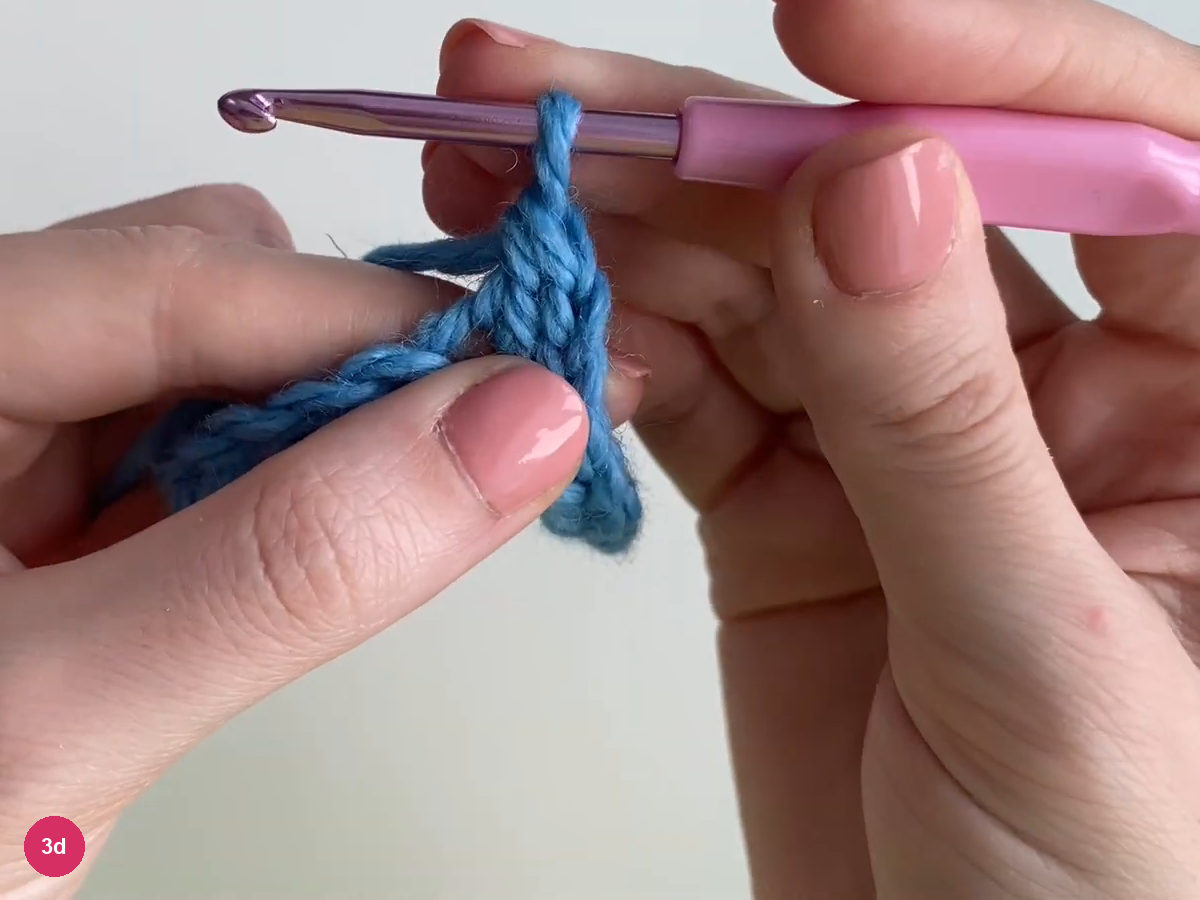
Step 3d: complete the blue double crochet. -
Change to the white stripe
- Start each round · ch 2
At the end of the blue round, locate the second chain of the starting chain and insert the hook there. Check that the last stitch meets the starting column without an unused foundation link or an extra stitch crowding the join.
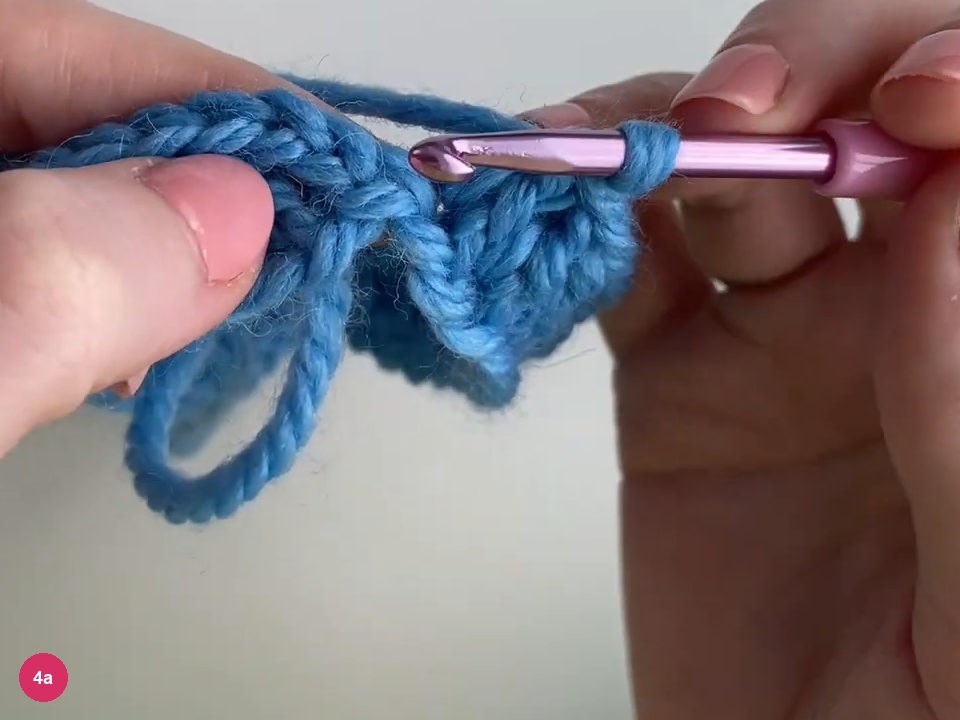
Step 4a: locate the round join. Place the white yarn over the hook and draw it through to make the joining slip stitch in the new color. Leave the blue working yarn attached at this change, since it will be picked up again after the white round.
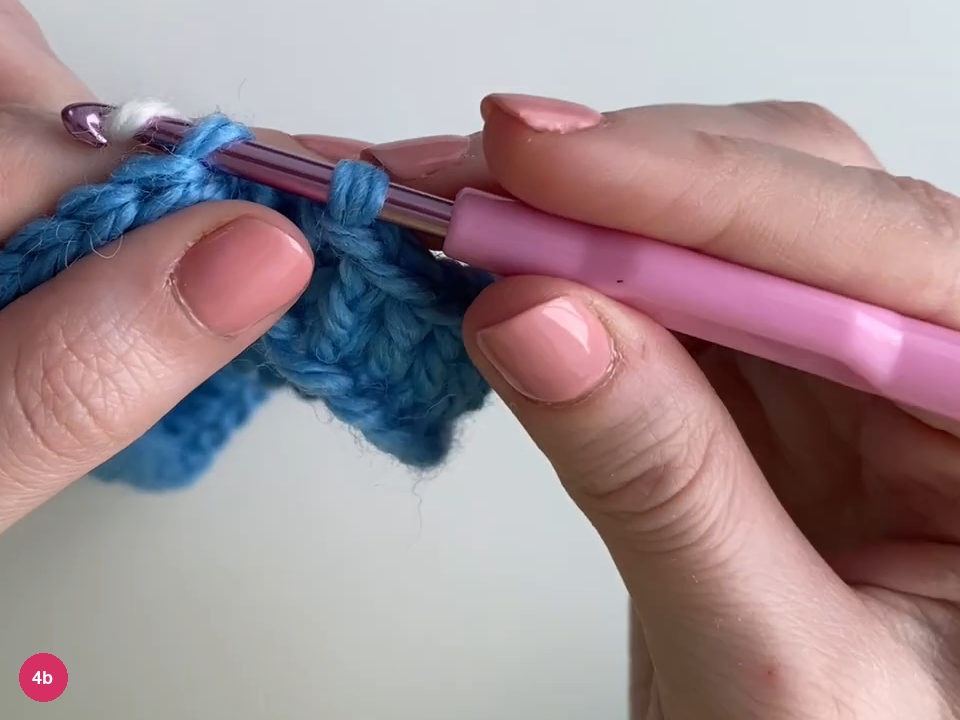
Step 4b: join with white yarn. Chain 2 in white for the start of the next round. Keep the unused blue strand relaxed at the join rather than tugging it tight against the side; the color change should not pinch the fabric into a narrow ridge.
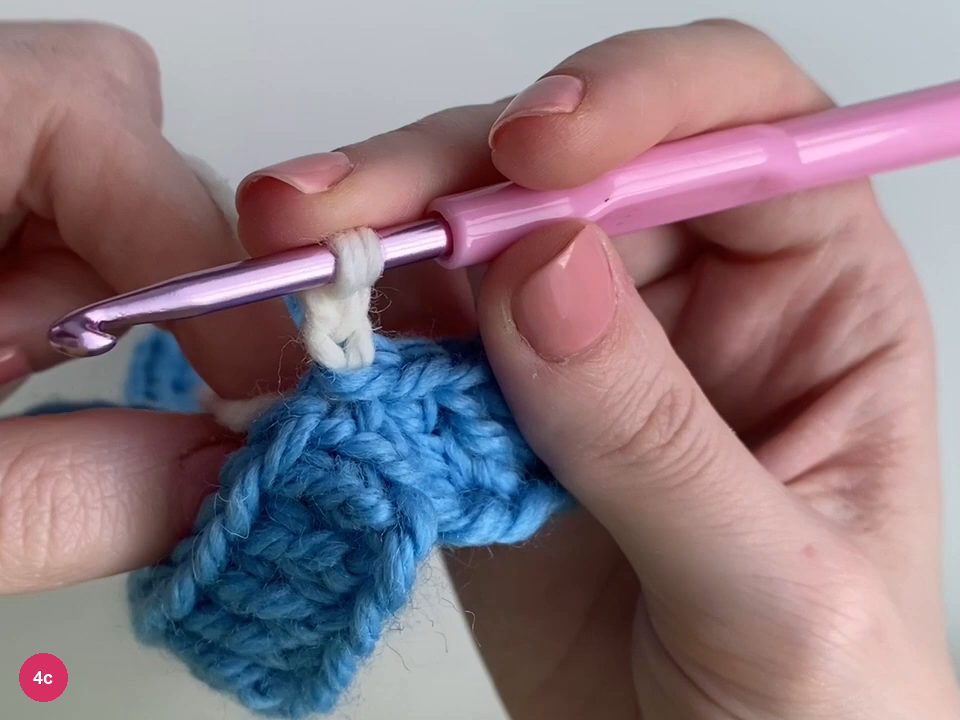
Step 4c: start the white stripe. Work double crochet into the stitch tops of the blue round, placing the hook under both top loops as shown. Lay the short white tail along the stitch bases while working over it, and keep the same stitch positions rather than increasing at the join.
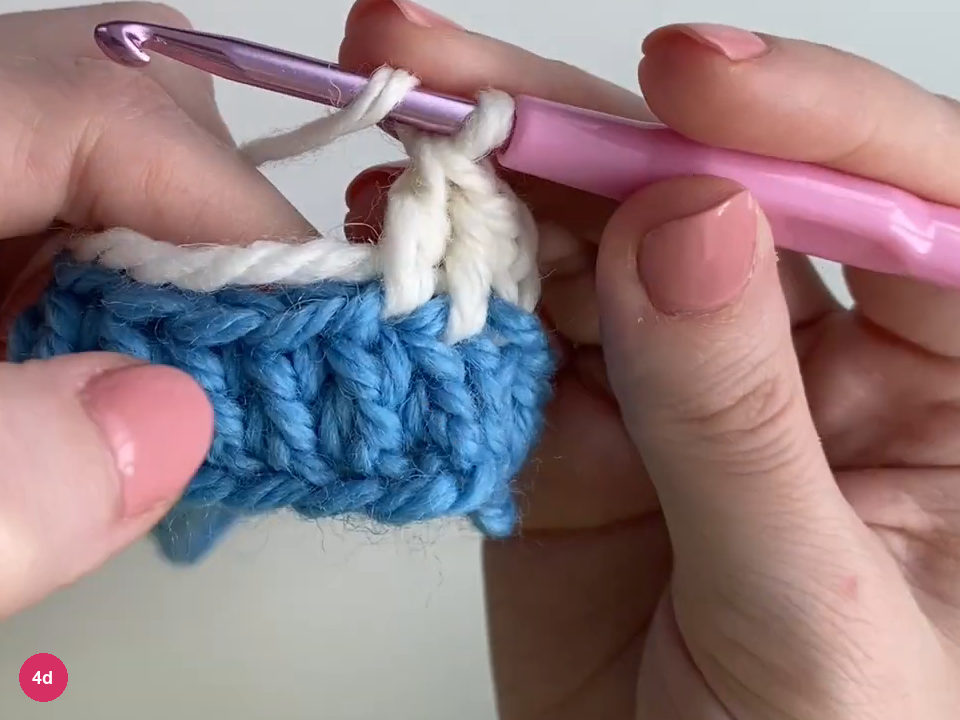
Step 4d: continue the white double crochet round. -
Repeat stripes to the body height
- Example body · 18 rounds
- Body before brim fold · 25 cm
Finish the white round and join at the top of its starting chain, bringing the waiting blue yarn through for the color change. The join should sit at the same area of the tube, with the white strand left available for the following stripe.
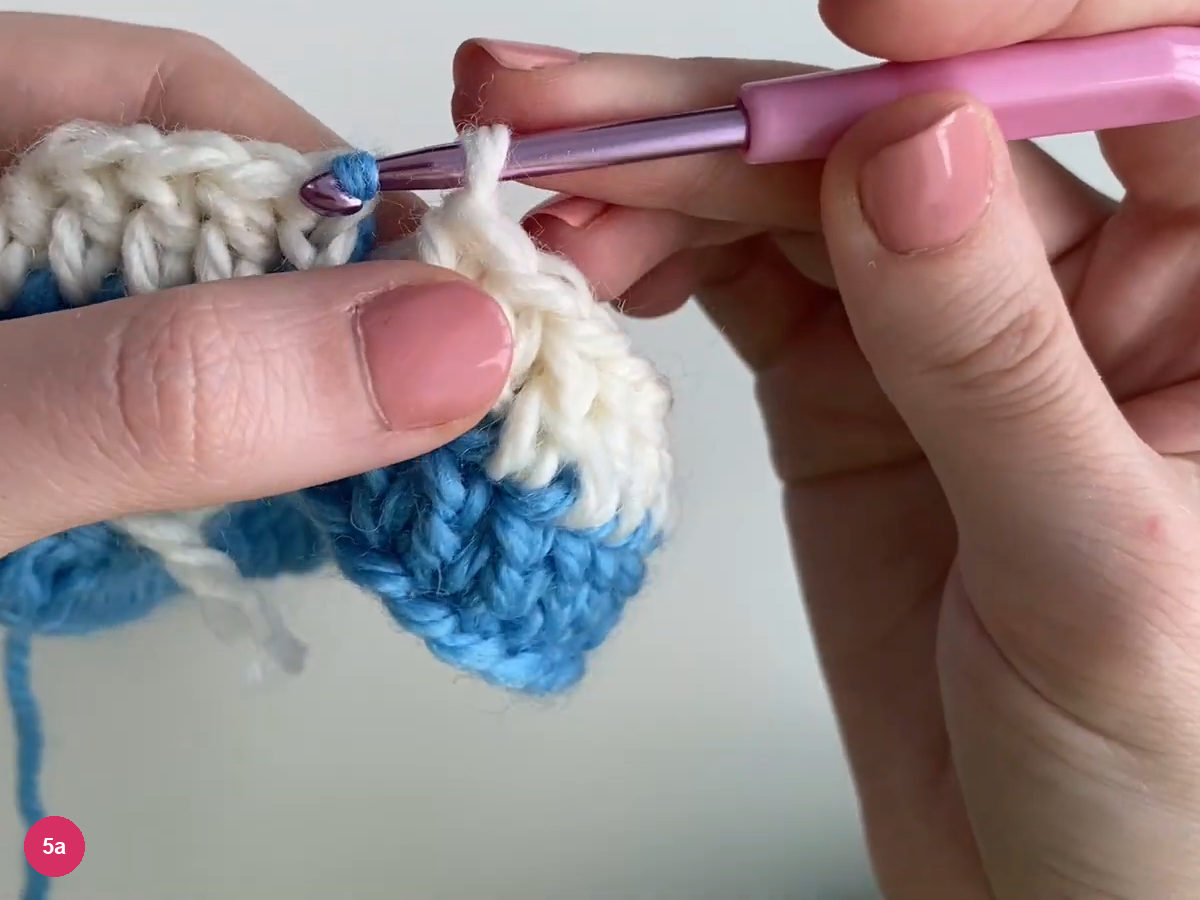
Step 5a: return to the blue yarn at the join. Chain 2 in blue, then continue the same double crochet round over the white stitches. Alternate blue and white rounds in this way, keeping the sides straight: this body uses no increases or decreases to produce the corner-ear shape.
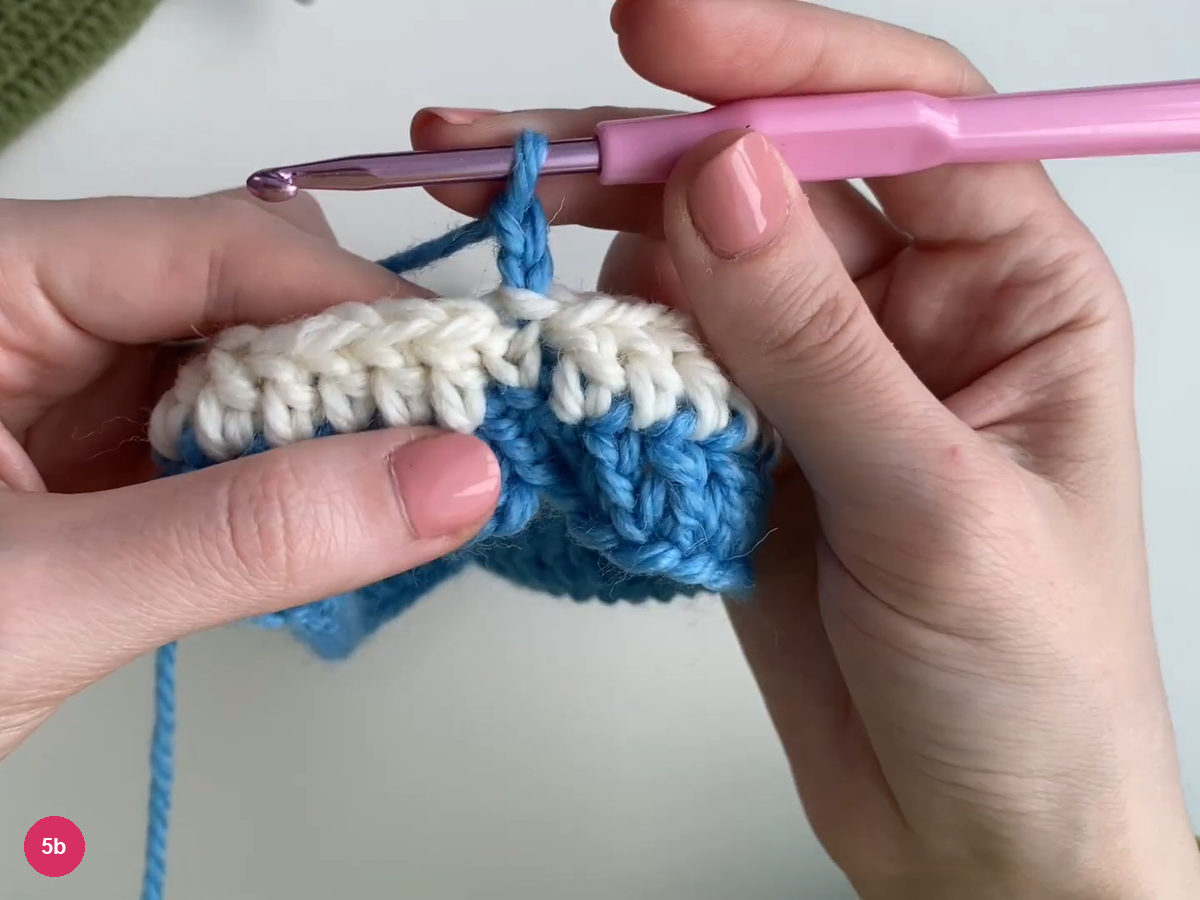
Step 5b: begin the next blue stripe. Continue the alternating rounds until the body reaches the depth you need, allowing for the folded brim. The example has 18 rounds and measures 25 cm from the first round to the last before folding; check the depth on the intended wearer rather than treating 25 cm as the final worn height.
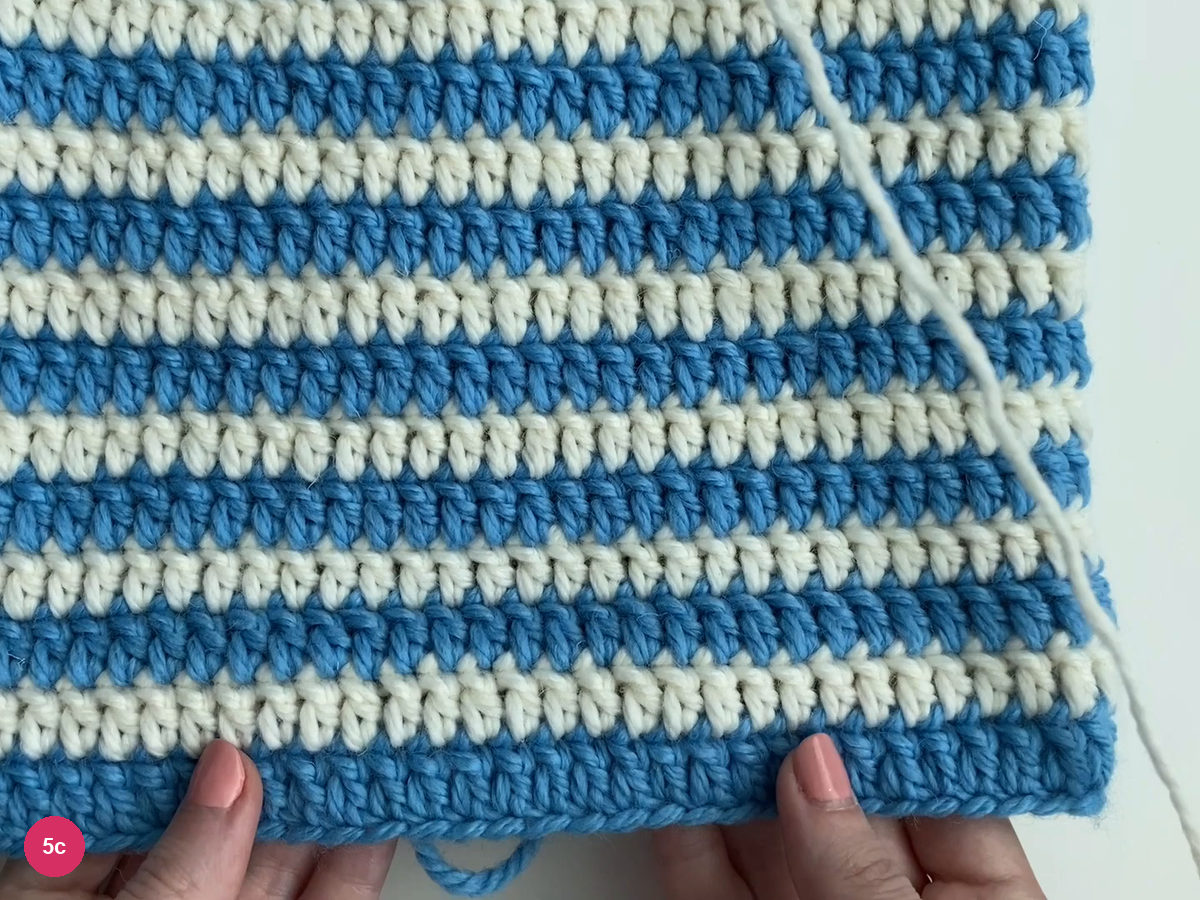
Step 5c: check the striped body before finishing. -
Finish the rounds and hide the ends
Join the last white round into the second starting chain, as for the earlier rounds. Check the top edge before fastening off: its stitch tops should make a level rim that can be brought together for a straight seam without gathering.
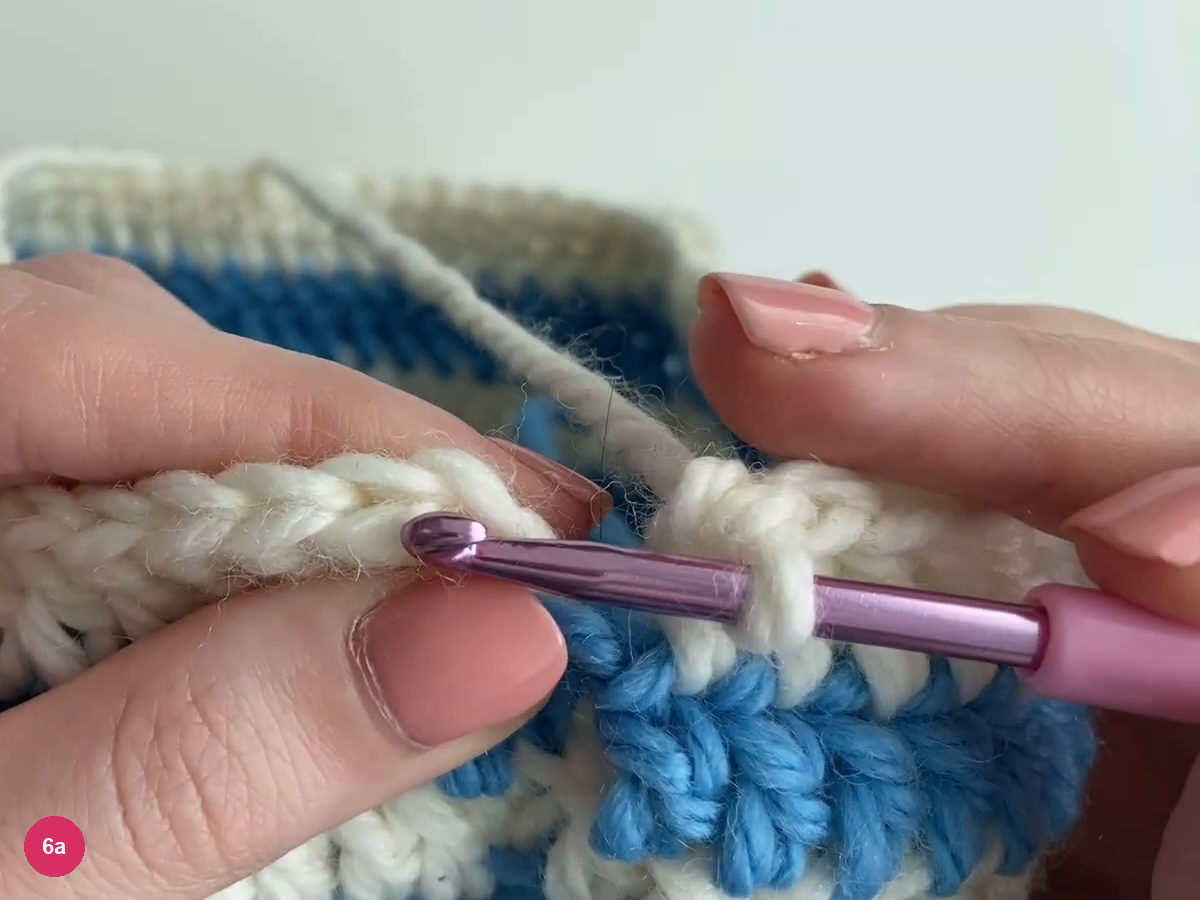
Step 6a: close the final round. Cut and secure the remaining working yarns after completing the body. The top is still open at this stage; do not draw the entire edge into a circular crown, because a flat closure is what leaves the pointed corners for the ears.
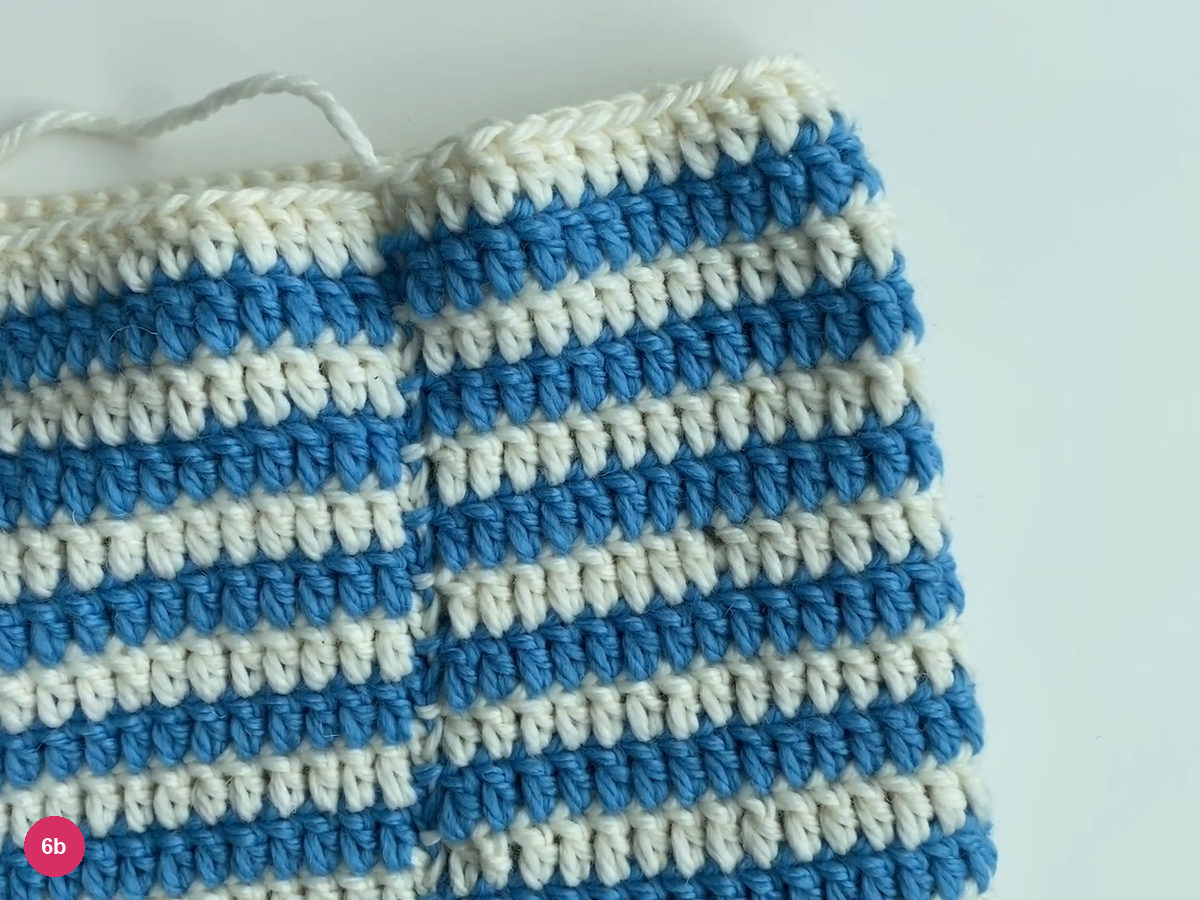
Step 6b: leave the top open for its flat closure. Use the hook to draw the blue starting tail through nearby stitch bases on the inside of the fabric. Follow the blue stripe so the tail blends into the surrounding stitches, and avoid stretching a long loose strand across the open spaces between posts.
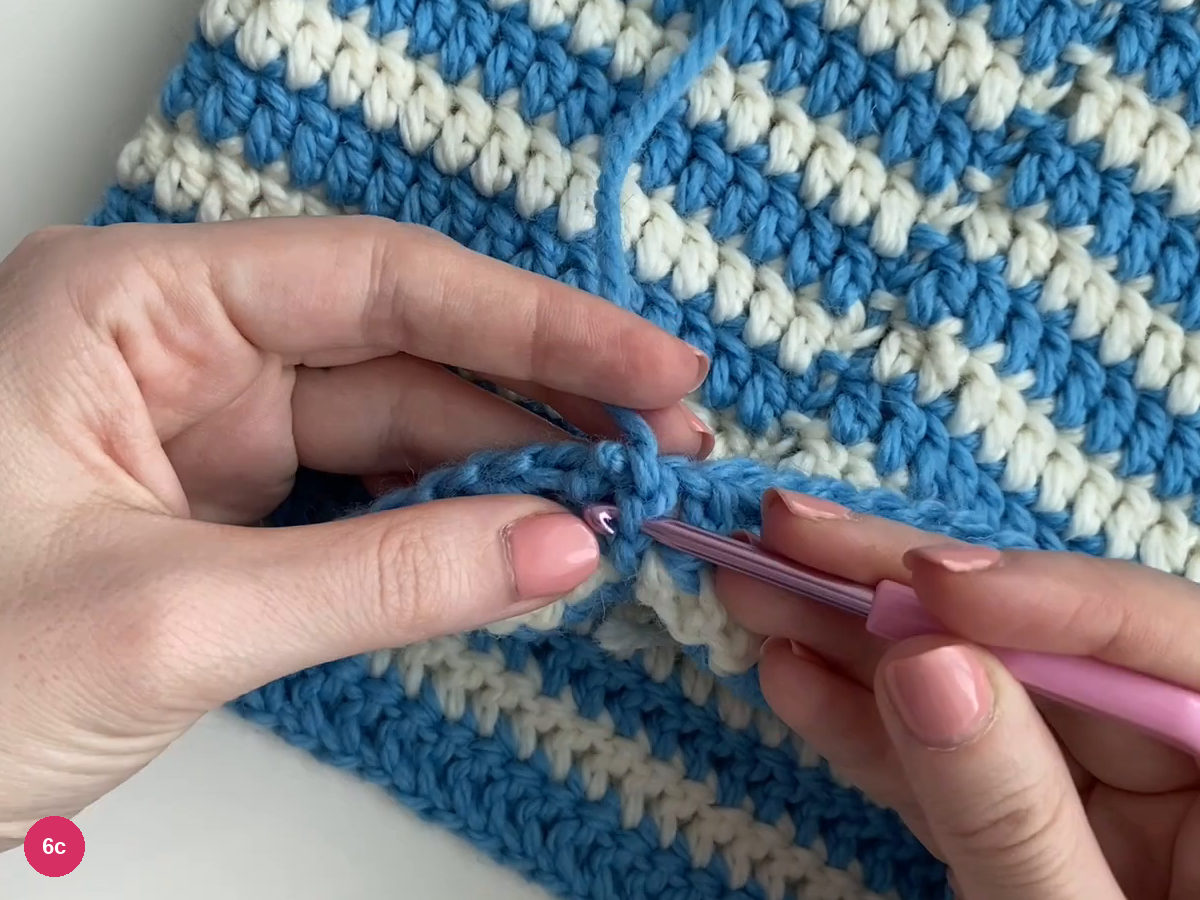
Step 6c: hide the blue starting tail. Secure the other loose ends with a small knot on the inside, then tuck the tails through the fabric in the same way. Check the outside after each tail is hidden, making sure a white tail has not been pulled across a blue stripe or left hanging at the folded-brim edge.
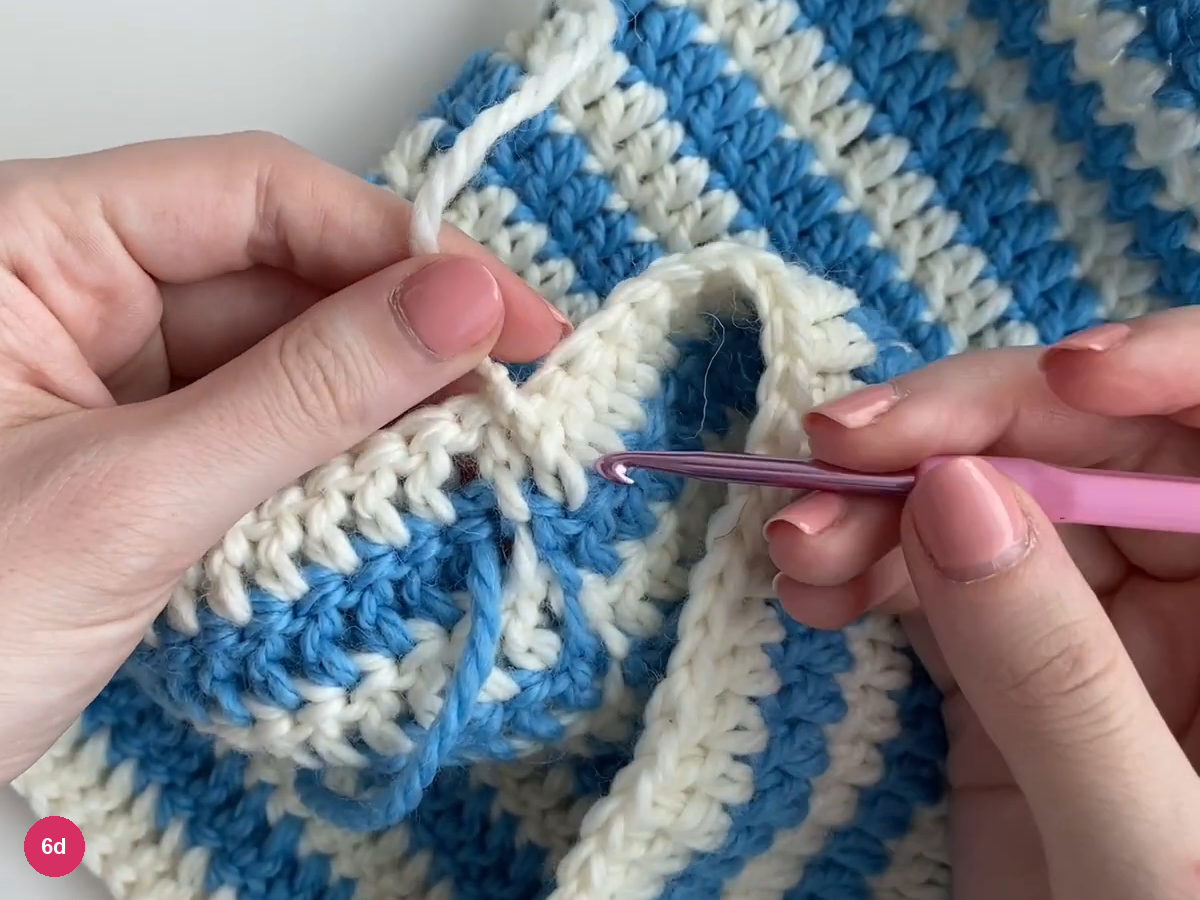
Step 6d: secure the remaining loose ends inside. -
Sew a straight top to form the corners
Flatten the tube with the round joins positioned neatly and bring the top edges together. Line up the two sides without stretching either one, checking that the last white round meets evenly from one corner to the other before the needle travels across it.
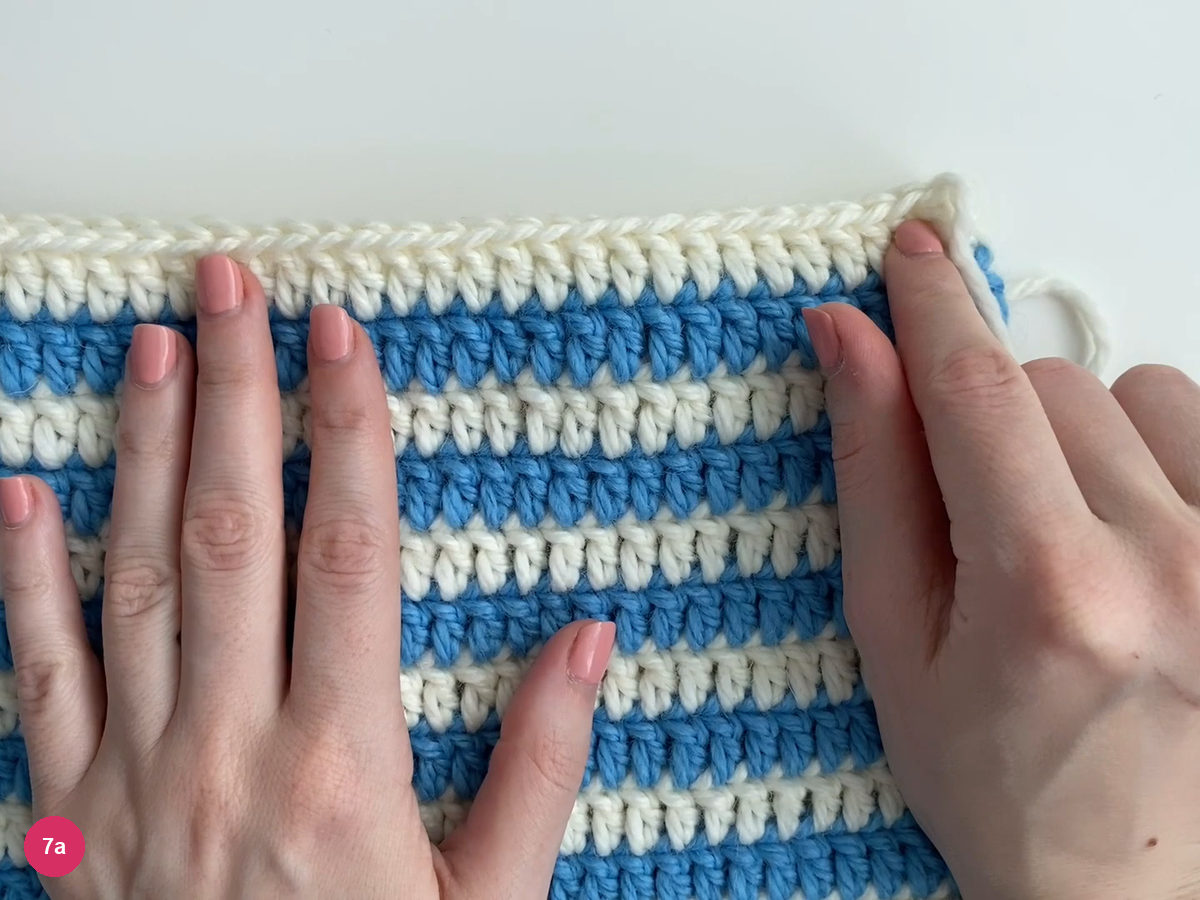
Step 7a: align the two top edges. Thread the yarn needle with white yarn and begin at a top corner, keeping the yarn end inside for securing. Pick up an edge loop from one side and its opposing loop from the other side, joining the layers without reaching down through a whole column.
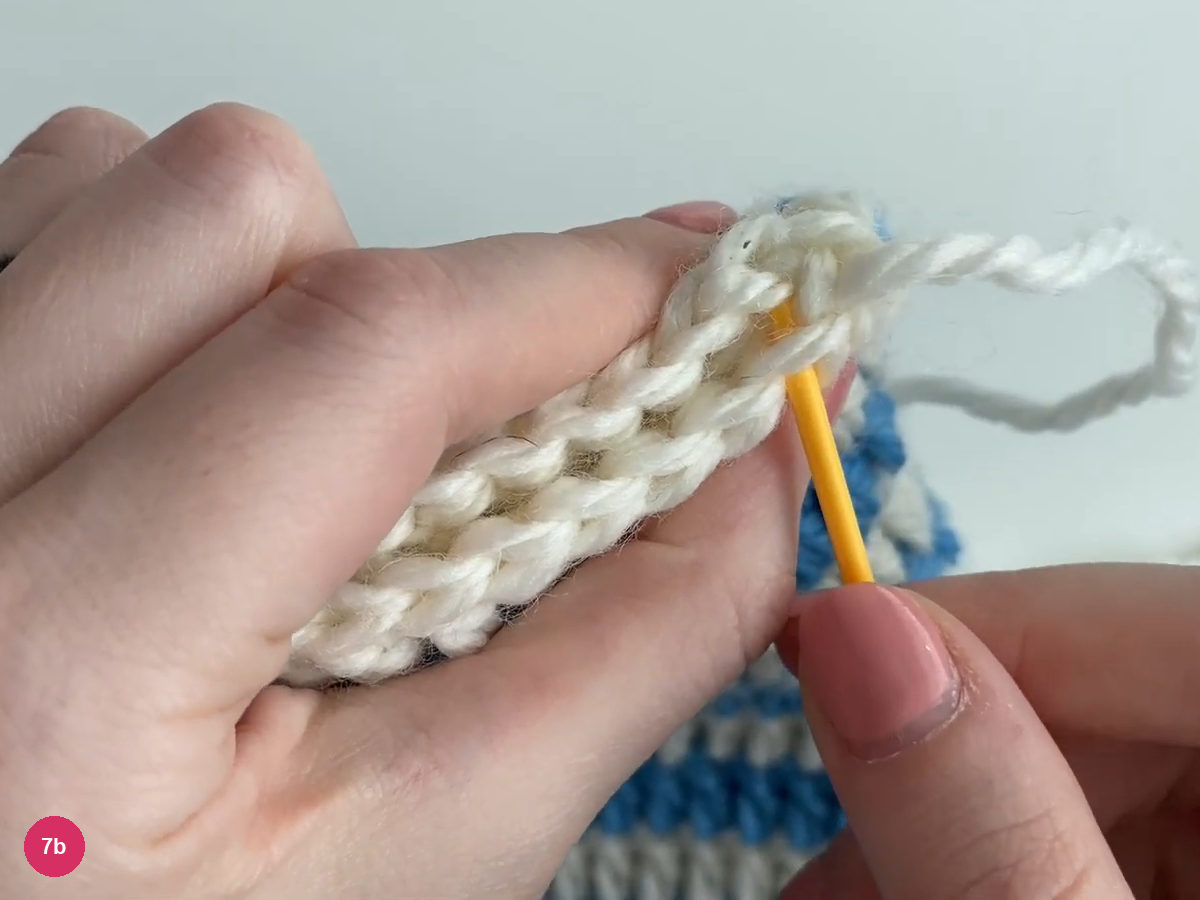
Step 7b: begin the top seam through opposing edge loops. Continue into the next opposing edge loops, alternating from side to side as demonstrated. Keep the white yarn tension even enough to close the gap while preserving the width of the top, rather than pulling the seam into a tight gathered line.
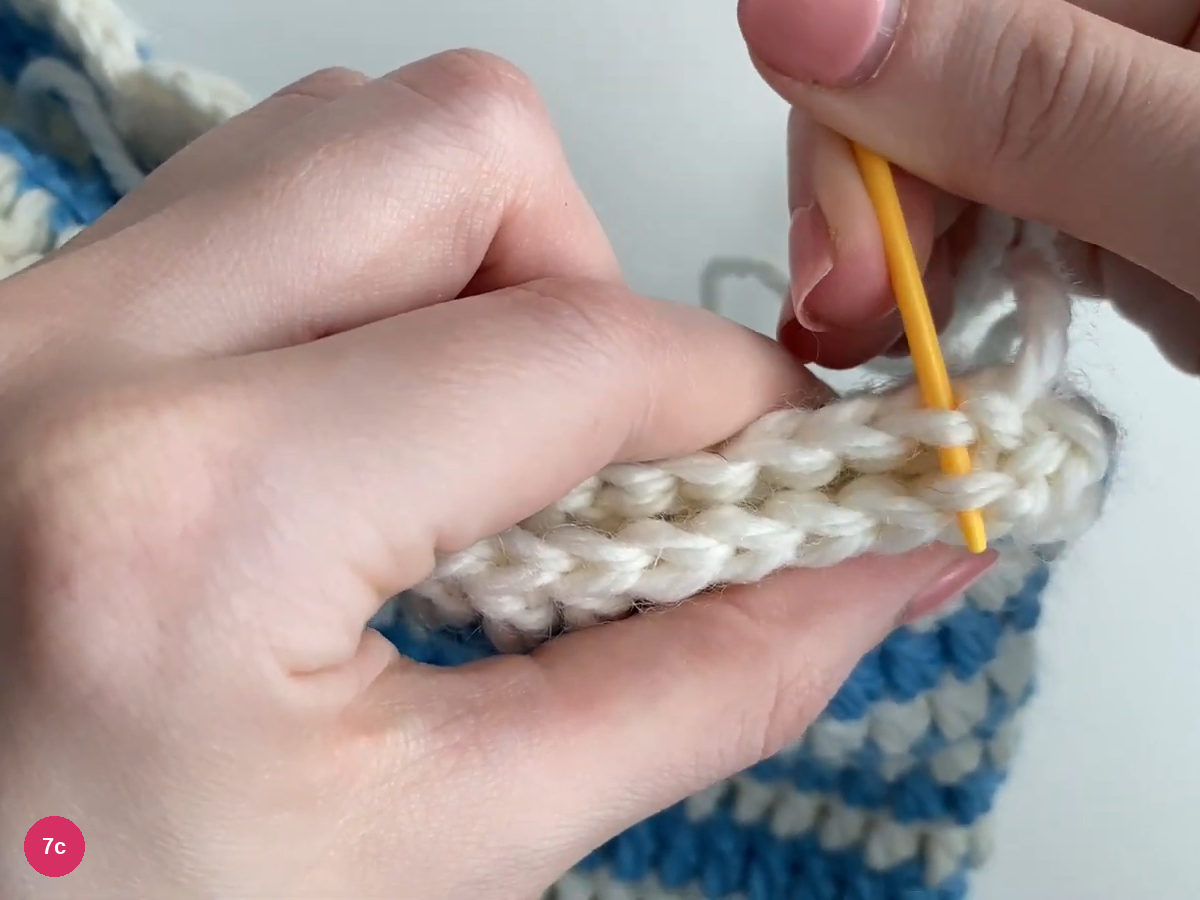
Step 7c: continue the seam along the top. Work the same seam toward the opposite corner, checking the paired edges as you go. The joined portion should lie flat behind the needle; if one side begins to creep ahead, pause and realign the next edge loops before continuing across.
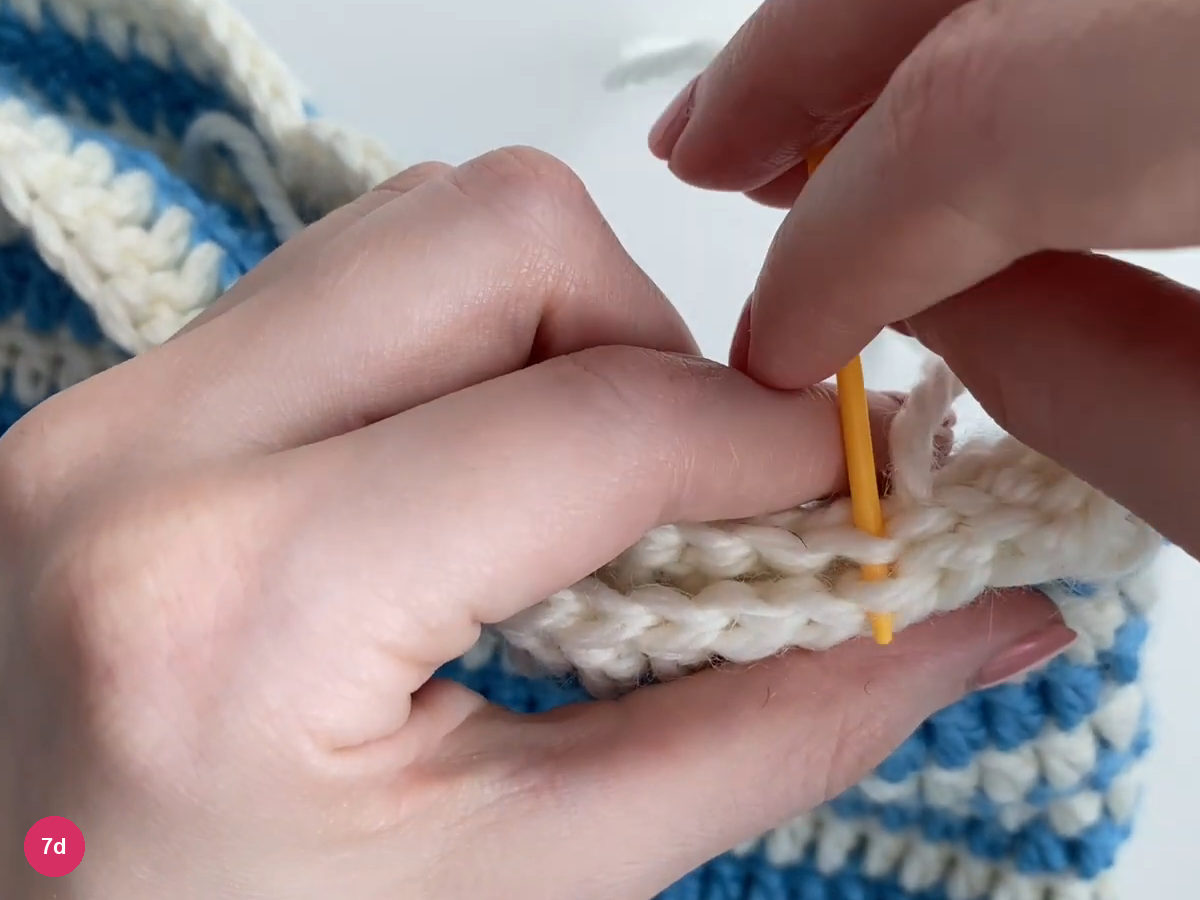
Step 7d: close the remaining top edge evenly. At the far end, take the needle and yarn to the inside and secure the tail through the fabric. Keep the corner intact instead of rounding it off with gathering stitches; the two ends of this straight seam become the cat-ear points when the hat is worn.
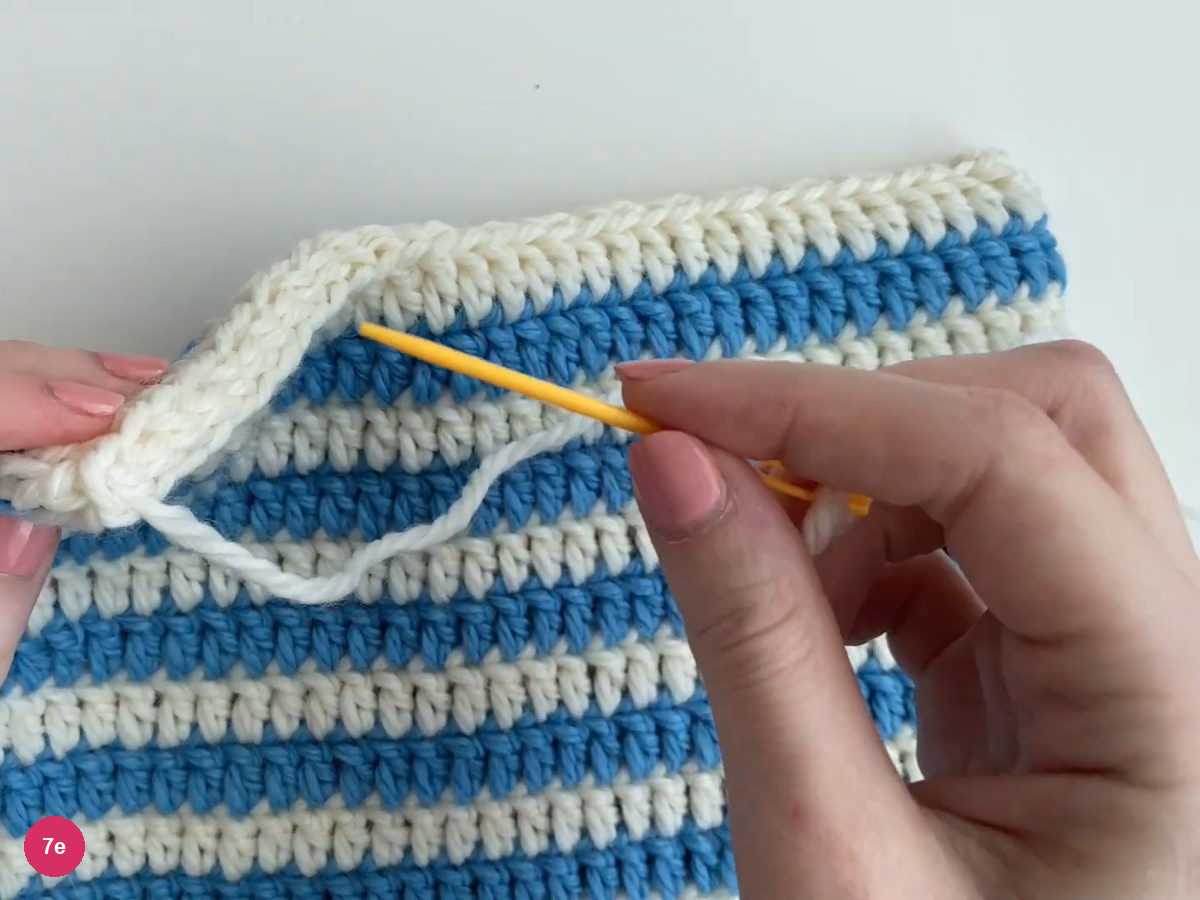
Step 7e: secure the top-seam end inside. -
Fold the brim and check the shape
Lay the closed hat flat and inspect the straight white top seam. There are no separate ear pieces to sew on for this design: the two corners rise when the hat opens over the head, while the body remains a striped tube below them.
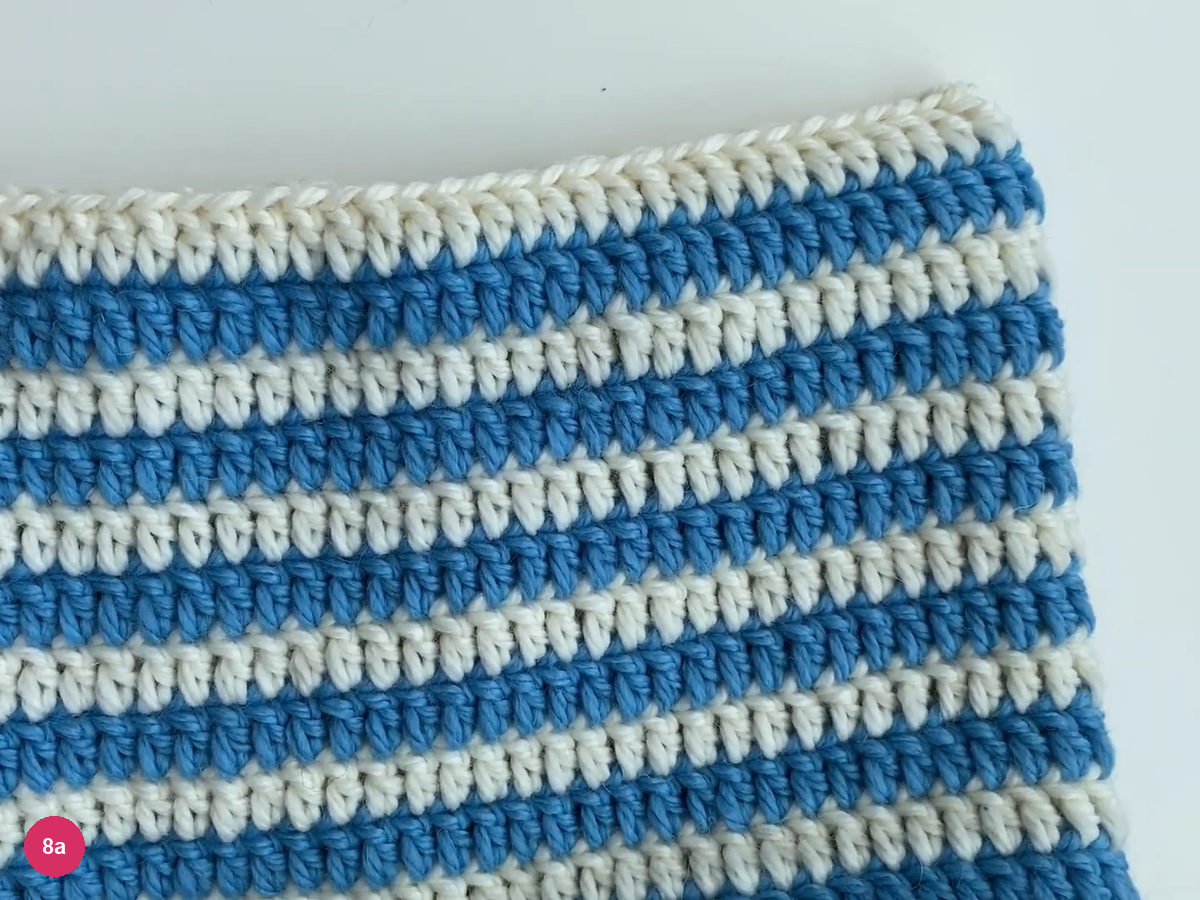
Step 8a: check the flat closed top and its corners. Turn up the lower edge to make the folded brim, adjusting the fold to suit the wearer. Keep the fold even around the opening and check that it does not consume so much body depth that the top seam pulls down tightly across the head.
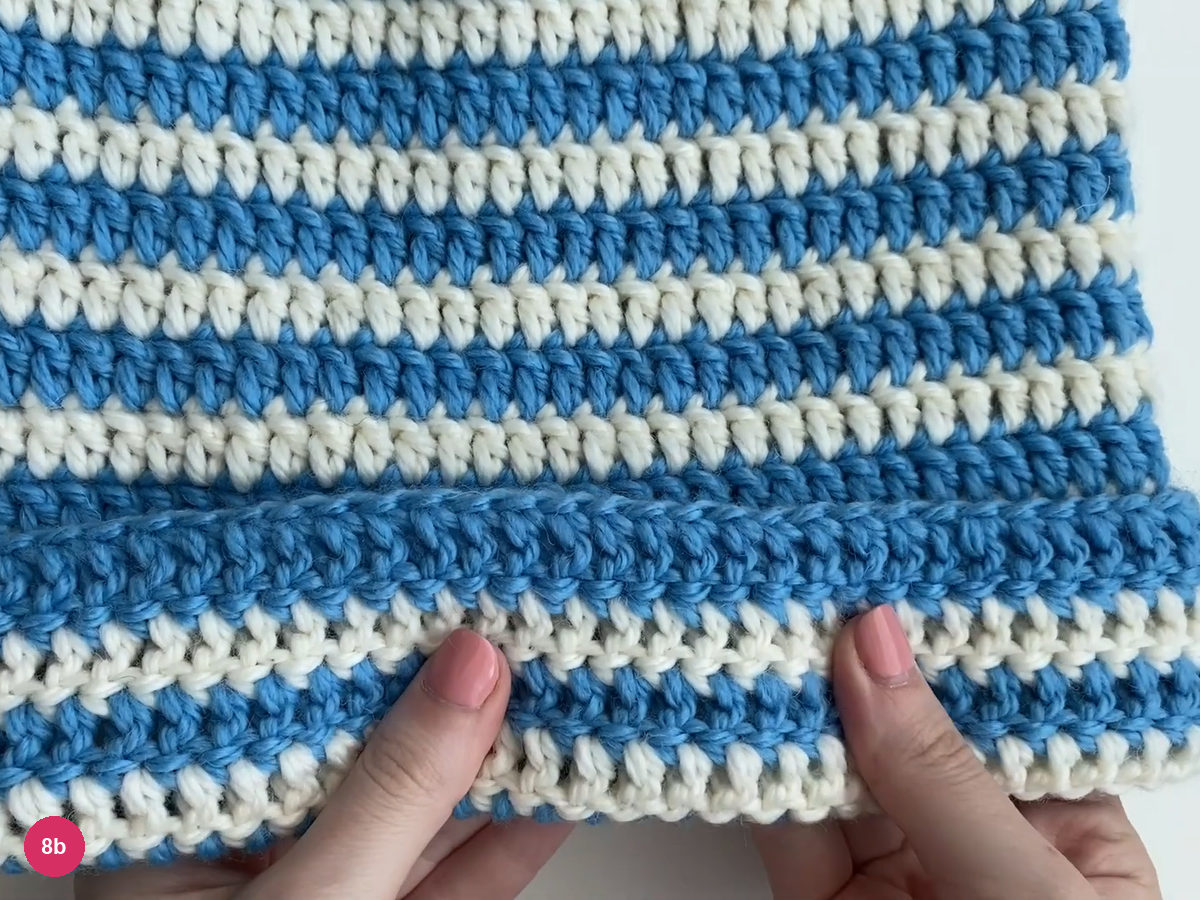
Step 8b: turn up the brim to finish the hat. Check the two top corners while the hat lies flat, keeping the straight seam relaxed. These closed corners become the ears when the tube opens over the head; they are not separate triangular pieces.
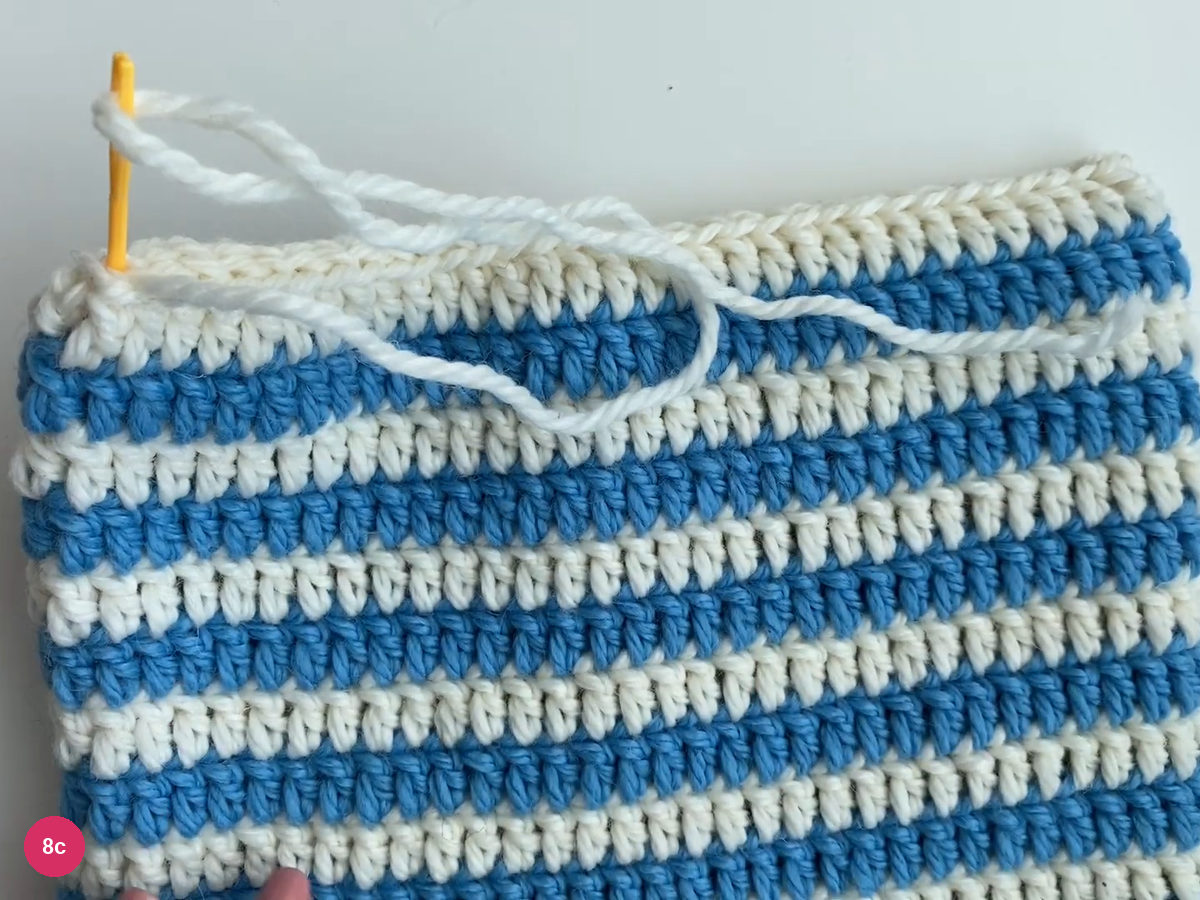
Step 8c: both closed top corners and the full top seam before the loose tail is hidden.
Fit and finishing checks
If the opening feels tight, compare it with the foundation chain before changing the body. A taller hat will not fix a narrow lower edge. If the top feels shallow once the brim is folded, reduce the fold first and check where the straight seam sits over the head.
If the stripes draw inward beside the join, inspect the carried yarn there. A strand pulled taut between its rounds can shorten that area even though the rest of the fabric is relaxed. The inactive color needs enough slack to reach its next round without dragging the neighboring stitch tops downward.
If the corner ears look uneven, flatten the hat and inspect the top seam before adding any shaping. Check whether the opposite sides were paired evenly and whether one corner was pulled tighter than the other. This crochet cat ear beanie relies on the straight closure and the way the hat opens over the head, so adding separate ear triangles would change the demonstrated design.
If a tail shows through a contrasting stripe, return it to the inside and follow stitch bases in its own color. Check the folded brim from both sides, since the reverse fabric becomes visible there. For another cat-themed project with a different construction, see the crochet cat bookmark.
Final checklist
Inspired by Filippova Di | Knitting Room’s video tutorial.

Save this pattern for later
Pin it to one of your boards so it’s ready when you have a free evening and the right yarn.