This crochet poncho joins two dusty-rose rectangles into a pointed garment with raised diamonds and a bobble edge. The demonstrated small size uses panels approximately 37 × 73 cm, followed by an open neck border and a plain double-crochet hem.
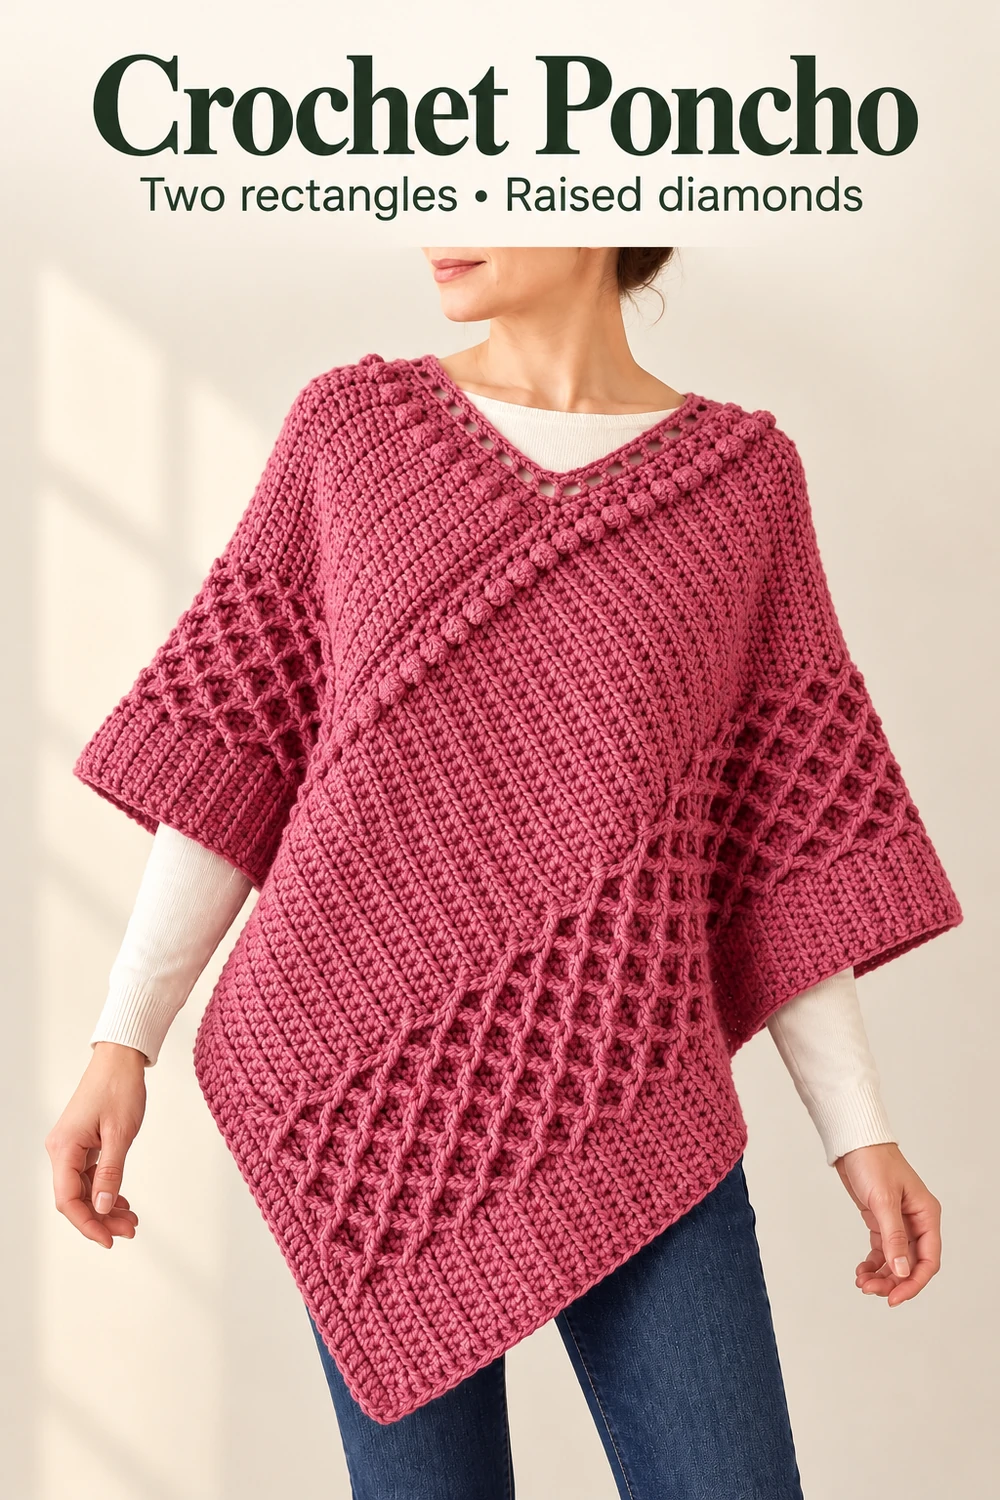
Unlike crochet poncho patterns worked outward from the neck, this design begins as flat fabric. The shapes stay rectangular while front-post stitches build the diamond texture, so it helps to understand the repeat before starting the long panels.
Before you start
- Medium, number 4 yarn; see the total amount for each size below.
- 5.5 mm crochet hook for the panels, joins and lower edging.
- 5 mm crochet hook for the neck edging.
- Yarn needle, scissors and measuring tape.
| Size | Each rectangle (width × length) |
Yarn | Foundation | Row 1 |
|---|---|---|---|---|
| Small | 37 × 73 cm | 450 g | 46 ch | 45 hdc |
| Medium | 39 × 77 cm | 450 g | 49 ch | 48 hdc |
| Large | 42 × 83 cm | 500 g | 52 ch | 51 hdc |
The detailed steps and photos below follow the small size. Each size repeats rows 5–8 to its listed rectangle length; medium and large also use different motif-placement counts, so follow the video’s corresponding size instructions for those rows.
No fibre composition or gauge is specified. Compare the panel with the stated measurements as you work; a stitch count alone cannot guarantee the same dimensions with a different yarn or tension.
US terms: ch = chain, sc = single crochet, hdc = half double crochet, dc = double crochet, sl st = slip stitch, and tr = treble crochet. A front-post stitch passes around the upright post of an earlier stitch, from front to back and back to front. The bobble used here is described separately below because its pull-through sequence differs from many standard bobbles.
A turning ch 1 does not count as a stitch in this project. The raised stitches replace the corresponding stitch behind them rather than adding extra stitches to the row. That replacement rule keeps the textured fabric rectangular.
Make the crochet poncho panels and joins
-
Start the small rectangle
- Small · 37 × 73 cm per panel
- Foundation · ch 46
- Row 1 · 45 hdc
Plan for two matching rectangles, each approximately 37 × 73 cm for the demonstrated small size. The raised diamond band runs near one long edge, while the bobbles sit beside the opposite edge; keep this orientation in mind before joining the panels.
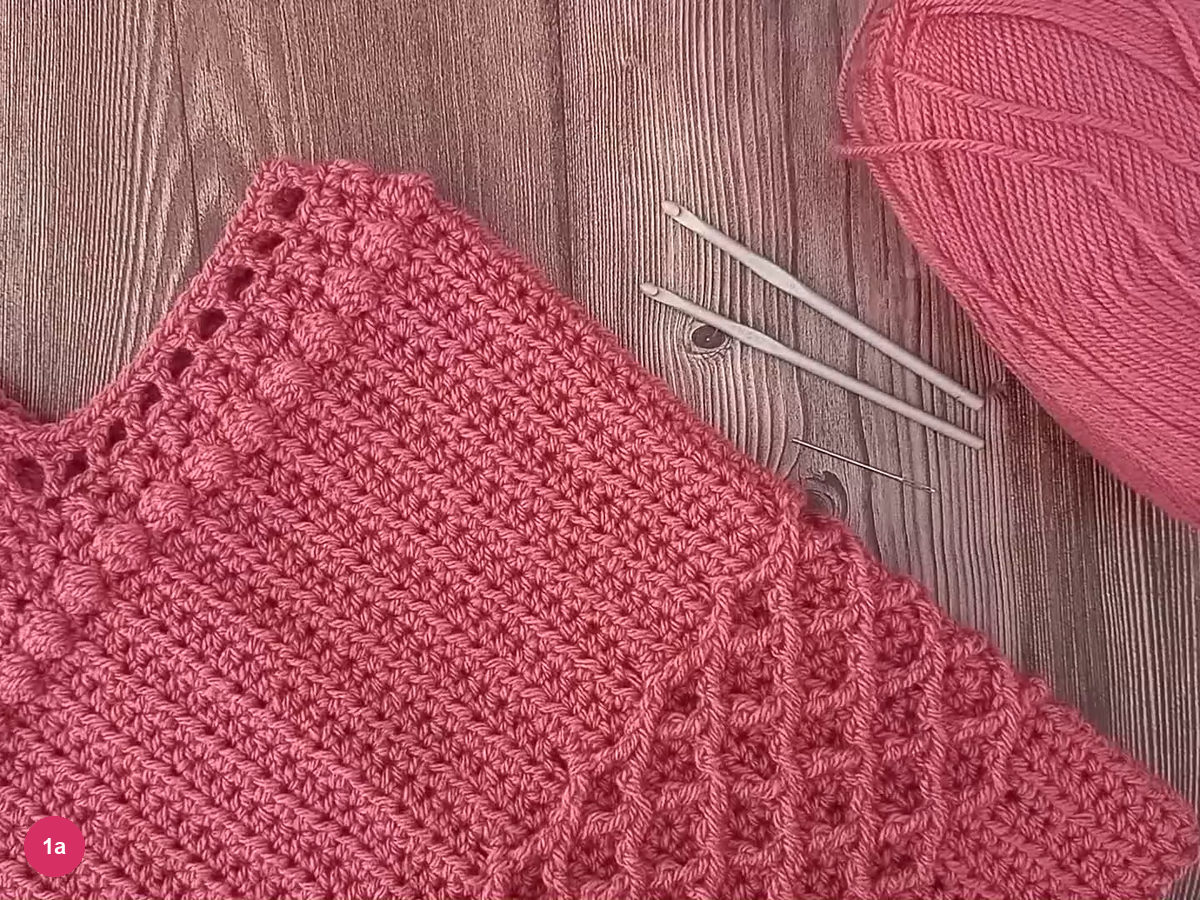
Step 1a: the finished poncho shows the position of the textured bands. With the 5.5 mm hook, make a slip knot and chain 46 without pulling the chains tight. Keep the strand feeding freely from the ball so the foundation remains flexible rather than drawing the lower edge into a narrow cord.
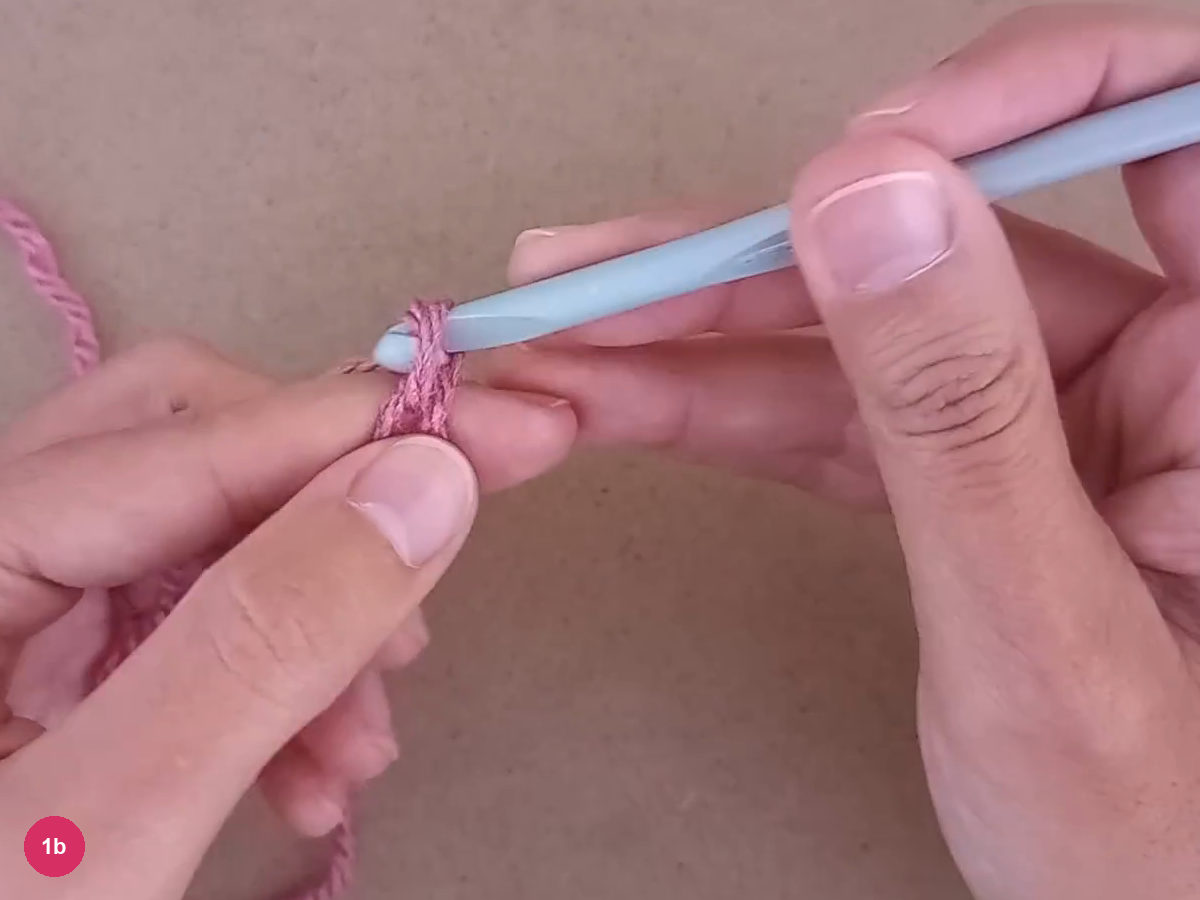
Step 1b: make the foundation chain. Work a half double crochet into the second chain from the hook, then one into every remaining chain. Yarn over, insert, draw up a loop, then yarn over and pull through all three loops for each hdc; the completed first row has 45 stitches.
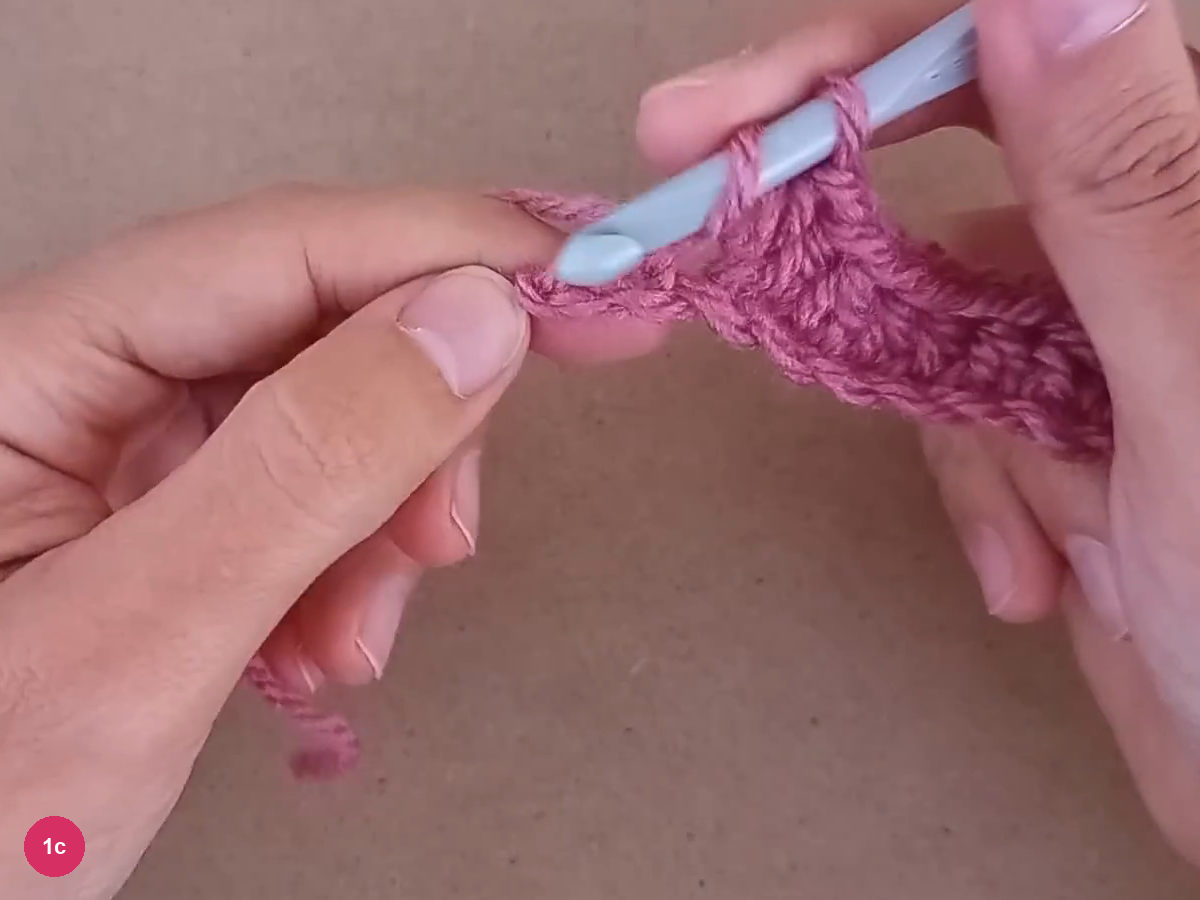
Step 1c: finish the half-double-crochet foundation row. -
Add the bobble edge on row 2
- Row 2 · 45 stitches
- Bobble · 3 repetitions, 7 loops
Chain 1 and turn; this turning chain does not count as a stitch. On this wrong-side row, work 1 hdc in the first stitch and 1 sc in the next, leaving the following stitch ready for the bobble.
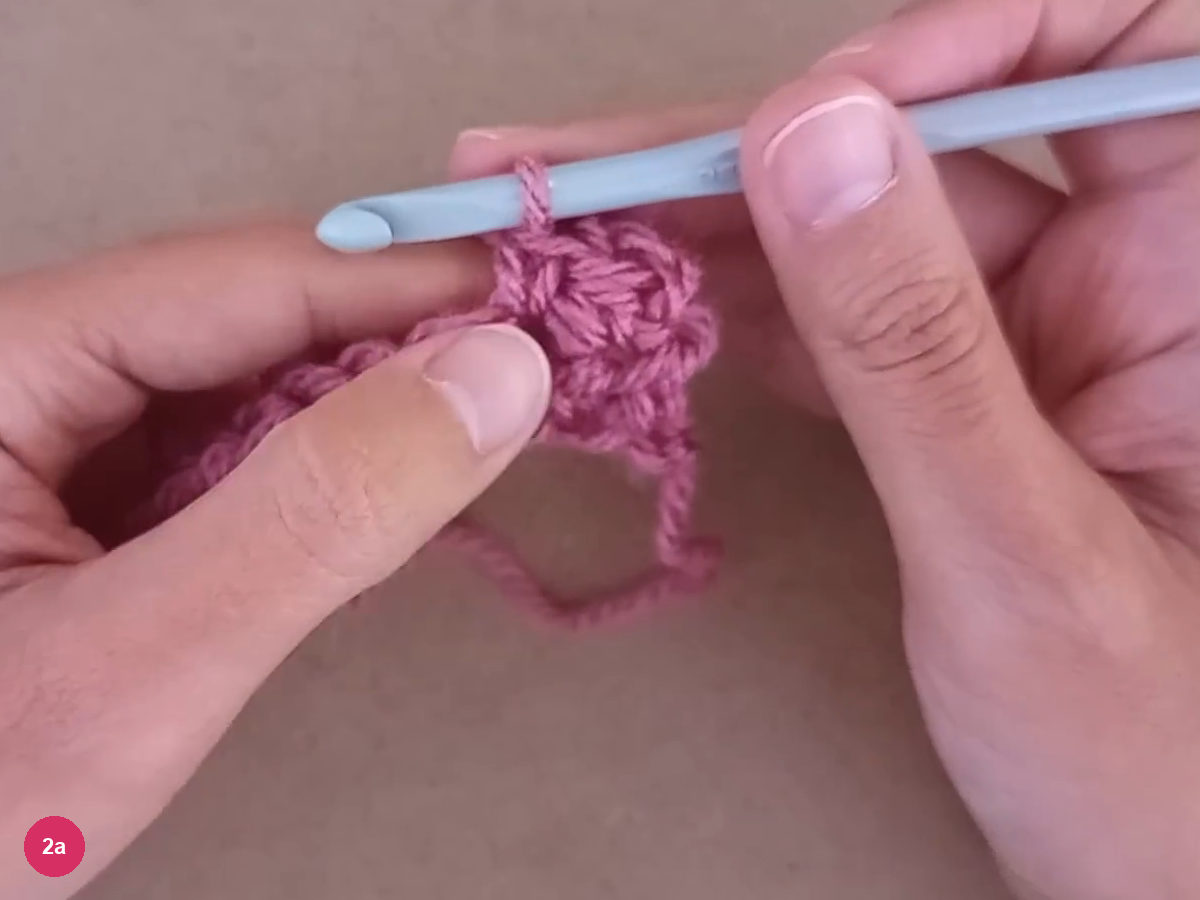
Step 2a: prepare the stitch beside the bobble. In that next stitch, repeat this movement three times: yarn over, insert into the same stitch, draw up a loop, then yarn over and pull through just one loop. Leave the other loops on the hook until there are seven loops gathered together.
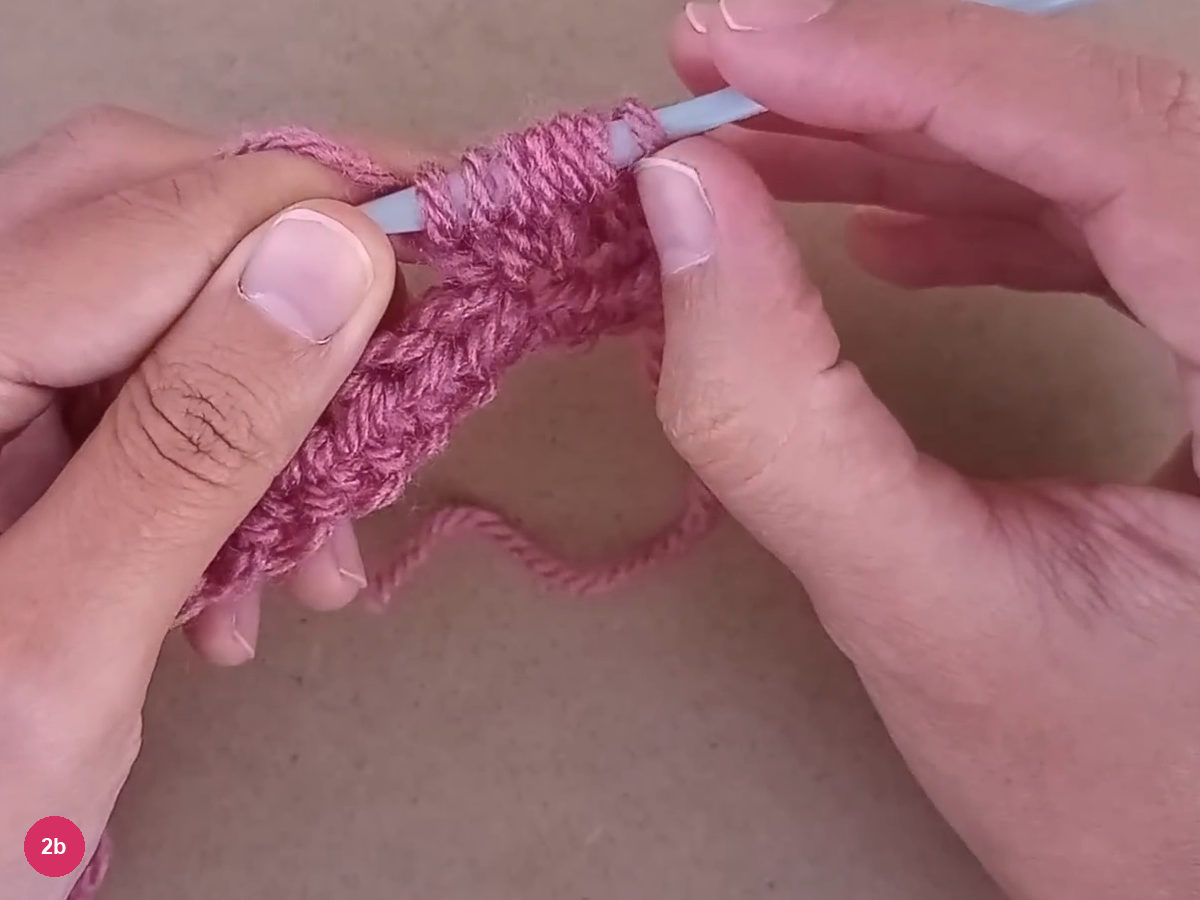
Step 2b: gather seven loops for the bobble. Yarn over and draw through all seven loops together to close the bobble, which projects toward the right side. Work 1 sc in the following stitch, then hdc in each remaining stitch to the end, keeping the row at 45 stitches.
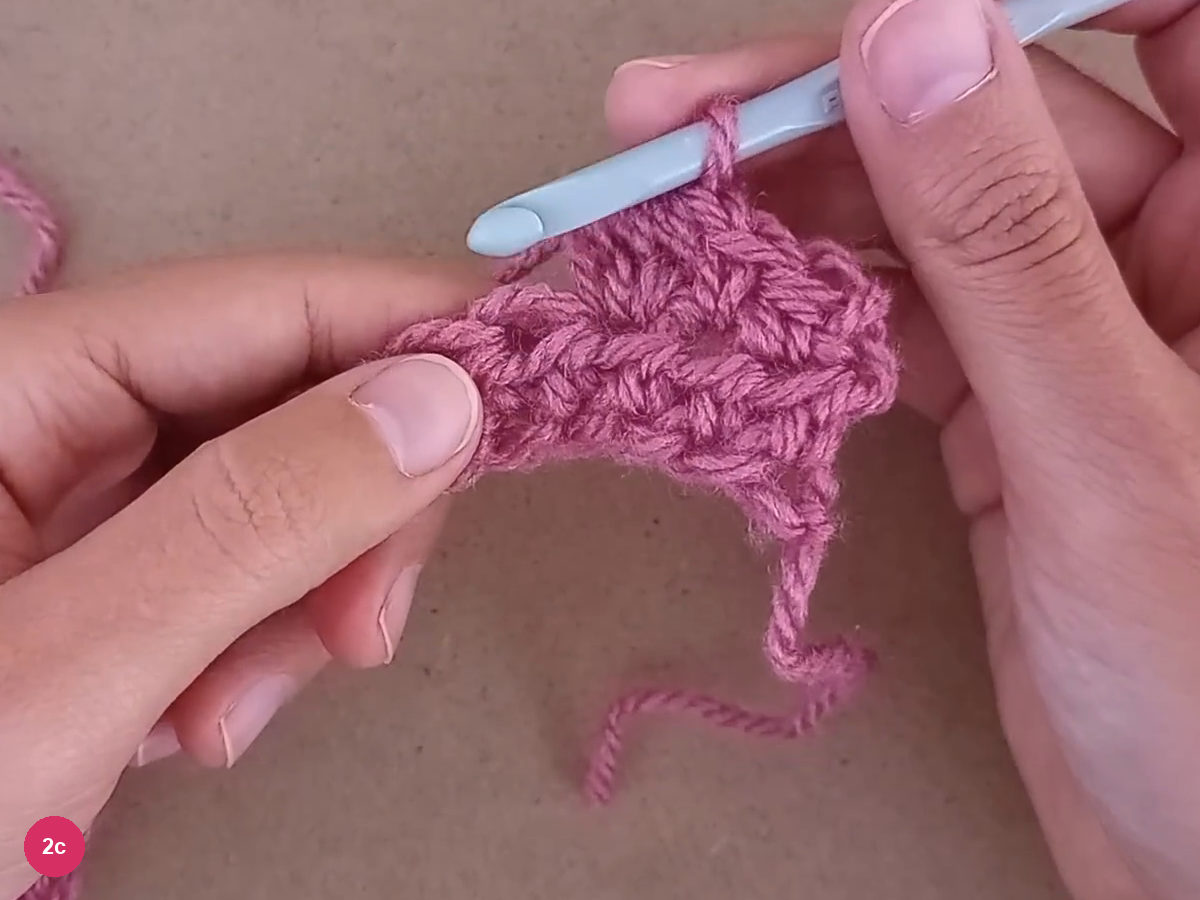
Step 2c: close the bobble and continue the row. -
Build the lower halves of the diamonds on row 3
- Row 3 · 8 hdc to start
- 4 raised pairs
- 24 hdc after final pair
Chain 1, turn to the right side, and work 8 hdc. For the first raised pair, locate the seventh post in row 1 counted from this row’s starting edge; the tall stitches wrap around posts below the working row rather than into their top loops.
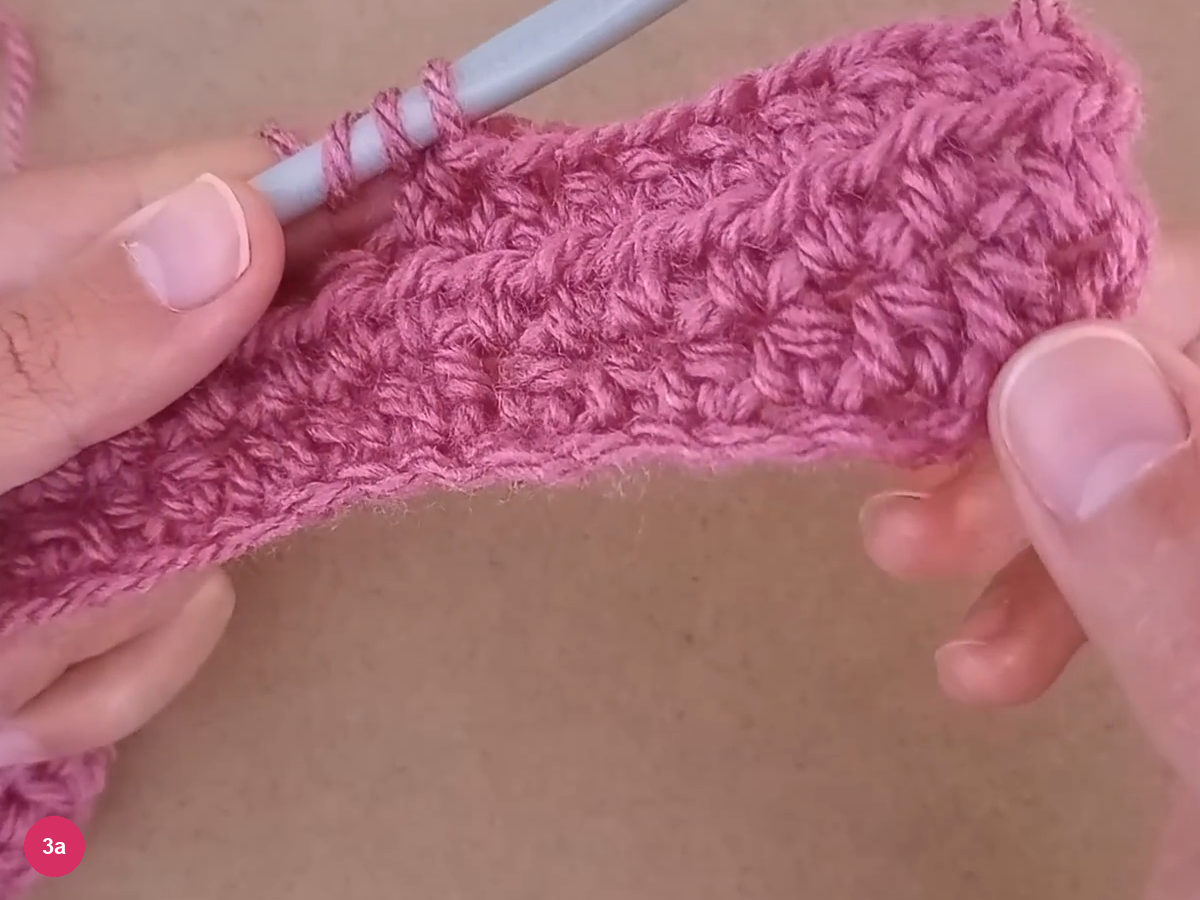
Step 3a: locate the first raised-stitch anchor. Yarn over twice and work a front-post treble around that post, stopping before its final pull-through. Begin another front-post treble around the row-1 post after three intervening posts, stop at the same point, then yarn over and pull through all three remaining loops to close the pair.
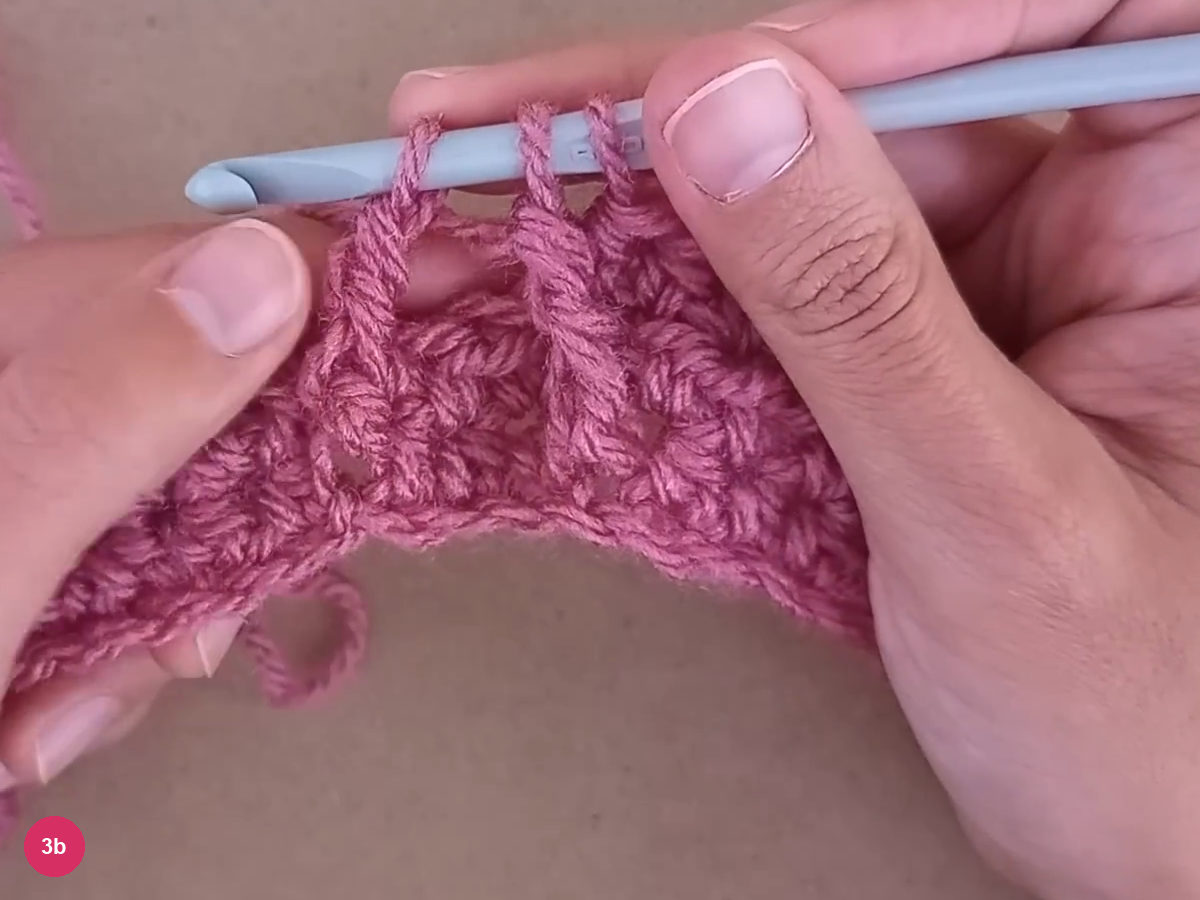
Step 3b: close the first front-post treble pair. Leave the working-row stitch directly behind the raised pair unworked, then make 3 hdc. Repeat the raised pair and separating hdc until there are four triangular groups, sharing each preceding group’s second anchor with the next group’s first; after the fourth group, hdc to the end for a final plain section of 24 hdc.
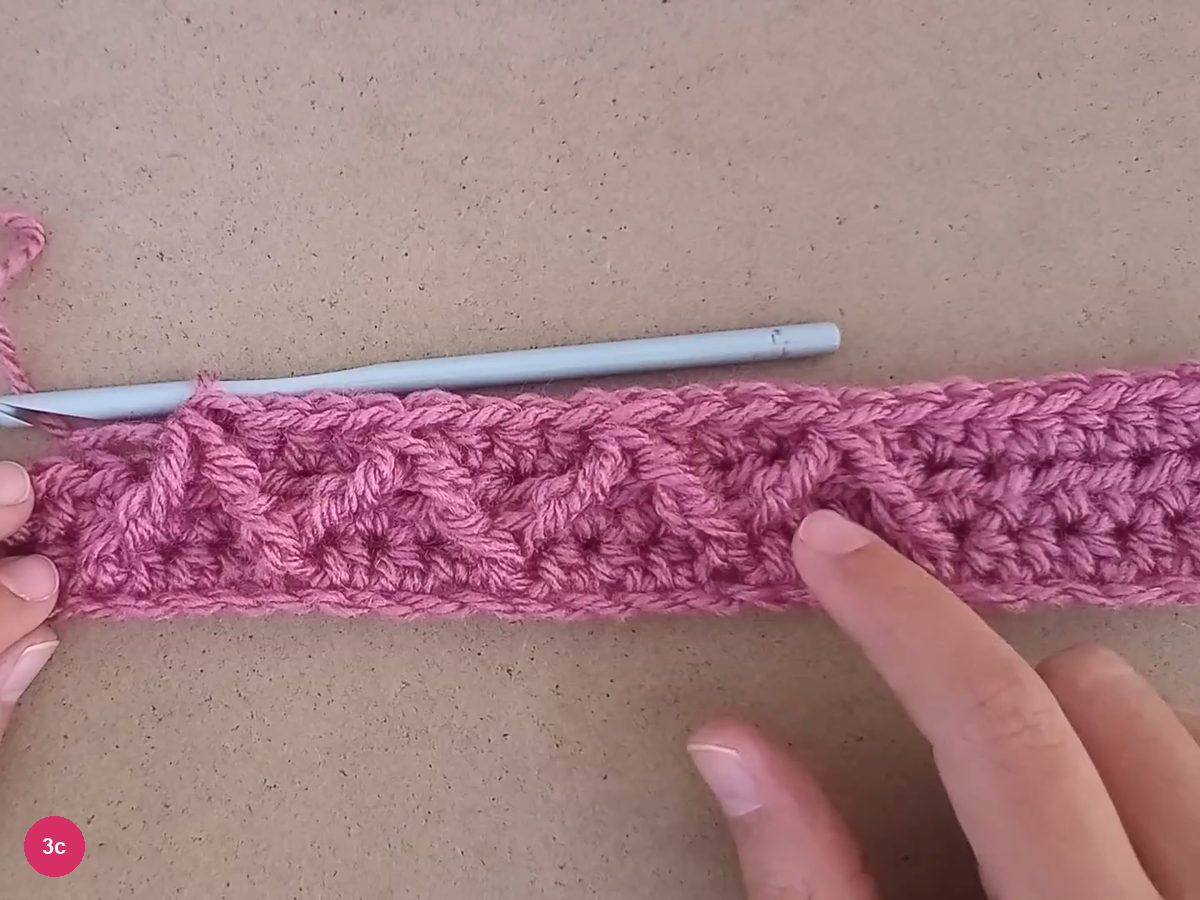
Step 3c: check the four raised triangles. -
Close the diamonds across rows 4 and 5
- Row 4 · repeat row 2
- Row 5 · 6 hdc to start
- 3 raised pairs between outside trebles
- 22 hdc to finish
For row 4, chain 1 and turn, then repeat row 2: hdc, sc, bobble, sc, followed by hdc to the end. Keep the bobble at the same edge on every wrong-side row so the small raised dots form a consistent border when the fabric is turned right side out.
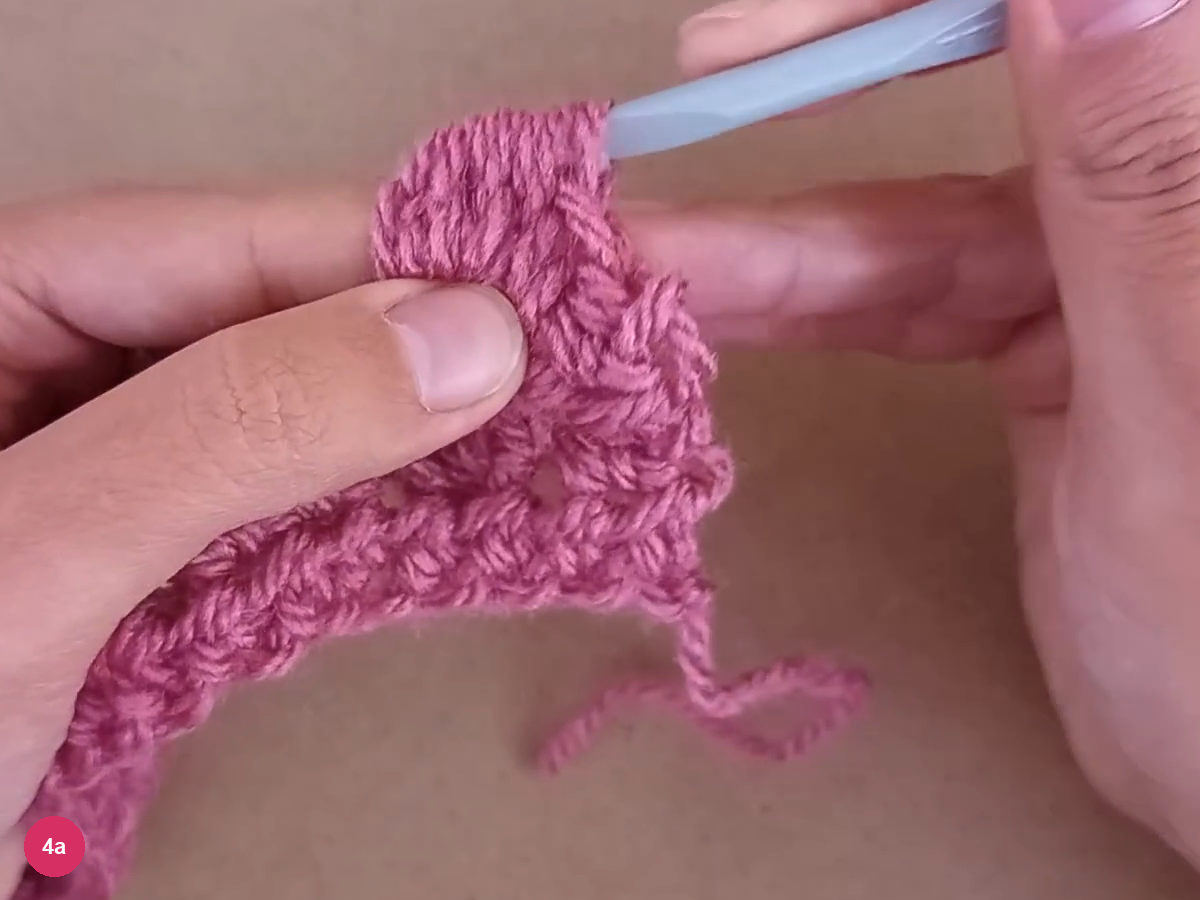
Step 4a: repeat the wrong-side bobble row. Start row 5 with chain 1, turn, and 6 hdc. Work one complete front-post treble around the first joined raised group below, leave its corresponding stitch behind unworked, then work 3 hdc; this single tall stitch begins the outside edge of the diamond band.
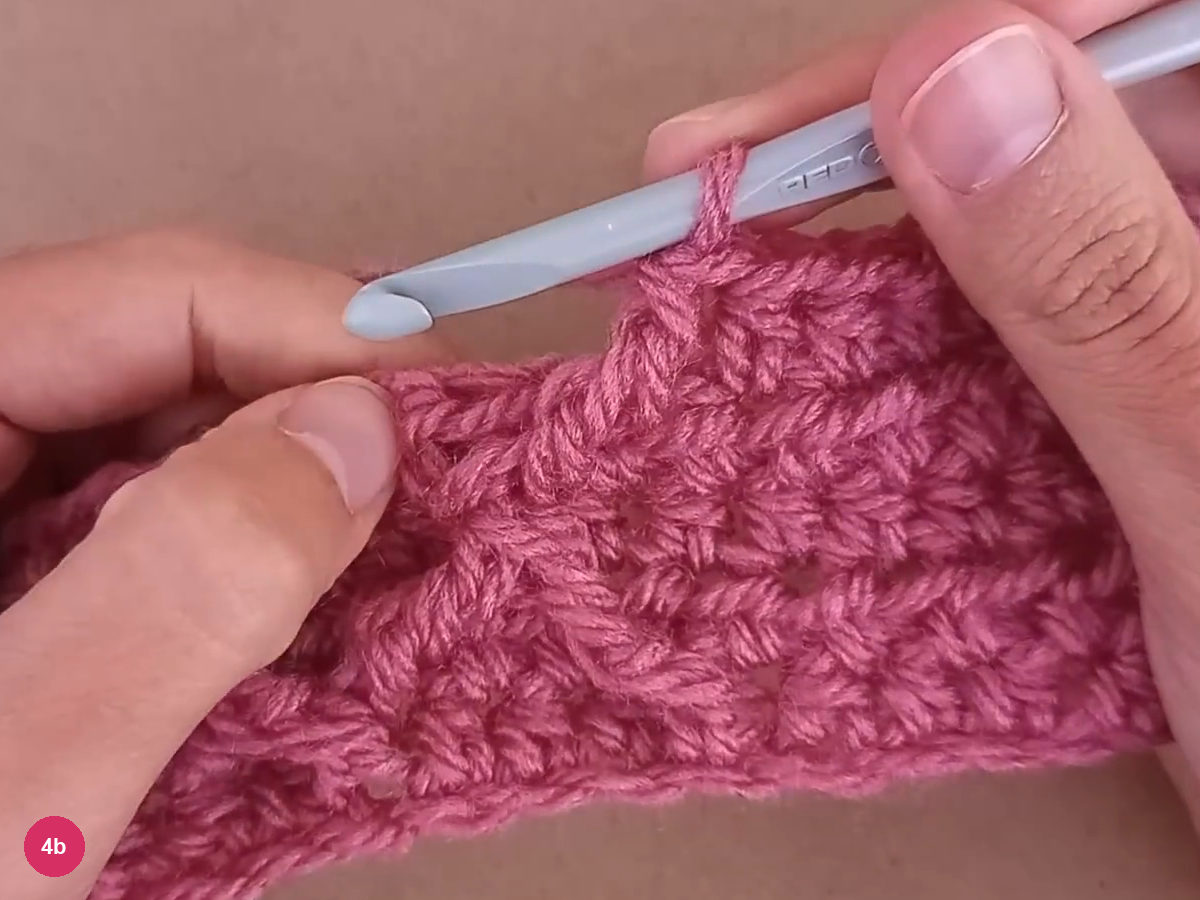
Step 4b: work the outside front-post treble. Work a front-post treble pair closed together, anchoring one leg around that same raised group and the other around the next group. Leave one corresponding stitch behind it unworked and make 3 hdc, then repeat across the next groups to form three joined pairs in this row.
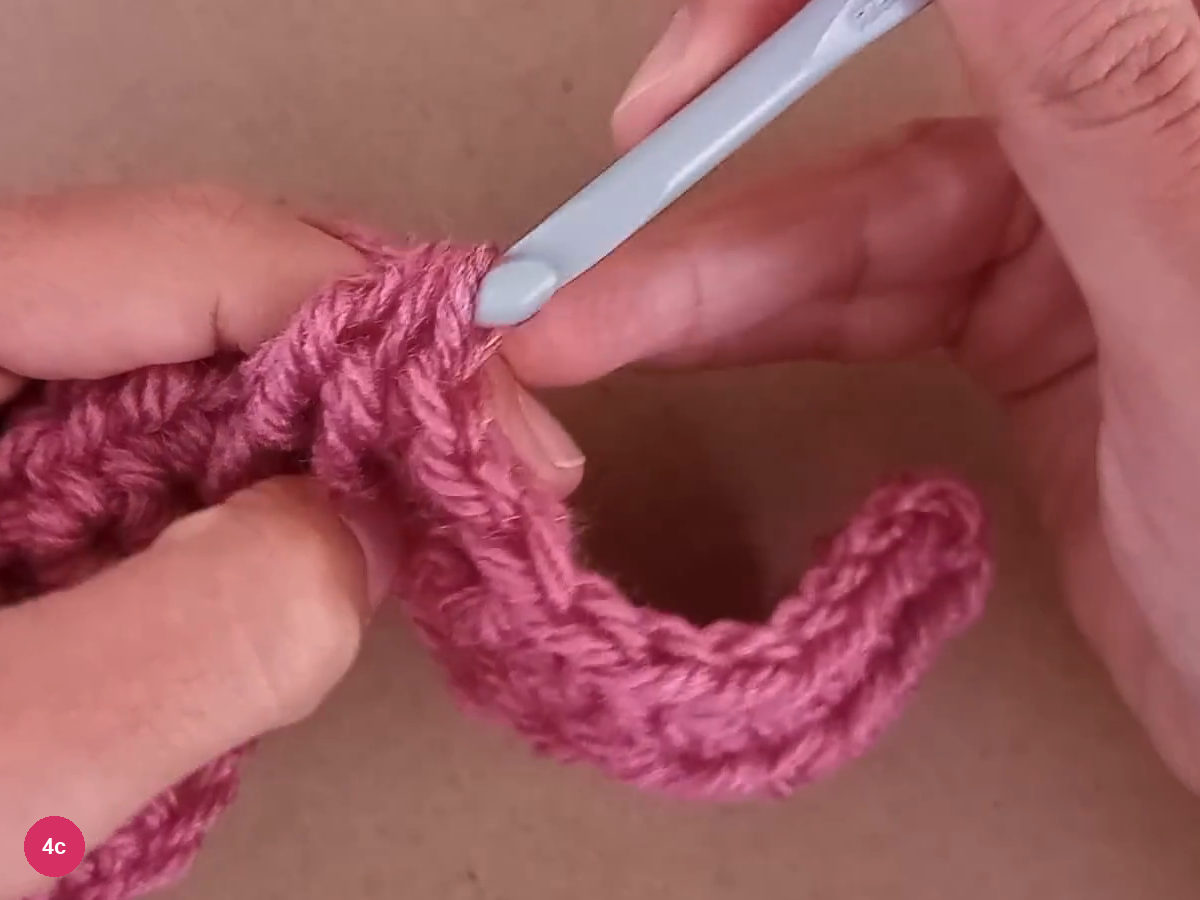
Step 4c: join neighboring raised groups. After the last separating 3 hdc, work one complete front-post treble around the final raised group. Leave its corresponding stitch behind unworked and hdc to the end; this plain ending section has 22 hdc, and the first diamonds now have both sloping sides.
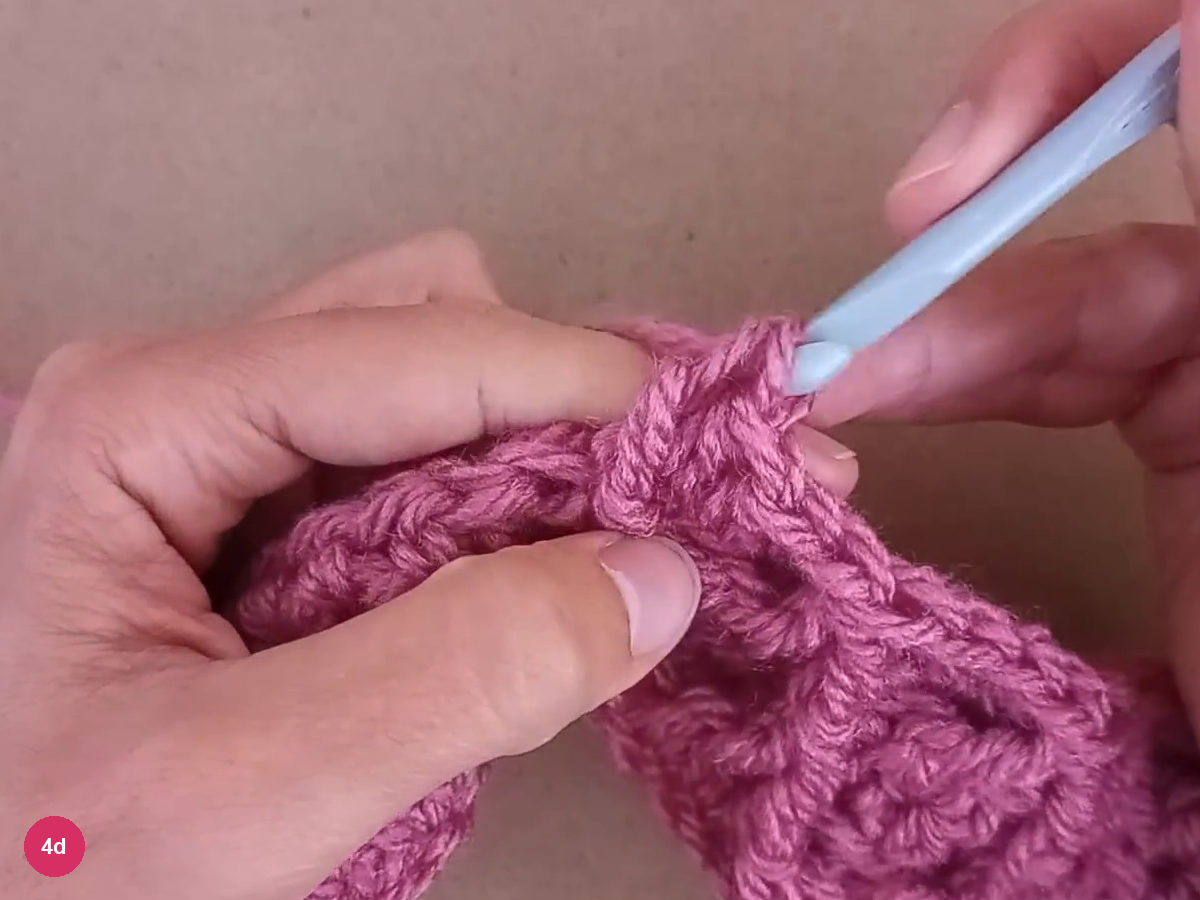
Step 4d: finish the outside edge of the diamond band. -
Extend the repeat into two rectangles
- Repeat rows 5–8
- Finish near 73 cm on row 5 or 7
- 2 matching rectangles
Work row 6 exactly like the earlier even rows: chain 1, turn, hdc, sc, bobble, sc, then hdc to the end. Feel for the tops of the sc stitches beside the bobble so neither disappears from your count beneath the raised texture.
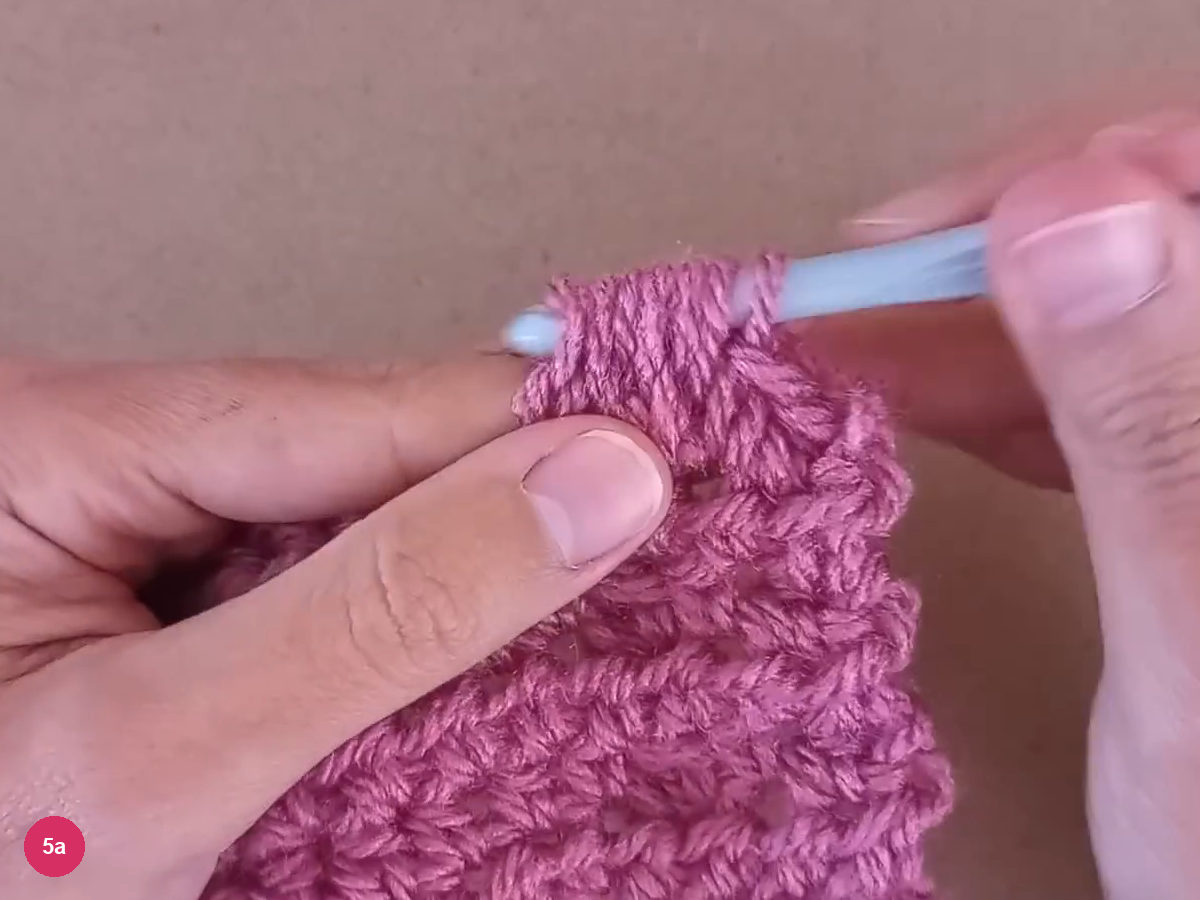
Step 5a: work the next bobble return row. For row 7, chain 1, turn, and work 8 hdc, then four front-post treble pairs with 3 hdc between them, as on row 3. Anchor into the raised stitches below, leave each corresponding working-row stitch unworked, and finish with 24 hdc after the last pair.
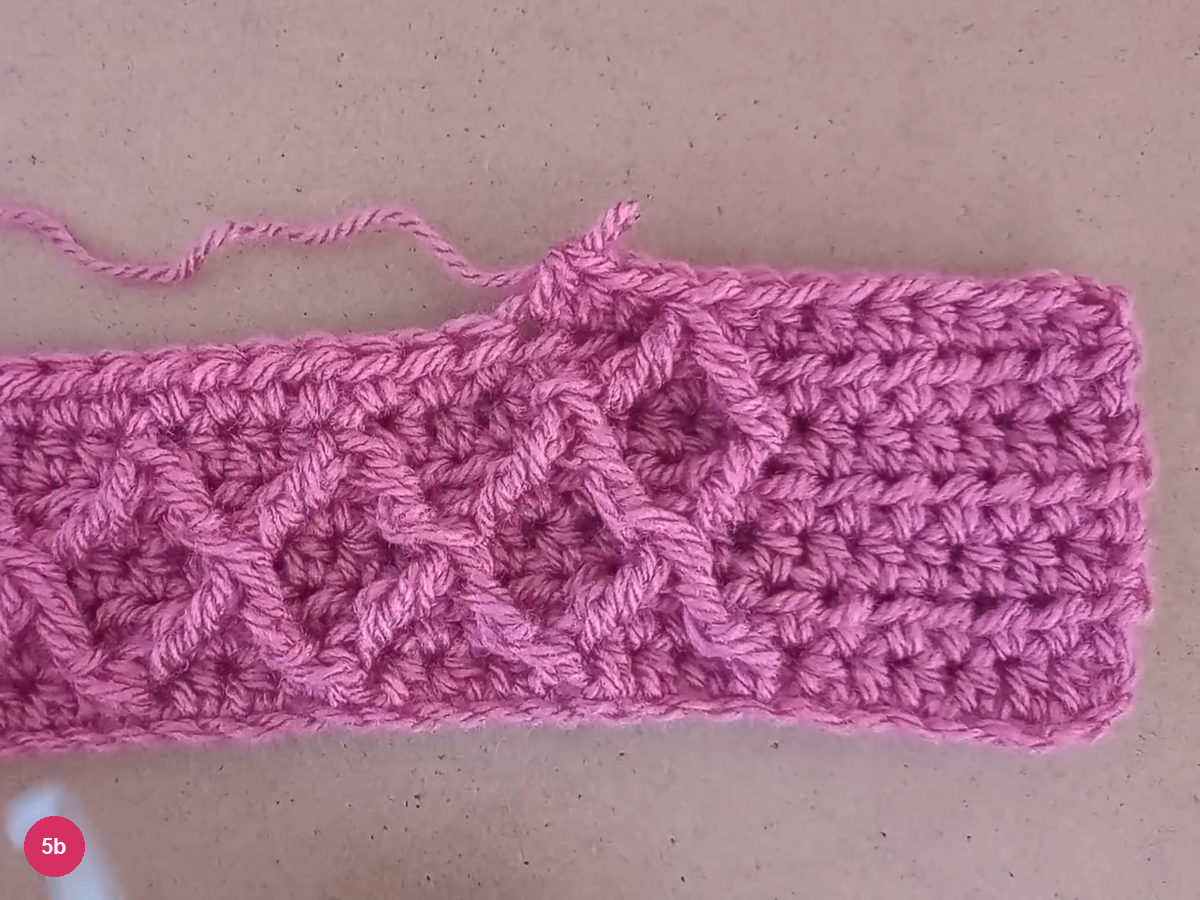
Step 5b: the first repeated pair extends the diamond band. Work row 8 like row 2, then continue repeating rows 5–8. Check the right side as the fabric grows: the diamonds should stack neatly along one edge and the bobbles should stay on the opposite edge, without extra stitches widening the rectangle.
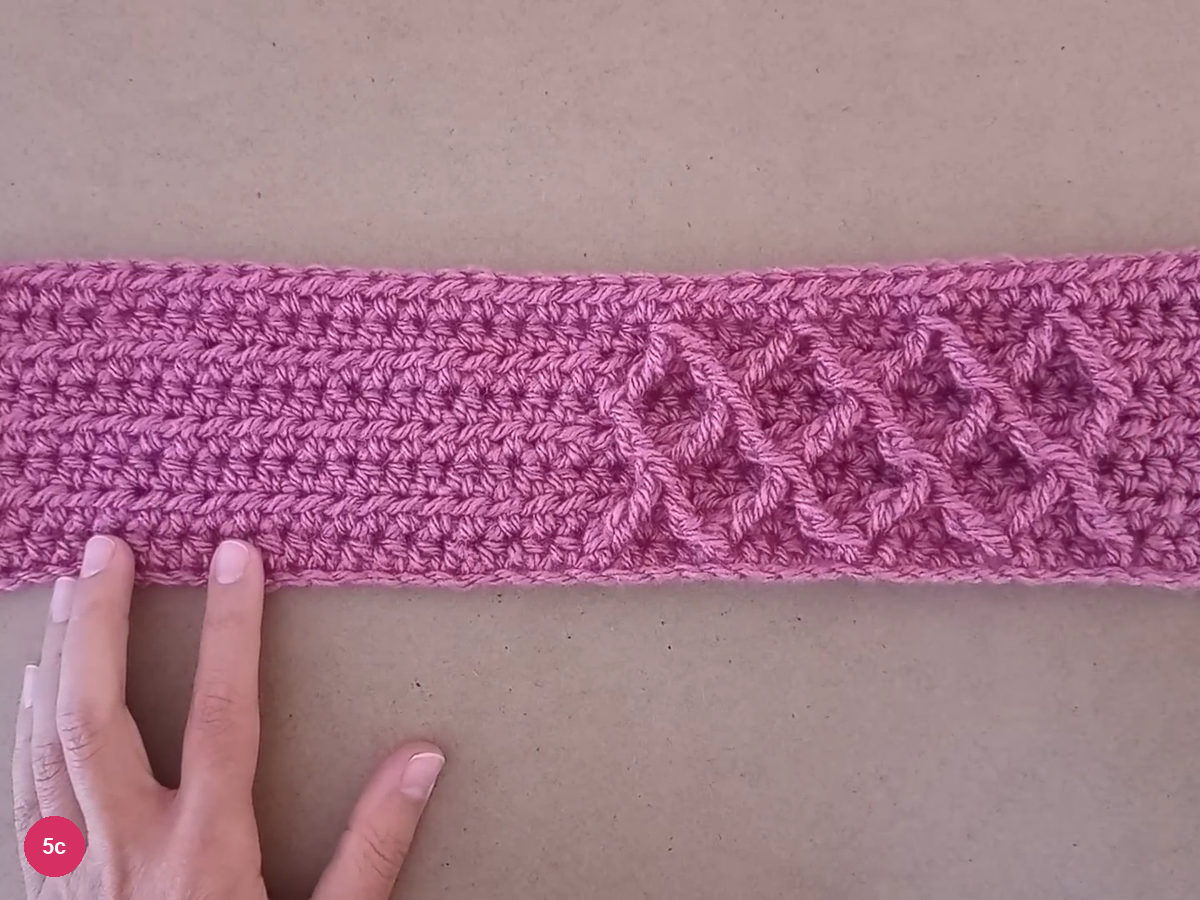
Step 5c: check the developing textured strip. Stop near 73 cm, ending on a right-side row equivalent to row 5 or row 7; a small difference in length is allowed in the demonstration. Fasten off and make the second rectangle with the same foundation count and exactly the same number of rows as the first, then weave the panel tails through the wrong side.
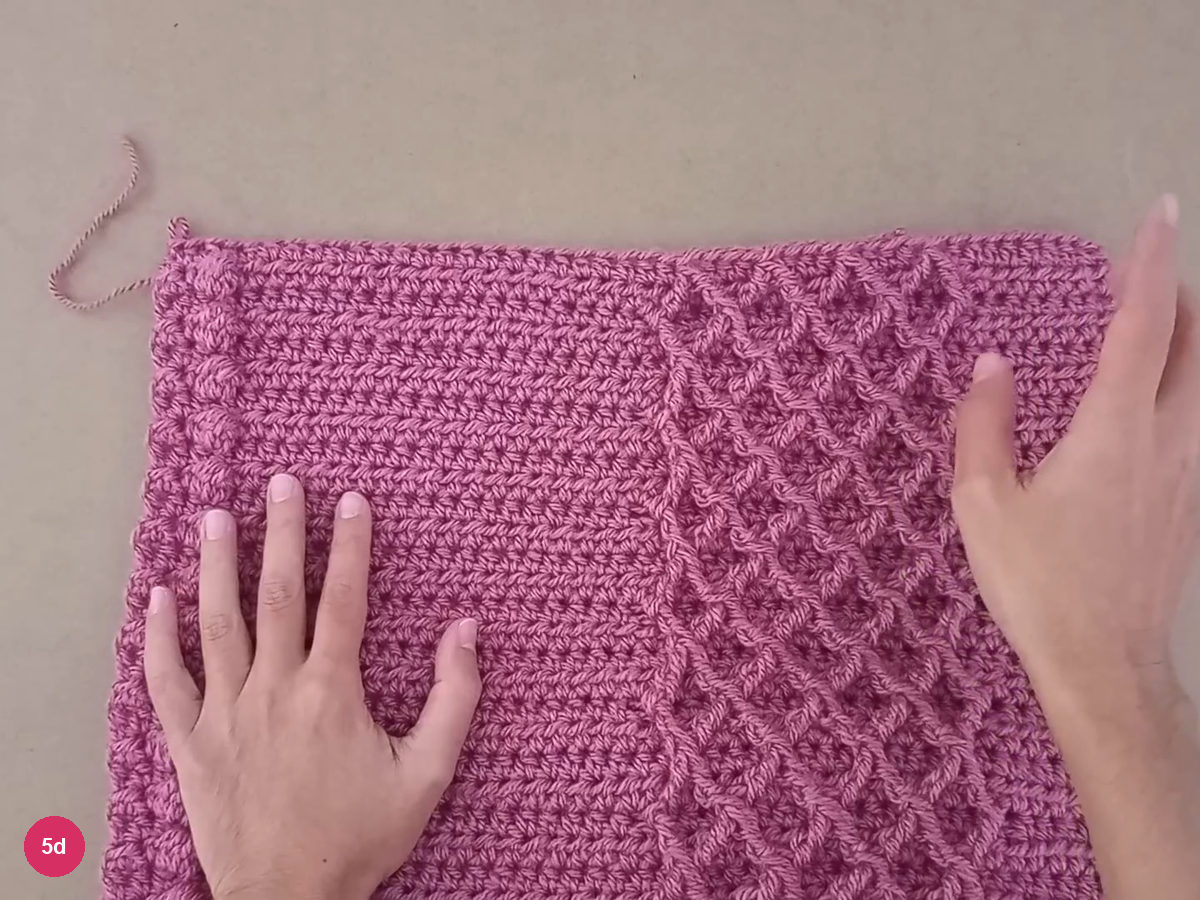
Step 5d: use the completed rectangle as the match for the second. -
Join the rectangles into the poncho
- 2 panel joins
Place both rectangles wrong side up, one vertically and one horizontally, with the end of the horizontal panel meeting the side of the vertical panel to form an L. Keep the stitch directions consistent and align the meeting edges without stretching either piece.
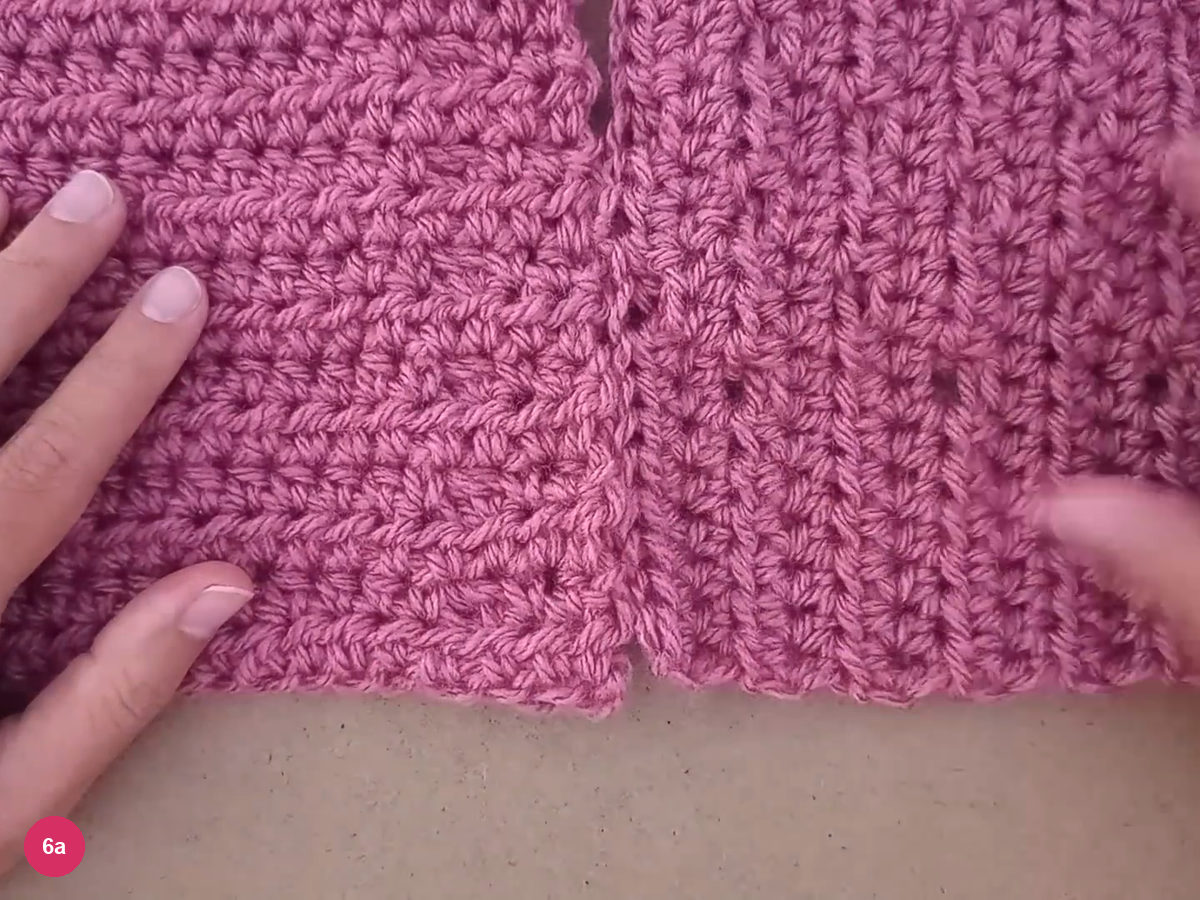
Step 6a: align a short edge with the neighboring long edge. Using the 5.5 mm hook and fresh yarn, join the aligned corner and chain 1 to secure it. Slip stitch through each stitch along the short edge and the facing space along the other panel’s side, keeping the seam loose enough for the hook to pass through comfortably.
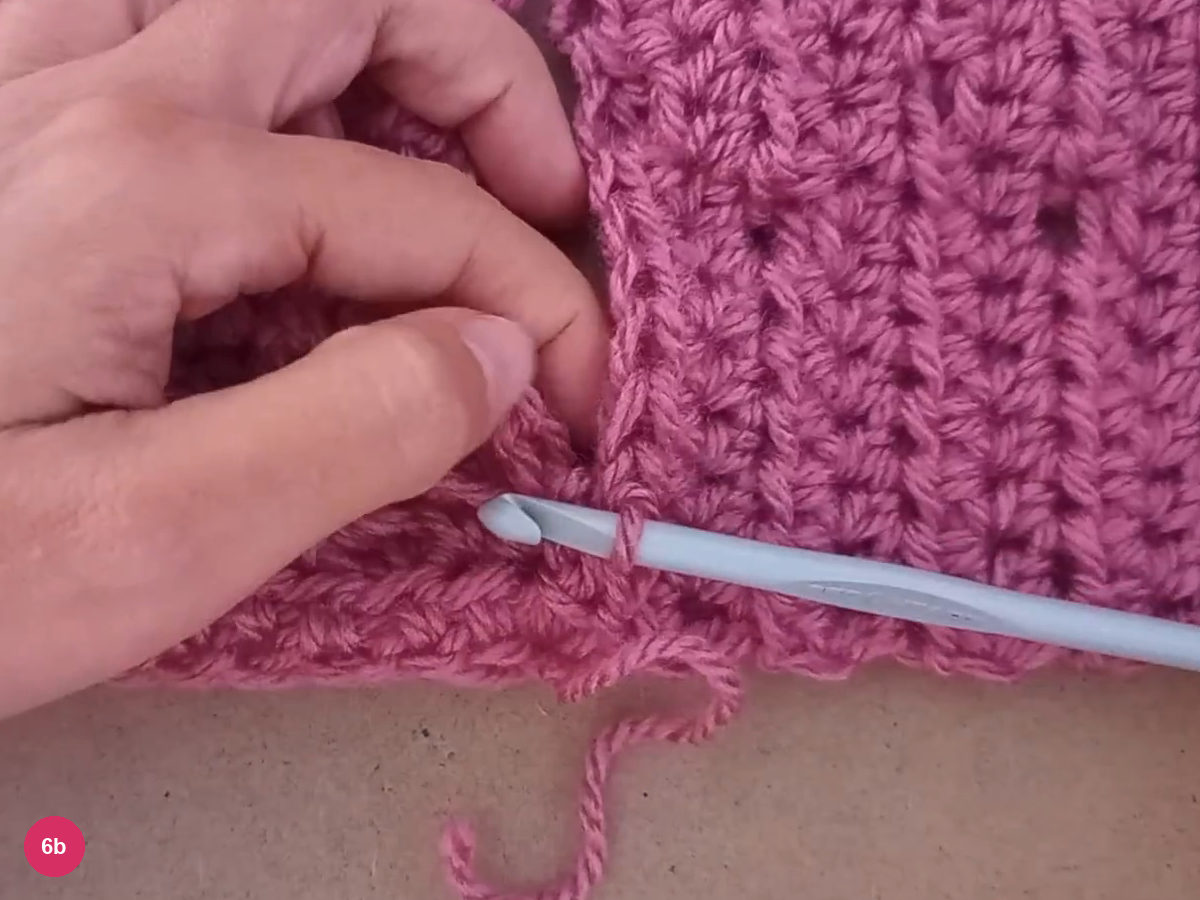
Step 6b: slip stitch the first panel join. Bring the remaining free short end across to meet the beginning of the other panel’s free side. The joined fabric now folds around into a poncho shape. The second seam is completed off camera; use the same slip-stitch join along this edge and keep the central opening clear.
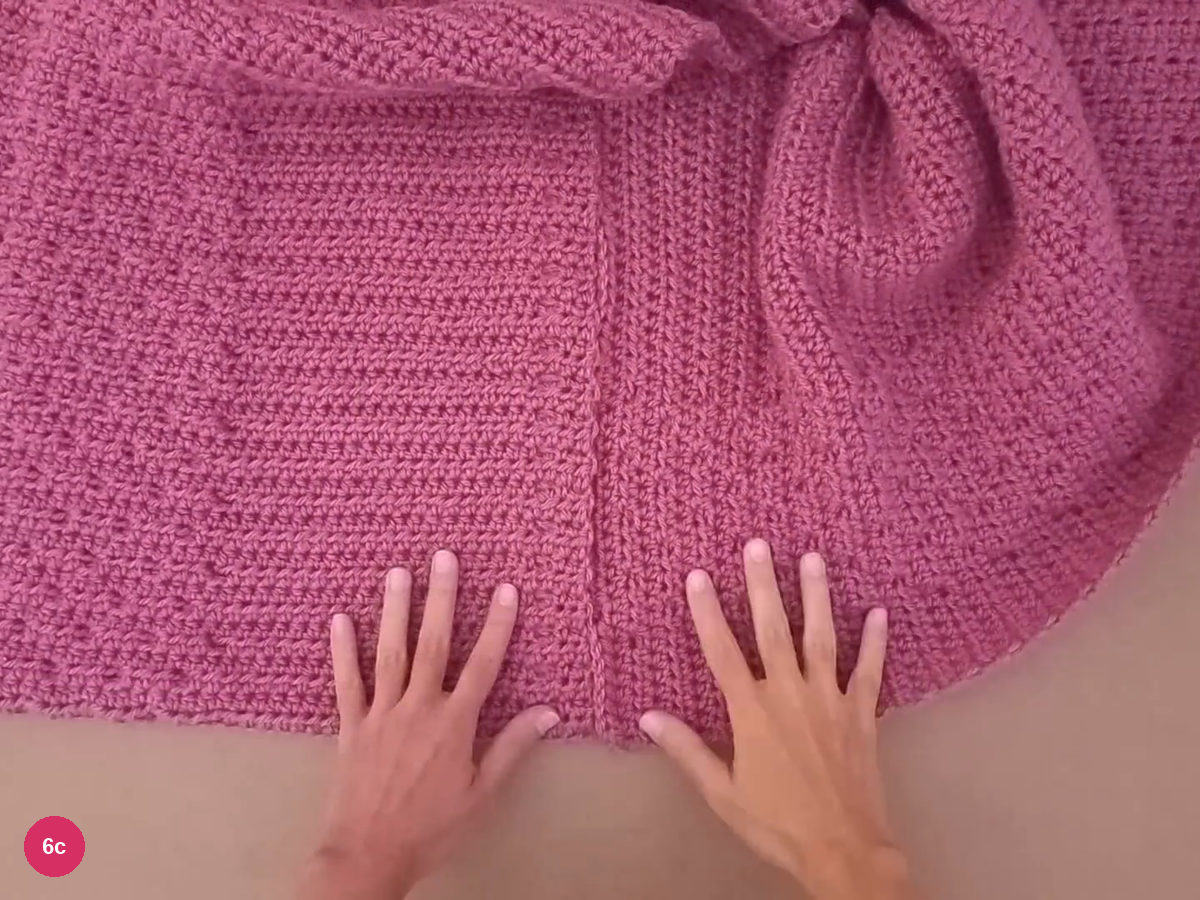
Step 6c: bring the remaining edges together for the second join. Turn the joined garment to the right side and check that the neck opening remains in the center. The seam should lie neatly between the panels without pulling the diamonds out of shape; secure and weave in the joining tails before they can catch in the open neckline.
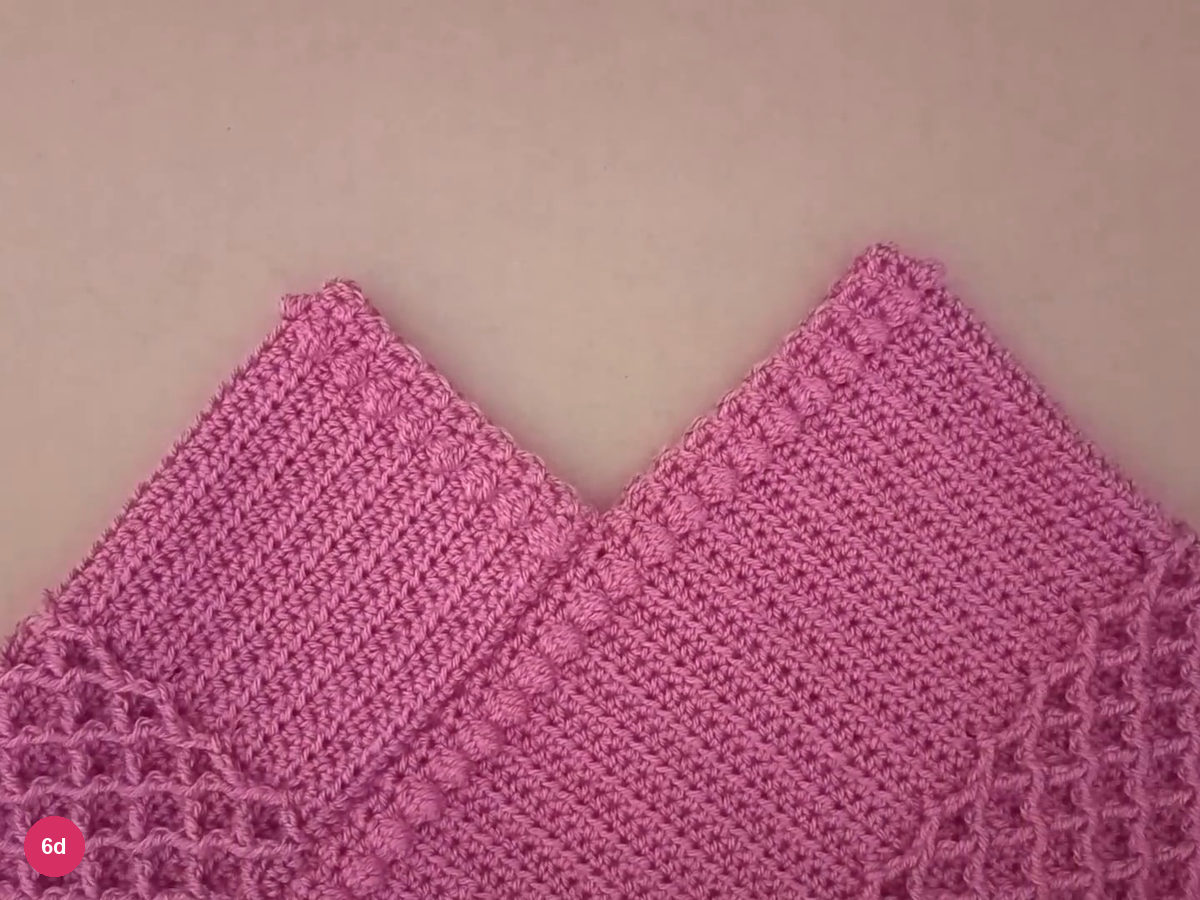
Step 6d: check the assembled poncho and its opening. -
Finish the crochet poncho neckline
- 5 mm hook
- Base sc round · even stitch total
- Mesh · dc, ch 1, skip 1
Change to the 5 mm hook and attach yarn near the back vertex of the neck opening. Chain 1 and sc once into each row end around the opening; count the resulting stitches and, only if needed, add one extra sc in the last space to make the total even, then join to the first sc.
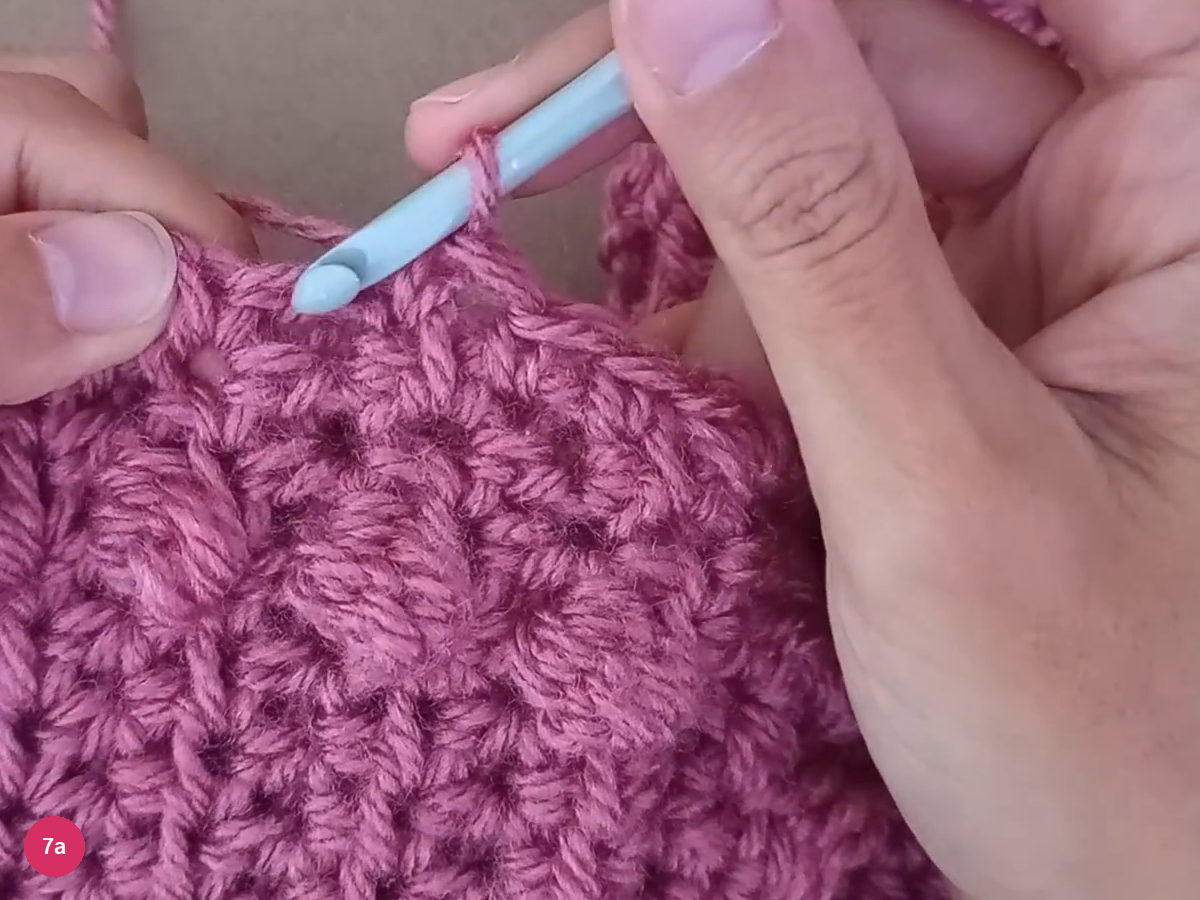
Step 7a: work single crochet around the neck opening. Chain 1, turn, and dc in the first stitch beside the turning chain. Repeat ch 1, skip 1 stitch, dc in the next stitch around the opening, finishing with ch 1 and the final skipped stitch before joining to the first dc.
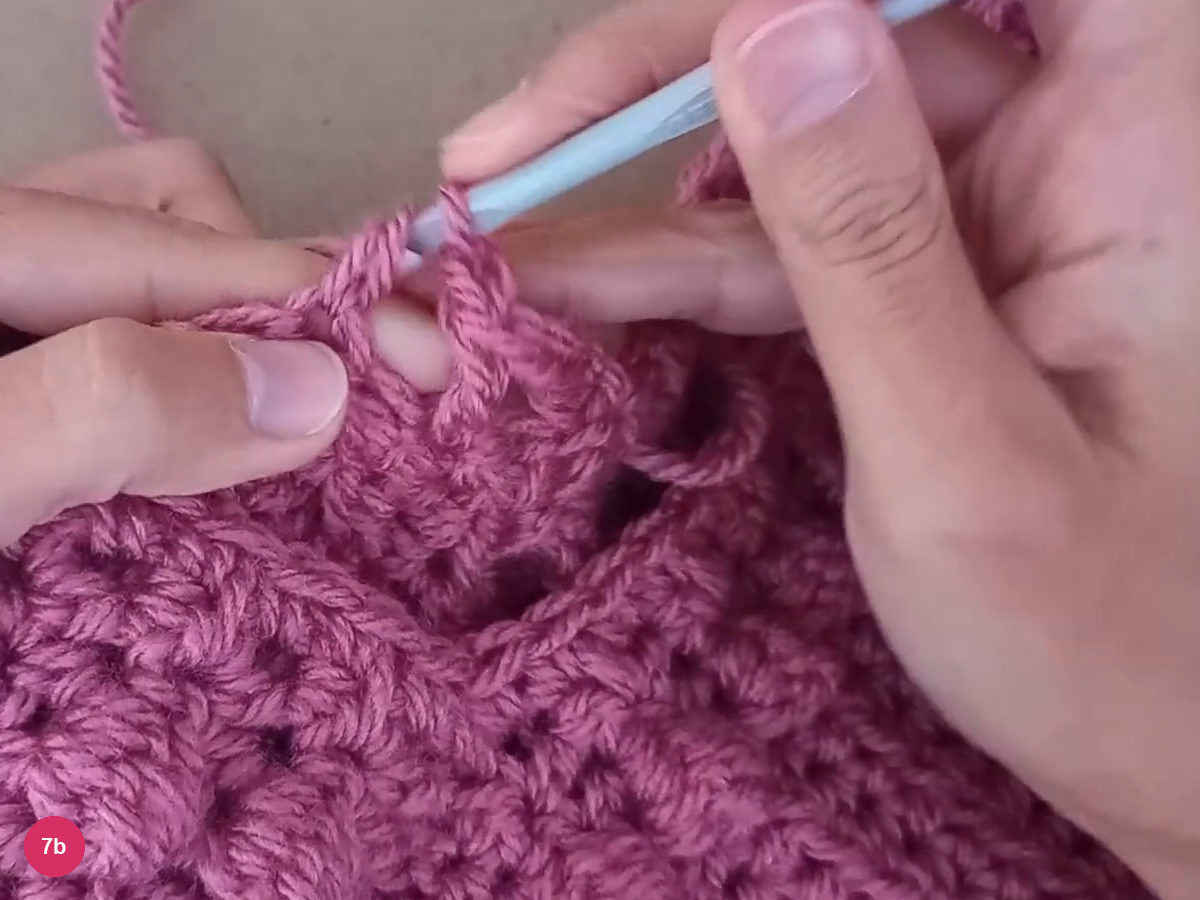
Step 7b: add the open double-crochet neck round. Chain 1 and turn again, then sc in every dc and every chain space around. Join to the first sc and fasten off; keep the opening relaxed enough to pass over the head without hauling on the diamond band or forcing the smaller hook to make tight stitches.
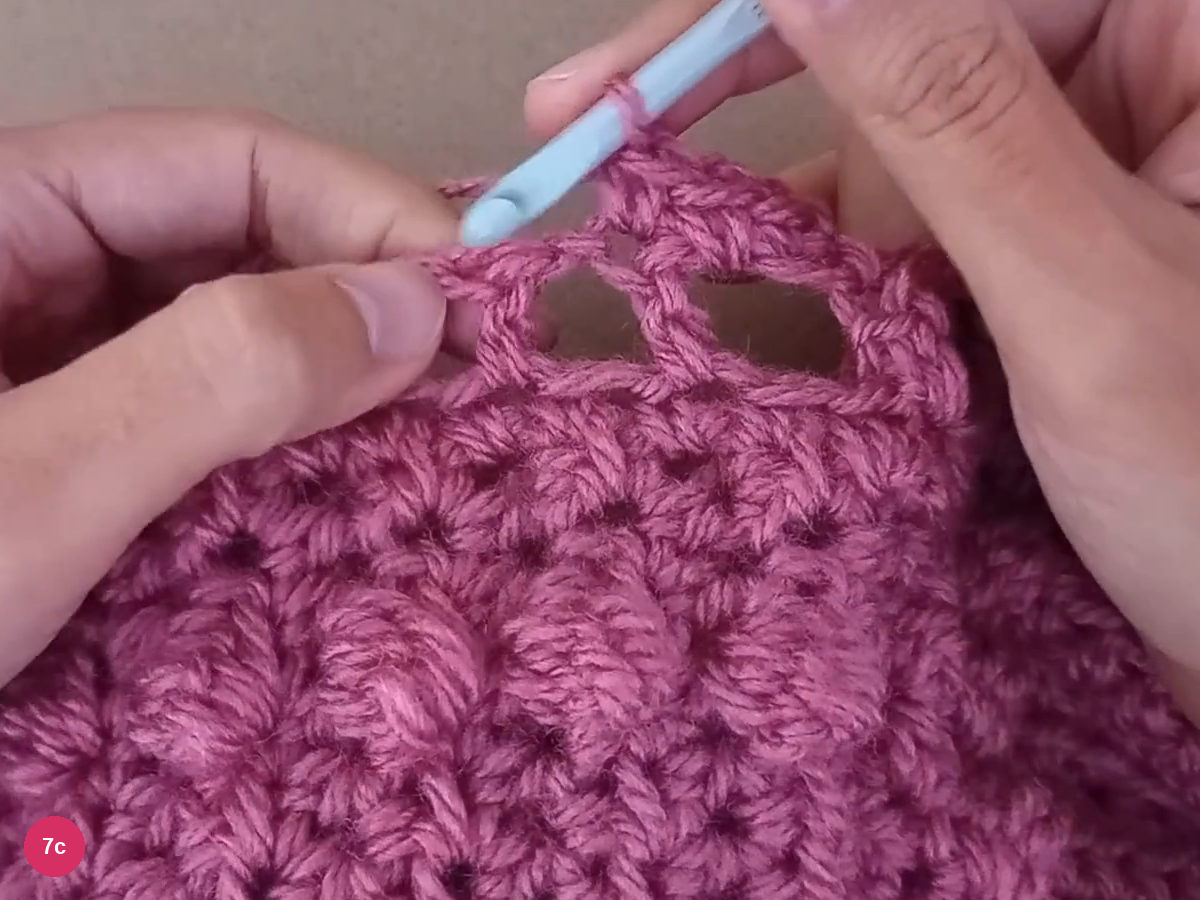
Step 7c: finish the neckline with single crochet. -
Add the lower edging and finish
- 5.5 mm hook
- 3 dc at each point
Return to the 5.5 mm hook and attach yarn near the back point of the lower edge. Chain 1 to secure, then dc in the same row end and once in each following row end along this side, letting the border follow the fabric rather than gathering it.
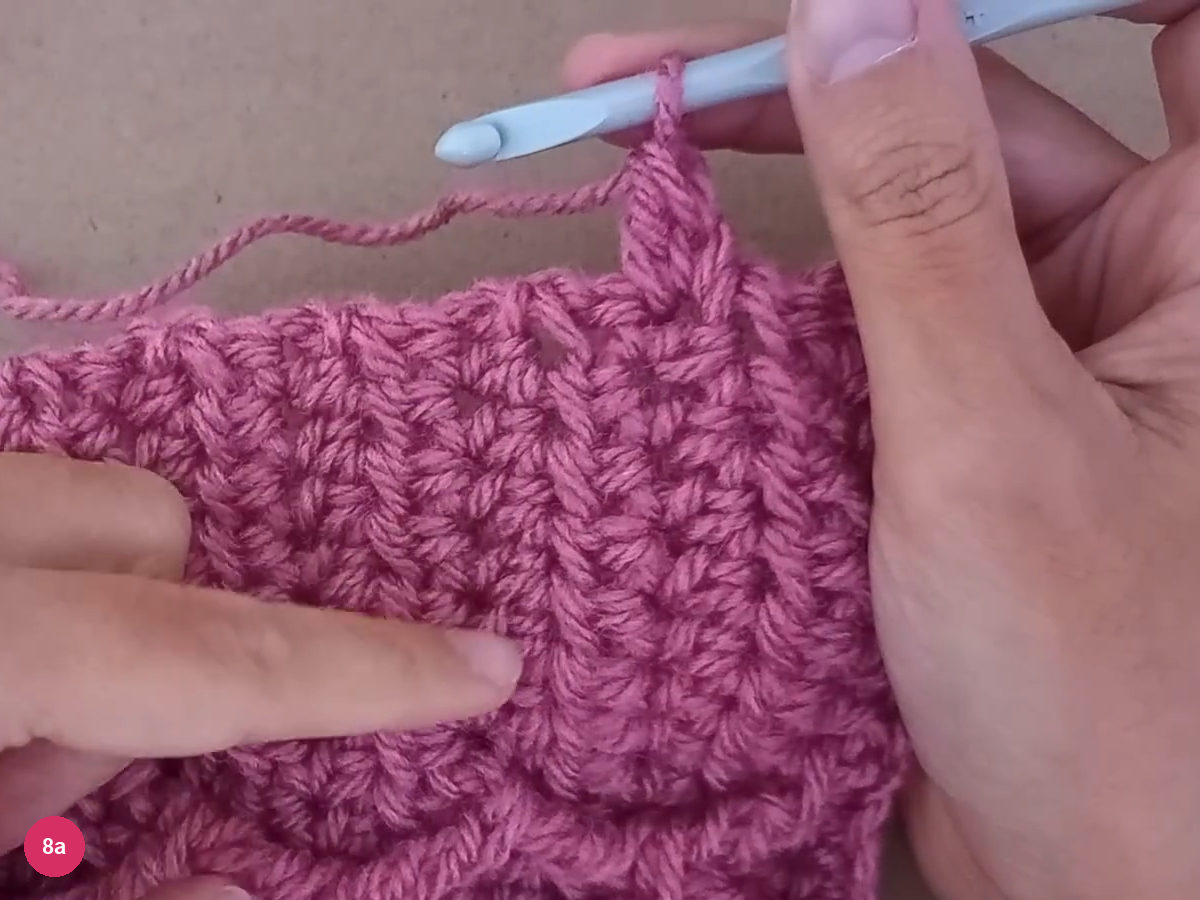
Step 8a: the first double crochet starts the lower edging. Where the border reaches the foundation edge, work one dc in each starting chain. Look beneath each hdc for its foundation chain so you follow the actual edge instead of catching a nearby strand inside the fabric.
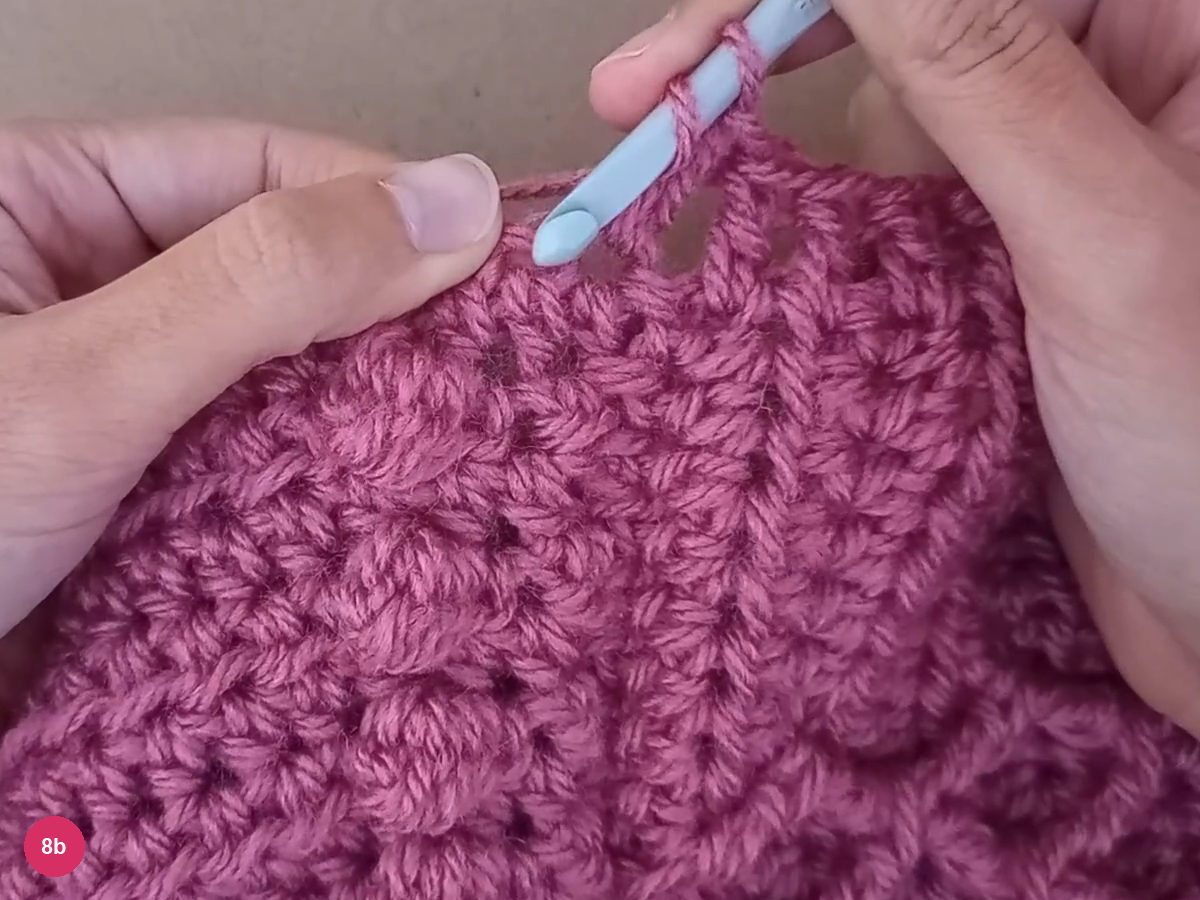
Step 8b: continue along the foundation chains. At the final foundation chain forming the point, work 3 dc into that same chain to turn the corner. Continue with one dc per row end or foundation chain, as appropriate, and give the opposite point the same three-stitch treatment.
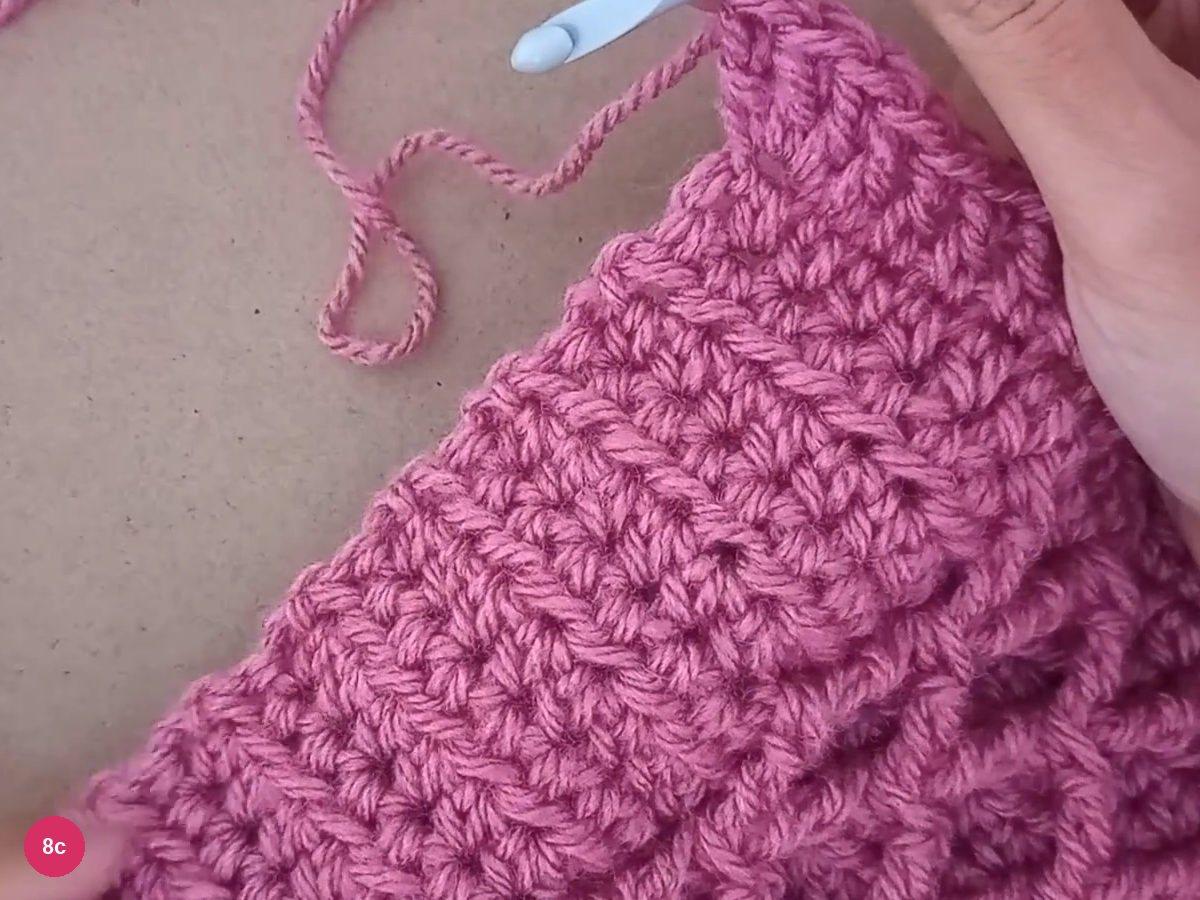
Step 8c: three double crochets turn the point. Join the completed edging to its first dc, fasten off, and weave the remaining tails through the wrong side. Spread the garment out and check the smooth hem, open neck, and diagonal diamond-and-bobble bands; this version finishes with a plain crocheted edge rather than fringe.
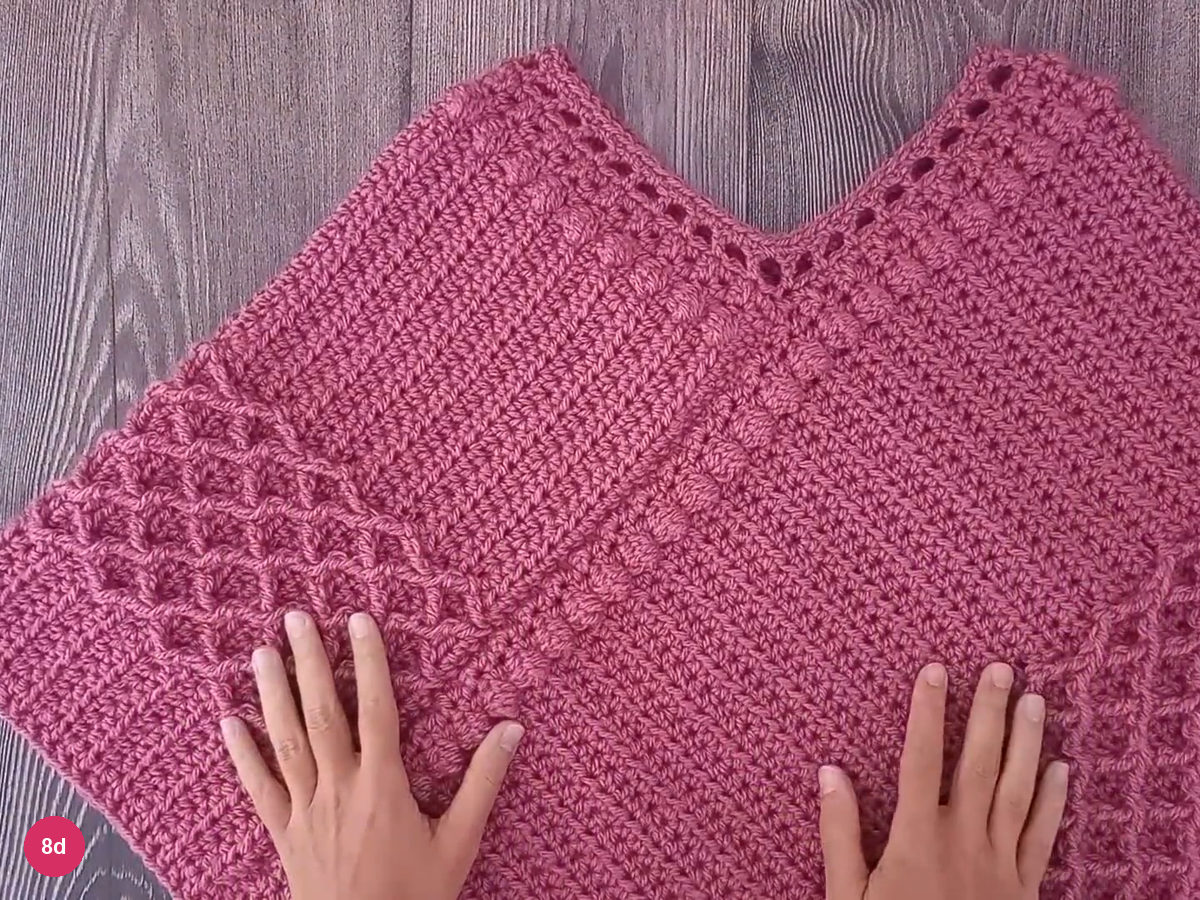
Step 8d: check the finished textured poncho.
Troubleshooting the texture and fit
If the rectangle tapers, count the row and examine the small stitches beside the bobble first. Their tops can hide under the raised dot. If the diamond band becomes wider, look for a working-row stitch that was crocheted into after its front-post replacement had already been made.
If the panels will not align, compare their row counts and relaxed lengths before trying to stretch one into place. The second panel must match the first, even if your final length differs slightly from the reference. A tight slip-stitch seam can also shorten the joined edge, so loosen the joining loops before changing the panel itself.
Check the neck opening while finishing its border. The first sc round follows row ends and needs an even total for the alternating dc-and-chain round; there is no universal total given for every maker. Do not replace the opening with an arbitrary fixed count or assume a tight border will stretch comfortably later.
- Both rectangles have matching foundation counts, row counts and relaxed measurements.
- The diamonds stack without adding width, and the bobbles remain on their intended edge.
- Both seams lie smoothly and leave the central neck opening clear.
- The neck base round has an even stitch total and the finished opening passes comfortably over the head.
- Both lower points have their corner groups, and all yarn tails are secured.
More textured accessories
For a smaller project with raised lines, try the twisted ribbed crochet headband. The retro crochet head scarf offers a different shaped accessory, while the scalloped summer headband is a lighter openwork option.
Inspired by Kiri Kiri’s video tutorial.

Save this pattern for later
Pin it to one of your boards so it’s ready when you have a free evening and the right yarn.