This crochet beanie is worked flat as one ribbed rectangle in back-loop single crochet, then joined into a tube and gathered closed at the top. Every row carries six slip stitches at one end, and the finished hat is shown with a folded brim. The creator lists the finished size as 19 × 28 cm.
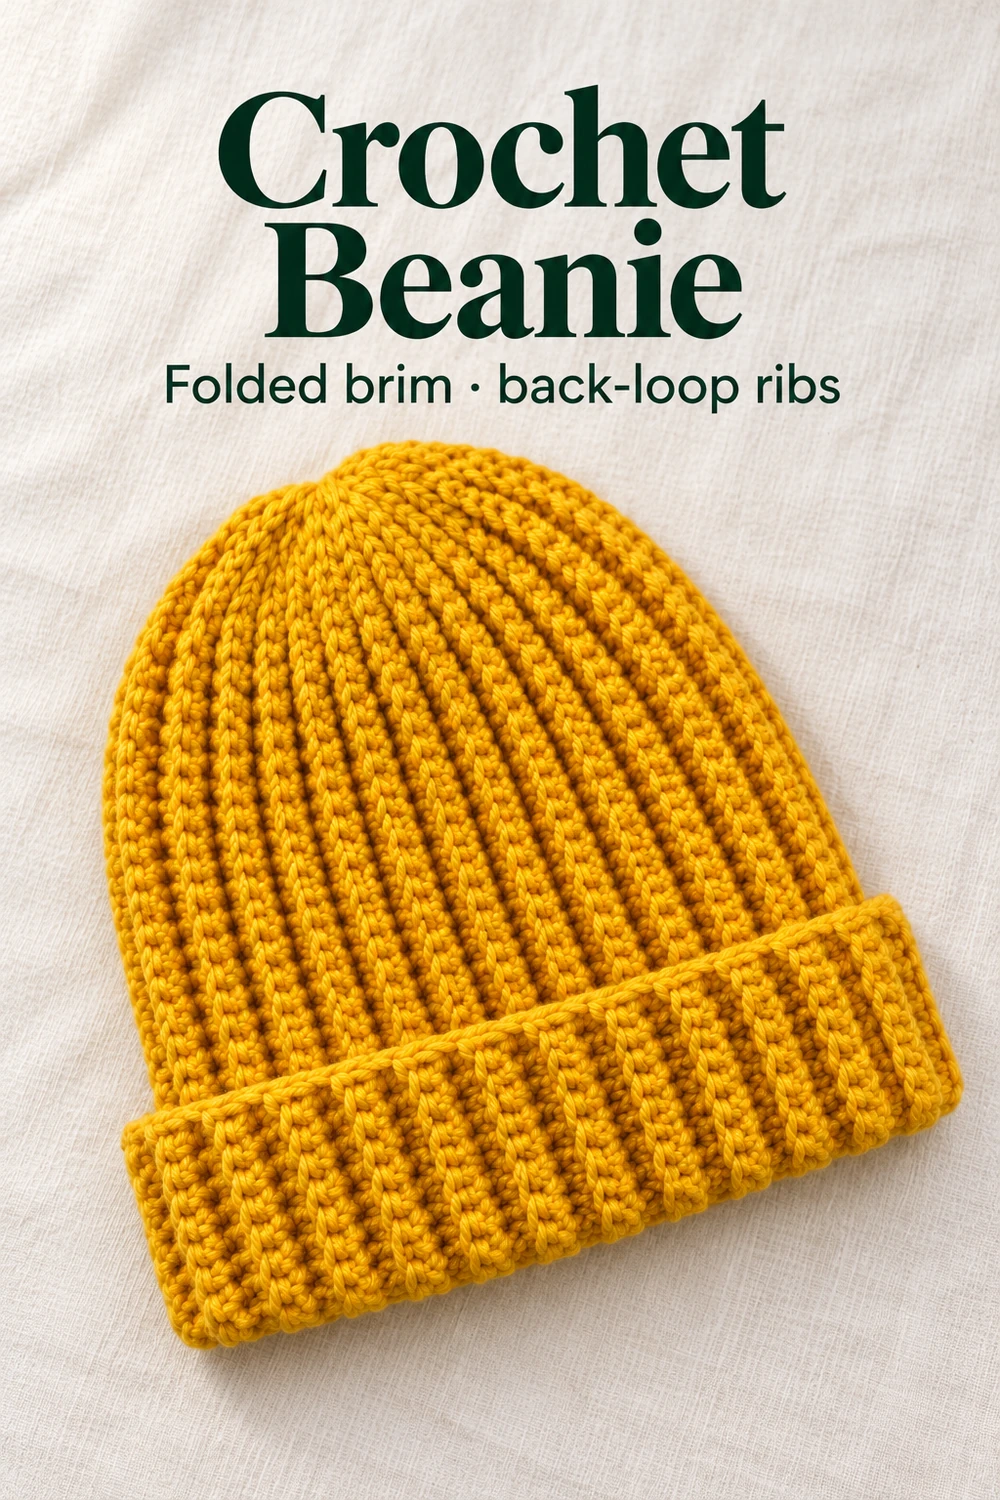
Before you start this crochet beanie
The video lists a 5.5 mm crochet hook, wool yarn of tex 500 and a tapestry needle. It does not state yardage, yarn weight category, gauge or head measurements, so none are given here. Everything below is the creator’s single worked example: 45 foundation chains and 64 rows.
These instructions use US terms: ch means chain, sc means single crochet, sl st means slip stitch, and back loop means the loop of each stitch farthest from you. The back-loop rows are what give this beanie crochet its ribbed look, and slip stitches are worked the same way in the six-stitch sections.
The video does not show how to change the size, so if you want a different fit, treat the counts below as one tested-by-the-creator starting point rather than a formula. A tape measure helps: the creator checks the first row against one.
How this beanie crochet pattern is built
Unlike a hat worked from the crown down in rounds, this one starts as a long chain and grows row by row into a rectangle. Each row is 45 stitches long, so the chain length sets how tall the hat will be, and the number of rows sets how far round the head it reaches. Because the rows are turned rather than joined, you never need to count rounds or move a stitch marker.
Once the rows are done, the first and last rows are slip stitched together to make a tube. The open top edge is then drawn shut with a threaded tail, which gathers the crown, and the other open edge becomes the lower edge that is folded up as a brim. The creator works in bright mustard wool on a white surface, which keeps the back-loop ridges clearly visible; a smooth, light-coloured yarn will show them best.
Work the crochet beanie flat in ribbed rows
Follow the steps in order. In the video a few repeated rows are skipped, so the same row pattern is described once and then repeated to 64 rows; the strip, the seam and the crown are all shown close up.
-
Make the foundation chain
- Foundation chain · 45 ch
Start with a slip knot on a 5.5 mm hook and begin chaining. This hat is worked as a flat rectangle, so every row will be as long as this chain.
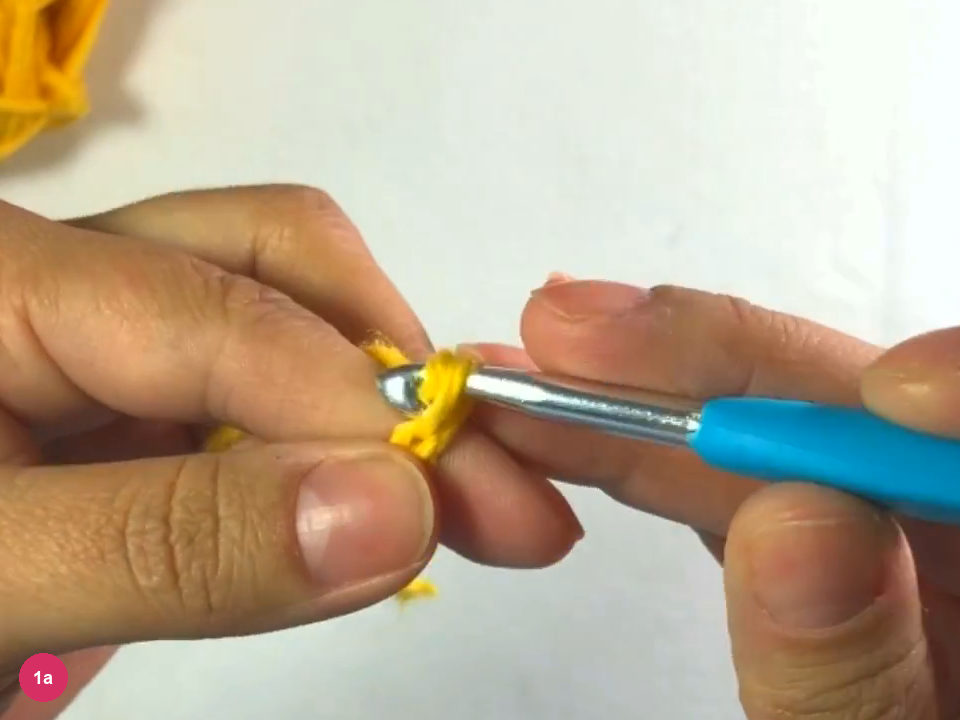
Step 1a: begin the chain on the 5.5 mm hook. - Foundation chain · 45 ch
Keep chaining until you have 45 chains. The finished chain is shown stretched out straight, ready for the first row.
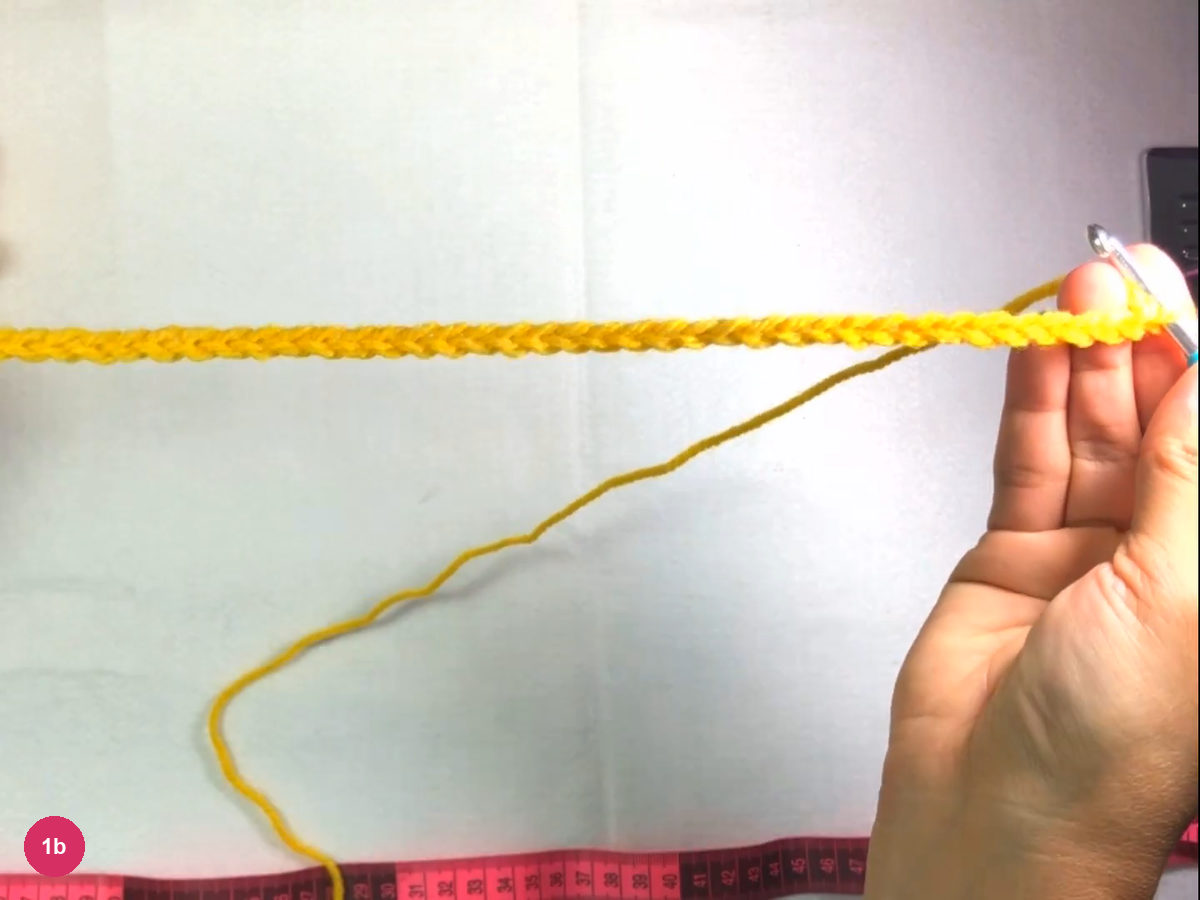
Step 1b: the completed 45-chain foundation. -
Work the first row
- Row 1 · 1 turning ch, then sc
Chain one more for turning, then begin single crochet back along the foundation, one stitch in each chain. Stop when six chains remain unworked.
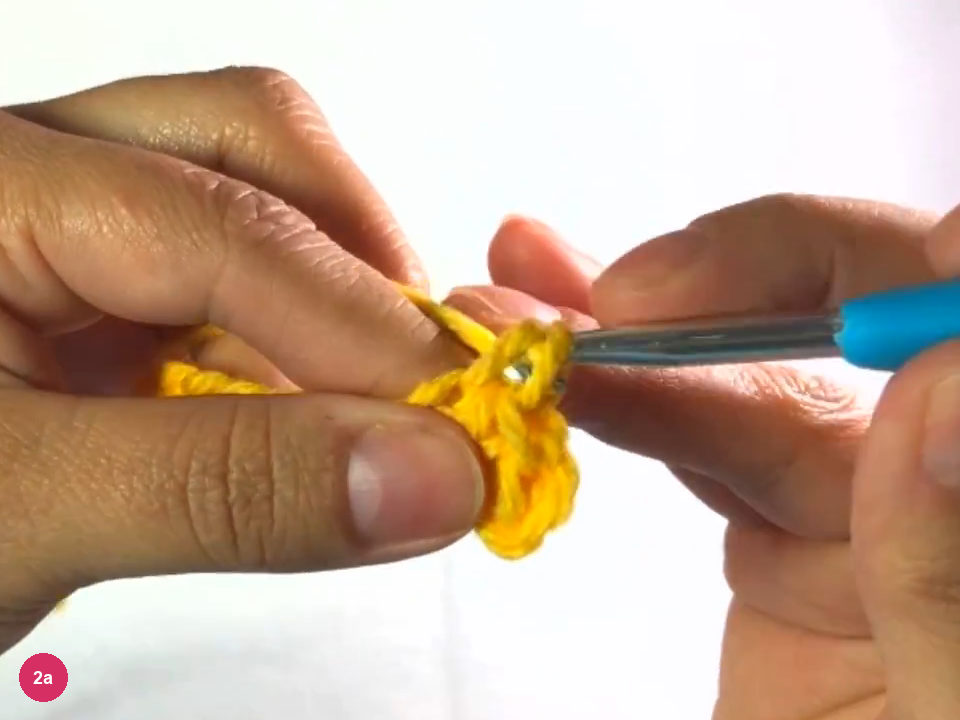
Step 2a: single crochet along the foundation chain. - Row 1 · 6 ch left
The single crochet now covers most of the chain, and six chains are left over at the end for the next part.
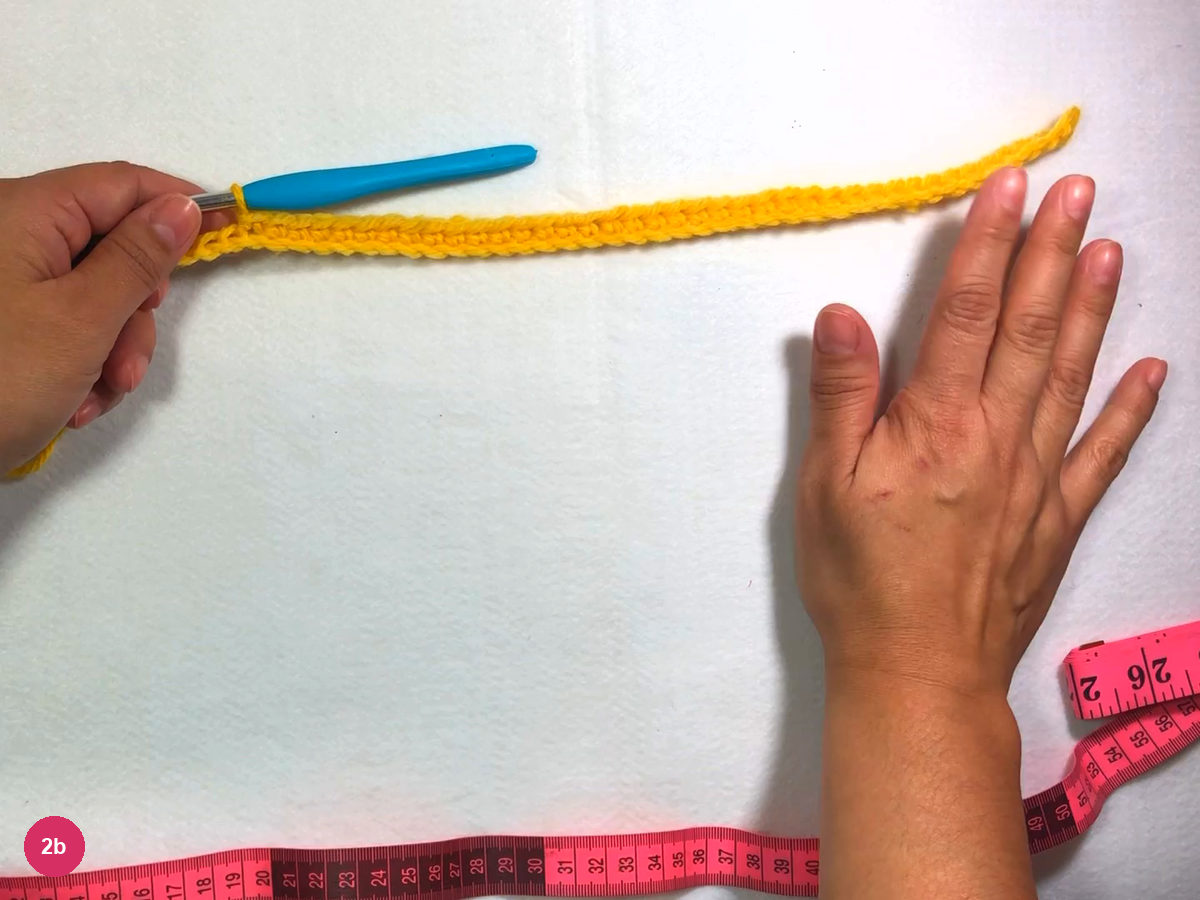
Step 2b: single crochet worked up to the last six chains. - Row 1 · 6 sl st
Work the six remaining chains as slip stitches. The creator counts them aloud, one to six, and it helps to do the same.
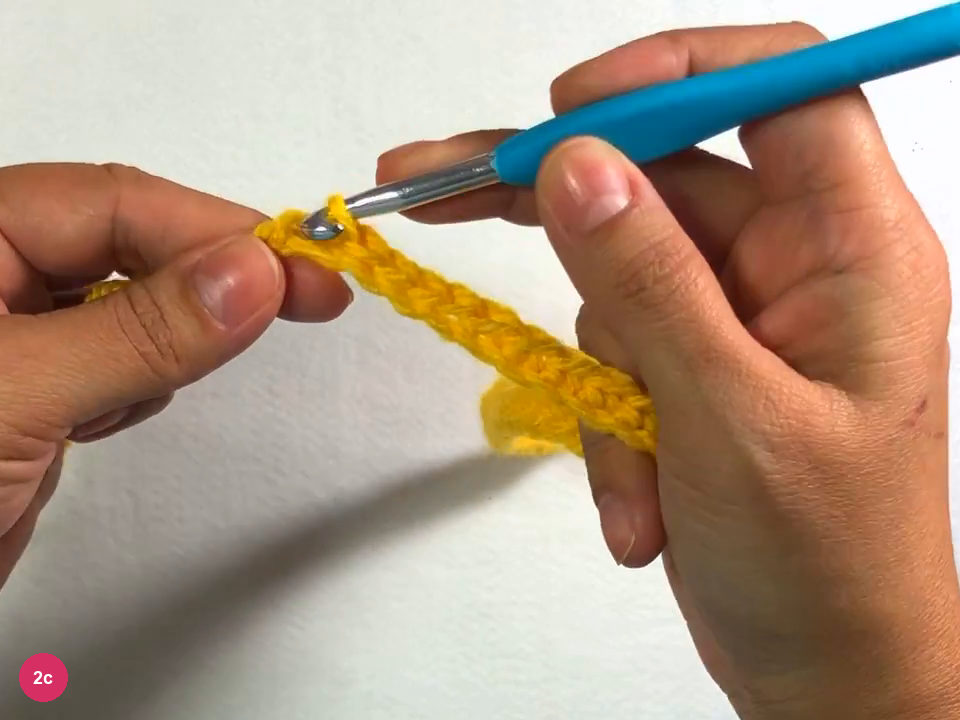
Step 2c: slip stitch the last six chains. - Row 1 · 45 sts · about 33 cm
The first row now holds 45 stitches. Laid beside a tape measure it comes to about 33 cm, which is a useful check before you carry on.
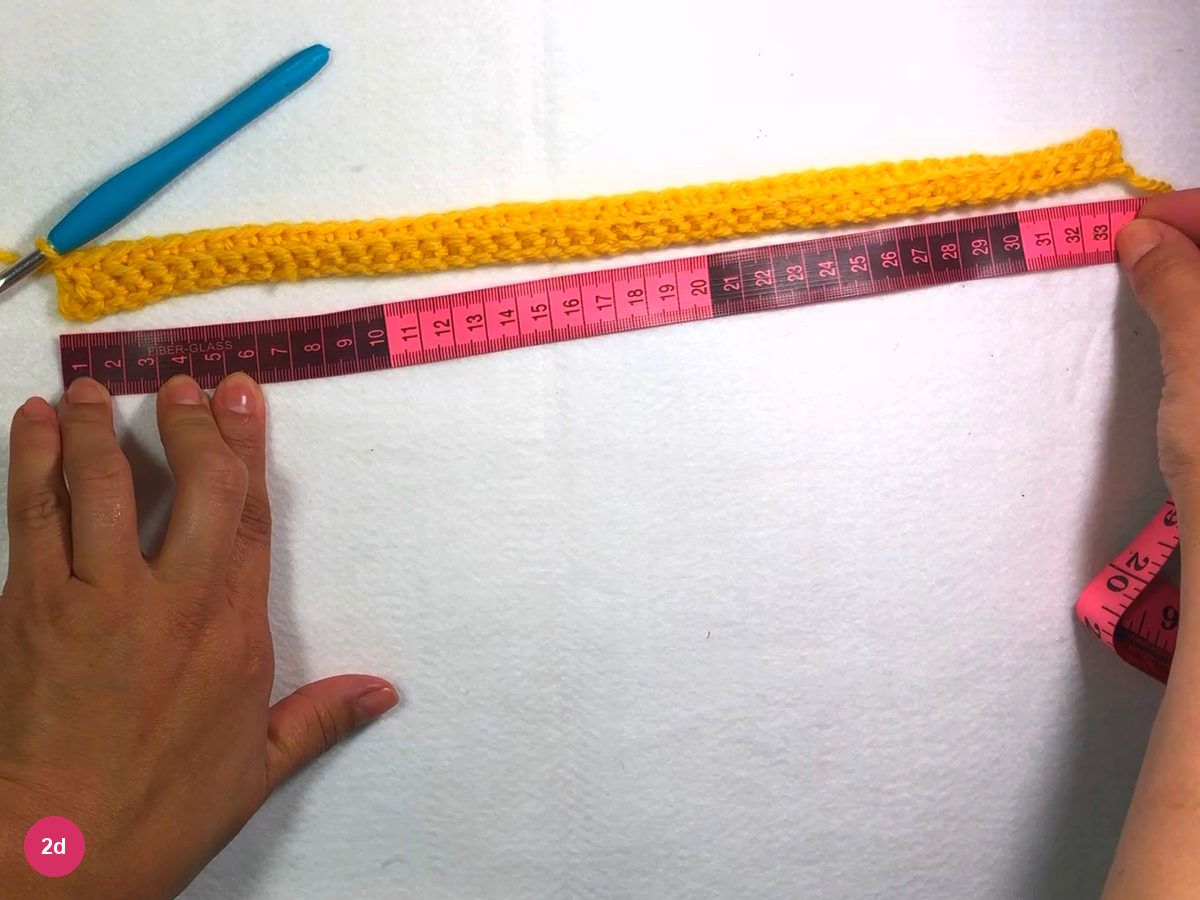
Step 2d: measure the first row against the tape. -
Turn and work rows 2 and 3 in the back loops
- Row 2 · ch 1, 6 sl st in back loops
Chain 1 and turn. Start the second row with six slip stitches, each worked through the back loop only, and count them aloud as you go.
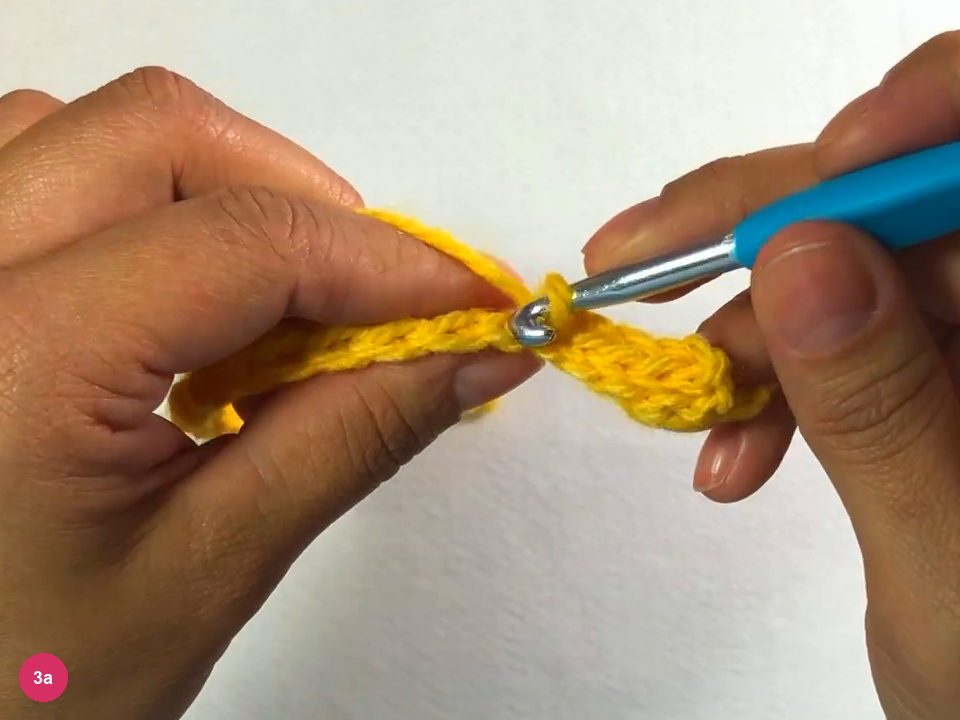
Step 3a: six back-loop slip stitches open the second row. - Row 2 · sc in back loops
Carry on along the row in single crochet through the back loops only. Make the very last stitch through both loops.
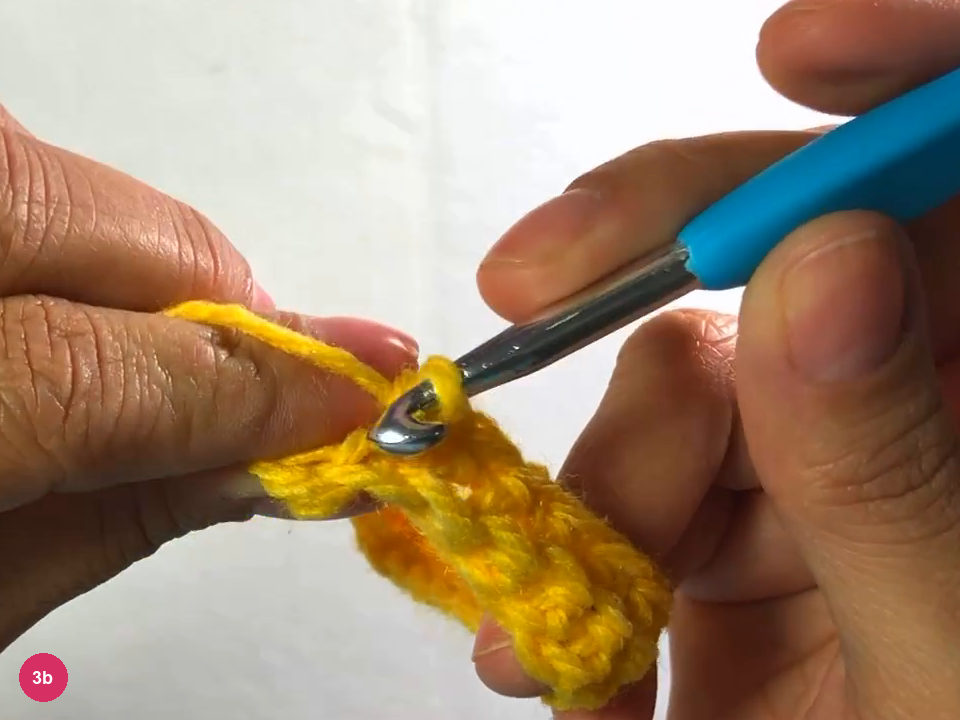
Step 3b: finish row 2, taking both loops of the last stitch. - Row 3 · ch 1, sc in back loops
Chain 1 and turn again. Work single crochet through the back loops only, until six stitches remain.
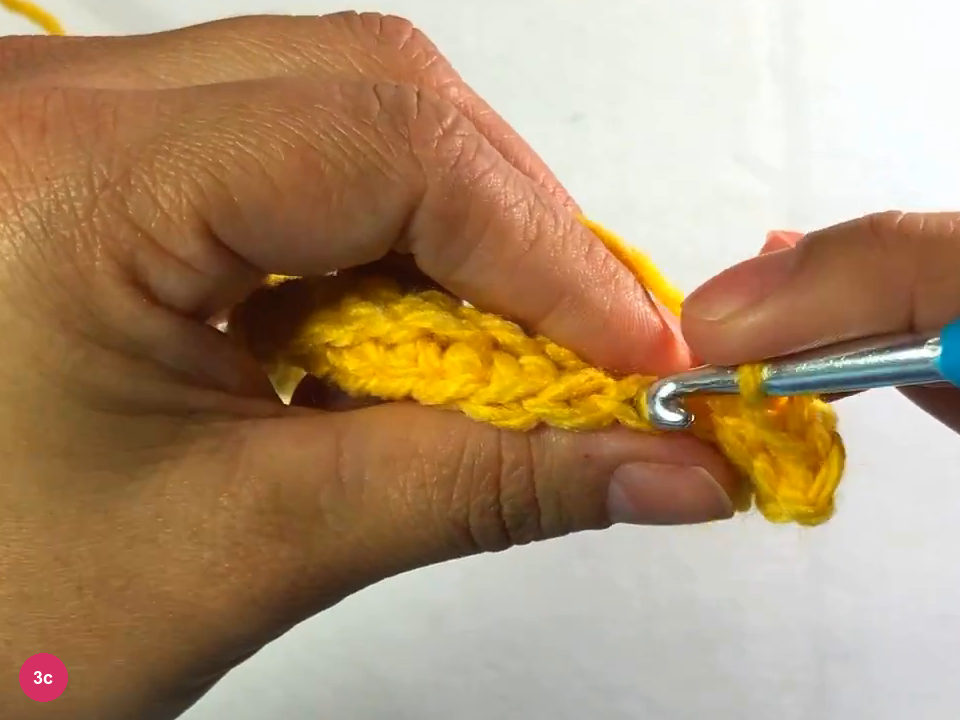
Step 3c: row 3 in back-loop single crochet. - Row 3 · 6 sl st in back loops
Work the last six stitches as slip stitches through the back loops, counting as you go. The final stitch takes both loops.
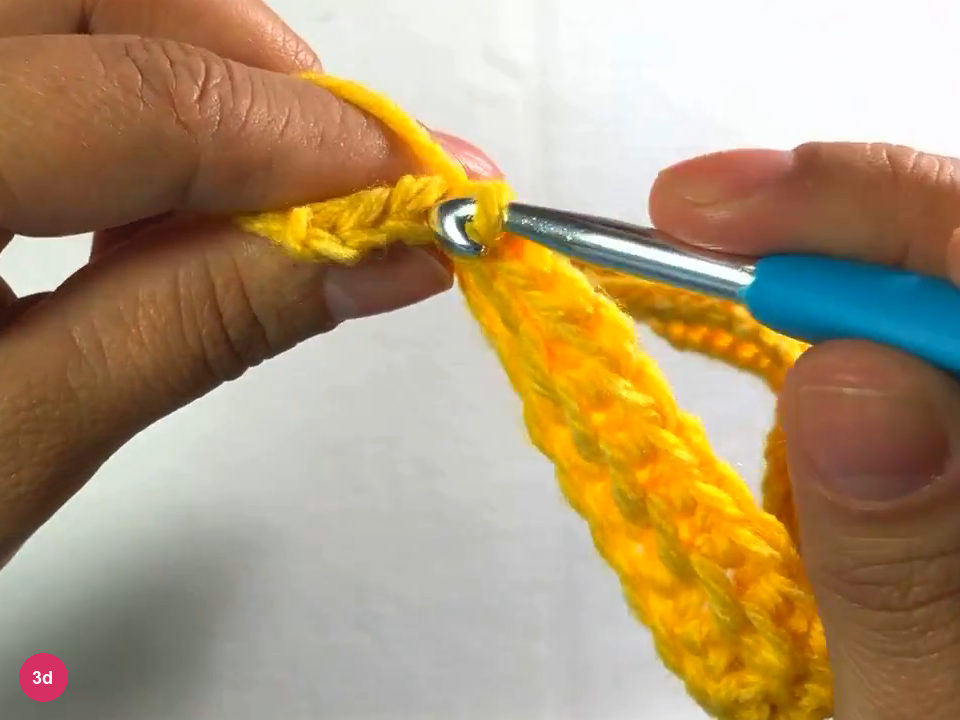
Step 3d: slip stitch the last six stitches of row 3. -
Repeat the rows until you reach 64
- Every row · 6 sl st + sc
Chain 1 and turn. From here every row holds six back-loop slip stitches at one end, with single crochet for the rest of the row. The slip-stitch ends always stack up on the same side.
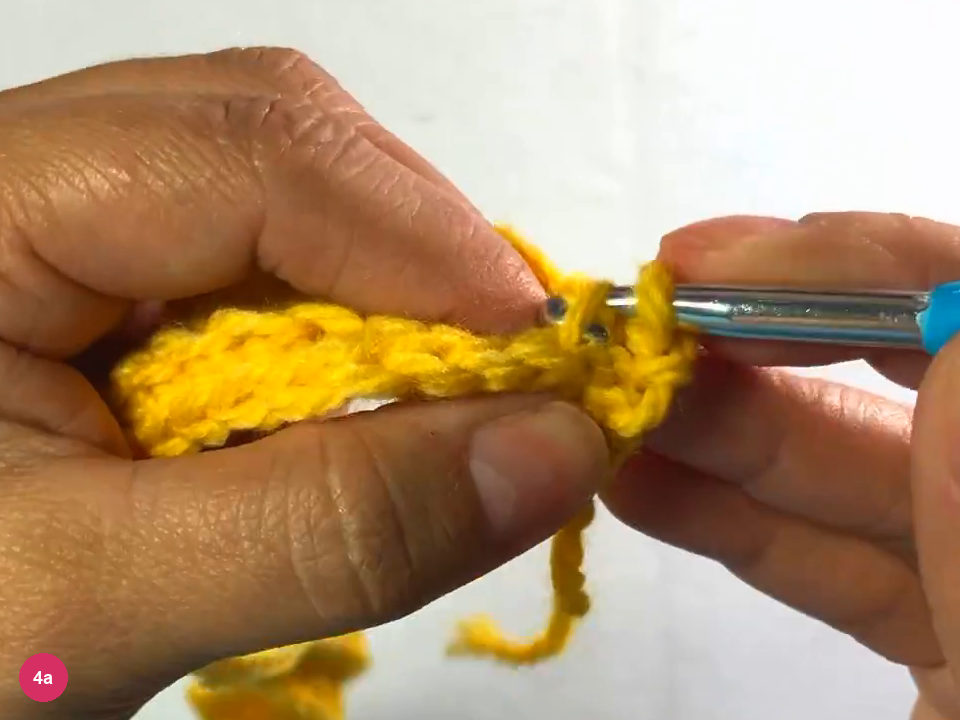
Step 4a: a new row begins with six slip stitches. - Rows alternate: 6 sl st first, then sc first
The rows alternate direction. One begins with the six slip stitches and the next ends with them, and each starts with a chain 1 and a turn.
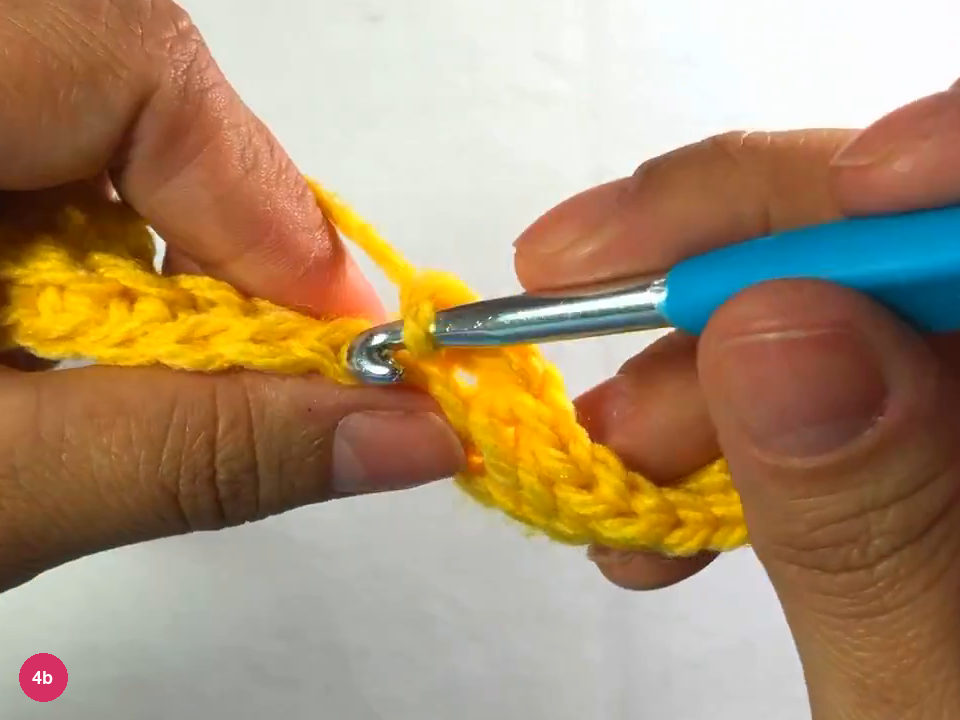
Step 4b: keep alternating where the six slip stitches fall. - Total · 64 rows
Keep repeating the rows until you have 64 in all. The video shows part of the repeat and then the finished strip.
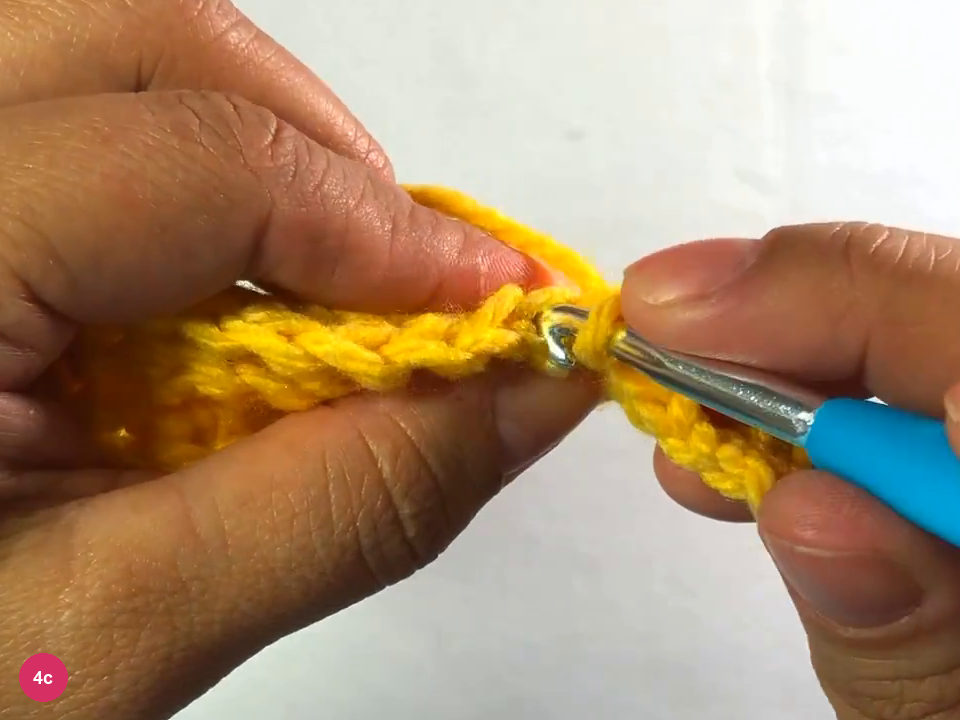
Step 4c: keep working rows toward 64. -
Join the first and last rows
- 64 rows complete
With all 64 rows done, bring the last row round to meet the first row so the piece starts to close into a tube.
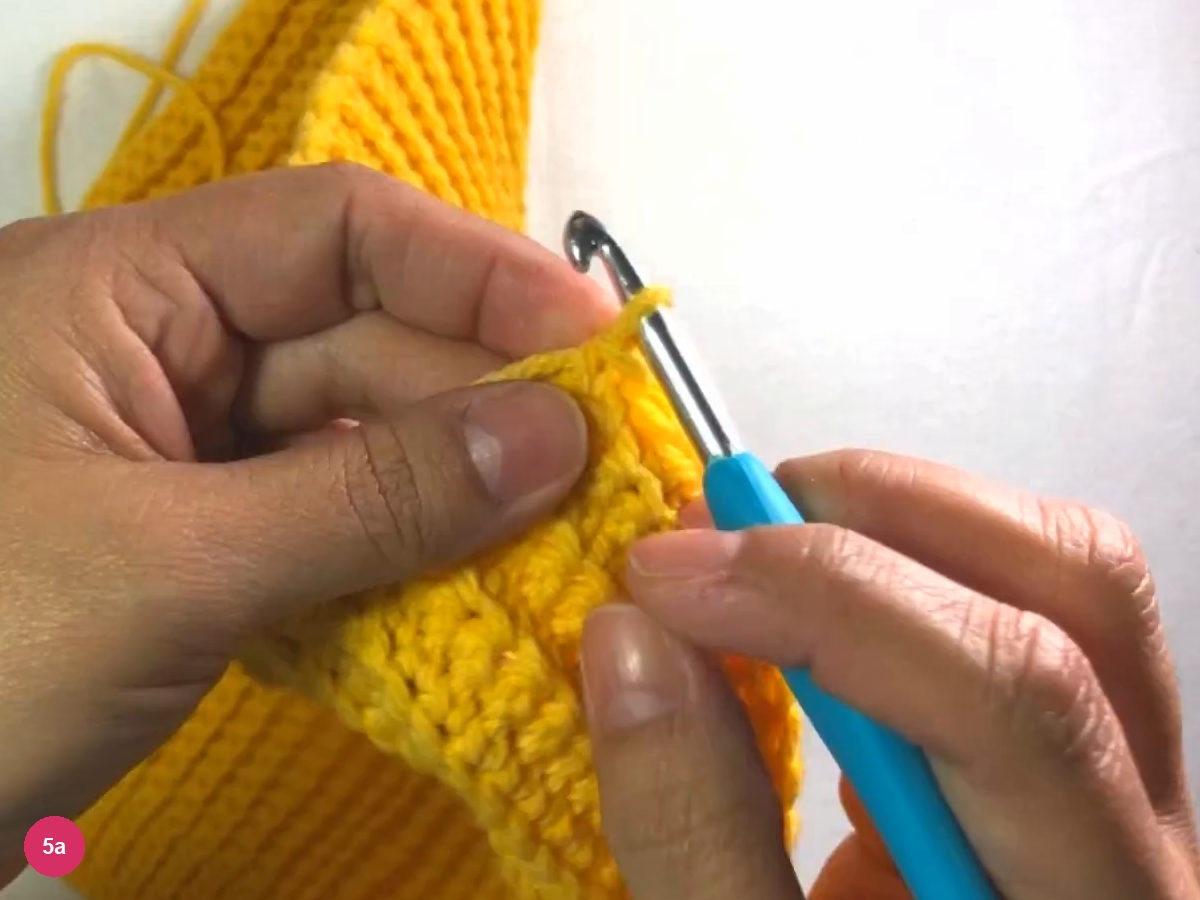
Step 5a: bring the last row round to the first. - Seam · slip stitch
Put the hook under the back loop of a last-row stitch and into the matching stitch of the first row. Close the two together with a slip stitch.
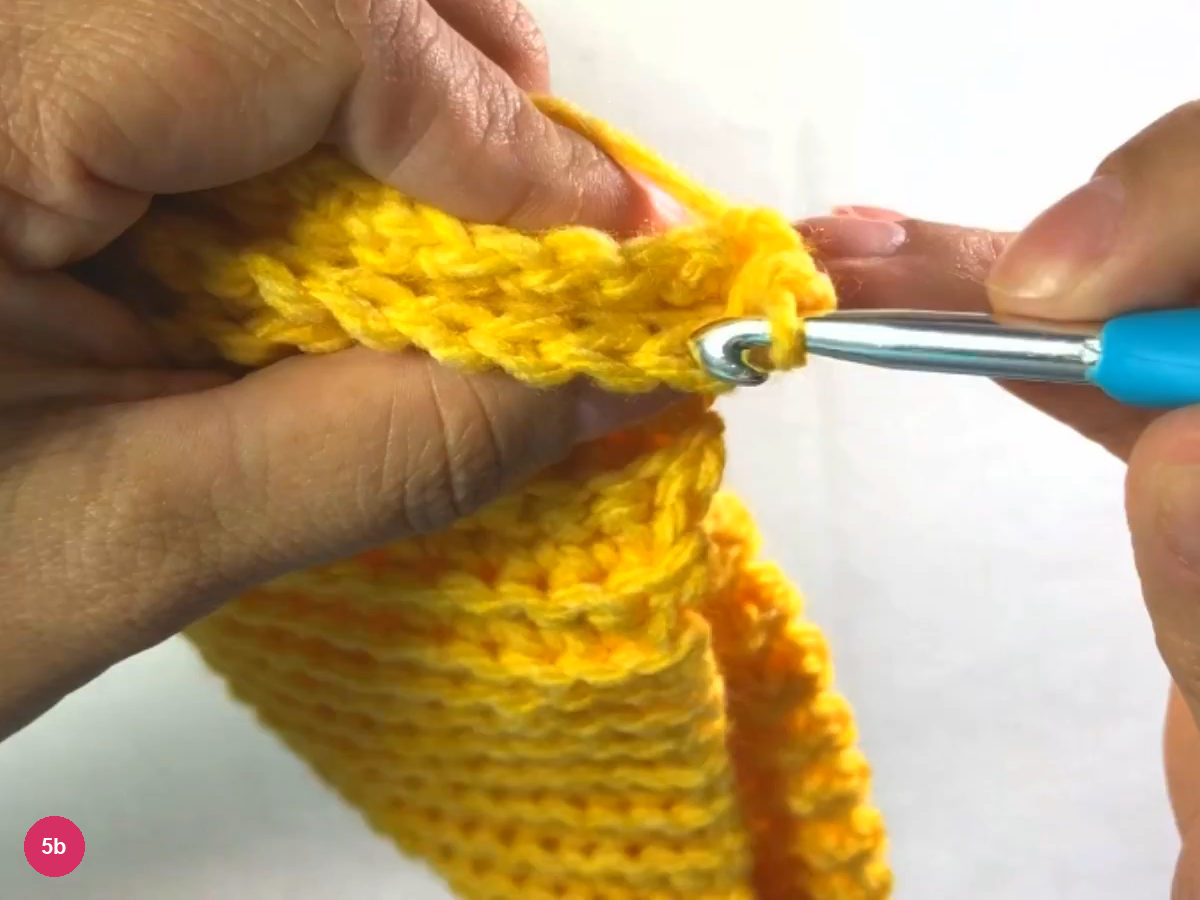
Step 5b: join the first and last rows with a slip stitch. - Seam · one sl st at a time
Keep joining the same way, one slip stitch at a time, all along the edge.
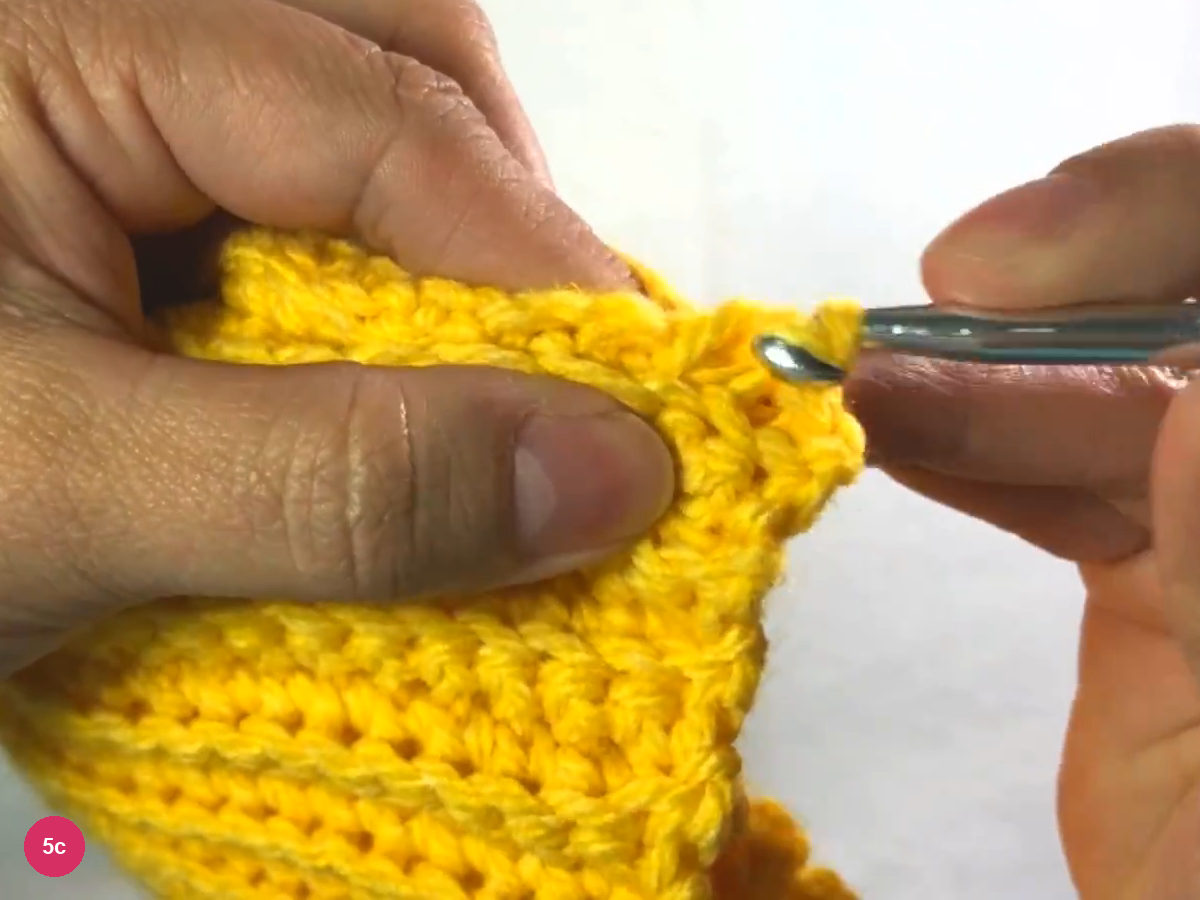
Step 5c: continue the slip stitch seam along the edge. - Seam · last stitch
Carry the seam right up to the last stitch to finish it.
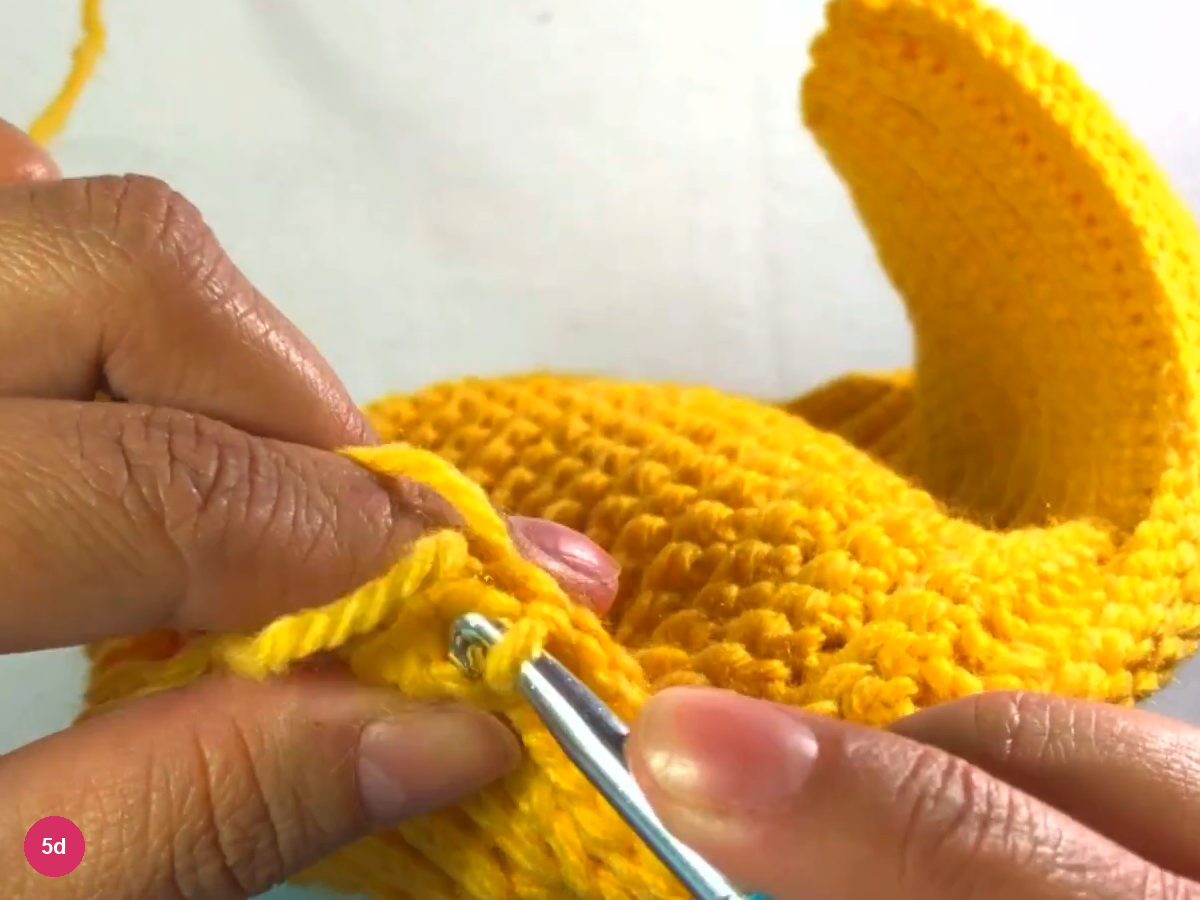
Step 5d: reach the last stitch of the seam. - Fasten off
Cut the yarn and keep the tail for the next stage. The joined piece lies flat as a rectangle.
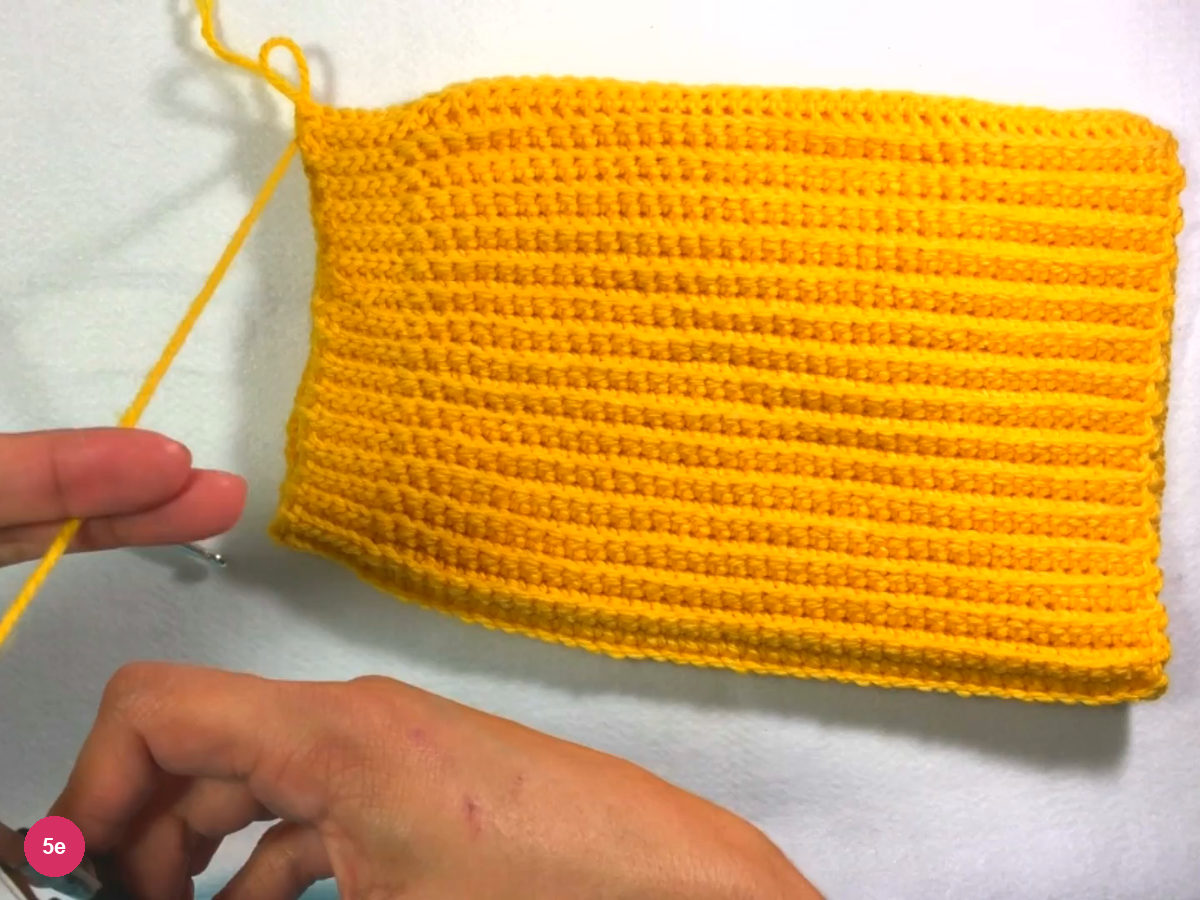
Step 5e: the joined piece lies flat once the yarn is cut. -
Gather and close the crown
- Tapestry needle
Thread the yarn tail onto a tapestry needle. The creator works on the open top edge of the joined tube.
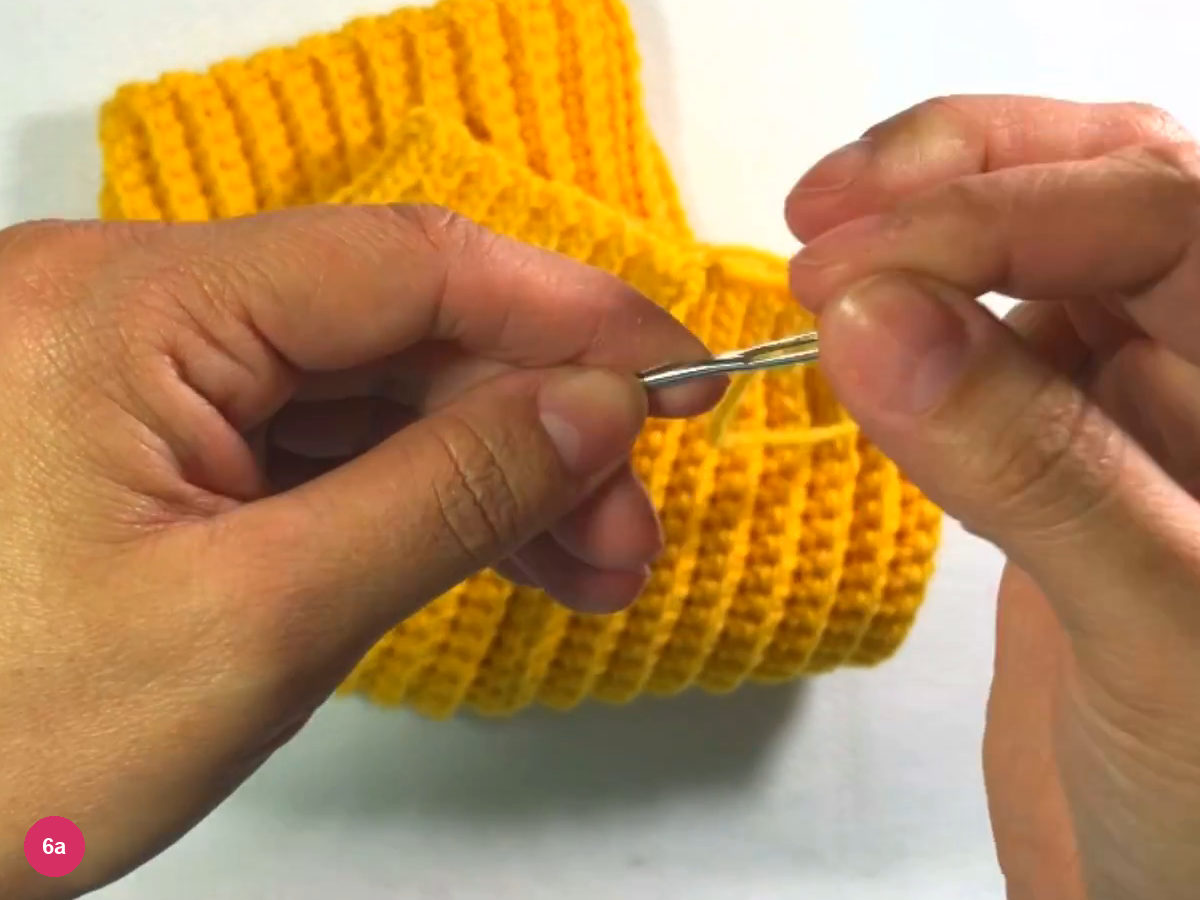
Step 6a: thread the tail on a tapestry needle. - Weave around the top edge
Pass the needle in and out through the stitches around the top edge, working all the way round.
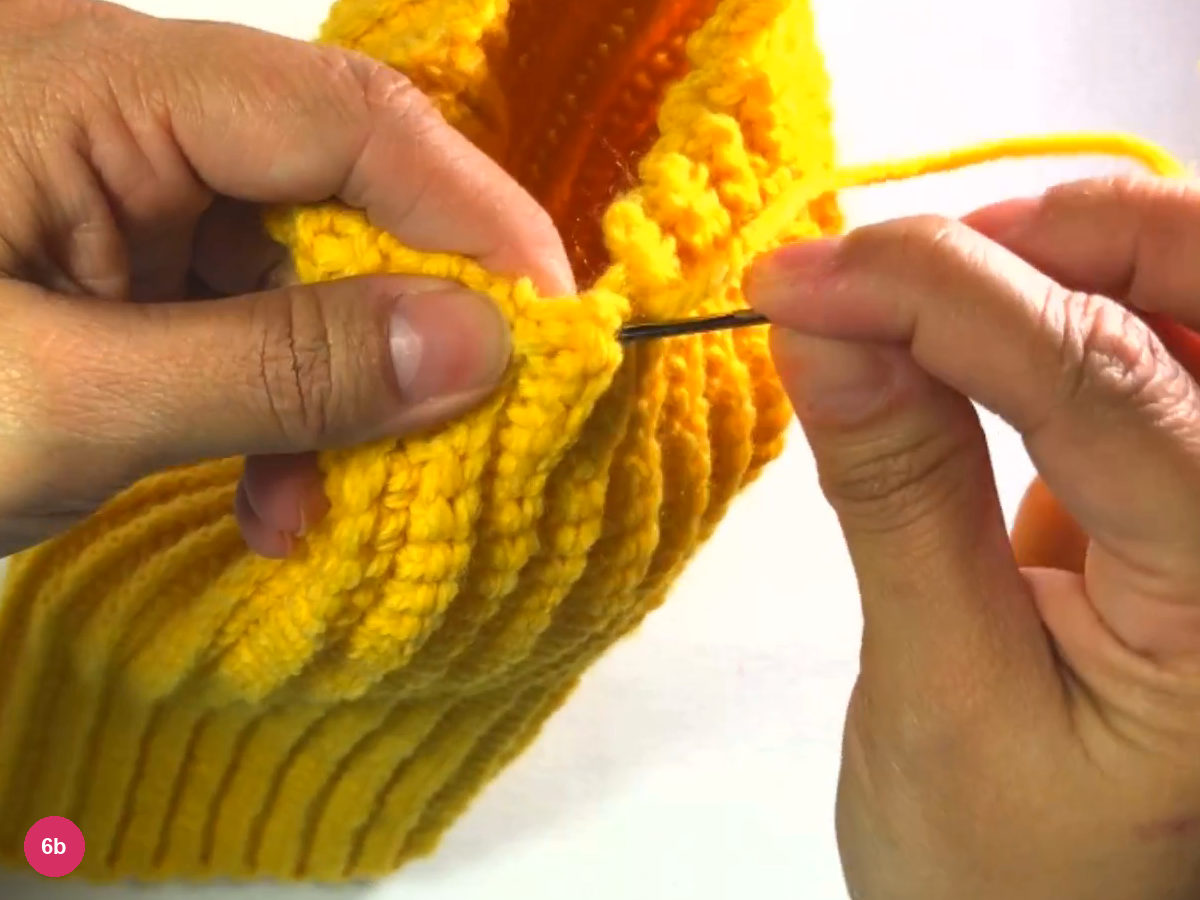
Step 6b: weave the needle round the top edge. - Pull to close
Pull the yarn firmly so the open top draws shut.
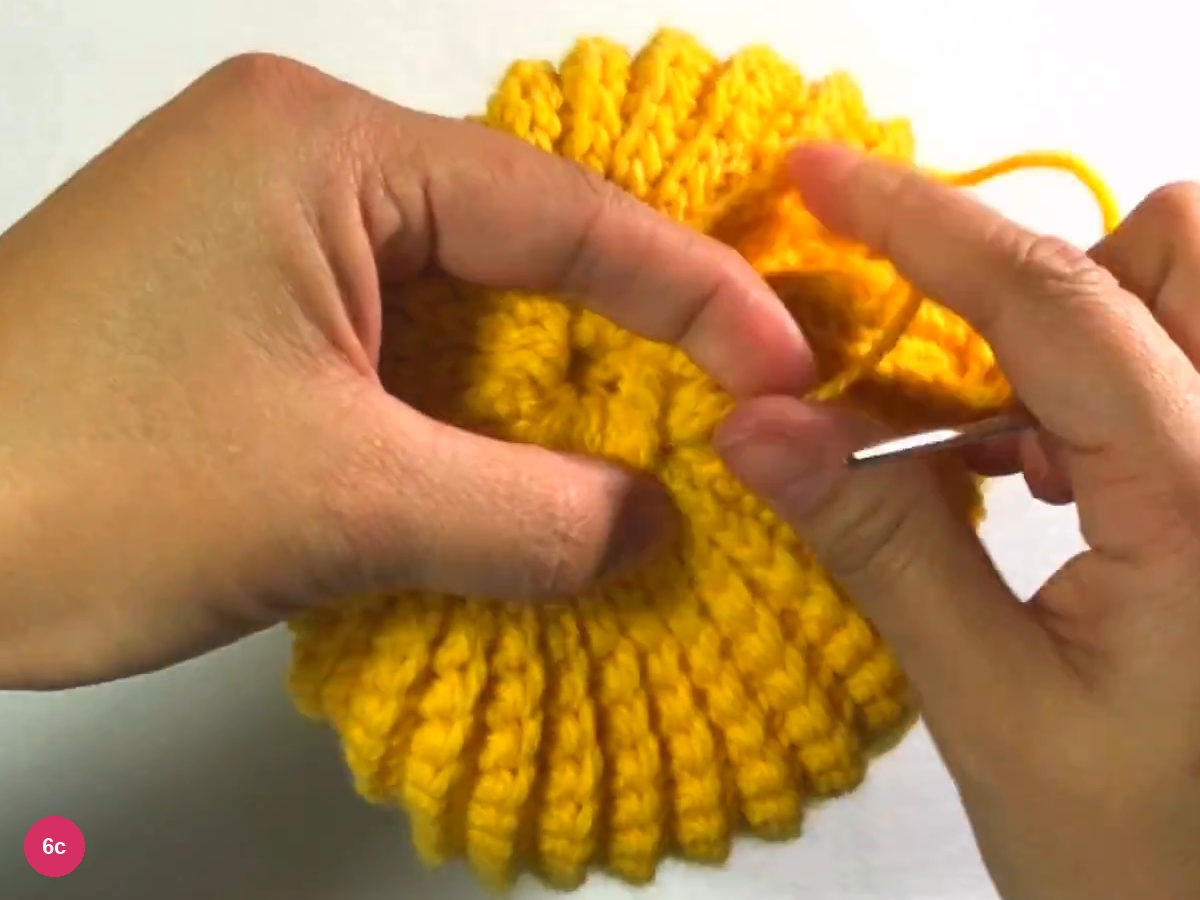
Step 6c: pull the yarn to close the top. - Knot the centre
Use the leftover tail from the start of the work to tie knots over the gathered centre. The creator then makes a few more passes through the crown to pull it together.
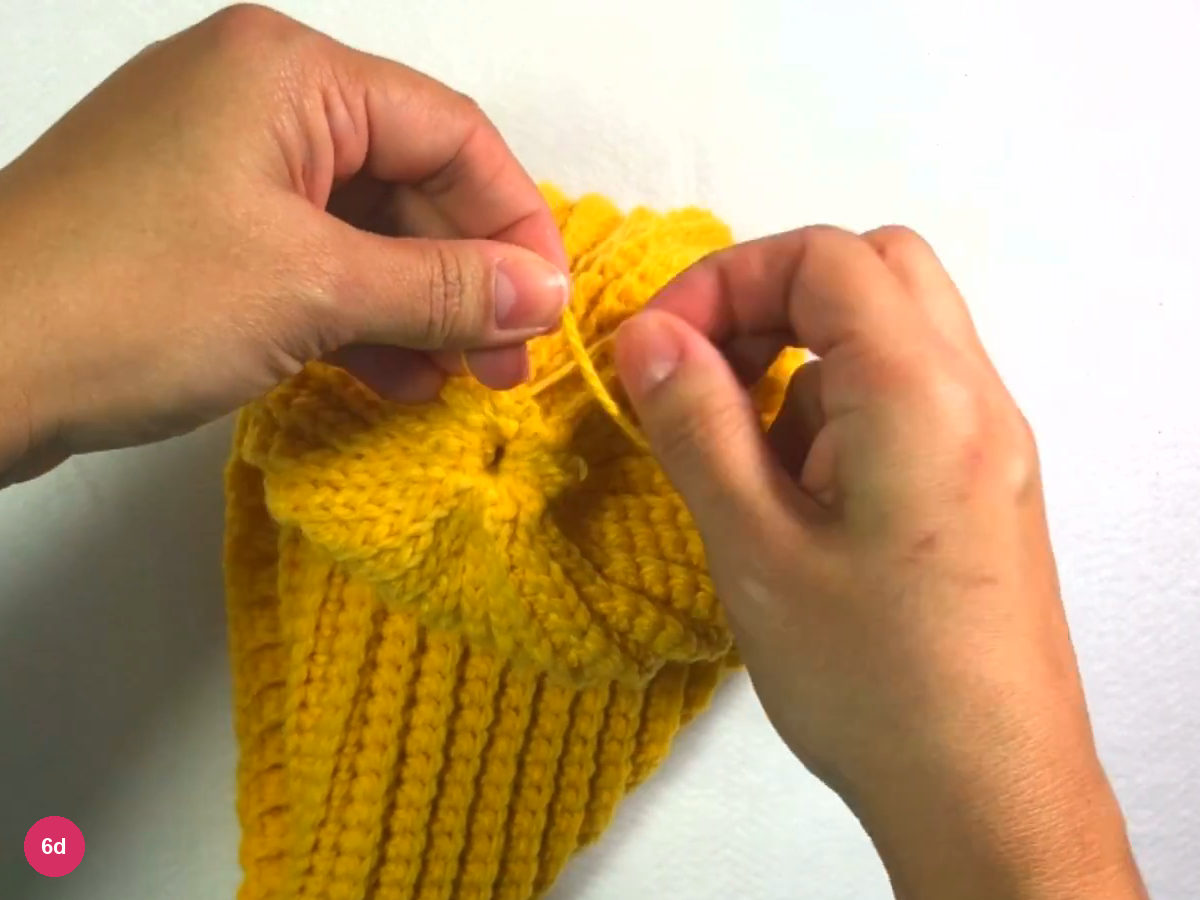
Step 6d: knot and stitch across the gathered centre. - Check the crown
Turn the crown to the right side and check it. It should be closed and small.
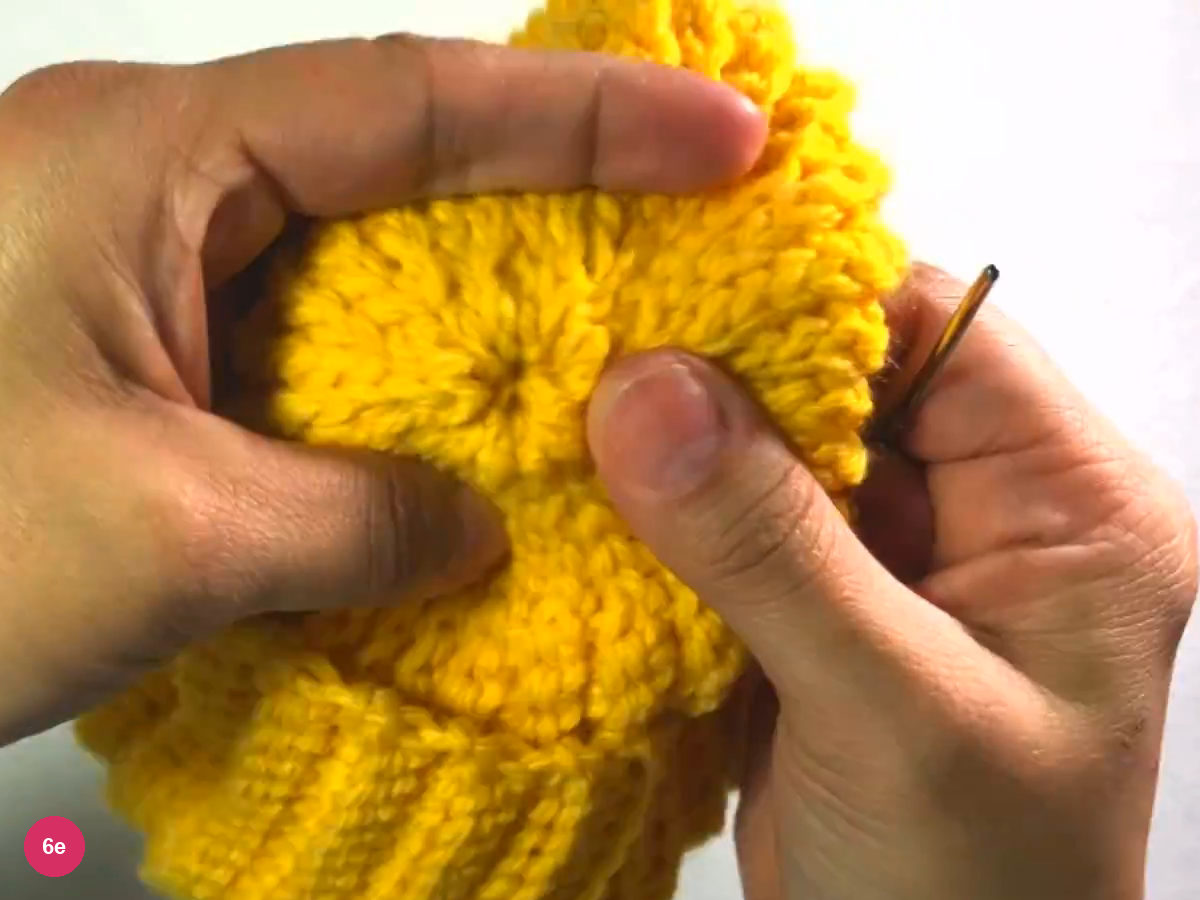
Step 6e: check the closed crown from the right side. - Knot and hide the yarn
Add a couple more knots, then take the needle through the crown once more to hide the yarn.
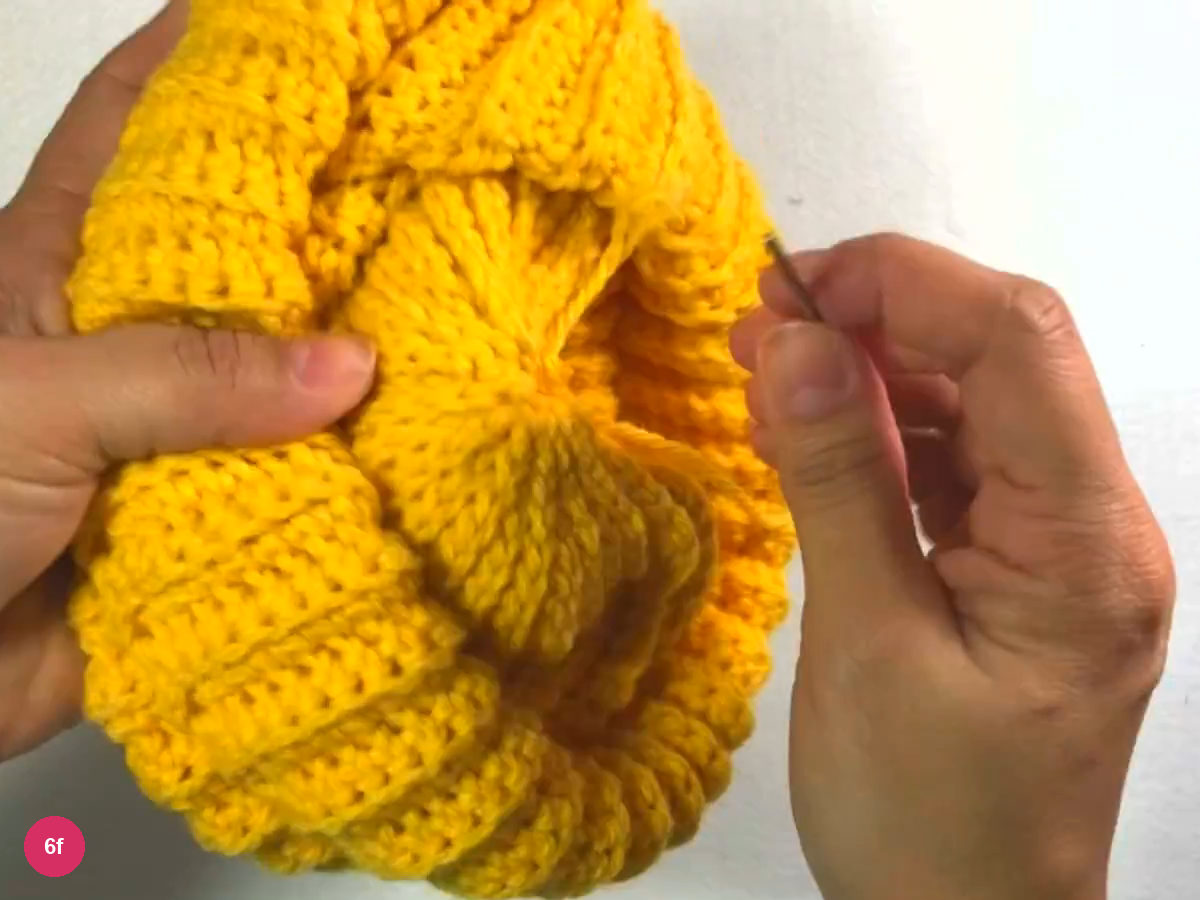
Step 6f: knot again and hide the yarn. -
Finish and fold the brim
- Trim the yarn
Once the yarn is hidden, trim it close to the work.
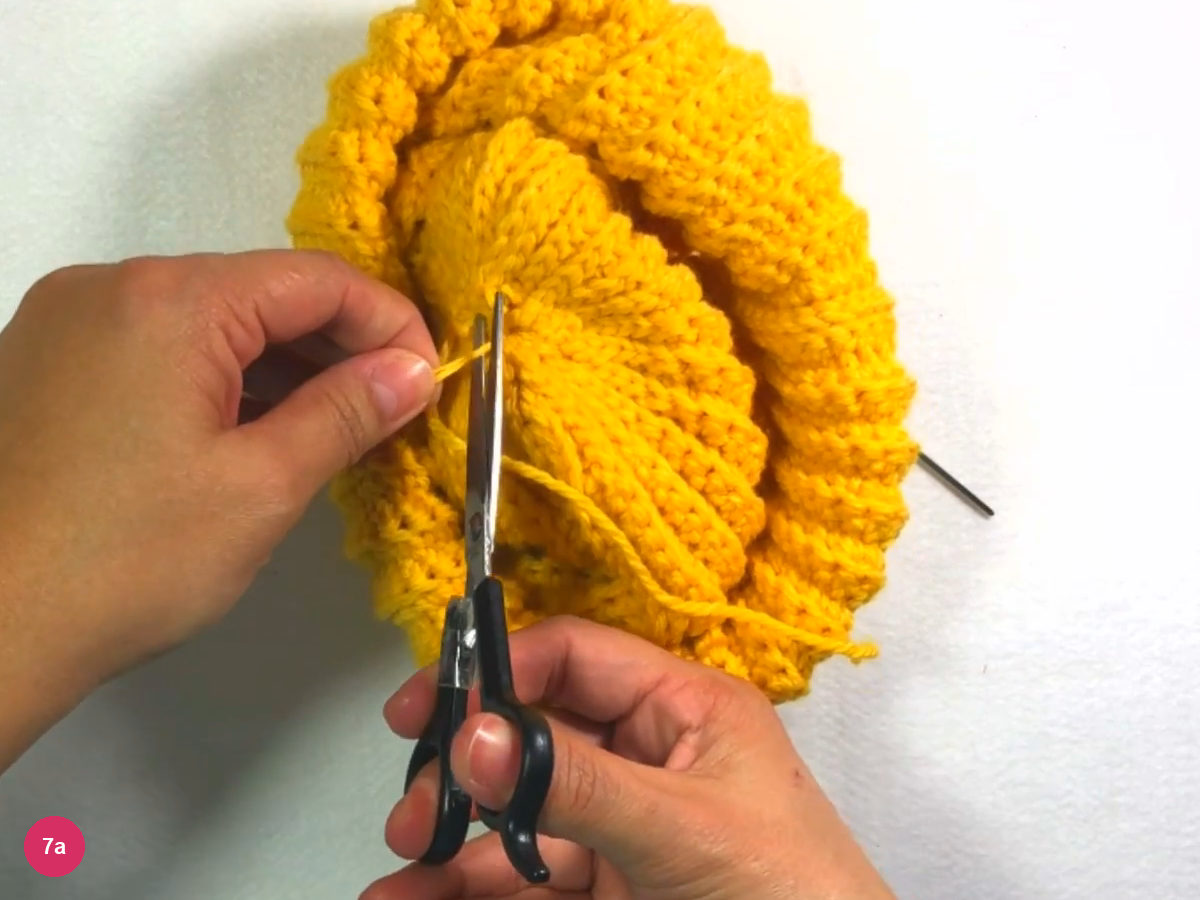
Step 7a: trim the yarn at the crown. - Finished hat
Lay the beanie flat and check that the ribs run straight along its length. The creator points out that the seam hardly shows.
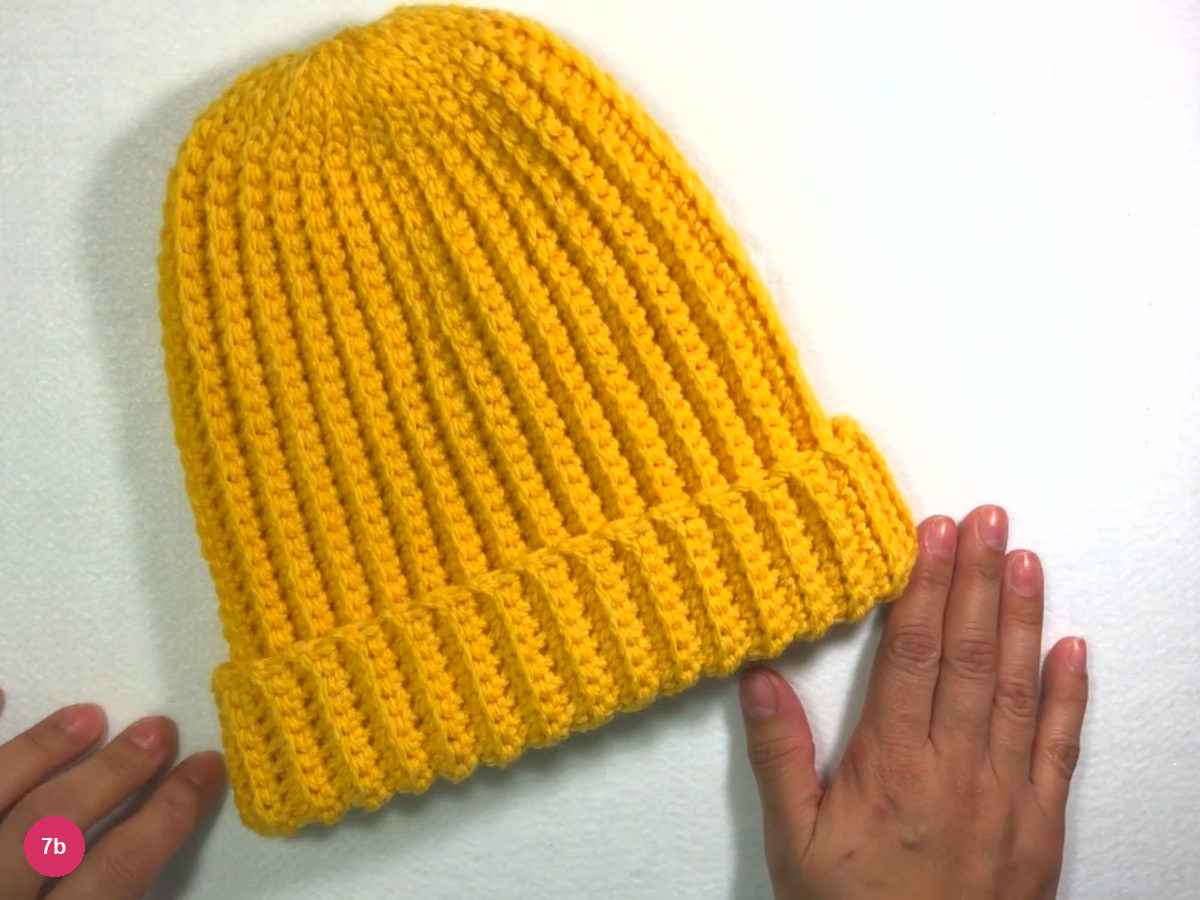
Step 7b: the finished beanie laid flat. - Finished size · 19 × 28 cm
Fold the lower edge up to make the cuff. The creator lists the finished size as 19 × 28 cm.
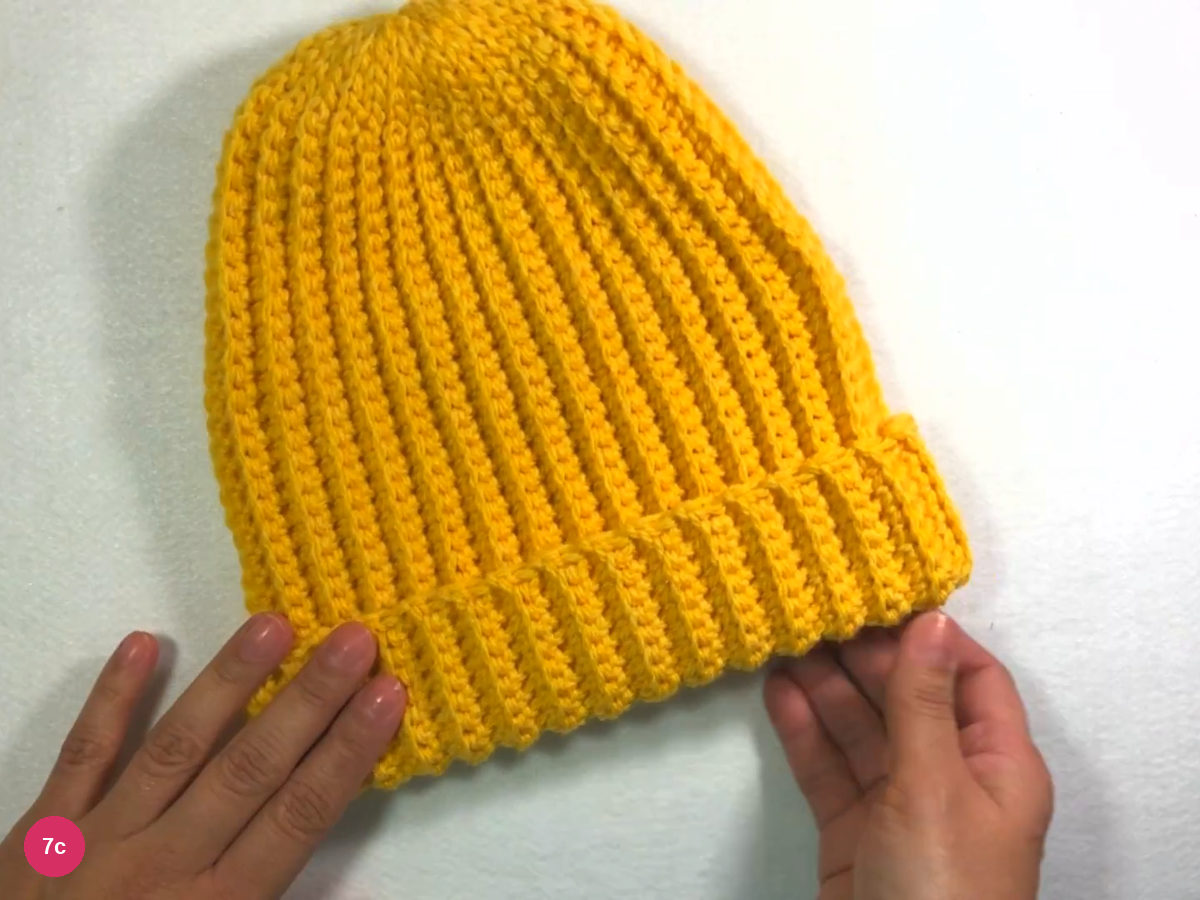
Step 7c: the finished beanie with its folded brim.
Fold, wear and check the finished beanie
When the crown is closed, the hat is shown laid flat with straight ribs, and then with its lower edge folded up to make the cuff. The creator says you can wear it like that. The video does not say how many times to fold or how deep the brim should be, so judge the fold on your own head; the listed finished size of 19 × 28 cm is the measurement to compare against.
It is worth laying your own piece next to the photos at each stage. The first-row check at about 33 cm, the 45 stitches, the six slip stitches and the 64 rows are the numbers the creator states, and matching them is the easiest way to know your hat is following the same plan.
Keep the six slip stitches on one side
Troubleshooting the flat-worked beanie
The first row is not about 33 cm: recount the 45 stitches before carrying on; the creator measures this row against a tape. The rows look uneven: check that each row begins with a chain 1 and a turn, and that you took the back loop only until the last stitch.
The seam looks bumpy: in the video the seam is slip stitched, one stitch at a time, along the whole edge, and the creator remarks that it hardly shows on the finished hat; keep each slip stitch relaxed. The top will not close: pull the threaded tail firmly, then use the leftover start tail and a few extra passes to hold the gathered centre.
Final checklist
- The foundation is 45 chains and the first row measures about 33 cm.
- Six slip stitches sit at the same end of every row, with the final stitch of each row through both loops.
- The piece has 64 rows and the first and last rows are joined with slip stitches.
- The top edge is gathered shut, knotted, and the yarn is hidden.
- The lower edge folds up into a cuff; the creator lists 19 × 28 cm as the finished size.
Try another ribbed accessory with the twisted ribbed crochet headband, or look at shaping with ribbing in the retro crochet head scarf. For a lighter project that also covers the head, see the crochet lace headband. Other crochet beanies use different constructions, so match the video you follow.
Inspired by Mãe e Filha Crochê’s video tutorial.
Save this pattern for later
Pin it to one of your boards so it’s ready when you have a free evening and the right yarn.