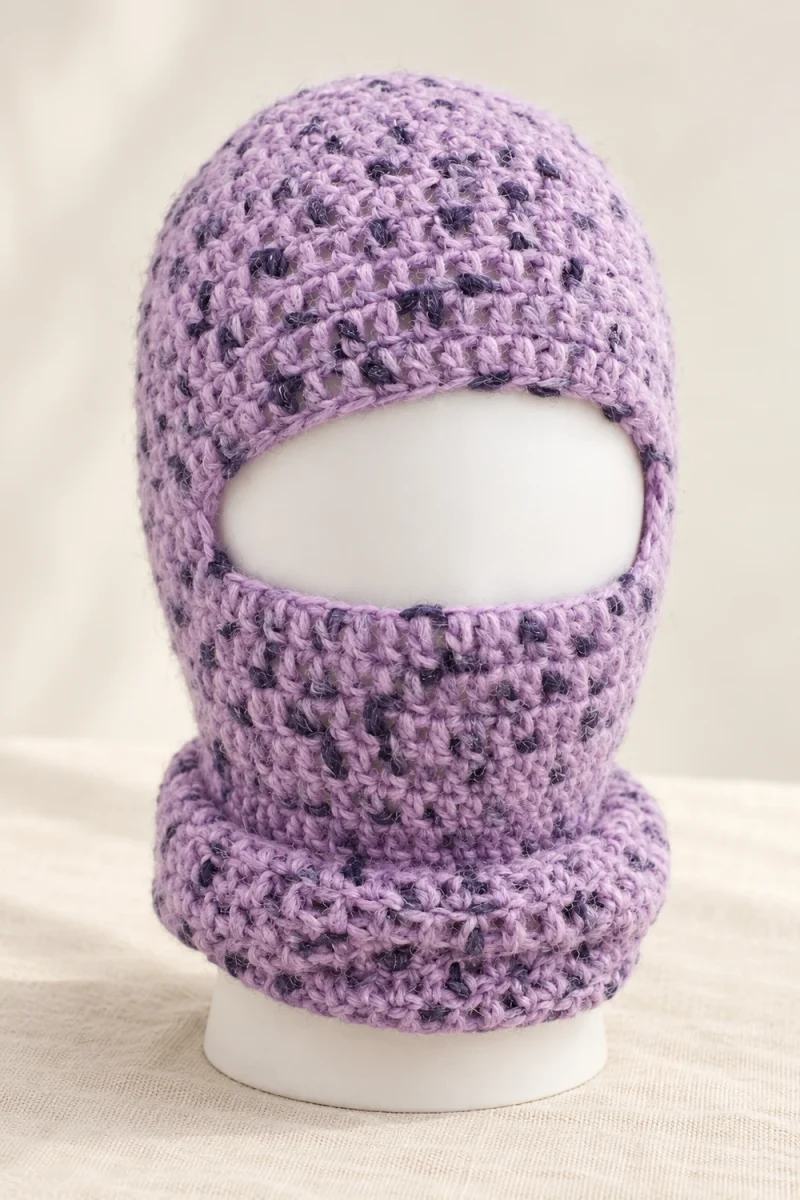
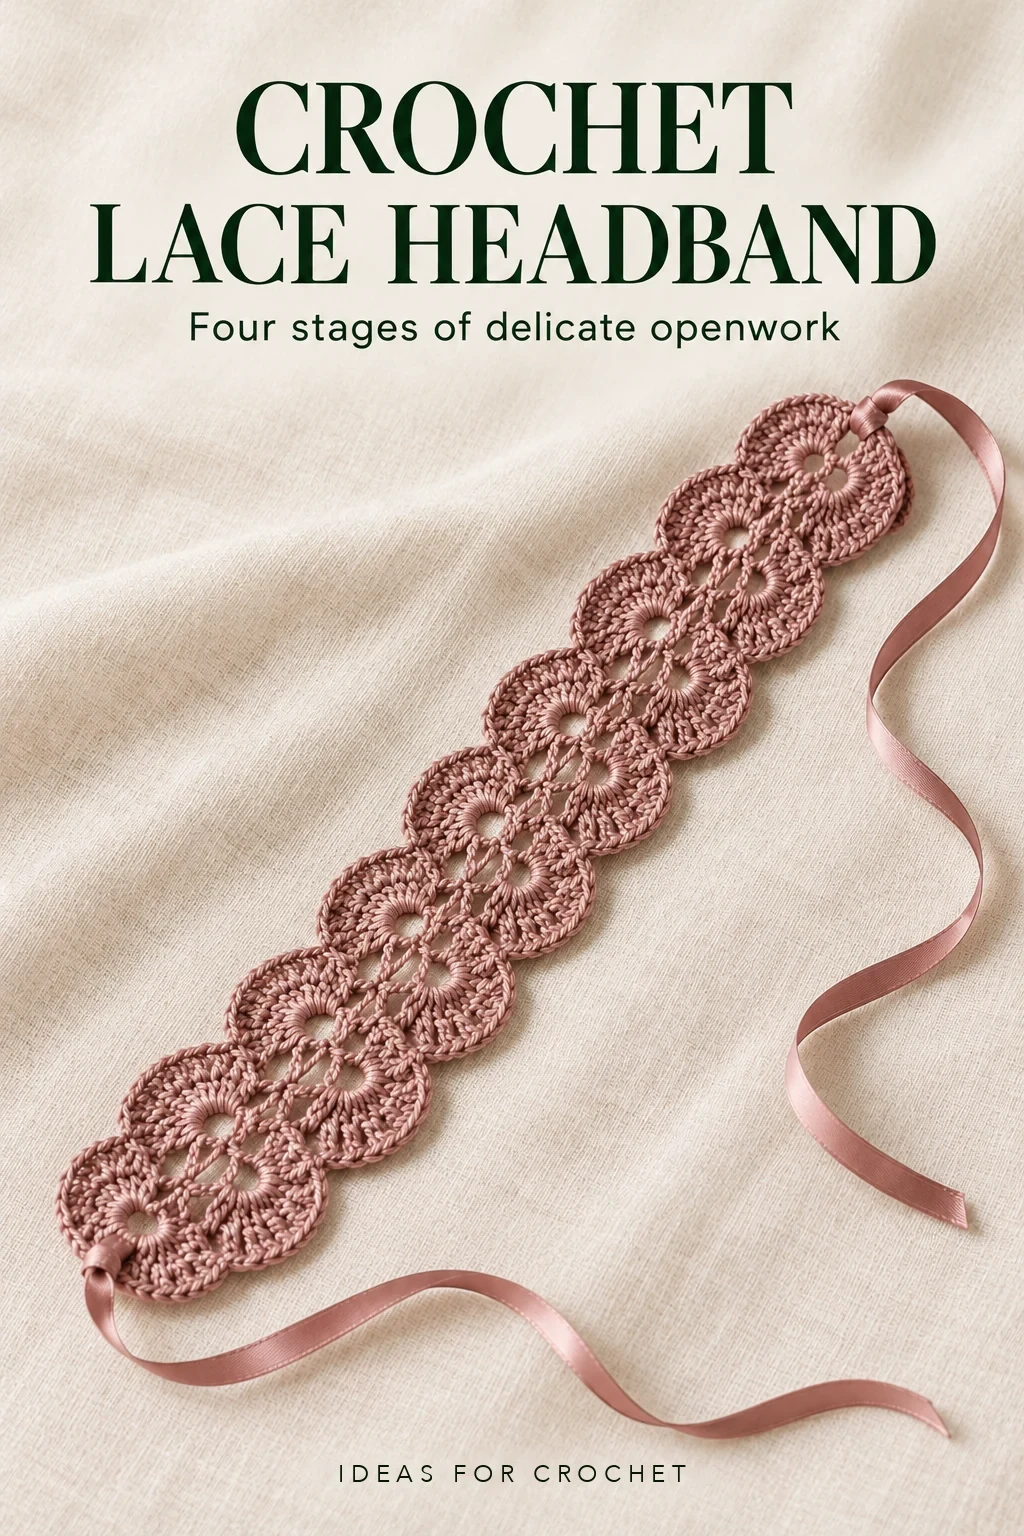
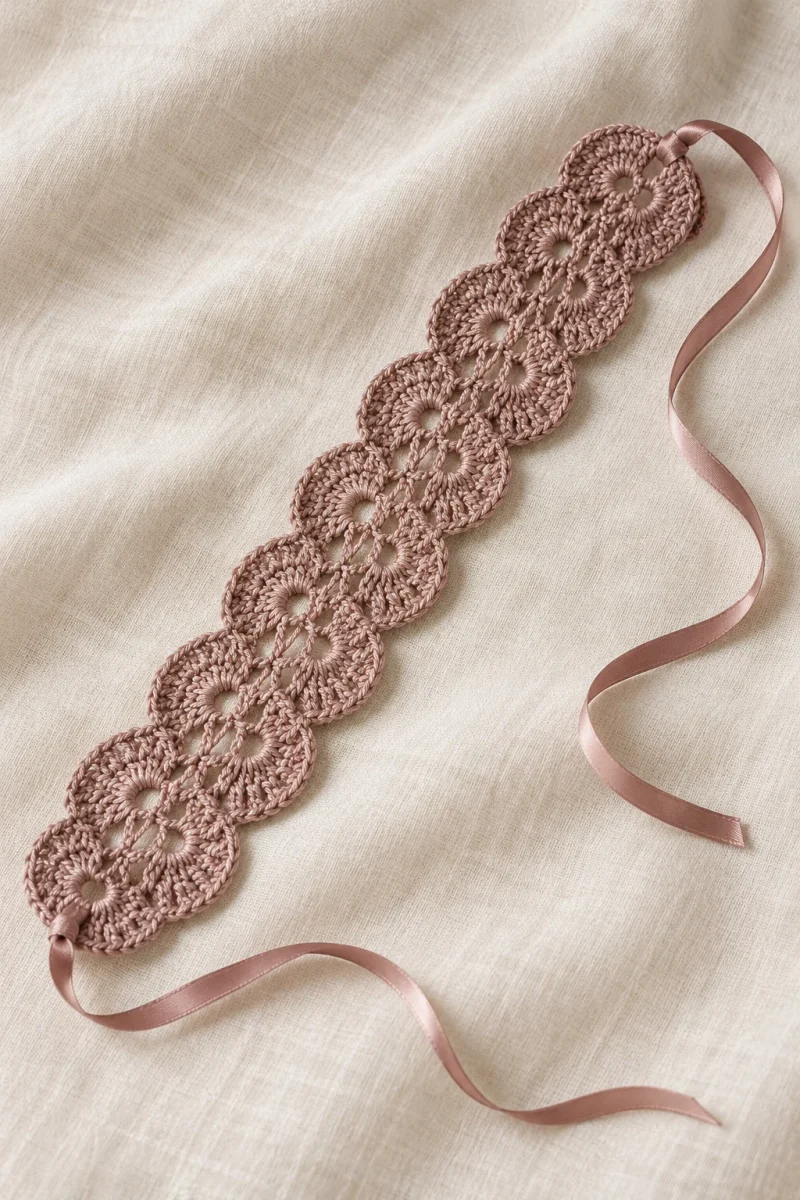
This crochet lace headband is made in four stages: a narrow center strip, a round of scalloped fans, an open mesh round, and a delicate chain-arch border. Satin ribbon ties turn the finished strip into an adjustable accessory without adding a rigid headband underneath.
All crochet stitch names here use US terms.
Supplies and sizing
- Mercerized cotton: the example uses Pekhorka Детский хлопок, 330 m per 100 g.
- A 2.5 mm crochet hook.
- Matching satin ribbon or a soft decorative cord for two ties.
- Scissors, a yarn needle, and a measuring tape.
The sample crochet section measures about 35 cm long × 6.5 cm wide, excluding the ties. Cotton thickness, hook size, and tension will change those dimensions. The ribbon completes the fit around the head, so check its length on the intended wearer before trimming it.
Useful abbreviations: ch = chain, sc = single crochet, dc = double crochet, and sl st = slip stitch. A center shell is 3 dc, ch 1, 3 dc worked into the same space.
1. Crochet the 33-shell center strip
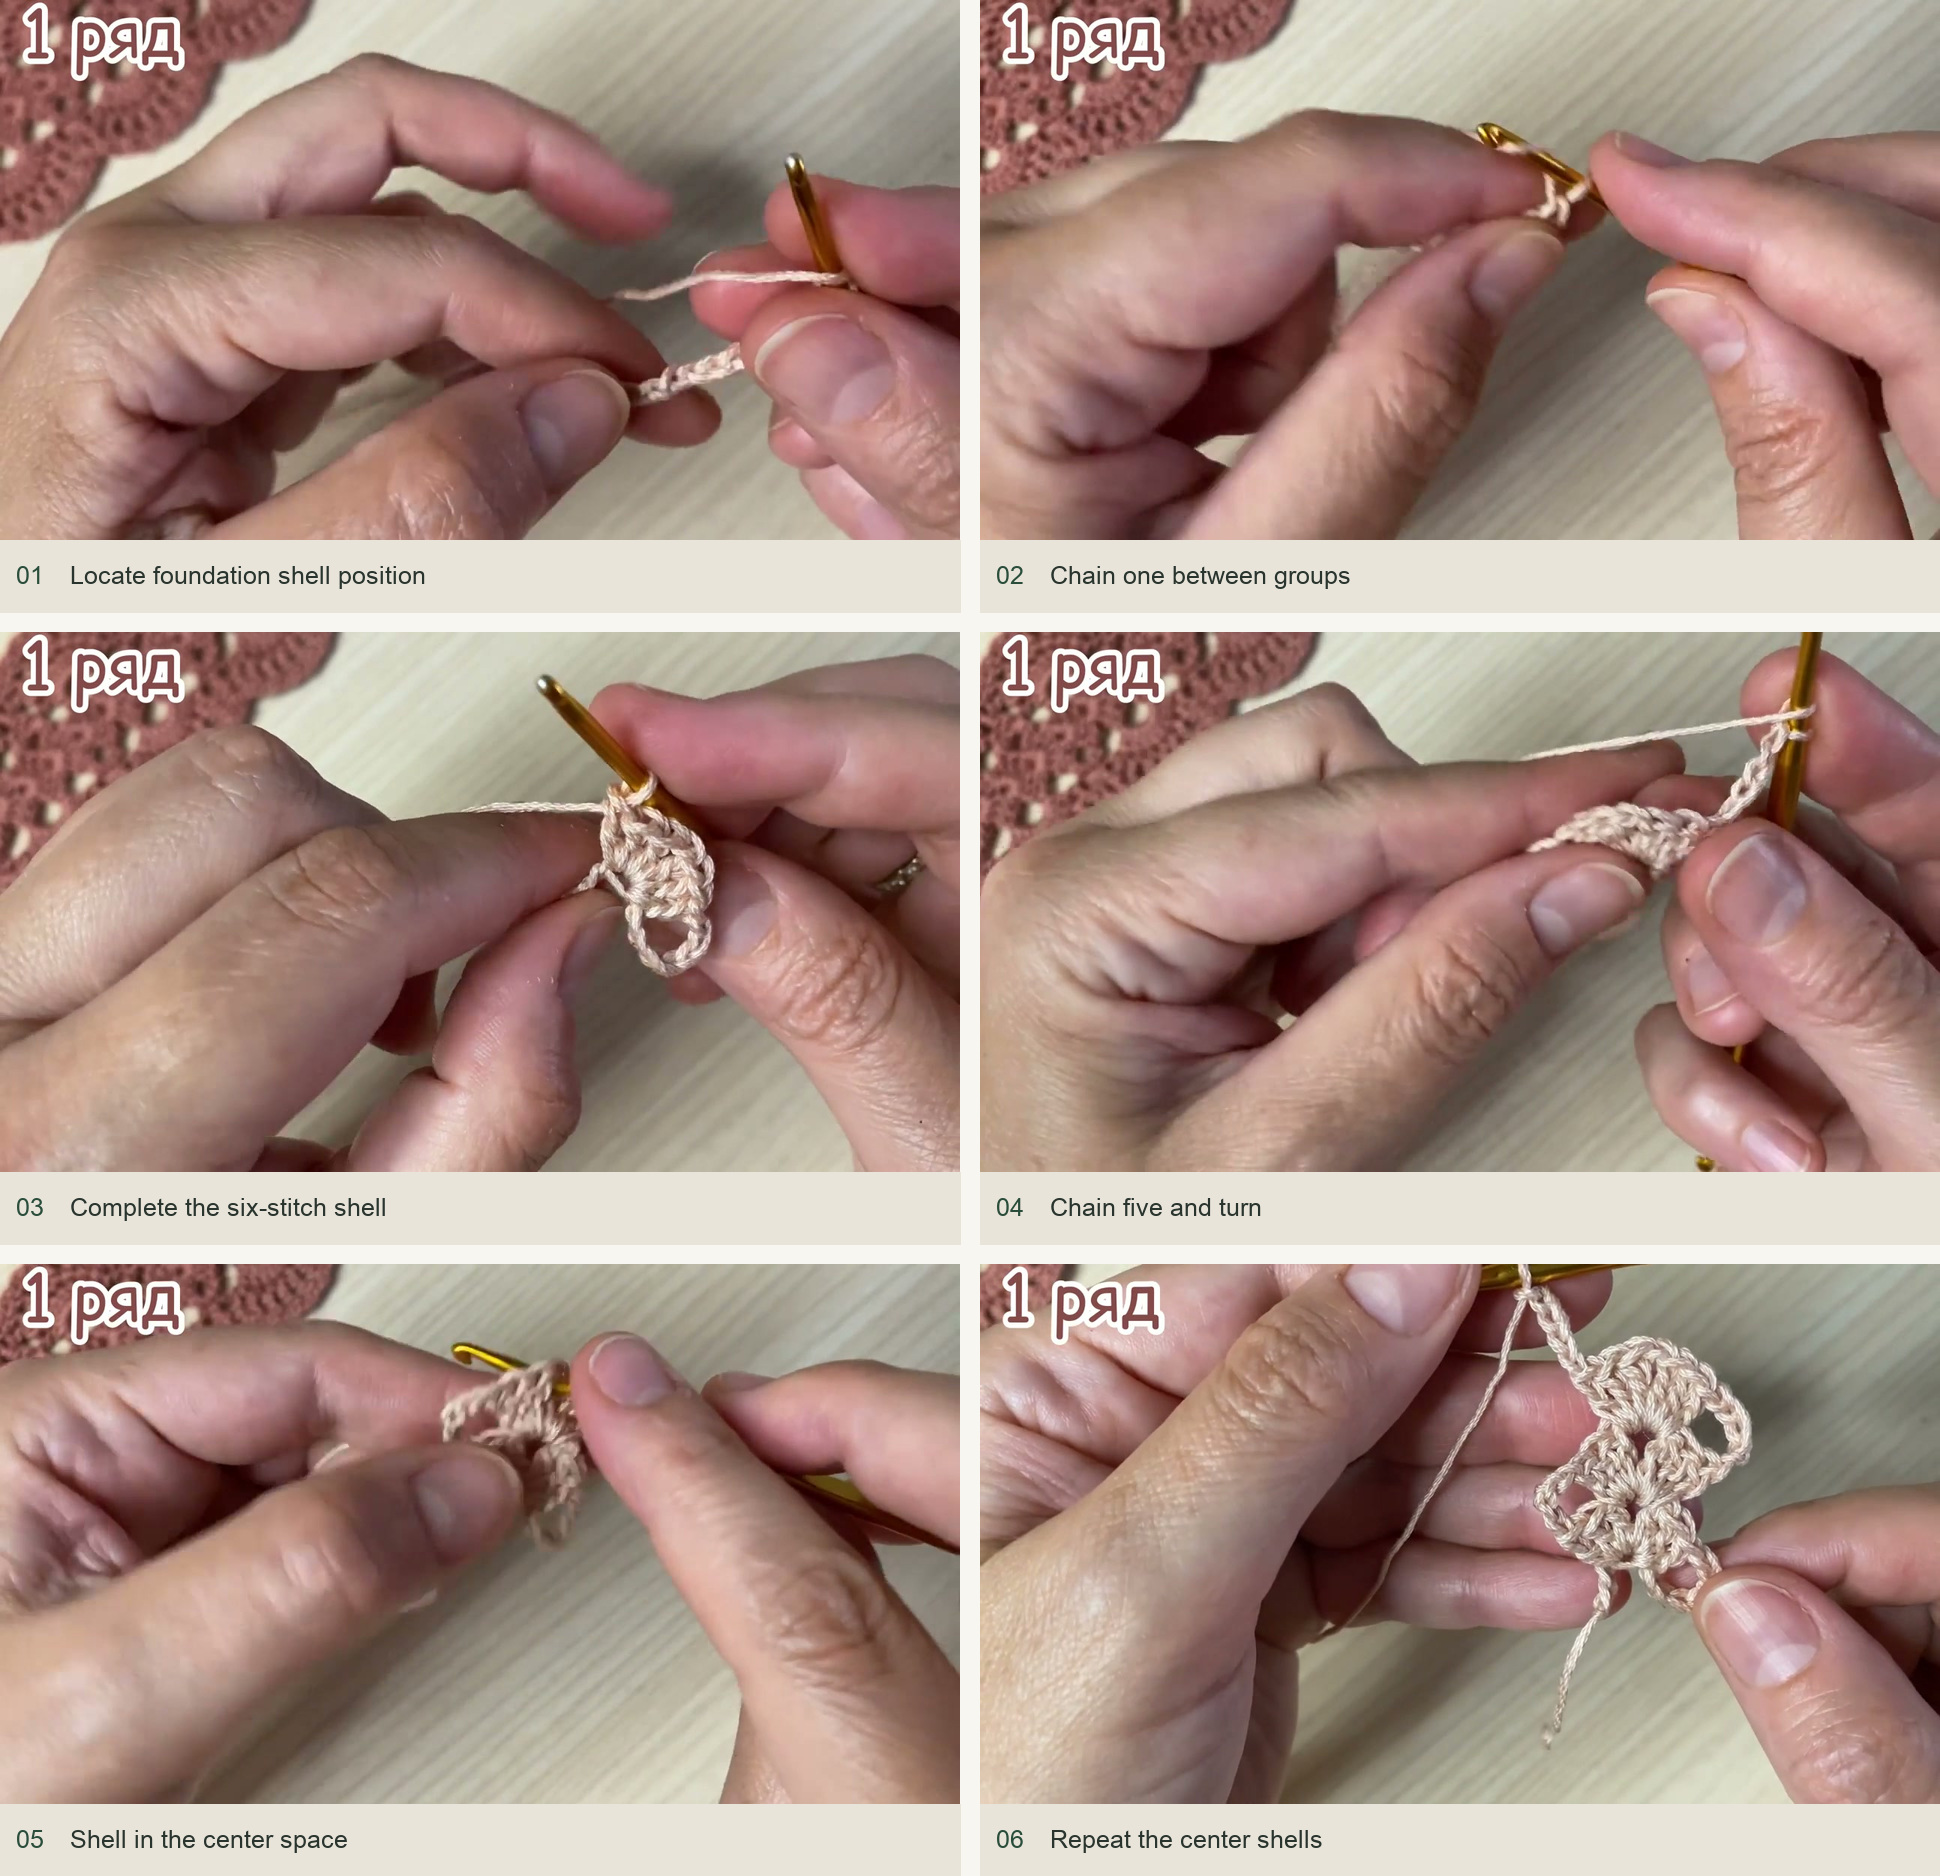
- Make the starting loop and chain 12. Visual reference: panel 1 below.
- Count the fourth chain from the starting end of that chain, following the placement in the first photograph sequence. Work three dc in that chain, ch one, then three more dc in the same chain. Visual reference: panel 1–3 below.
- Chain five and turn the small piece. Visual reference: panel 4 below.
- Into the ch-one space at the center of the preceding shell, work another shell: three dc, ch one, three dc. Visual reference: panel 5 below.
- Repeat ch five, turn, and work a shell into the previous center space until the strip has 33 shells. Visual reference: panel 6 below.
Count the completed shells, not just the visible side loops. The strip twists while you work because every shell is turned; spread it flat before beginning the next stage so you can identify the arches on both sides.
2. Add the eight-fan borders
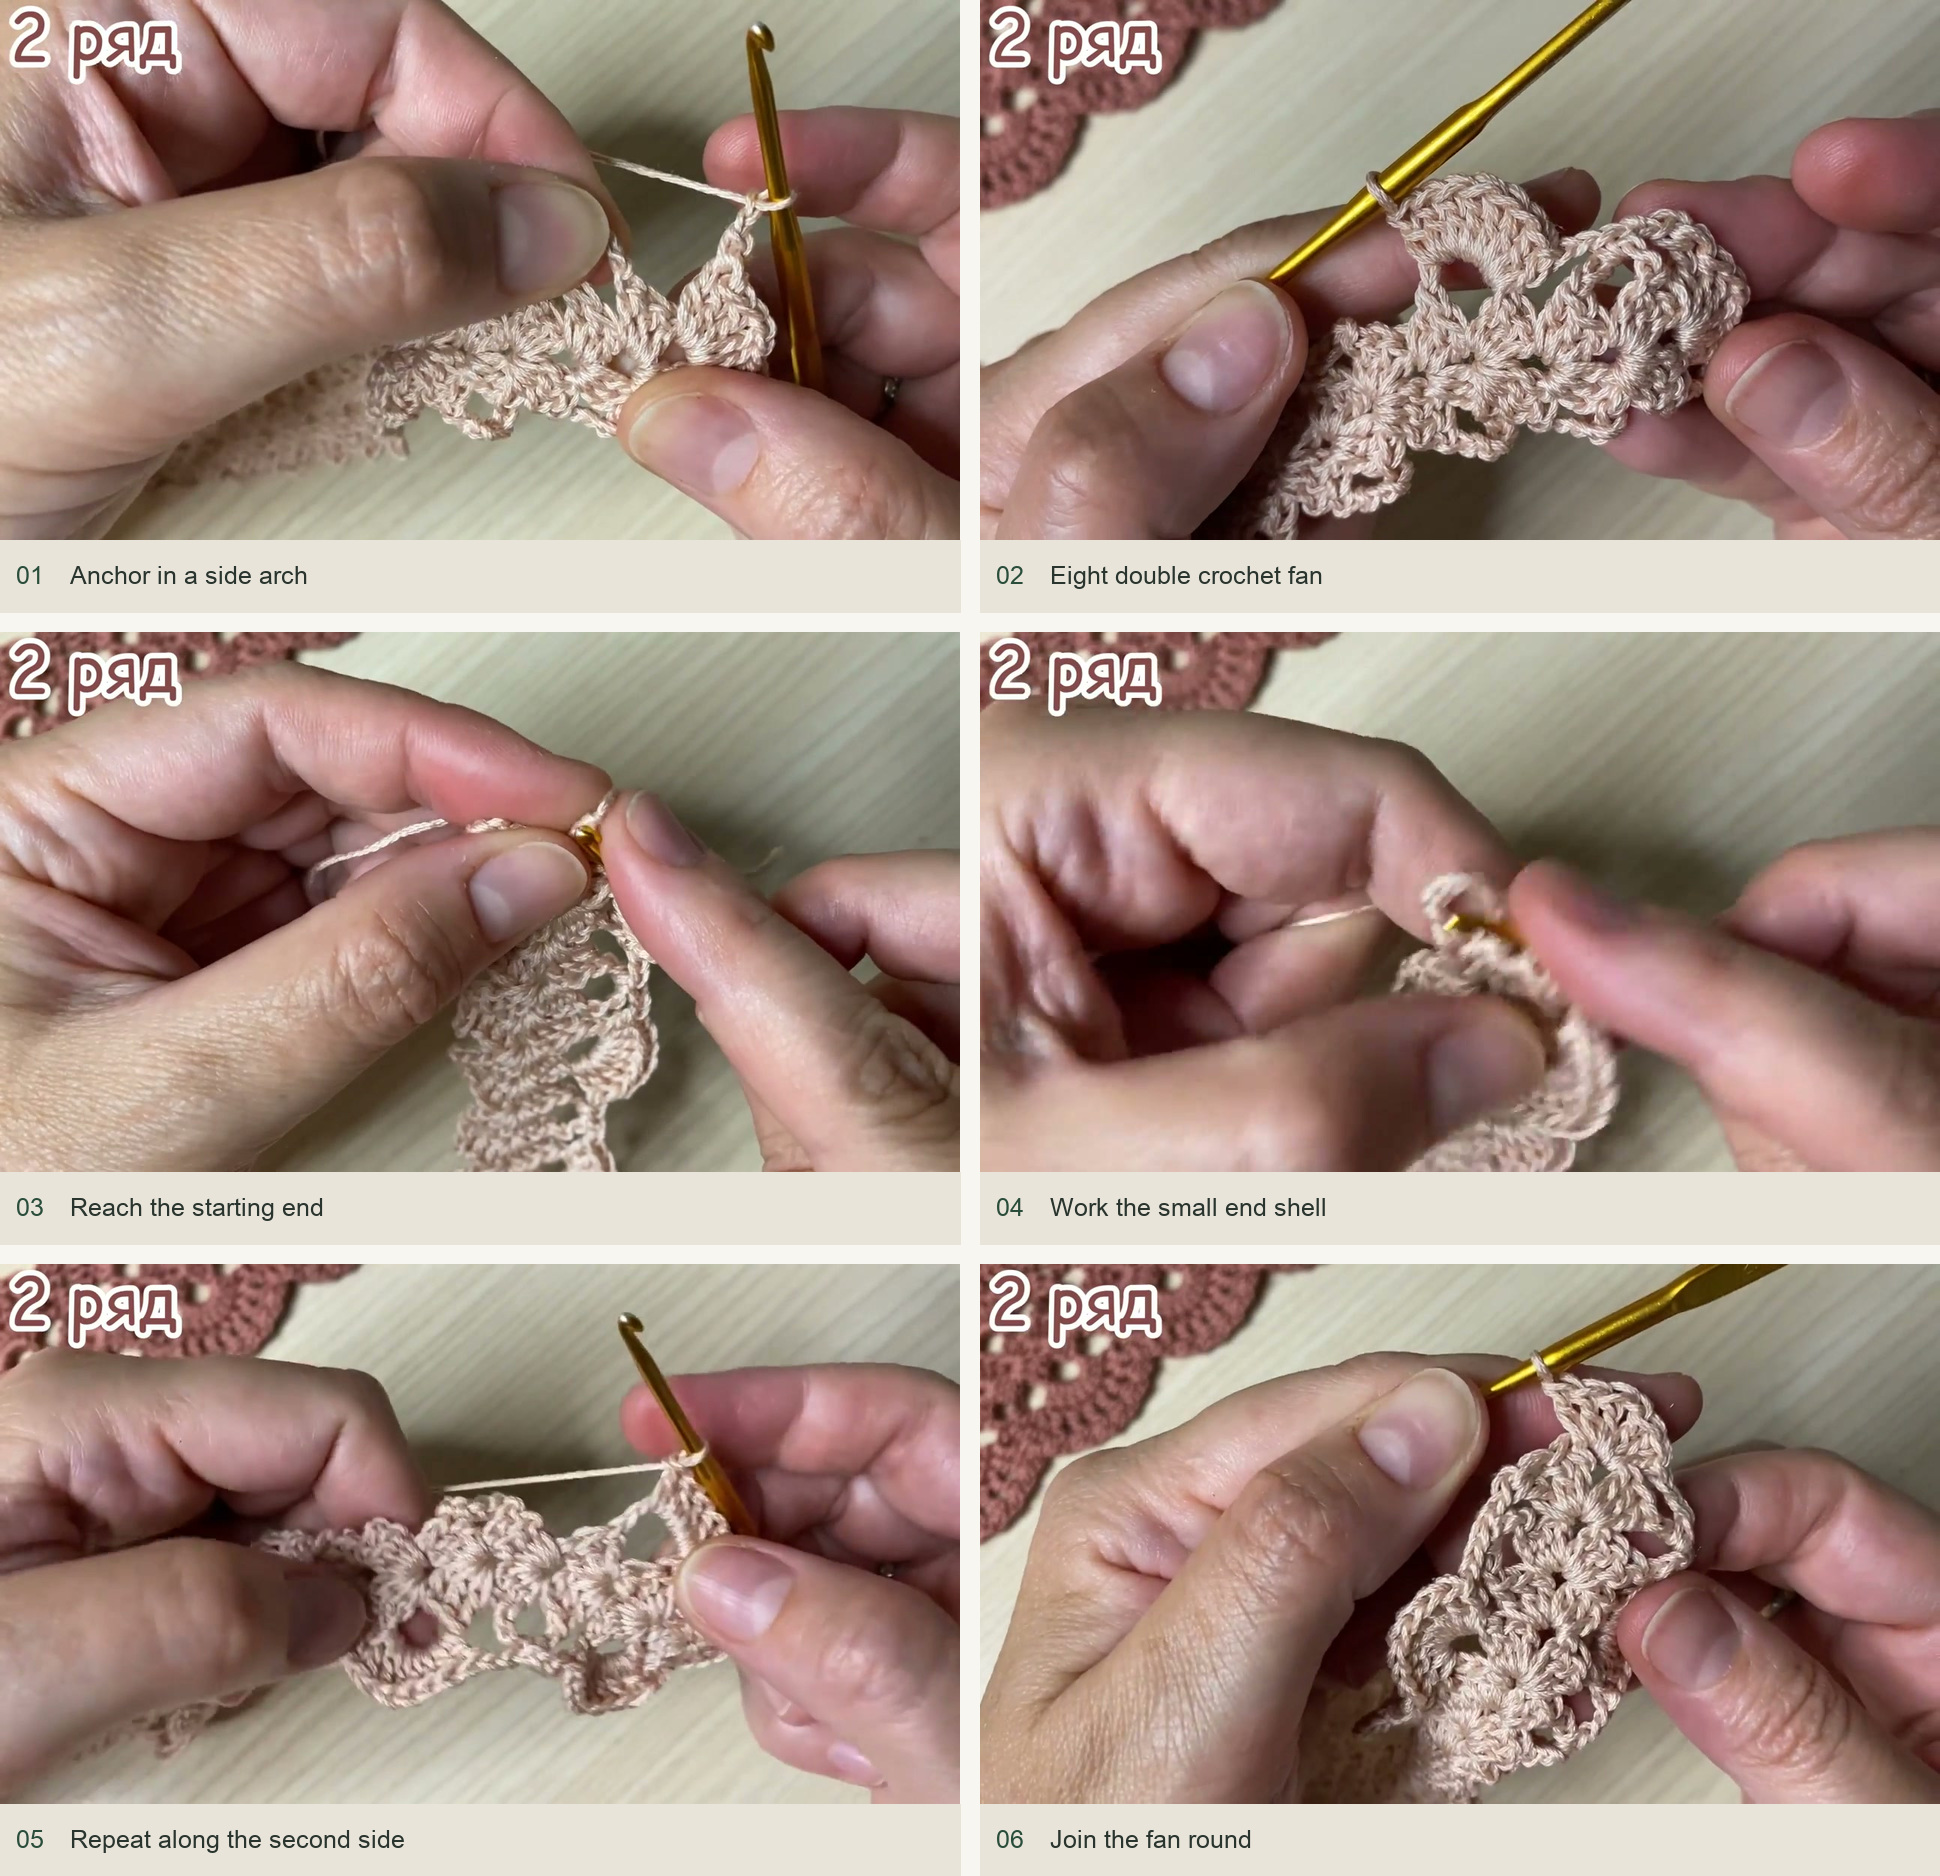
Now work around the long strip. Larger fans of eight dc alternate with sc anchors in the side arches. The two short ends receive smaller six-dc shells so the border can turn around them.
- Ch one and work sc in the top of the last dc of the center strip. Visual reference: panel 1 below.
- Ch two and work sc in the next ch-five side arch. Visual reference: panel 1 below.
- Ch two and work eight dc in the following side arch to make the first large fan. Visual reference: panel 2 below.
- Continue alternating: ch two, sc in the next arch, ch two, eight dc in the next arch. Make eight large fans along the first long side. Visual reference: panel 2 below.
- At the starting end, ch two and anchor with sc in the original beginning chain. Ch two, then make a small shell of three dc, ch one, three dc in the same foundation position used for the first center shell. Visual reference: panel 3–4 below.
- Continue around the opposite long side in the same alternating pattern, making eight more large fans. Visual reference: panel 5 below.
- At the far short end, work the corresponding six-dc shell into its center ch-one space. Ch two and join to the first sc with sl st. Visual reference: panel 6 below.
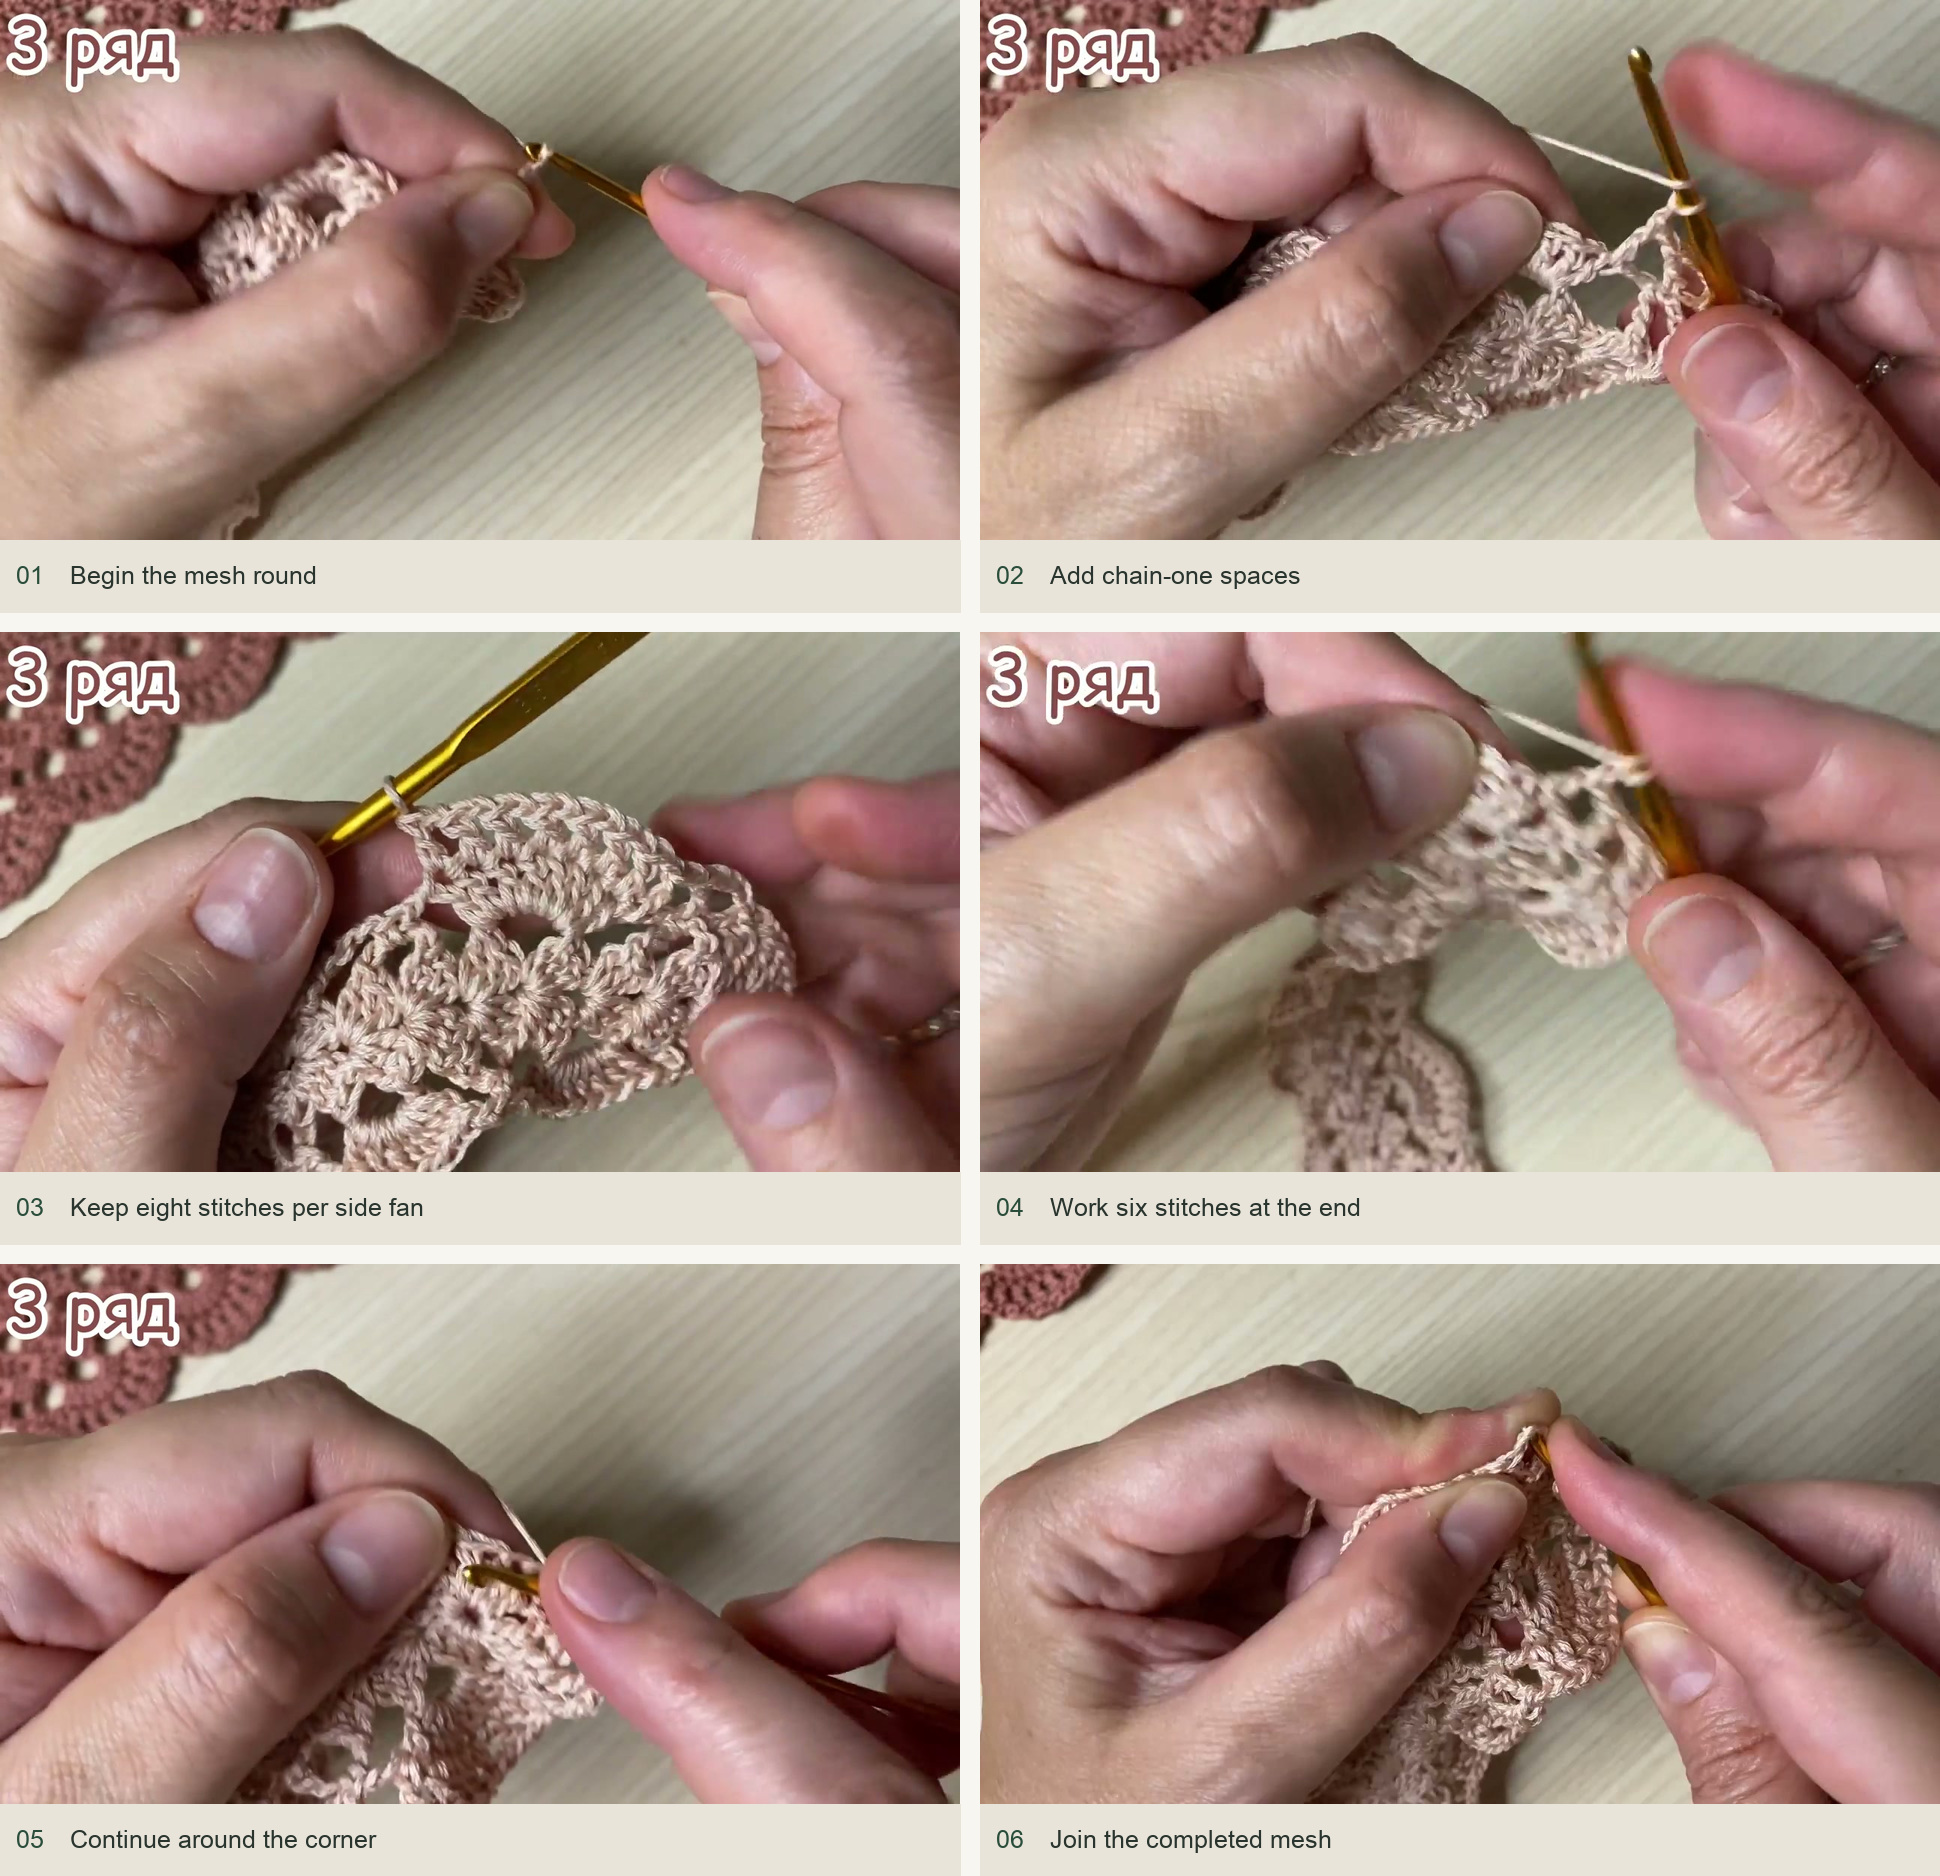
3. Open the fans with chain-one mesh
The next round works a dc into each existing dc, separating the new stitches with ch-one spaces. This spreads each fan without adding another dc to its count.
- Ch three for the first dc, then ch one. Work dc in the next sc anchor, followed by ch one. Visual reference: panel 1 below.
- Across a large fan, work one dc in each of its eight dc, placing ch one between the new dc. Visual reference: panel 2–3 below.
- After the fan, ch one and work dc in the next sc anchor. Ch one, then work across the next eight-dc fan in the same way. Visual reference: panel 3 below.
- At a short-end shell, work one dc in each of its six dc with ch-one spaces between them. Leave its old middle ch-one space unworked rather than adding an extra dc there. Visual reference: panel 4–5 below.
- Continue around the second side and remaining short end. Join with sl st in the third chain of the beginning ch-three. Visual reference: panel 6 below.
4. Finish with small chain arches
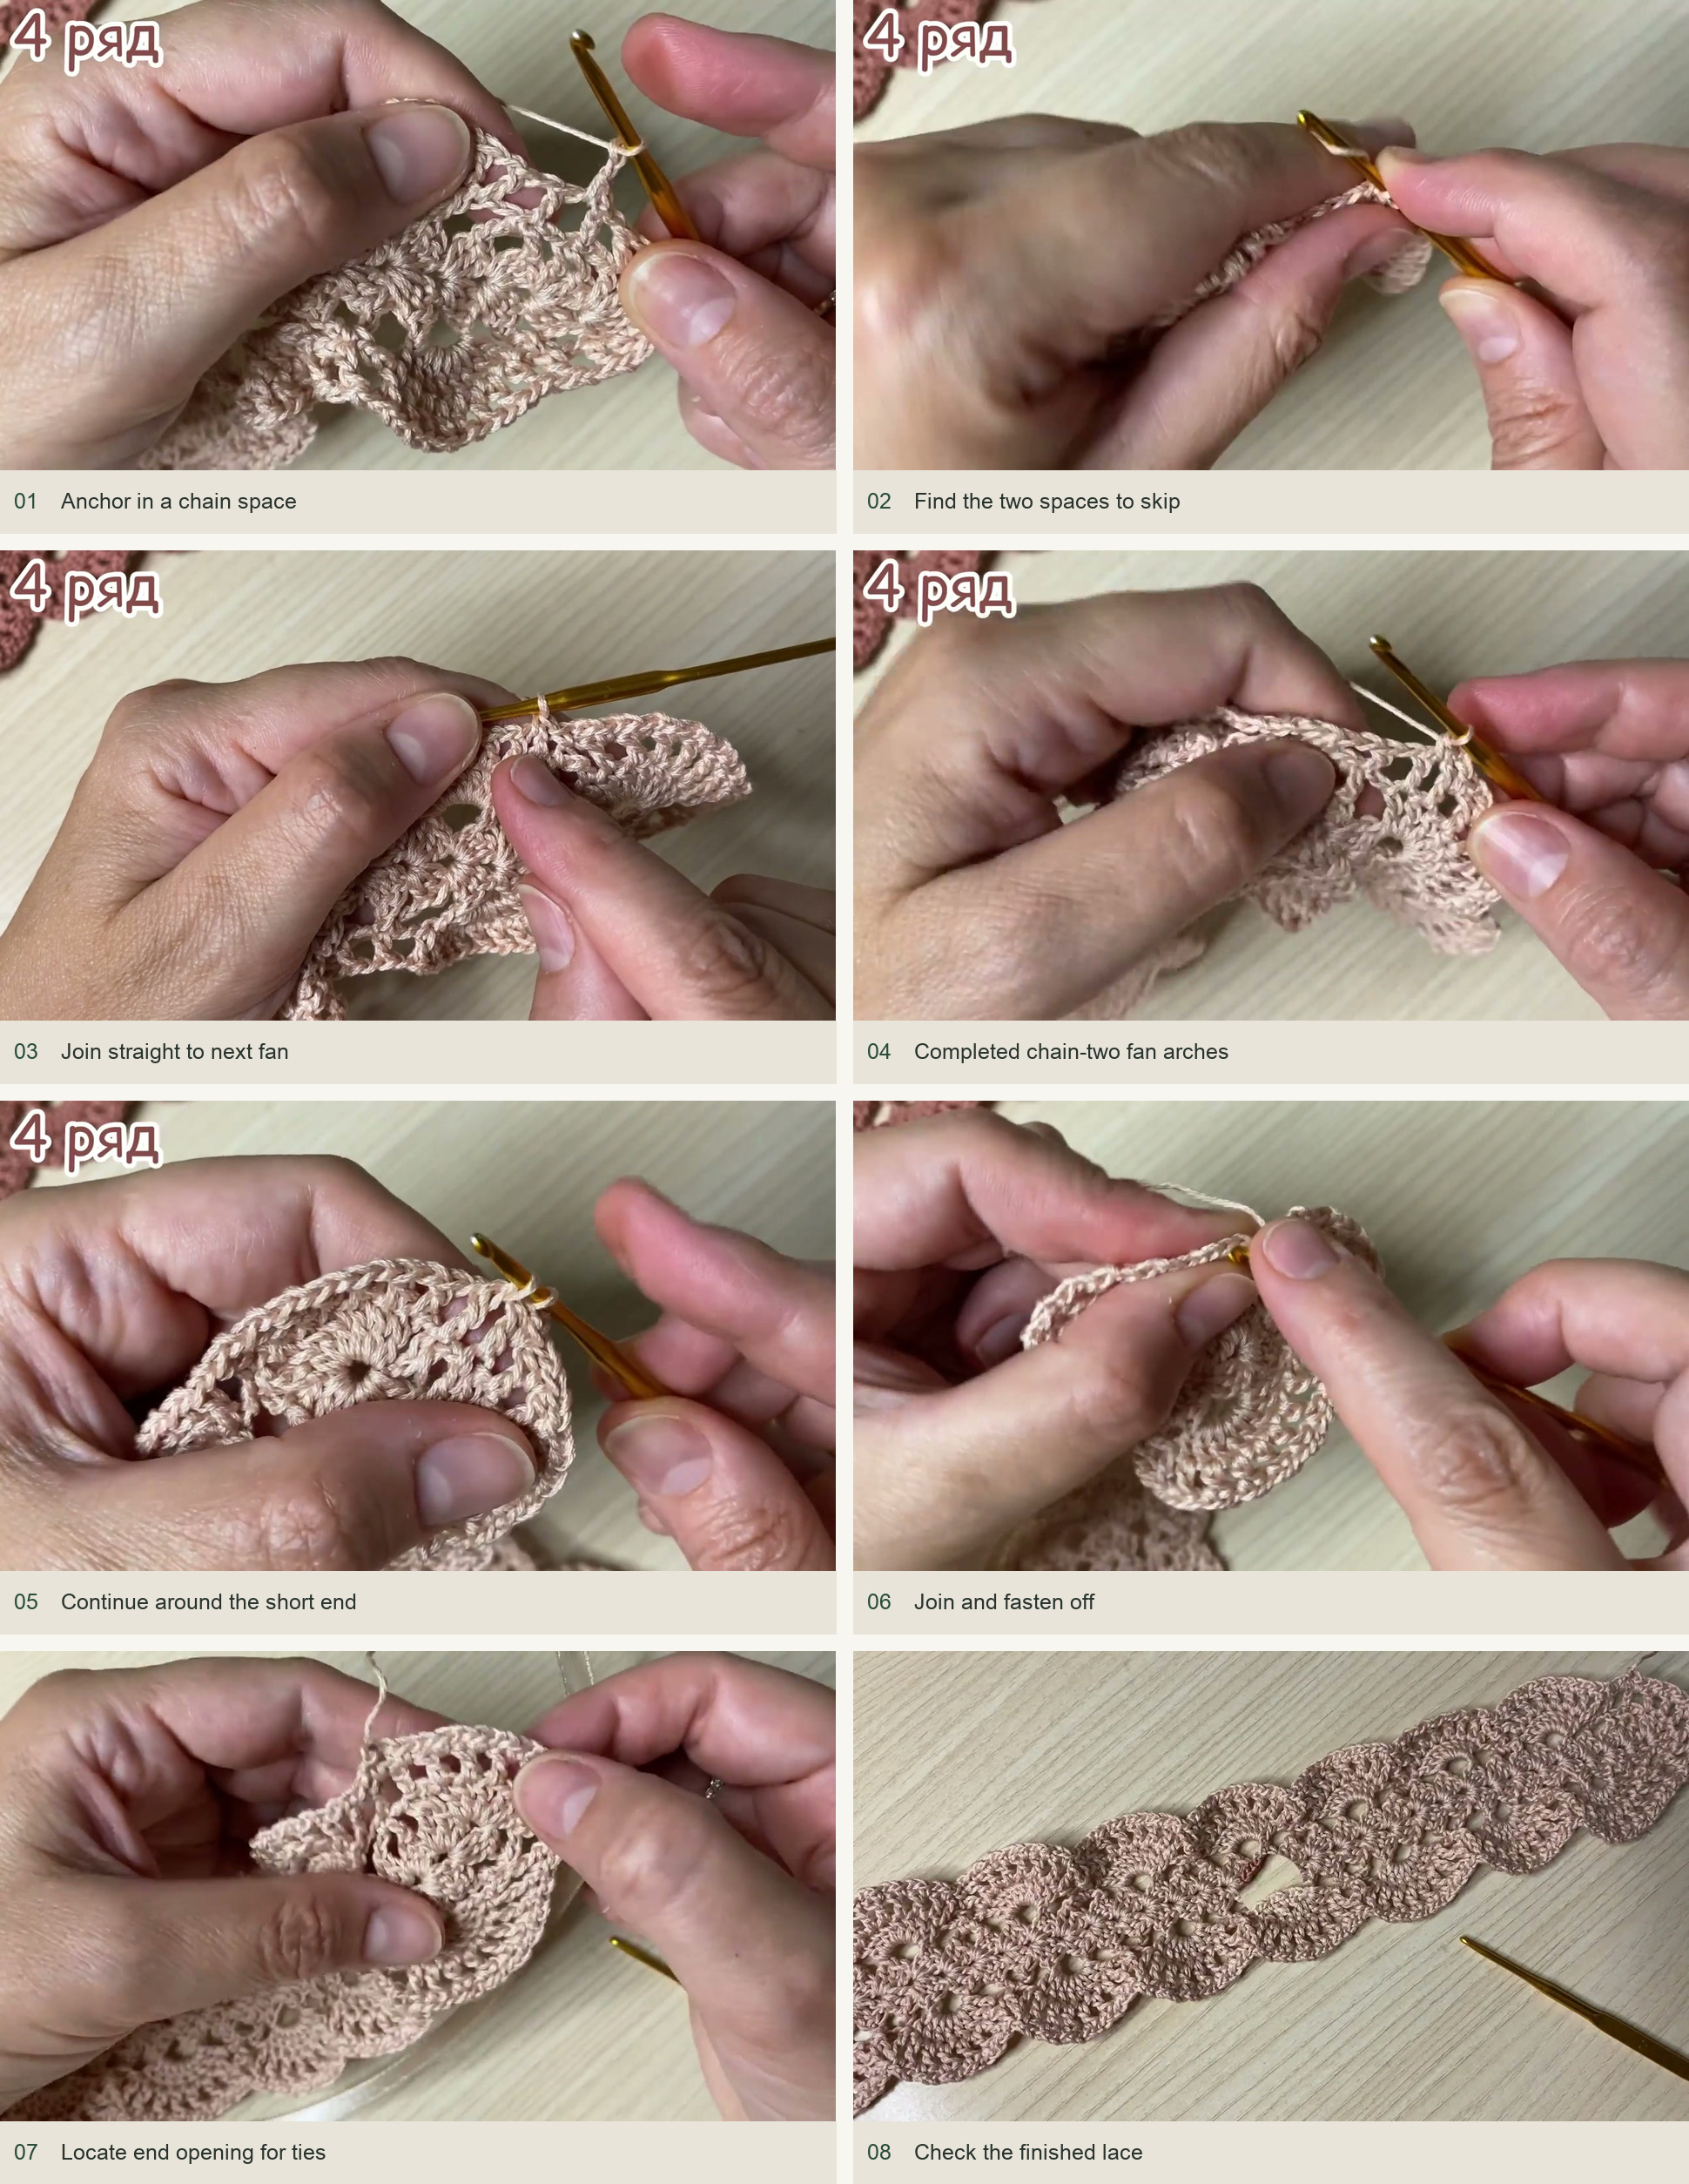
- Ch one and work sc in the next ch-one space. Visual reference: panel 1 below.
- Ch two and work sc in the following ch-one space. Continue around the outer curve of the fan, making six ch-two arches over a full long-side fan. Visual reference: panel 1–4 below.
- When you reach the gap between two long-side fans, skip the two ch-one spaces immediately before and after the solitary dc anchor. Visual reference: panel 2 below.
- Work sc directly into the first space between dc one and dc two of the next fan, then resume ch two, sc in the next space. Visual reference: panel 3 below.
- At each short end, stop skipping spaces. Work around all the end spaces so the lace rounds the corner; the example has eight small arches around each short-end section. Visual reference: panel 5 below.
- Continue around, join to the beginning sc, fasten off, and weave the tail securely into the dense parts of the lace. Visual reference: panel 6 below.
Add ties and settle the lace
Lay the strip flat and gently arrange the scallops. Lightly block it using a method suitable for your cotton; avoid stretching the center strip while spreading the outer arches. Let it settle before measuring the final fit.
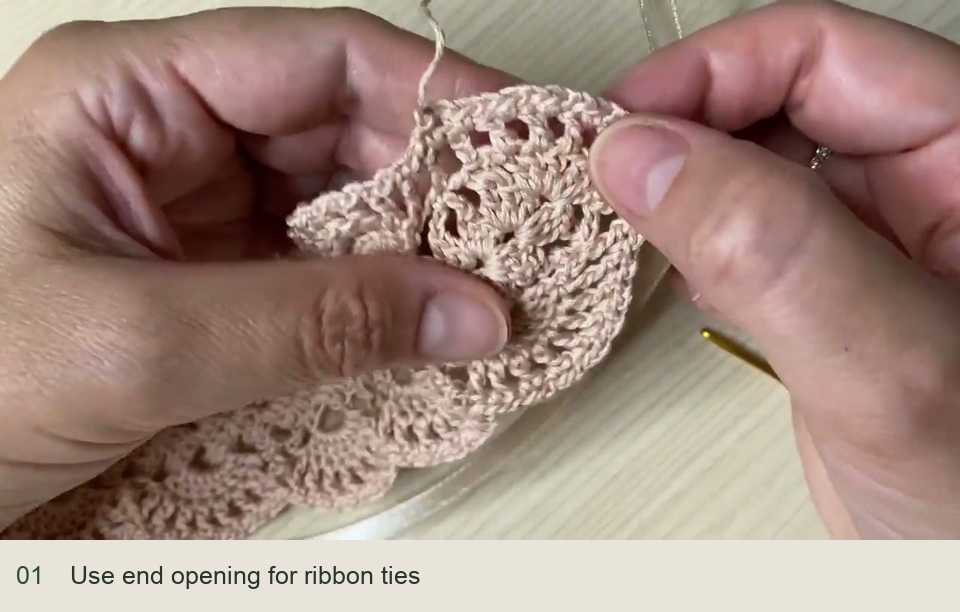
Sew a ribbon or soft cord tie to the middle arch at each short end. Spread the attachment through secure crochet loops rather than pulling against a single chain. Test the tie length, then trim and finish the ribbon ends neatly.
Final checks and useful fixes
If a long edge flares more than the other, recount the fans and check the two-space skips in the final round. If an end folds inward, check that you did not continue the long-side skips around that short end. Correct the misplaced spaces before blocking; blocking cannot replace a missing pattern repeat.
Inspired by Odri Studio’s crochet lace headband video tutorial. Original design and demonstration photographs belong to the creator.
Watch the original tutorial
Save this pattern for later
Pin it to one of your boards so it’s ready when you have a free evening and the right yarn.