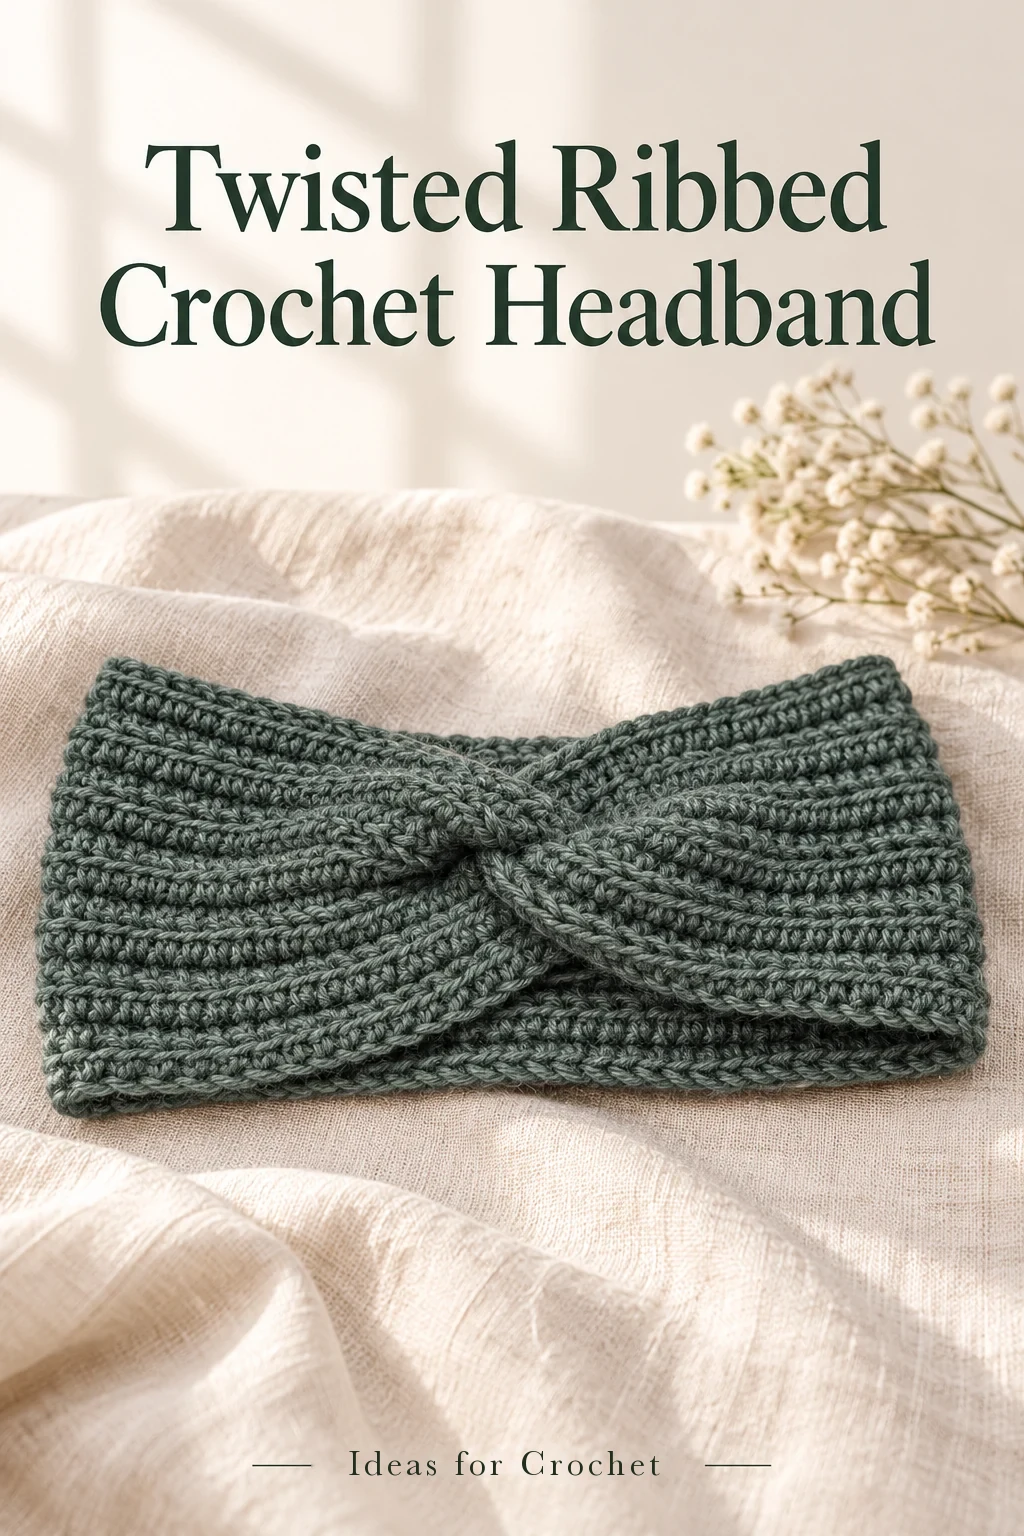
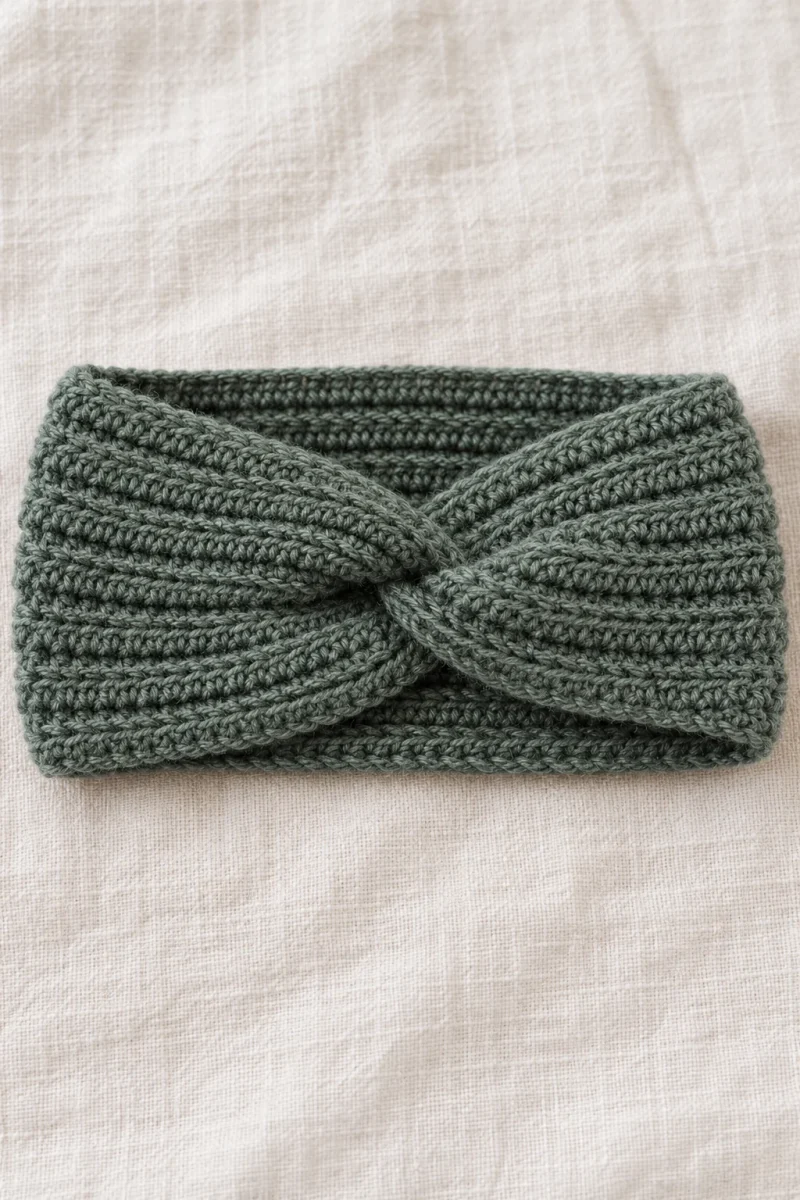
This twisted ribbed crochet headband is made from one rectangular strip, then folded and joined through four layers to form its bow-like front. The raised horizontal ridges come from half double crochet worked into the backmost extra loop.
Yarn, hook and sample measurements
Vika uses Alize Lanagold, a wool-blend yarn labeled 240 m per 100 g, with a 3.5 mm crochet hook. Have scissors and a yarn needle or hook for burying the ends. The demonstrated version is intended for a head circumference of about 56 cm. Its strip measures roughly 50–51 cm under the light stretch shown, before the ends are joined.
The foundation is 77 chains: 75 working stitches plus two turning chains. The adult sample is 14 rows deep, giving seven visible ridge bands on its face. Vika shows a narrower 12-row version and recommends the deeper adult version in this yarn. She discusses a finished depth of approximately 13–15 cm, so measure the fabric instead of assuming a fixed row count will give the same coverage in another yarn.
Work a short sample if changing the yarn. The strip must stretch comfortably without feeling rigid around the head. Lanagold can make firm fabric when worked tightly; Vika suggests that some crocheters may prefer a 4 mm hook. A larger hook changes the measurements, so check both the length and the depth before making the permanent join.
| Checkpoint | Demonstrated adult version |
|---|---|
| Head circumference | About 56 cm |
| Foundation | 77 chains |
| Working count | 75 half double crochet per row |
| Strip length | About 50–51 cm under light stretch |
| Depth | 14 rows, seven visible ridge bands |
| Front join | Four interlocking folded layers |
Make the ribbed strip
-
Chain the foundation
Ch 77 with even tension. Turn the chain over to expose its back bumps. Skip the first two chains and begin in the third chain from the hook. The two skipped chains provide the rise and are not part of the 75 working stitches.
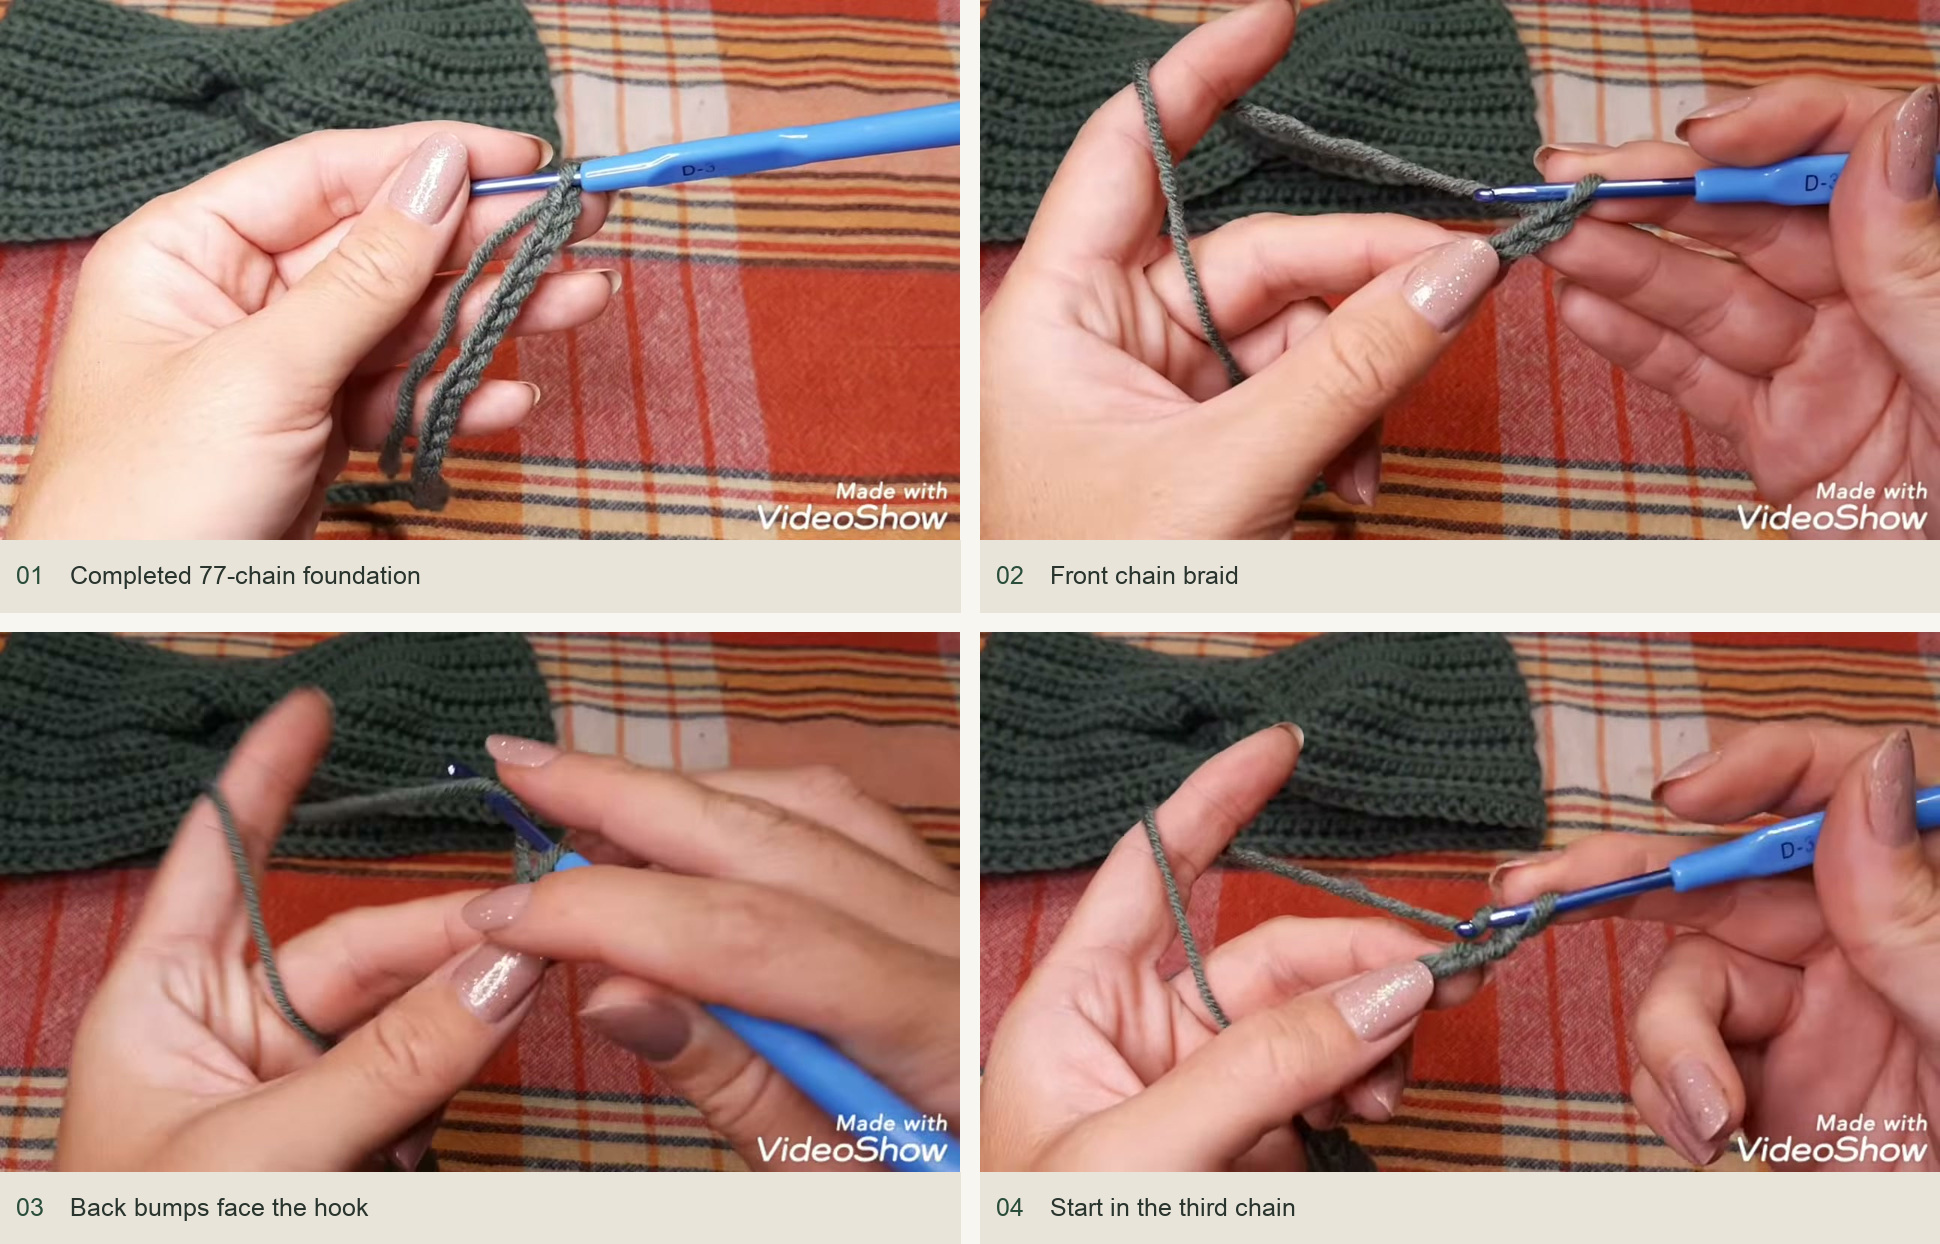
Numbered source sequence: 1. Completed 77-chain foundation; 2. Front chain braid; 3. Back bumps face the hook; 4. Start in the third chain. -
Work the first half double crochet row
Yarn over, insert beneath the next back bump and draw up a loop. Yarn over and draw through all three loops. Repeat into each remaining chain bump for 75 hdc. Count before turning: a missing foundation stitch changes the fit and makes every later row harder to compare.
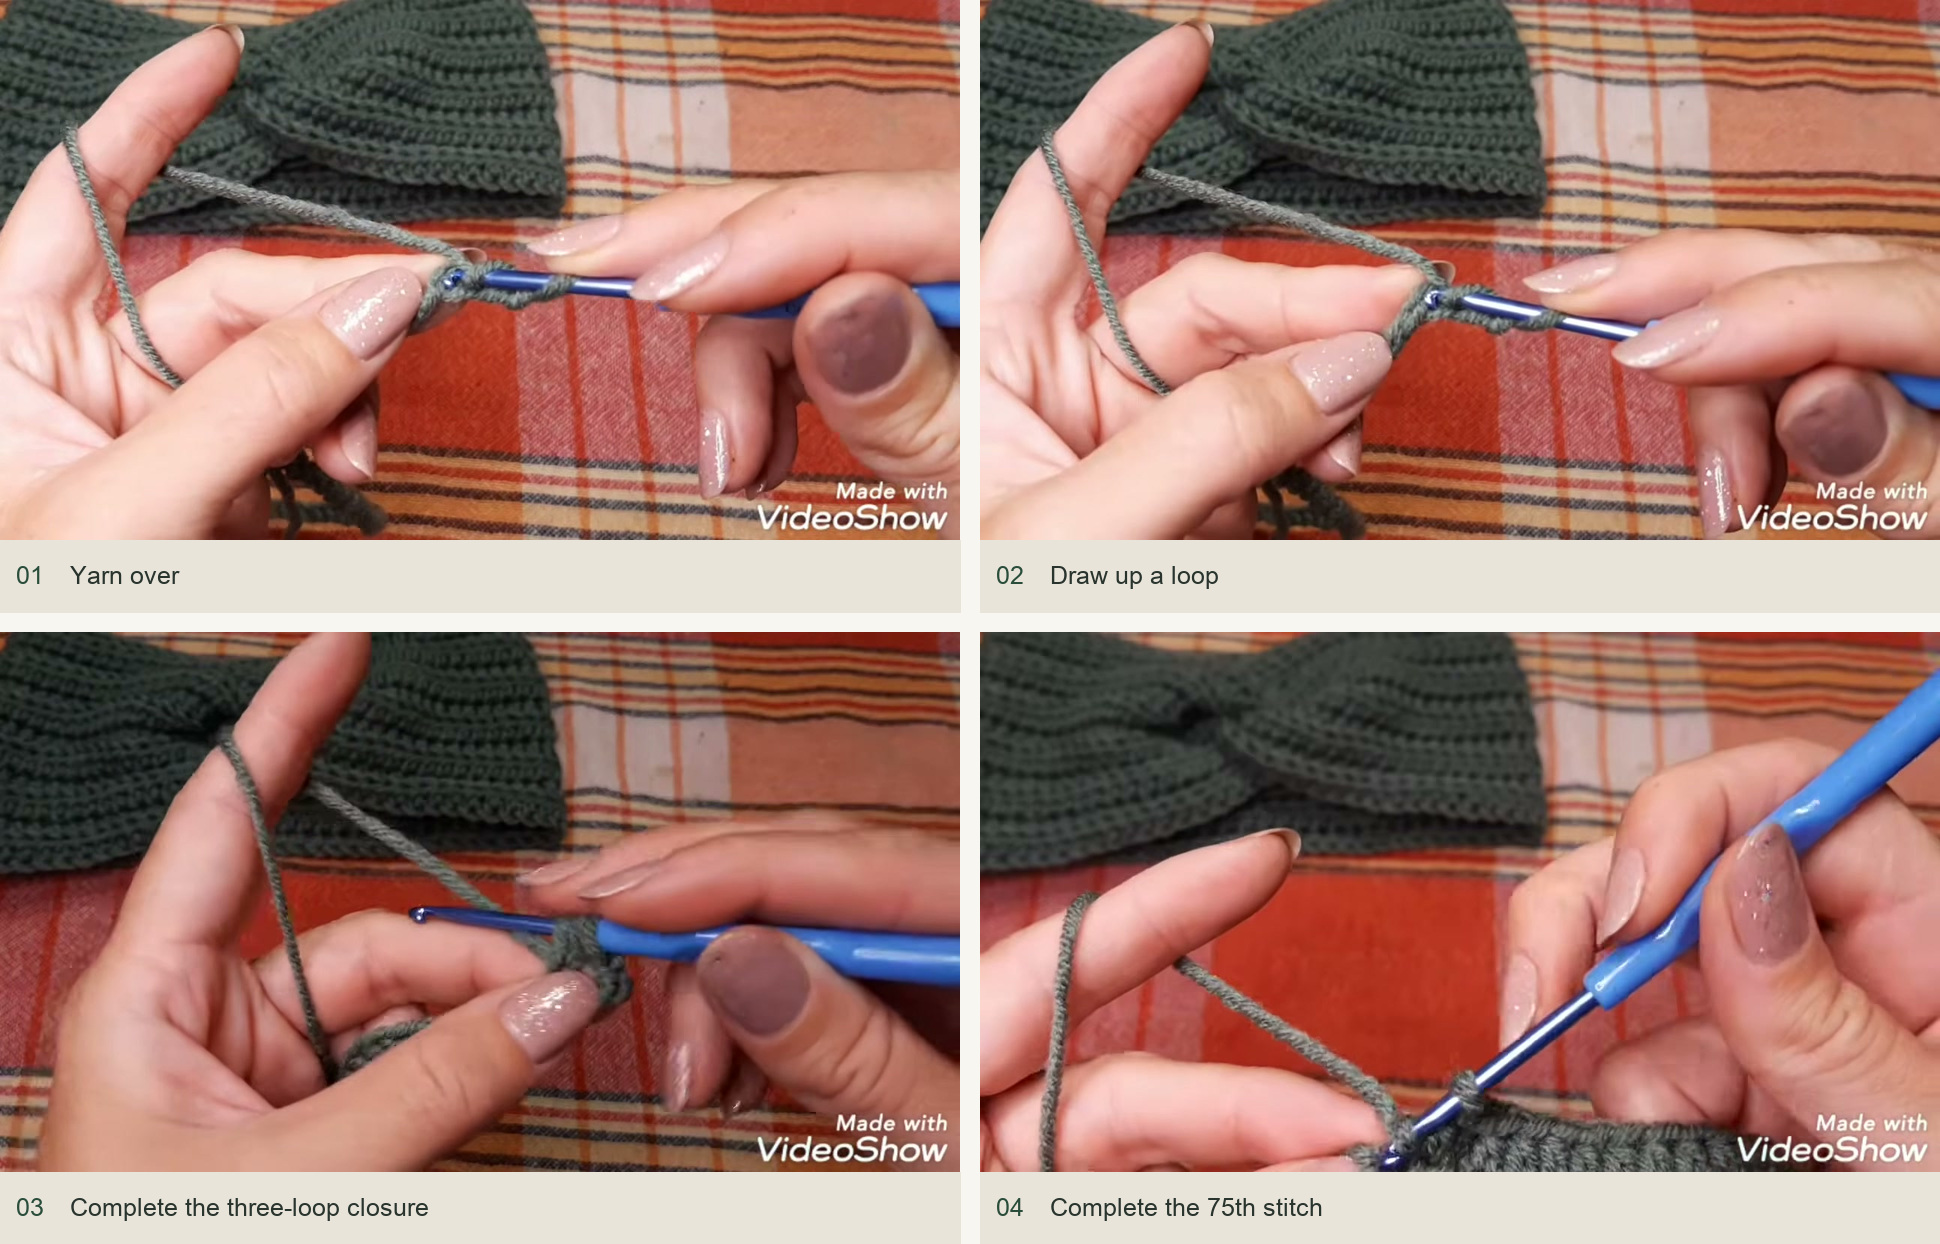
Numbered source sequence: 1. Yarn over; 2. Draw up a loop; 3. Complete the three-loop closure; 4. Complete the 75th stitch. -
Locate the backmost extra loop
Ch 2 and turn. A half double crochet has the familiar top V plus an additional horizontal bar. Vika works into the backmost of the three available strands, leaving the top V visible as a raised braid. Look from the side and identify that extra loop before starting the row. This is different from taking both strands of the top V.
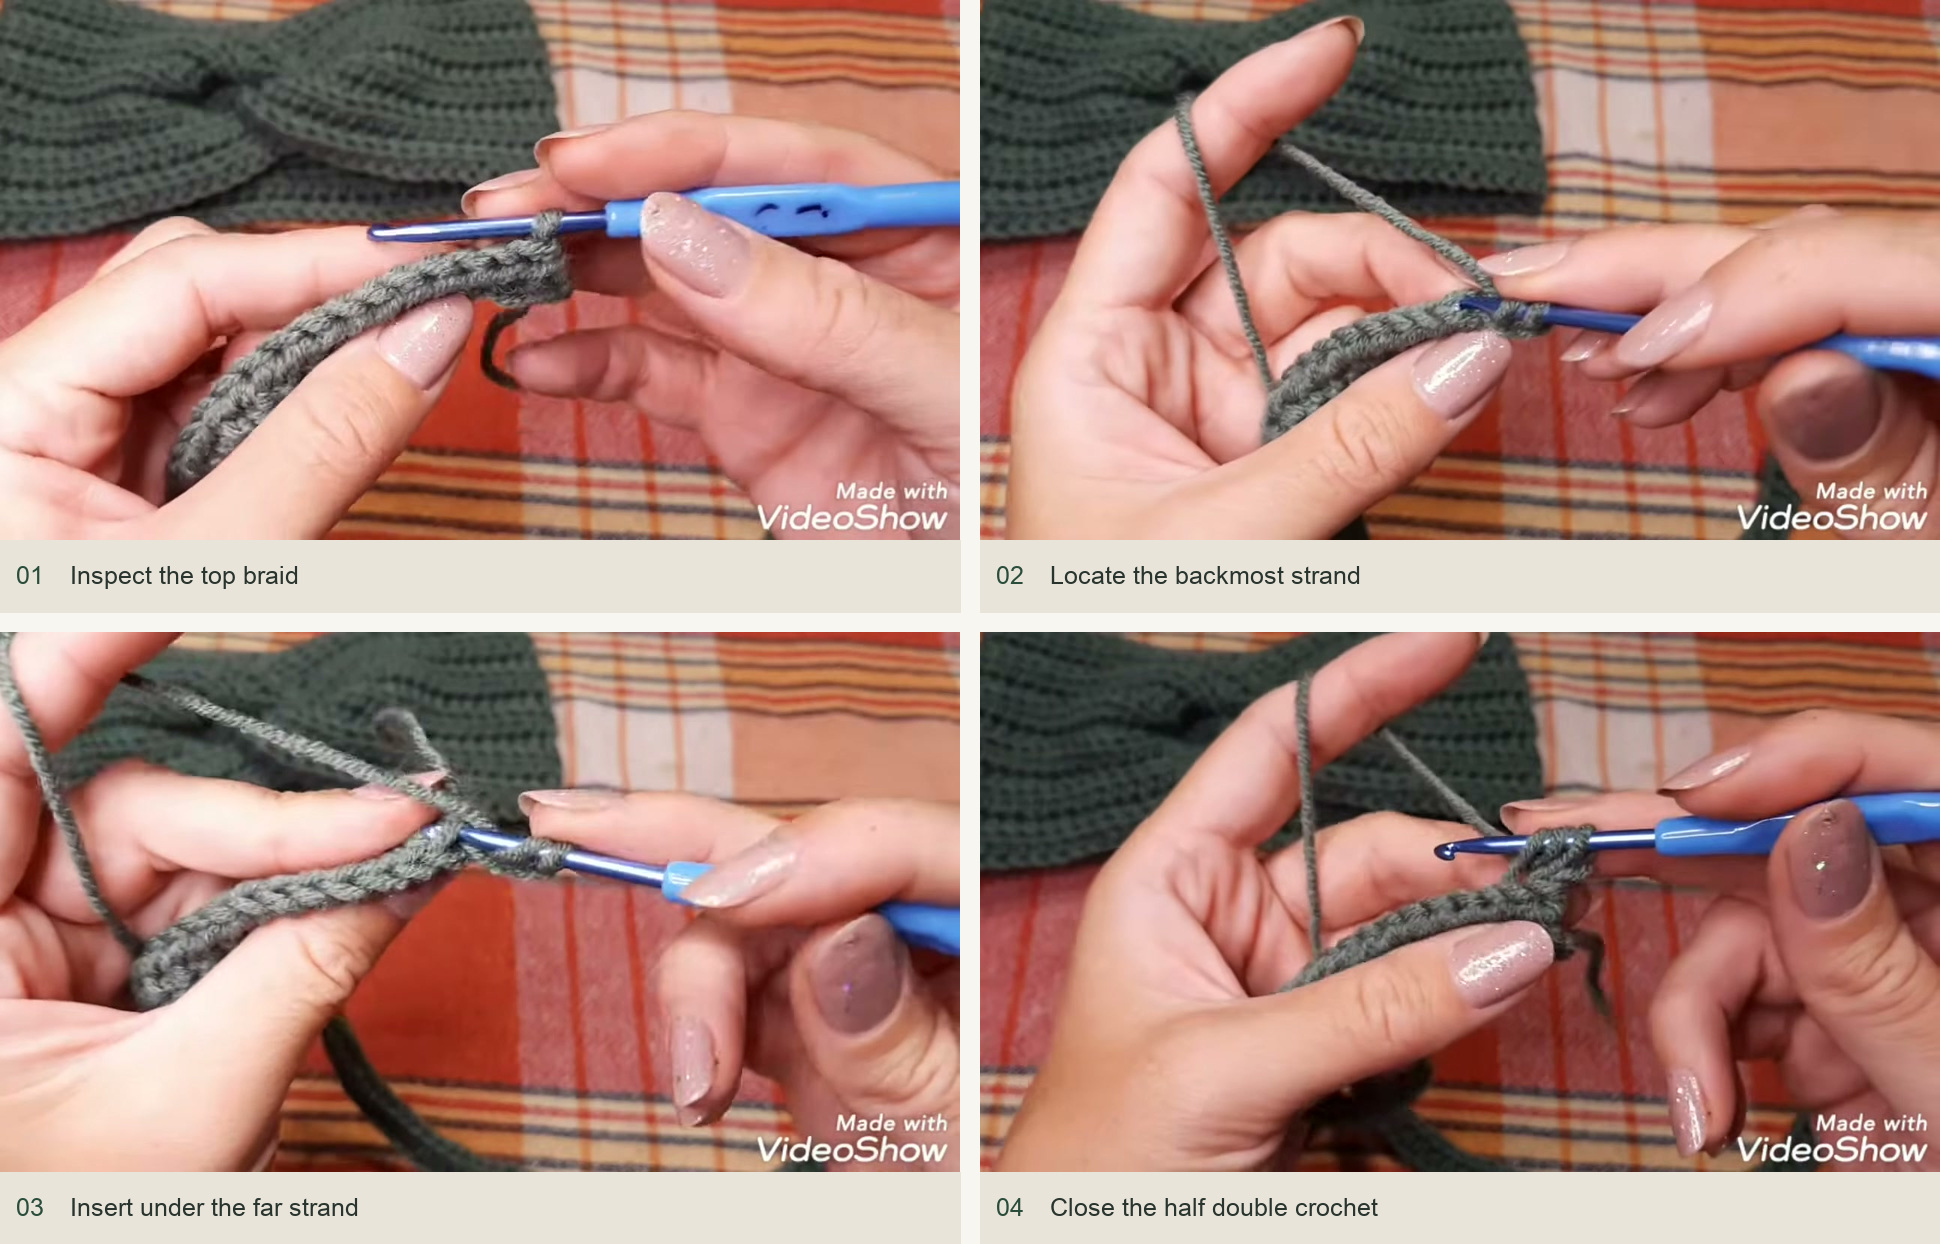
Numbered source sequence: 1. Inspect the top braid; 2. Locate the backmost strand; 3. Insert under the far strand; 4. Close the half double crochet. -
Keep the row ends complete
Make the first working hdc over the first actual stitch, not into a turning chain. Continue across the backmost loop for the body of the row. At the final stitch, Vika catches two strands to make a stronger edge. Count 75 hdc again. Marking the first and last actual stitch can help distinguish them from the two-chain rise.
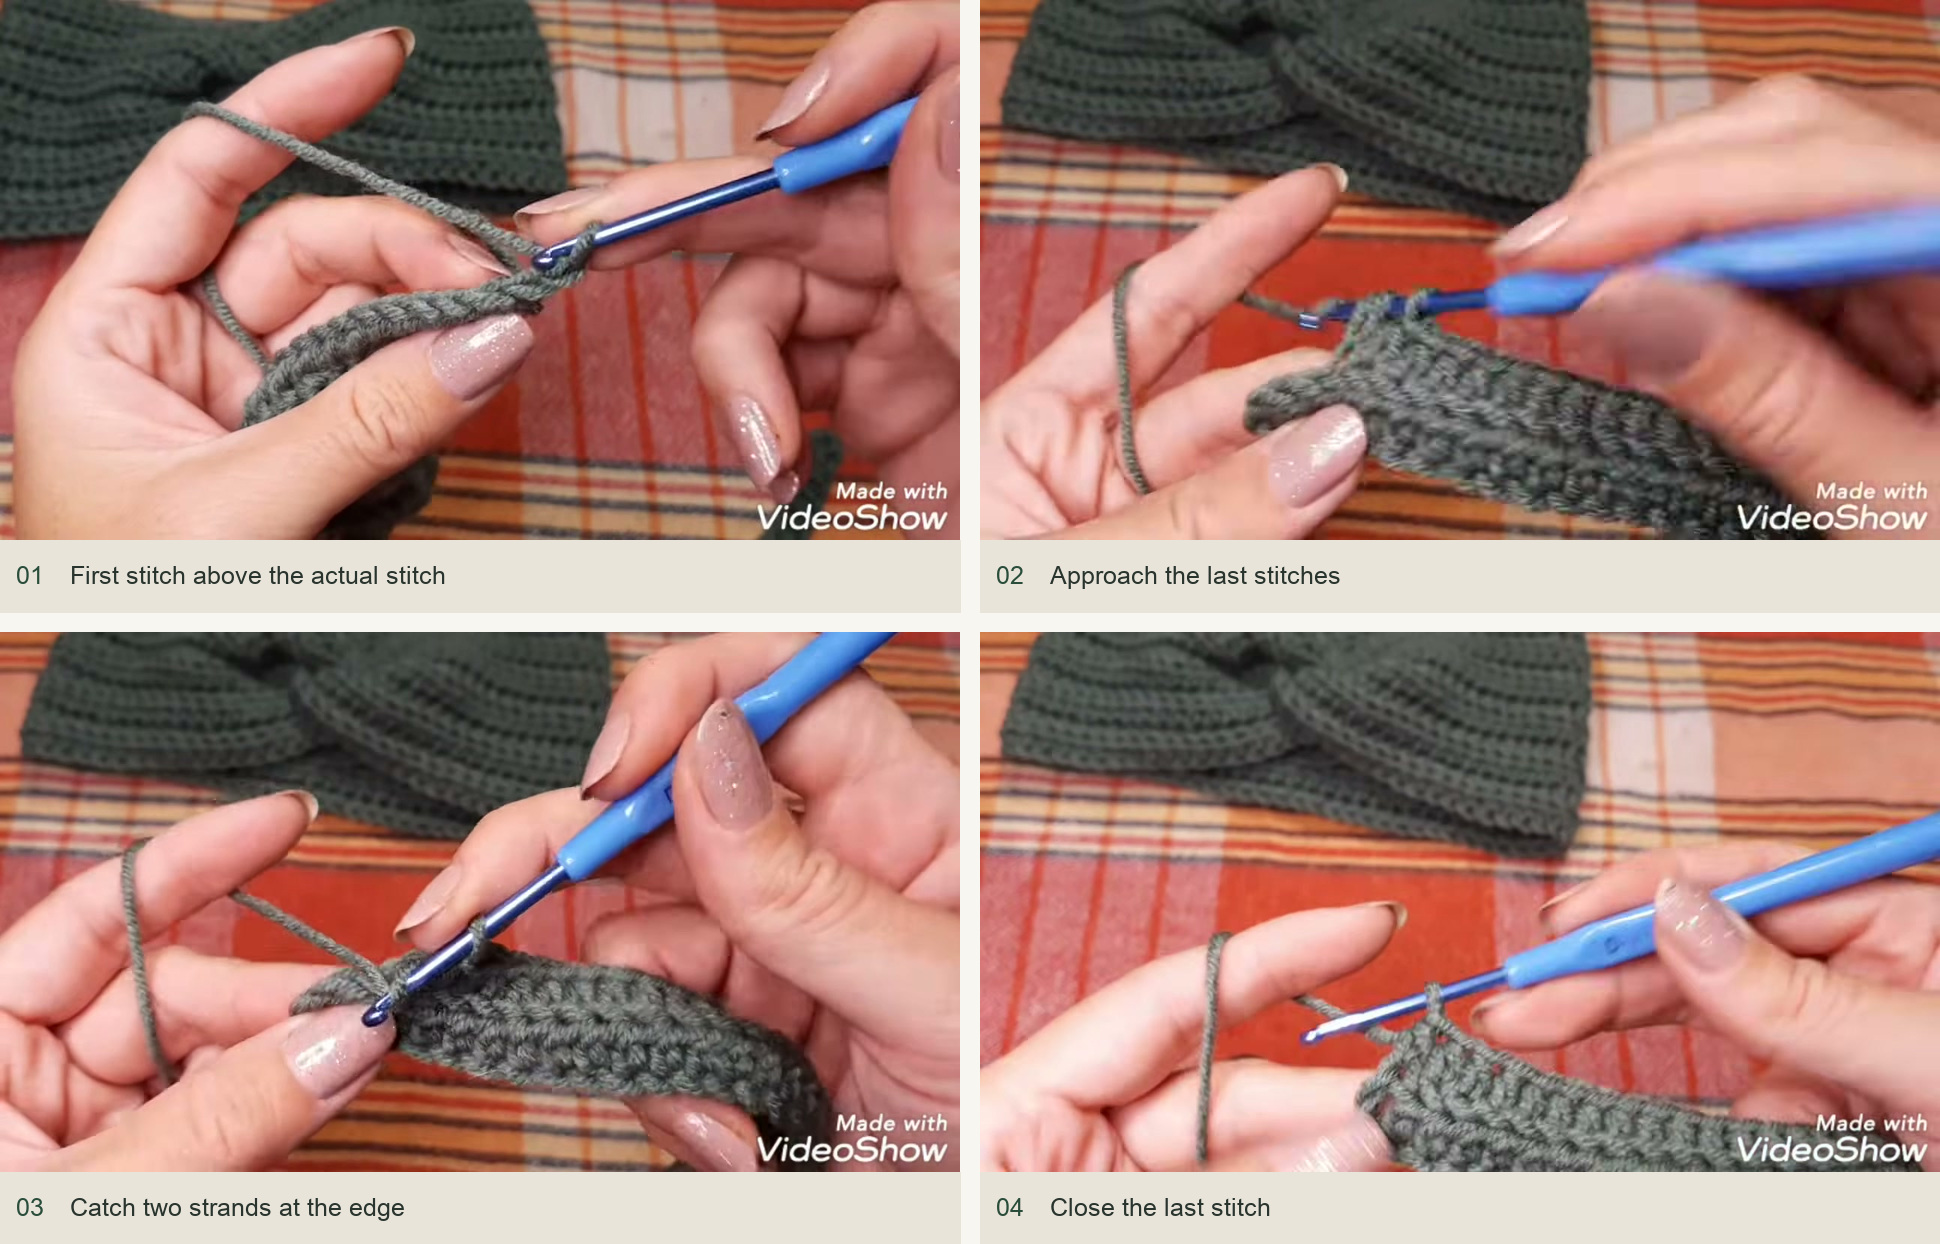
Numbered source sequence: 1. First stitch above the actual stitch; 2. Approach the last stitches; 3. Catch two strands at the edge; 4. Close the last stitch. -
Repeat to the chosen depth
Continue ch 2, turn and 75 hdc, maintaining the same loop choice and reinforced last stitch. Finish on an even number of rows so the ridges begin and end cleanly. The adult sample ends after row 14, with seven visible ridge bands. Lay the strip flat and compare the long edges; neither should be noticeably shorter or tighter than the other.
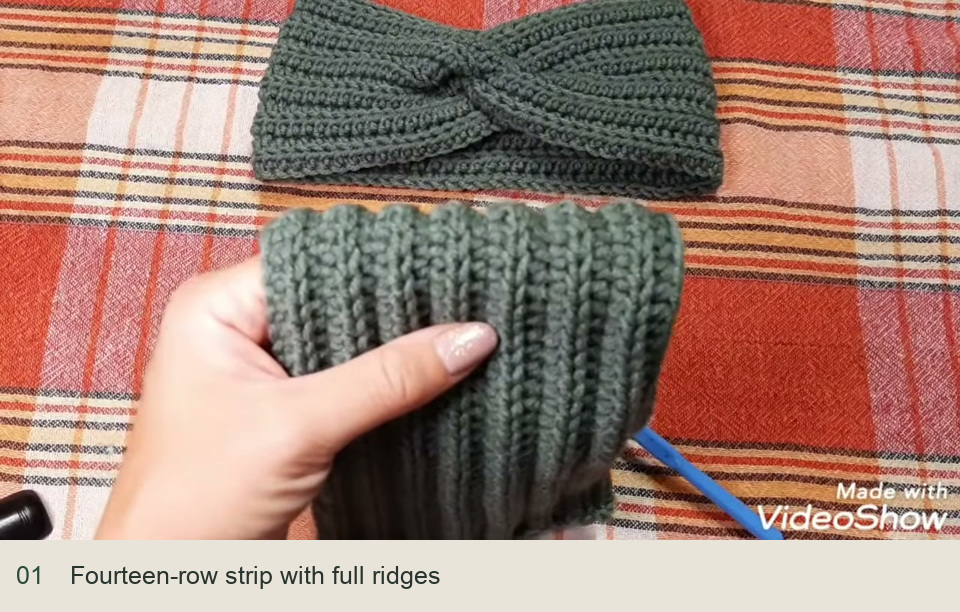
Source close-up: 1. Fourteen-row strip with full ridges.
Fold the interlocking front twist
-
Choose the outside
Vika uses the face visible after the last row as the right side. Bring the two short ends together with that face turned inward. The join will be hidden when the band is turned right side out.
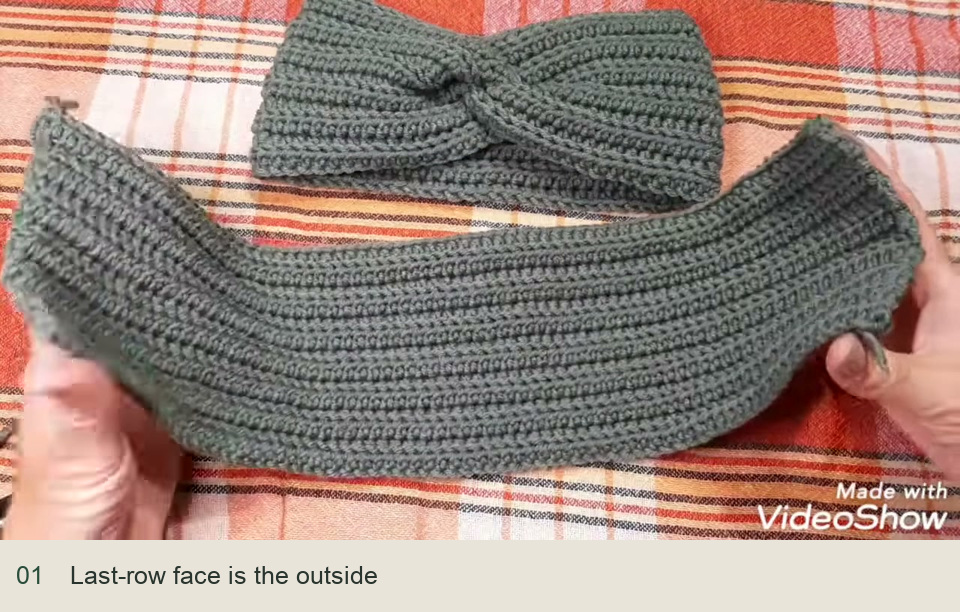
Source close-up: 1. Last-row face is the outside. -
Fold each short end in half
Fold both ends across their depth, making two U-shaped folds. Slide one folded end between the two layers of the other, so that their four layers alternate. Viewed from the edge, the stack interlocks rather than placing one folded end simply on top of the other. Keep the long strip untwisted behind this small folded area.
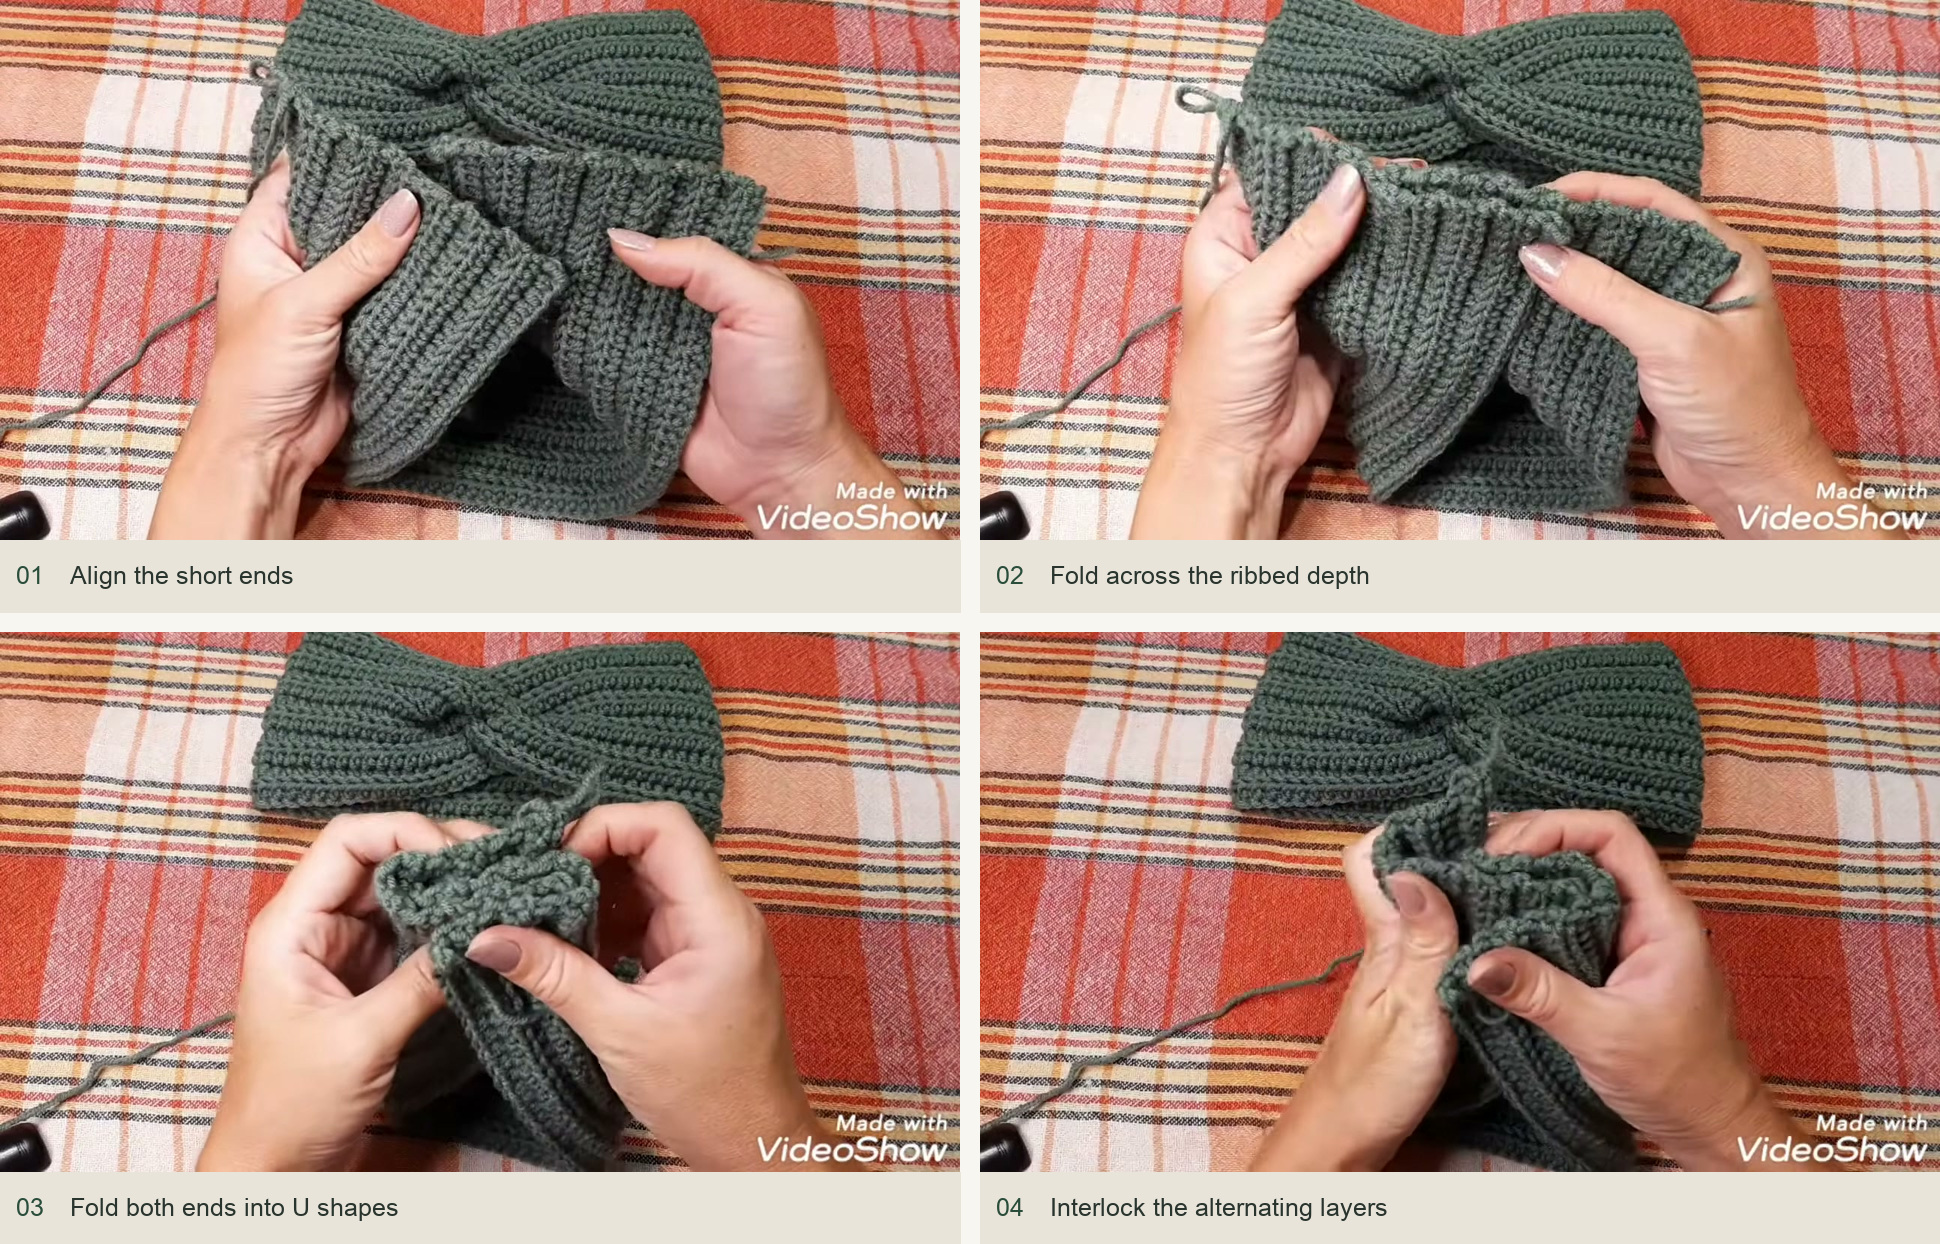
Numbered source sequence: 1. Align the short ends; 2. Fold across the ribbed depth; 3. Fold both ends into U shapes; 4. Interlock the alternating layers. -
Join through all four layers
Use the working loop and hook to draw the yarn through all four layers along the short edge. Make the joining passes deep enough to catch every layer; a surface-only join can leave an inner flap unsecured. Keep the folds lined up as you move across. The close-up sequence below shows the placement before the bundle is turned.
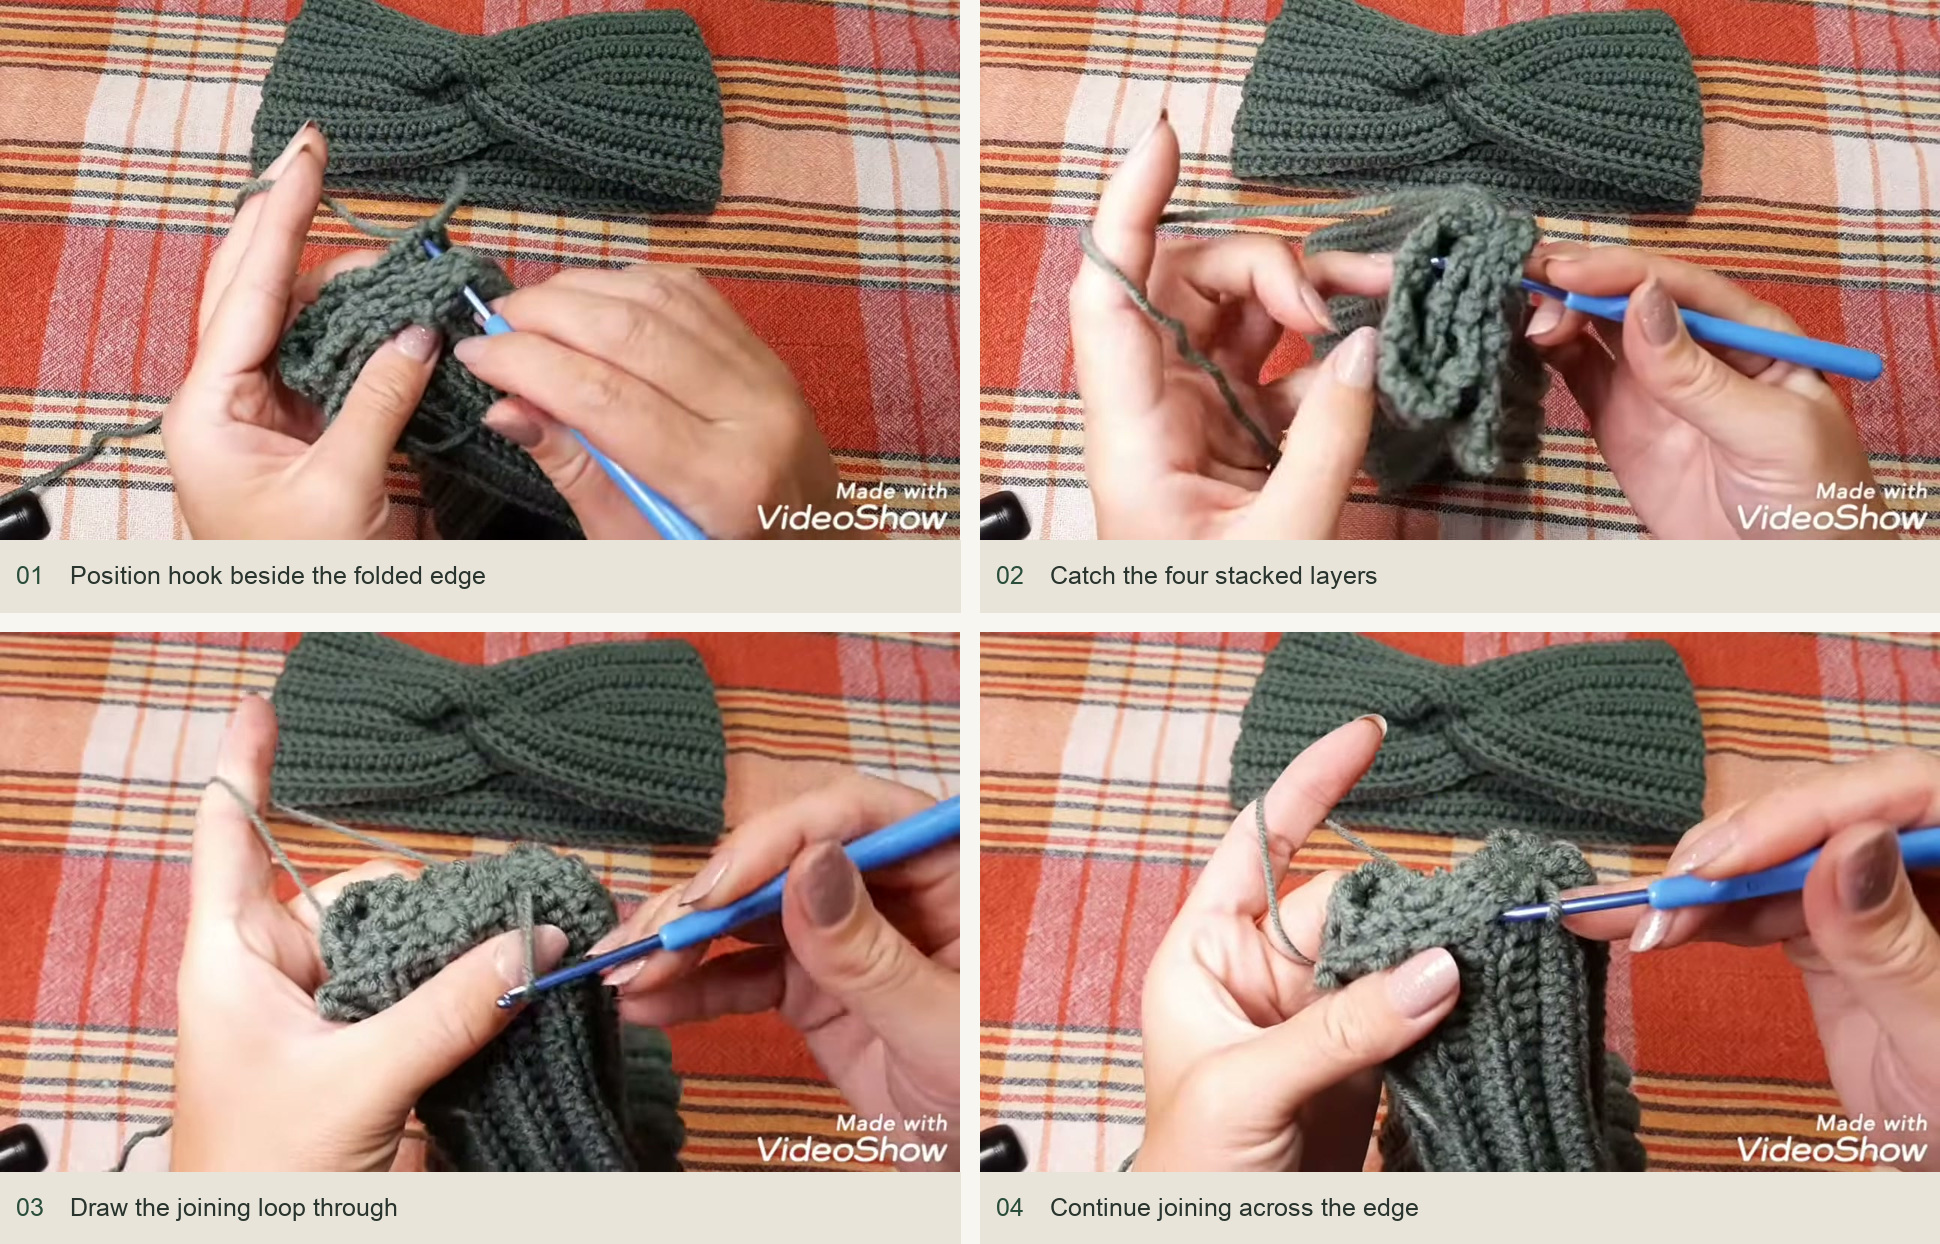
Numbered source sequence: 1. Position hook beside the folded edge; 2. Catch the four stacked layers; 3. Draw the joining loop through; 4. Continue joining across the edge. -
Secure and turn
Fasten securely at the end of the join. Vika brings the beginning and ending yarn tails together, ties them and tucks them into the inside. Bury the tails so the knot does not sit against the forehead. Turn the band right side out and spread the ribs around the center twist. The folded seam should disappear inside the bow-like gather.
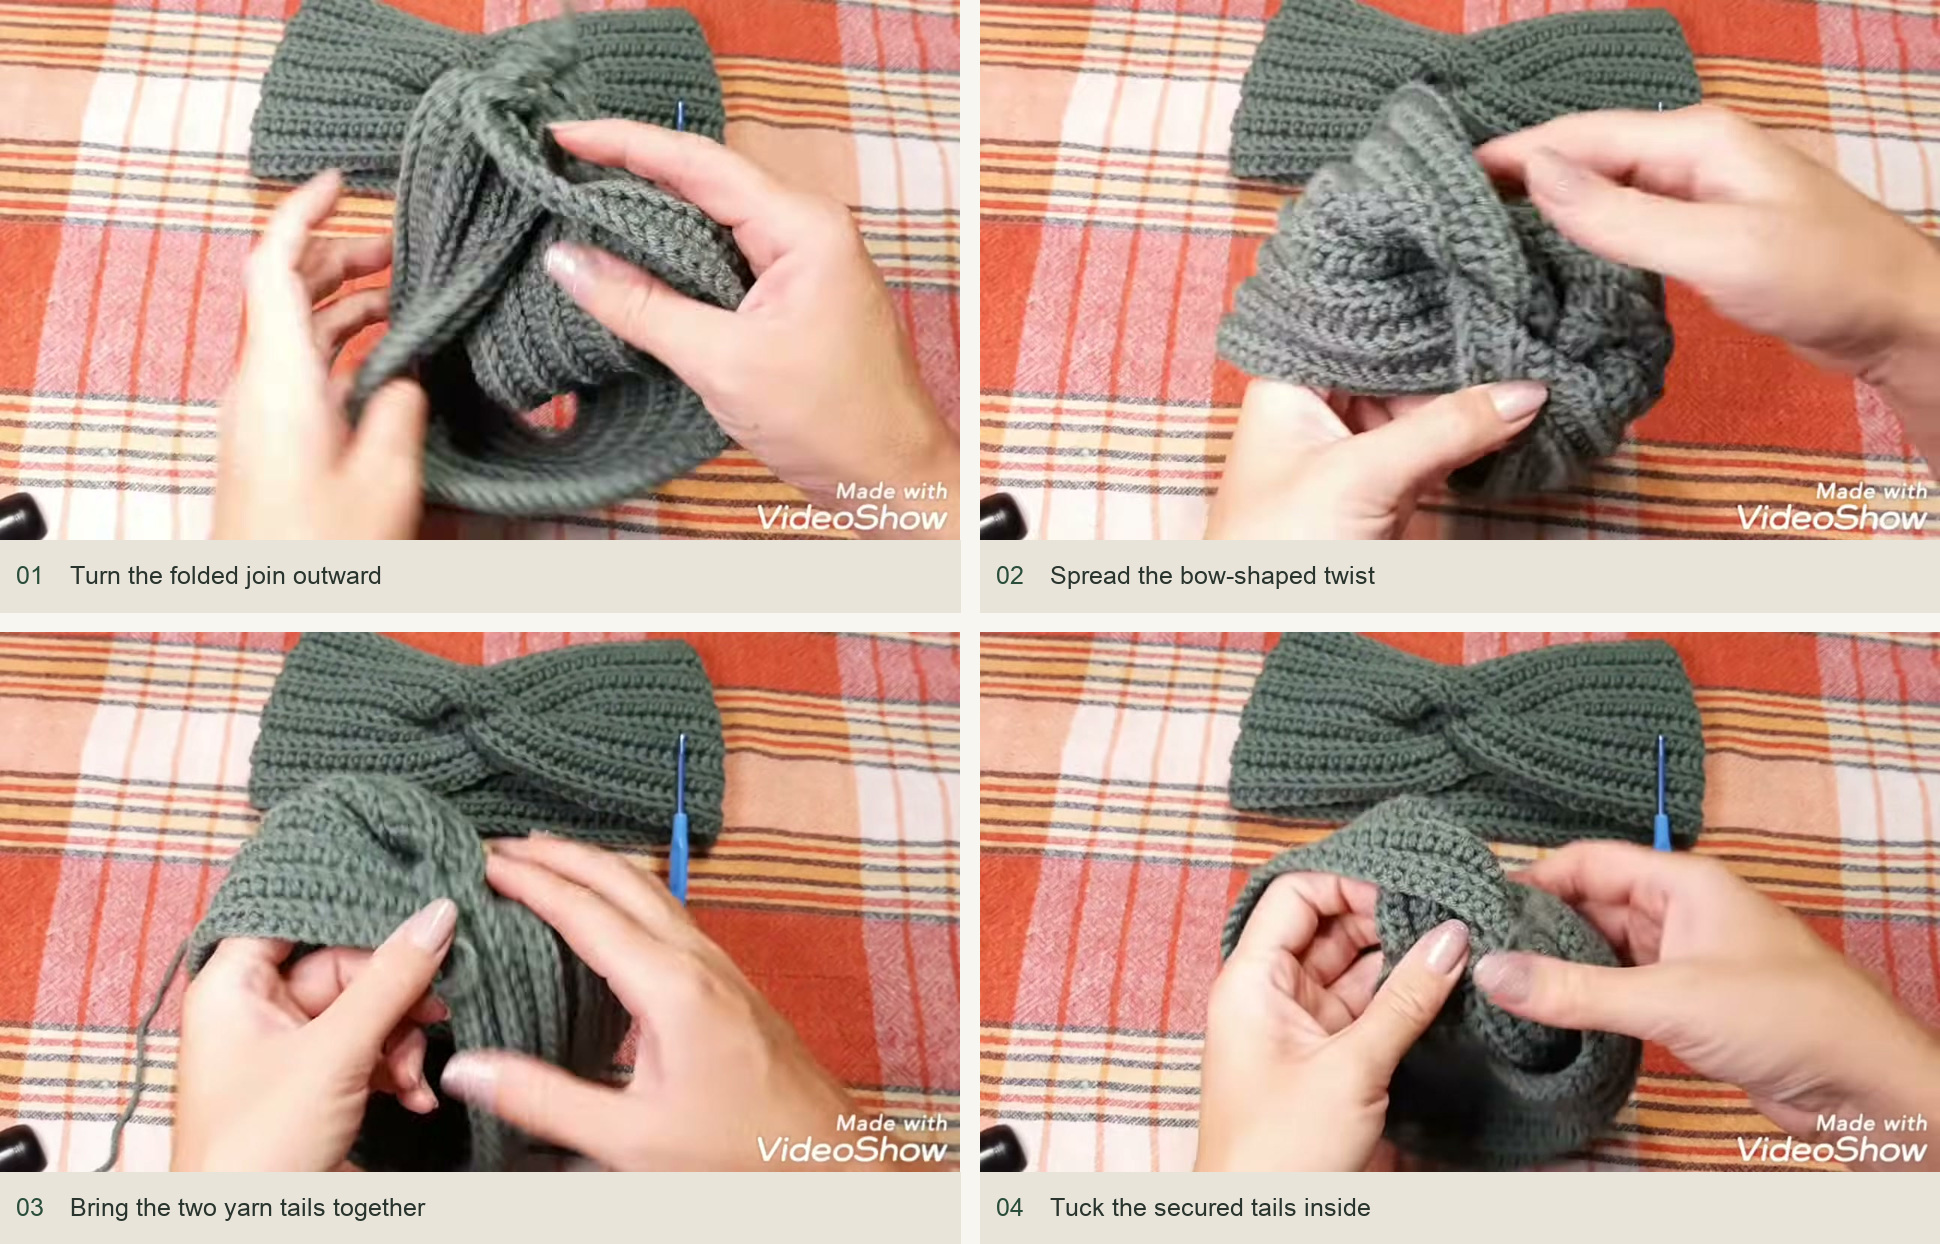
Numbered source sequence: 1. Turn the folded join outward; 2. Spread the bow-shaped twist; 3. Bring the two yarn tails together; 4. Tuck the secured tails inside.
Fit and finishing checks
Put the headband on with the twist centered. It should cover the ears without pressing hard at the join. If the strip feels stiff before joining, correct the tension or hook size first; pulling hard on the finished band will not reliably soften dense stitches. If it fits too loosely, adjust the strip length while keeping the row edges straight and the depth consistent.
Check the center from both sides. The bow should look balanced, with no loose inner flap or exposed seam. If one side is higher, undo the join and align the folds again. If a gap appears inside the fold, check whether a joining pass missed one of the four layers. Do not try to hide an unsecured layer by stretching the twist over it.
Inspired by Vika Bosch’s video tutorial.
Save this pattern for later
Pin it to one of your boards so it’s ready when you have a free evening and the right yarn.