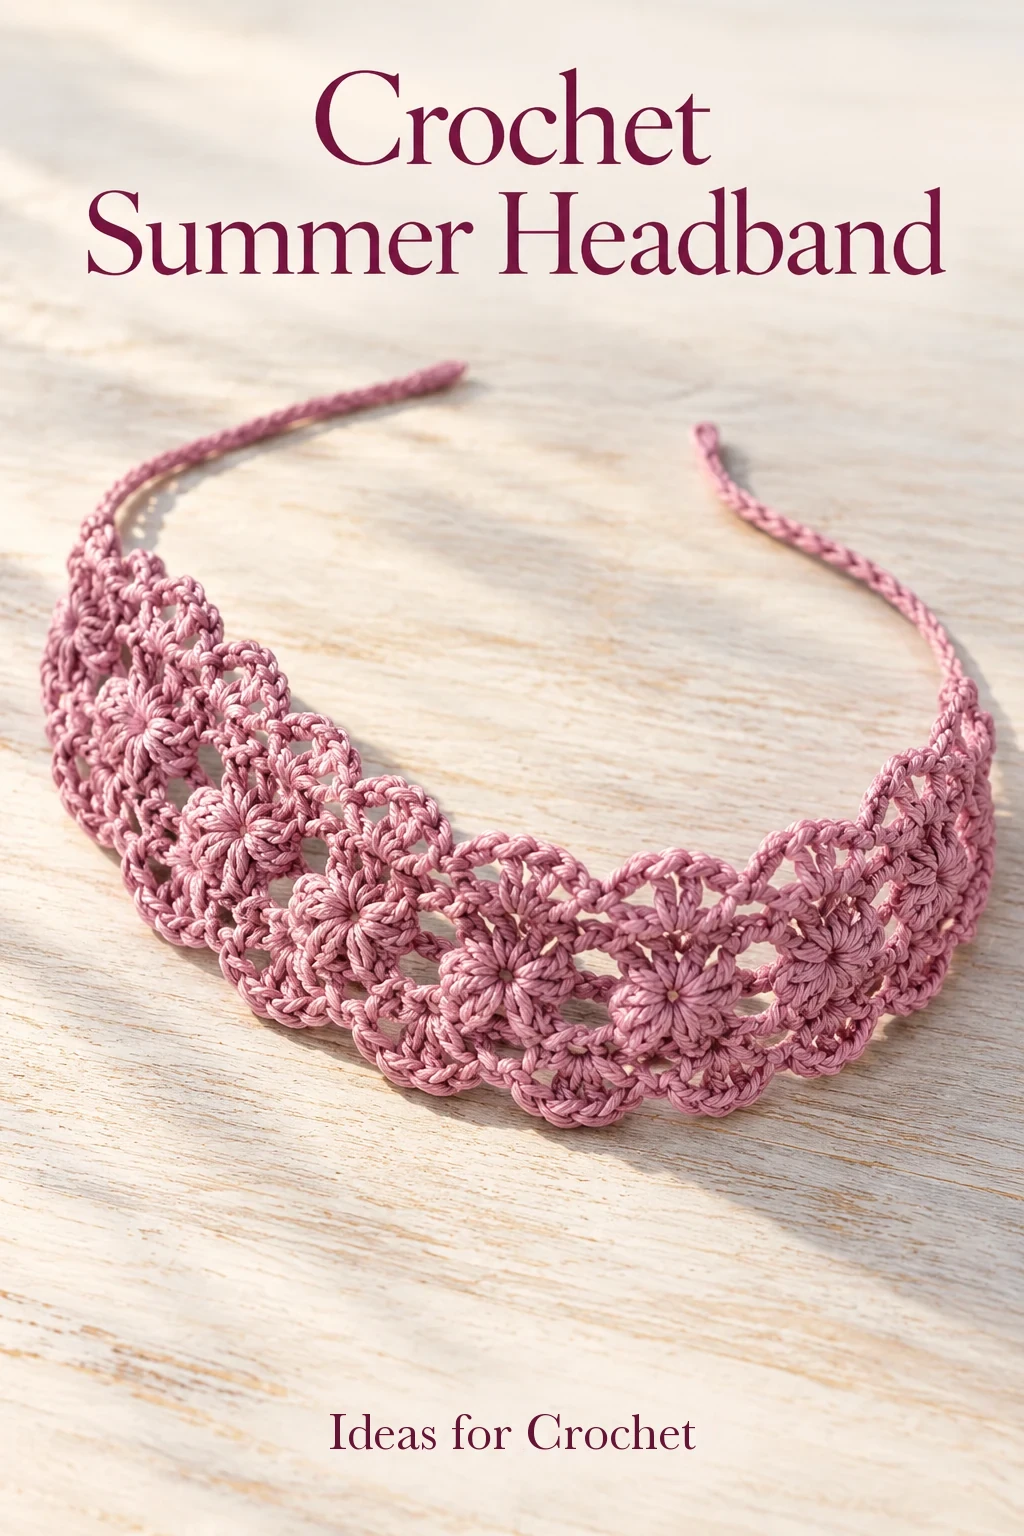
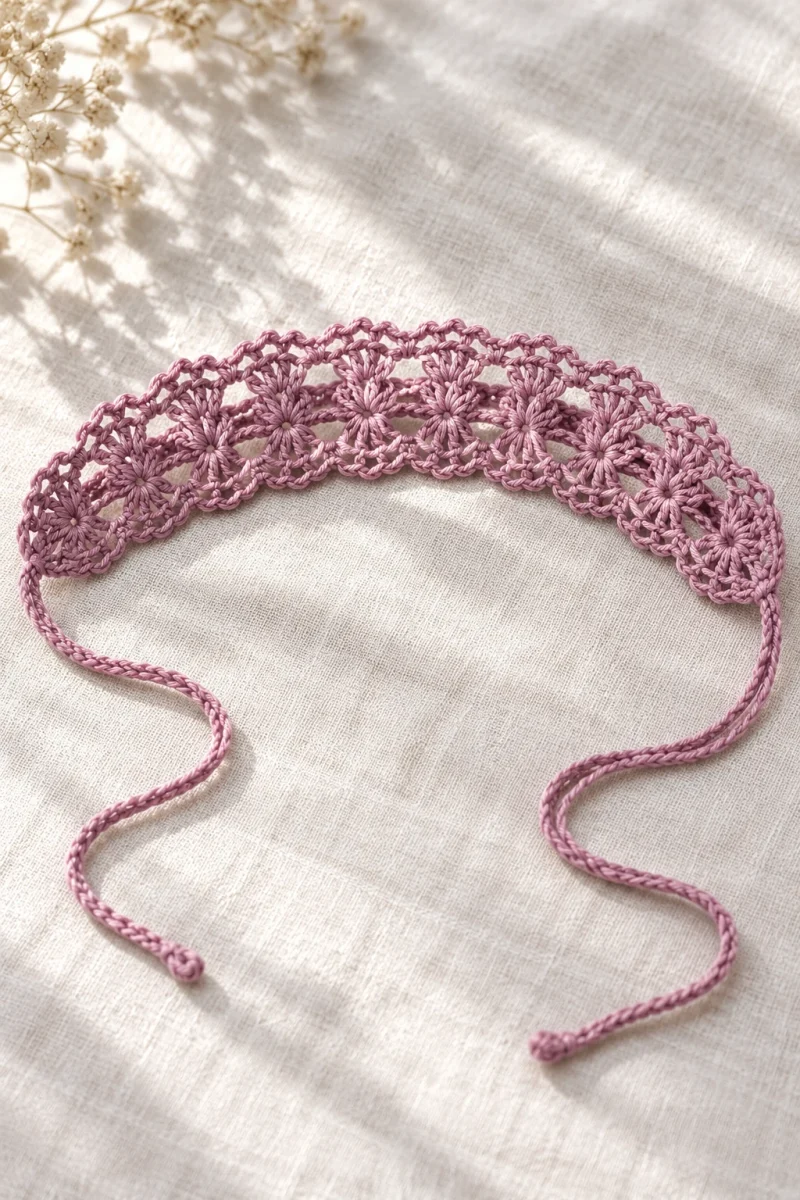
This crochet summer headband starts as a narrow strip of connected shells, then gains scalloped lace along both sides. Fine cotton gives the fans a clear outline, while separate ties let you adjust the fit.
Materials and fit
Choose a smooth mercerized cotton with enough body to show the scalloped fans. Nataly demonstrates rose and mint versions in her chosen cotton and uses a 2.75 mm hook. She deliberately chooses a smaller hook than the yarn would usually suggest so the headband has structure. You also need scissors, a needle for the ends and extra matching yarn for the twisted ties. Ribbon or crochet-chain ties are alternatives mentioned in the lesson.
The central strip has 30 shell rows and measures about 40 cm in the demonstrated yarn. That is the decorative section, not a closed head circumference. Try it around the front and sides of your head before adding the border. The gap at the back is completed by the ties. Different yarn and tension change both the length and width; use the 40 cm measurement as a sample reference rather than assuming 30 rows will fit everyone.
| Part | Count to follow |
|---|---|
| Starting chain | 12 chains |
| Central shell | 3 dc, ch 1, 3 dc in one opening |
| Shell strip | 30 rows, approximately 40 cm in the sample |
| Side fans | 8 dc per fan |
| Rounded end in openwork round | 7 dc separated by ch 1 |
| Final edging | Small ch-3 arches, with contracted joins between fans |
Make the central shell strip
-
Form the first shell
Ch 12 and position the first shell in the fourth foundation chain as shown in the tutorial. Keep the little unused chain tail at the end rather than working across the whole chain. Work 3 dc, ch 1 and 3 dc into that same opening. Check the reference close-up for the foundation orientation: the first row is one six-dc shell, not a row of twelve separate stitches.
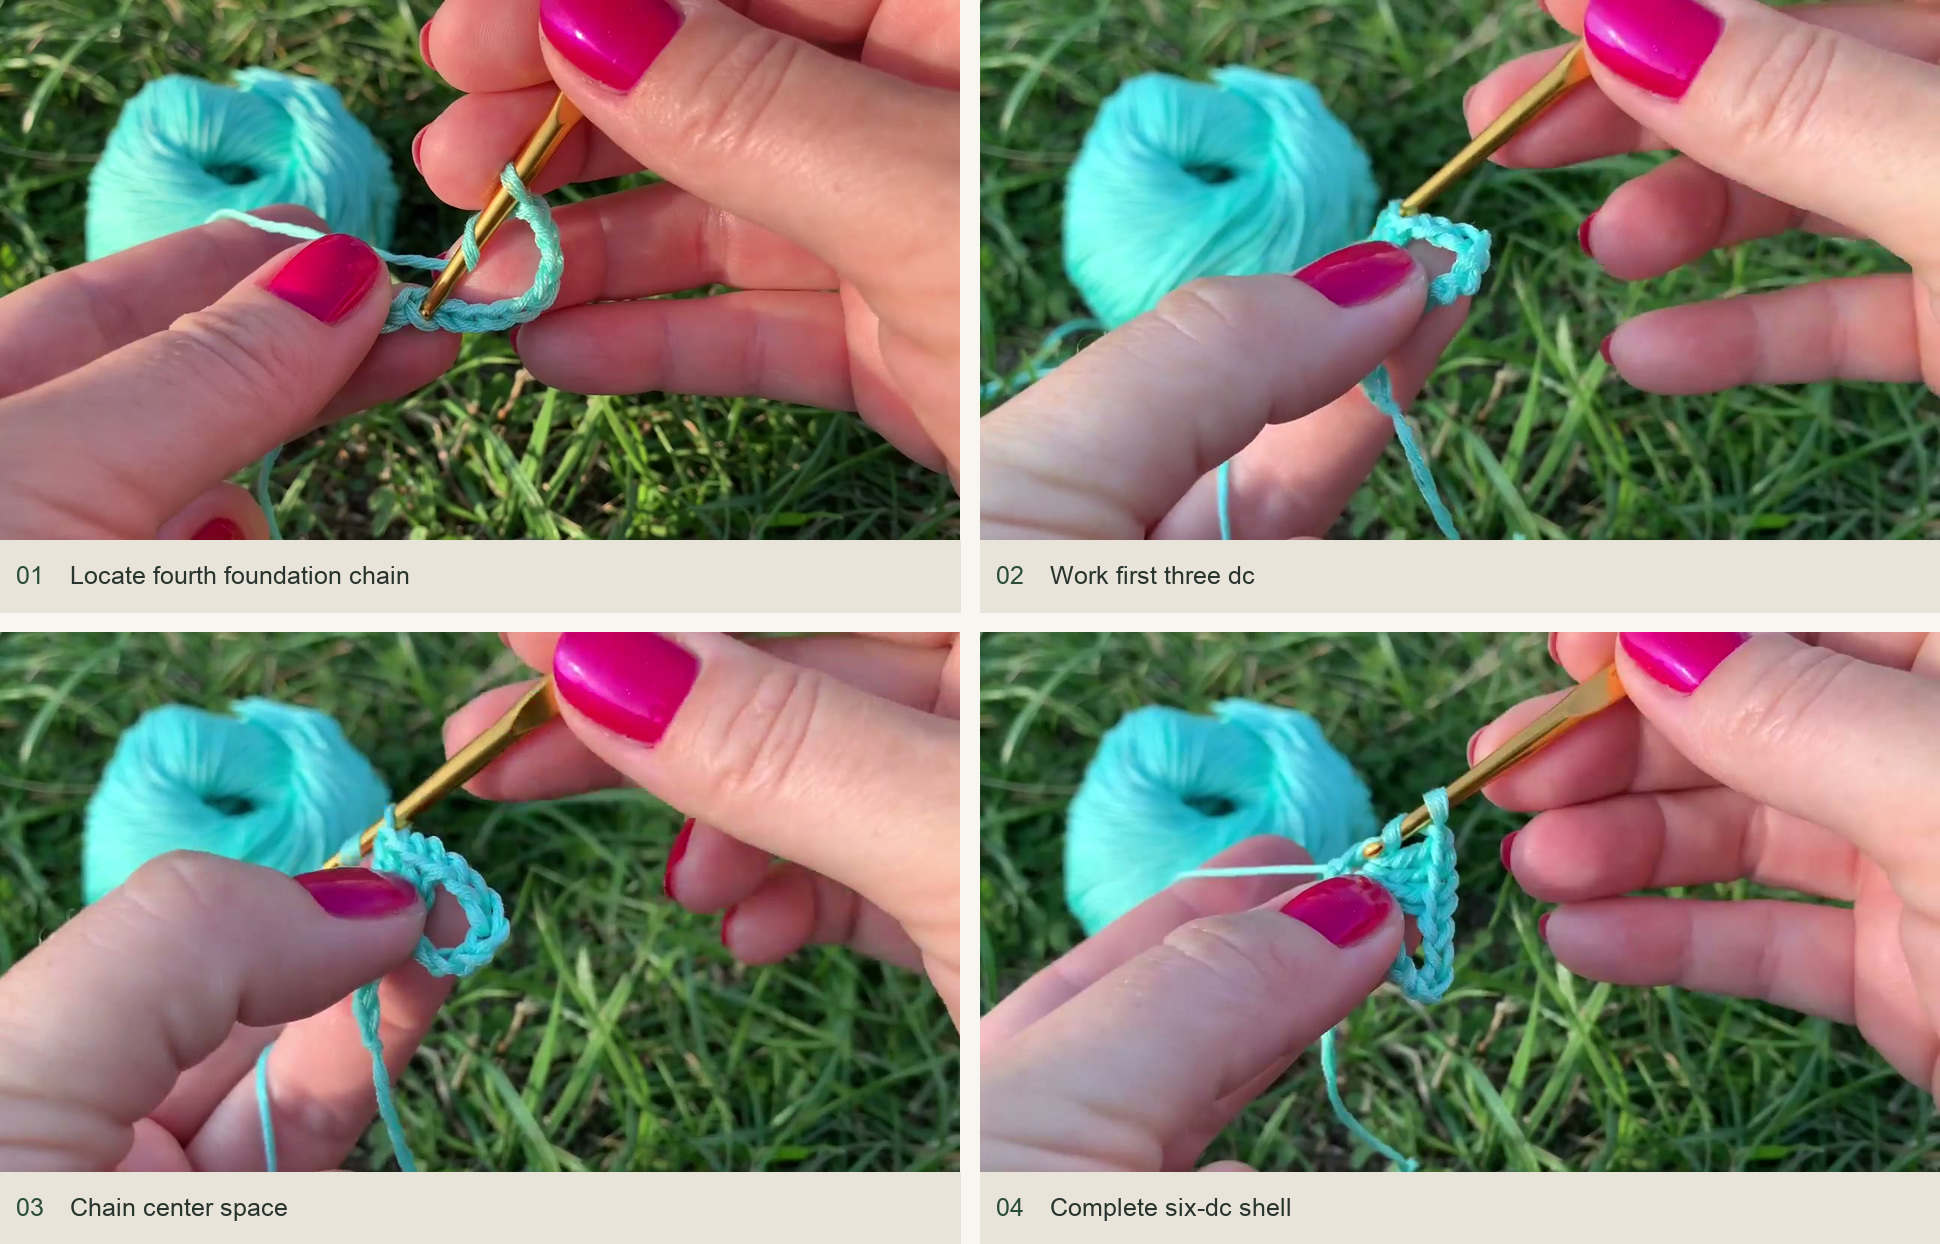
Source demonstration: Locate fourth foundation chain → Work first three dc → Chain center space → Complete six-dc shell -
Turn with a tall side loop
Ch 5 and turn. Into the ch-1 center of the preceding shell, work 3 dc, ch 1 and 3 dc. The turning chain forms a side arch; do not accidentally include its chains in the shell’s six dc count.
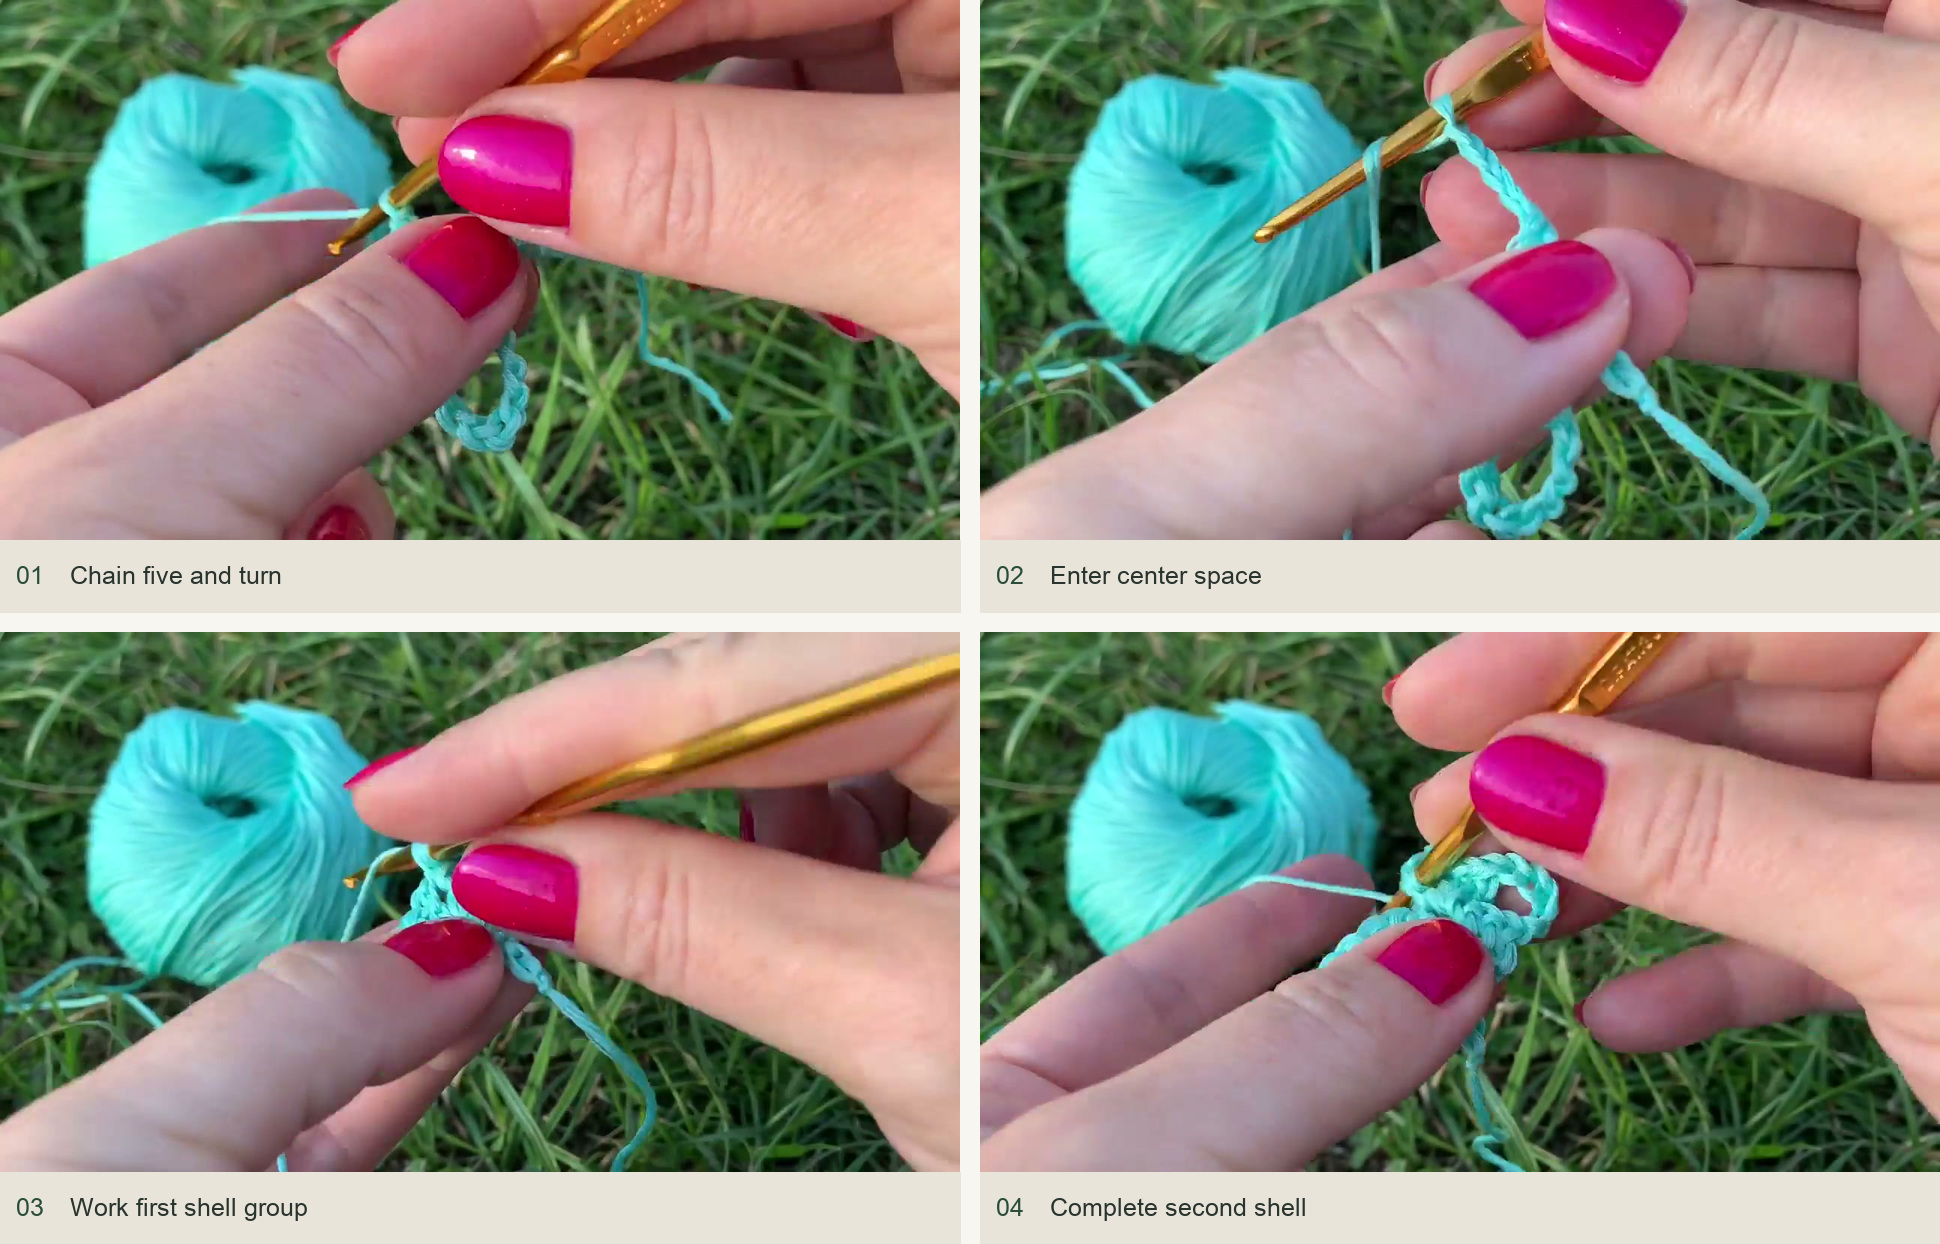
Source demonstration: Chain five and turn → Enter center space → Work first shell group → Complete second shell -
Repeat to the demonstrated length
Continue the same row: ch 5, turn, shell into the preceding shell’s center. Work 30 shell rows in total. Lay the strip flat and count the central openings one by one. Keep the chain-5 loops even, because the border later uses them as attachment points. Check its position on your head now, before the scallops make the strip wider.
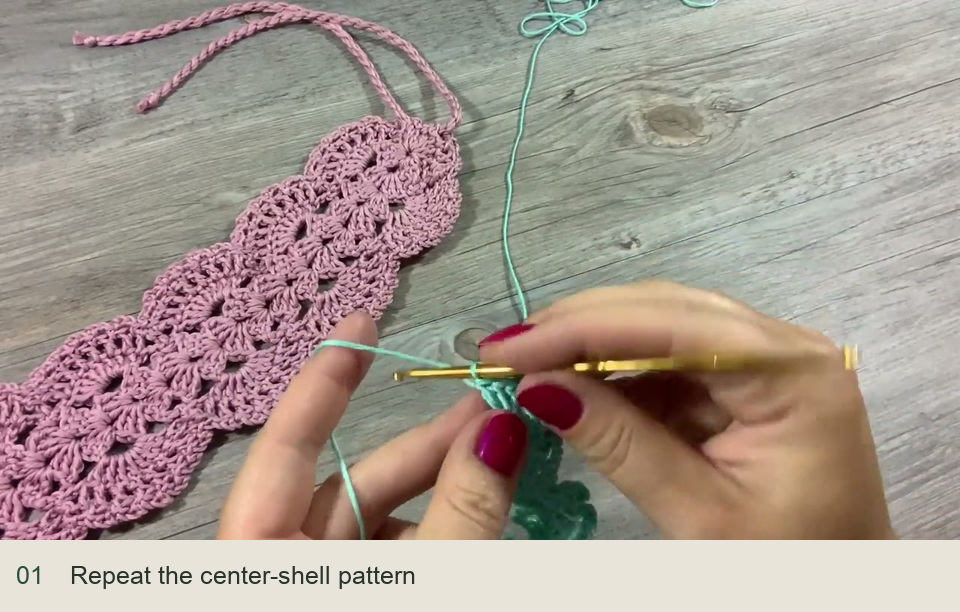
Source demonstration: Repeat the center-shell pattern The compact teaching strip shows the repeat; continue to the written 30-shell length.
Add the scalloped fans
-
Start the border along one side
After the last shell row, ch 1 and sc into the last dc. Ch 2, sc into the next side arch, ch 2, then work 8 dc into the following arch. Continue along the strip by alternating a sc anchor and an eight-dc fan, separating those groups with ch 2. Spread the fan stitches evenly inside each arch.
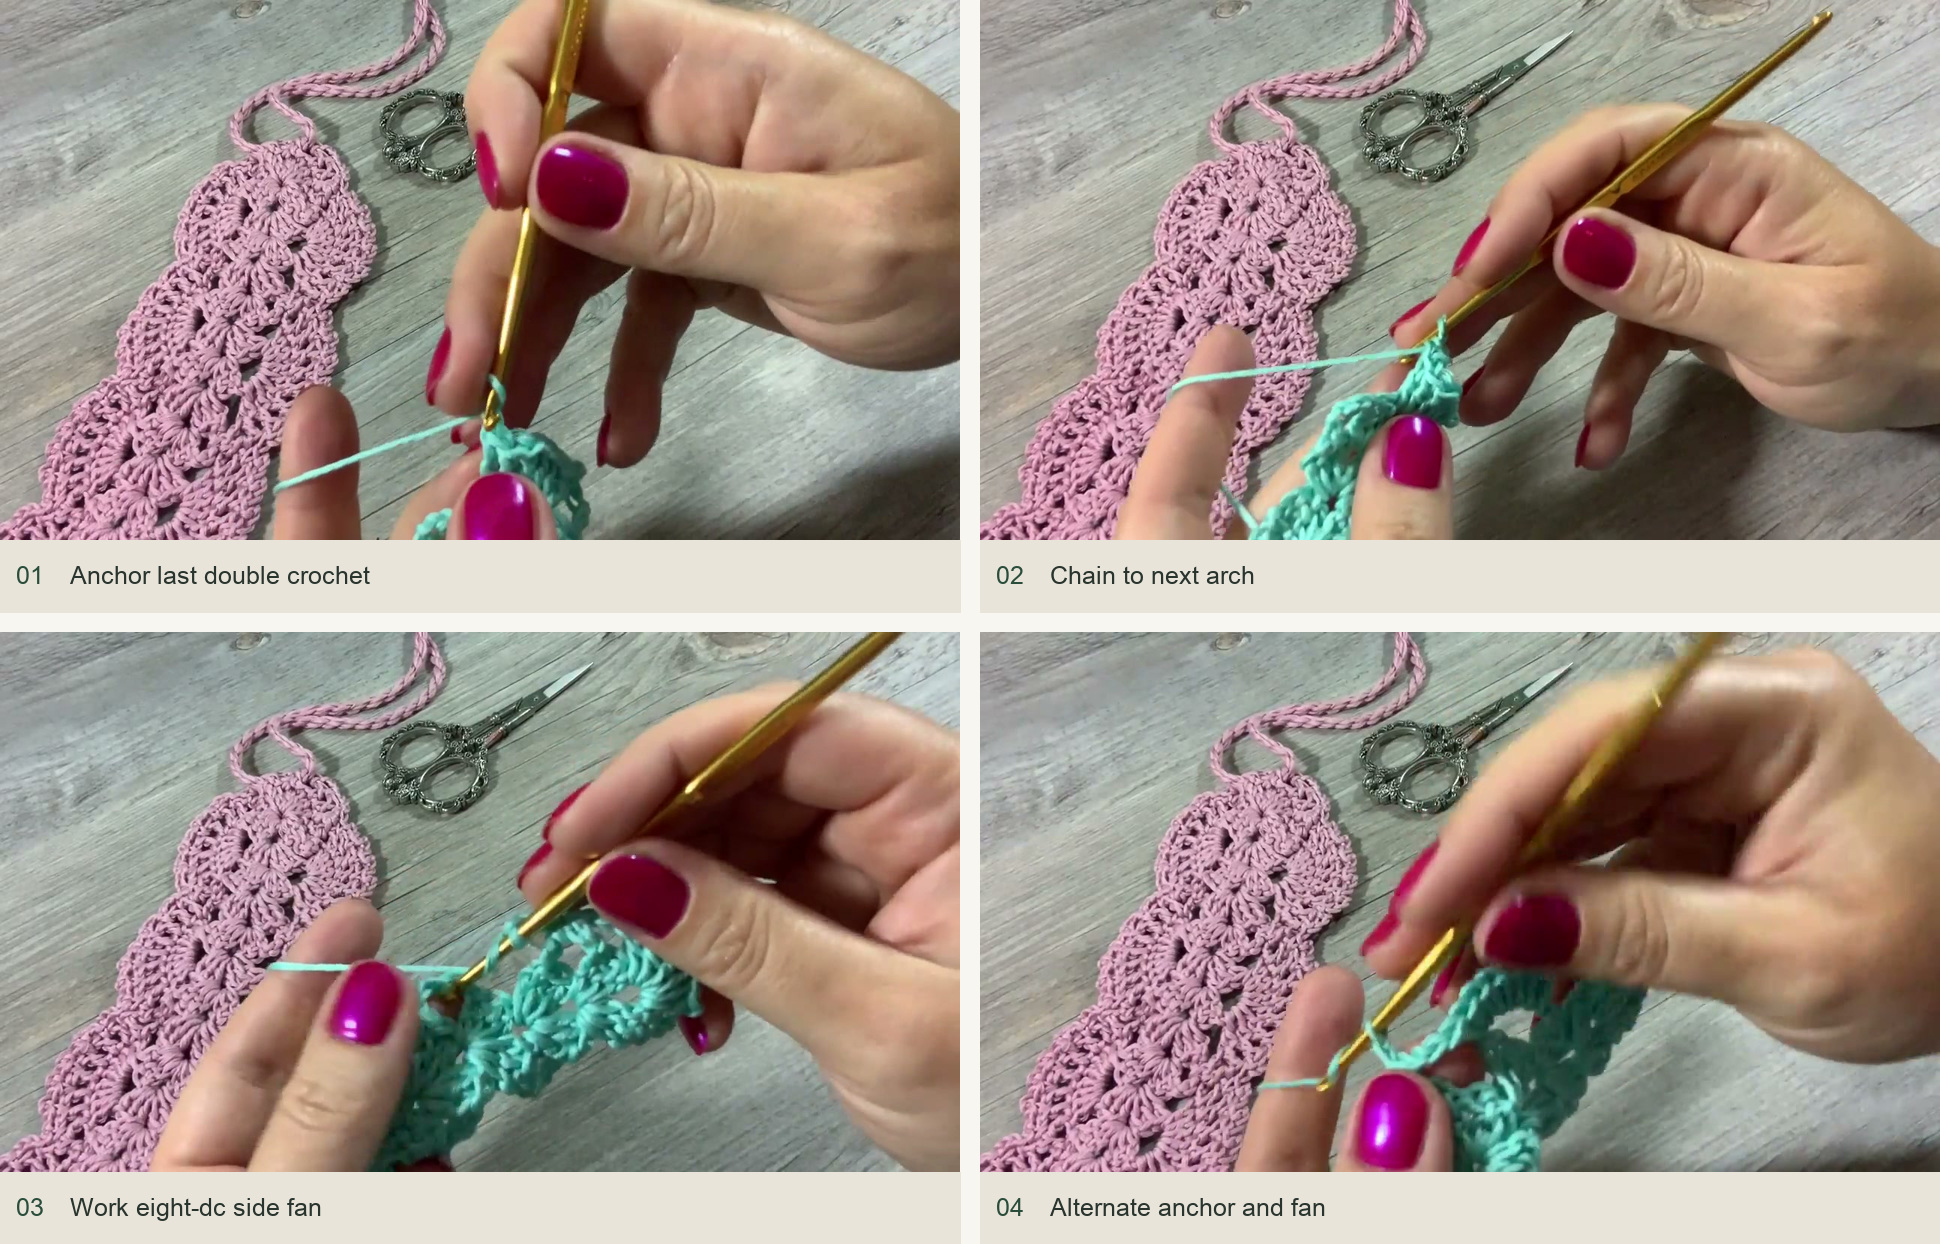
Source demonstration: Anchor last double crochet → Chain to next arch → Work eight-dc side fan → Alternate anchor and fan -
Turn around the short end
At the end, follow the tutorial’s shell turn: work 3 dc, ch 1 and 3 dc into the end opening. This carries the border around the narrow end without treating it as another eight-dc side fan. Continue along the opposite long edge with the same alternating anchors and fans. Mirror the end shell at the other tip, then connect to finish this border circuit.
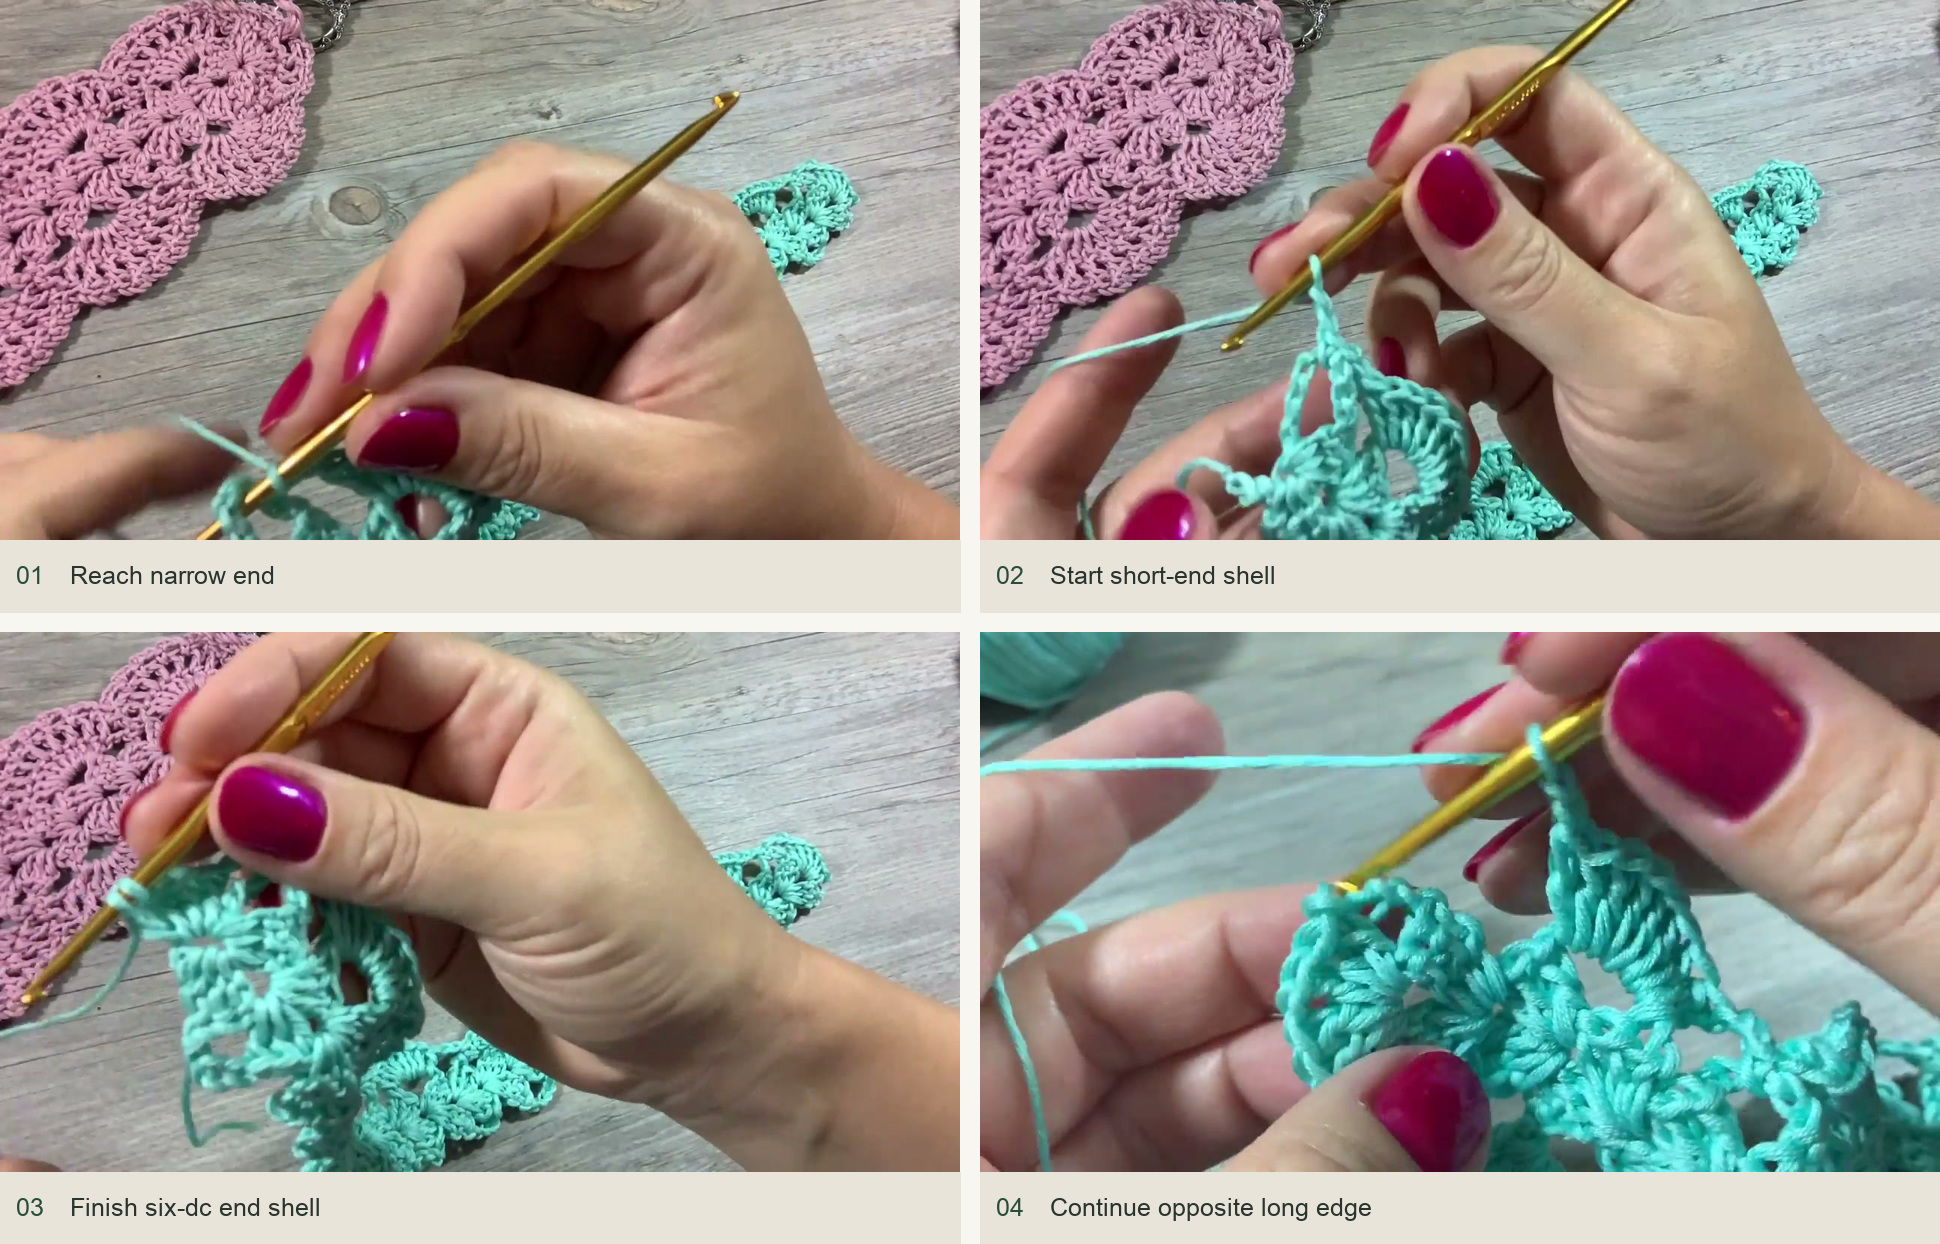
Source demonstration: Reach narrow end → Start short-end shell → Finish six-dc end shell → Continue opposite long edge -
Open the fans with chain spaces
For the next circuit, work one dc into each of the eight dc across a side fan, with ch 1 between neighboring dc. Nataly tightens the transition between fans by removing the extra chains on either side of the central joining stitch. Work that central dc directly after the last fan dc, then go directly into the first dc of the next fan. Resume the ch-1 spaces within the fan itself.
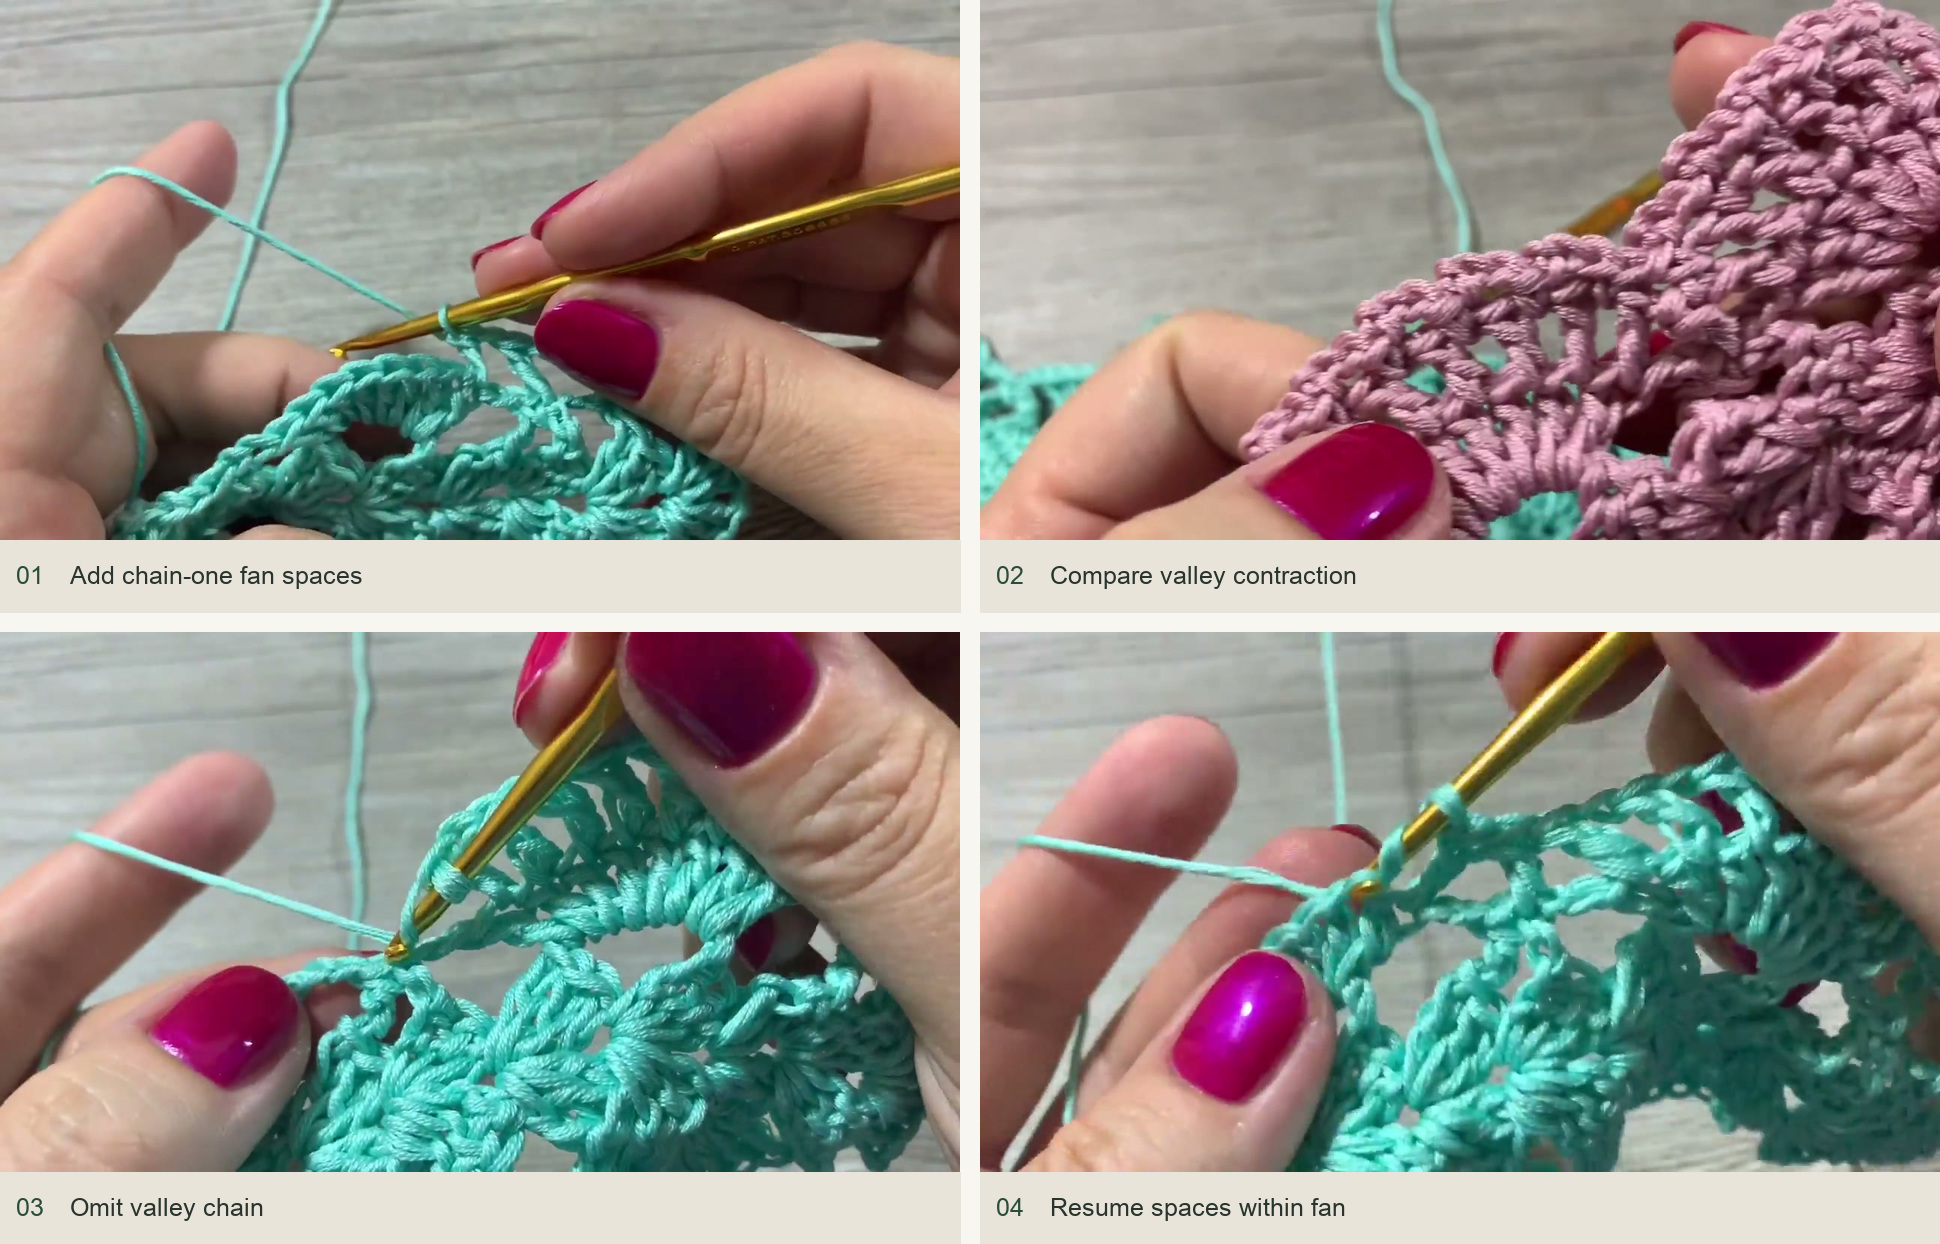
Source demonstration: Add chain-one fan spaces → Compare valley contraction → Omit valley chain → Resume spaces within fan -
Round the ends with seven stitches
At each short end, work across the three dc, the central opening and the next three dc, giving seven dc with a ch-1 space between each. The extra dc into the center opening gives a rounded turn. Continue along the opposite side with the eight-dc fan treatment and contracted transitions. Join in the third chain of the opening rise.
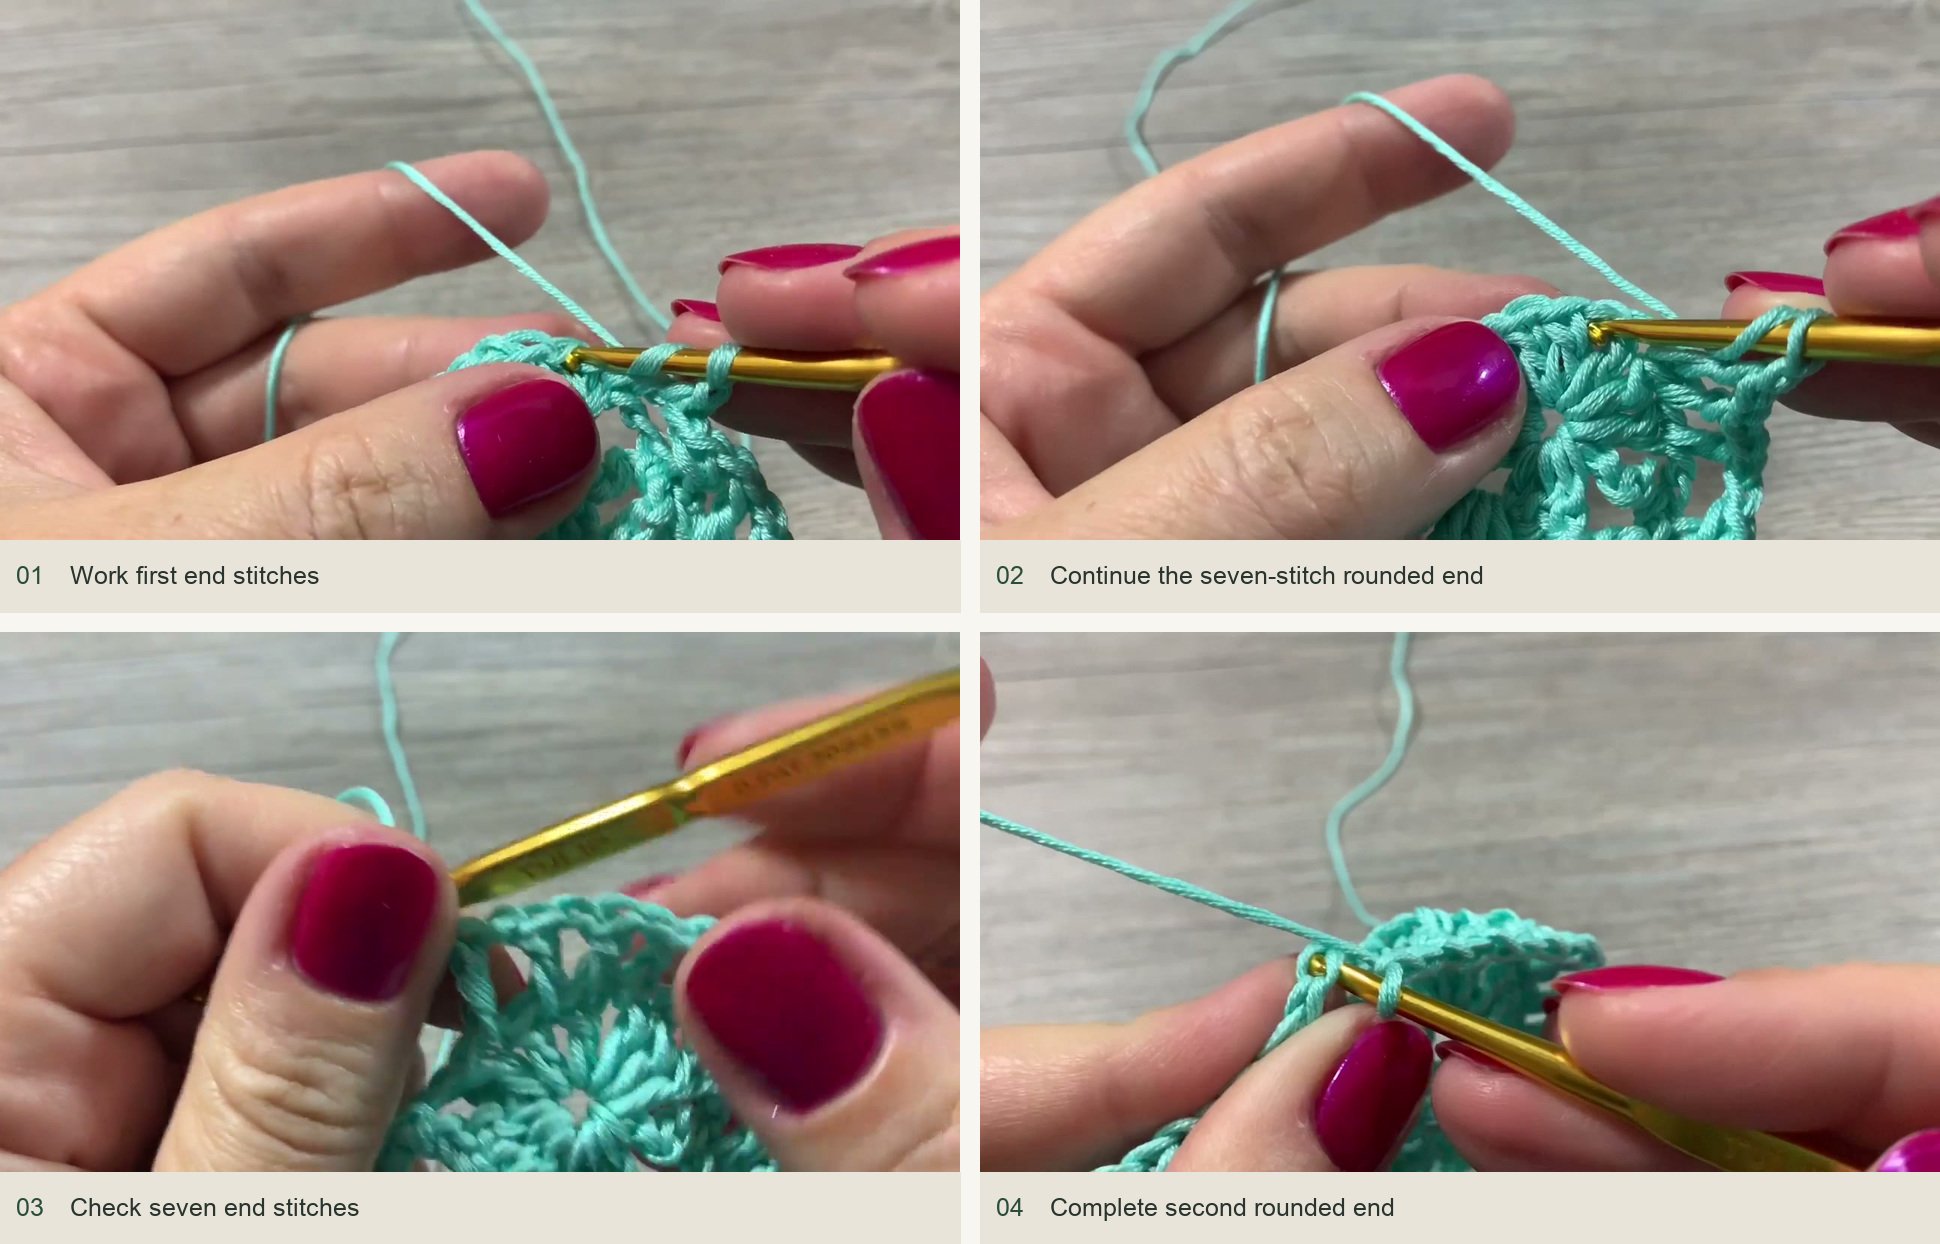
Source demonstration: Work first end stitches → Continue the seven-stitch rounded end → Check seven end stitches → Complete second rounded end
Work the small arch edging
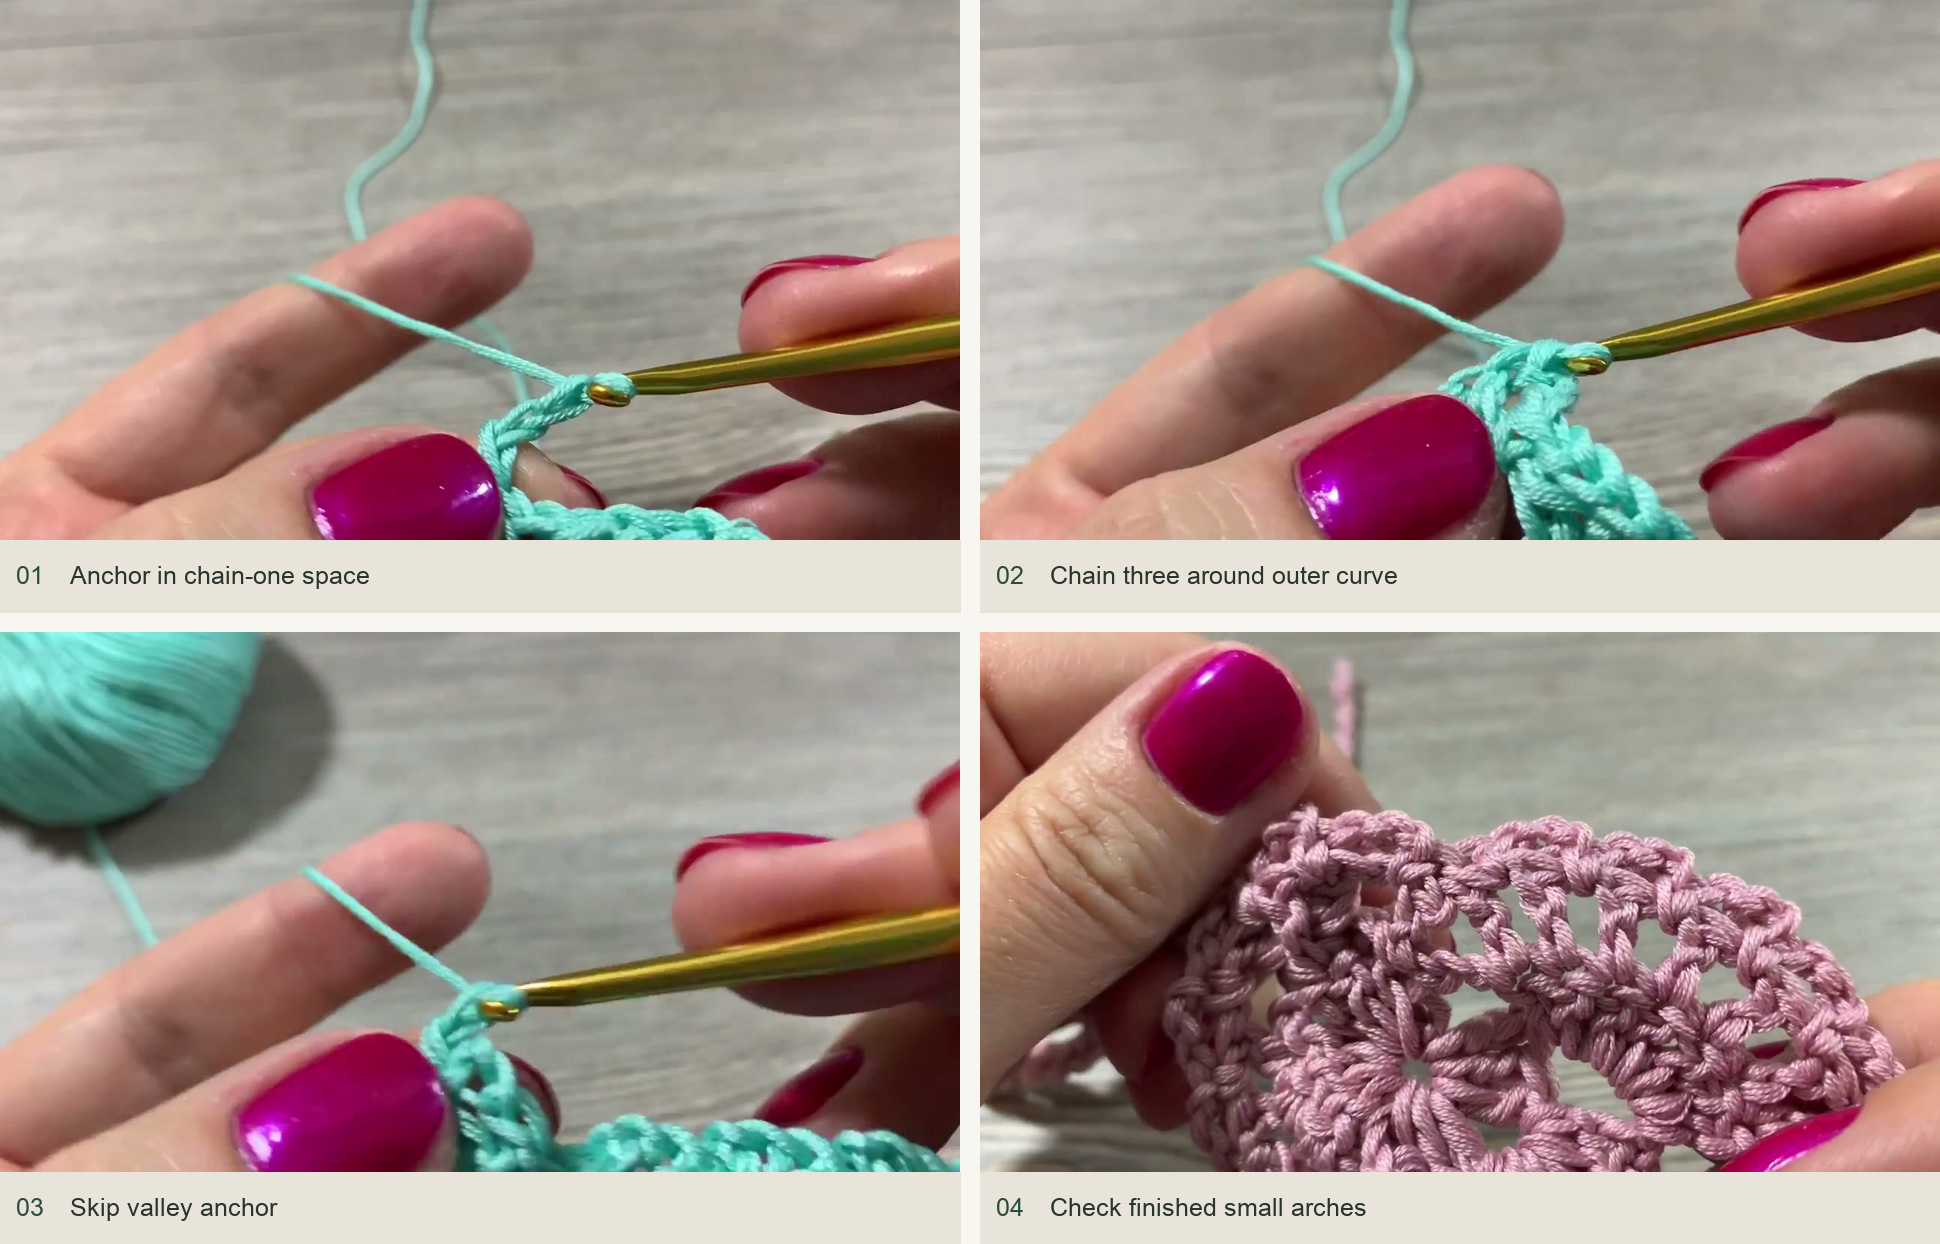
Sc into the next ch-1 space, ch 3 and sc into the following ch-1 space. Continue these little arches around the fans. At a valley between neighboring fans, omit the arch across the center join: make the adjacent sc anchors directly so that the edging does not add slack there. The source skips across the central stitch and its two neighboring transition positions. Compare each valley to the completed side before continuing; consistent valleys are what keep this border from becoming a loose ruffle.
Work around both rounded ends, finish neatly and weave the tails into the backs of solid stitch groups. Do not pull the lace into a narrower strip while hiding the ends. Smooth it flat with your fingers. If your cotton needs blocking, use its care instructions and preserve the gentle curved shape rather than stretching the fans wide.
Make ties and check the fit
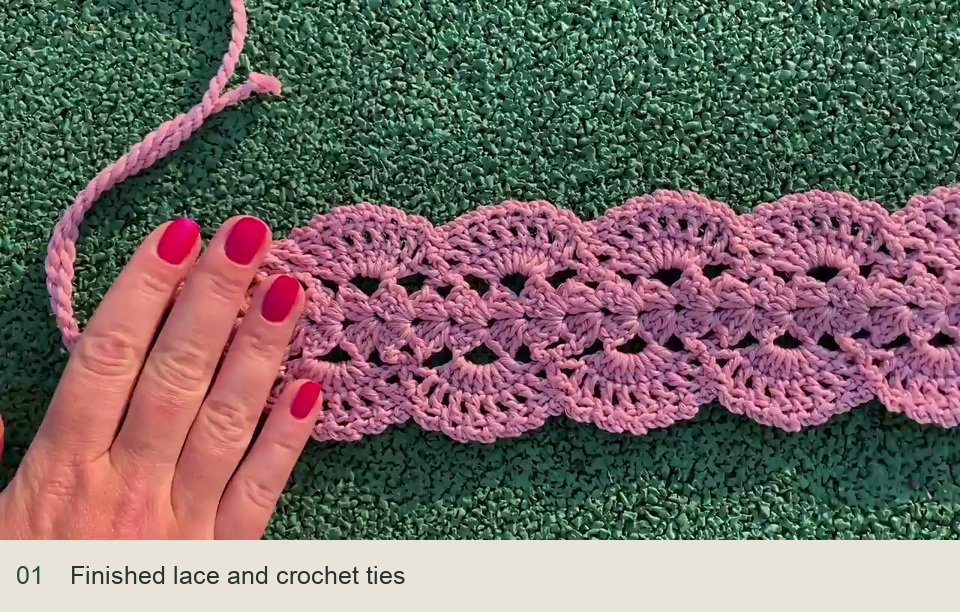
Nataly makes a twisted cord from matching yarn held in five strands, beginning with roughly 1.2–1.3 m lengths. Twist the bundles consistently, fold them together and allow them to coil into a cord, then secure the ends with knots. Fit the cord through the end detail shown in the tutorial. Make the second end to match and check that the knots cannot slide through the opening.
Try the headband with the ties loosely knotted at the back. The lace should follow the head without digging in, and the side fans should remain recognizable rather than being stretched into straight lines. Ties provide room for small changes as cotton relaxes with wear. Keep enough tie length to knot comfortably and trim only after this fitting.
If a fan twists, count its stitches before blocking. If the edge ripples, check the transition chains between fans. If the strip is too short, alter the central strip before adding the full border; longer ties cannot correct a decorative section that sits in the wrong place on the head.
Inspired by Nataly Masters’ video tutorial.
Save this pattern for later
Pin it to one of your boards so it’s ready when you have a free evening and the right yarn.