These crochet leg warmers have a plain half-double-crochet body and deep ribbed cuffs attached at both ends. The demonstrated adult pair finishes at approximately 41 cm long, with the narrower ribbing framing a softly textured leg section.
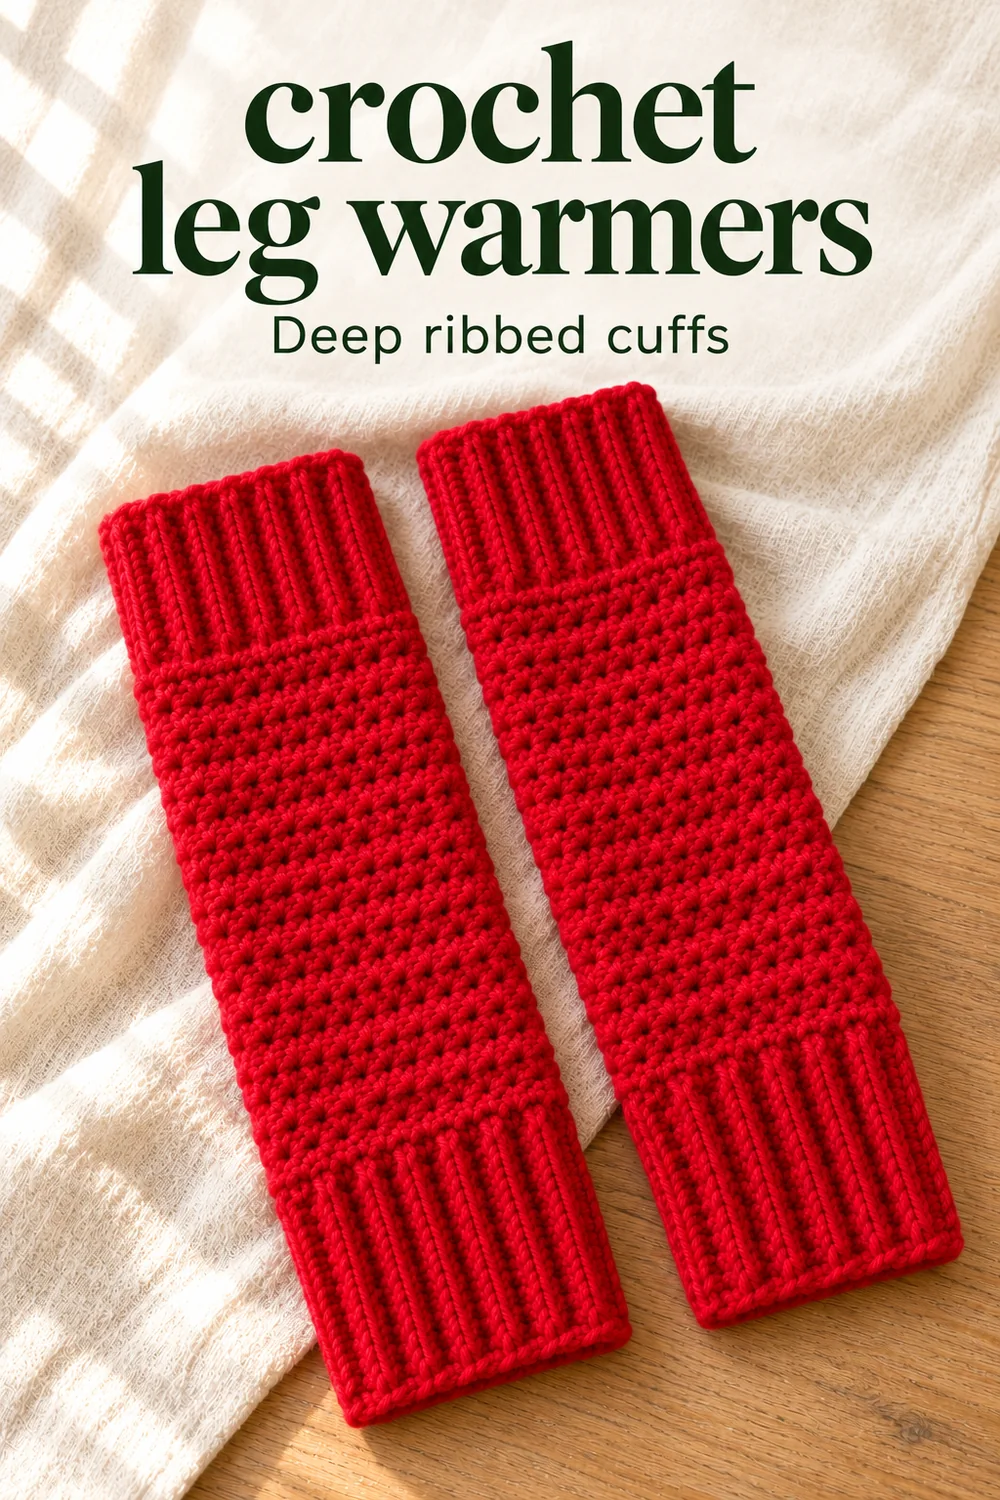
The body is worked as a tube in joined, turned rounds. Each cuff is then built from narrow rows of back-loop single crochet, attaching it to the body as you go. Keep a small record of your foundation, body rounds and cuff rows so the second piece follows the first.
Before you start these crochet leg warmers
- Yarn comparable in thickness to the red strand shown, with enough of the same yarn for both pieces.
- A 5 mm hook for the body and a 4 mm hook for the cuffs.
- Stitch markers, measuring tape, scissors and a yarn needle for finishing the inside ends.
The video does not give a verified fiber composition, yarn meterage or gauge. Its sample is described as an adult medium, but the demonstrated measurements are more useful than treating that label as a universal fit. Check your own calf and the path over your foot before committing to the closed foundation and cuffs.
US terms: ch = chain; sl st = slip stitch; sc = single crochet; hdc = half double crochet. A half double crochet begins with a yarn over and closes by pulling through all three loops together. Back-loop single crochet uses only the farther loop of the V at the top of the stitch; the body uses both loops.
Make the body and attach the ribbed cuffs
-
Make and join the foundation
- Foundation · ch 37
- Demonstrated chain · 30 cm gently stretched
Use the 5 mm hook to make a slip knot, then chain 37 for the demonstrated adult size. Keep the loops loose enough to move along the hook without dragging. The foundation sets the body circumference, so note your chain count before you begin the second warmer.
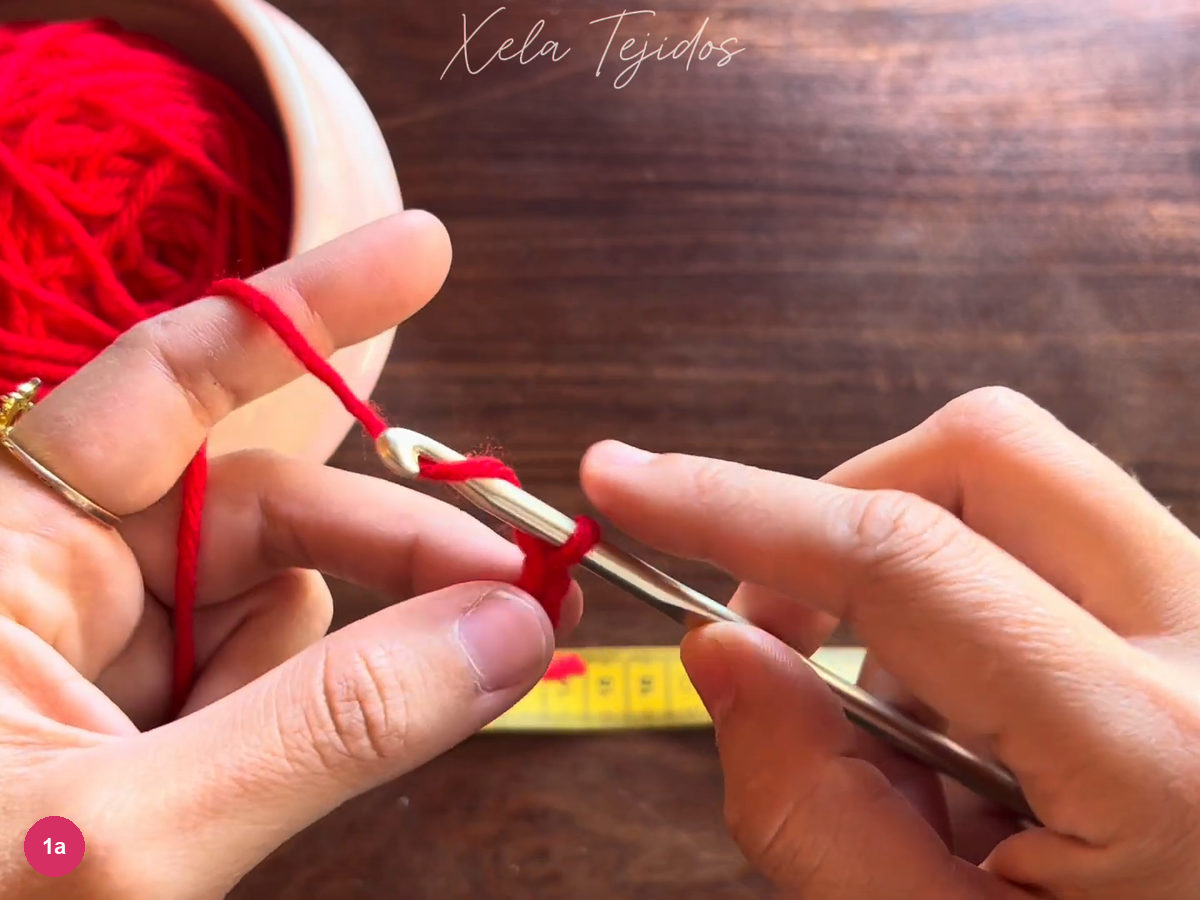
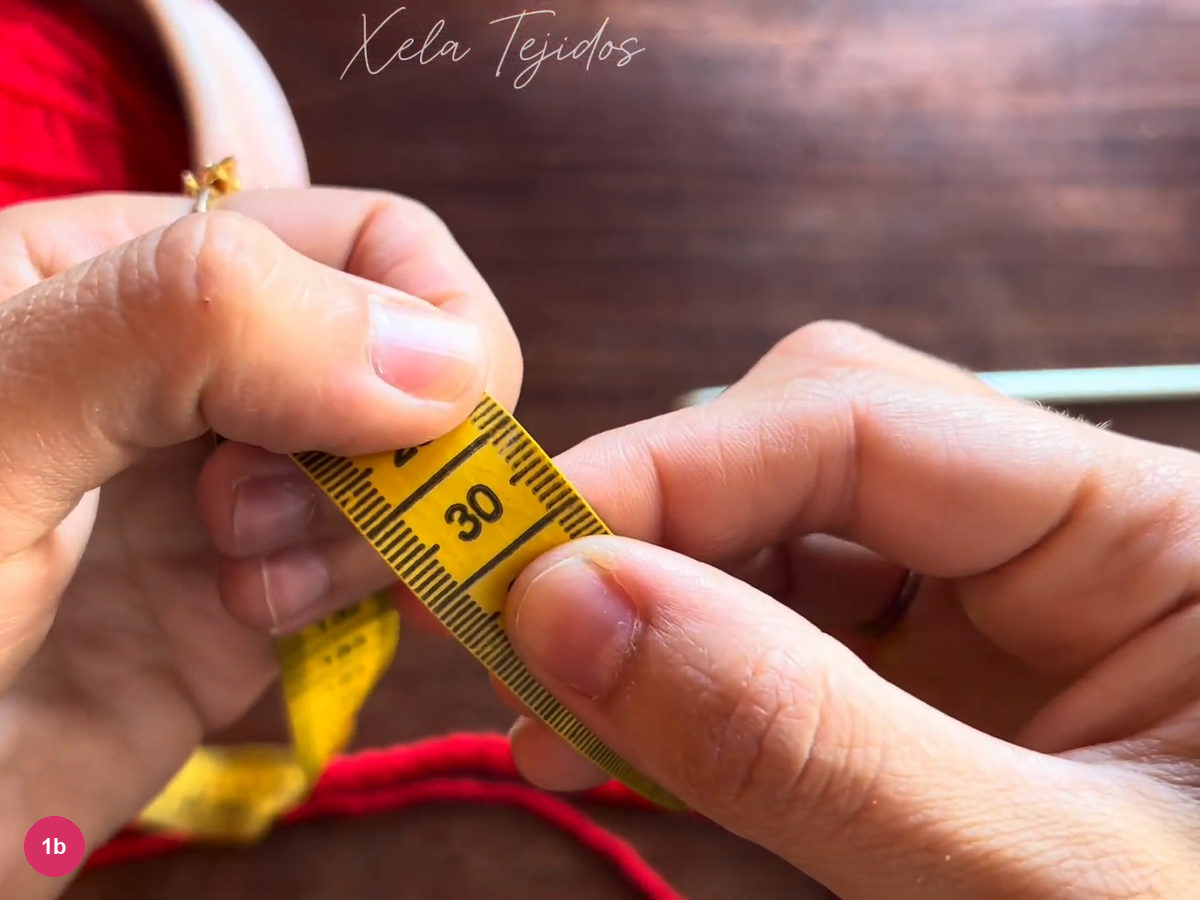
Step 1a: Make the foundation chain. Lay the chain beside a measuring tape and give it the gentle stretch shown for sizing. The demonstrated chain measures 30 cm under that light stretch. Keep this measurement separate from the finished length: this chain goes around the leg, not from ankle to knee.
Step 1b: Check the foundation circumference. Bring the first chain back to the hook and check that the chain has not twisted. Slip stitch into that first chain to close the ring. Run your fingers around the ring now so the little chain tops stay on the same edge all the way around.
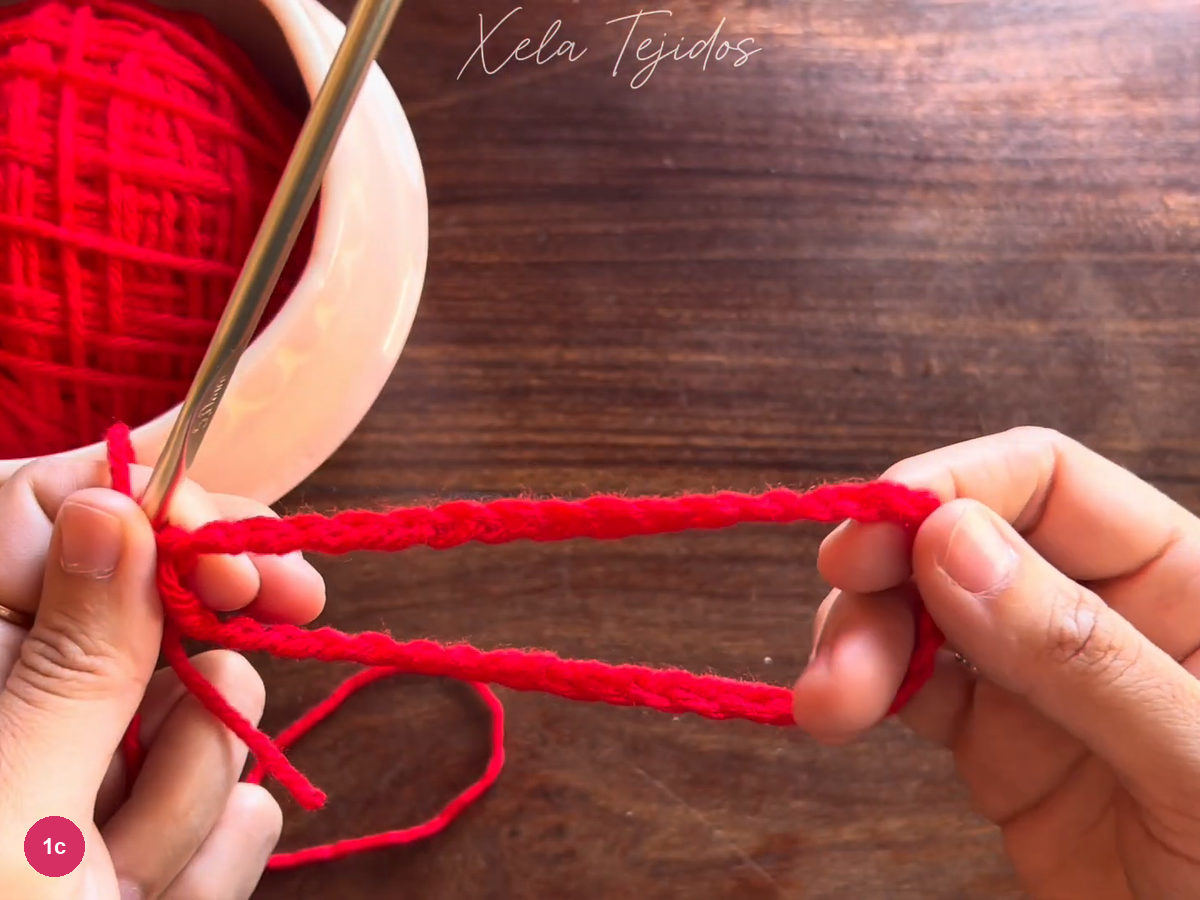
Step 1c: Close an untwisted chain ring. -
Work the first body round
- Round 1 · 37 hdc
Chain 1 for height and work a half double crochet in the same starting position. Yarn over, insert into the chain, draw up a loop and pull through all three loops together. Keep the chain ring open below your hands so you can find the next foundation chain.
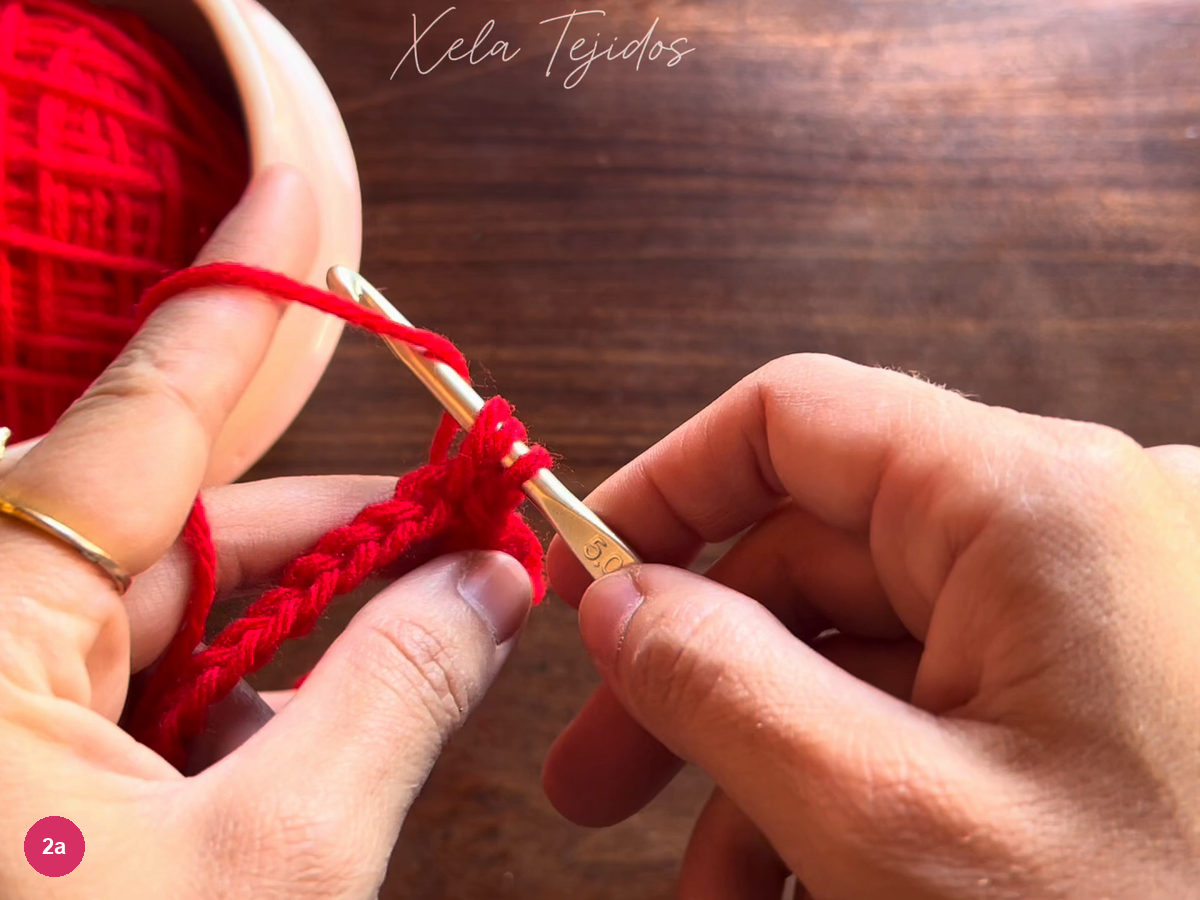
Step 2a: Begin half double crochet around the ring. Mark the first half double crochet, then continue with one half double crochet in each chain around. The starting chain for height is separate from the stitch count. Count 37 half double crochets before joining, using the marker to distinguish the first stitch from the nearby chain and slip stitch.
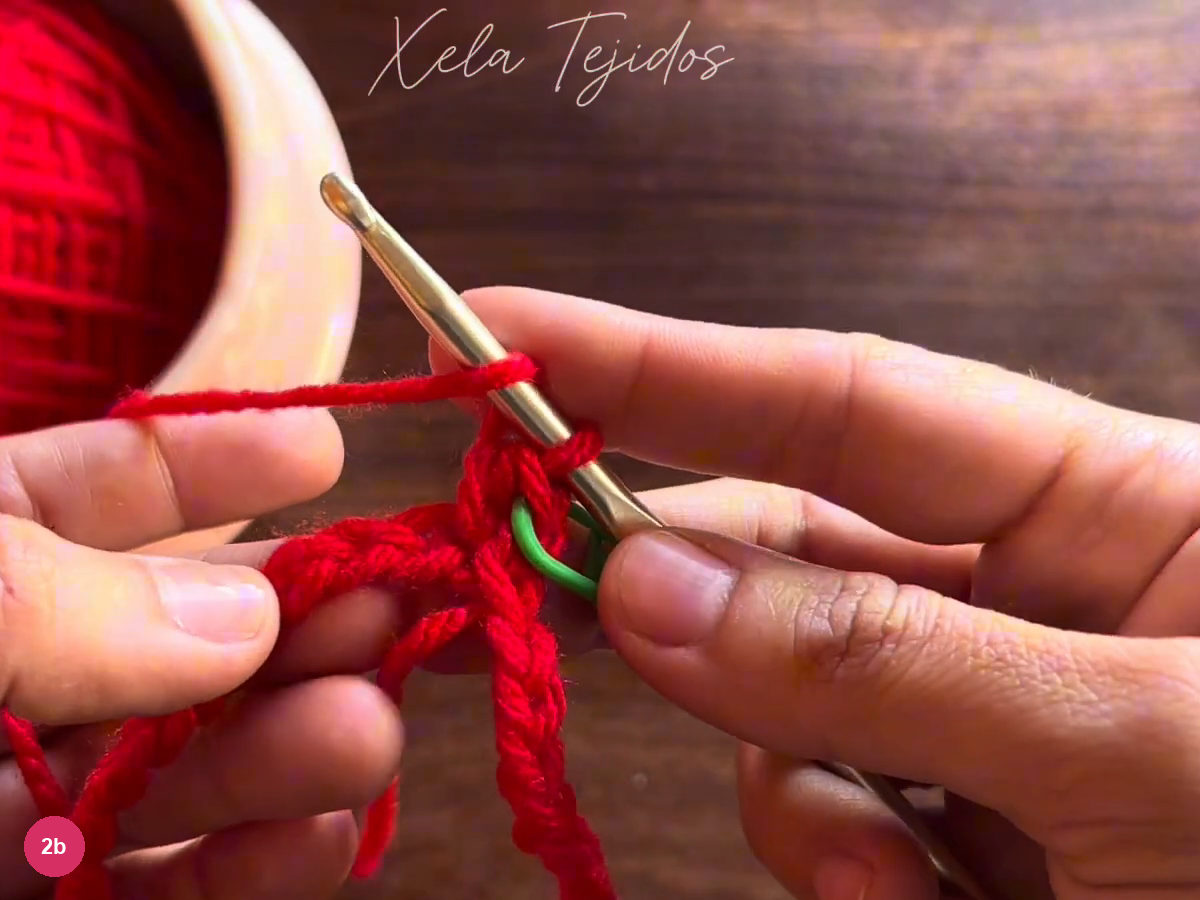
Step 2b: Mark and count the first body round. Find the marked first stitch rather than the small joining loop beside it. Slip stitch into that first half double crochet to close the round. Keep the marker in sight until you have identified where the next round will begin.
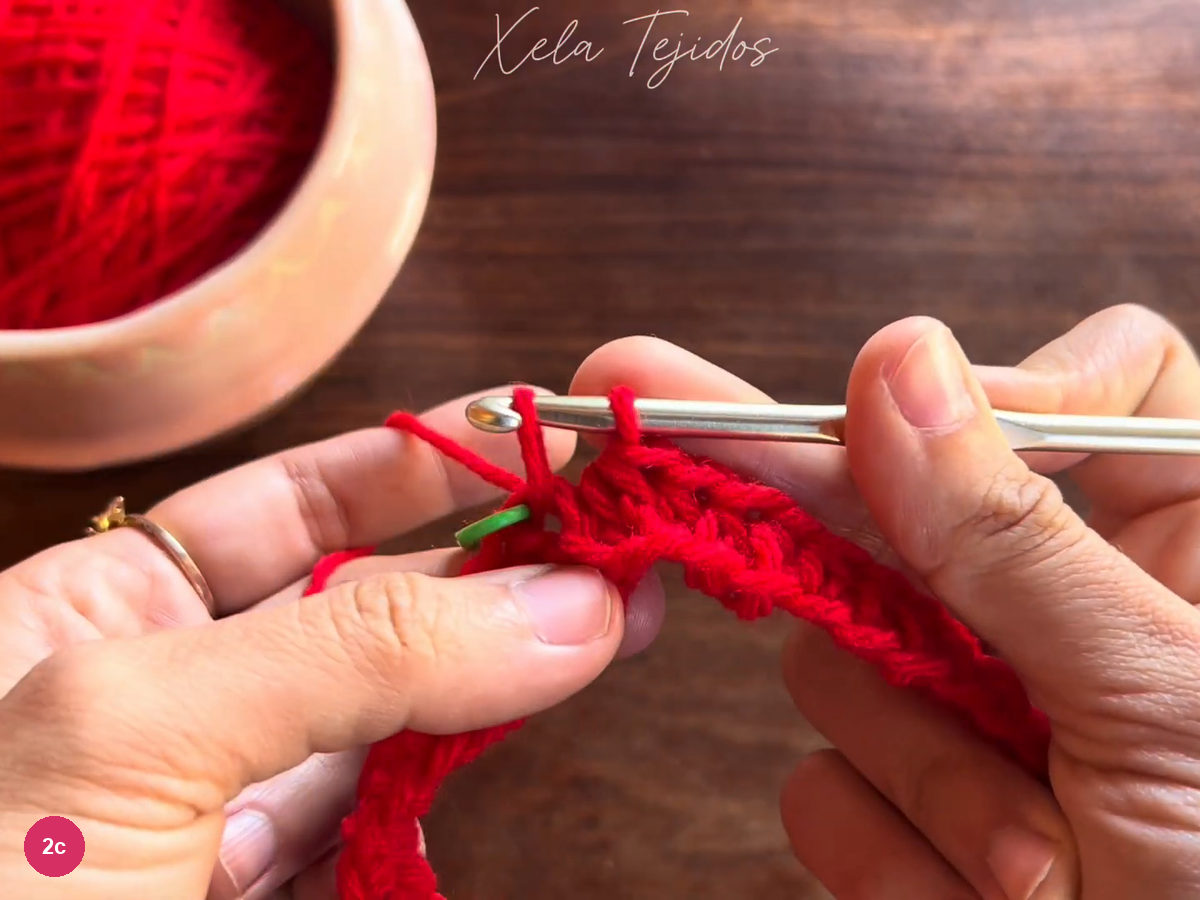
Step 2c: Join in the marked first stitch. -
Turn each round and grow the body
- Body · 37 hdc per round
- Sample body · 22 rounds, about 23 cm
- Flat body width · 15 cm
Chain 1, turn the tube and work back in the opposite direction. Begin in the first half double crochet, which was the last stitch of the previous round. Mark this new first stitch so the chain for height cannot be mistaken for an extra stitch.
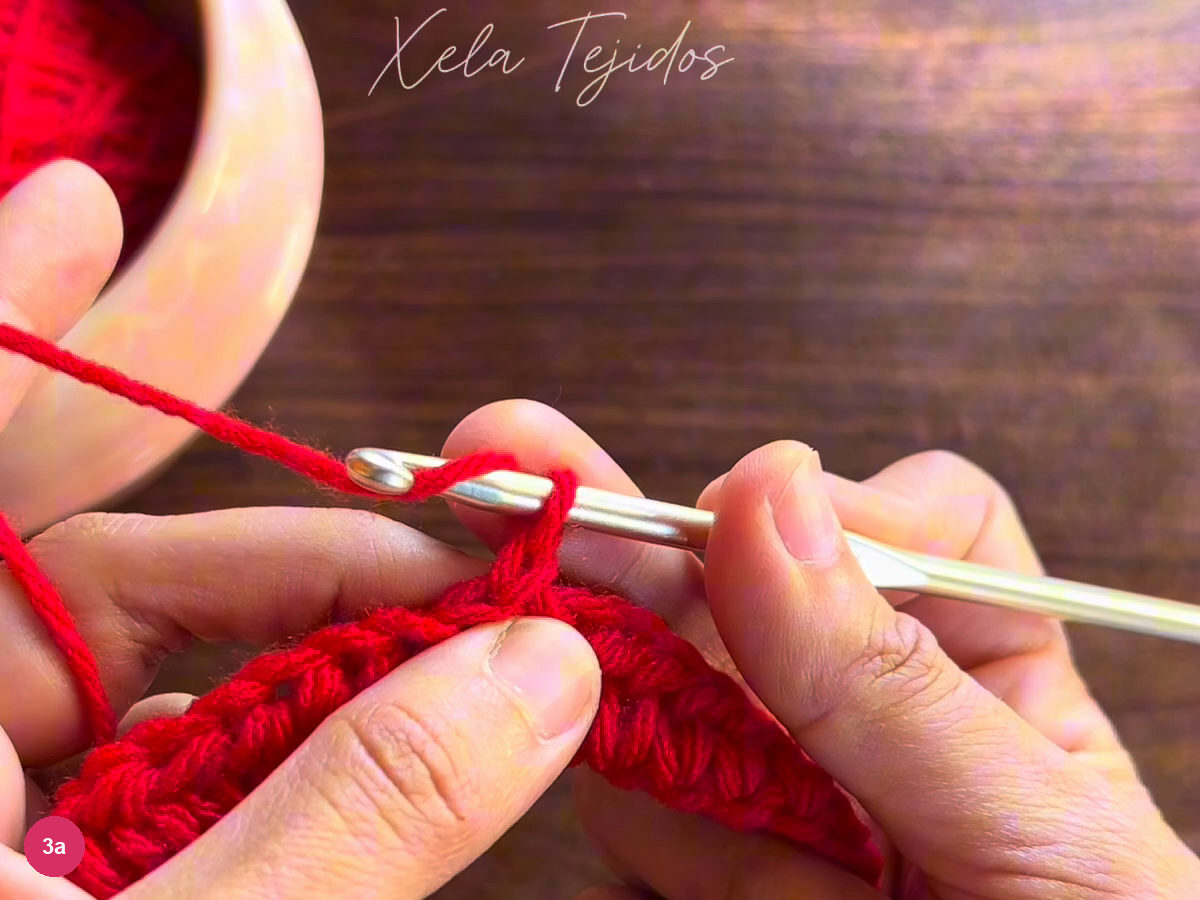
Step 3a: Turn before starting the next body round. Continue half double crochet under both loops at the top of each stitch. Keep 37 stitches in every round, then slip stitch into the marked first stitch, chain 1 and turn again. The body uses the complete stitch top; save back-loop-only work for the attached cuffs.
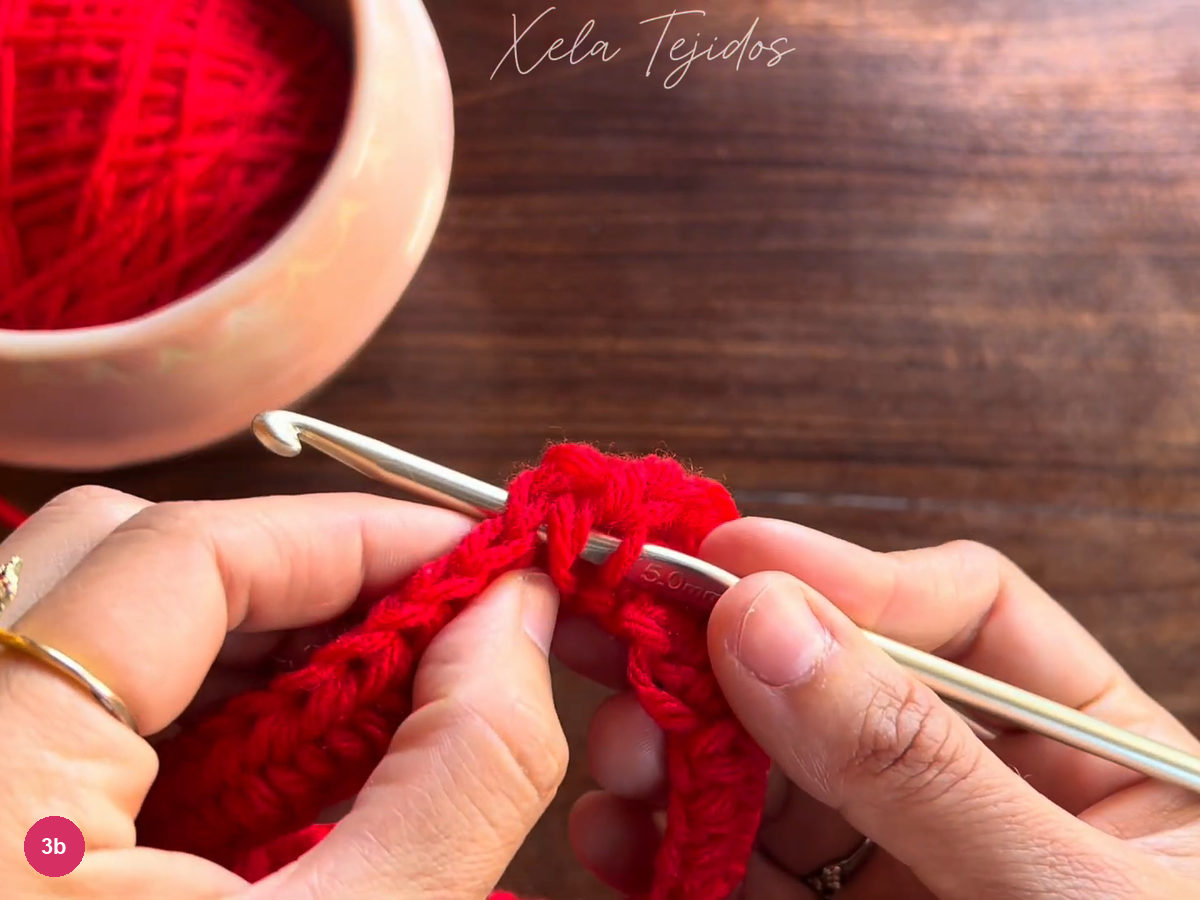
Step 3b: Work through both loops in the body. The demonstrated body has 22 rounds and measures approximately 23 cm before the cuffs are attached. Check that body measurement separately from the cuff depth. The ribbed ends will add to the length and should not be counted as body rounds.
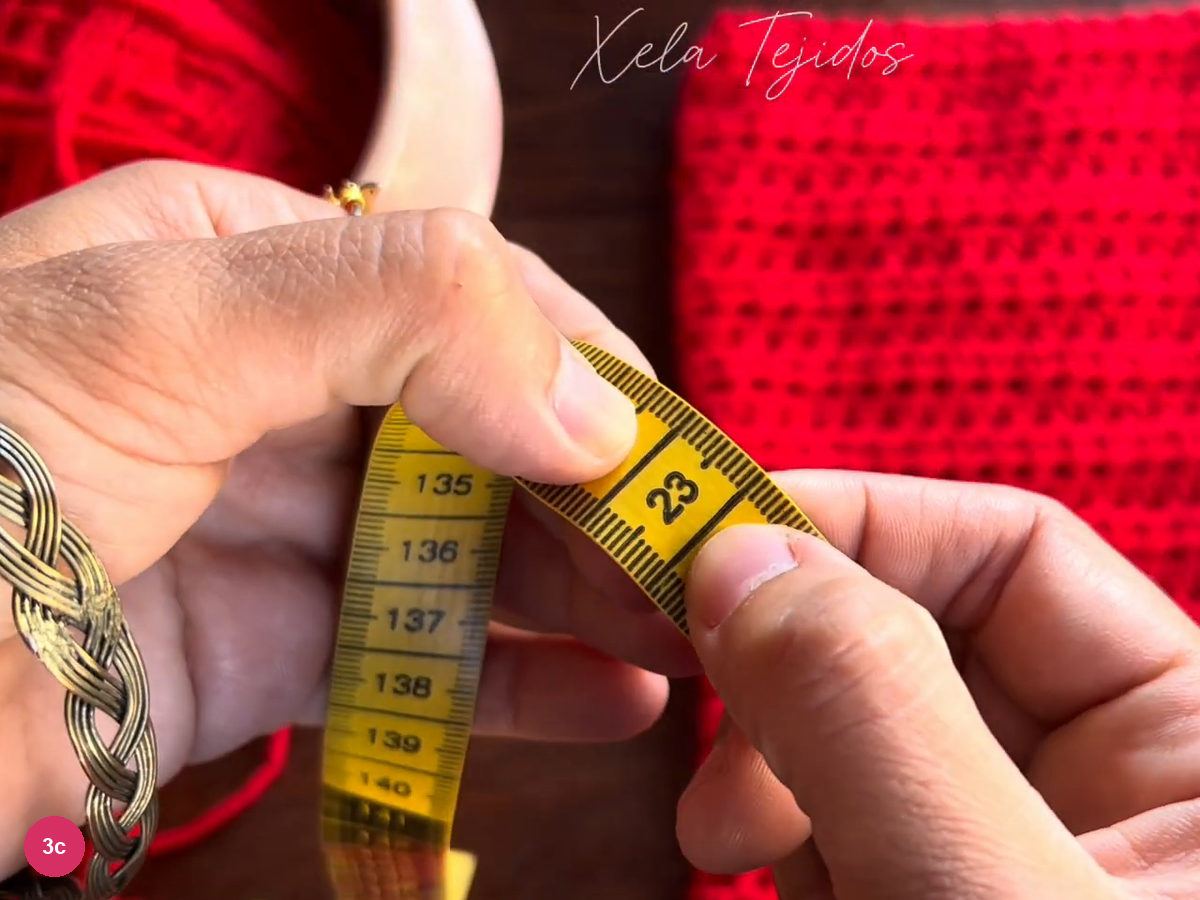
Step 3c: Measure the body before adding cuffs. Check the body width while it is lying flat under the same light tension. The sample measures 15 cm across at this point. Try the open tube over your foot before attaching the cuffs, and keep a note of both this width and the body round tally for the matching piece.
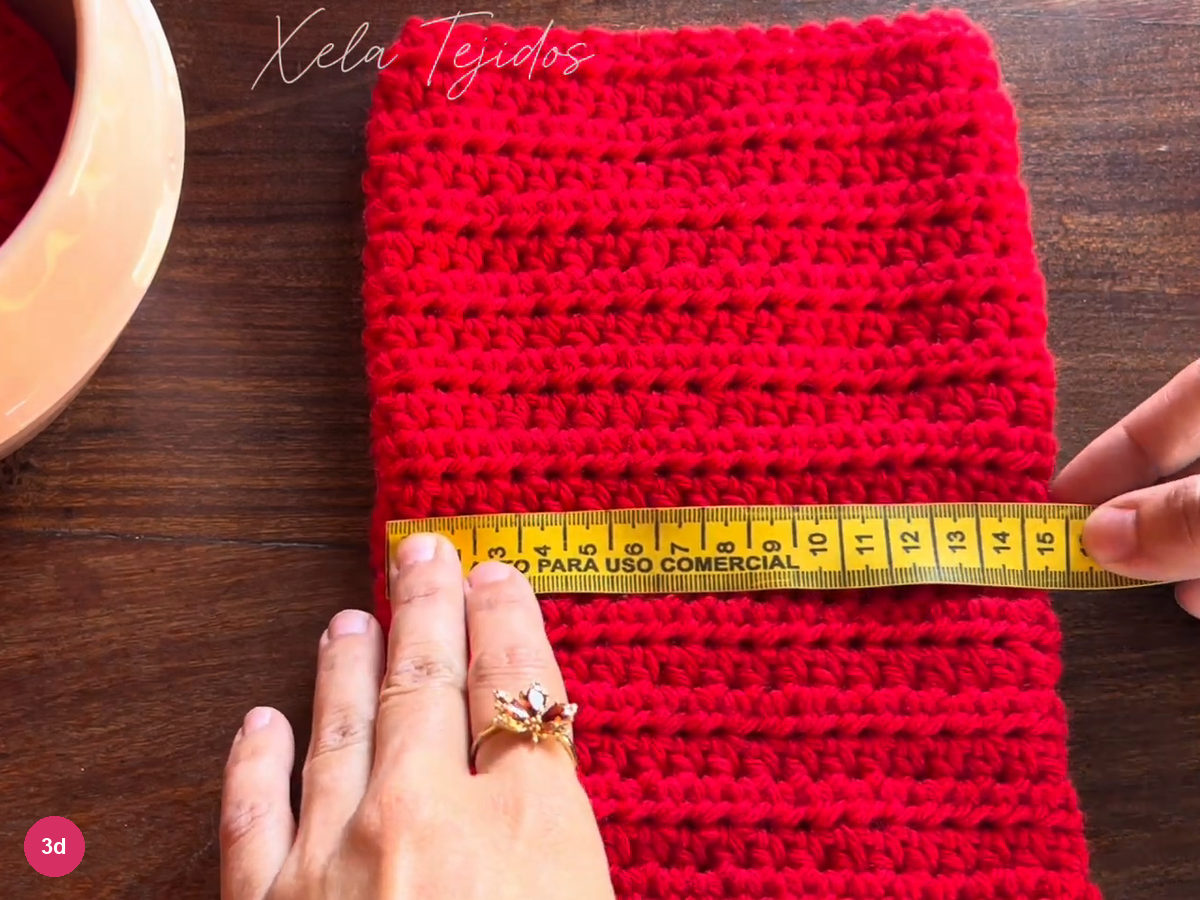
Step 3d: Check the flat body width. -
Start an attached ribbed cuff
- Cuff hook · 4 mm
- Cuff foundation · ch 15 + 1 turning chain
- Each cuff row · 15 sc
Change to the 4 mm hook and attach the yarn at the body's joining area. Leave a tail that can be tucked inside later. Position the tube so the new ribbing can grow outward from its open edge without catching the opposite side of the tube.
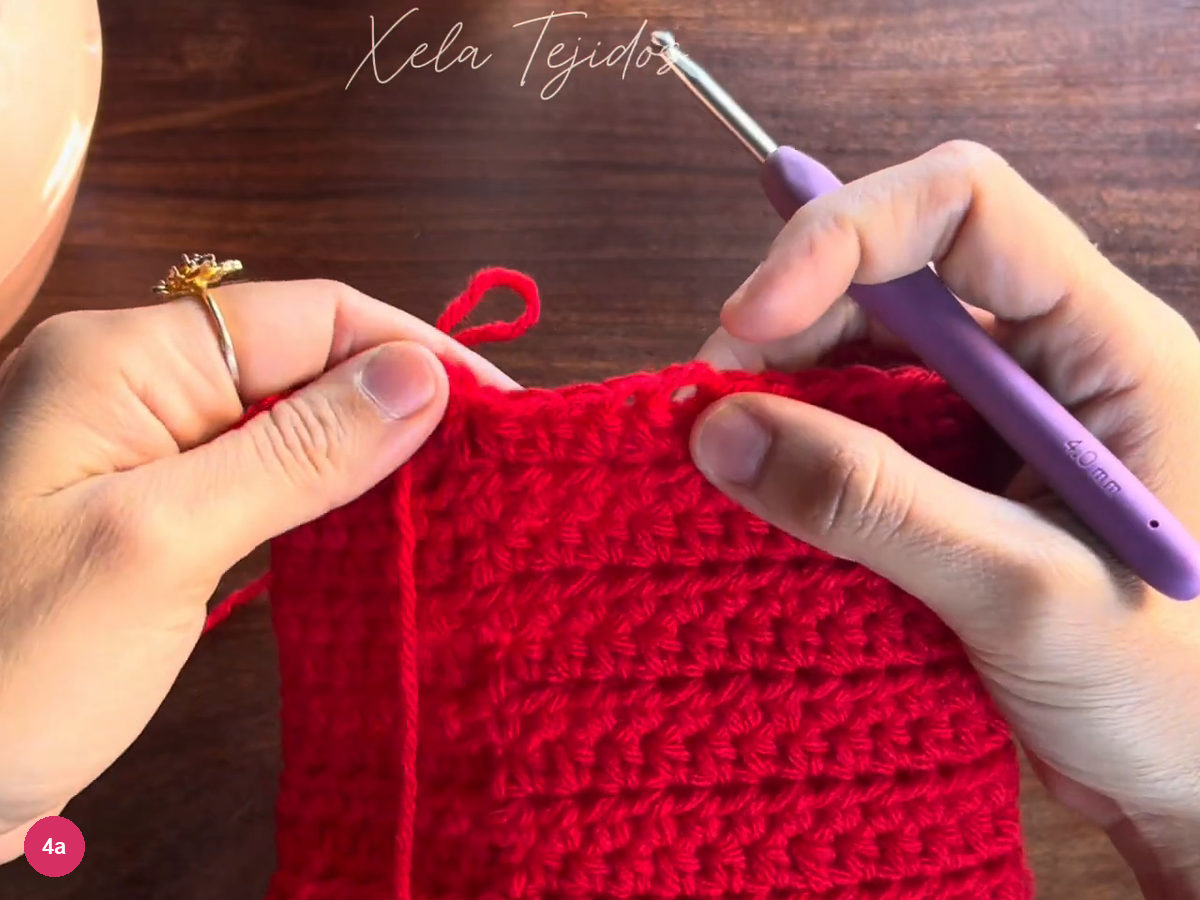
Step 4a: Locate the attachment with the smaller cuff hook. Chain 15 outward from the body for the cuff depth. Under the gentle stretch used for the sample, that chain measures 10 cm. Add 1 chain for turning; this extra chain is for height and is not one of the cuff's working stitches.
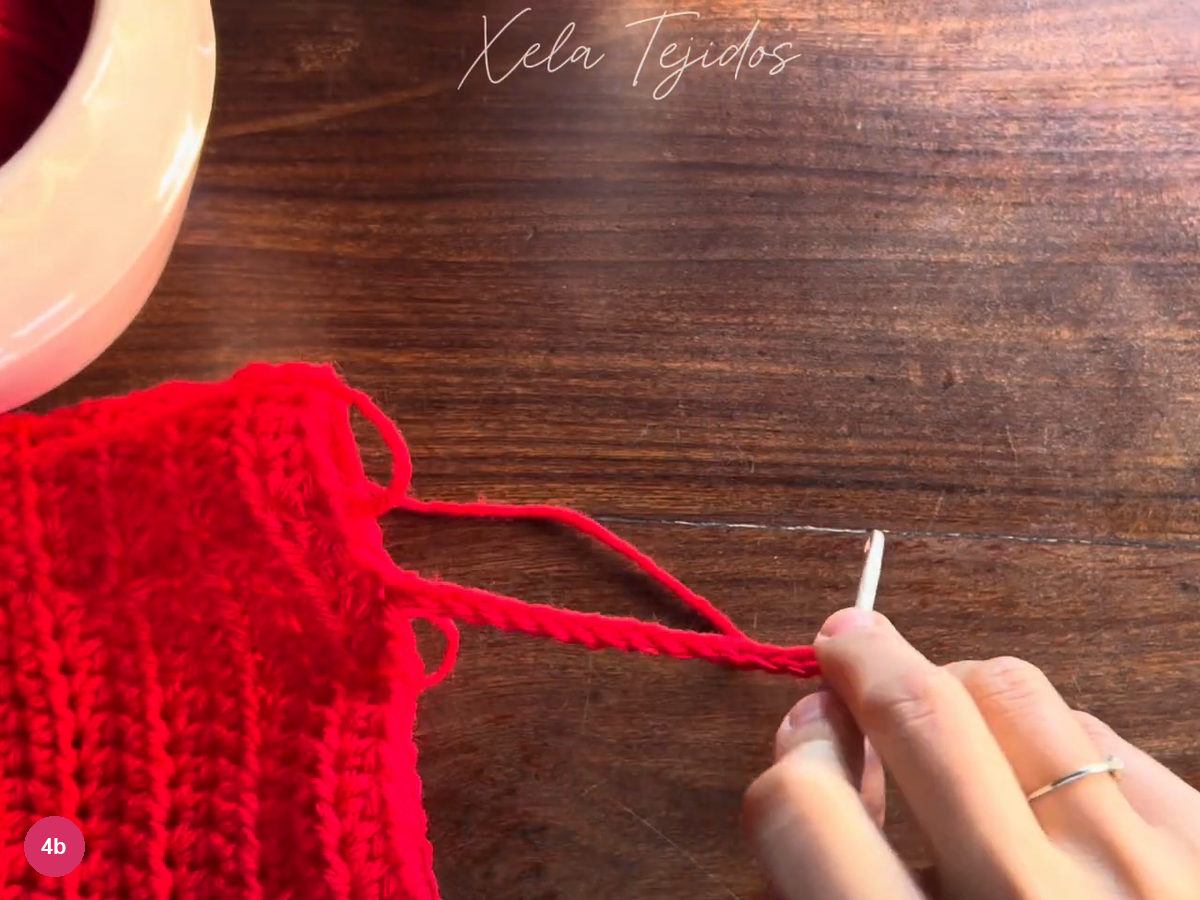
Step 4b: Make the cuff foundation chain. Start in the second chain from the hook and work single crochet back toward the body. Mark the first single crochet so you can find the outer edge after turning. Work 15 single crochets along the cuff strip, keeping each chain available rather than splitting its yarn.
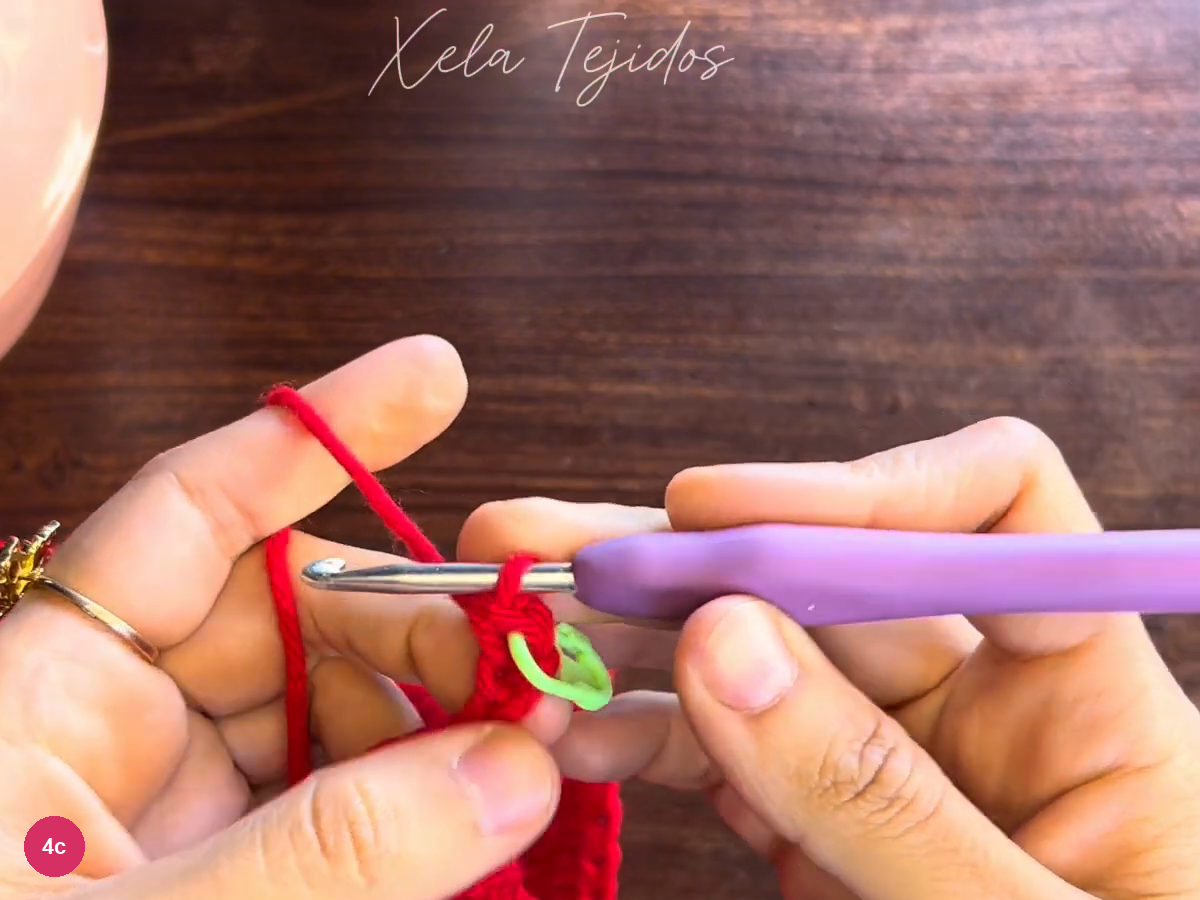
Step 4c: Work the first single-crochet cuff row. -
Anchor the cuff and turn into back loops
- Attachment · 2 sl st
- Return row · 15 sc in back loops
Work the last single crochet at the body end of the strip and check that the row still has 15 stitches. Keep its last stitch separate from the body stitch where the strip began. The narrow row should reach the tube edge without pulling that edge into a pucker.
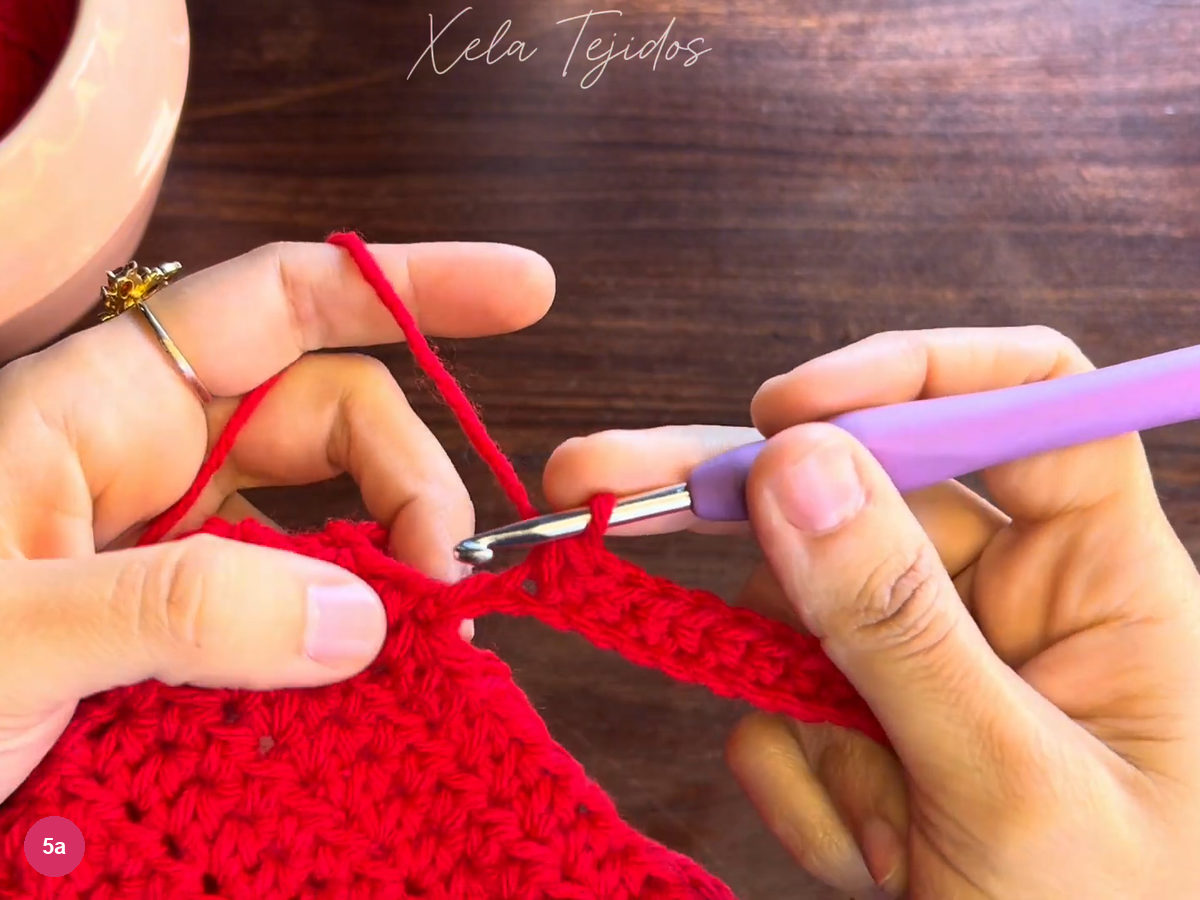
Step 5a: Finish the cuff row at the body edge. Slip stitch into the same body stitch where you attached the cuff yarn. This secures the completed strip to the tube. Keep the join relaxed so the cuff can bend at the attachment instead of forming a tight ridge across the body edge.
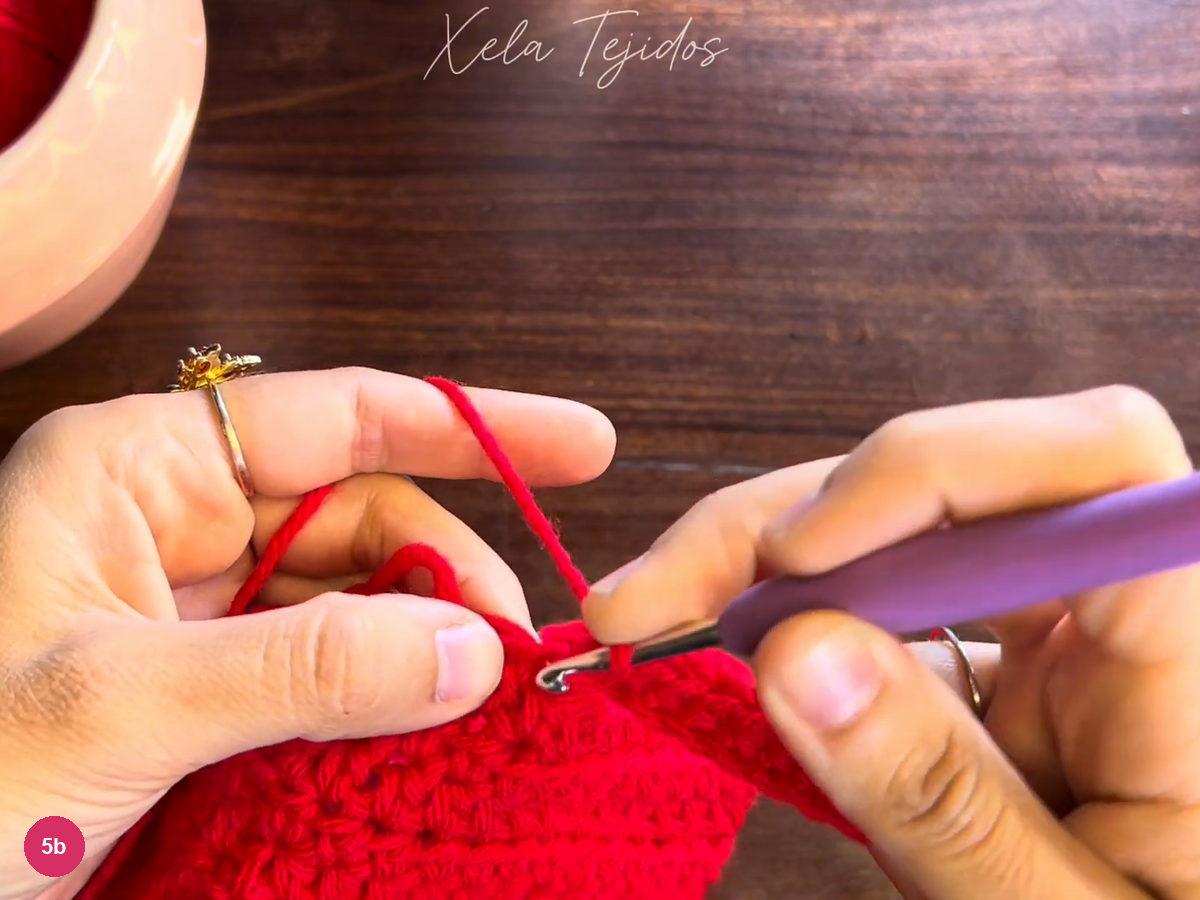
Step 5b: Anchor the strip in its starting body stitch. Make another slip stitch in the next body stitch before turning the ribbing. These two slip stitches attach and advance the cuff; they are not part of its 15 single crochets. Identify them now, since working them on the return row would make the cuff wider.
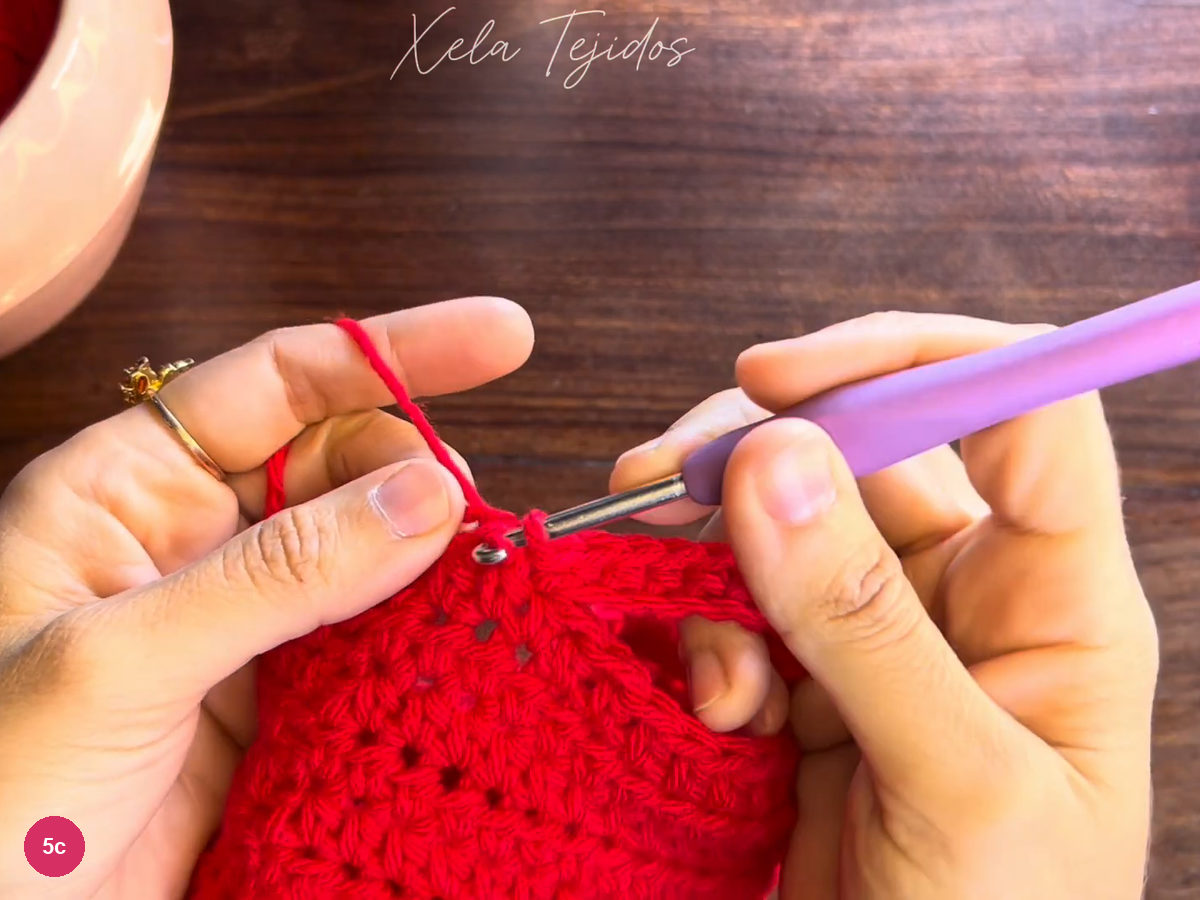
Step 5c: Advance with the second attachment slip stitch. Turn the narrow strip and skip the two attachment slip stitches. Work into the back loop of the last single crochet from the previous row, then continue in back-loop single crochet toward the outer cuff edge. Keep both markers available so neither the joining stitches nor the turning chain enter your row count.
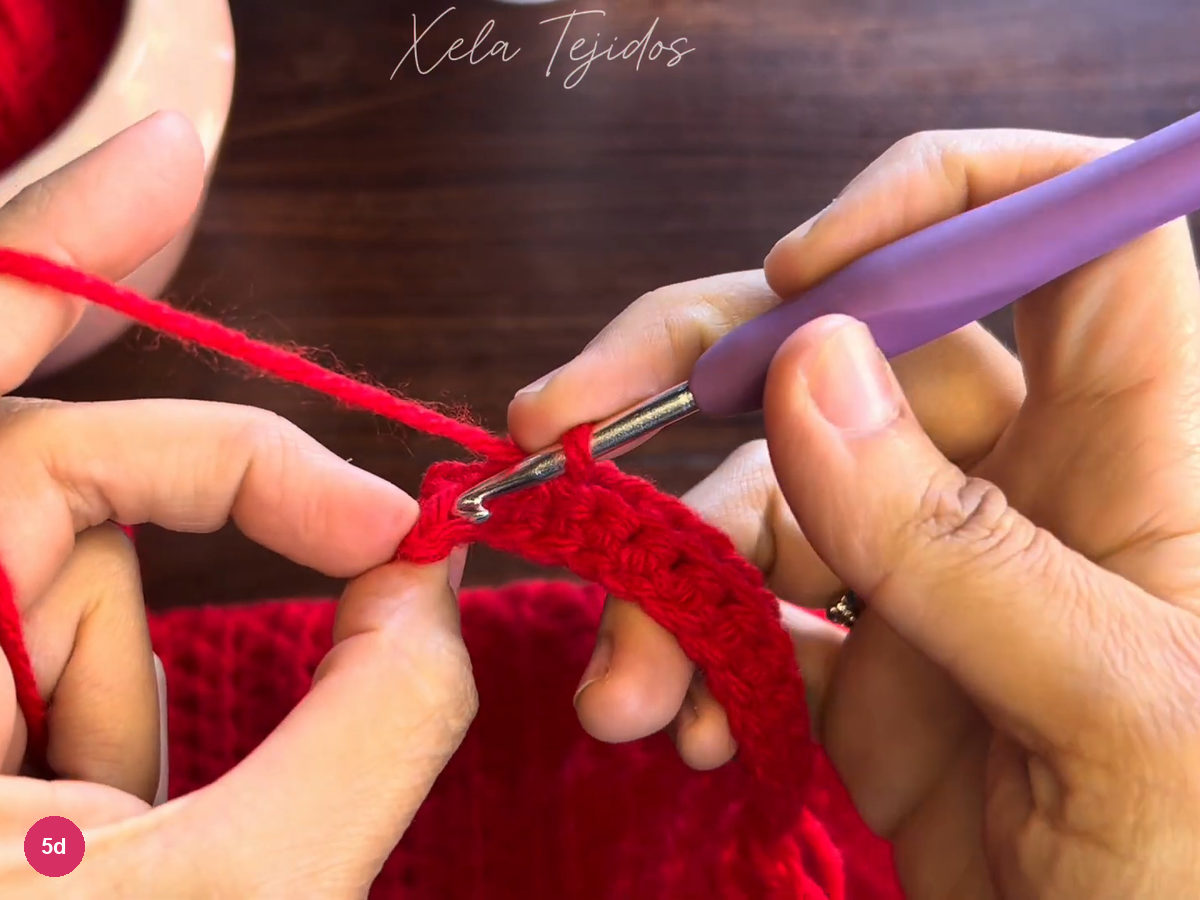
Step 5d: Skip the joins and work back loops along the cuff. -
Repeat the ribbing around the opening
- Outer edge · ch 1 and turn
- Body edge · attach, advance, turn
Finish the return row at the marked outer edge, then chain 1 and turn. Work back-loop single crochet toward the body again, keeping 15 working stitches in the row. The unworked front loops form the raised ribs, so use the same loop choice in both directions.
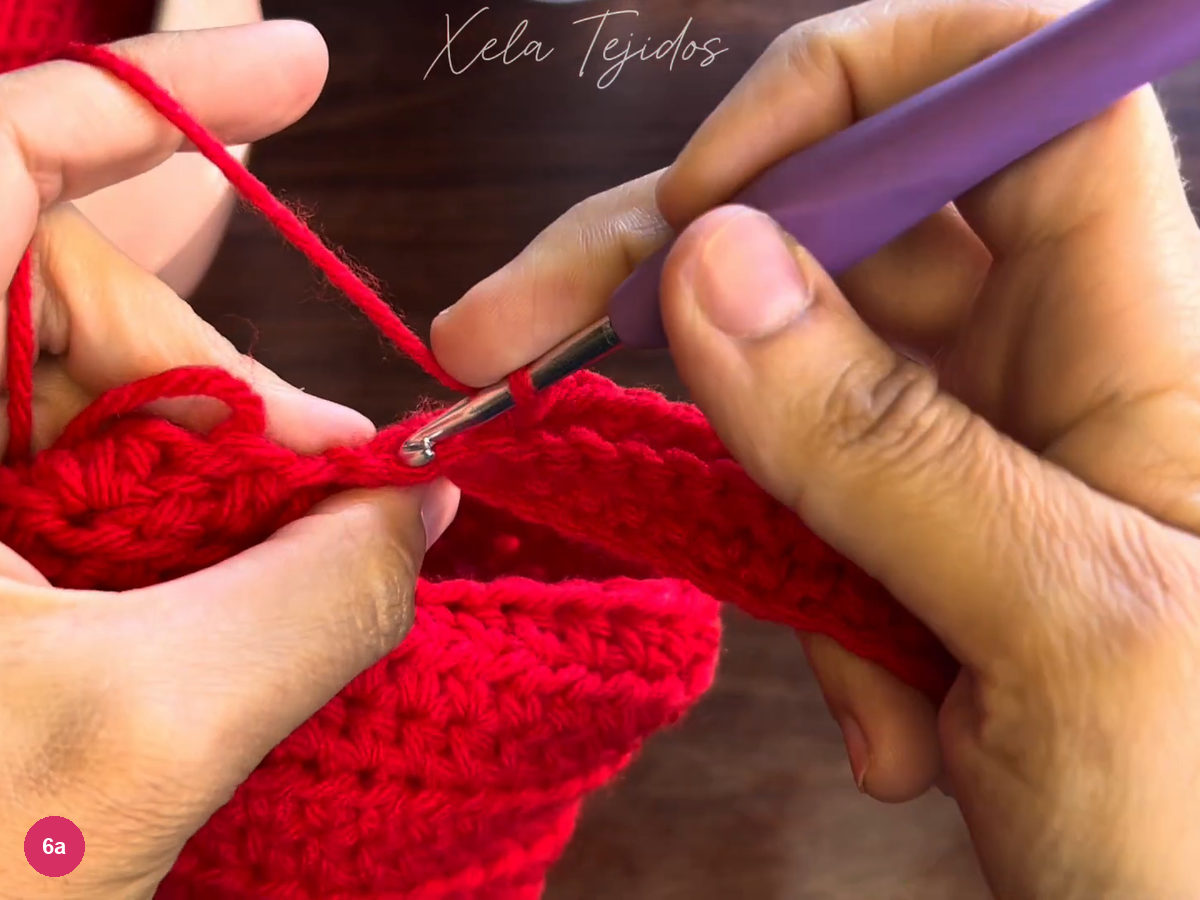
Step 6a: Turn at the outer cuff edge. When the strip reaches the body, use the next available body stitch for the first attachment and the following one to advance. Turn, skip the two slip stitches and work back along the cuff. Continue this attachment rhythm around the opening without repeatedly joining into a body stitch you have already used.
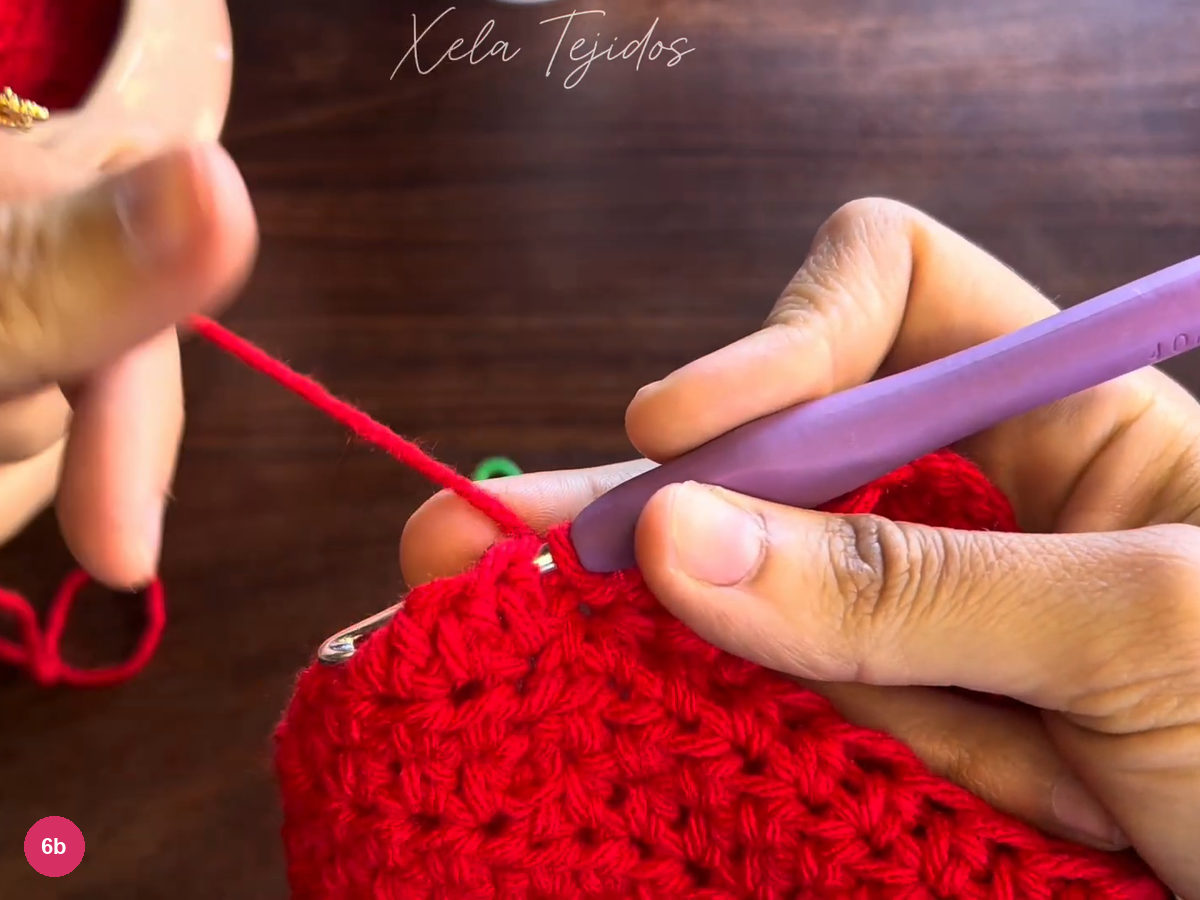
Step 6b: Continue the attachment rhythm around the opening. Keep working the narrow rib rows until the cuff surrounds the opening. Check the cuff's outer edge and its attachment edge as separate lines: neither should gain extra stitches. Leave the short cuff ends ready to join, with the body held flat enough to see whether the ribbing is pulling evenly around it.
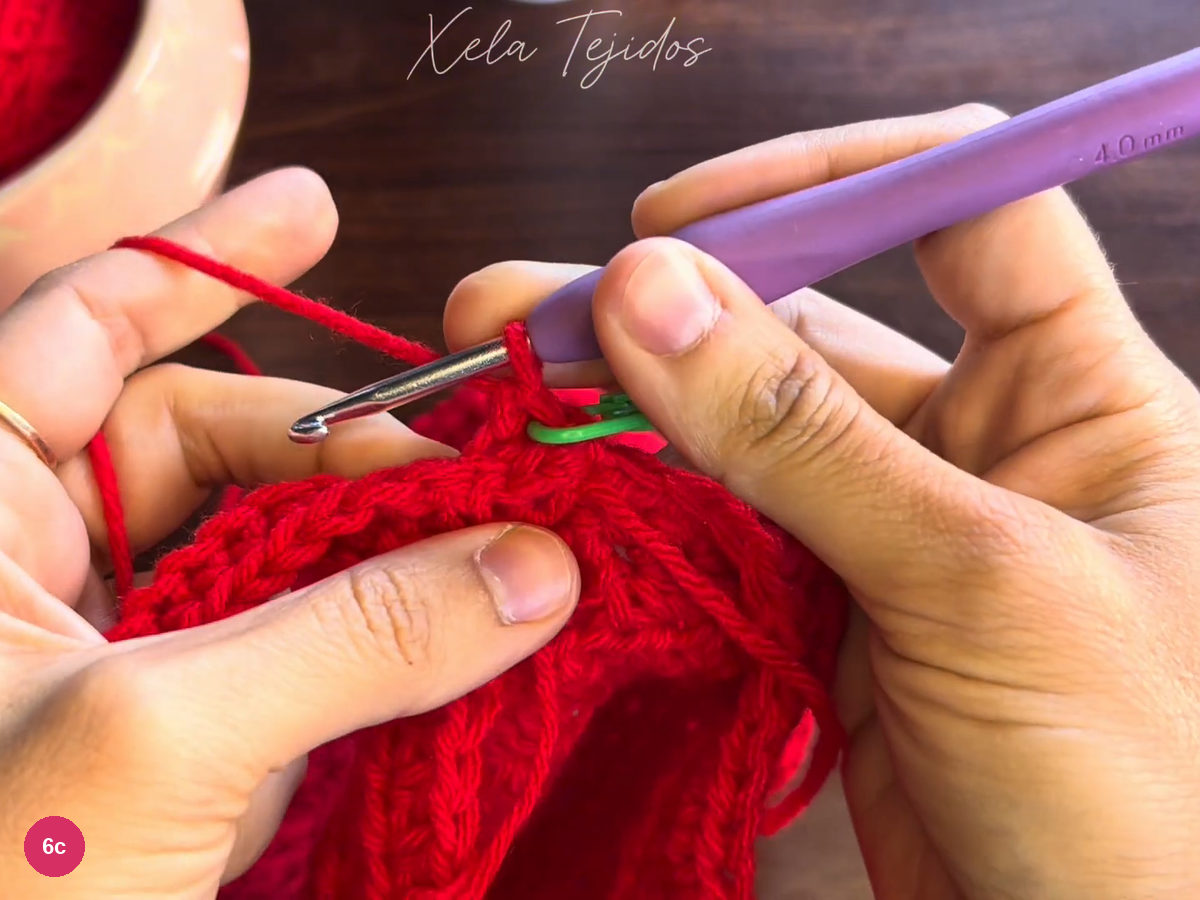
Step 6c: Check the ribbing as it wraps around the body. -
Complete the other cuff and join the short ends
- Cuff seam · 15 matched stitch positions
Repeat the attached ribbing around the other open end, then make the second leg warmer to match. The completed cuff section is shown here before its short ends are closed; the repeated cuff work is not demonstrated again in detail. Keep all the cuff strips at the same working width so their short ends can be joined evenly.
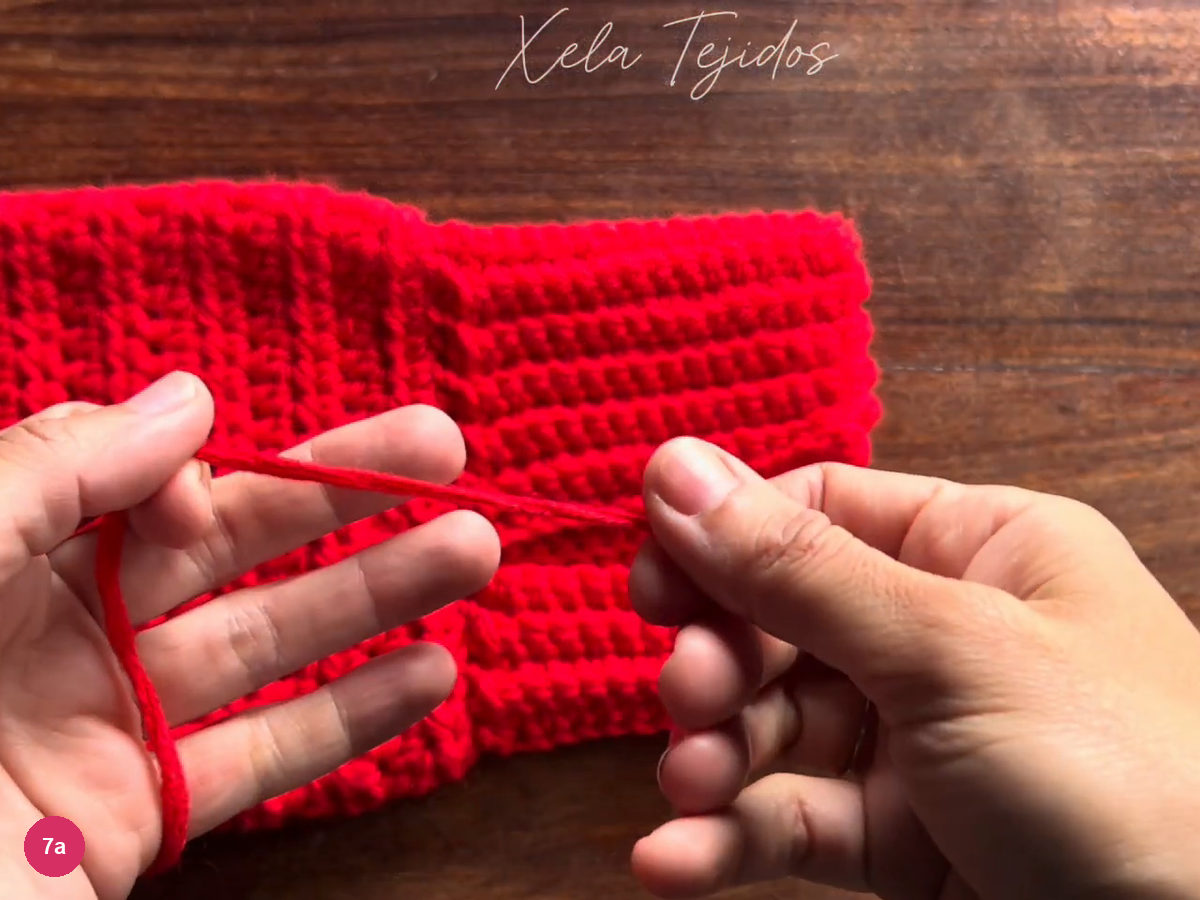
Step 7a: Check the repeated cuffs before joining their ends. Bring a cuff's short ends together with the outside of the warmer facing you. Align the stitches and take one back loop from each edge onto the hook, then draw the yarn through to start the seam. Make the opening chain as demonstrated, keeping the two edges level instead of folding one higher than the other.
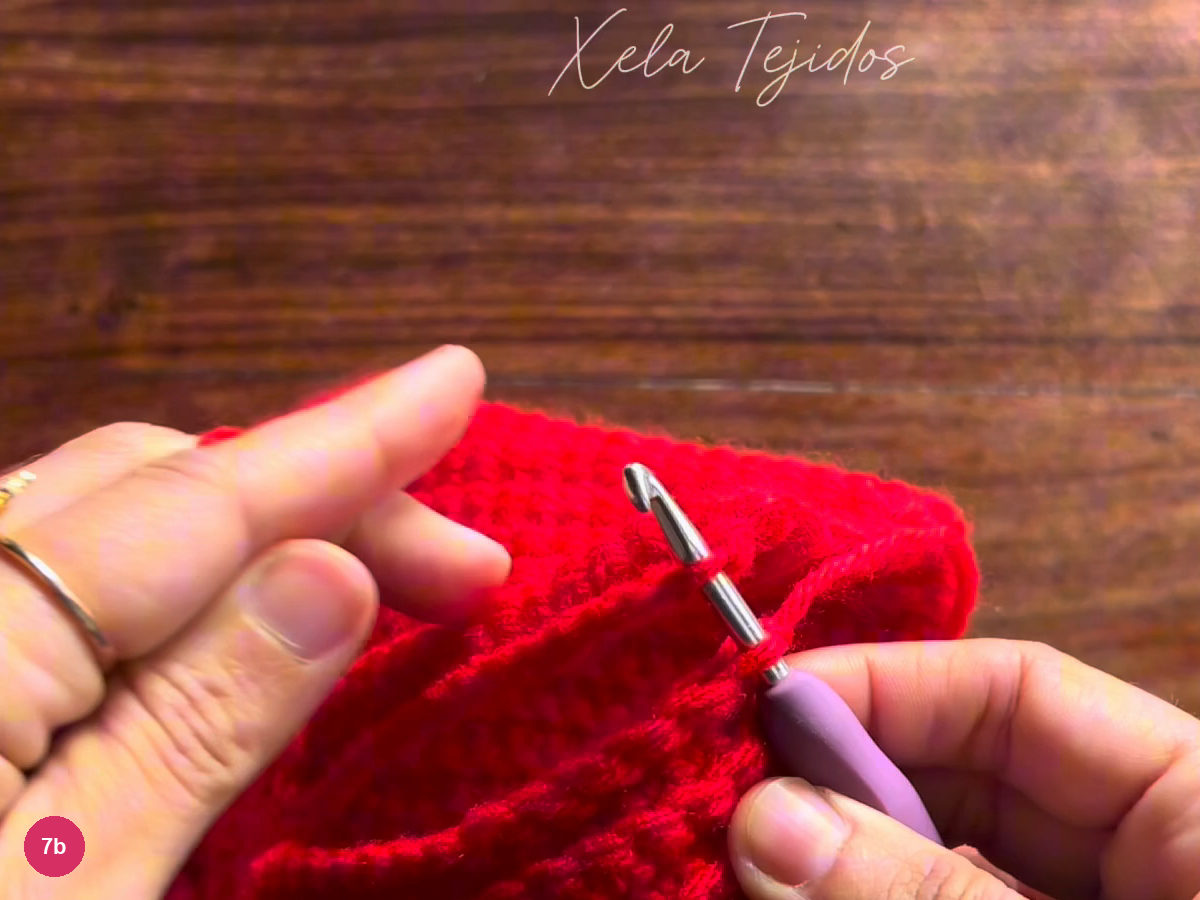
Step 7b: Align the cuff ends for the seam. Single crochet the matched cuff loops together, taking one loop from each edge for every seam stitch. Keep the 15 cuff stitch positions paired all the way across. Use an even, relaxed pull-through so the seam follows the ribbing rather than becoming a stiff cord.
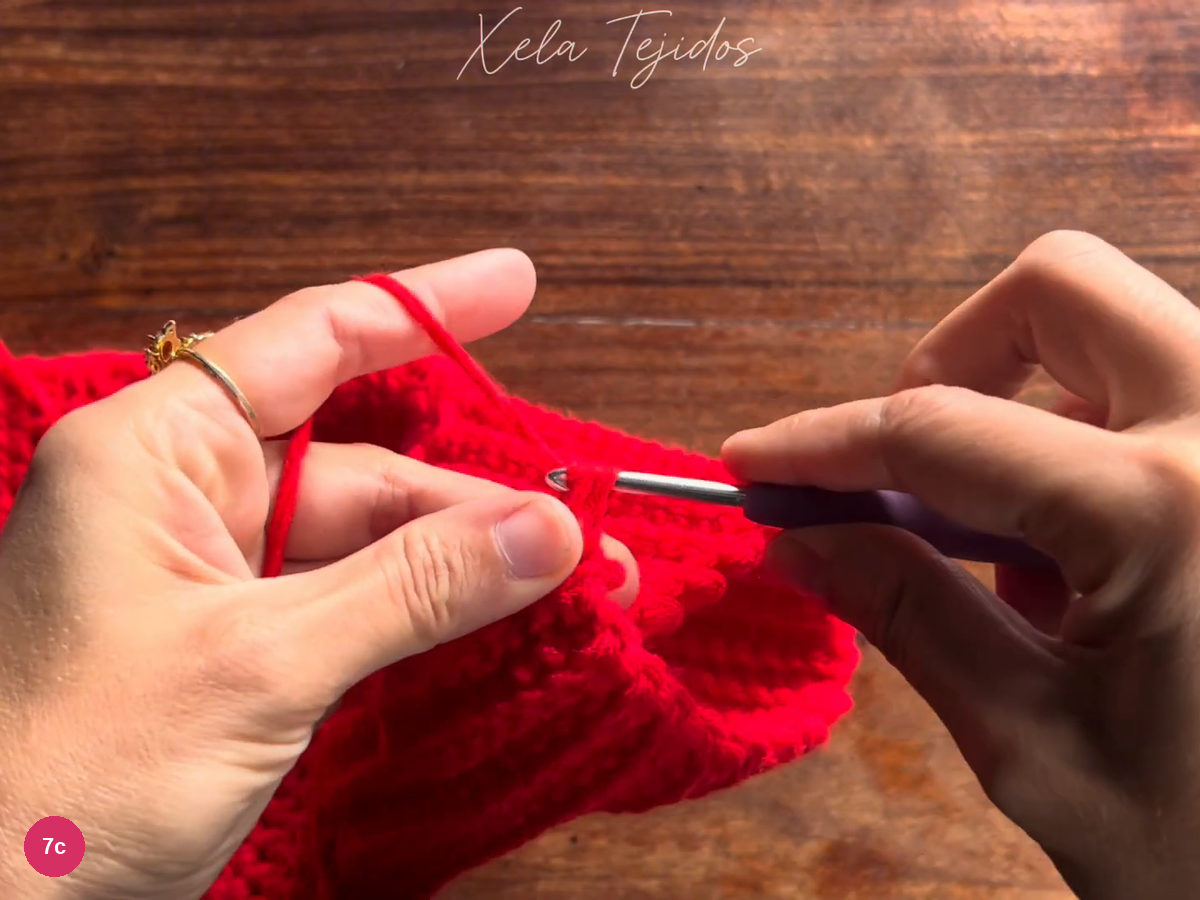
Step 7c: Single crochet the aligned cuff ends together. -
Secure the ends and measure the finished pair
- Finished length · approximately 41 cm
Thread the remaining tail onto a yarn needle and pass it through the inside stitches near the cuff join. Keep the tail inside the fabric and clear of the opening. Secure the other ends in the same way, leaving the ribbing free to stretch.
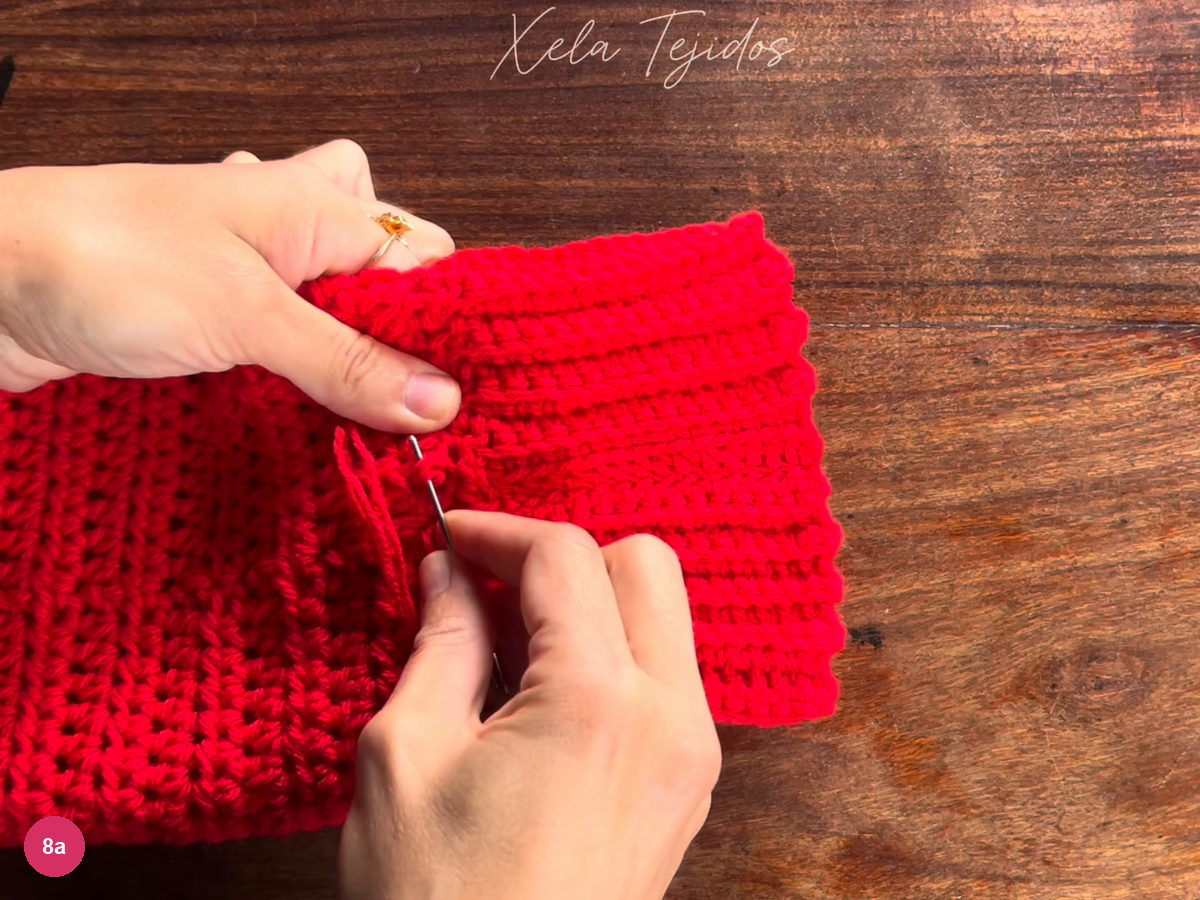
Step 8a: Weave the tail through the inside stitches. Open the warmer and inspect the cuff-to-body joins. Check the seam and the texture of the body beside the ribbing. Compare the two pieces under the same light tension so a stretched cuff is not mistaken for a longer one.
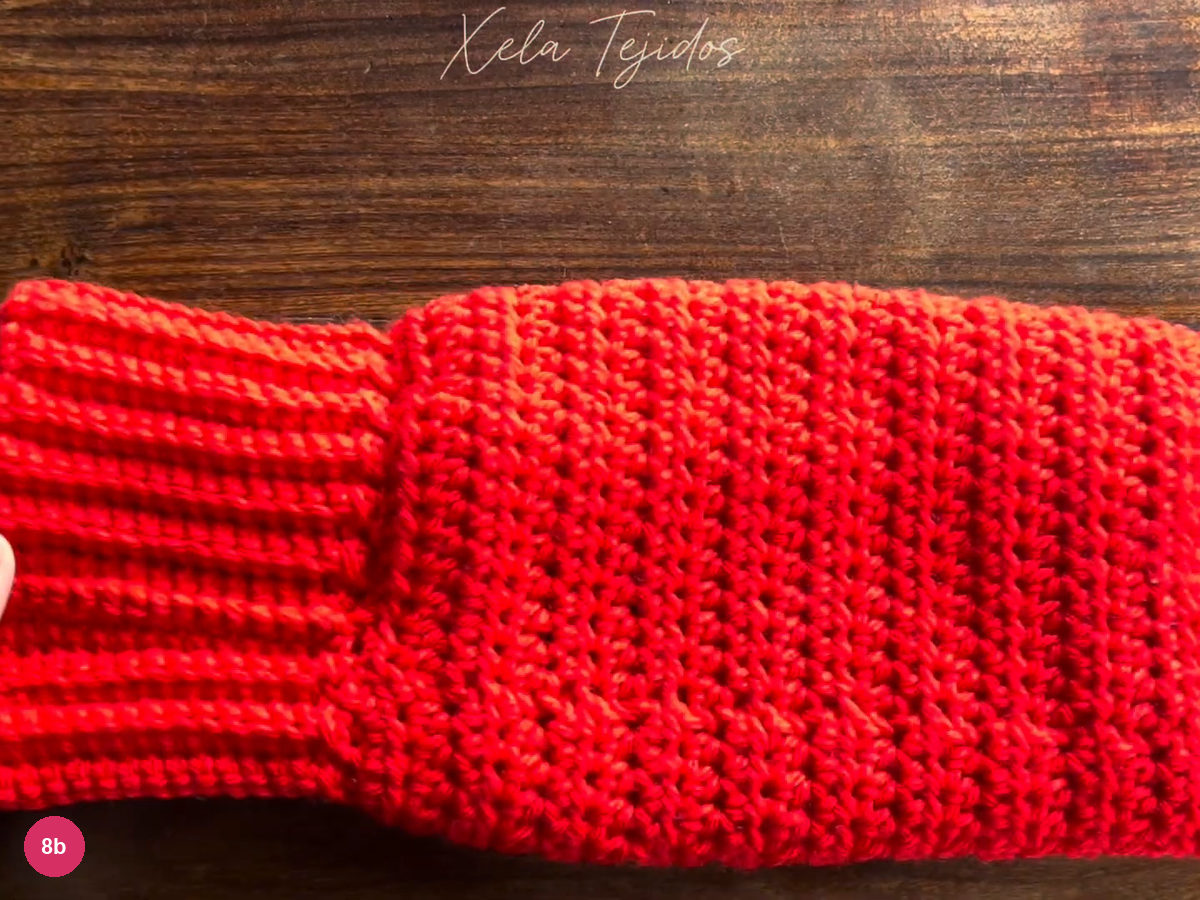
Step 8b: Inspect the completed cuff and body join. Measure the complete warmer from one cuff edge to the other. The demonstrated finished length is approximately 41 cm. Record that full measurement separately from the earlier body and cuff-chain measurements, then check that the second warmer settles to the same length.
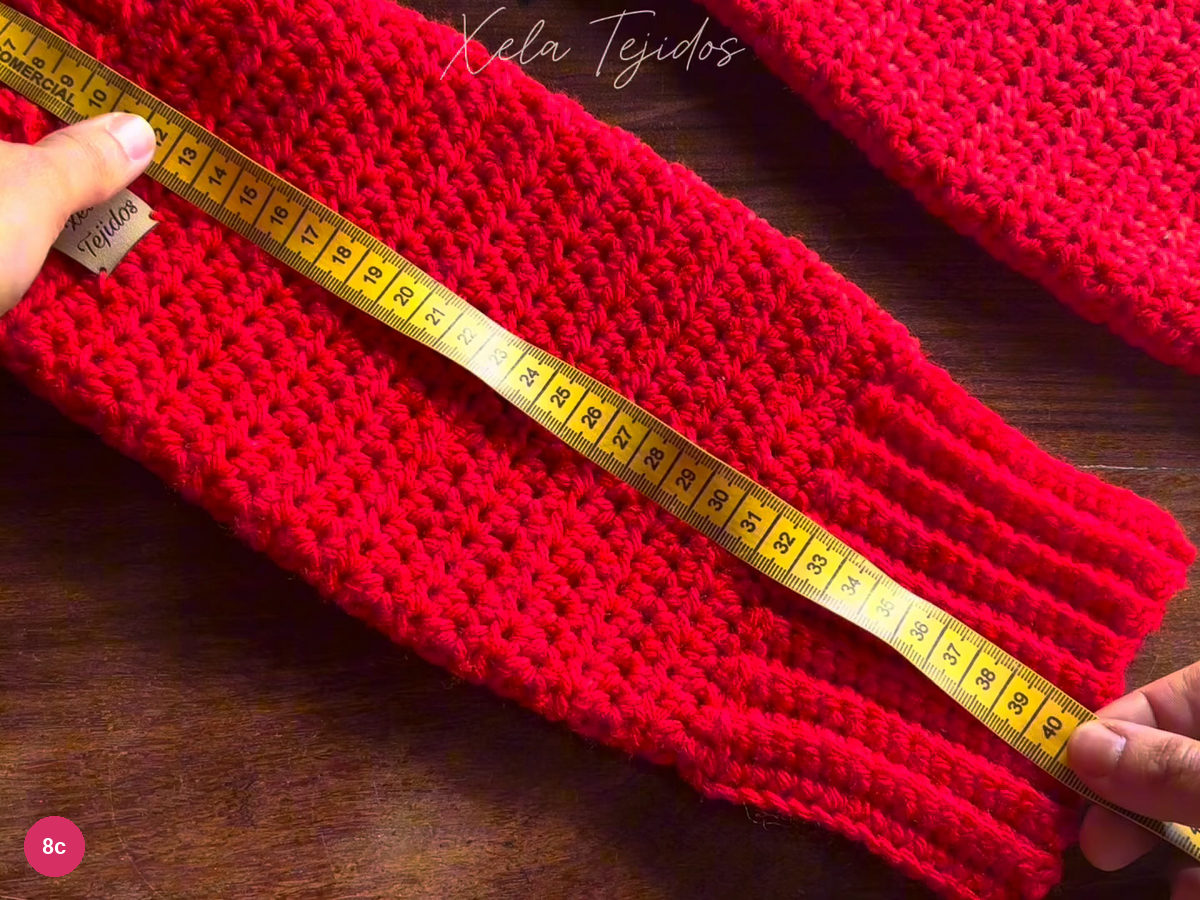
Step 8c: Check the full finished length.
Fit checks and troubleshooting
The chain ring will not pass over the foot. Check the ring before building the body. A restricted foundation stays tight even when the fabric above it stretches. Compare the chain with the lightly stretched measurement, then check the actual ring on the wearer rather than assuming the sample size will fit.
The body gains a stitch near its join. Find the marked half double crochet and distinguish it from the turning chain and slip stitch. Recount before beginning another round. Keeping the first stitch marked after every turn is especially useful because the direction changes, while the joining area remains close to the hook.
The cuff grows wider. Count its working stitches separately from the two attachment slip stitches. Keep the first and last single crochet marked until the strip is established. If an extra stitch has entered the cuff, correct it close to the working edge so the short ends will still have matching stitch positions.
The cuff attachment puckers. Check that you are moving to the next available body stitch as the ribbing advances. Keep the slip stitches relaxed enough to bend with the fabric. Compare the outer ribbed edge with the attachment line before closing the cuff seam; a tight join shows clearly while the short ends are still open.
The pair looks uneven. Compare the body stitch counts, round tallies and cuff depth first. Lay both pieces down and let them relax before measuring. These crochet legwarmers use deep cuffs, so a difference in their row width can change the overall appearance even when the body sections match.
Final checklist
- Both foundation rings are untwisted and pass comfortably over the foot.
- The body keeps the same working stitch count through its joined, turned rounds.
- Cuff rows keep their working stitches separate from attachment slip stitches.
- All cuff seams have paired edges with no unmatched stitch left over.
- Both warmers have matching relaxed lengths and secured inside ends.
For another project with defined ribbing, try the twisted ribbed crochet headband. The back-loop crochet scarf uses a different ridged fabric, while the folded-brim crochet beanie completes a cold-weather set. If you usually wear short crochet boot cuffs, check the longer measurement here before choosing the body length.
Inspired by Xela Tejidos’ video tutorial.

Save this pattern for later
Pin it to one of your boards so it’s ready when you have a free evening and the right yarn.