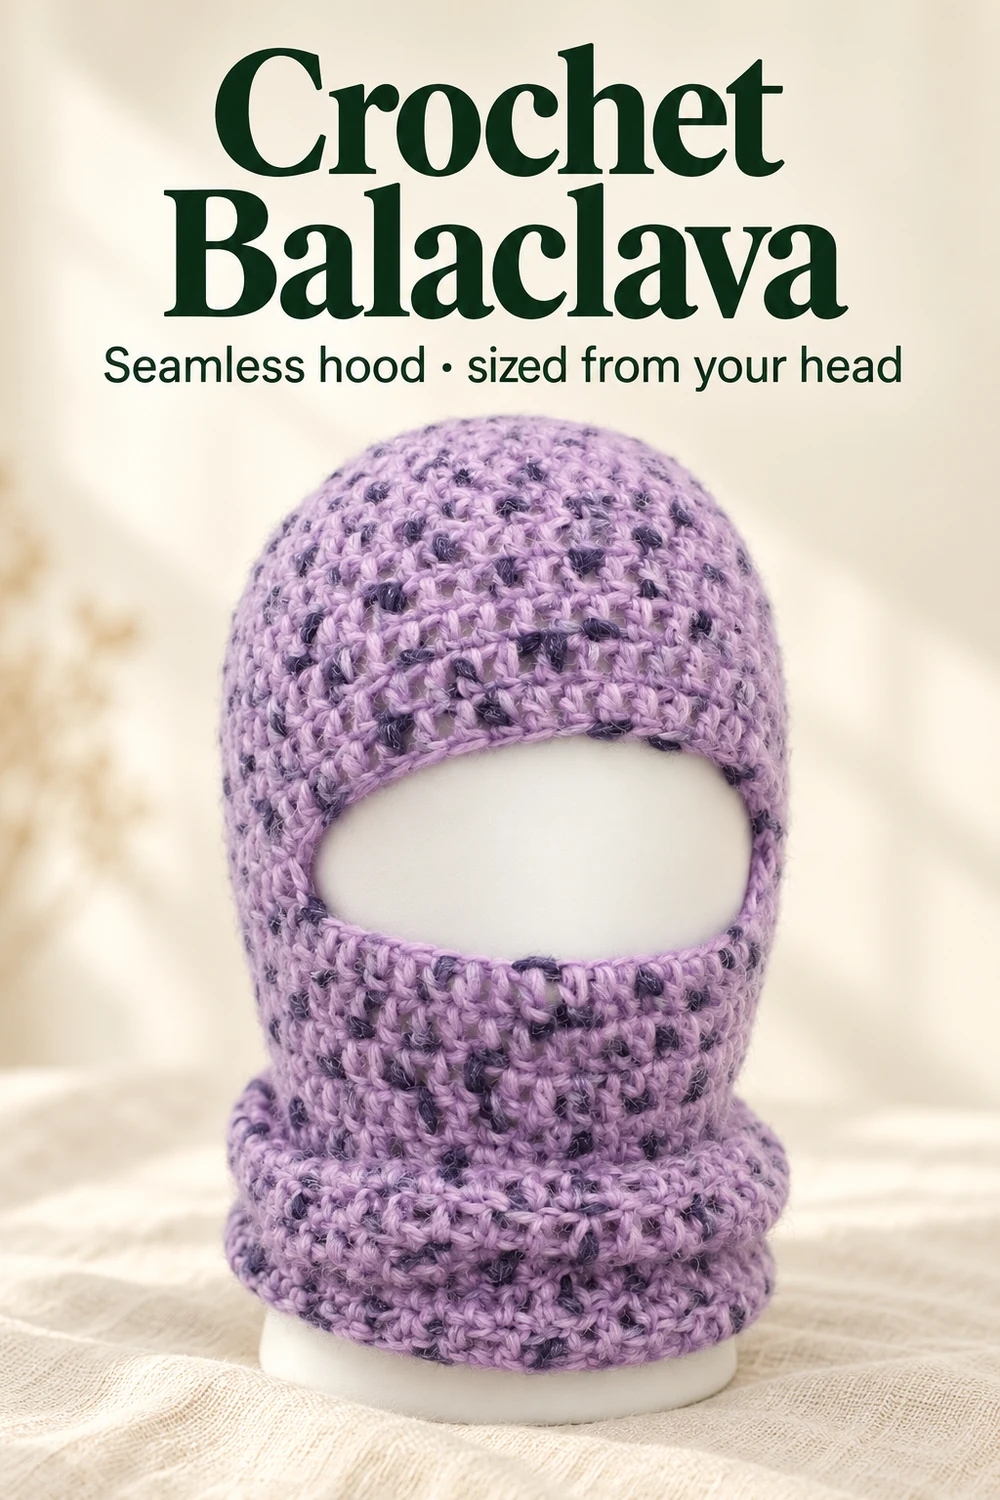
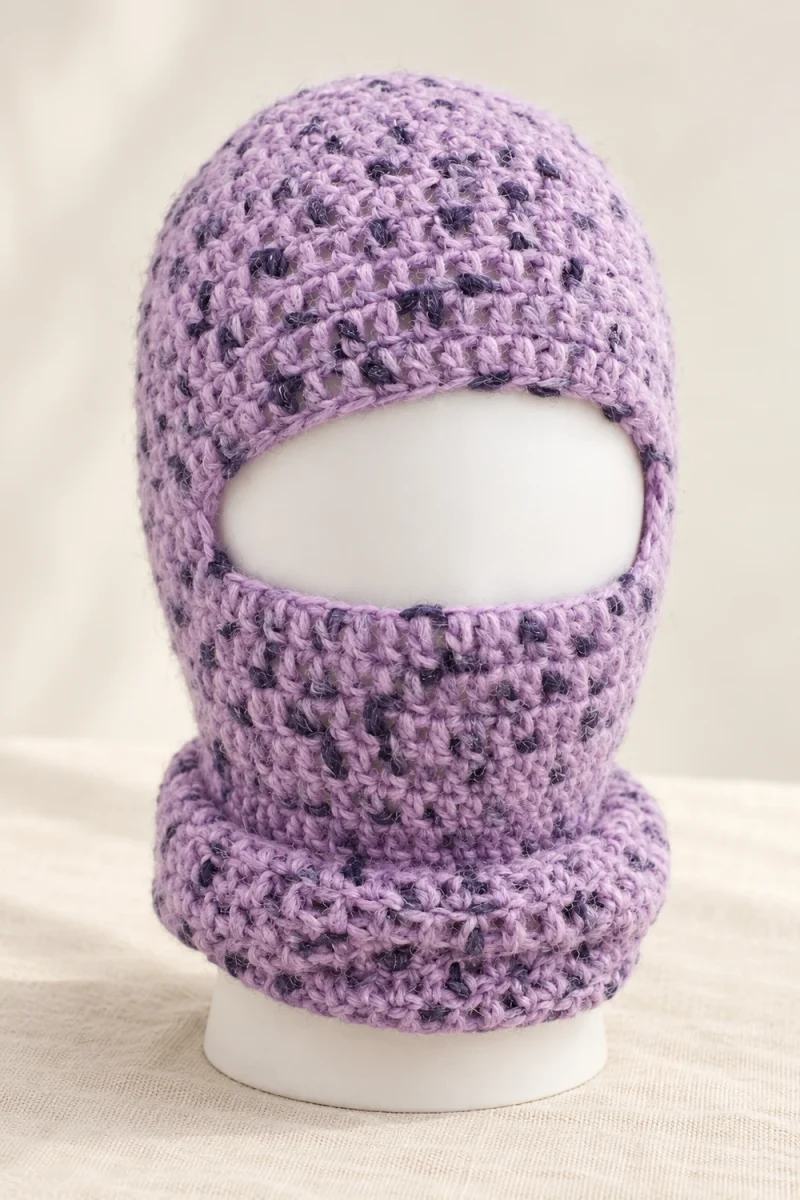
This crochet balaclava is a hood and neck warmer made in one piece, starting with a flat crown disc and then worked in rounds with no seams. A chain bridge forms the eye opening, and a longer section below it covers the neck. The video sizes it from your head circumference: divide it by 3.14 for the crown width, add 2 cm for the cap height and divide the crown stitches by 3 to place the opening. The hood shown uses a 6 mm hook and 60 crown stitches; the video does not state a finished circumference or neck length in centimetres.
Before you start this crochet balaclava
Plan for one flat crown, one hood section and one neck section. For a different head-covering shape, compare the retro crochet head scarf, or try the twisted ribbed crochet headband if you only need ear cover.
- Yarn: the demonstrated yarn is a soft alpaca blend (65% baby alpaca, 7% merino, 28% polyamide), 50 g = 150 m. The video lists 70 g for the balaclava shown. It advises choosing a warm, soft yarn that does not prickle, since the fabric sits against the face; it names alpaca and wools labelled baby as the safest choices.
- Hook: 6 mm. The video says 5 or 7 mm are suggested for this yarn and picks 6 mm for a slightly closer, warmer fabric.
- Two stitch markers for the opening, one more for the ring, a tape measure and a calculator.
US terms: ch = chain; sl st = slip stitch; dc = double crochet; dc2tog = two dc unfinished and closed together, a decrease. An increase is 2 dc in one stitch. In the creator’s Italian wording a dc is a “maglia alta”.
Other stitch heights and yarns: the video says half double crochet starts with 10 stitches in the ring and single crochet with 6, and that a different yarn or stitch needs more or fewer increase rounds. It does not list those extra rounds, so keep measuring the flat crown against your target width instead of relying on five rounds.
Work the balaclava from the crown down
-
Set the size from your head measurement
- Crown width = head circumference ÷ 3.14
- Cap height = crown width + 2 cm
The finished piece is a hood with an eye opening and a longer section below it that covers the neck. All of the shaping comes from one measurement, your head circumference.
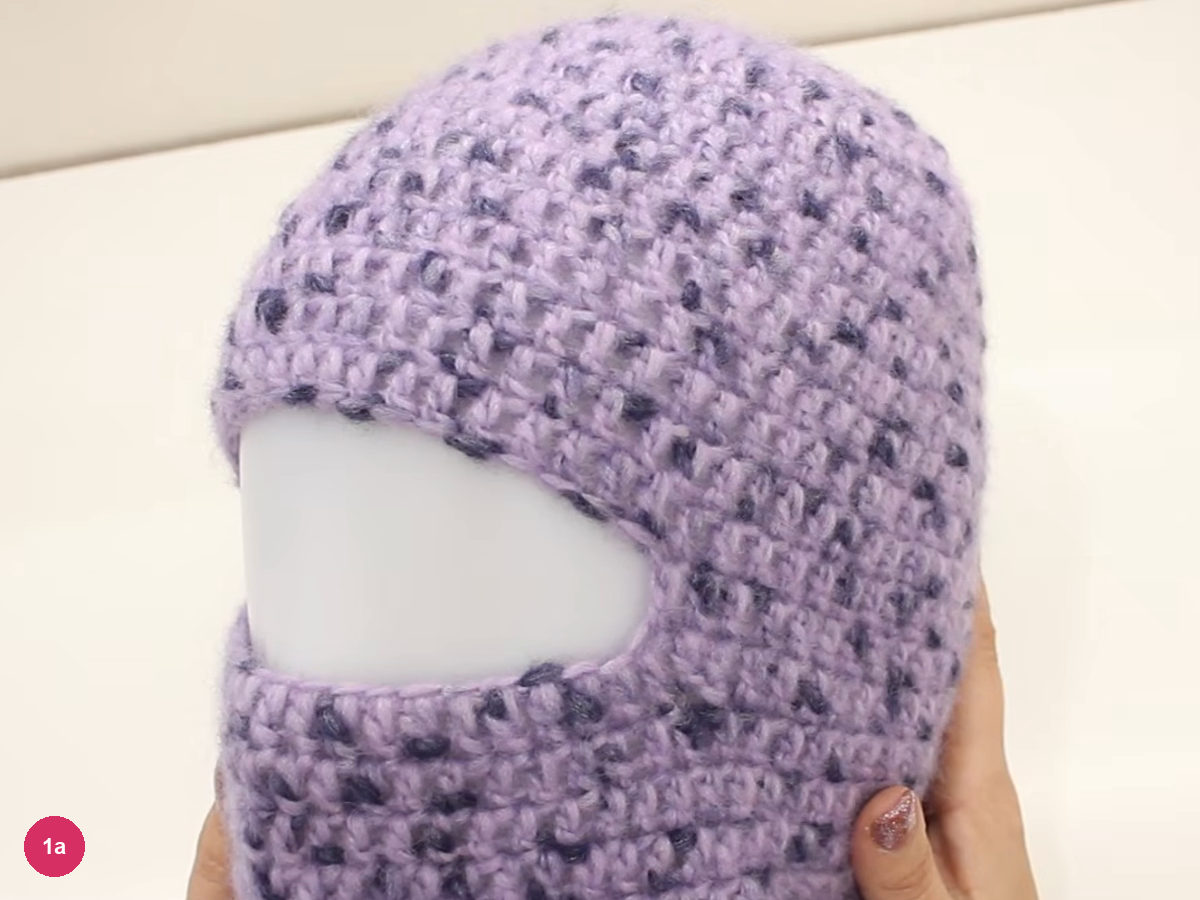
Step 1a: the finished hood with its eye opening and neck section. Divide your head circumference by 3.14 to find how wide the flat crown must become. The video's example is 56 cm ÷ 3.14, which gives 17 once the decimals are dropped; its own crown measures 16 cm, a little under, because the fabric stretches.
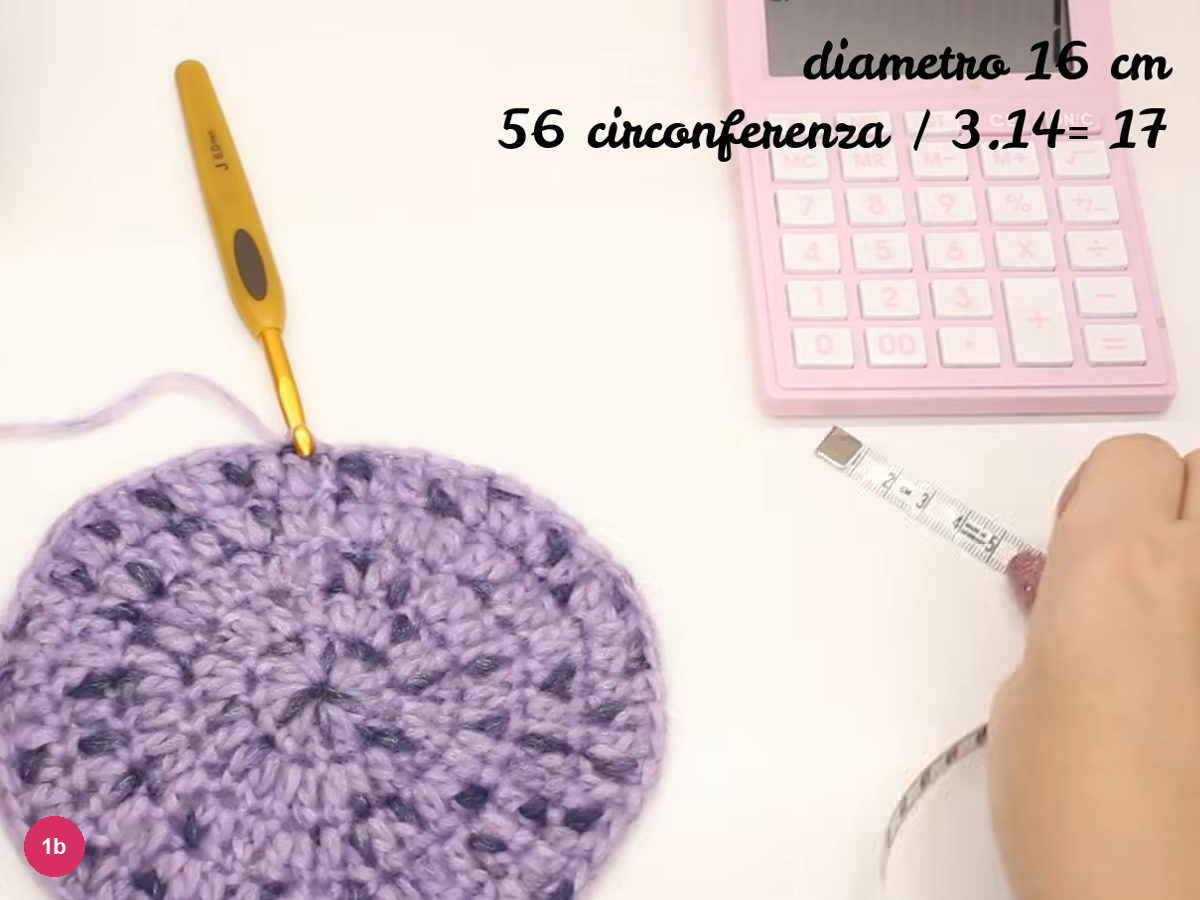
Step 1b: head circumference ÷ 3.14 sets the crown width. -
Crochet the flat crown
- Rnd 1 · 12 dc
- Rnd 2 · 24 dc
- Rnd 3 · 36 dc
- Rnd 4 · 48 dc
- Rnd 5 · 60 dc
Make a magic ring and secure it with one chain, then work 12 dc into the ring. A stitch marker in the first dc marks where each round ends.
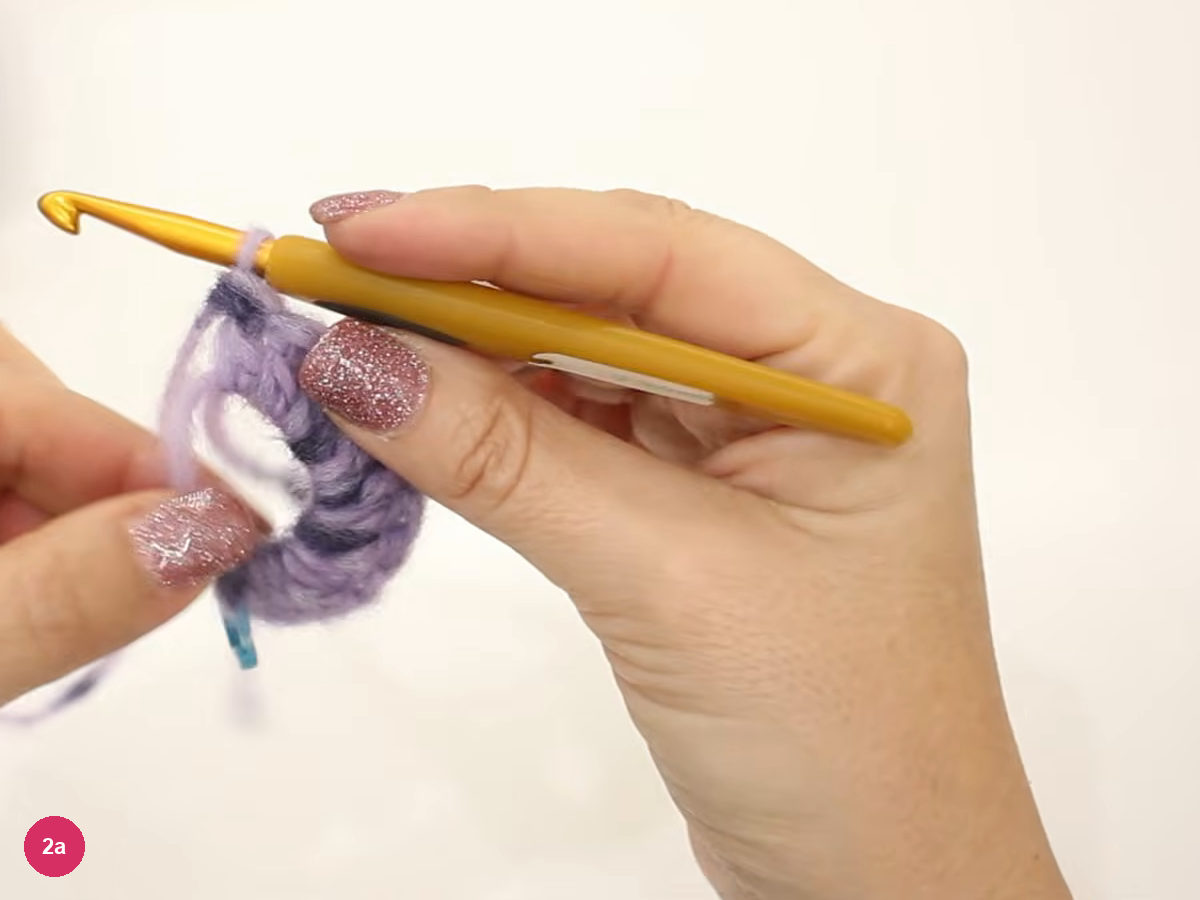
Step 2a: dc stitches worked into the magic ring. Pull the ring closed, remove the marker and join with a slip stitch into the marked stitch. The 12 dc now form a small disc.
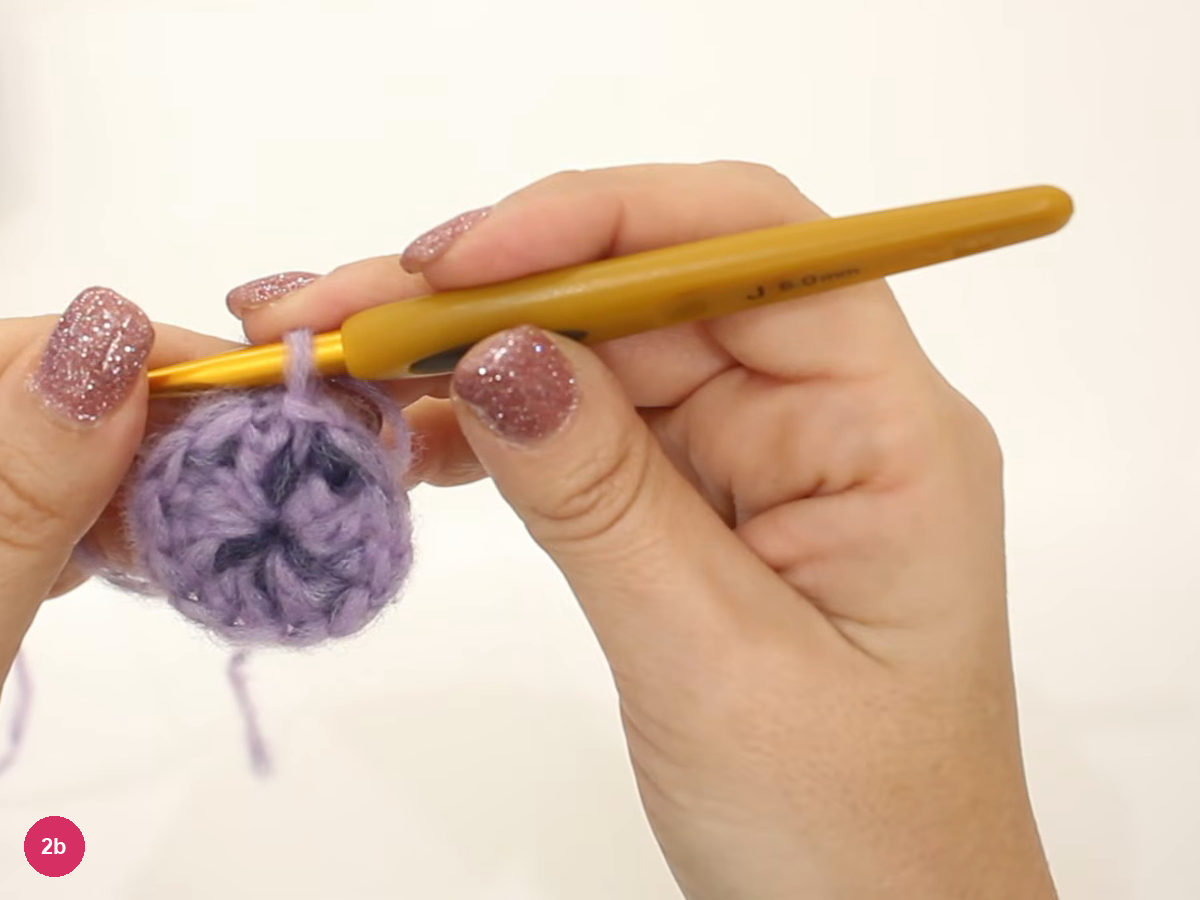
Step 2b: the closed disc of 12 dc. Round 2: work 2 dc into every stitch around, 12 increases in all. This takes the disc to 24 dc; close the round with a slip stitch.
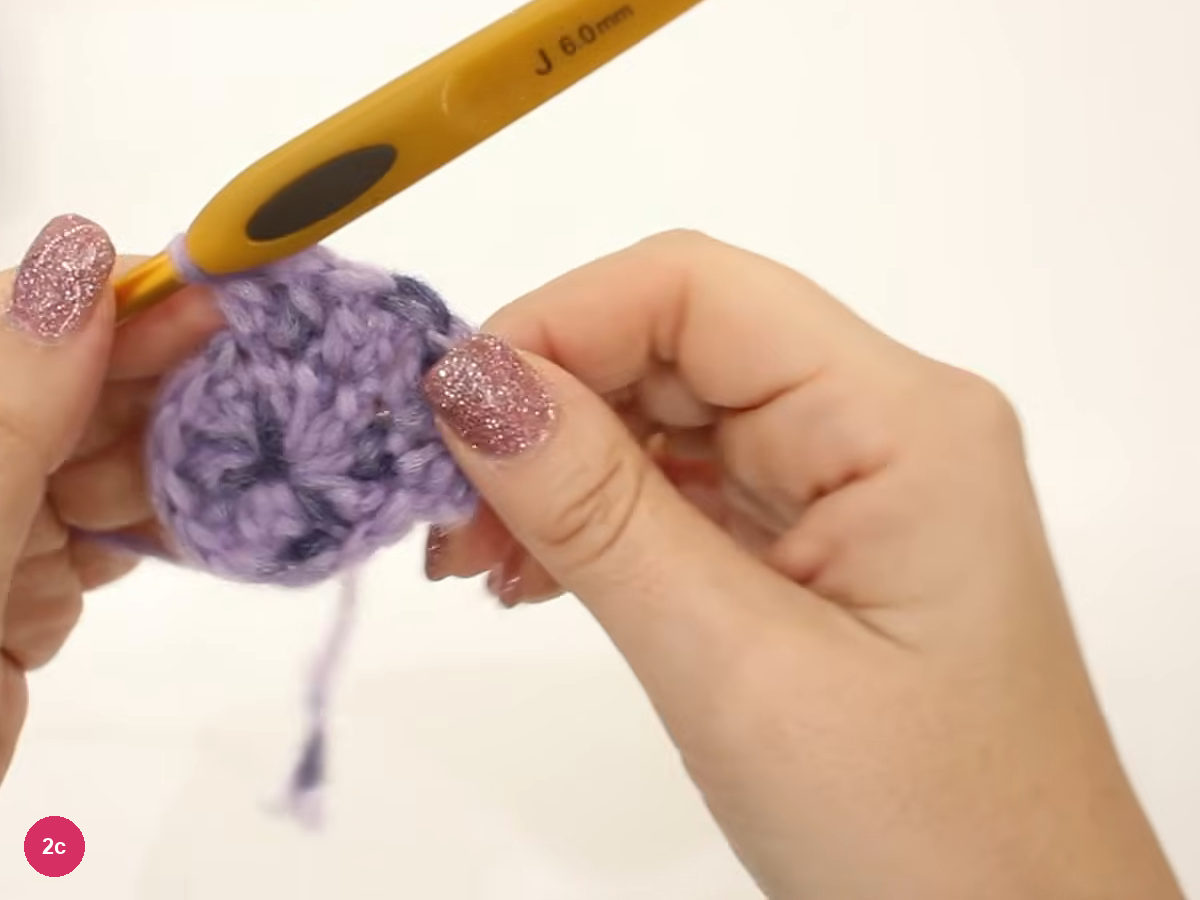
Step 2c: round 2 doubles the disc to 24 dc. Round 3: ch 2, then work 1 dc followed by 2 dc in the next stitch, and repeat around. That brings the total to 36 dc.
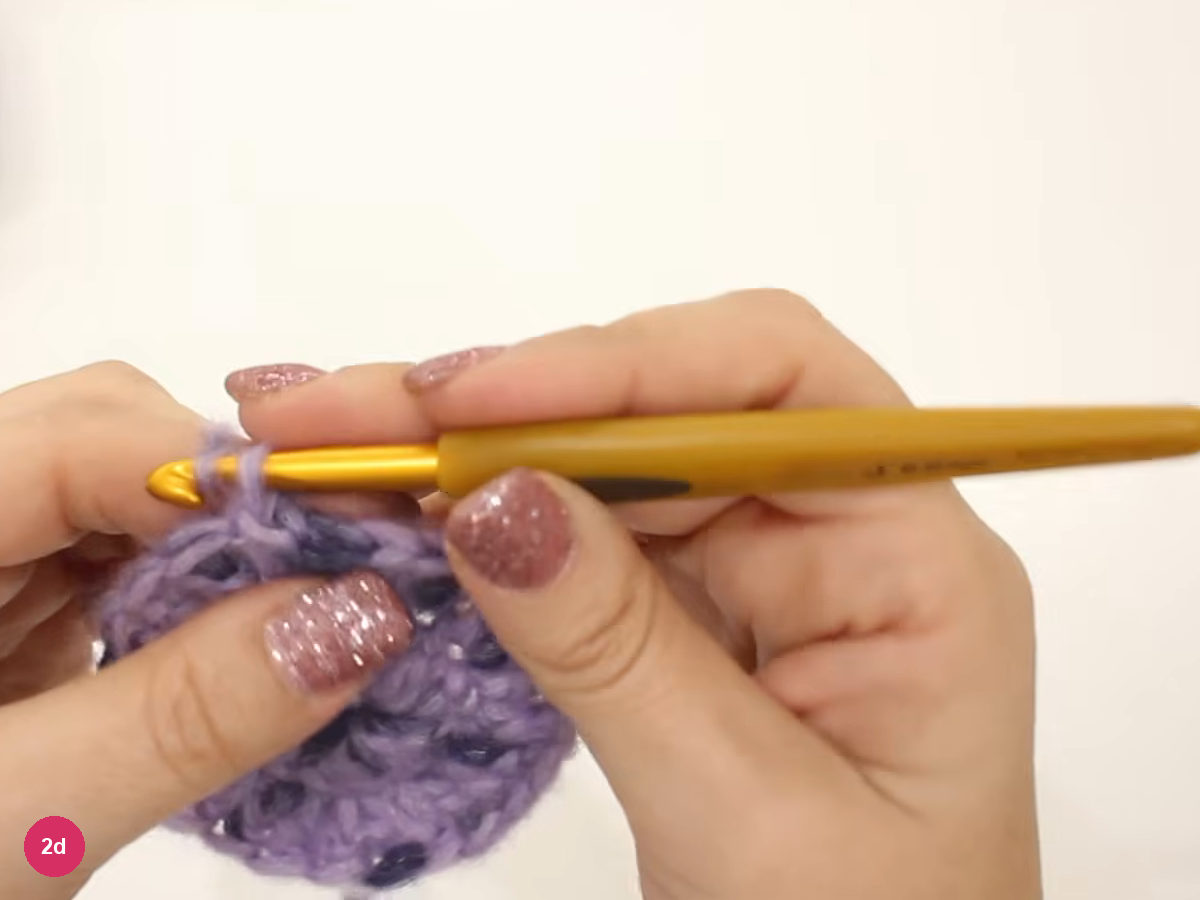
Step 2d: round 3 pattern, 1 dc then an increase, gives 36 dc. Round 4: ch 2 and work 2 dc, then an increase, and repeat around. The disc now has 48 dc.
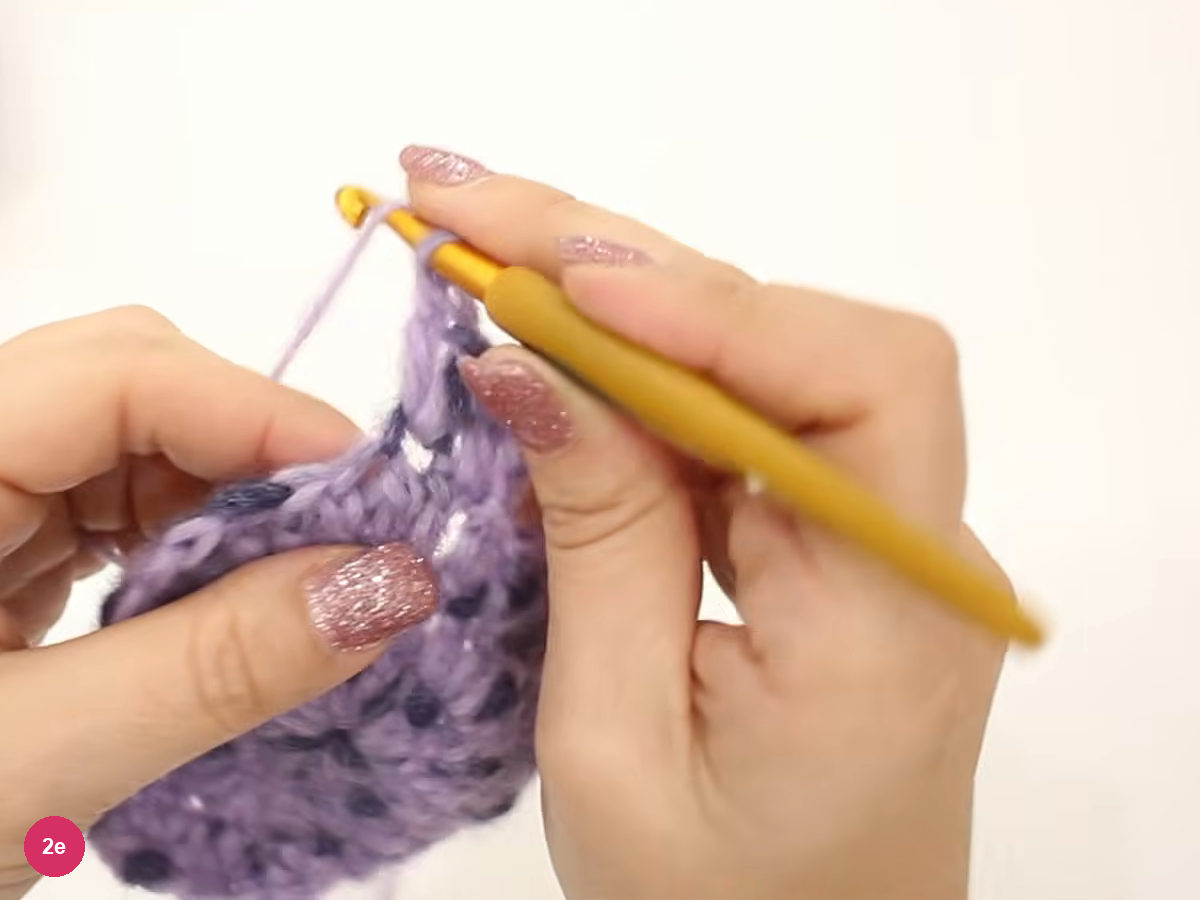
Step 2e: round 4 grows the disc to 48 dc. Round 5: close round 4 with a slip stitch, then work 3 dc and an increase around. The disc reaches 60 dc.
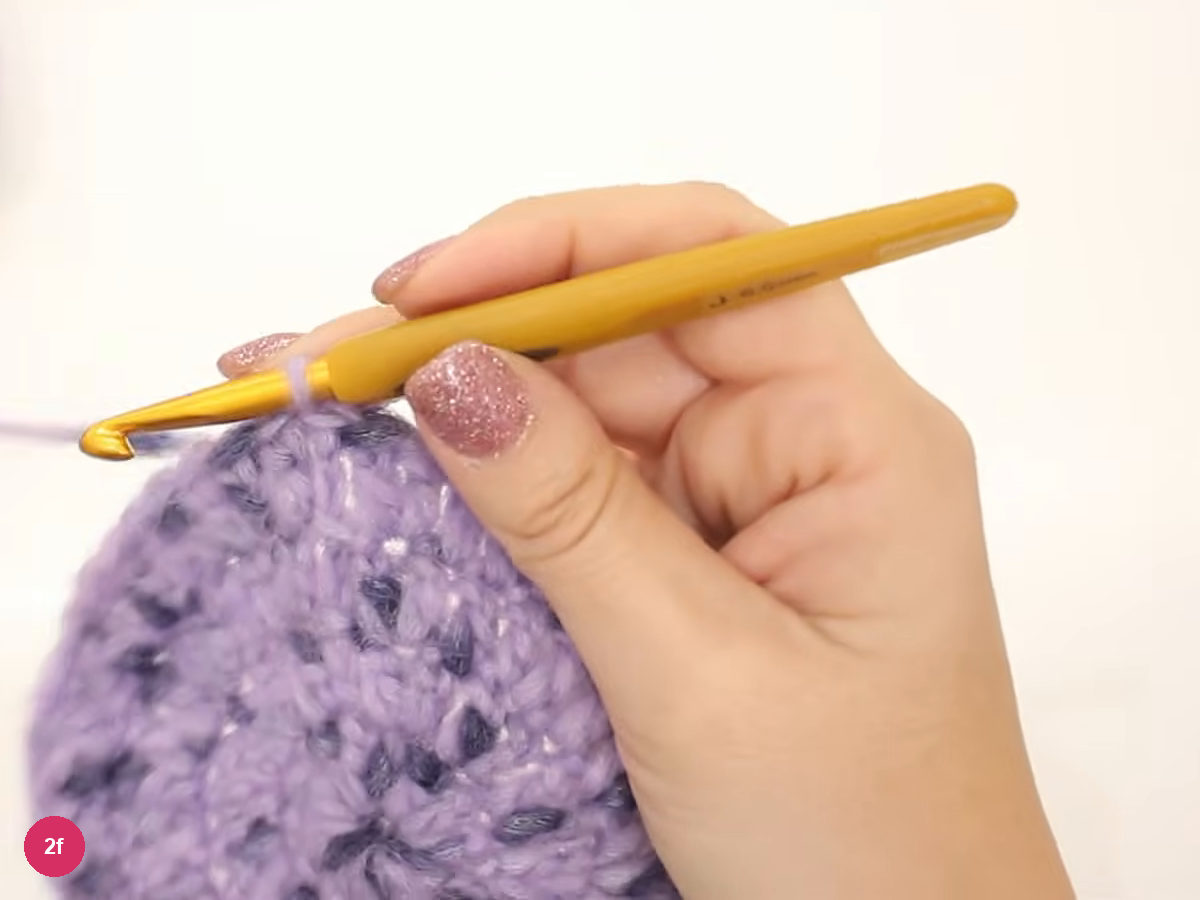
Step 2f: the disc at the start of round 5. Lay the disc flat and measure across it. The video's disc is 16 cm, a little under the calculated 17 cm, so the finished fabric can stretch around the head.
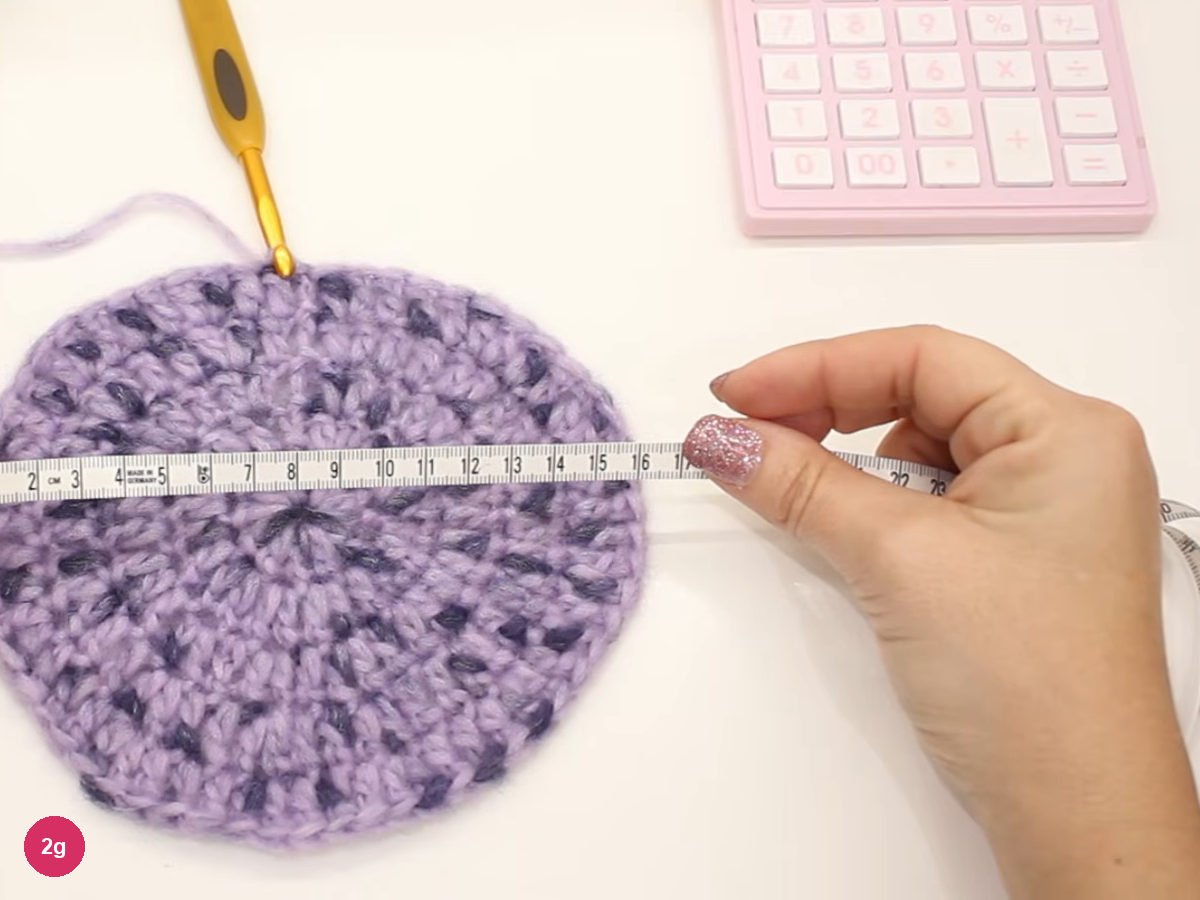
Step 2g: measure the flat crown across its centre. -
Raise the crown to cap height
- 60 dc in every round
- Cap height = crown width + 2 cm
Stop increasing. From here work 1 dc in each of the 60 stitches, round after round, so the sides rise straight. Join each round with a slip stitch as before.
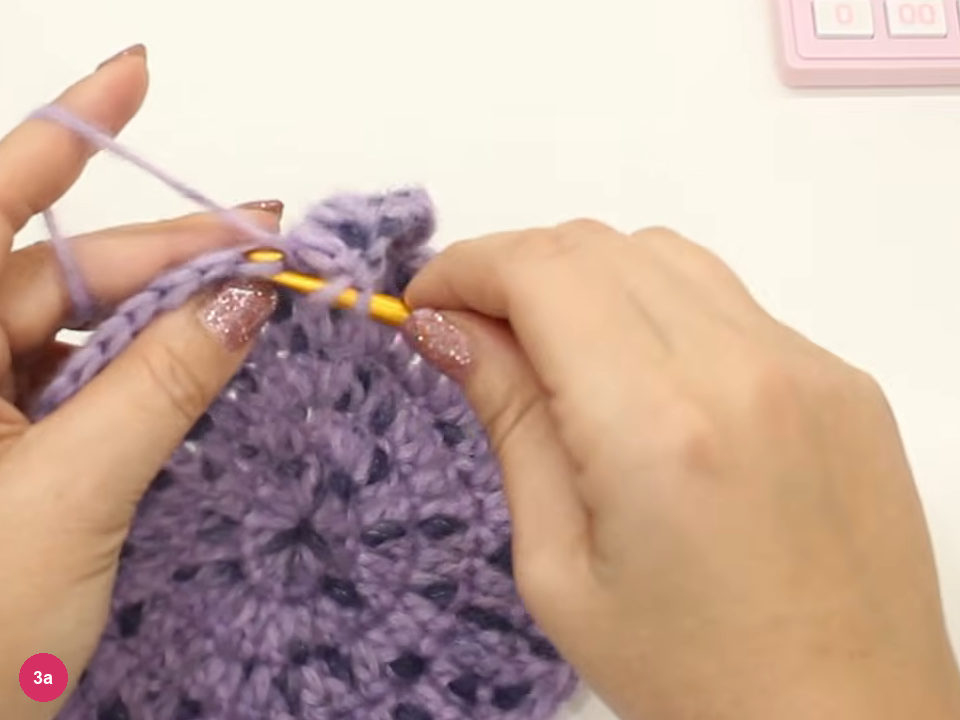
Step 3a: straight rounds worked with no increases. Keep going until the cap is as tall as the crown width plus 2 cm. In the video that is 17 + 2 = 19 cm, checked with the tape measure.
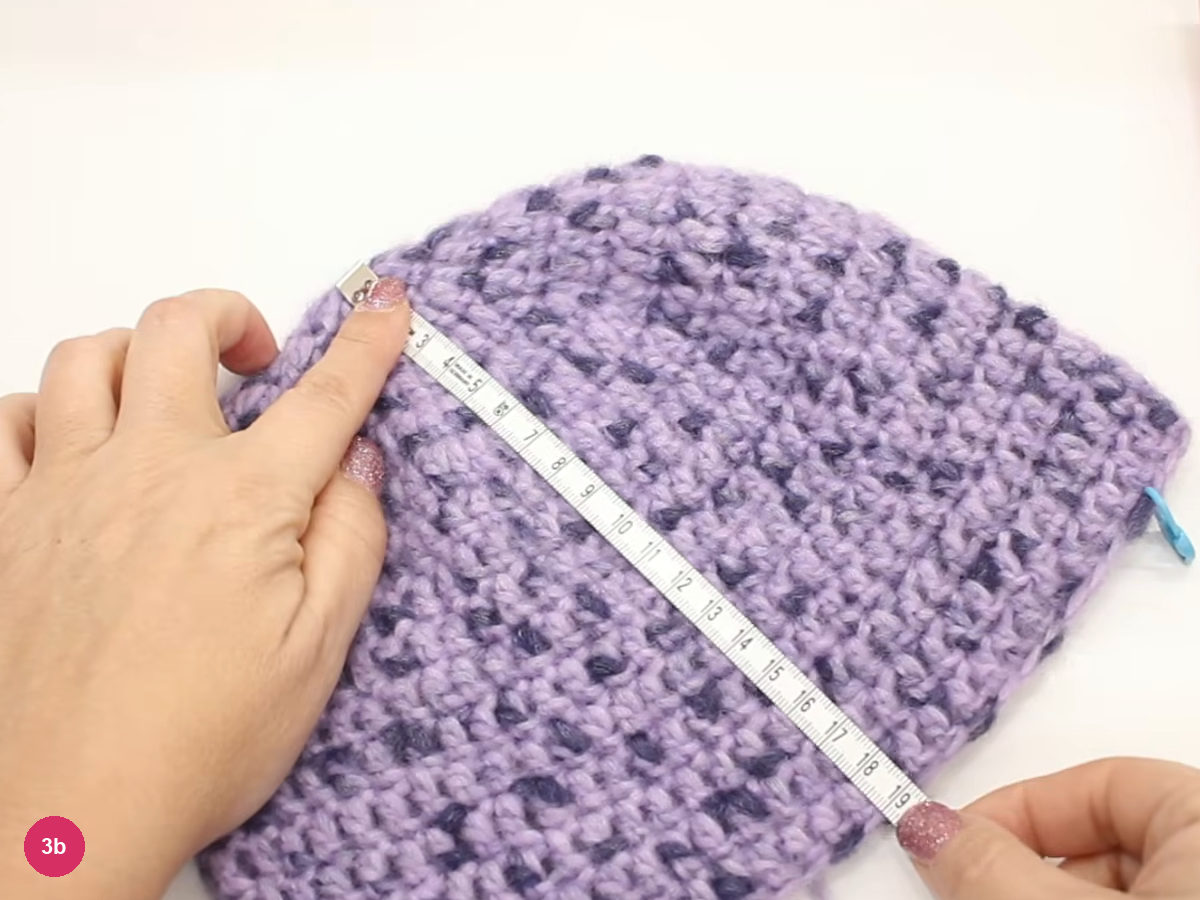
Step 3b: measure the cap height against the tape. -
Mark and chain the eye opening
- 60 ÷ 3 = 20
- Ch 20 over 20 skipped stitches
Divide the 60 stitches of the last round by 3 to get 20. Counting from the join, mark the 20th stitch, then count 20 from the other side and mark again; 20 stitches are left between the markers at the front for the opening.
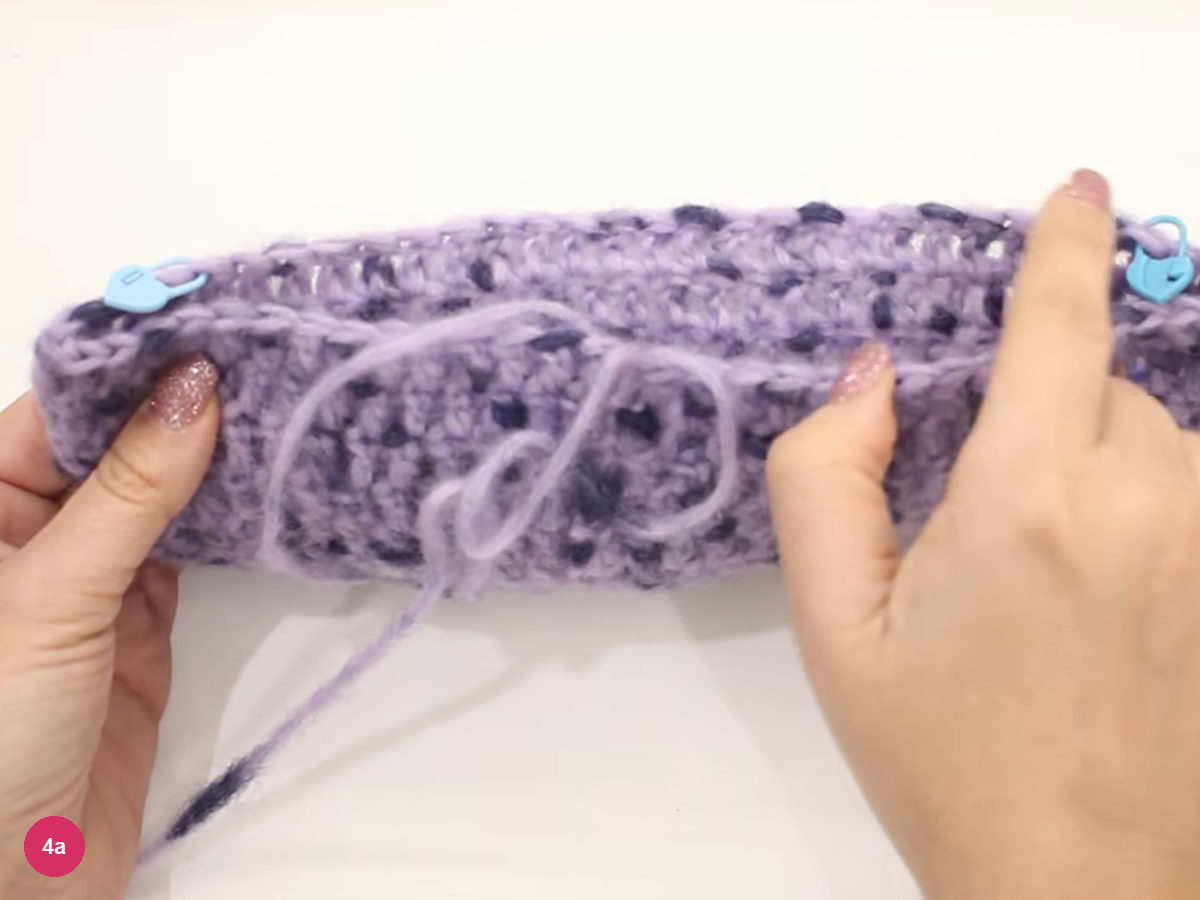
Step 4a: two markers set on the cap's rim. Work 1 dc in each stitch from the join to the first marker.
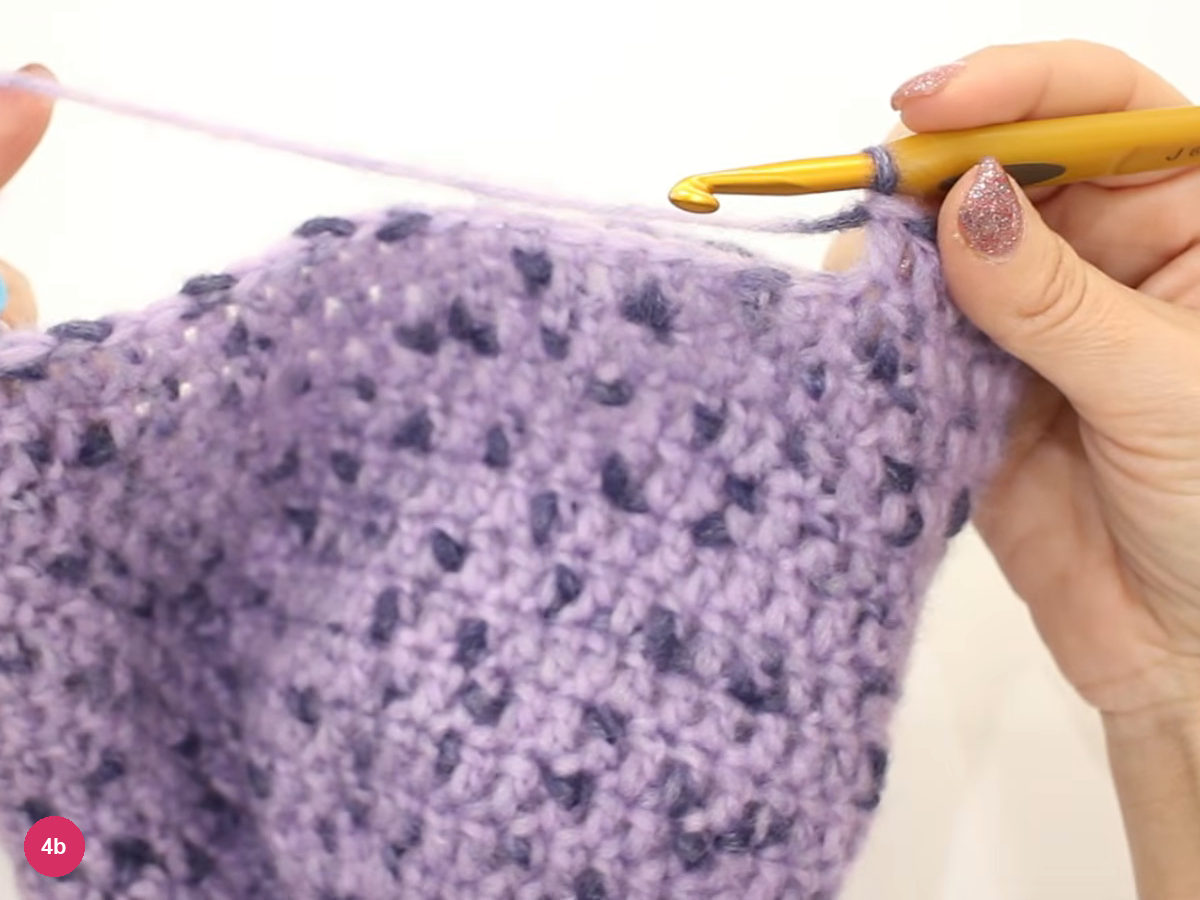
Step 4b: dc worked up to the first marker. At the first marker, ch 20, one chain for each of the 20 stitches you skip, and attach it at the second marker. Keep the chain relaxed; a tight chain makes the next round hard to enter with the hook.
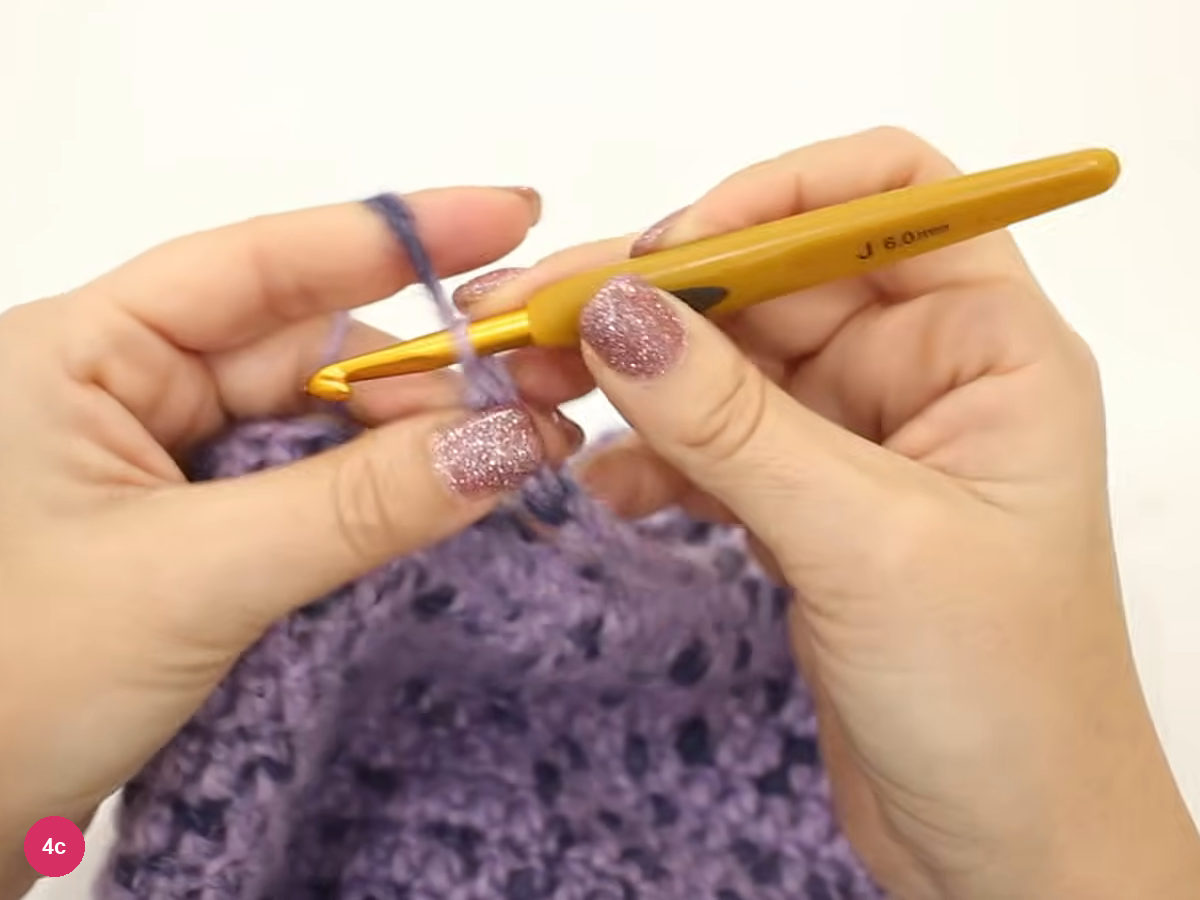
Step 4c: the 20-chain is worked over the skipped stitches. Turn the hood to look inside: the chain bridges the gap left by the skipped stitches. Take out the markers and carry on with dc around.
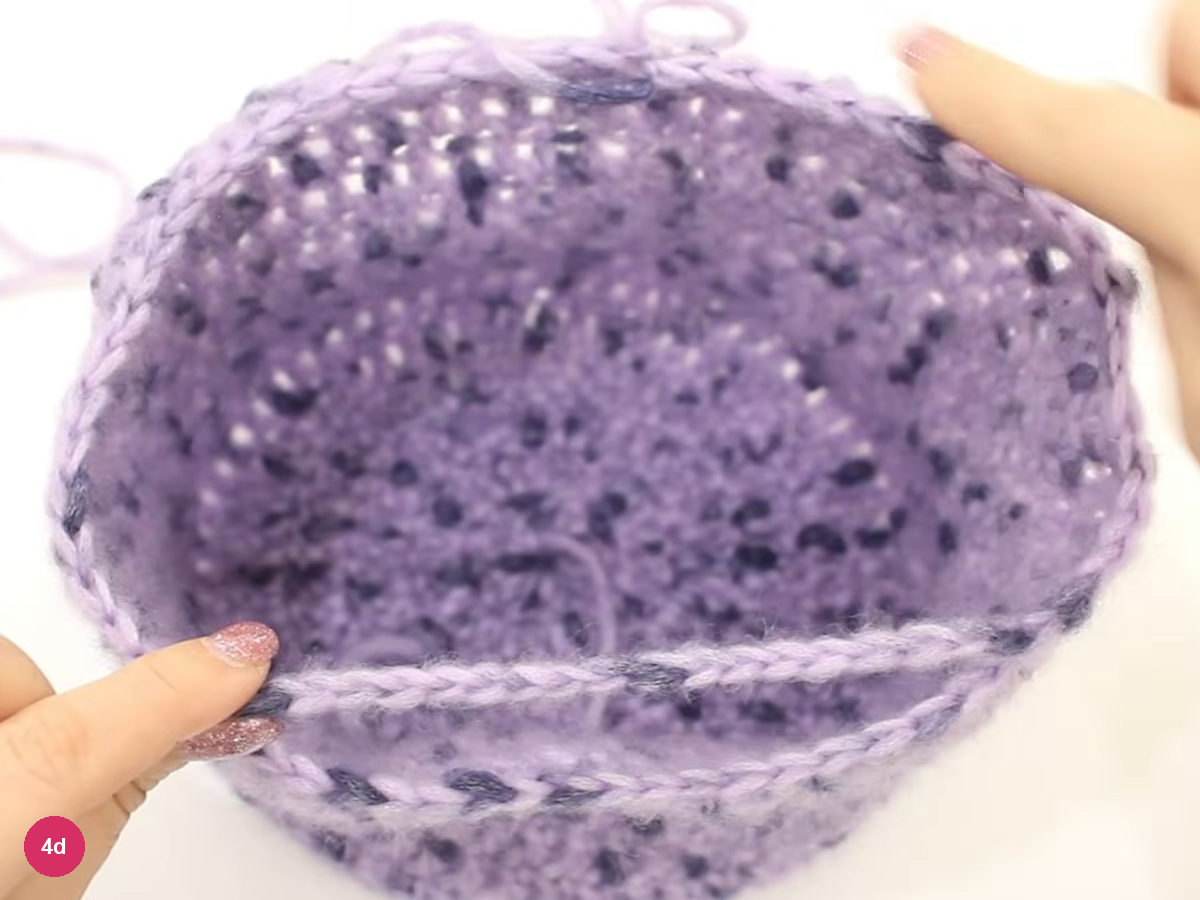
Step 4d: the chain bridge seen from inside the cap. Next round: work dc in each stitch, then 1 dc in each of the 20 chains without skipping any chain. Carry on with dc in every stitch to the end of the round.
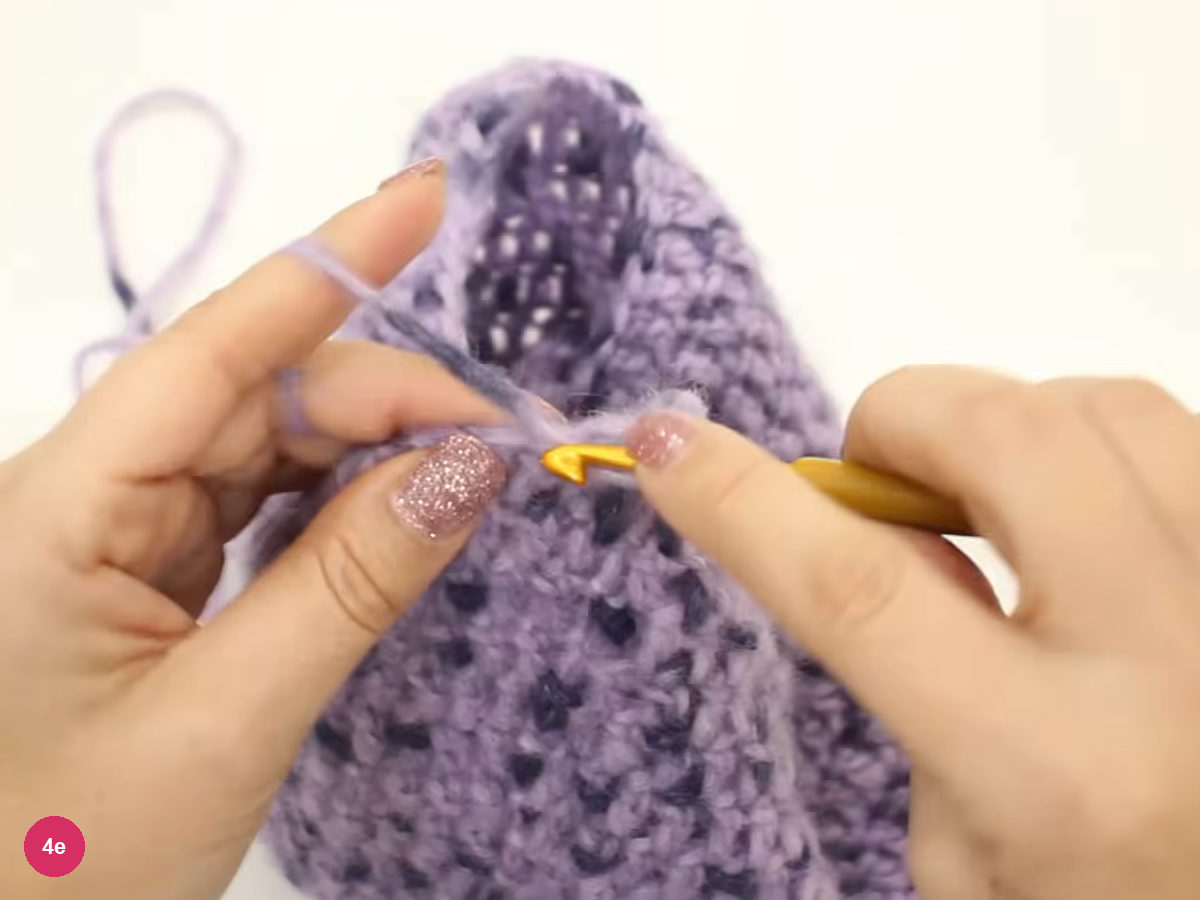
Step 4e: dc worked along the chain bridge. -
Work the neck section and finish the shape
- 9 rounds ≈ 11 cm
- Round 10 · 5 dc + dc2tog
- 15 rounds each side of the opening
Continue in dc, round after round, for about 10 cm. The video has 9 rounds here, roughly 11 cm. The opening now shows as a horizontal slit across the hood.
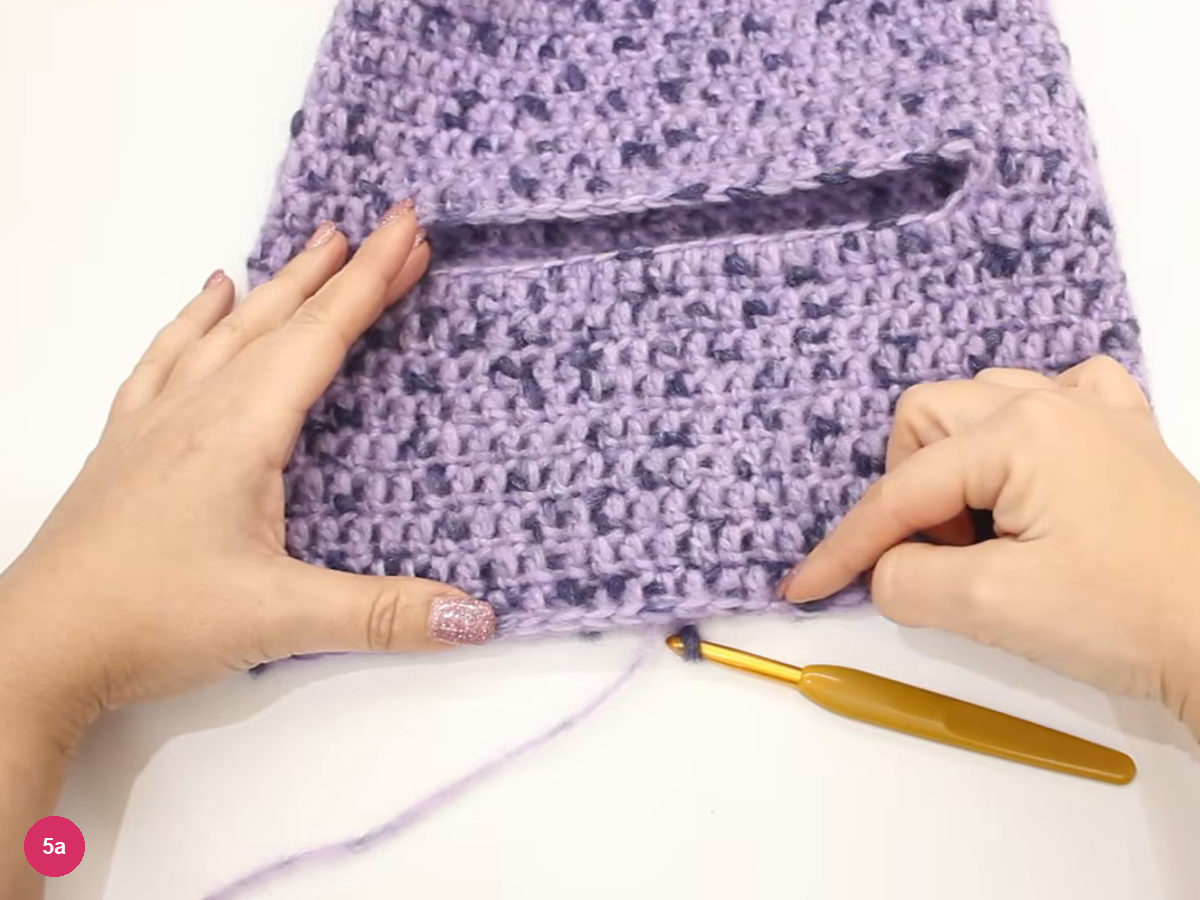
Step 5a: the slit opening after the neck rounds. Round 10: work 5 dc, then a decrease over the next 2 stitches (dc2tog), and repeat around. The video does this once to settle the neck; it advises against decreasing in two rounds in a row, and against making it so tight that the hood will not pass over the head.
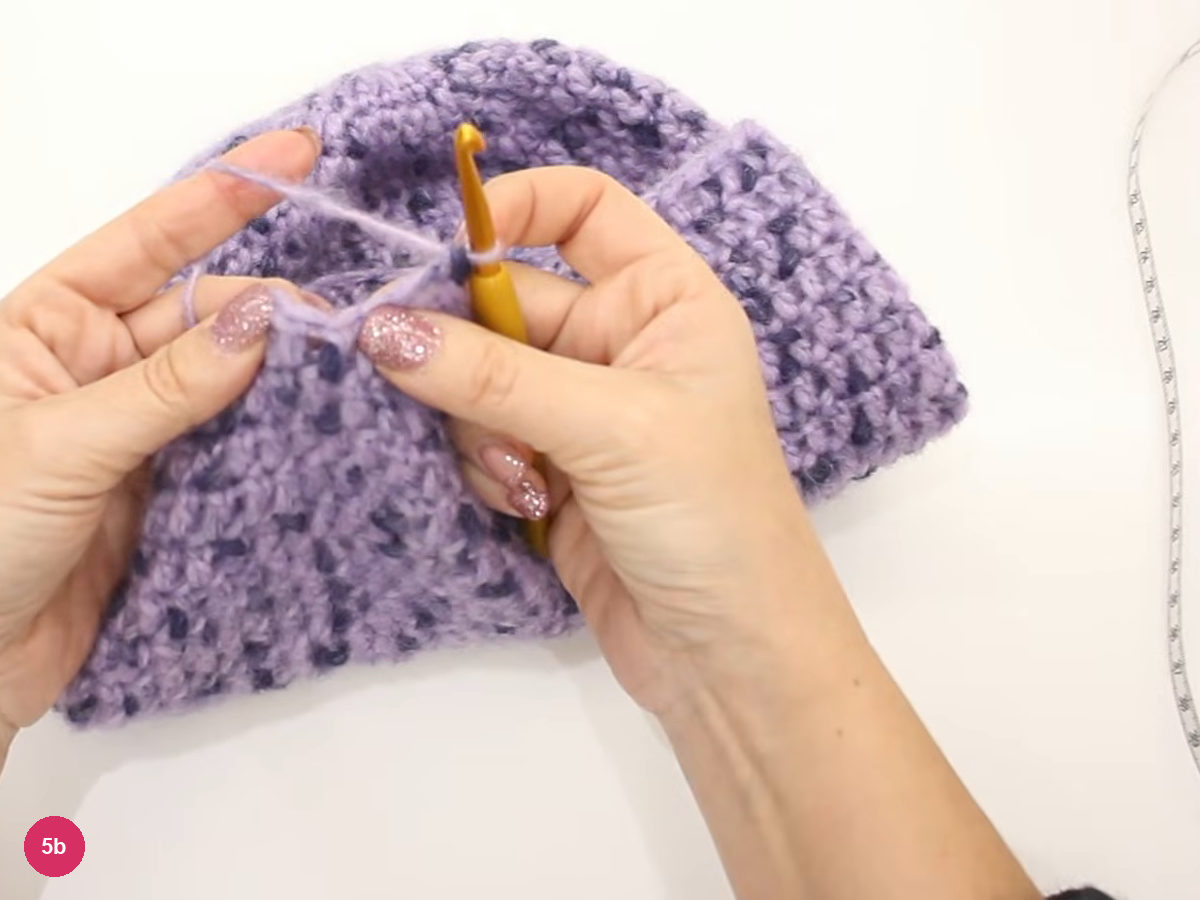
Step 5b: the decrease round, 5 dc then a decrease. Keep working dc until the neck section has 15 rounds; the video counts 15 rounds on the hat side and 15 on this length, so the opening sits between two sections of equal round count. The decrease round gives the slit a slightly egg shape.
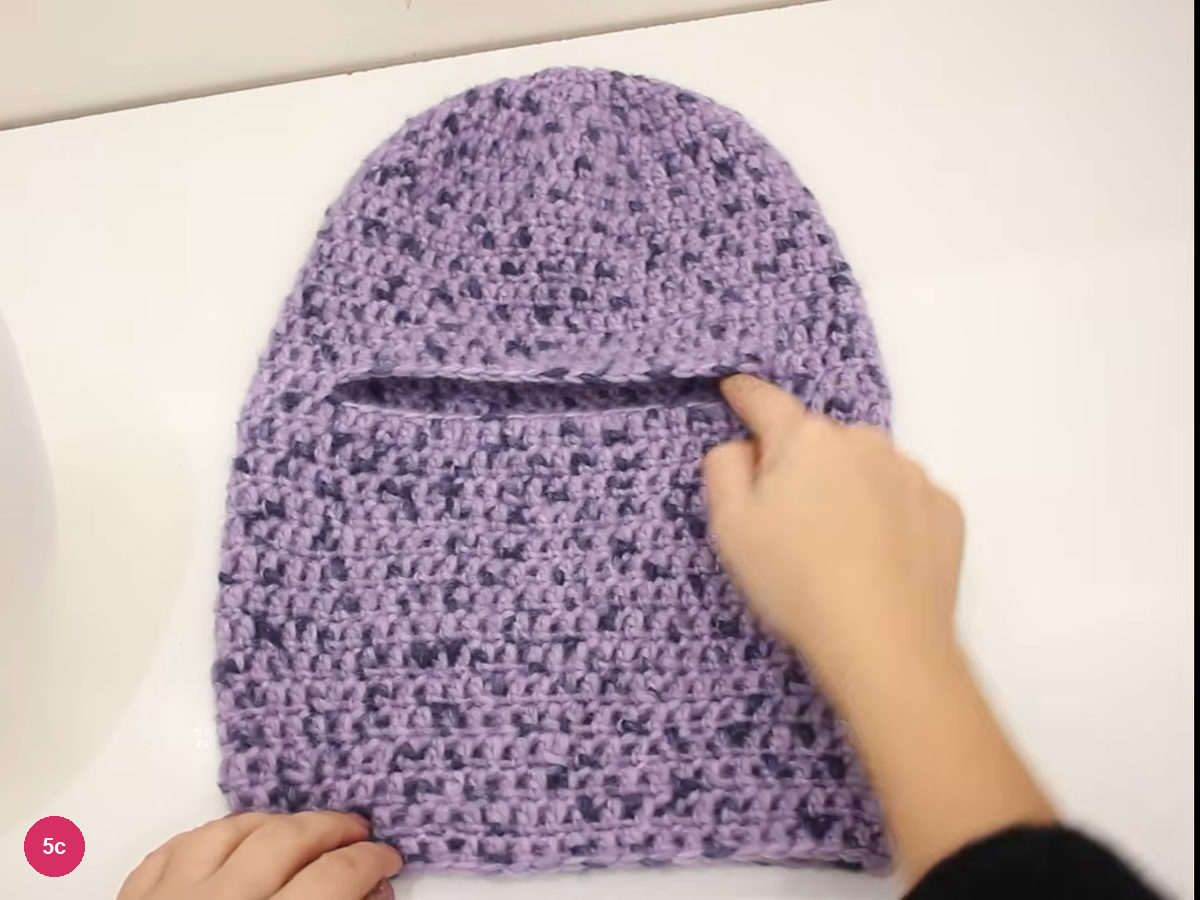
Step 5c: the finished piece laid flat with the opening between cap and neck. -
Try the balaclava on
Slip it over the head, using a head form if you have one, and settle the cap so the opening sits over the eyes. The nose can stay covered or the edge can sit lower to leave it free.
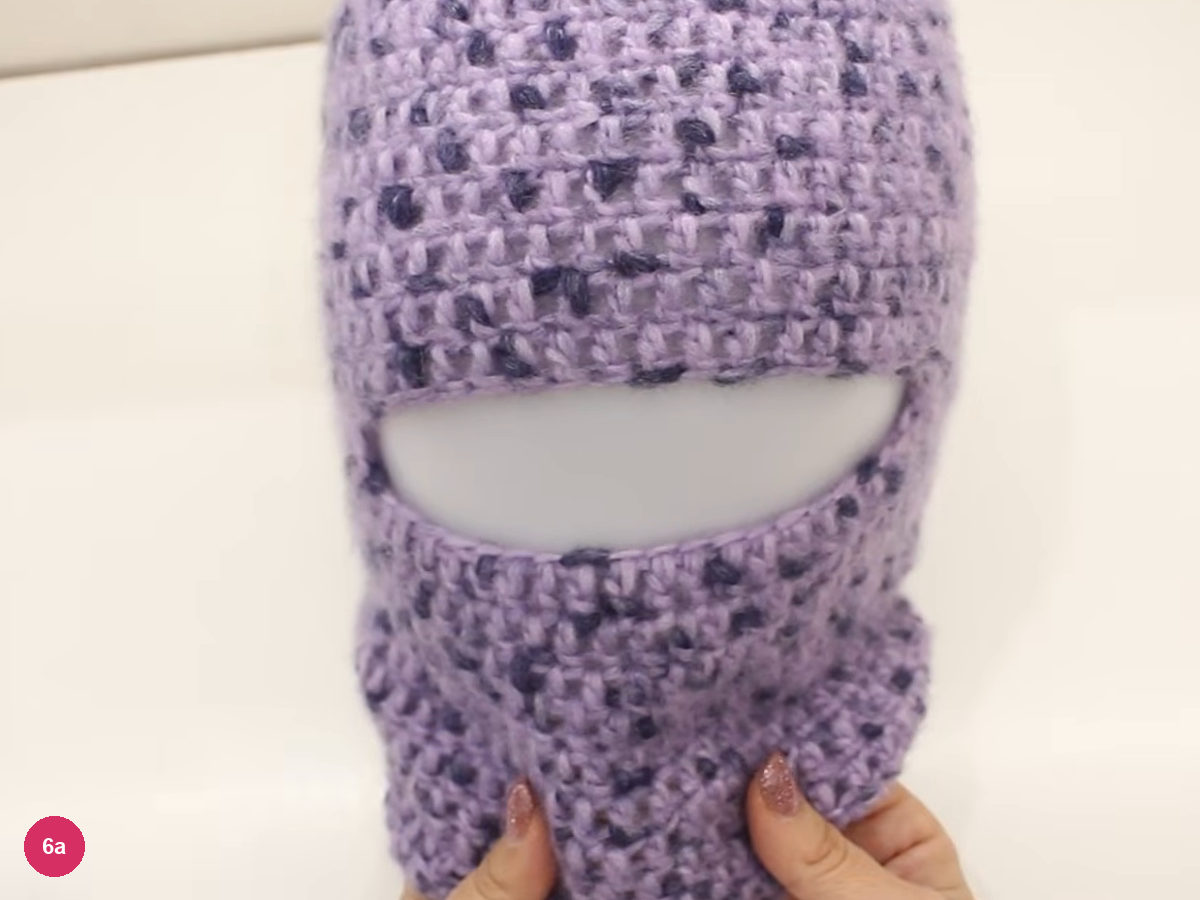
Step 6a: the opening sits over the eyes. To wear it as a hat, turn the edge of the opening up, then fold everything back onto the forehead like a cuff. The video shows the cuffed version from the side.
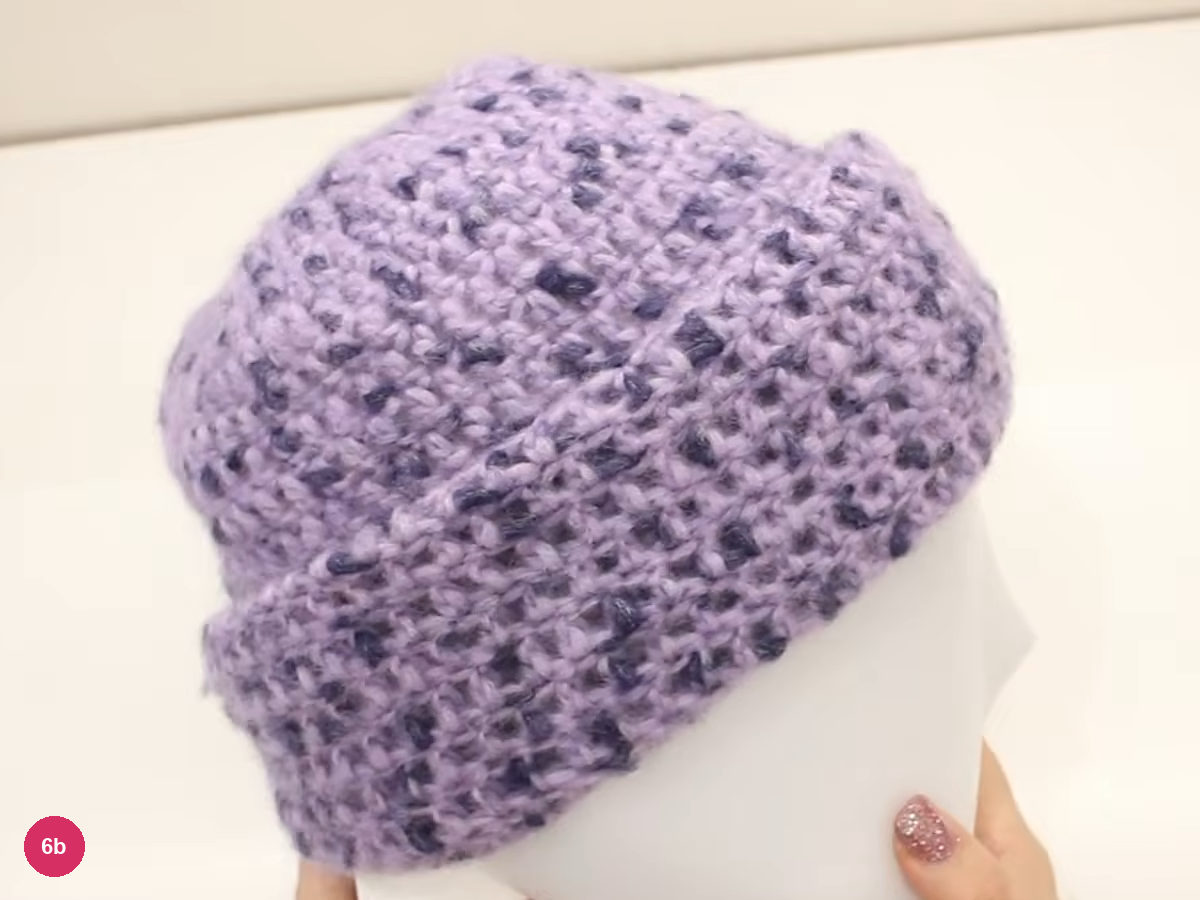
Step 6b: rolled back as a cuffed hat. Unroll it again for full coverage in the cold. The neck section then covers the throat, and the opening can sit over the eyes or lower on the face.
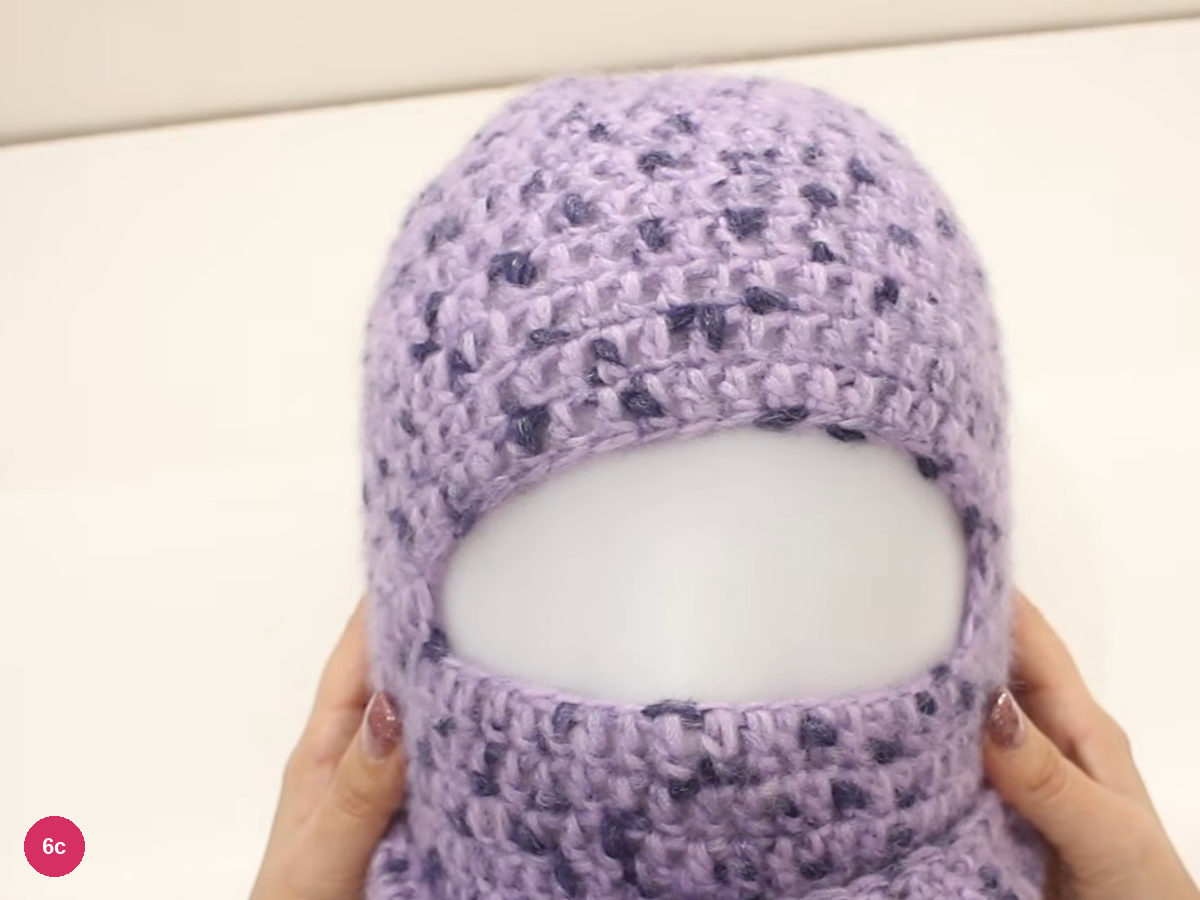
Step 6c: unrolled again with the opening at the eyes.
Troubleshooting the fit
The opening sits too high or too low: check that you counted 20 stitches from the join in each direction and that the 20 stitches left at the front are the ones you chained over. With another yarn, divide the last-round total by 3 and use that number for the markers and the chain.
The chain is hard to work into: it was pulled too tightly. Undo it and chain again more loosely, then work 1 dc into each chain.
The neck feels tight: the decrease round is the only shaping in the neck. Work it once, do not repeat it in the next round, and test that the hood still passes over the head.
The hood is not the size you wanted: return to the formula. Head circumference divided by 3.14 gives the crown width, and cap height is that width plus 2 cm. The video states the formula, not a size table, so measure your own head and calculate your own numbers.
The video also suggests changing the stitch pattern or yarn colour, using one stitch for the top and another below, or adding ears, a pompom or embroidery; those are variations rather than part of the demonstrated build.
Final check
- Flat crown measures close to your calculated width before the sides begin.
- Cap height reaches the crown width plus 2 cm.
- Two markers set with one third of the stitches between them at the front.
- Chain worked loosely, with 1 dc worked into each chain next round.
- One decrease round only, and the hood still passes over the head.
- Opening sits over the eyes on the head form or head.
The video does not show weaving in the yarn ends, so finish the tails in the way you normally would.
Inspired by La Fata Tuttofare’s video tutorial.
Save this pattern for later
Pin it to one of your boards so it’s ready when you have a free evening and the right yarn.