This crochet bonnet is an adult hood with long tapered ties and cream ribbing framed by a small brown scalloped edge. It covers the back of the head and ears, while the ties can close below the chin or wrap loosely around the neck. The demonstrated first tie section measures about 75 cm long and 25 cm across its broad end; the finished hood has no stated head-circumference measurement.
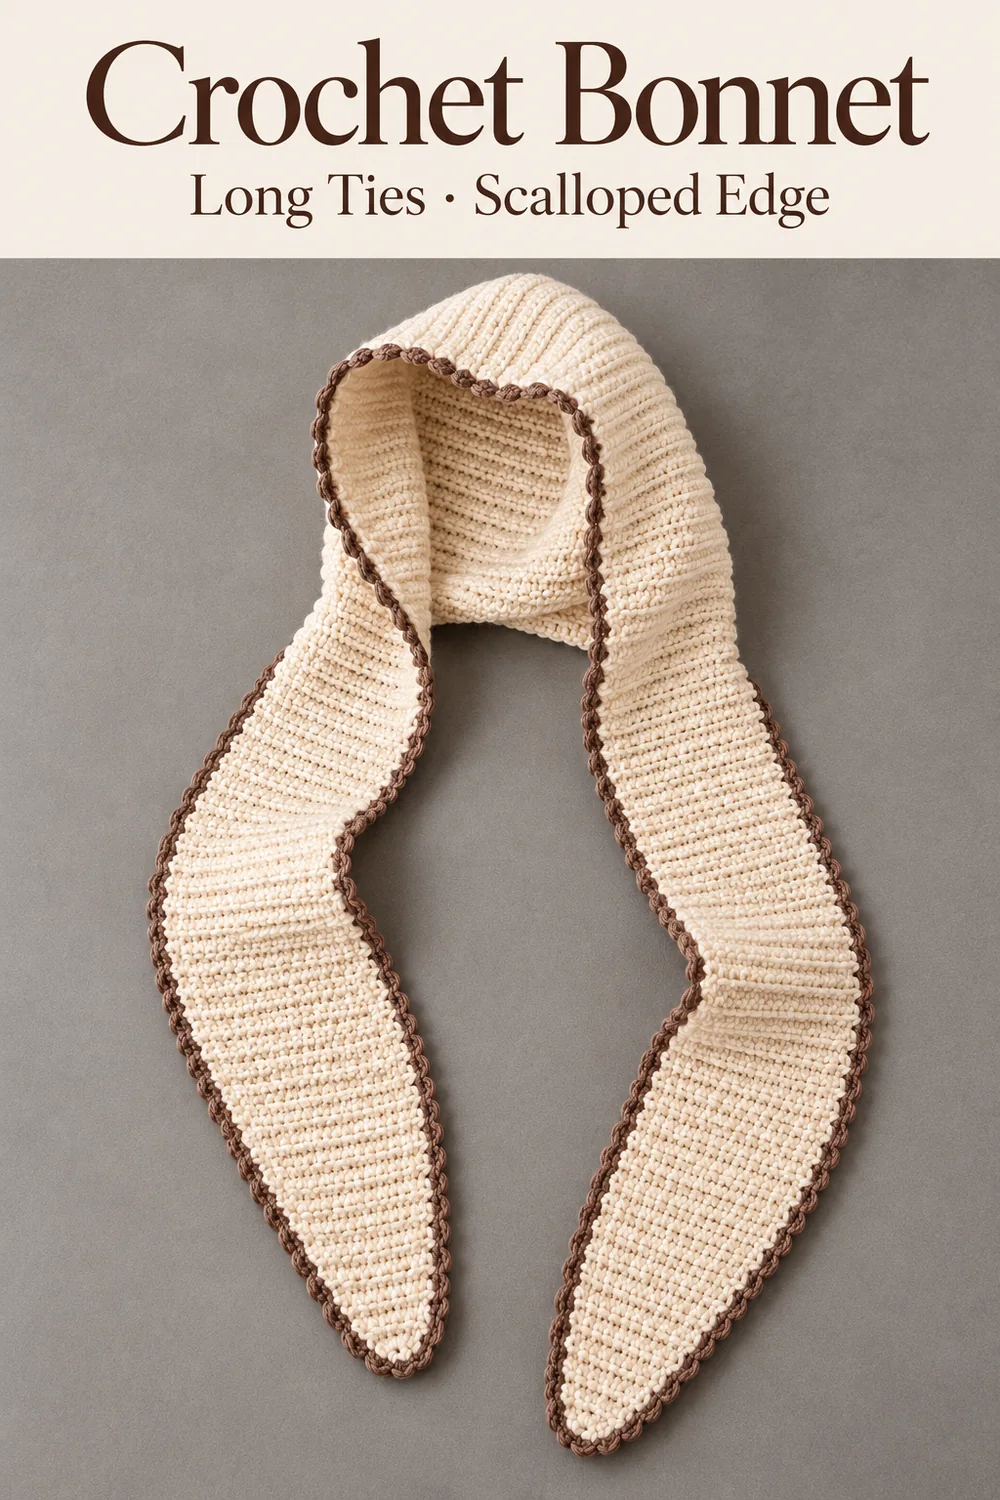
The fabric grows continuously from one tapered end, through the shaped hood, and out to the other tie. A crocheted seam closes the stepped crown and back. The body uses slip stitches through back loops, giving it close-set ridges and a flexible edge rather than a tall, open stitch pattern.
Before you start this crochet bonnet
- Four balls of the demonstrated acrylic, wool and cotton blend, each 50 g / 120 m.
- 5 mm hook for the main fabric and 3 mm hook for the optional edging.
- Contrasting yarn for the brown trim, if desired; its exact weight and amount are not specified.
- Stitch markers, scissors, a yarn needle and a tape measure.
US terms: ch = chain, sl st = slip stitch, sc = single crochet, dc = double crochet, and back loop = the farther loop of a stitch top when the work faces you. For the main fabric, insert through that back loop, catch the yarn and pull it through both the stitch and the loop already on the hook. Keep the loop mobile rather than tightening it against the hook shaft.
There is no stated gauge or graded size chart. Use the demonstrated measurements as checkpoints for this adult example and check the fabric against the wearer before closing the hood. A different yarn or tension can change both the depth and the height, even when the shaping sequence remains the same.
The long ties increase every fourth row. The tutorial also shows a shorter sample made by increasing every second row, with the second tie narrowed at the corresponding pace. The instructions and photos below follow the long version; keep both ends on the same shaping schedule.
Work the hood from tie to tie
-
Start the narrow tip of the first tie
- Foundation · ch 2
- Rows 1–3 · 1 sl st each
Make a slip knot and ch 2, leaving the working loop loose enough to move along the hook. Hold the short chain close to its base so it stays steady when you begin the tiny tip.
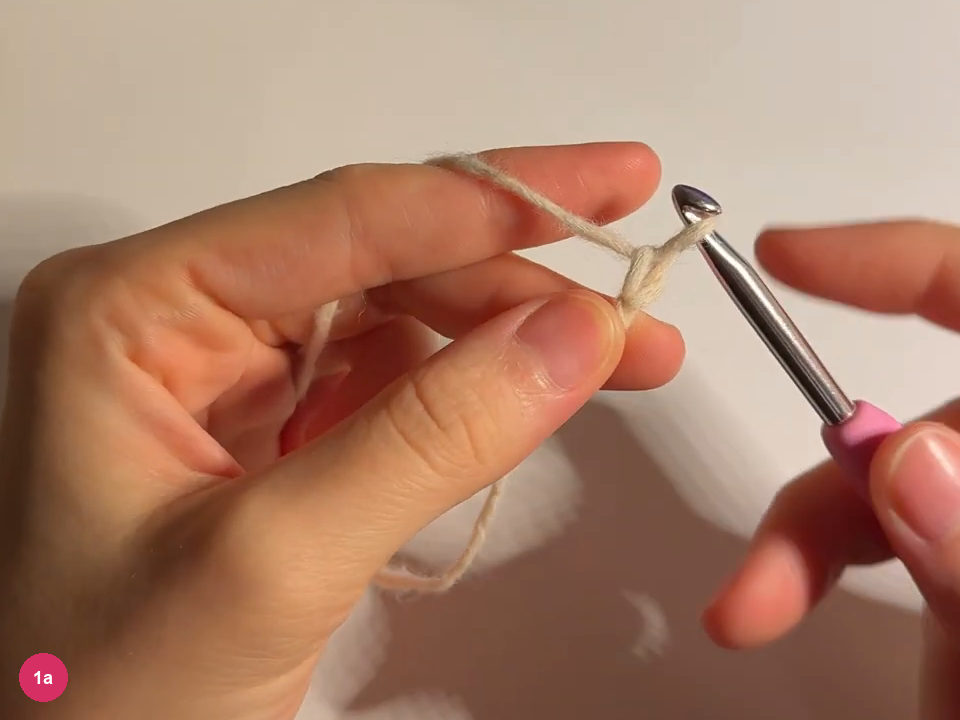
Step 1a: hold the short starting chain. Work a sl st into the second chain from the hook to make the first row. Draw the new loop directly through the loop already on the hook; there is no yarn over before insertion.
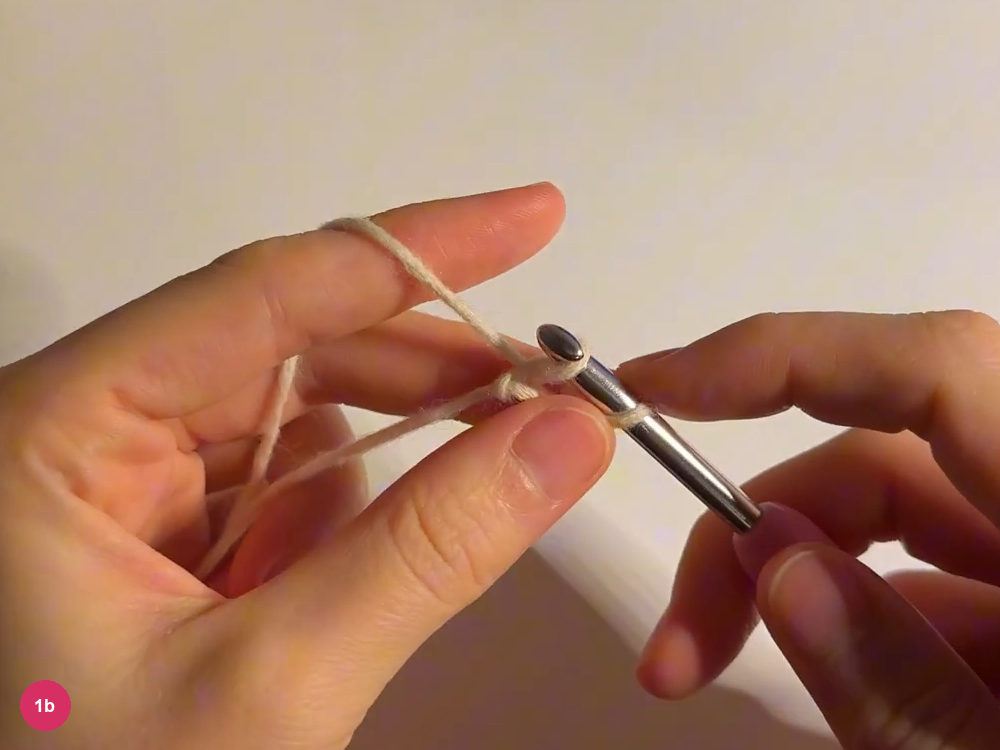
Step 1b: work the first slip stitch. Ch 1, turn and work a sl st through the back loop of the stitch; repeat that turning row once more. These narrow rows form the point of the tie, rather than a ring or a cord worked in the round.
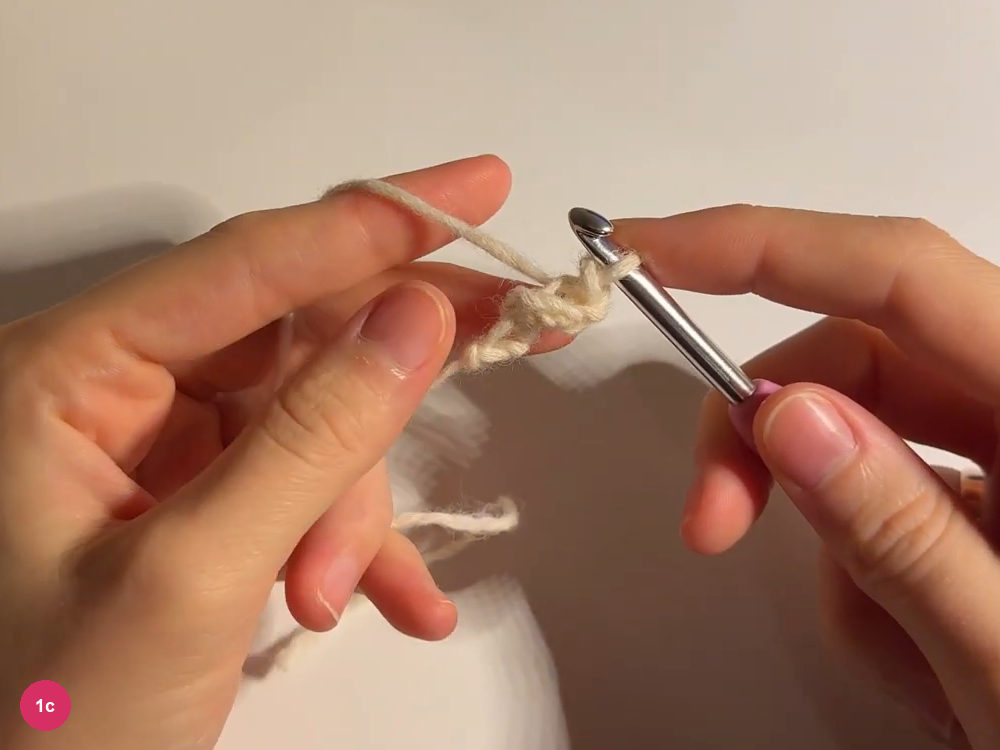
Step 1c: build the narrow tie tip. -
Widen the first tapered tie
- Row 4 · ch 2, then 2 sl st
- Long tie · increase every fourth row
- Measured section · about 75 × 25 cm
At the next turn, ch 2 instead of ch 1, then work from the second chain back across the row. This adds a stitch at the shaping edge and begins the gradual flare of the tie.
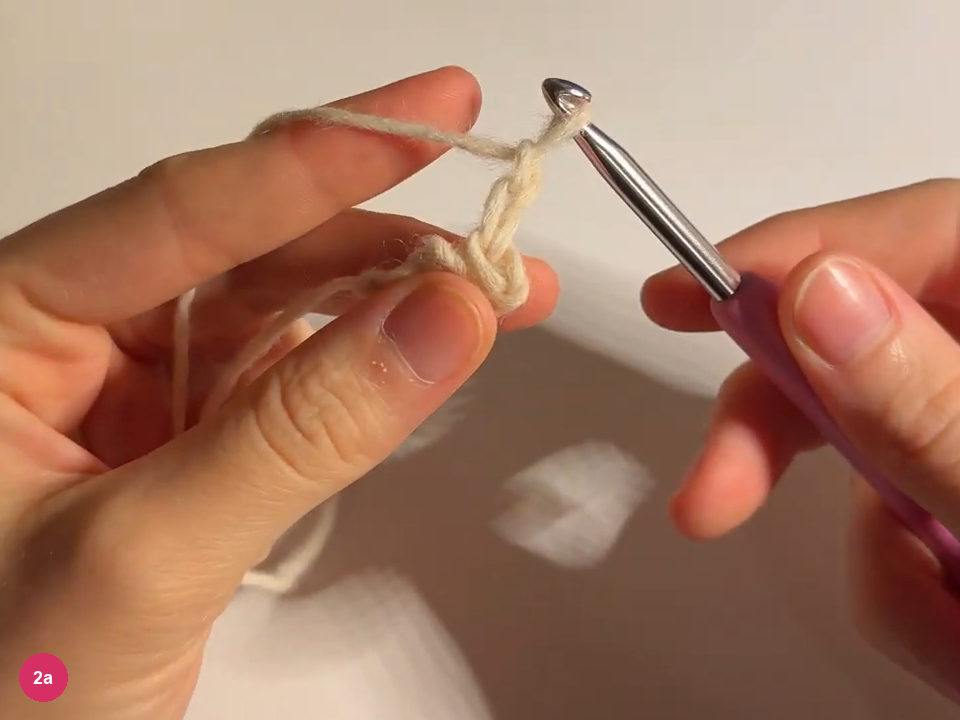
Step 2a: extend the shaping edge. Mark the edge where the increase occurs, then work the following 3 rows without increasing, using ch 1 to turn. Keep working into the back loops and move the marker upward as the fabric grows.
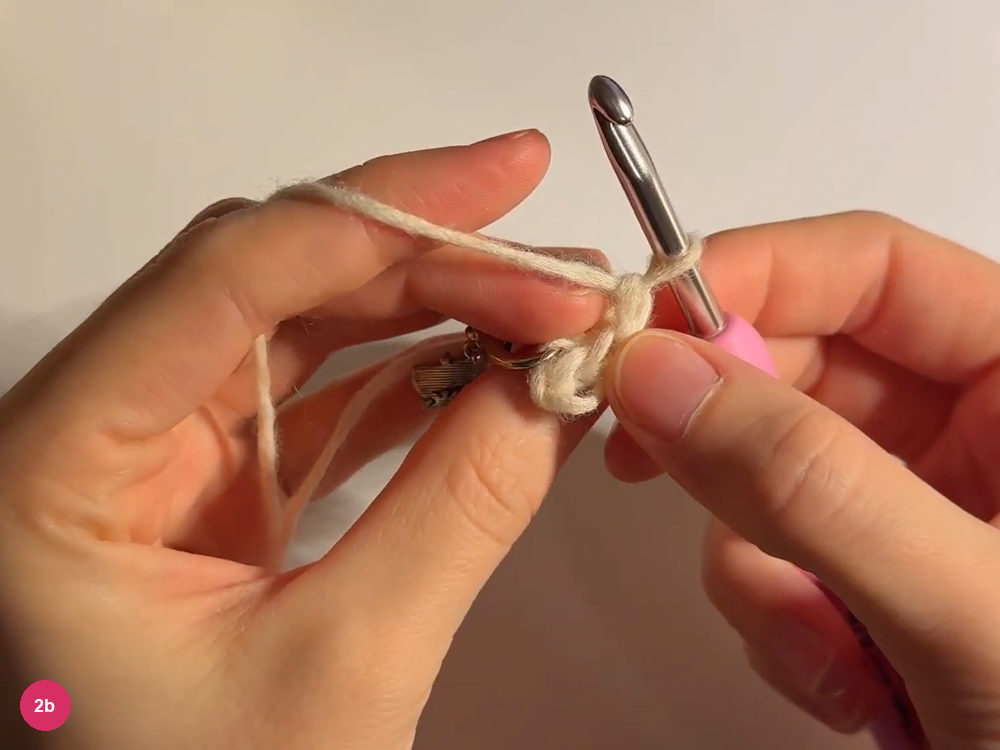
Step 2b: work a plain return row. Increase again on the marked edge in the fourth row, then repeat the same spacing. Only that edge widens; the opposite edge stays straight, so keep the marker with the shaping side rather than moving it to whichever end is nearest.
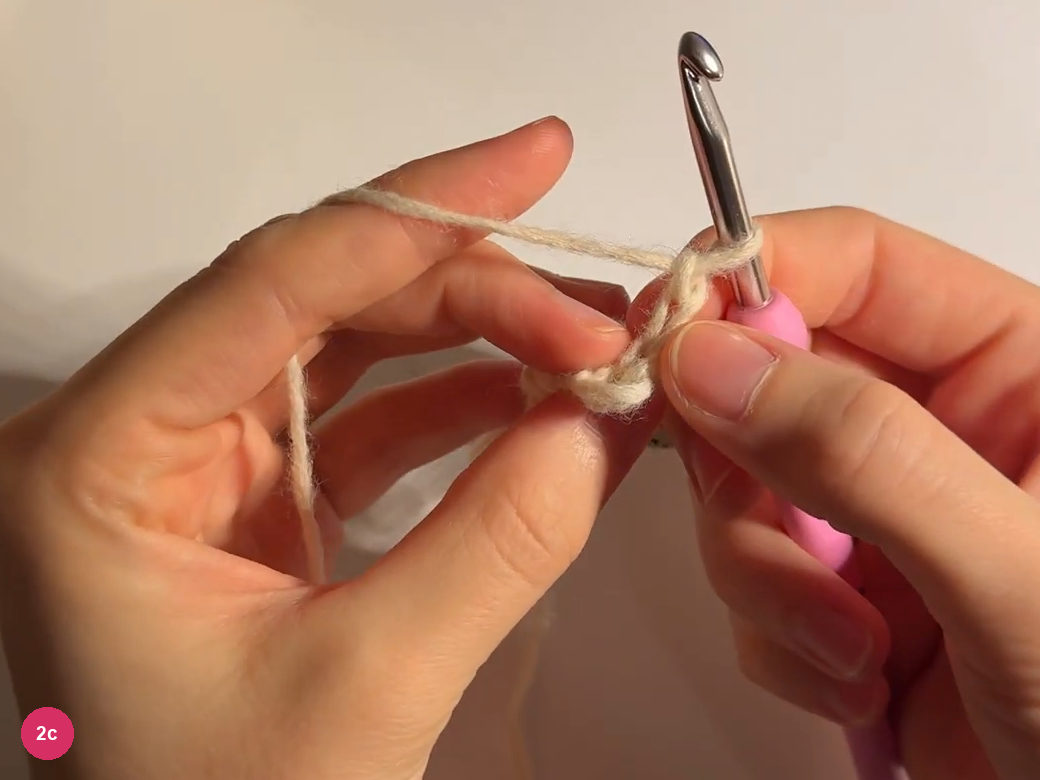
Step 2c: repeat the gradual increase. Continue until the first tie reaches the width you want for the hood depth. The demonstrated section measures about 75 cm along its length and 25 cm across its broad end; measure without pulling the ribbed fabric hard.
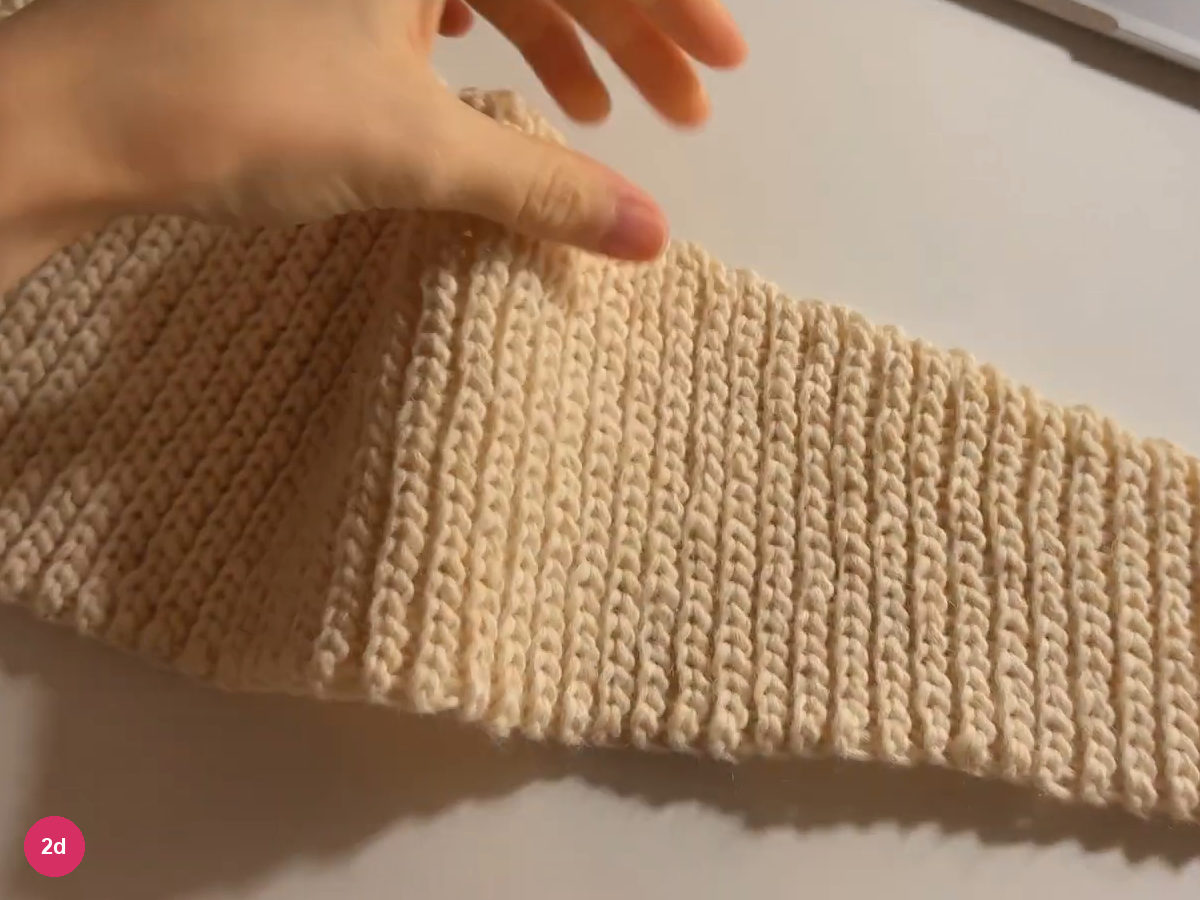
Step 2d: check the broad ribbed tie. -
Add the straight hood side
- First straight side · 13 visible ridges
Stop increasing while keeping the full working width, and mark the first straight ridge. Ch 1 at the turns and continue the same back-loop slip stitches, so the tie flows directly into the side of the hood.
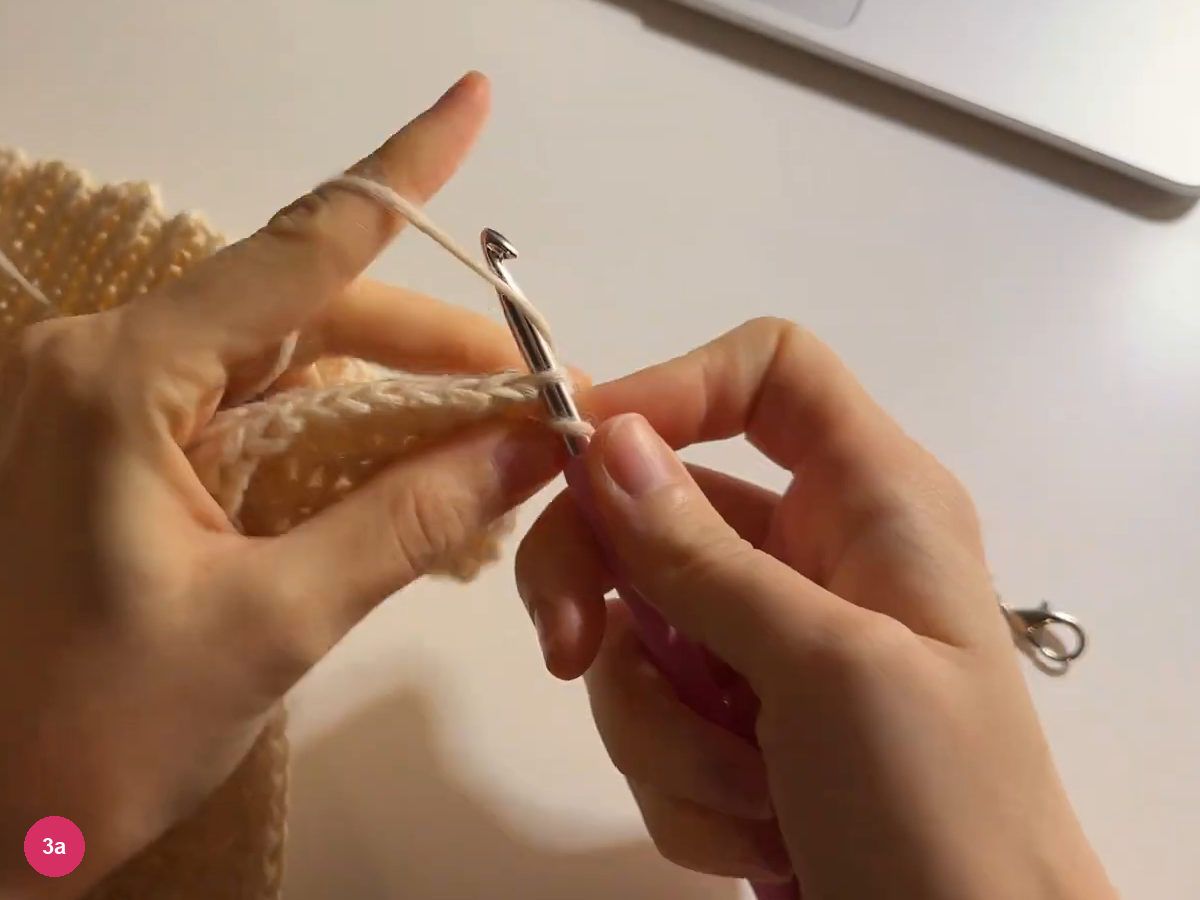
Step 3a: begin the straight hood section. Work straight until there are 13 ridges from the marker, as counted in the demonstration. Count the raised lines in the fabric rather than treating each ridge as a single row; this section supplies height above the tie.
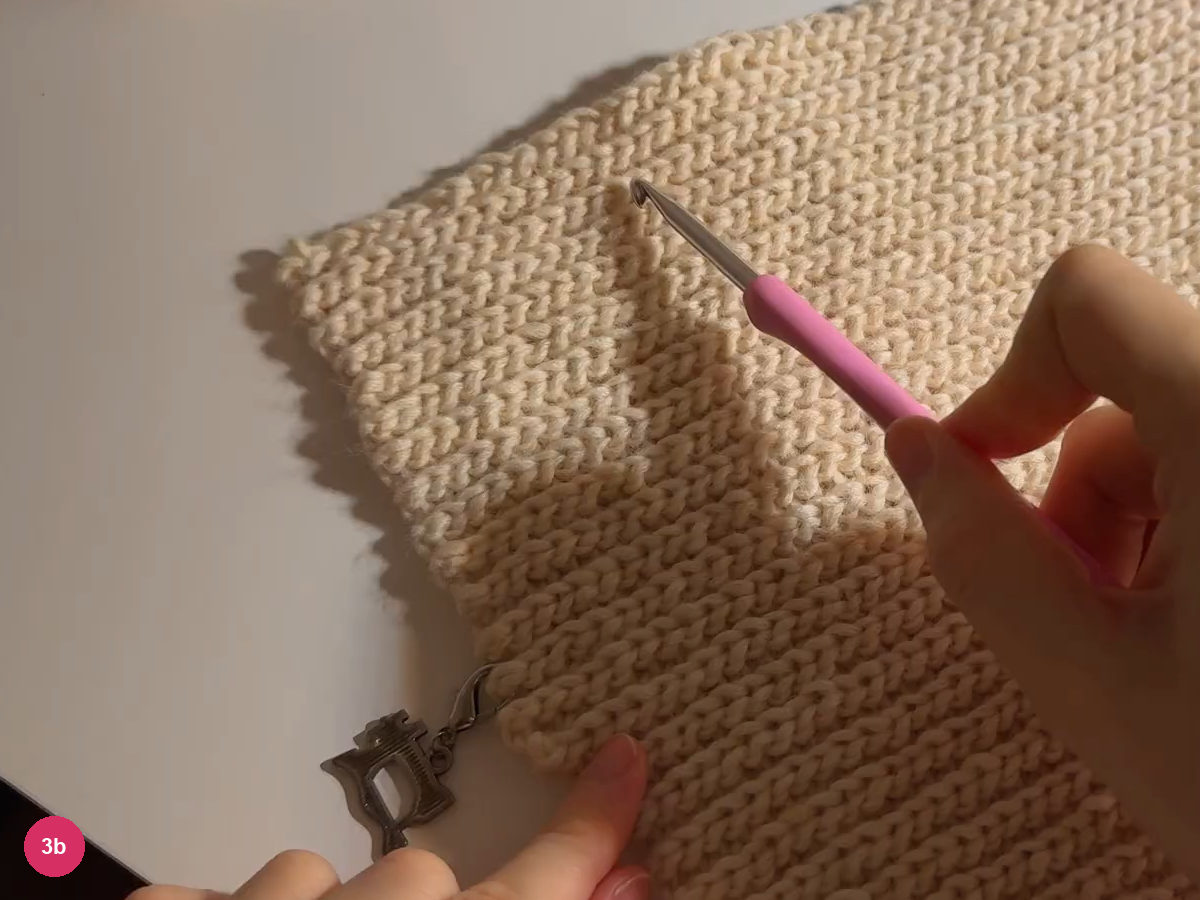
Step 3b: count the straight section ridges. -
Shape the crown with stepped short rows
- Crown · leave 2 stitches unworked
- Repeat · 10 downward steps
Work toward the shaping edge but stop with the final 2 stitches unworked. Check the very last stitch behind its edge bar before turning, since overlooking it changes the size of the step.
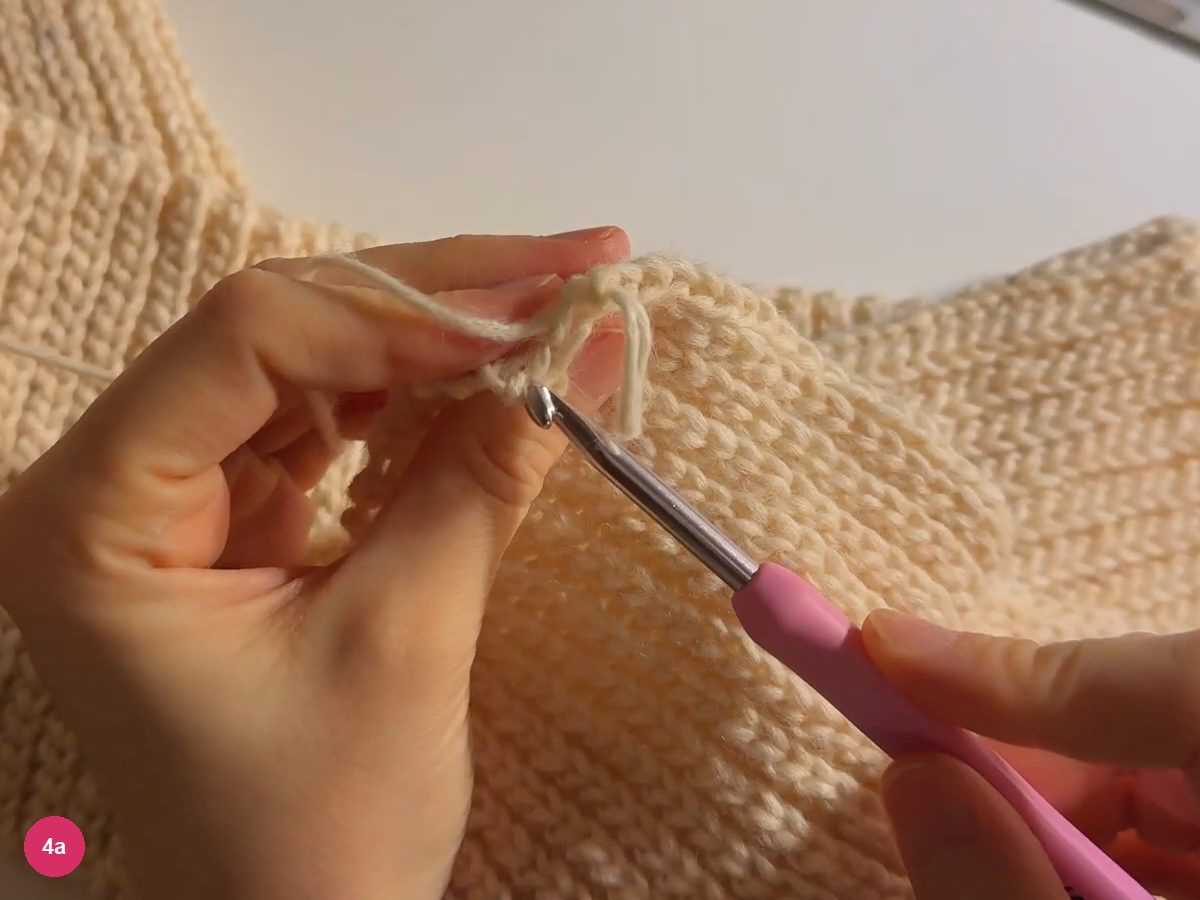
Step 4a: stop short at the shaping edge. Ch 1, turn and work back to the straight edge. On the next outward pass, again leave the last 2 stitches unworked, building the small steps on the same side while the opposite edge remains straight.
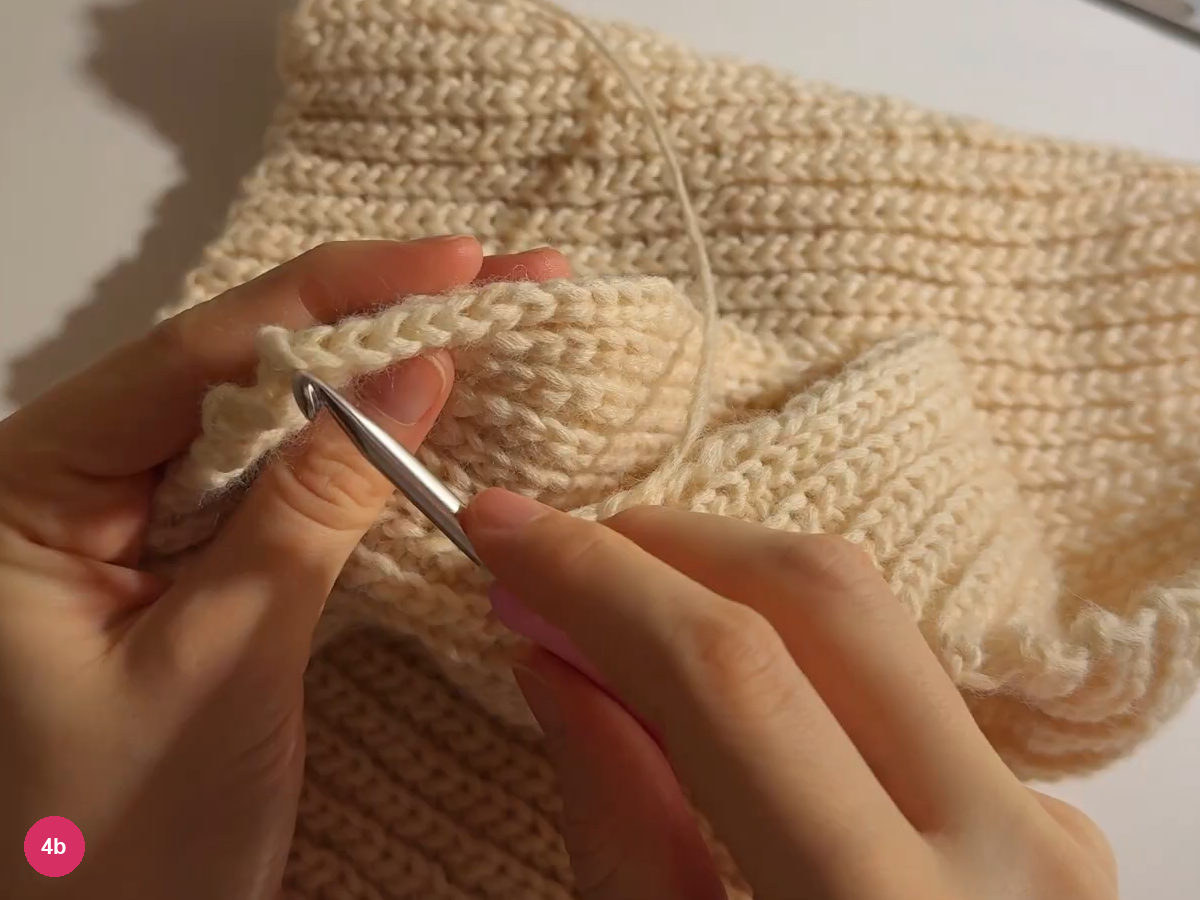
Step 4b: return from the shortened row. Repeat until you have made the 10 downward steps shown here. Lay the panel flat to see the staircase clearly, and keep its broad straight portion smooth while you compare the successive ledges.
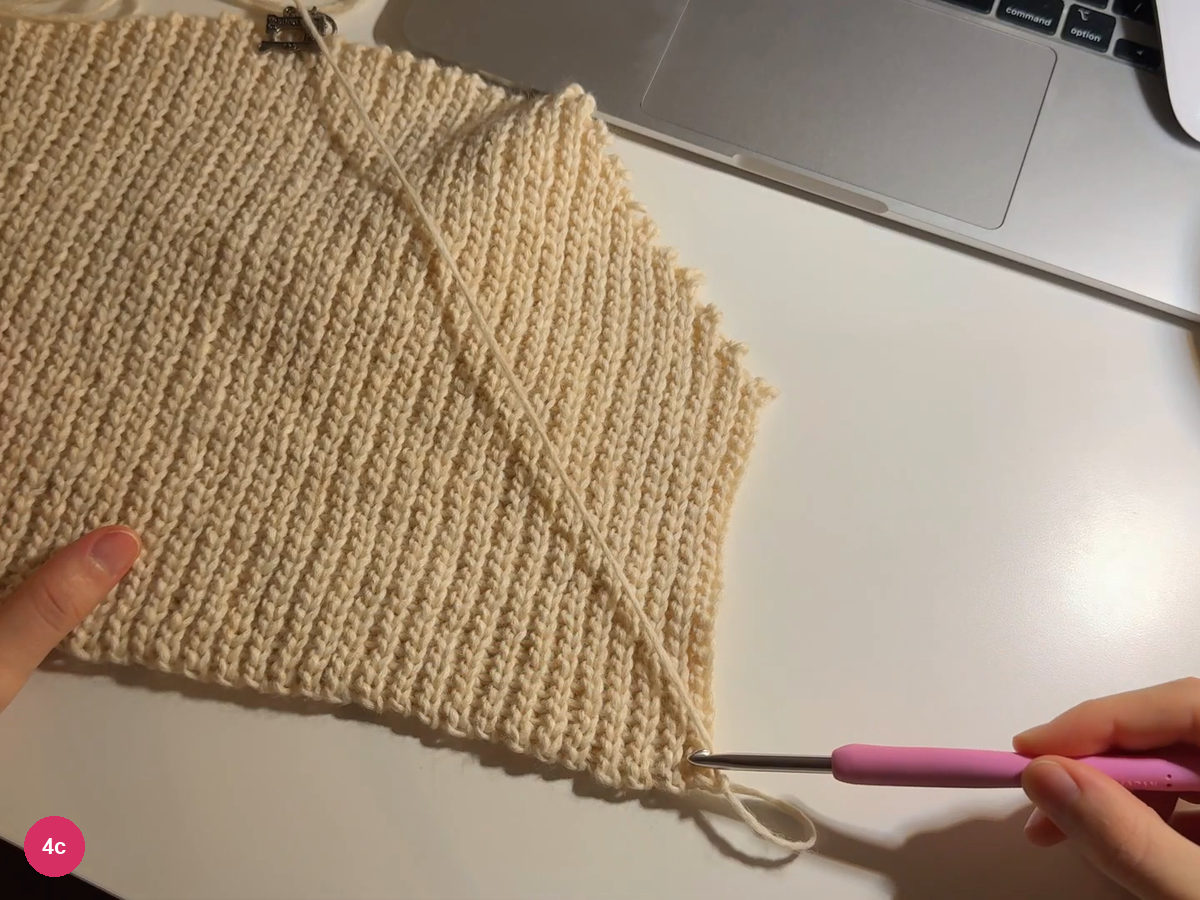
Step 4c: check the downward crown steps. -
Mirror the shaping for the other side
- Return shaping · ch 3 to add 2 stitches
- Second straight side · 13 ridges, then 2 extra
Work out to the stepped edge, ch 3 and turn; starting in the second chain, work back down across the row. The chain extension restores the stitches that were omitted on the first half of the crown.
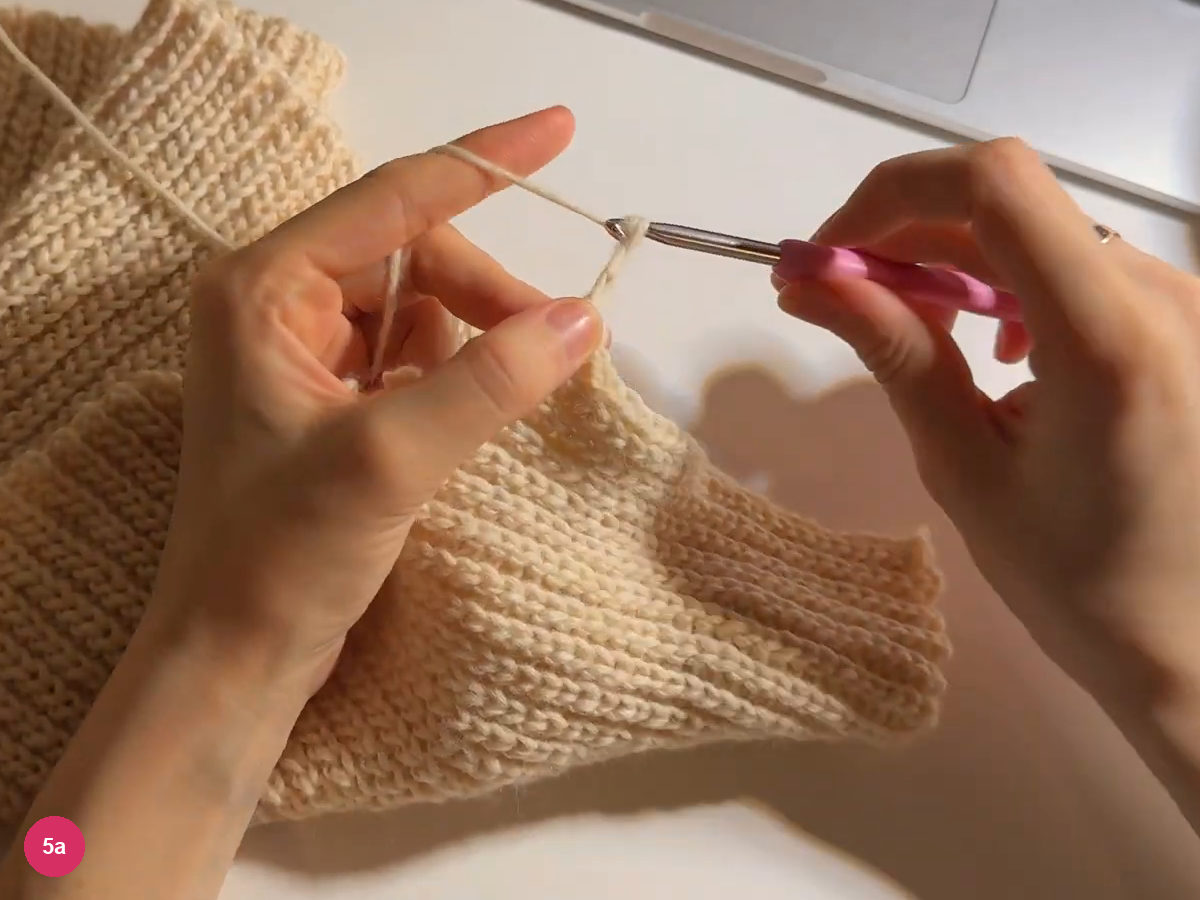
Step 5a: extend the return-side step. Repeat that outward-and-return sequence until the new staircase matches the first one. Spread the central shaping flat before continuing, so a missed extension can be corrected while the ledges are still visible.
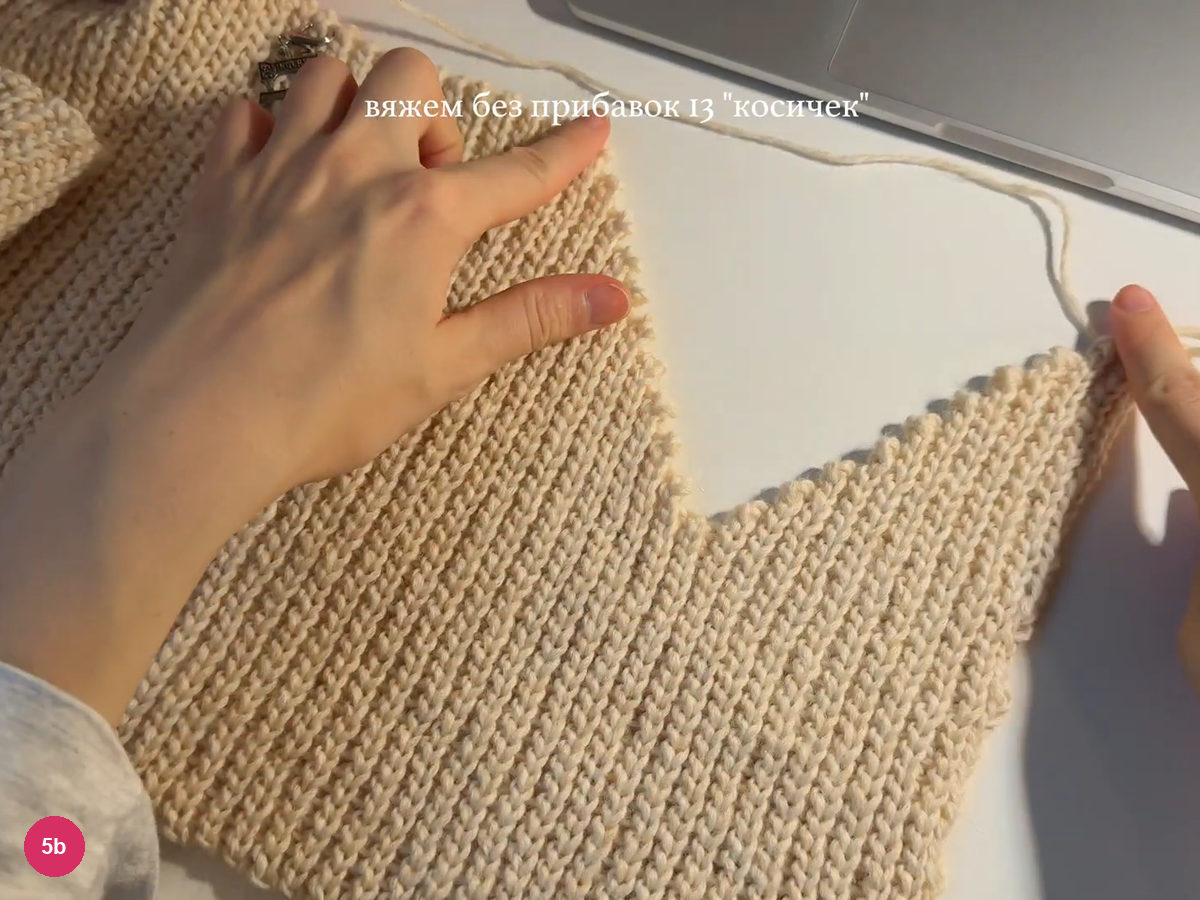
Step 5b: compare the mirrored crown steps. Work straight again for the same 13 ridges as on the first hood side. Keep the original marker in place, since it will also show where the final back seam must stop.
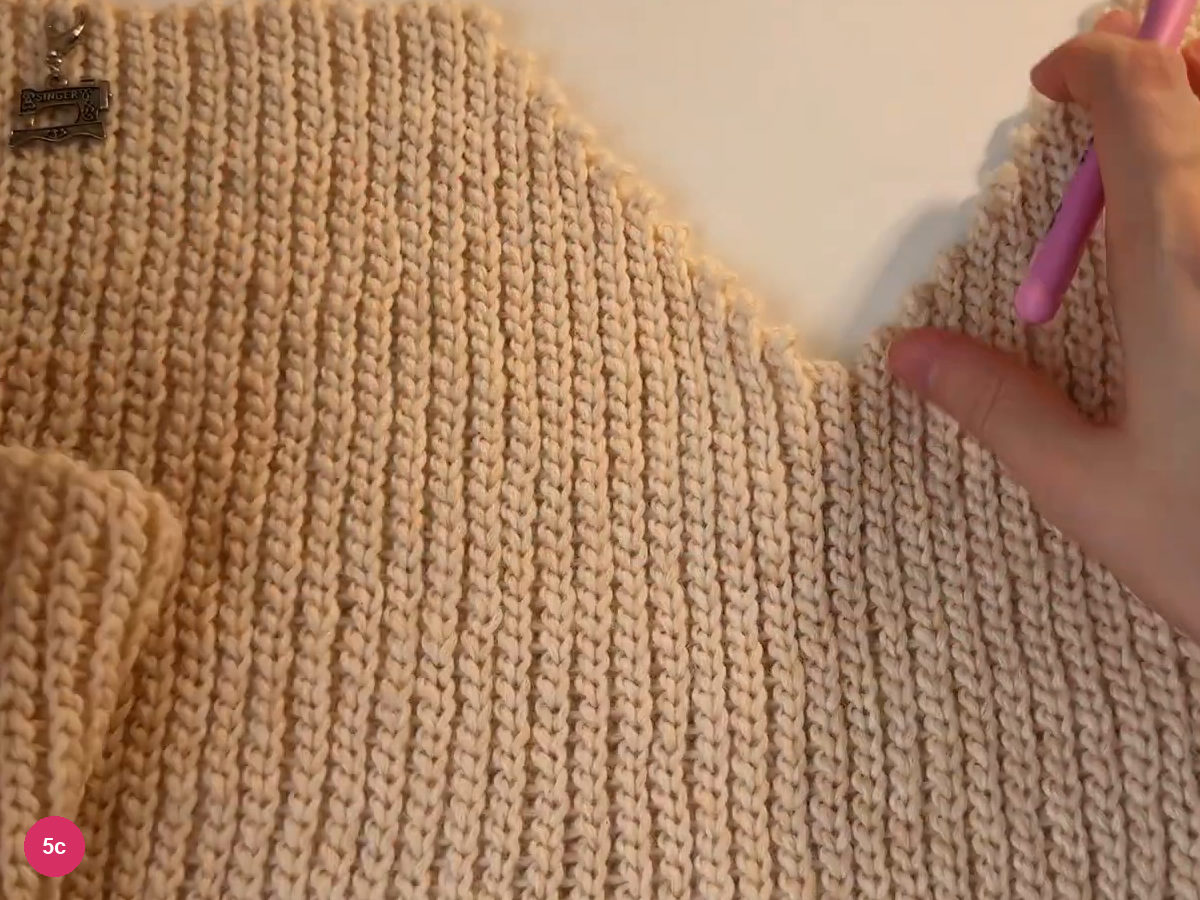
Step 5c: match the second straight section. Add the 2 extra straight ridges specified after that matching section. Keep these separate in your notes from the matched section, rather than shifting the marker and losing the original joining boundary.
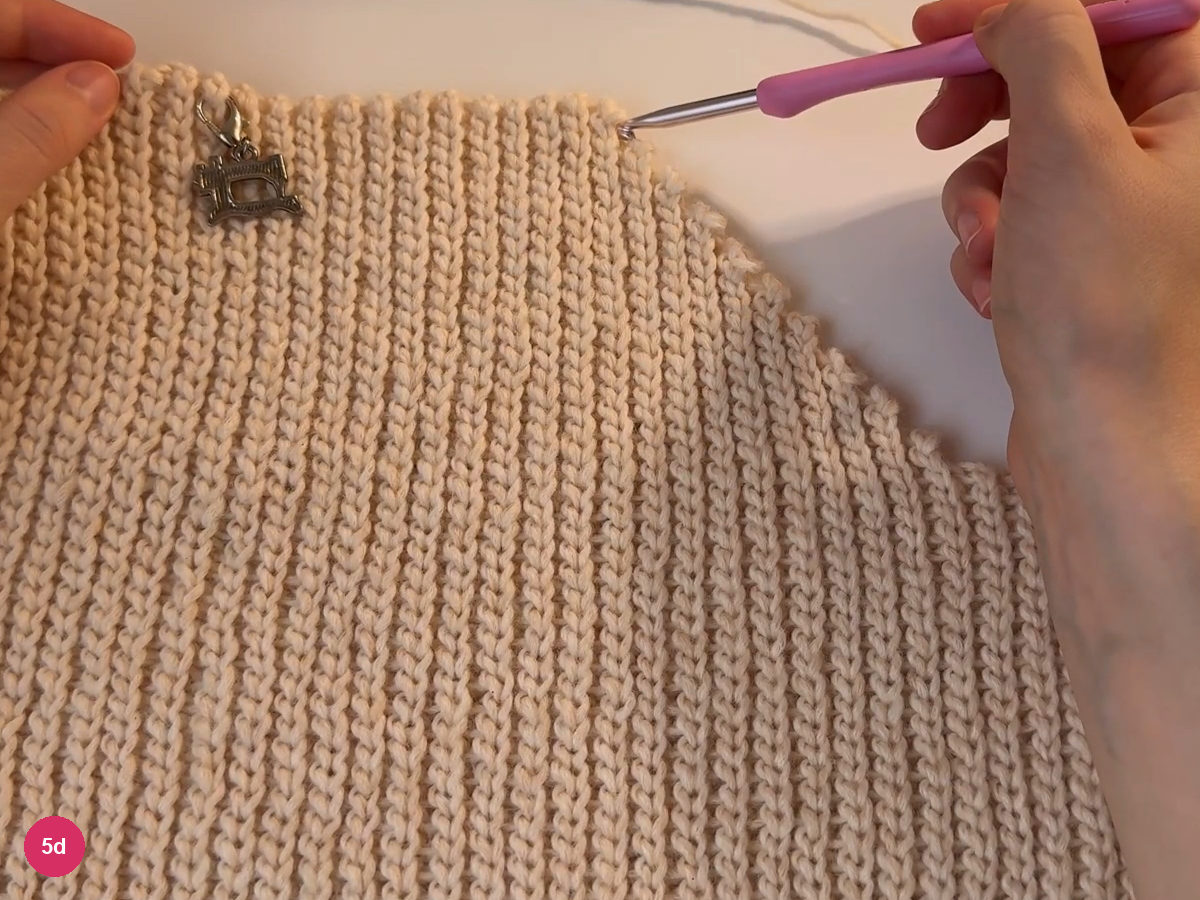
Step 5d: add the extra straight fabric. -
Taper the second tie
- Second tie · omit 1 stitch every fourth row
- Finish taper · 1 stitch remains
At the shaping edge, leave the last stitch unworked, then ch 1 and turn. Work the next 3 rows without further narrowing, and repeat the decrease in the fourth row to reverse the gradual flare of the first tie.
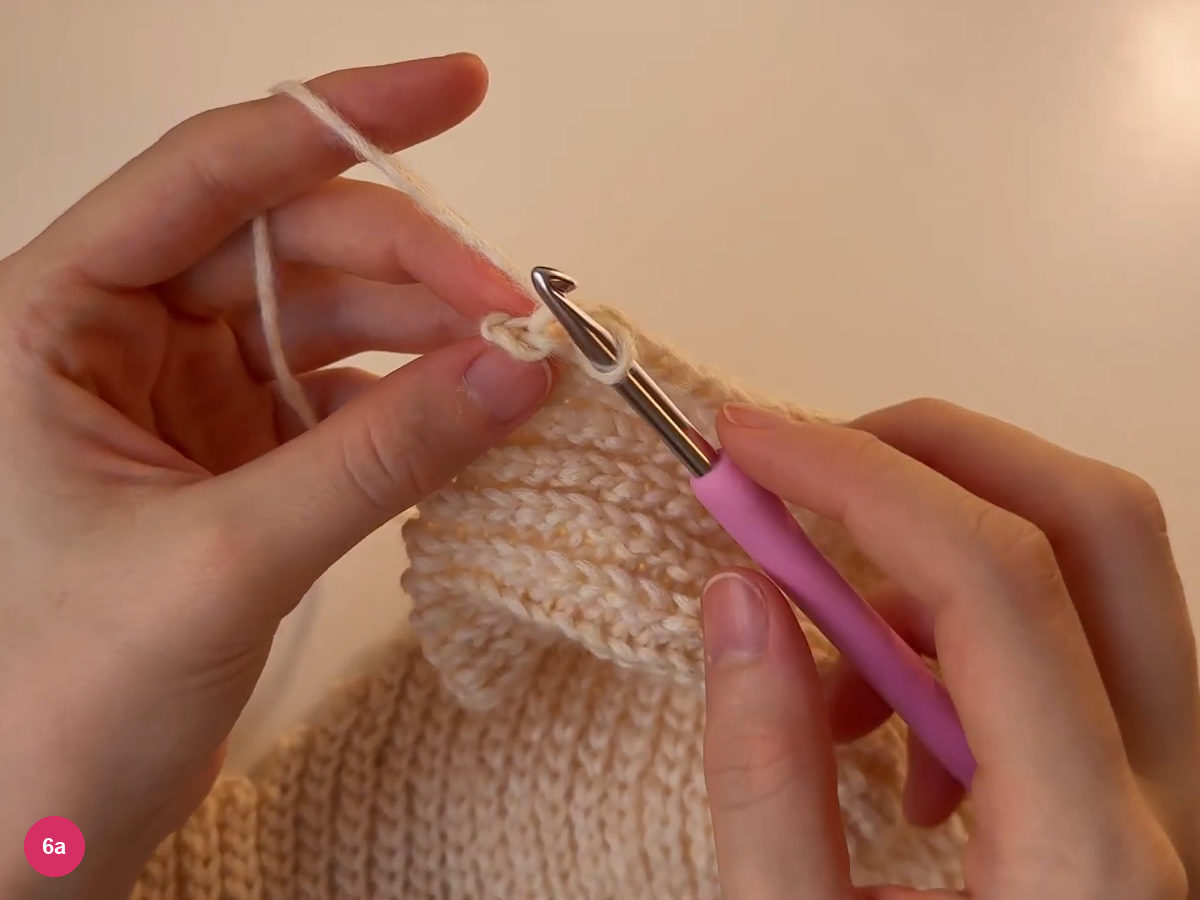
Step 6a: begin tapering the second tie. Continue this taper until only 1 stitch remains, then ch 1 and cut the yarn. Lay the tie sections together and compare their width and ribbing without stretching one much more than the other.
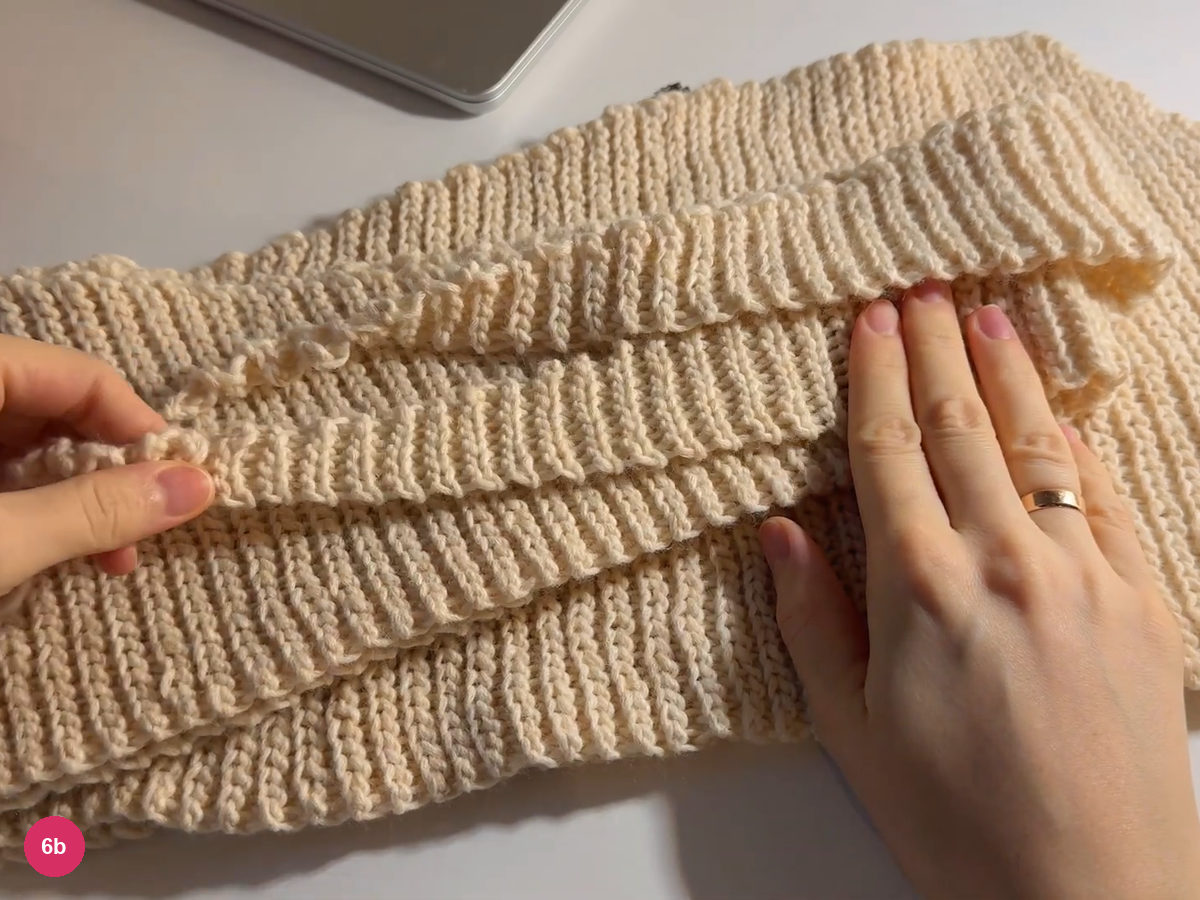
Step 6b: compare the completed tie sections. -
Join the crown and back
- Join · paired stitch tops and step bridges
- Stop · at the original straight-section marker
Bring the matching crown ledges together with the intended seam on the inside. Attach the yarn at the central stepped area, keeping the two fabric edges aligned before you begin joining them.
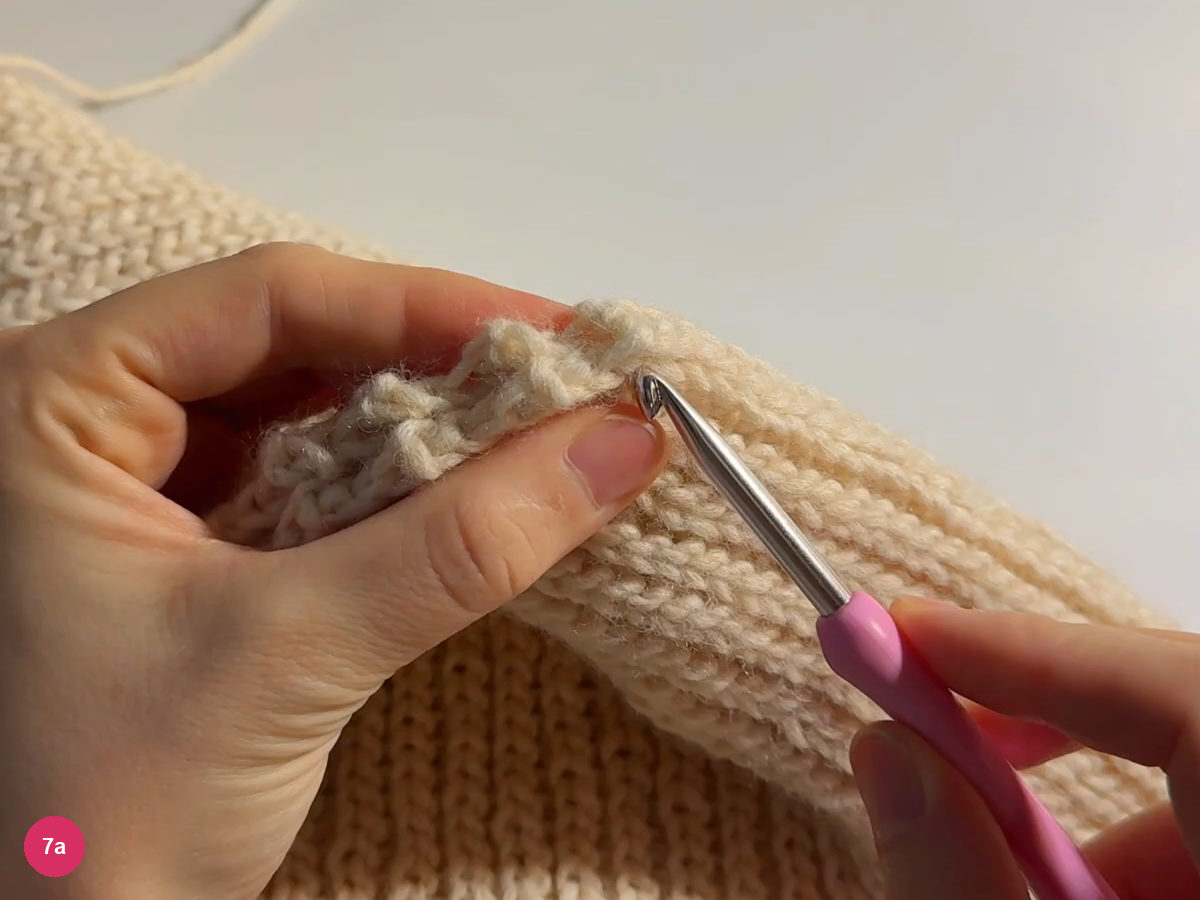
Step 7a: align the crown edges. Insert through a back loop on each corresponding edge and close with a sl st. Join the paired stitch tops along the ledge without pulling them into a tight cord; the seam should follow the shape already crocheted into the panel.
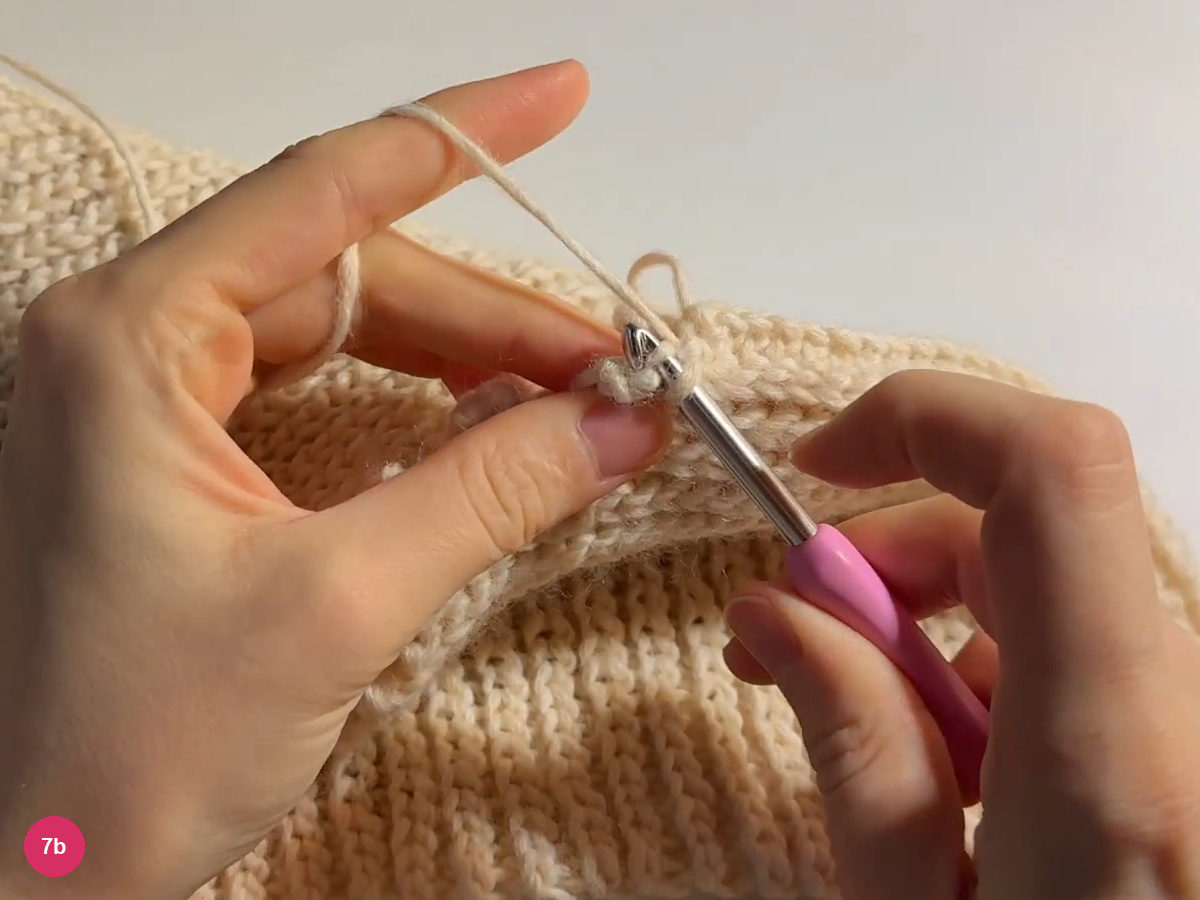
Step 7b: join the paired edge loops. At the rise between ledges, catch the bridge above the ridge on both edges and slip stitch them together. Continue up the staircase, alternating the stitch tops on each ledge with its connecting bridge.
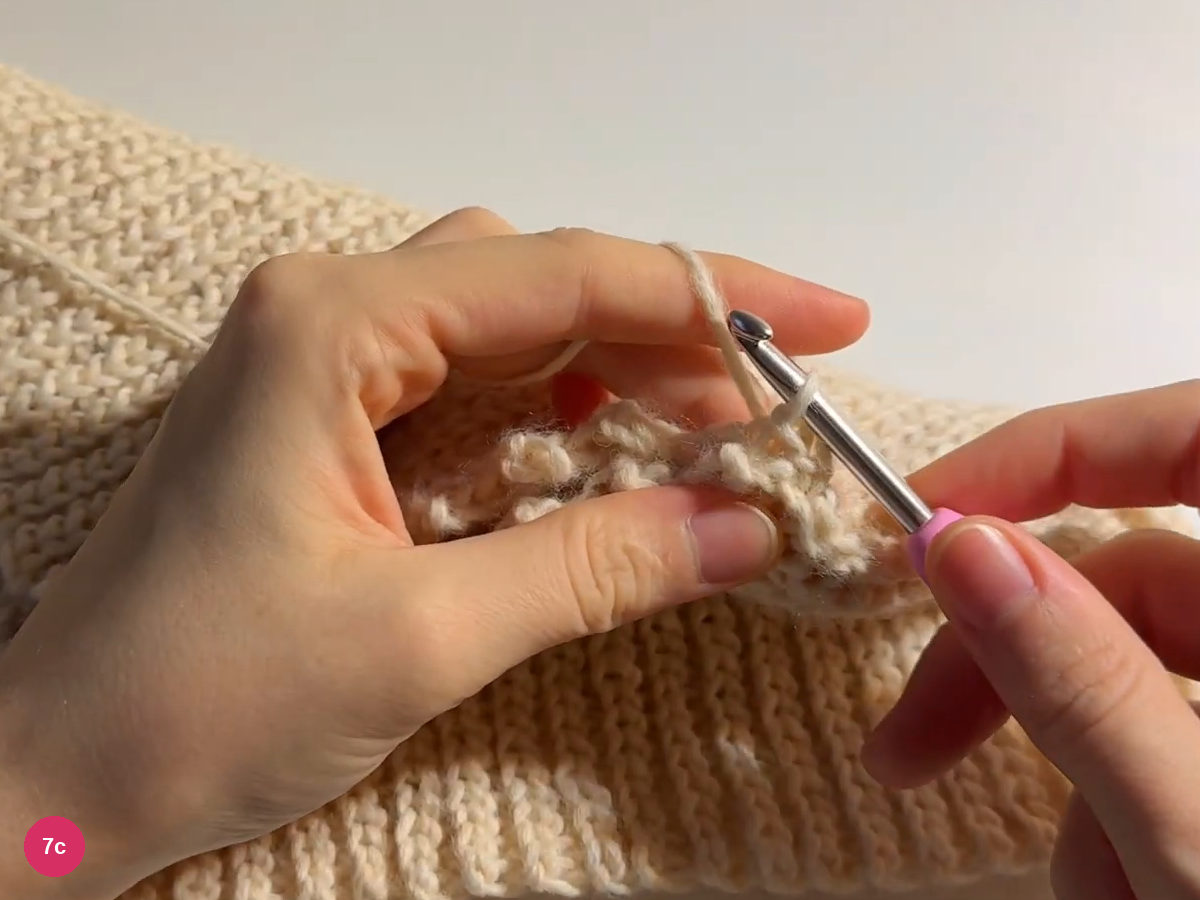
Step 7c: cross the bridge between ledges. Open the joined crown enough to check the seam line before extending it down the back. The ridges should meet in pairs, with no loose ledge projecting from one side or a skipped gap between the joined sections.
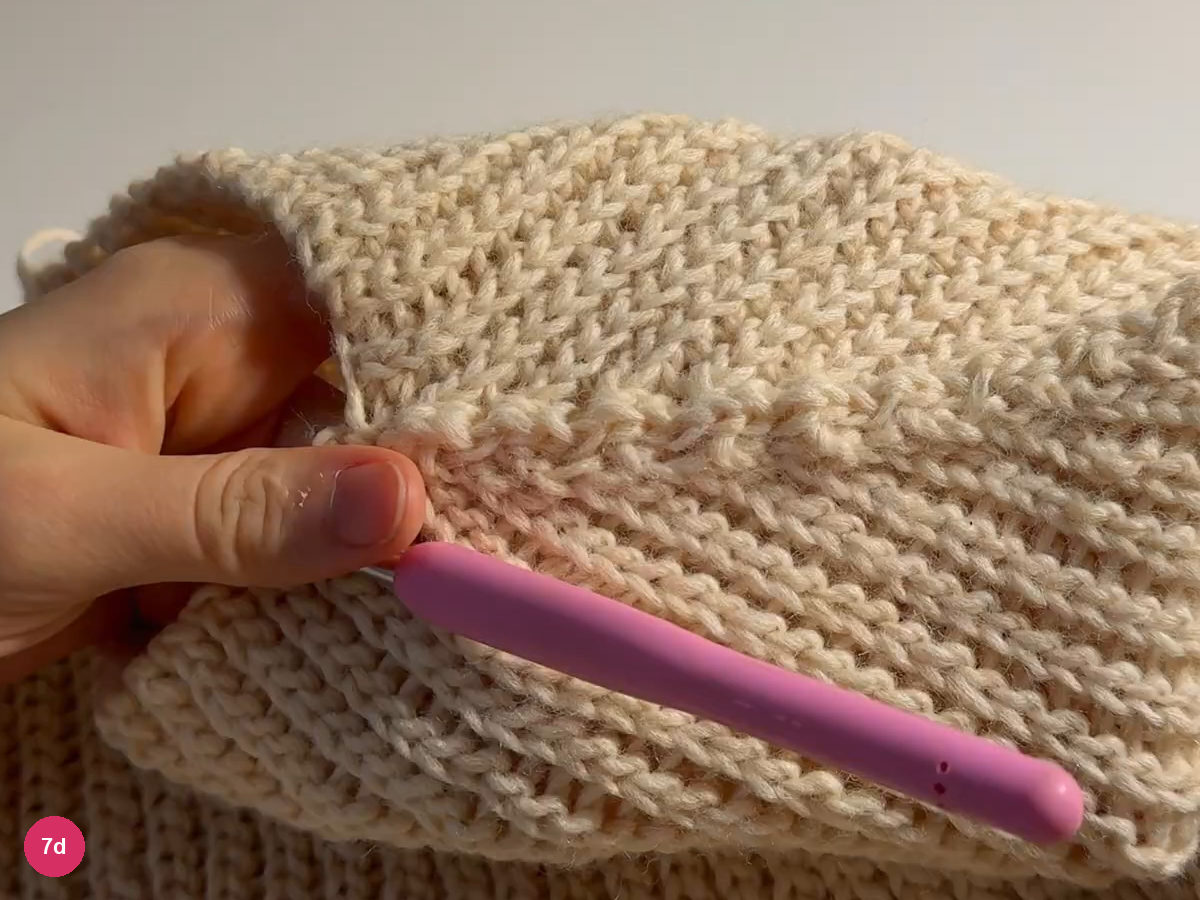
Step 7d: inspect the joined crown. Continue joining down the straight section toward the marker, picking up between ridges and through the bridge above each ridge as shown. Stop at the original marked boundary so the tie sections remain separate below the hood.
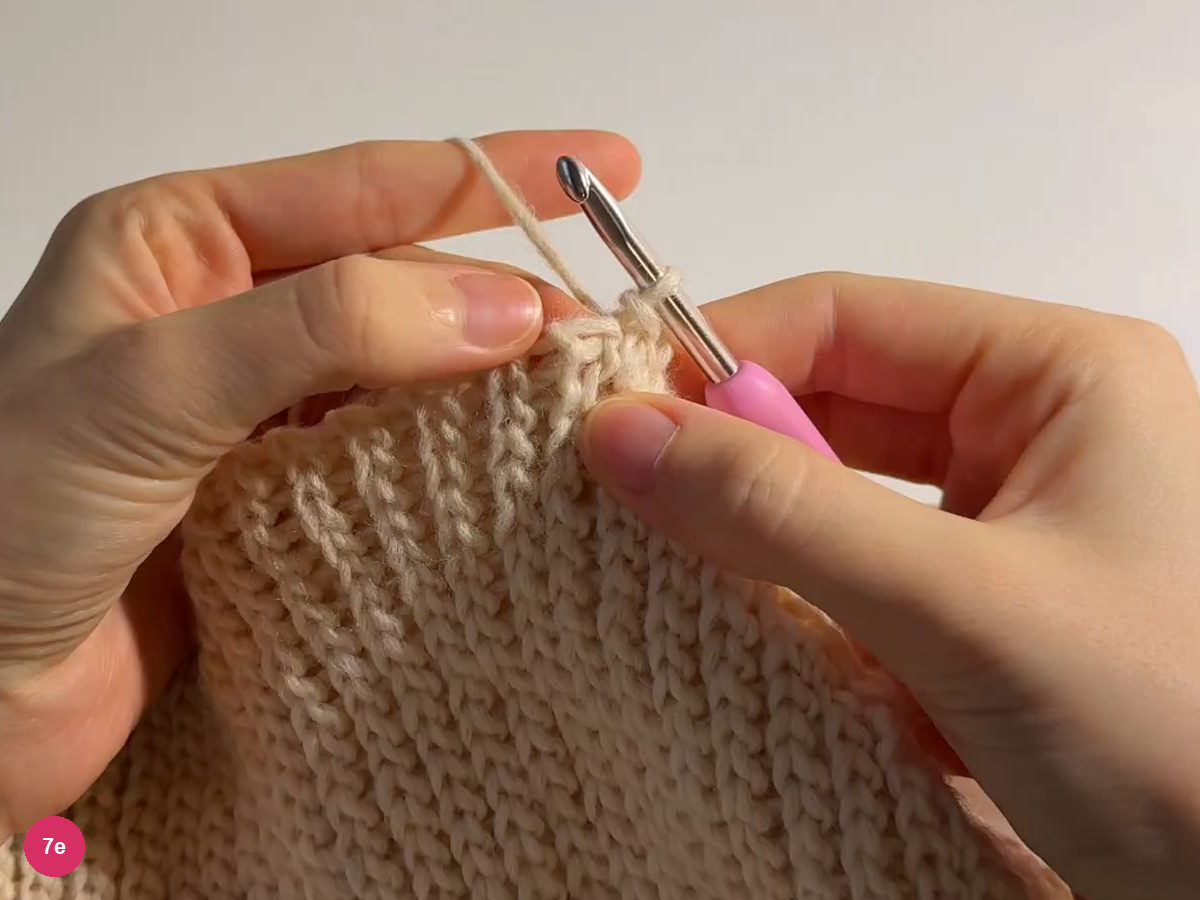
Step 7e: continue the back join toward the marker. Ch 1 and cut the joining yarn when you reach the marker. Turn the seam outward for a check: the hood should open cleanly, and the remaining yarn ends can be secured through neighboring fabric without tightening the opening.
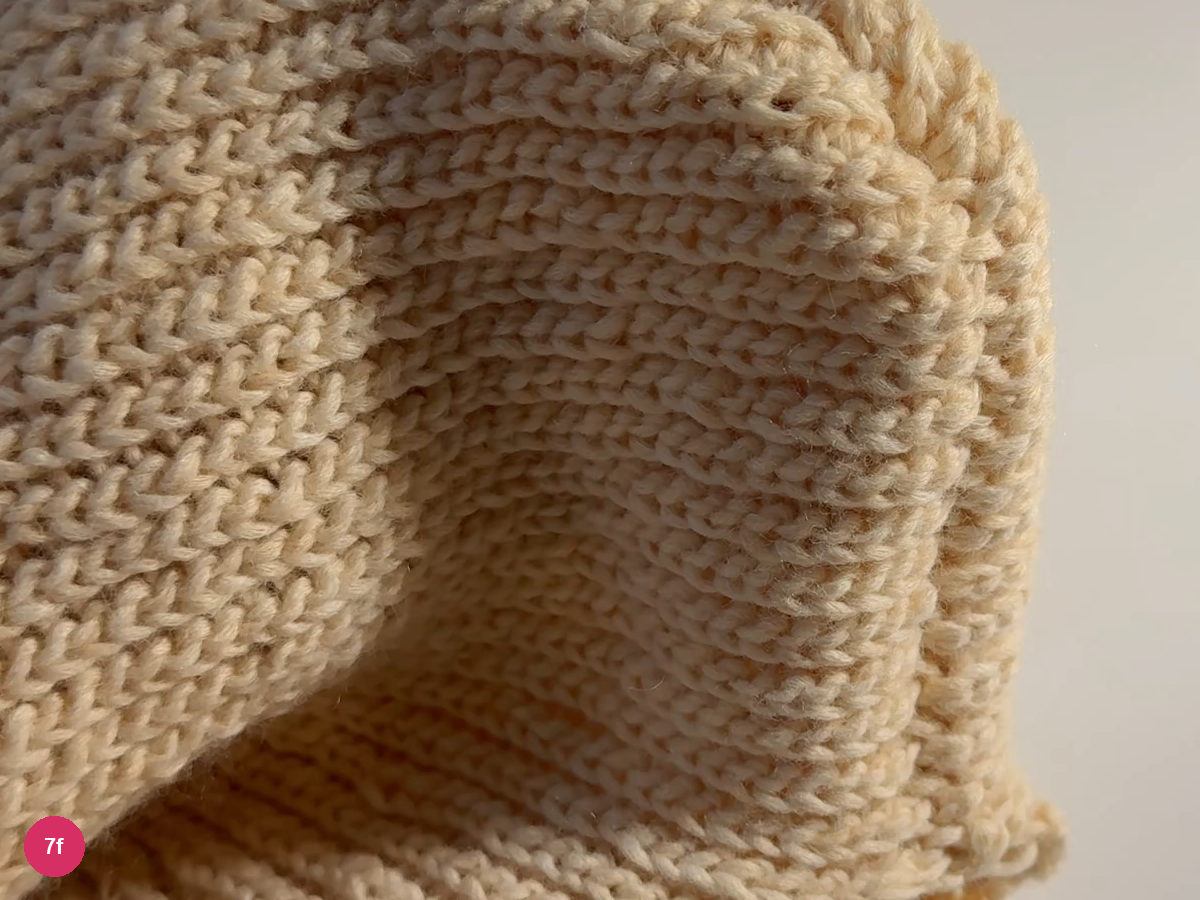
Step 7f: inspect the completed back seam. -
Finish the face edge and tie perimeter
- Optional scallop · sc, dc, sc in one gap
- Edging hook · 3 mm
For a narrow plain trim, work sl sts between the ridges and into the bridges above them, following the same edge placements used for the seam. This is the demonstrated alternative to the scallops; choose the finish before edging the full perimeter.
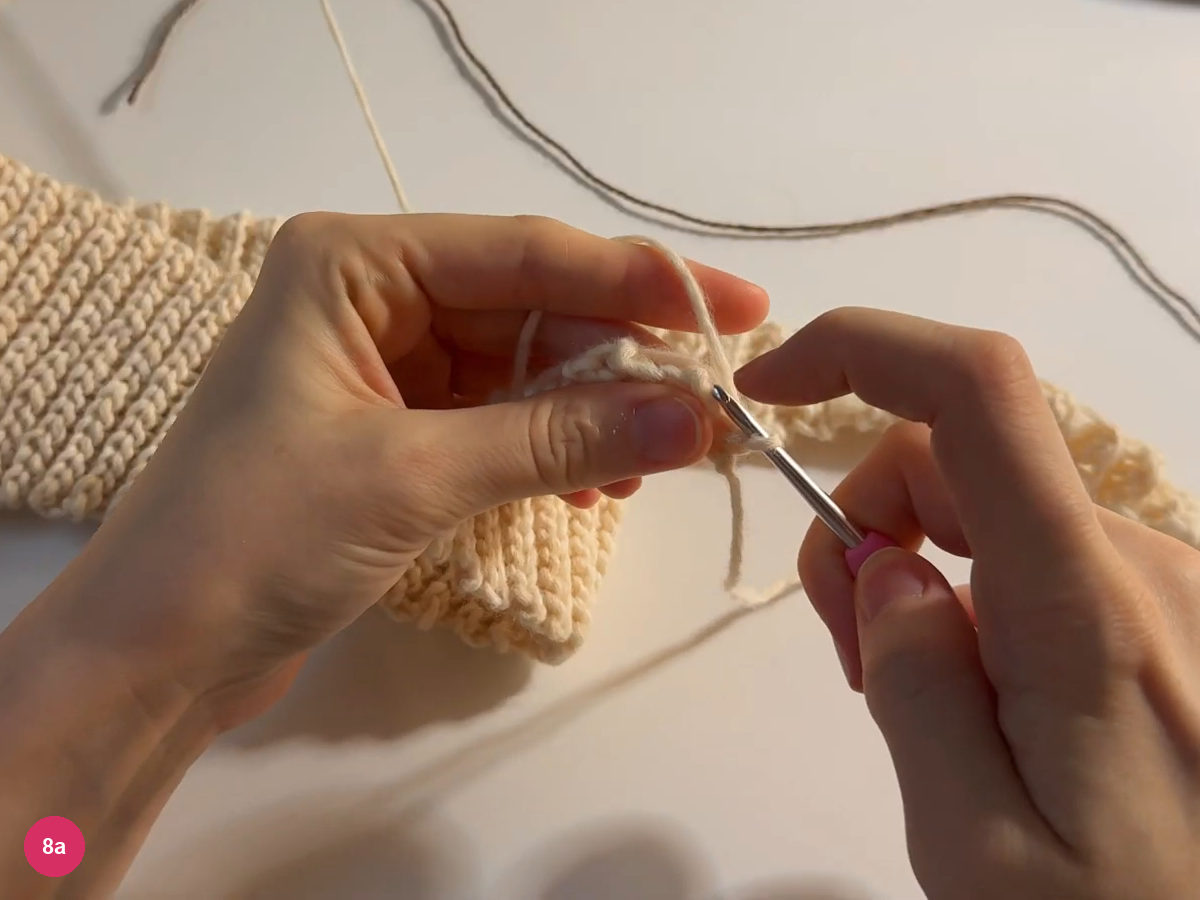
Step 8a: see the narrow plain-trim option. For the scalloped finish, use the smaller 3 mm hook and attach the contrasting yarn in a gap between ridges. Begin a sc in that gap, keeping the cream edge relaxed beneath the new stitch.
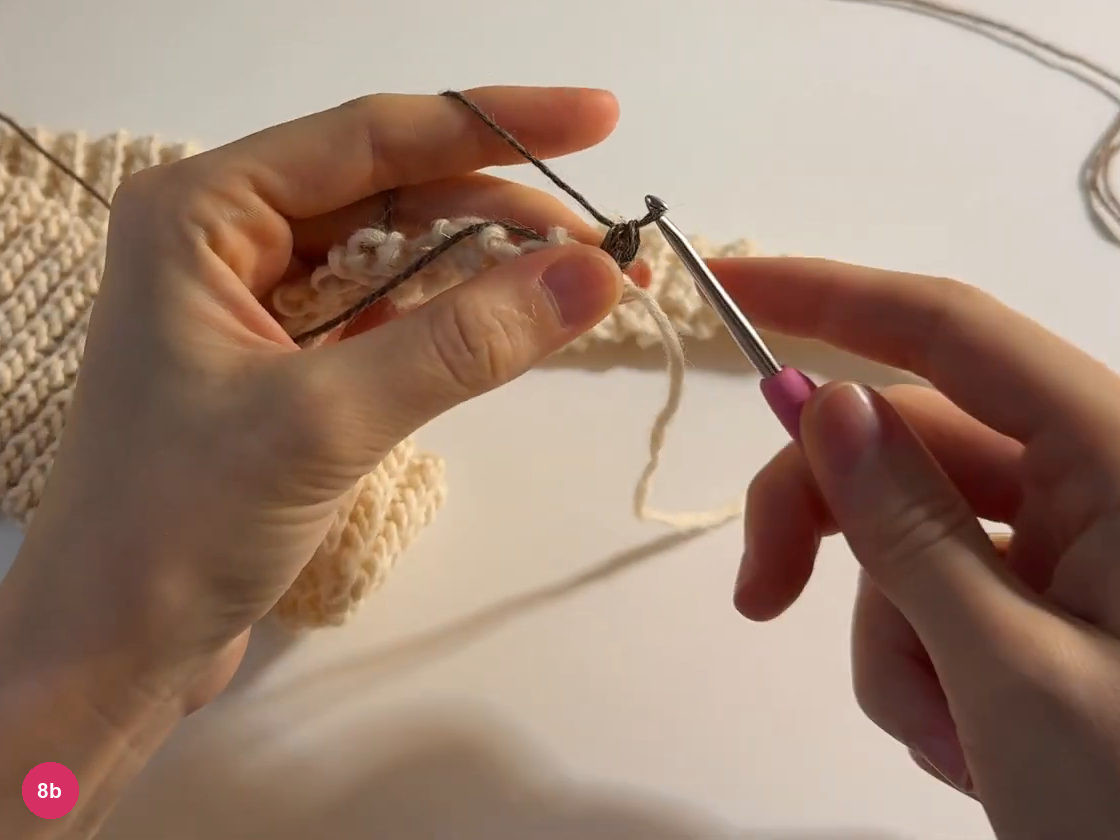
Step 8b: start the contrasting scallop. Work a dc into that same gap to raise the center of the scallop. Keep its base in the shared insertion point rather than moving into the next ridge, which would spread the edging repeat apart.
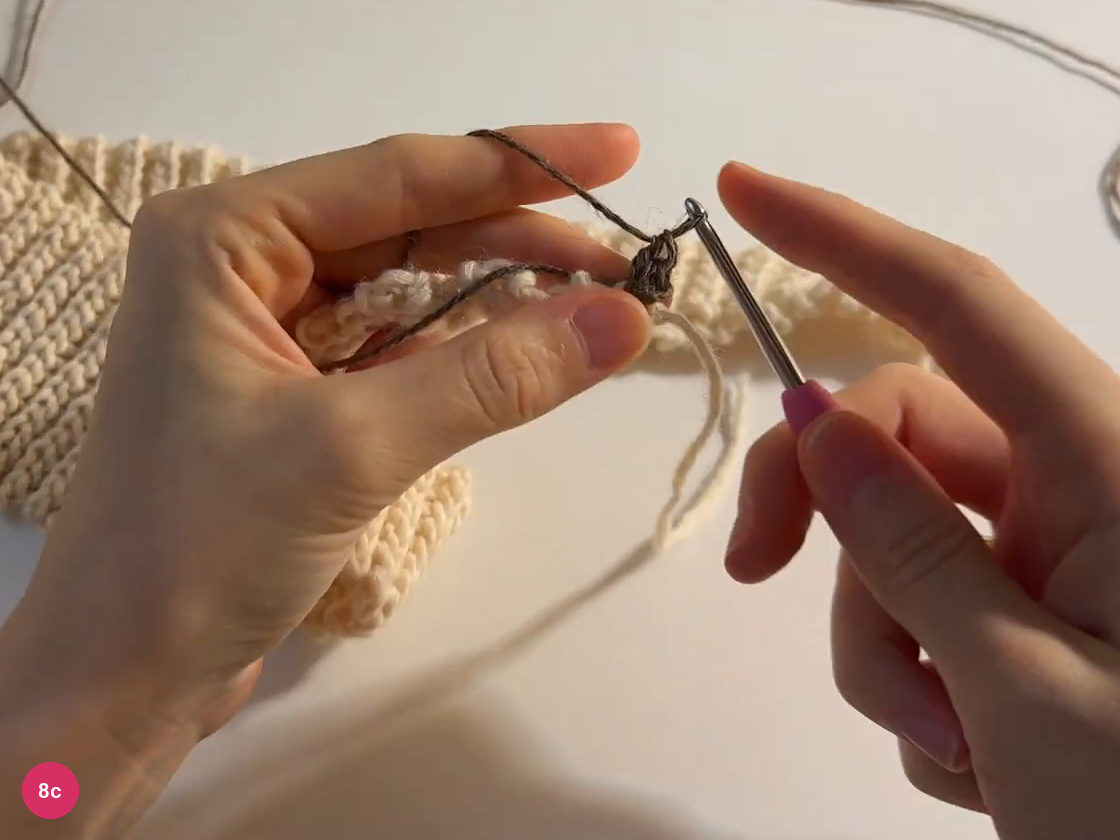
Step 8c: raise the center of the scallop. Work another sc into the same gap, then skip the ridge and begin the next scallop in the following gap. Repeat the sc, dc, sc group around the edge of the hood and its ties, following the visible ridge spacing. At the end, ch 1, cut the yarn and secure the remaining ends into the fabric.
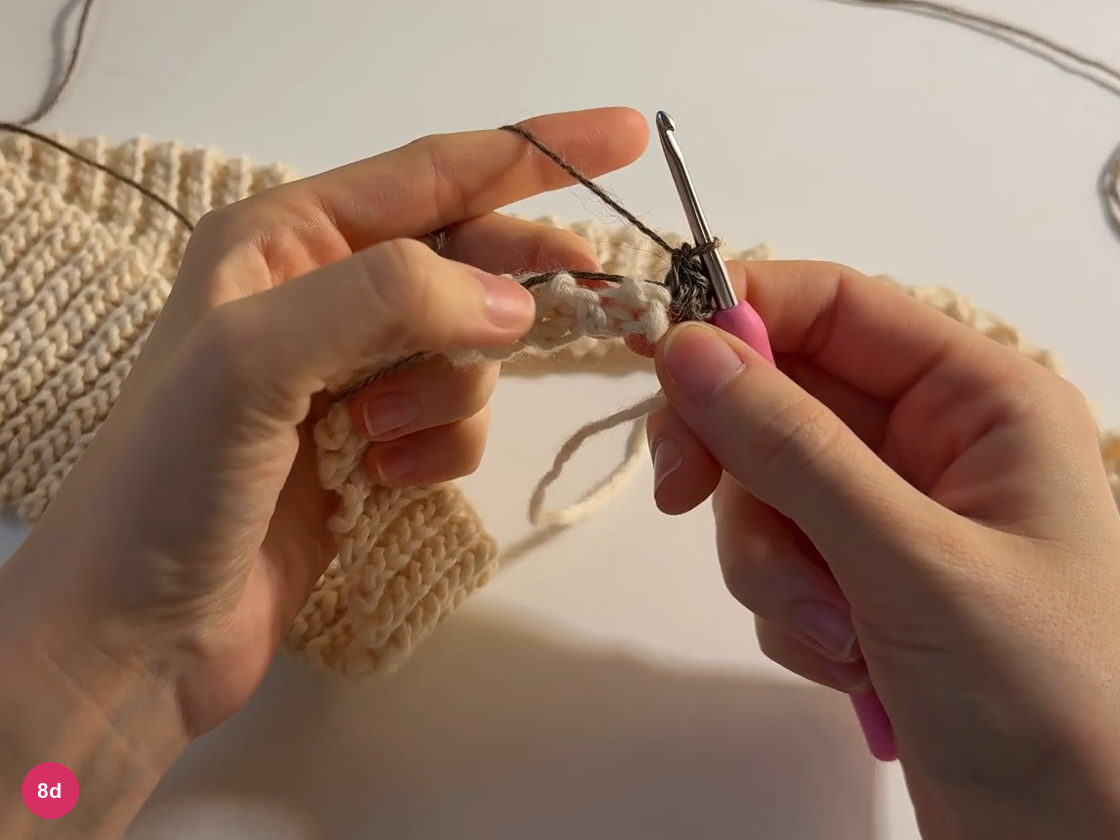
Step 8d: repeat the scallops between ridges. The completed brown scallops run along the edges of the cream ribbed ties. Seen from the back, the long ties hang down from the finished hood.
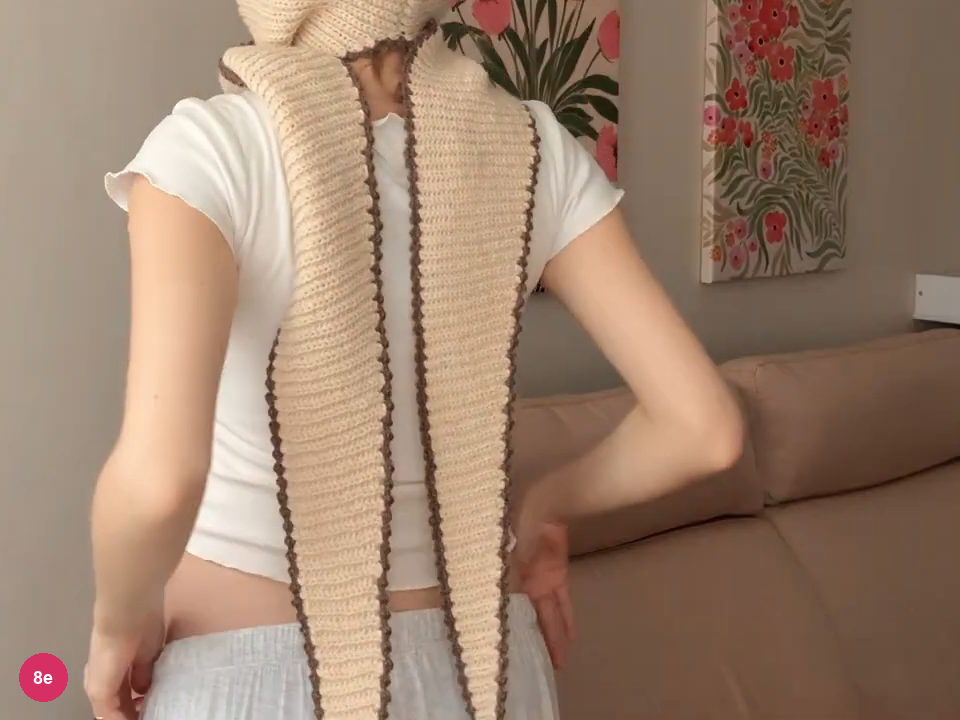
Step 8e: the finished scalloped edge along the ties
Fit and finishing checks
Try the bonnet with the opening relaxed around the face before knotting the ties. The crown should sit over the back of the head, with the lower edge reaching below the ears. If you have to pull the ties hard to bring the sides into place, check the hood depth and seam placement before blaming the tie length.
A crochet bonnet pattern with tapered ends depends on consistent tension over a long stretch of narrow fabric. Compare the ties laid flat as well as wrapped around the neck: a relaxed rib can look longer than its partner while still having matching shaping. Avoid forcing a large difference out by stretching; first compare the increase and decrease intervals.
Troubleshooting the ribbing, seam and edging
The hook is difficult to insert. Slip stitches tighten readily. Relax the working loop and let each completed stitch settle along the full hook shaft before continuing; forcing the hook through a pinched loop makes the next return row harder to work.
The hood twists at the crown. Open it and compare the ledges. Each downward step needs a matching extension on the other half, and corresponding edges must meet at the seam. An unpaired ledge or a skipped bridge can pull the crown sideways even if the broad sections look similar.
The tie suddenly becomes narrower. Check the final stitch at the row end. It can hide behind the edge bar, which is why intentional omissions and accidental missed stitches need to be distinguished before continuing several more rows.
The face edge puckers after trimming. Check that the scallops share their insertion gaps and that the edging yarn has not been pulled taut. Lay the opening relaxed while you compare the last repeat with the earlier ones; do not use the trim to force the hood into a smaller size.
Final checklist
For a lighter tied accessory, see the retro crochet head scarf. For a closer winter head covering, compare the crochet balaclava; the twisted ribbed crochet headband offers a smaller ribbed project.
Inspired by Волшебное плетение’s video tutorial.

Save this pattern for later
Pin it to one of your boards so it’s ready when you have a free evening and the right yarn.