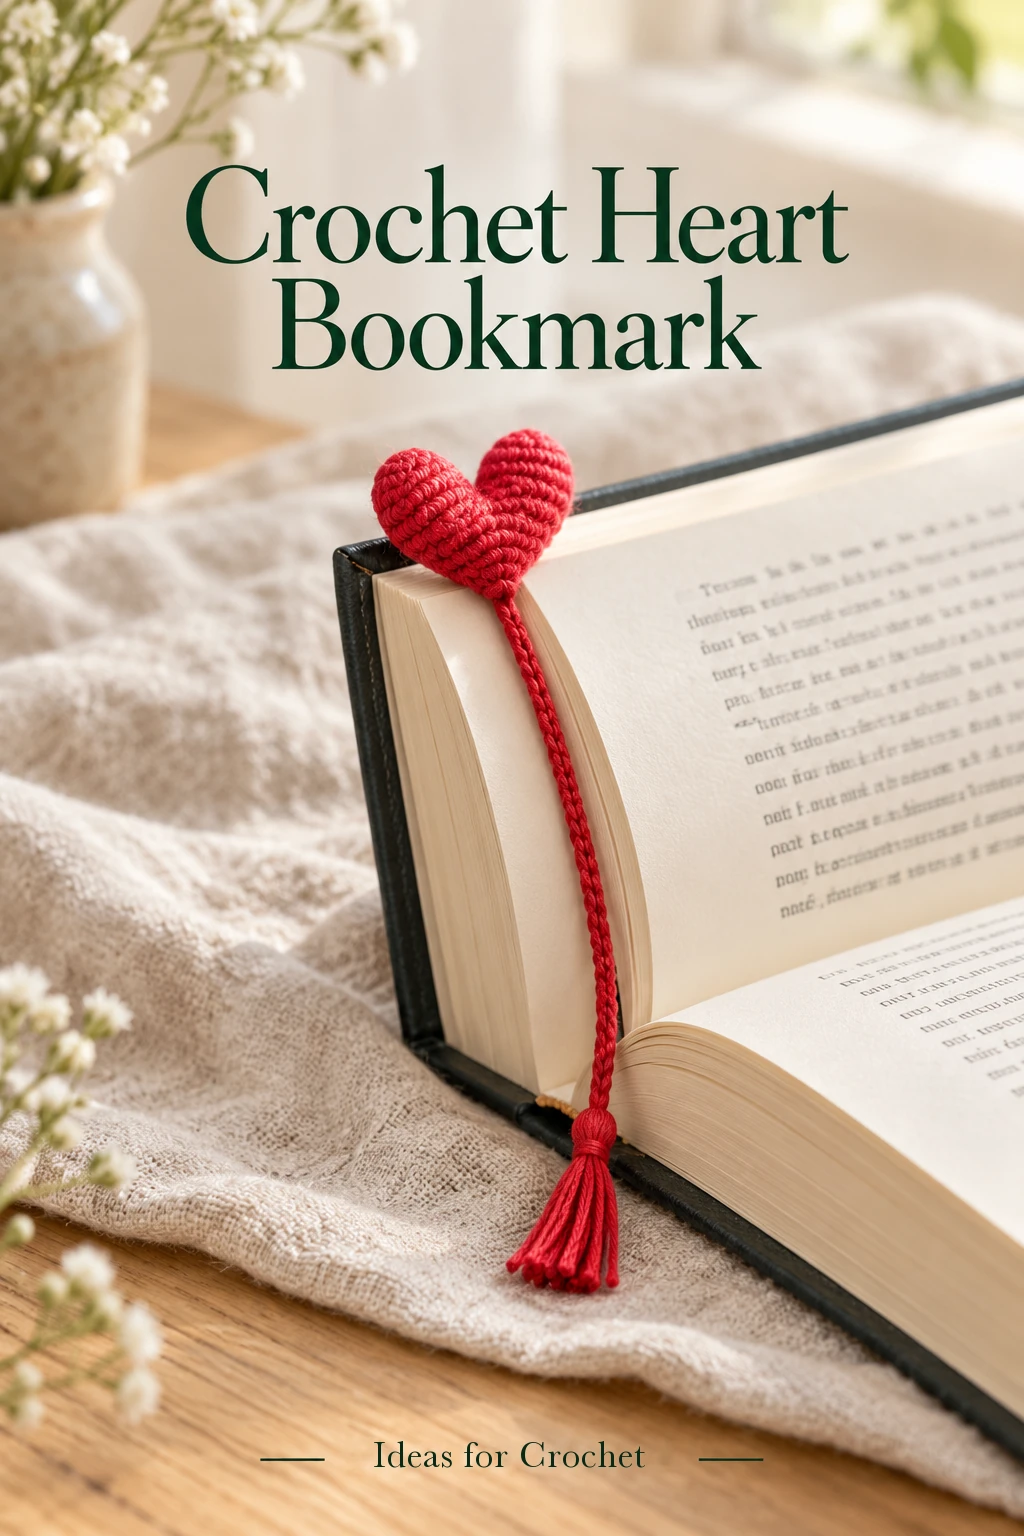
A tiny red heart above the page and a little tassel below make this crochet bookmark feel like a small keepsake. The heart is lightly stuffed, while a simple chain runs between the pages. Fine yarn keeps the topper modest in size, so the design adds character without turning into a large ornament.
The heart begins with two little lobes that join into one piece, then narrows through a short series of decreases. The chain length is measured against the actual book. Make one in a favorite color as a thoughtful addition to a book gift.
Materials and stitch terms
- Fine cotton or similar thread. The creator uses Pekhorka Azhurnaya.
- 1 mm crochet hook for the fine-thread sample.
- A very small amount of soft stuffing.
- Scissors, yarn needle and optional stitch marker.
US terms: sc = single crochet, inc = two sc in one stitch, dec = sc2tog, ch = chain and sl st = slip stitch. The two small lobes begin separately. After they join, continue around both in a spiral. Mark the round beginning so the decreases remain easy to count.
A thicker yarn and larger hook will make a larger heart. If substituting a yarn such as YarnArt Jeans, choose a hook that gives a tight fabric and expect a noticeably bigger topper. The fine-thread version needs only a little stuffing; fill it gradually rather than packing the tiny lobes hard.
Crochet the heart and bookmark chain
-
Make the first lobe
Work six sc into an adjustable ring and close the center. Round 2: repeat (1 sc, inc) three times for nine sc. Round 3: repeat (2 sc, inc) three times for twelve sc. Round 4: work one sc in each stitch, keeping twelve. Secure and cut the yarn, leaving an end to hide inside the heart.
The tiny cup may curl inward while you work. Gently push it into the intended rounded lobe shape with your fingers or the blunt end of a suitable tool. Do not pull the stitches apart to make the opening larger.
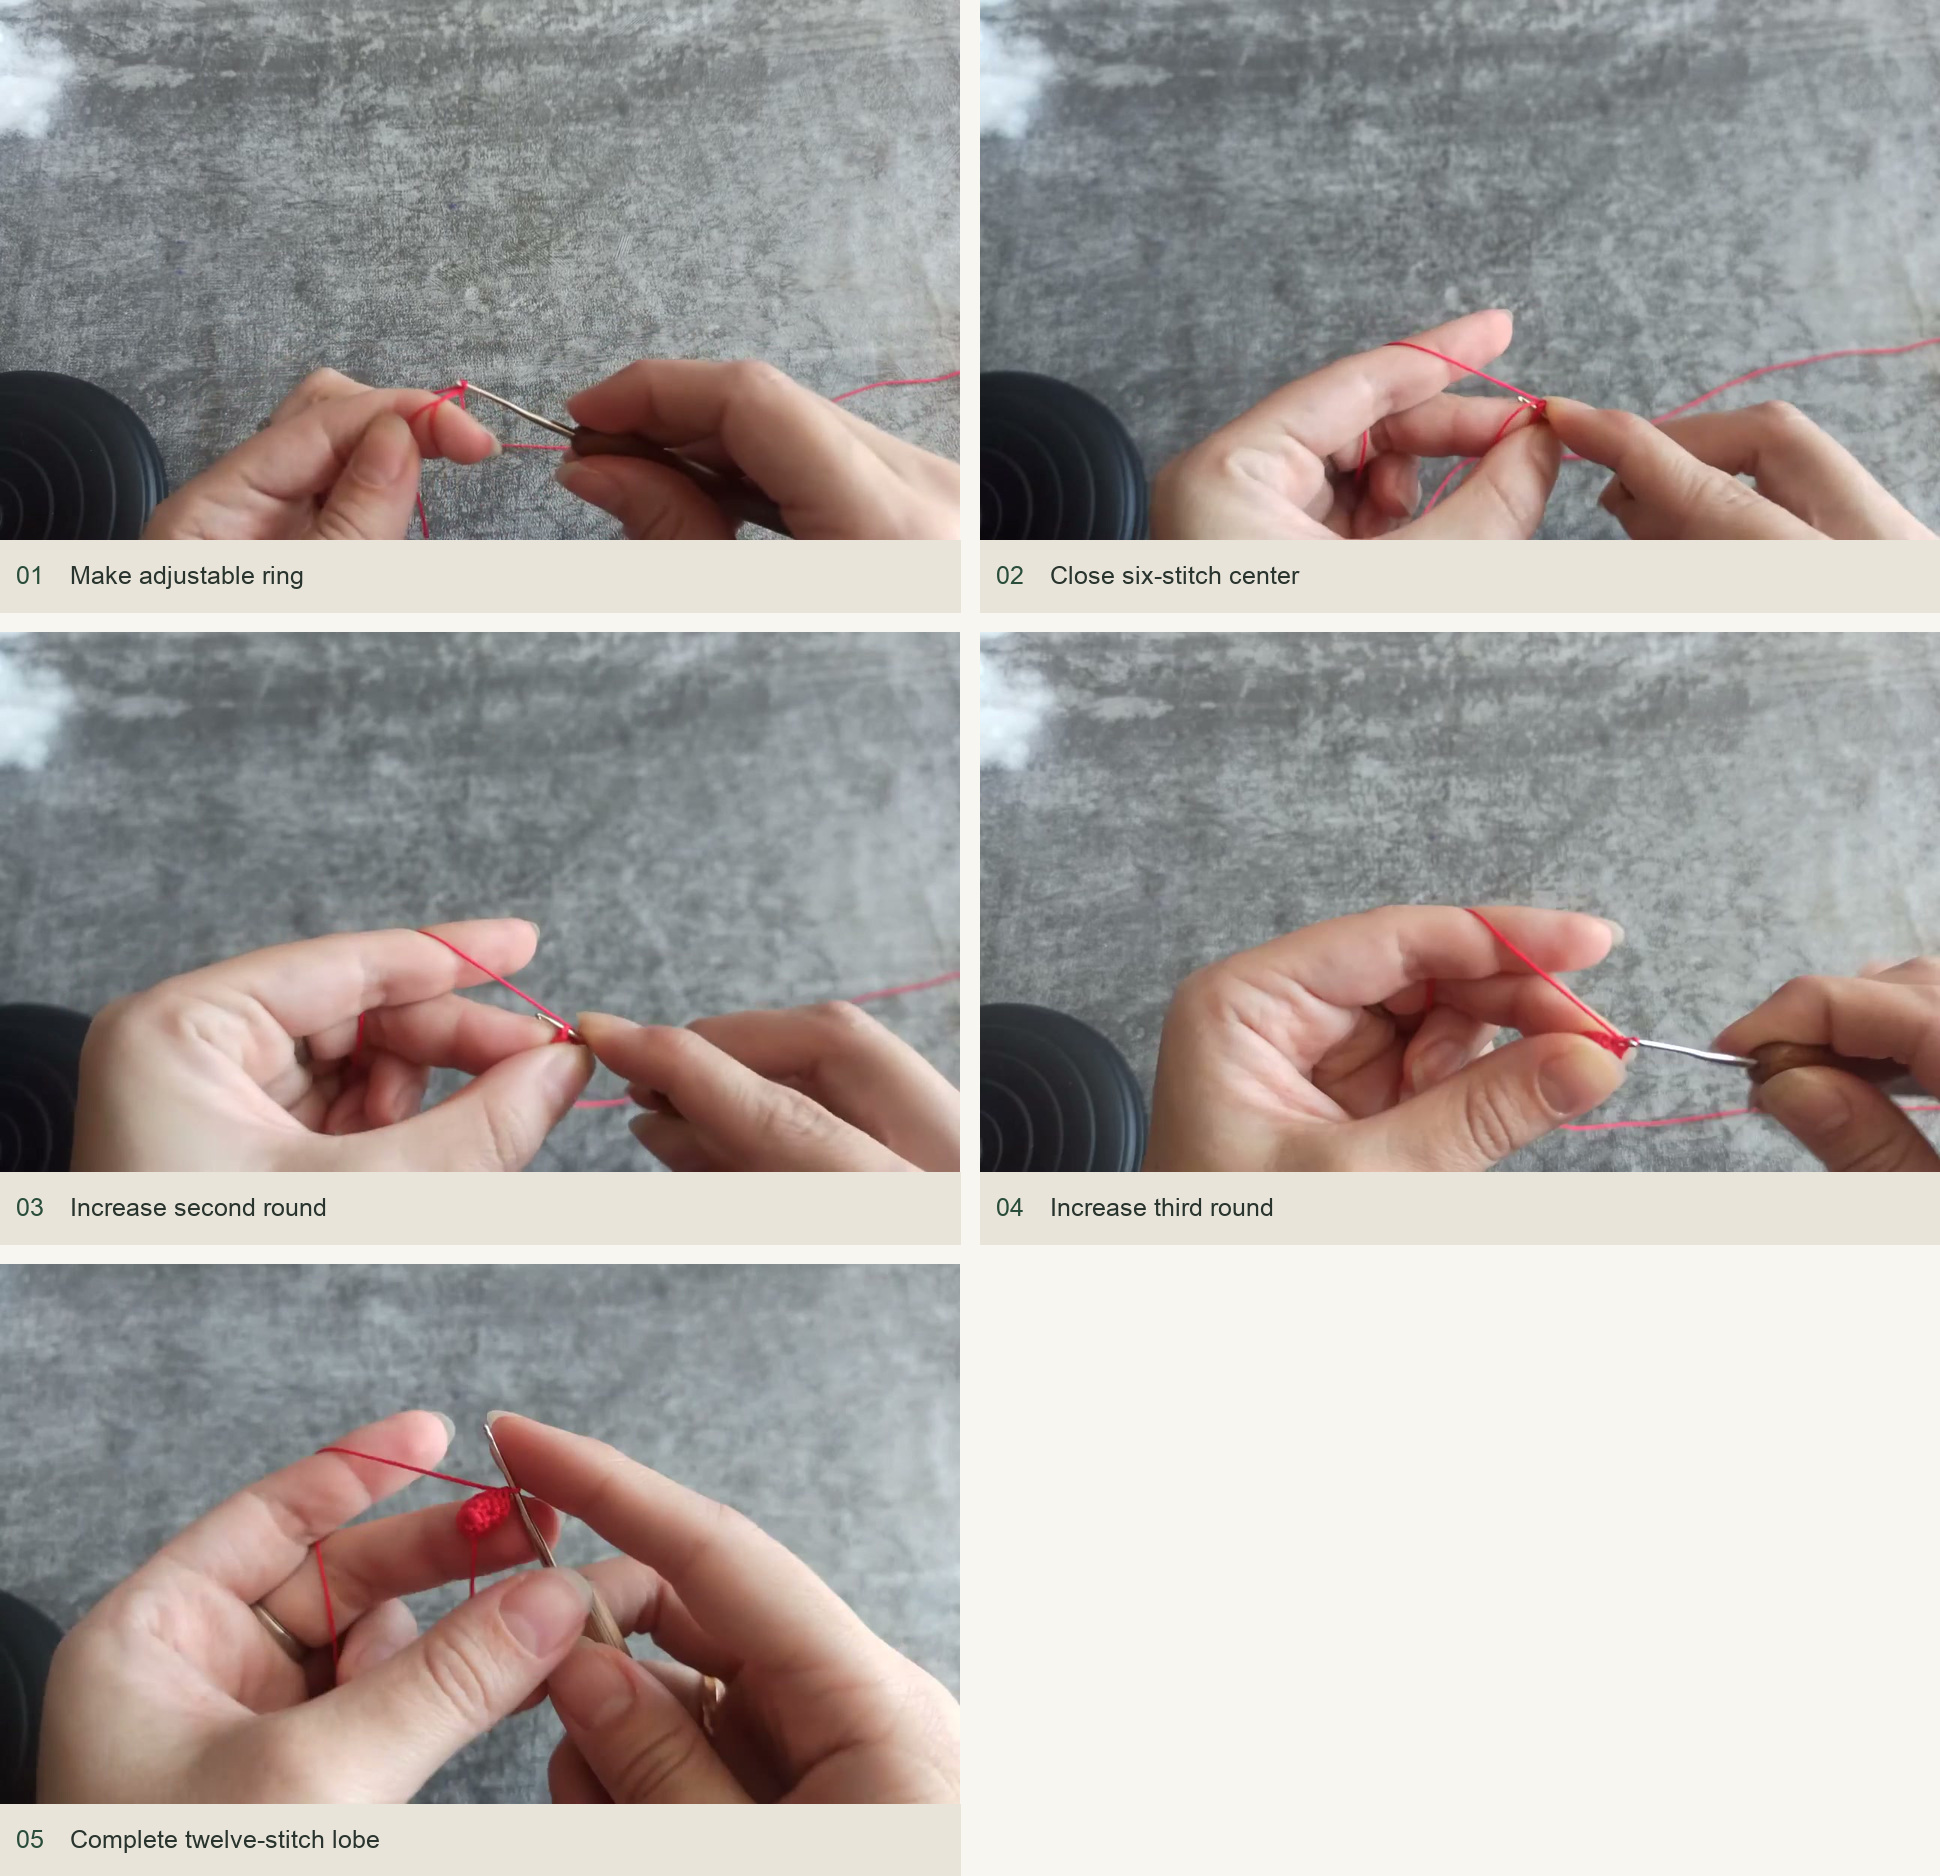
Source demonstration: Make adjustable ring → Close six-stitch center → Increase second round → Increase third round → Complete twelve-stitch lobe -
Make the second lobe and join
Work a second lobe exactly like the first, but leave its yarn attached. Slip stitch into the indicated finishing position of the first lobe. Work twelve sc around the first lobe, then twelve around the second. Tuck the short ring tails inside. The combined round has 24 sc.
At the meeting point, move directly to the next genuine stitch instead of working again into the joining slip stitch. Count the full circumference before continuing. If an accidental extra stitch is present, correct it at the join now rather than letting it shift the following shaping.
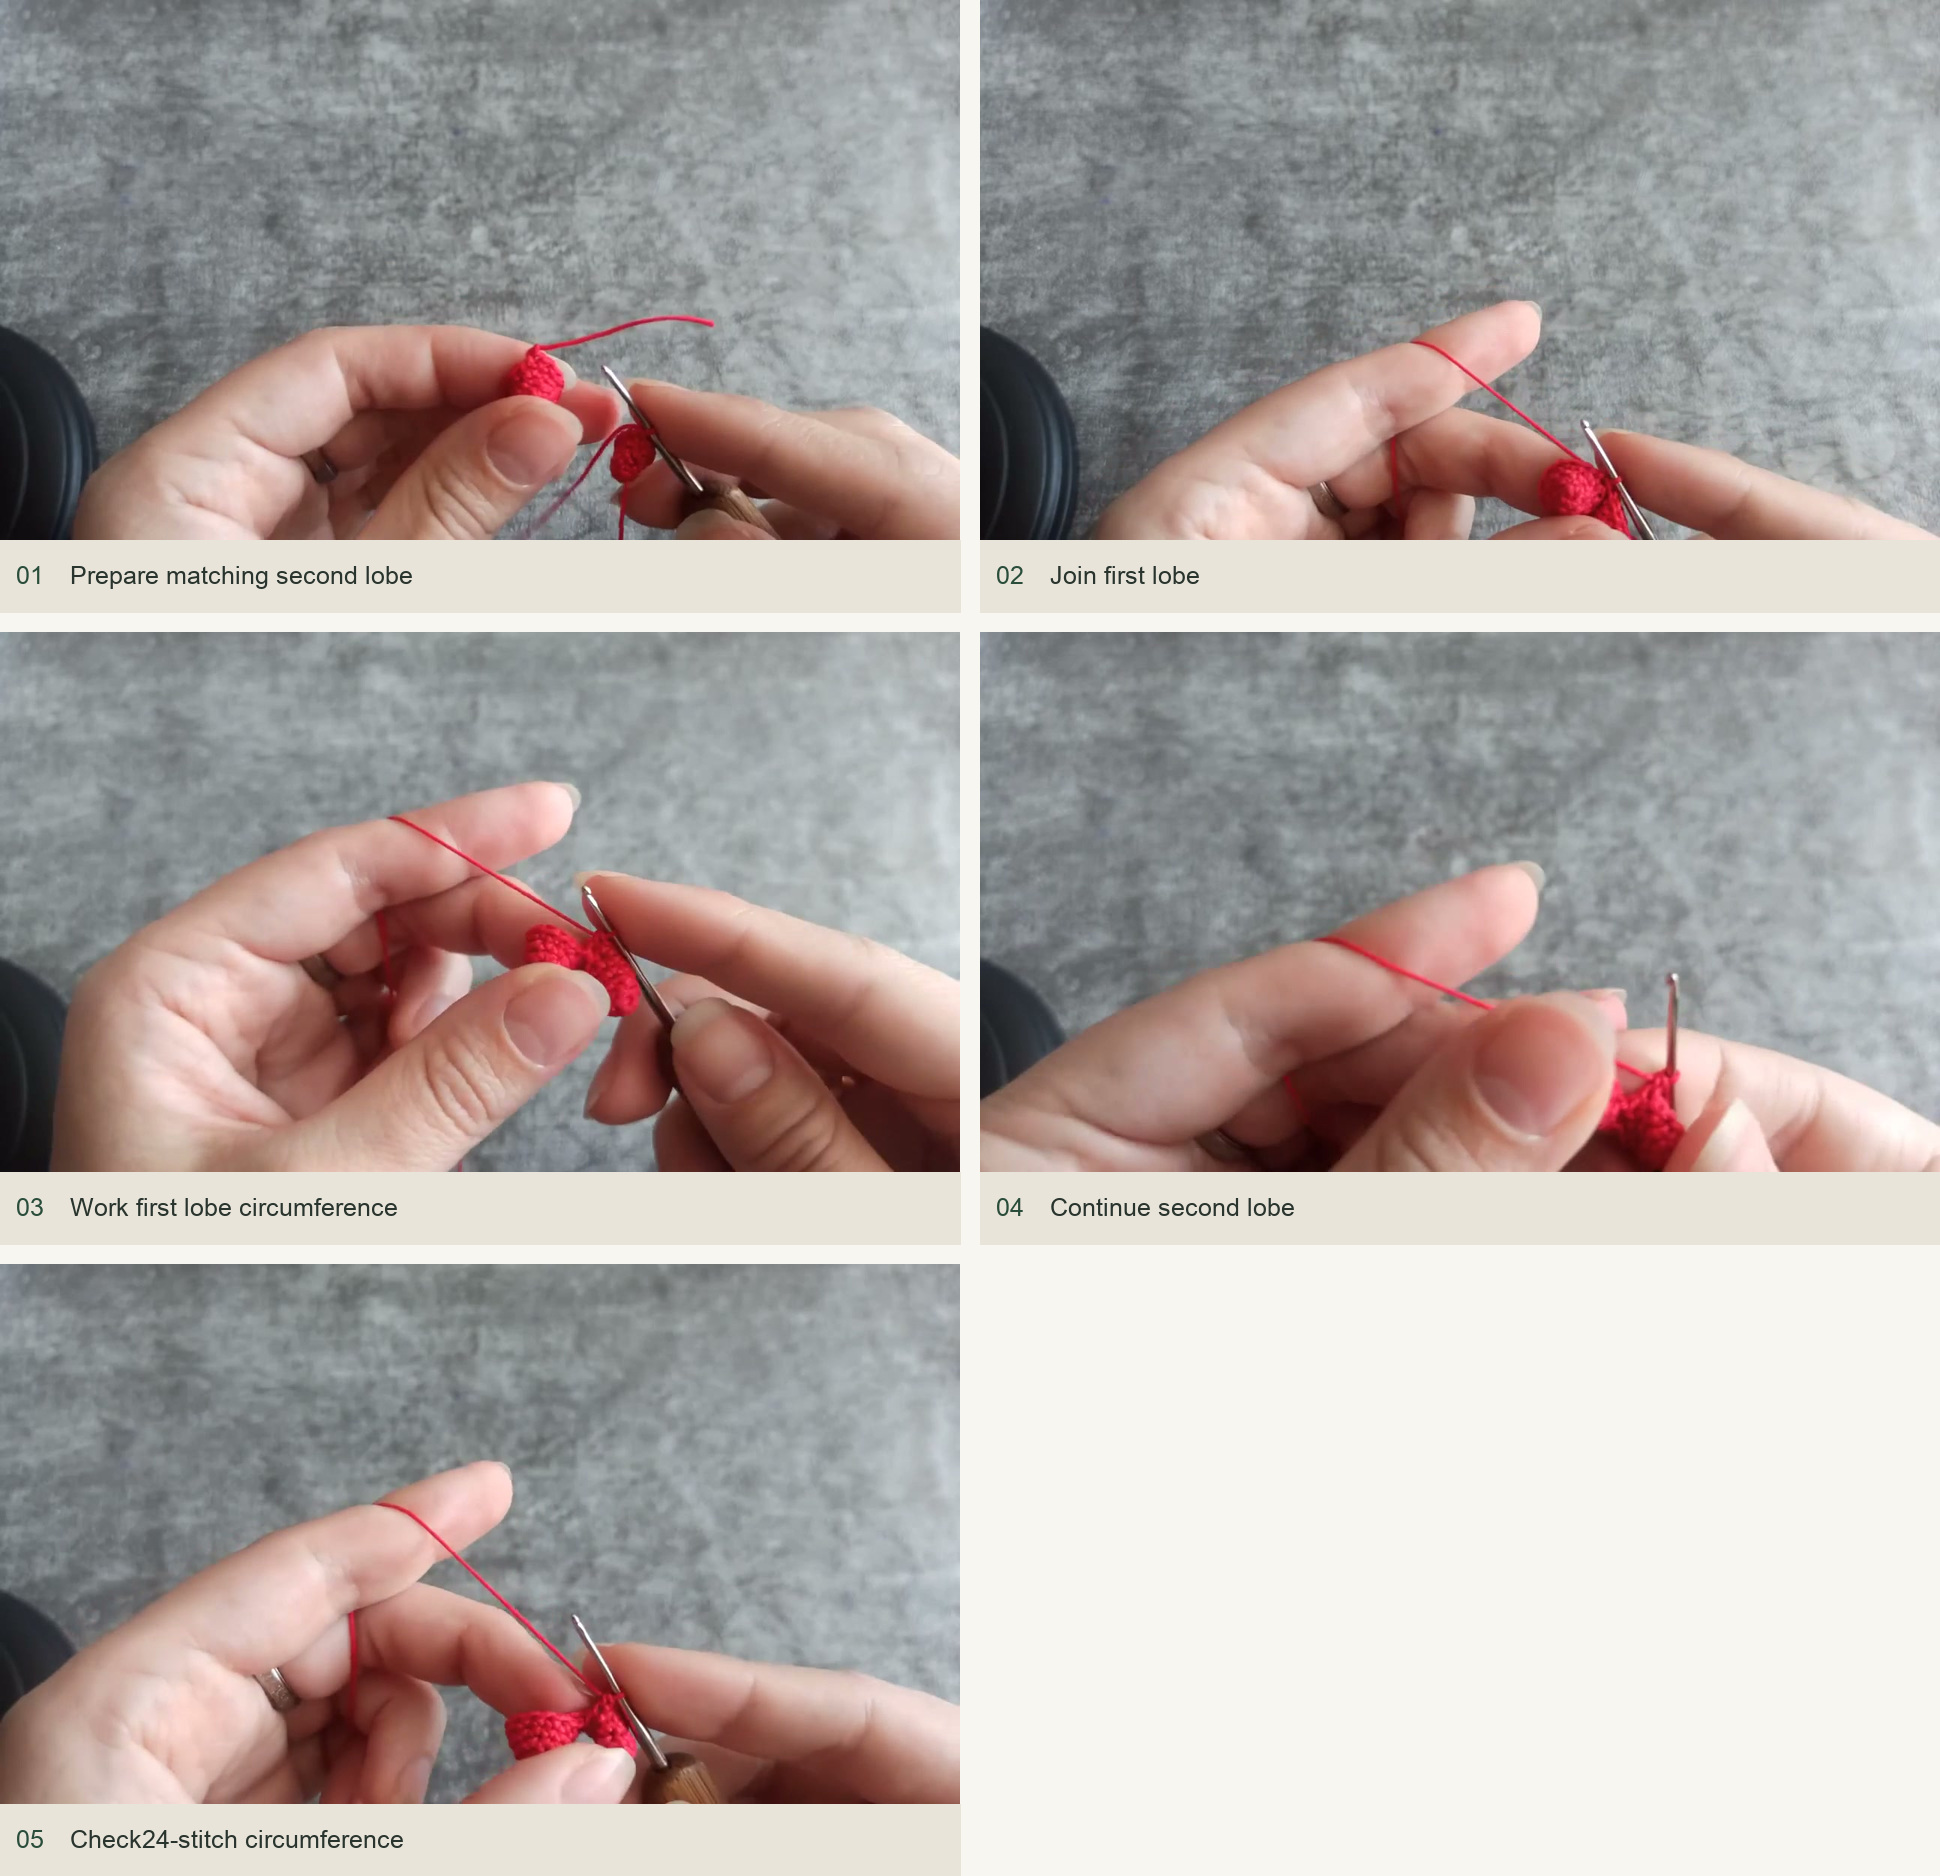
Source demonstration: Prepare matching second lobe → Join first lobe → Work first lobe circumference → Continue second lobe → Check24-stitch circumference -
Begin the lower heart shaping
Next round: repeat (4 sc, dec) four times, leaving 20 sc. Work the following round without changes, one sc in each stitch for twenty. Add a small amount of stuffing into the lobes and body. Keep their cleft visible and their shapes balanced.
For an inconspicuous decrease, pick up the front loop of each of the next two stitches, pull the working yarn through them, then complete the sc. A conventional sc2tog also works if the thread is too fine to handle comfortably, though its ridge may show more.
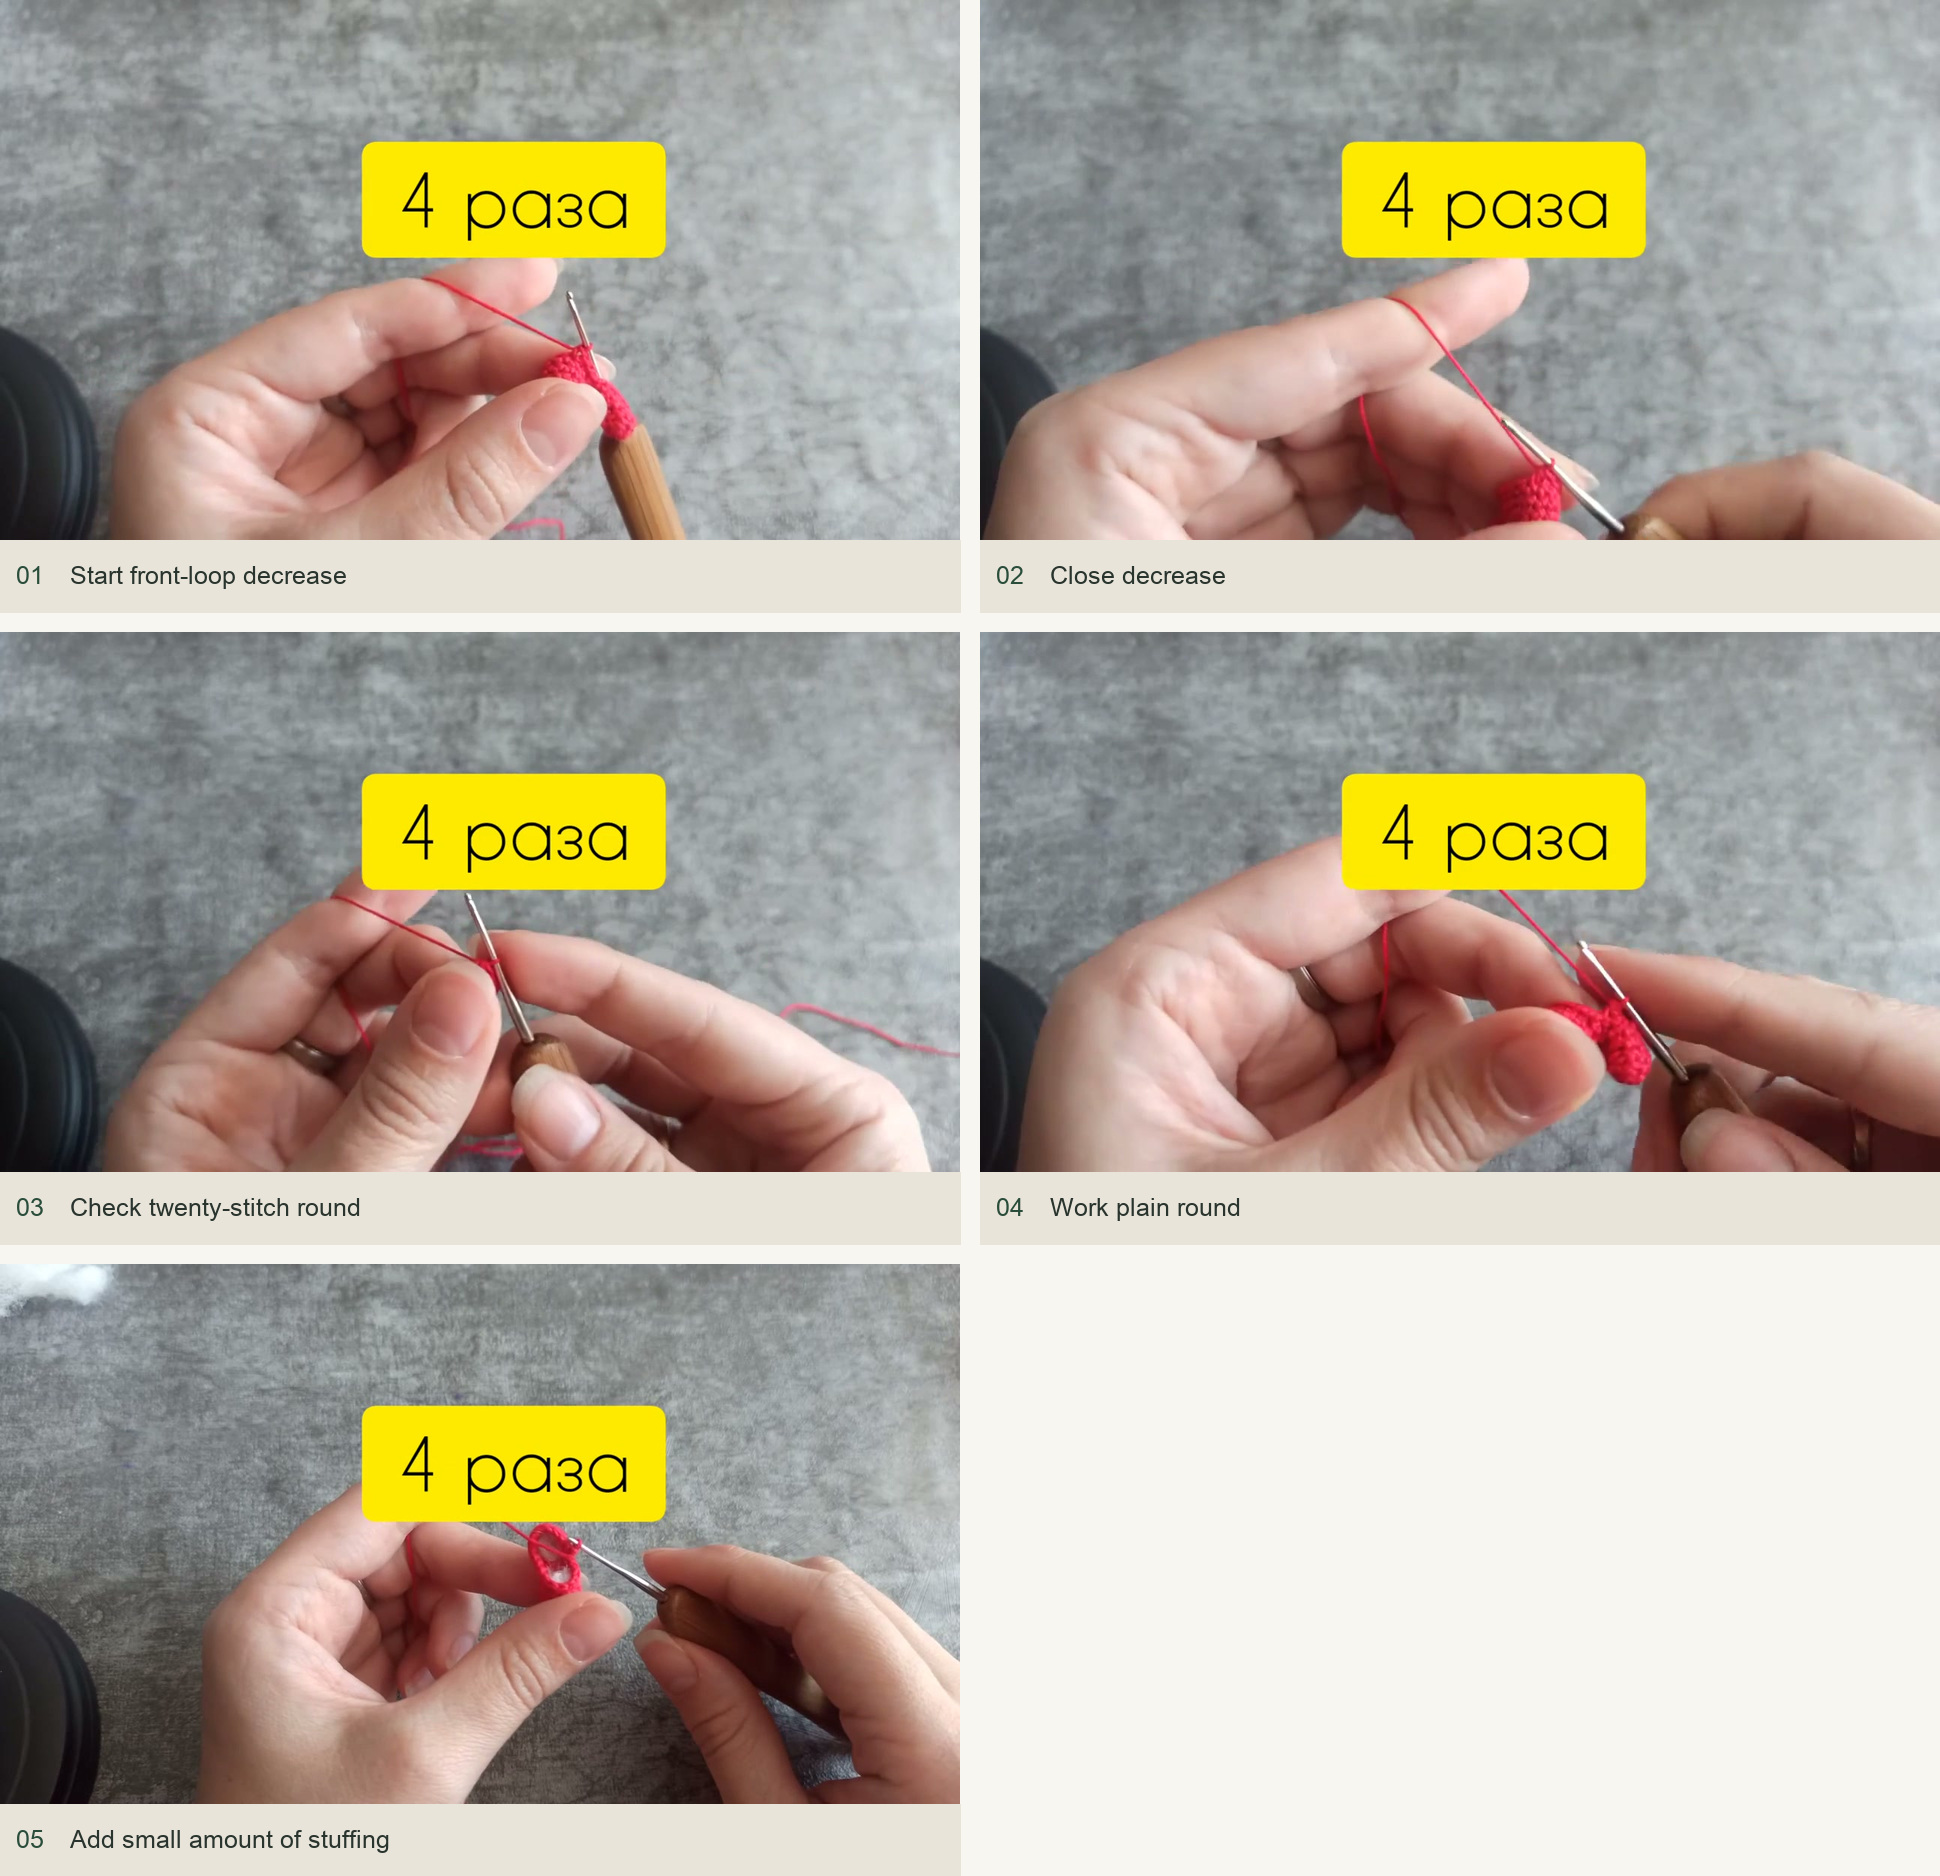
Source demonstration: Start front-loop decrease → Close decrease → Check twenty-stitch round → Work plain round → Add small amount of stuffing The yellow overlay is retained from the original video; follow the written stitch counts and strand count for this step. -
Narrow to the point
Work (3 sc, dec) four times for 16 sc. Next work (2 sc, dec) four times for 12. Add the last small amount of stuffing now, shaping the heart gently; it becomes difficult to add filling through the remaining opening. Work (1 sc, dec) four times for eight stitches, then four consecutive decreases for four stitches.
Close the little remaining opening with the hook as shown in the demonstration, keeping the working strand attached. The taper should lead into a small point. Avoid leaving a large knot at that point because the bookmark chain starts there.
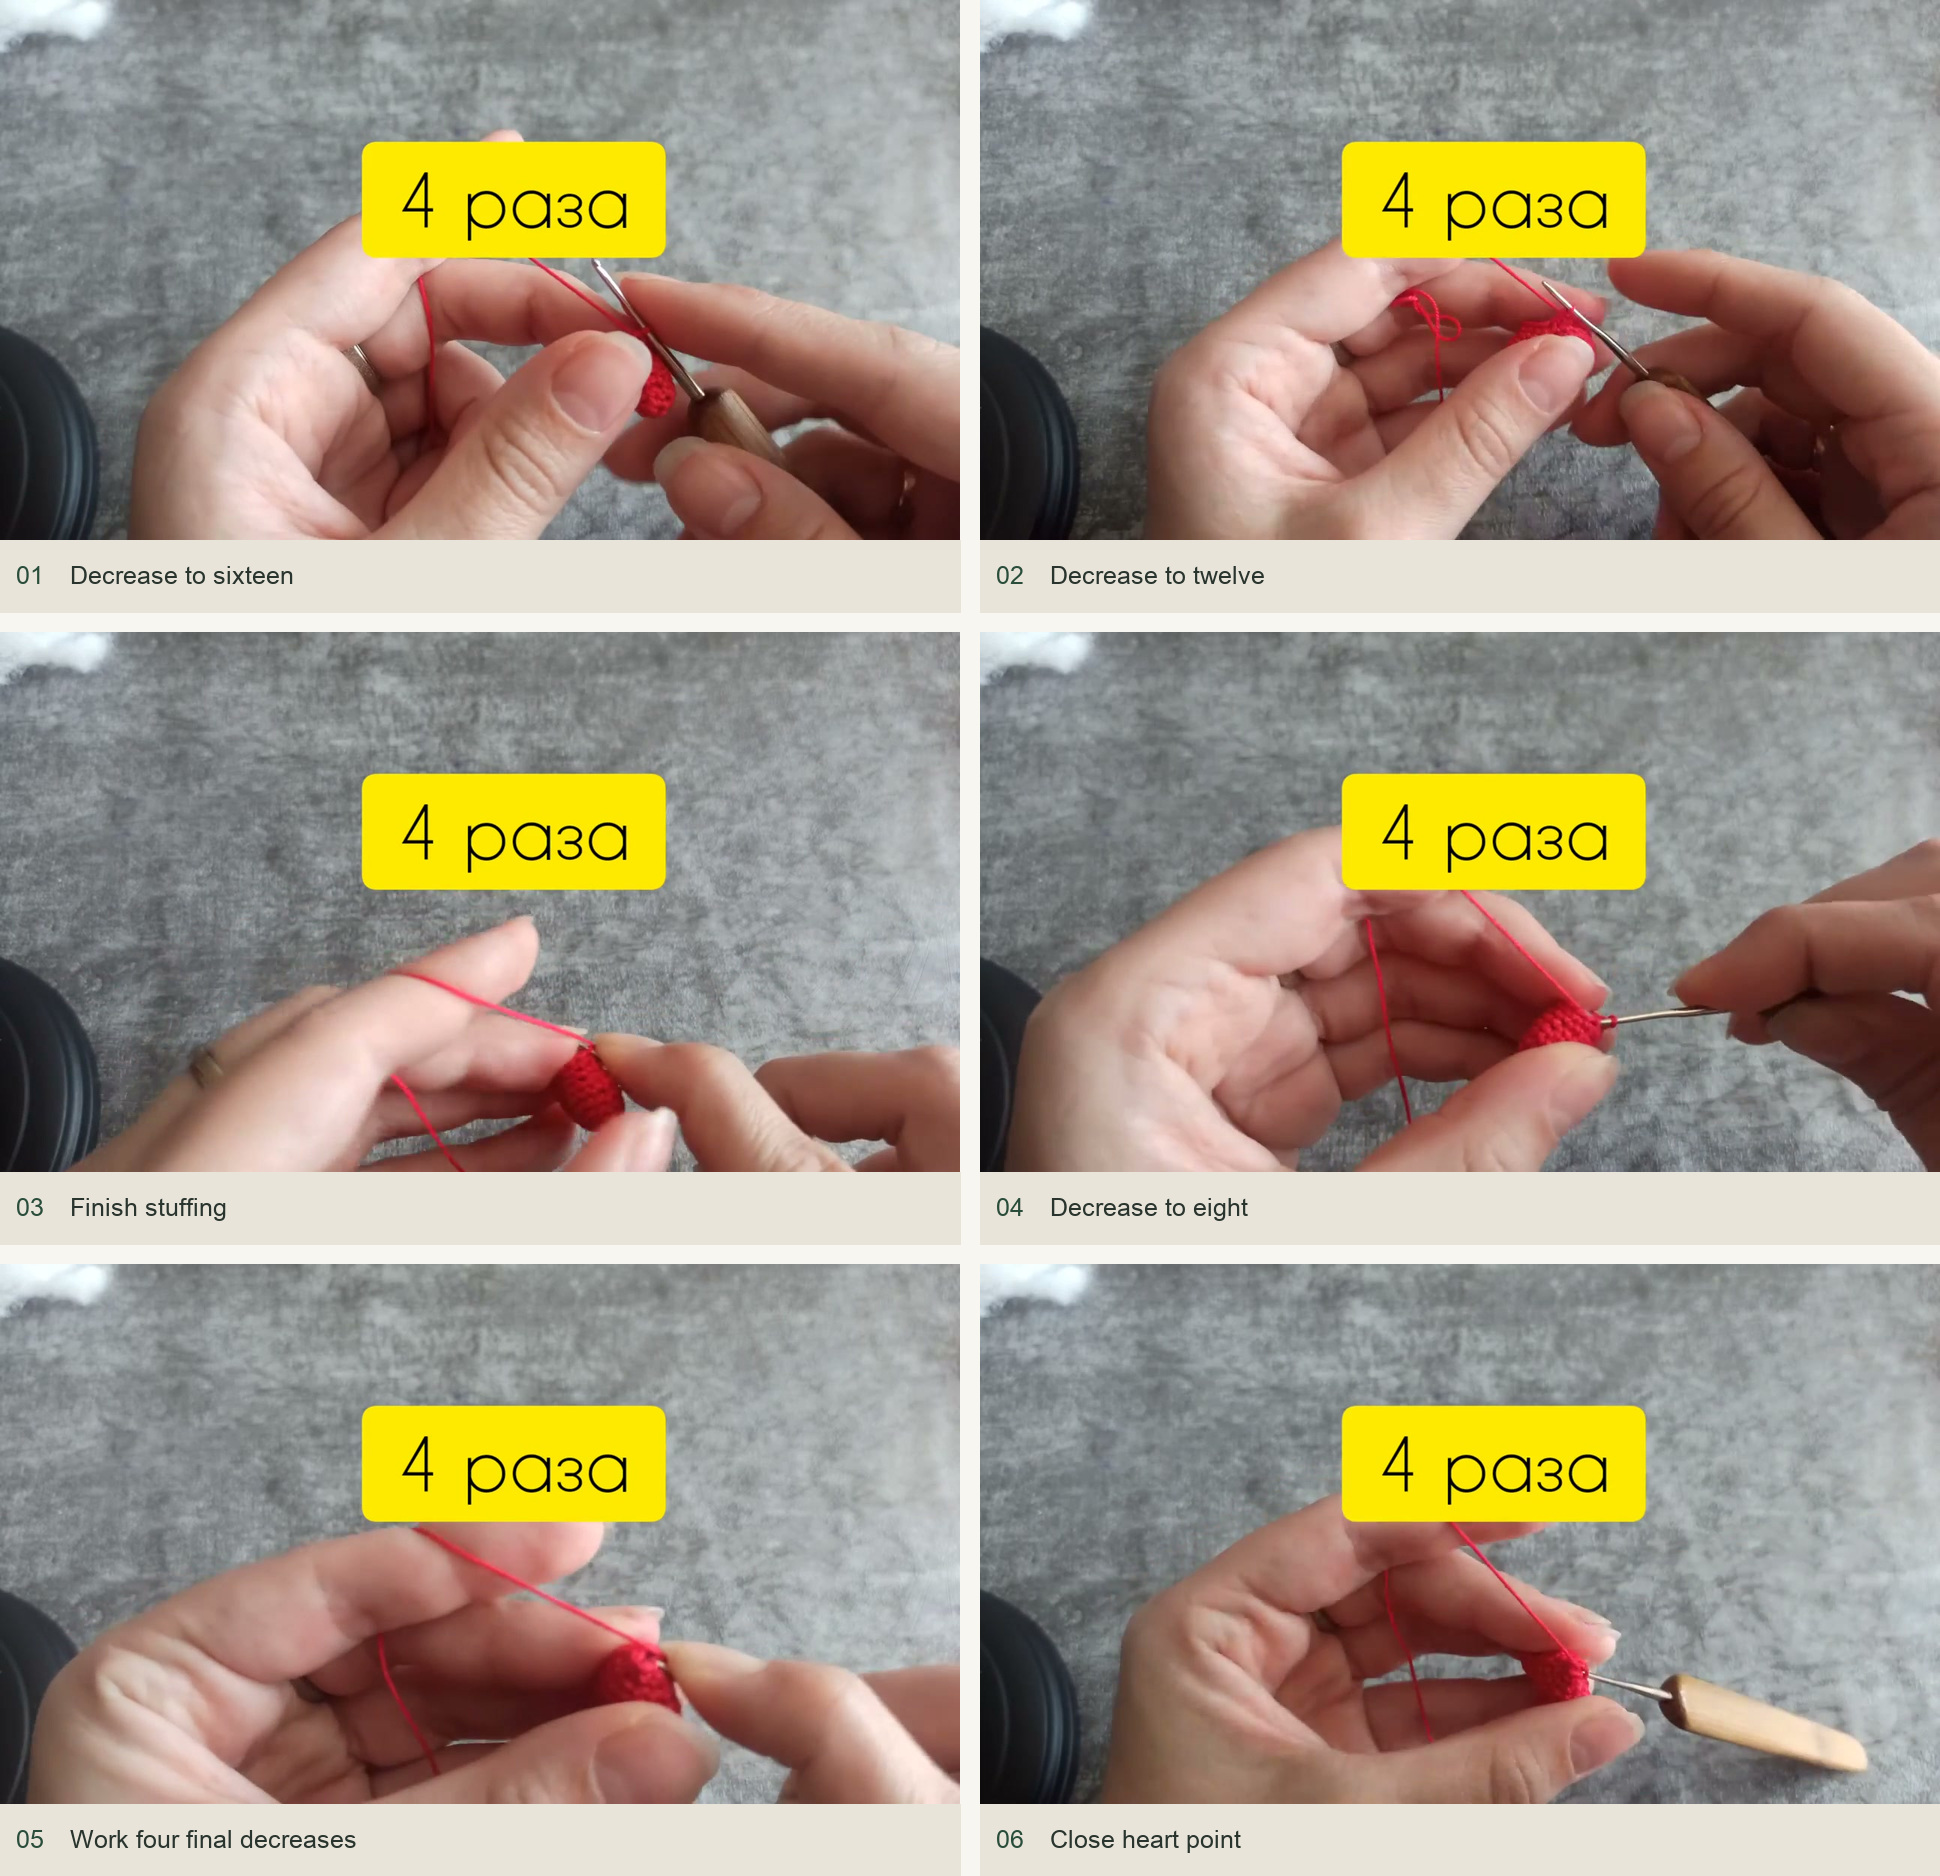
Source demonstration: Decrease to sixteen → Decrease to twelve → Finish stuffing → Decrease to eight → Work four final decreases → Close heart point The yellow overlay is retained from the original video; follow the written stitch counts and strand count for this step. -
Chain to match the book
From the closed heart point, work a chain long enough to span the intended page. The creator’s sample uses 73 chains, but the correct count depends on yarn tension and book size. Lay the chain along the book as you go. It should reach the lower page edge while the heart remains above the upper edge.
Once the length is right, make a securing chain, cut the yarn and fasten it. Keep the final chain loop accessible because the tassel strands will attach there. Do not stretch the chain tightly while measuring; it should lie comfortably at rest.
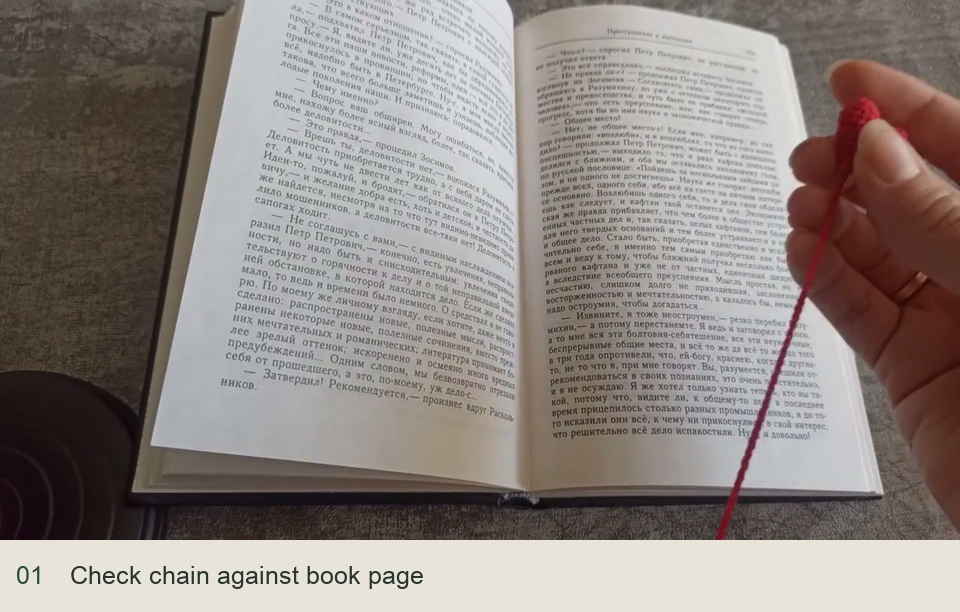
Source demonstration: Check chain against book page -
Attach a small tassel
Cut several equal lengths of the same thread. The creator uses eight strands, each roughly measured across a hand, then trims them after attaching. Fold one strand in half. Pull its folded center through the final chain loop, then pass both loose ends through that folded loop and tighten. Repeat with the remaining strands in the same final loop.
Comb the strands straight with your fingers and trim the ends evenly. A few strands make a light tassel; adding more makes it fuller but also bulkier. Keep the size proportional to the small heart so the bookmark remains delicate.
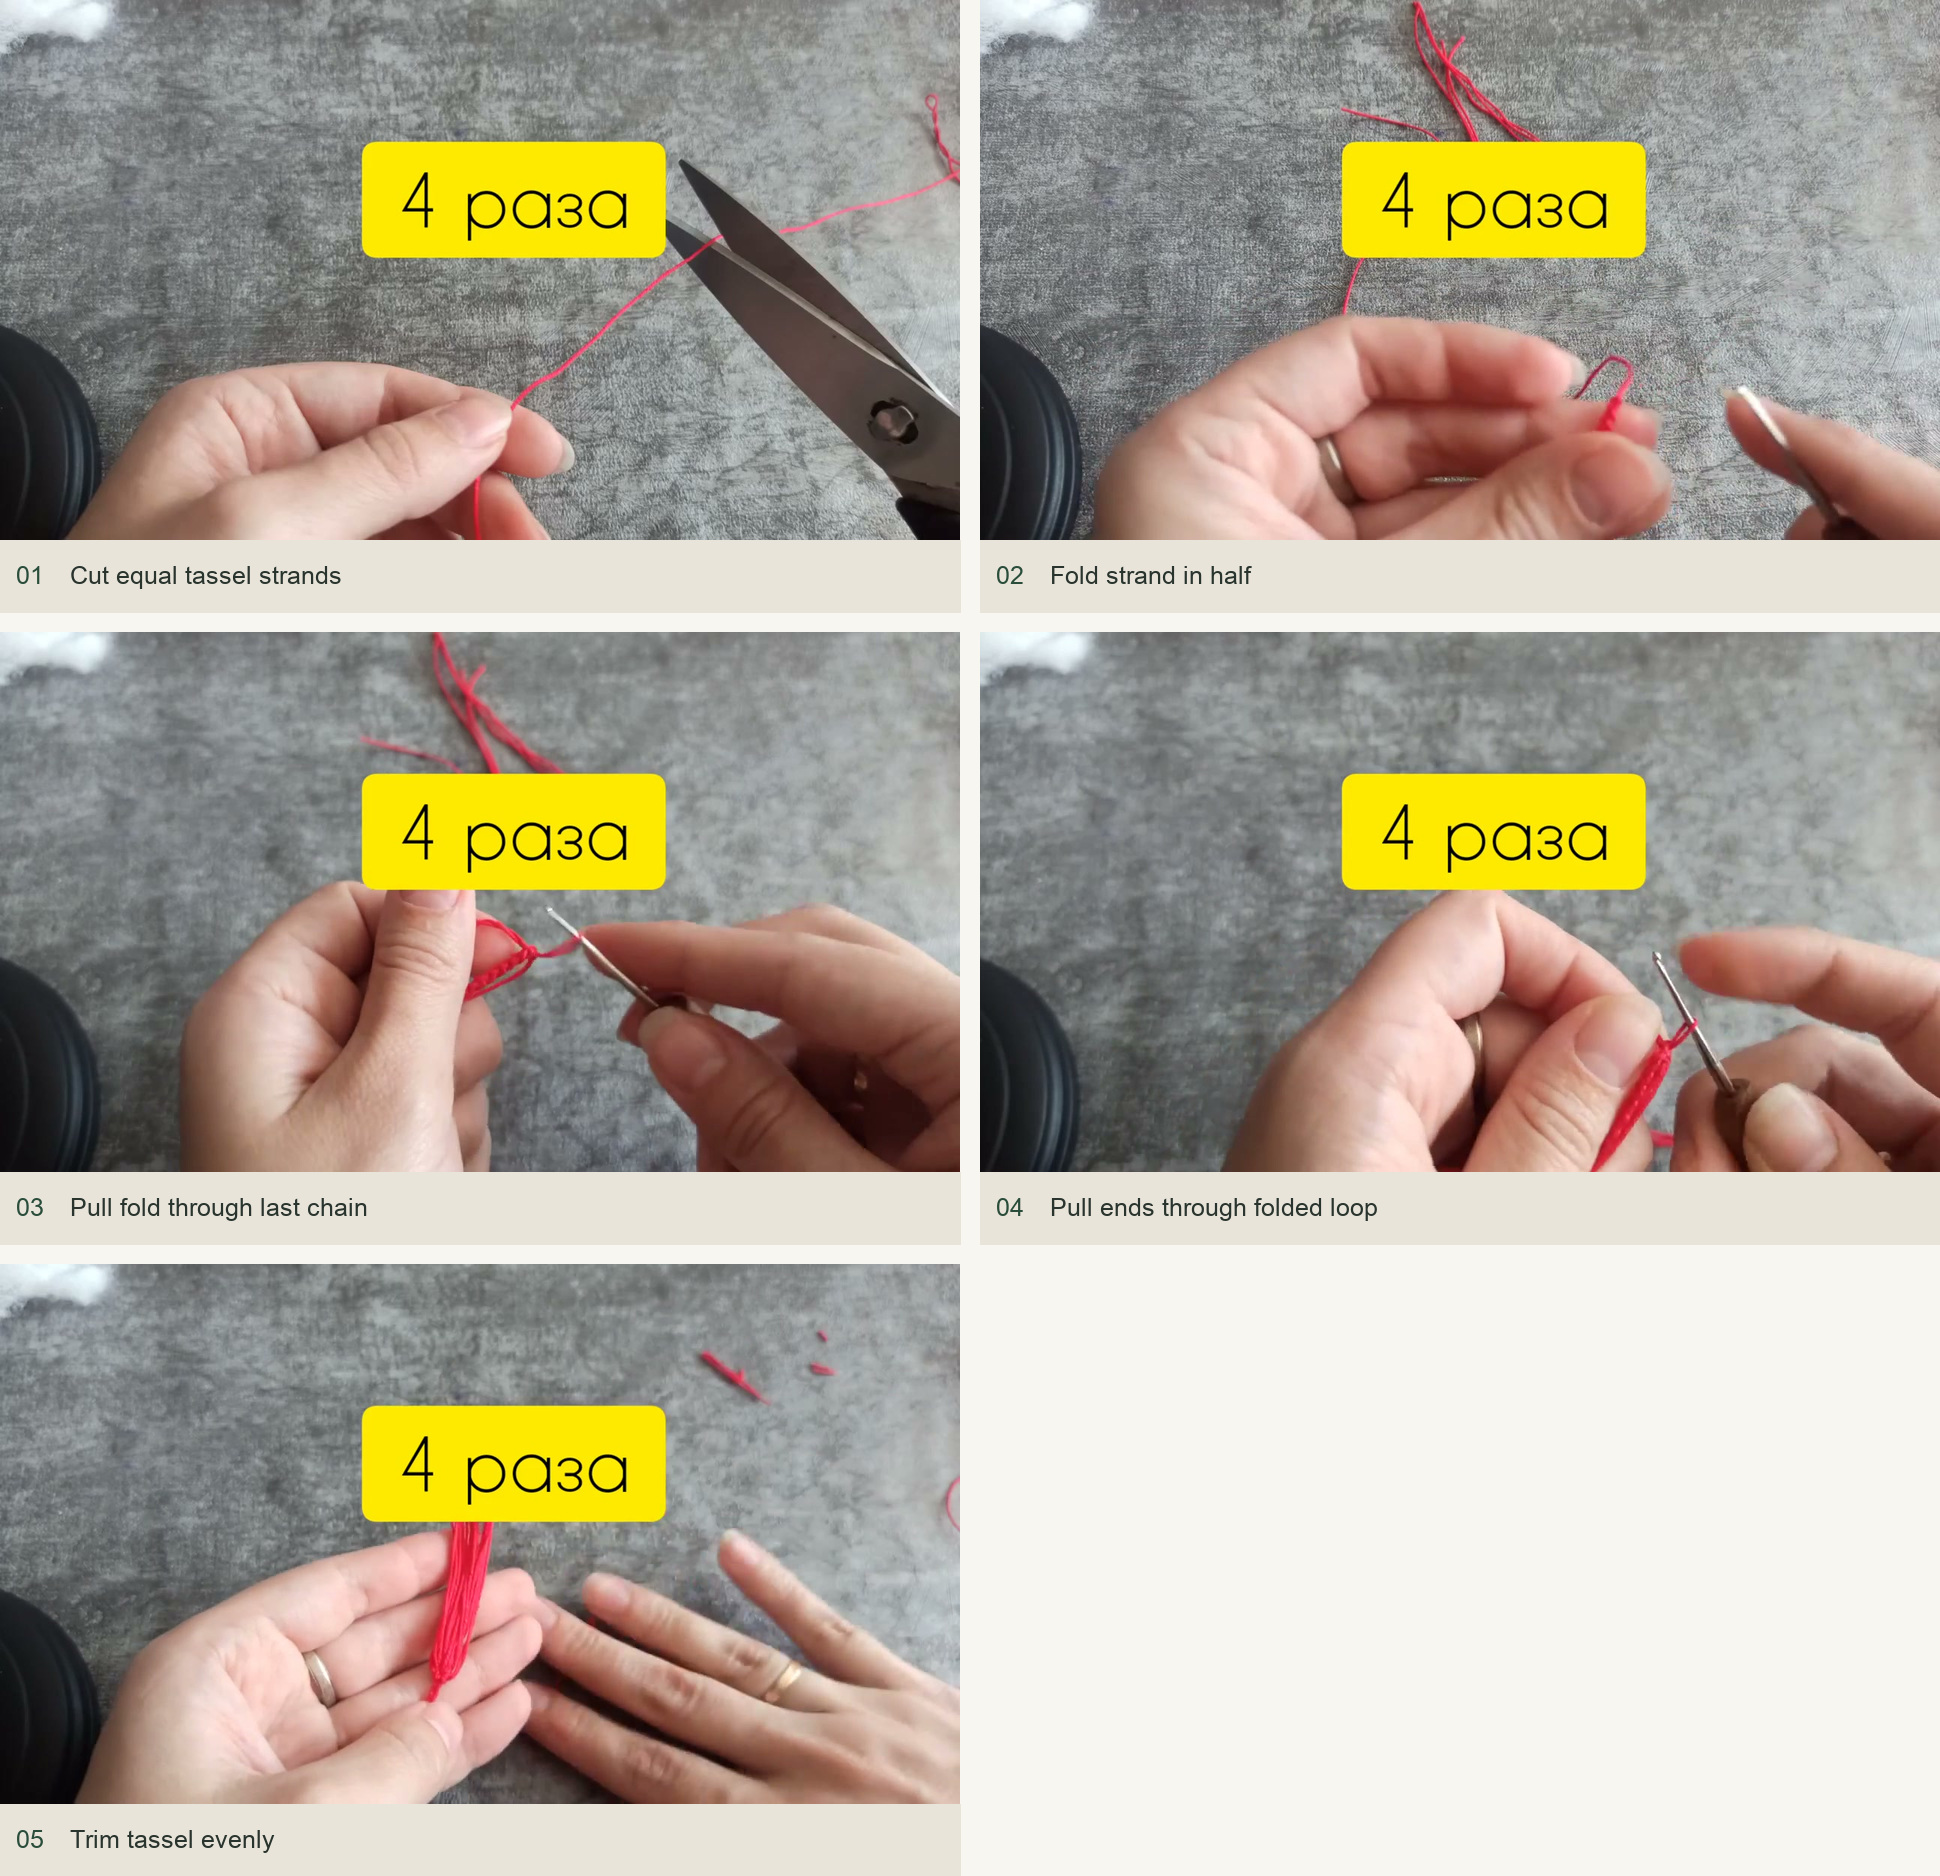
Source demonstration: Cut equal tassel strands → Fold strand in half → Pull fold through last chain → Pull ends through folded loop → Trim tassel evenly The yellow overlay is retained from the original video; follow the written stitch counts and strand count for this step. -
Finish the concealed ends
Hide the heart’s short ends inside its stitches and check that no stuffing shows through a gap. Secure the chain end neatly beneath the tassel attachment. Set the bookmark in the book with the heart and tassel outside the pages. The stuffed heart is the topper, not the part intended to be compressed inside the book.

Source demonstration: Keep the stuffed heart outside the pages
Keep the little heart balanced
If the lobes look different, compare their four-round counts before joining: 6, 9, 12 and 12. If the cleft disappears, check that the filling is not packed too tightly across the joined top. Uneven decreases can twist the point; moving the marker and counting each shaping round prevents the start from wandering.
The simplest size adjustment is the chain length. Change that count to fit a notebook or hardcover without altering the heart. Changing the topper itself is a yarn-and-hook choice: use the same shaping counts in finer or thicker yarn and expect the finished dimensions to change.
Inspired by Matveeva toys’s video tutorial.

Save this pattern for later
Pin it to one of your boards so it’s ready when you have a free evening and the right yarn.