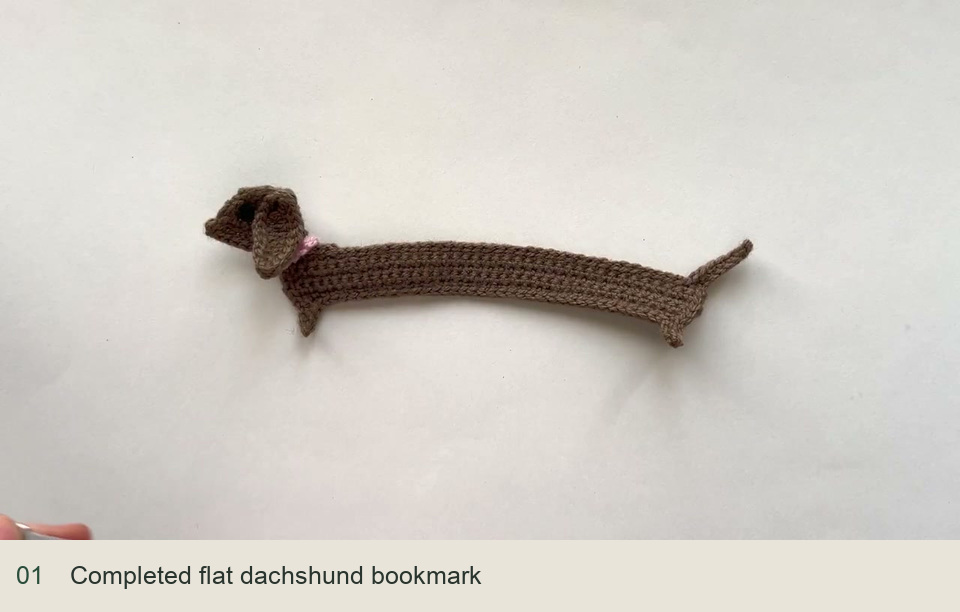
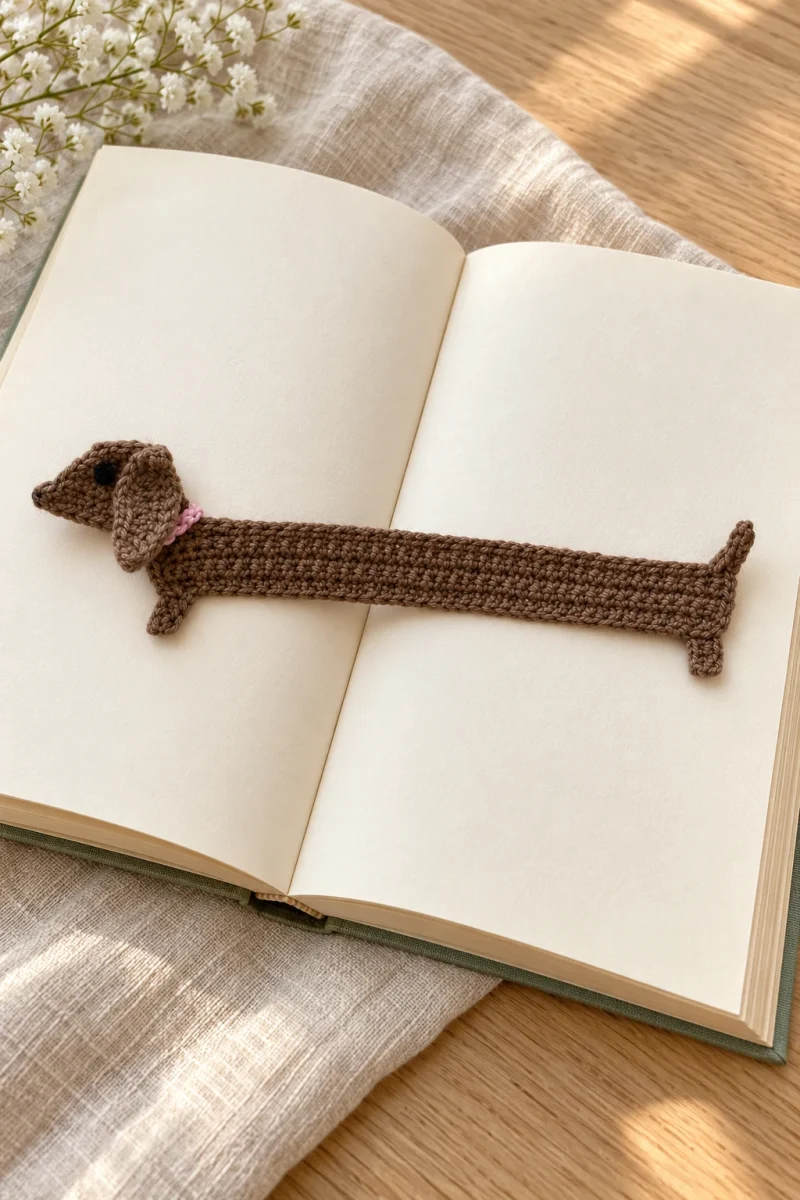
A dachshund’s long body makes a particularly good bookmark shape. This crochet version uses a narrow flat strip for the body, then adds a shaped head, two short legs, an upright tail and a separate floppy ear. A tiny embroidered eye and pink chain collar make the silhouette instantly recognizable without stuffing it.
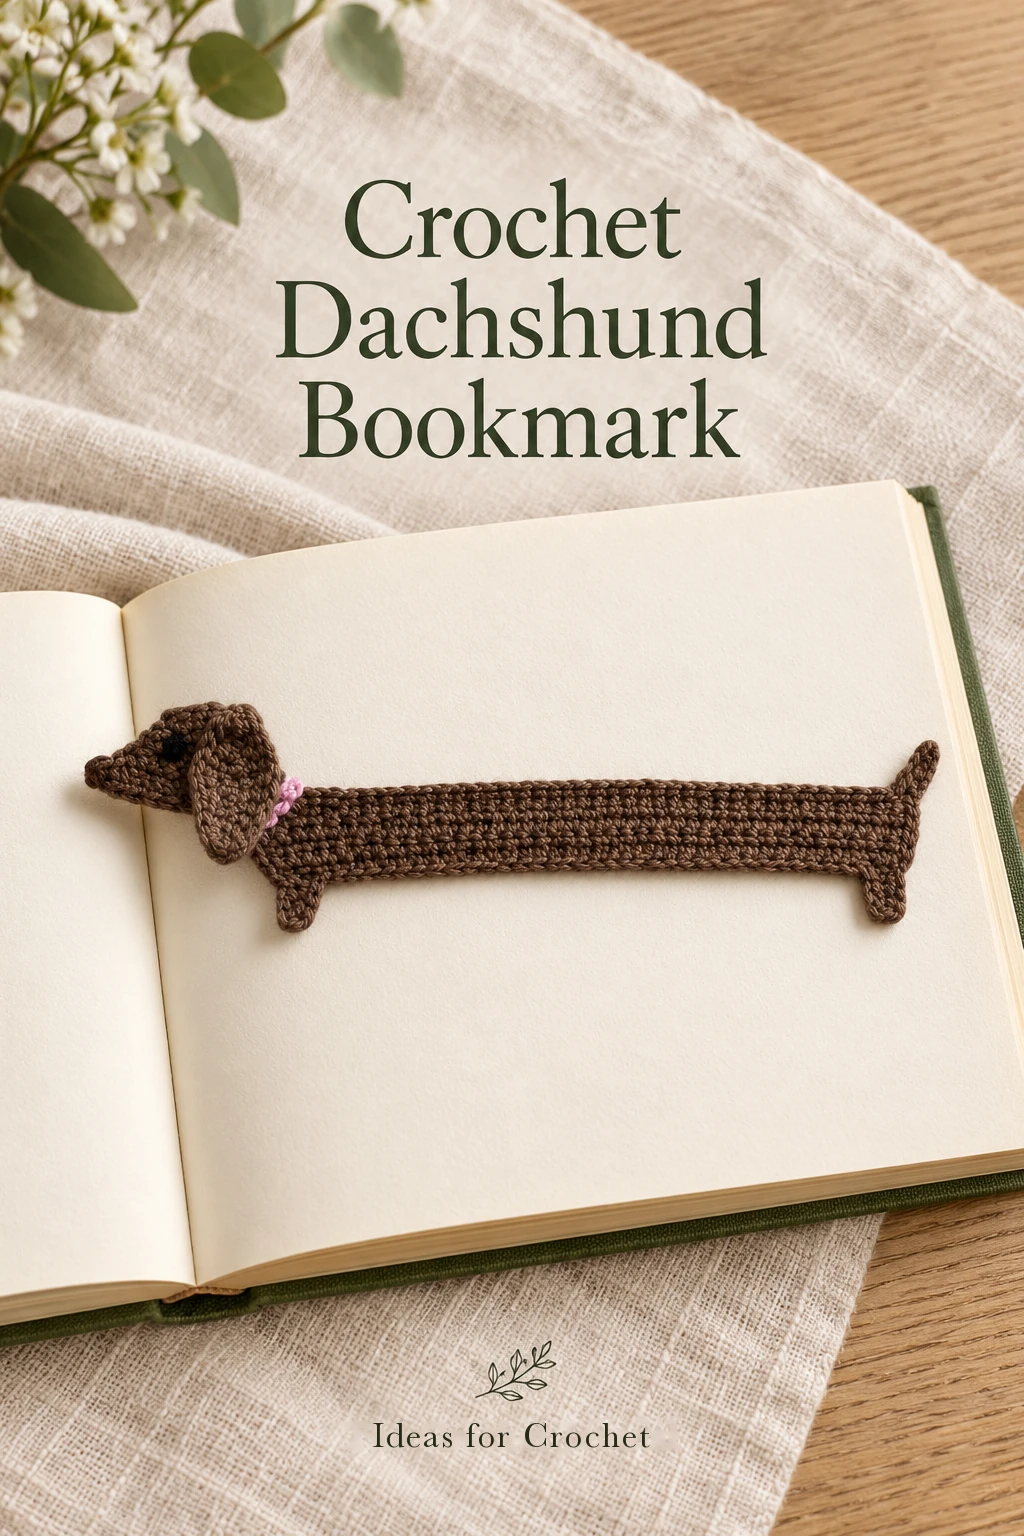
The demonstrated body is about 16 cm long and 2.5 cm wide. The creator reduces an earlier sixty-chain version to forty chains so it sits more comfortably in a book. Use that shorter sample as the starting point, then compare the strip with your own pages before shaping the head.
Materials and abbreviations
- Brown yarn for the body and ear; choose a smooth yarn that shows small stitches clearly.
- Small pink and black leftovers for the collar and eye.
- 3 mm crochet hook.
- Yarn needle, stitch marker, measuring tape and scissors.
US terms: ch = chain, sl st = slip stitch, sc = single crochet, hdc = half double crochet, dc = double crochet, tr = treble crochet and sc2tog = single crochet two stitches together. The body uses turning chains; the head’s short rows are turned without them to create a smoother profile.
Crochet the flat dachshund
-
Make the long body strip
Ch 41: forty foundation chains plus one turning chain. Starting in the second chain, work 40 sc. Ch 1 and turn. Work 40 sc under both top loops for the next row, including the last edge stitch even if it curls underneath. Repeat until you have five rows in total. Fasten off. The sample strip measures approximately 16 × 2.5 cm.
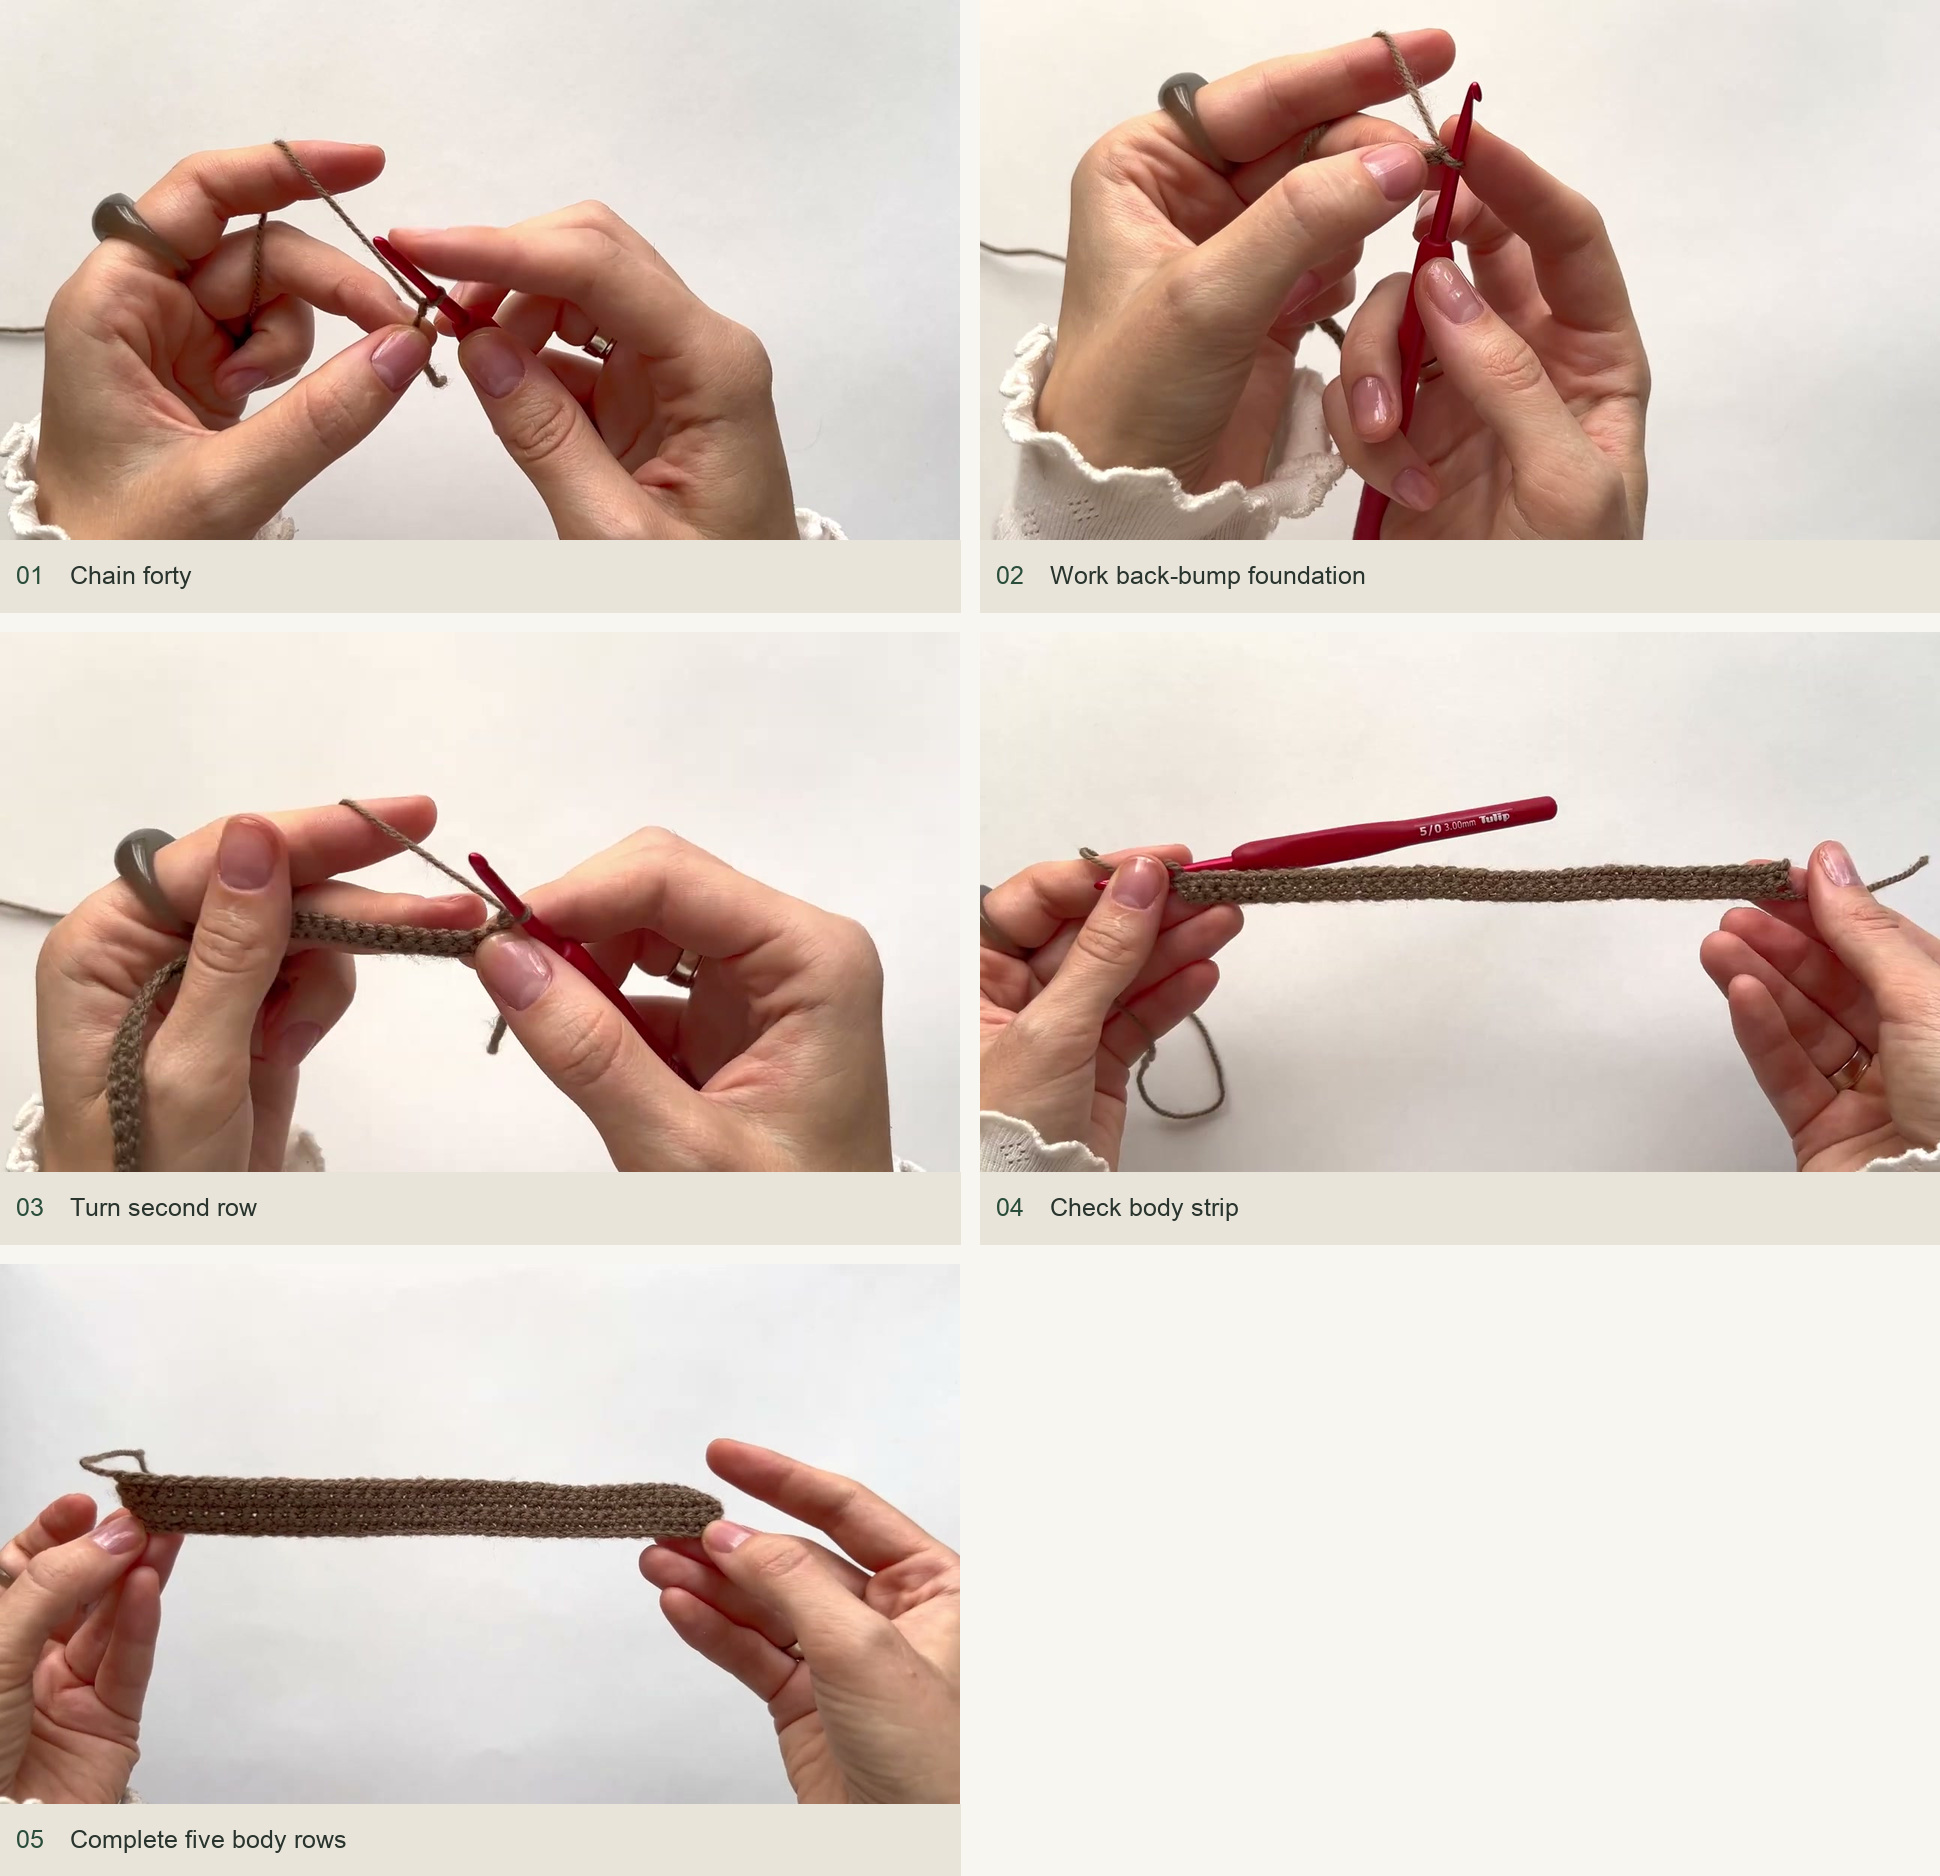
Source demonstration: Chain forty → Work back-bump foundation → Turn second row → Check body strip → Complete five body rows -
Establish the head extension
Along the final row, count five body stitches from the chosen head end and join brown in the sixth position. Work back toward that end across five sc. Immediately ch 8, then work seven sc back from the second chain. Continue three sc into the body edge as shown, giving a ten-stitch head row formed by seven chain stitches and three body stitches.
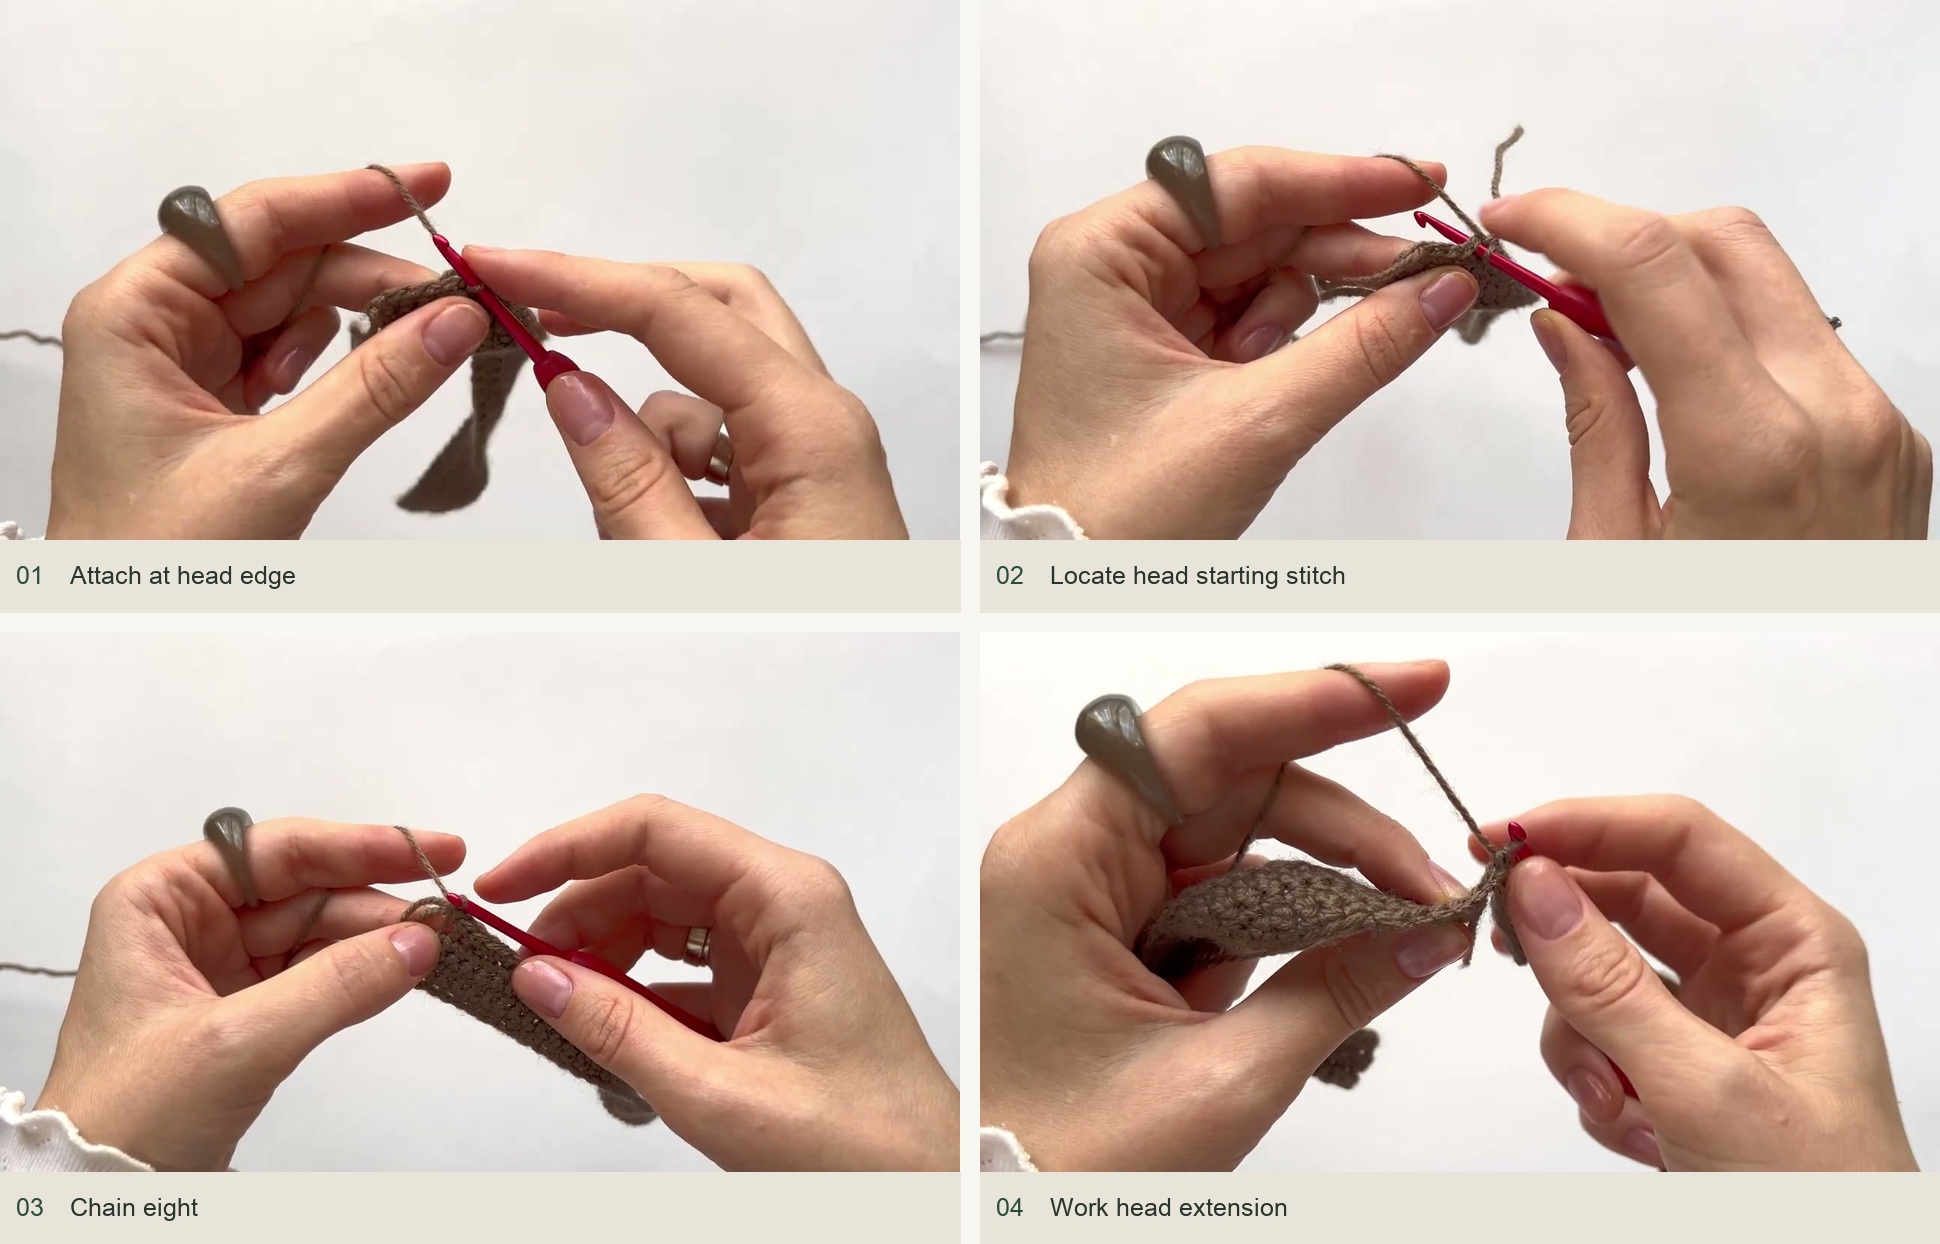
Source demonstration: Attach at head edge → Locate head starting stitch → Chain eight → Work head extension -
Shape the profile with short rows
Turn without a lifting chain. Work nine sc and leave the last stitch unworked. Turn, make a sl st in the first position and work eight sc. Turn, skip the first position, work seven sc and finish with a sl st in the preceding row’s slip-stitch position. Turn, skip the first position, make a sl st in the second and work six sc.
For the next shaped row, sc2tog across the first two stitches, then work hdc, dc, hdc, sc and a finishing sl st in the indicated edge position. Turn, skip the first position, sl st in the second and work four sc. Turn again and slip stitch across the small upper section. These stepped edges create the snout and forehead. Follow the video close-up for their exact turning points; adding automatic turning chains changes the outline.
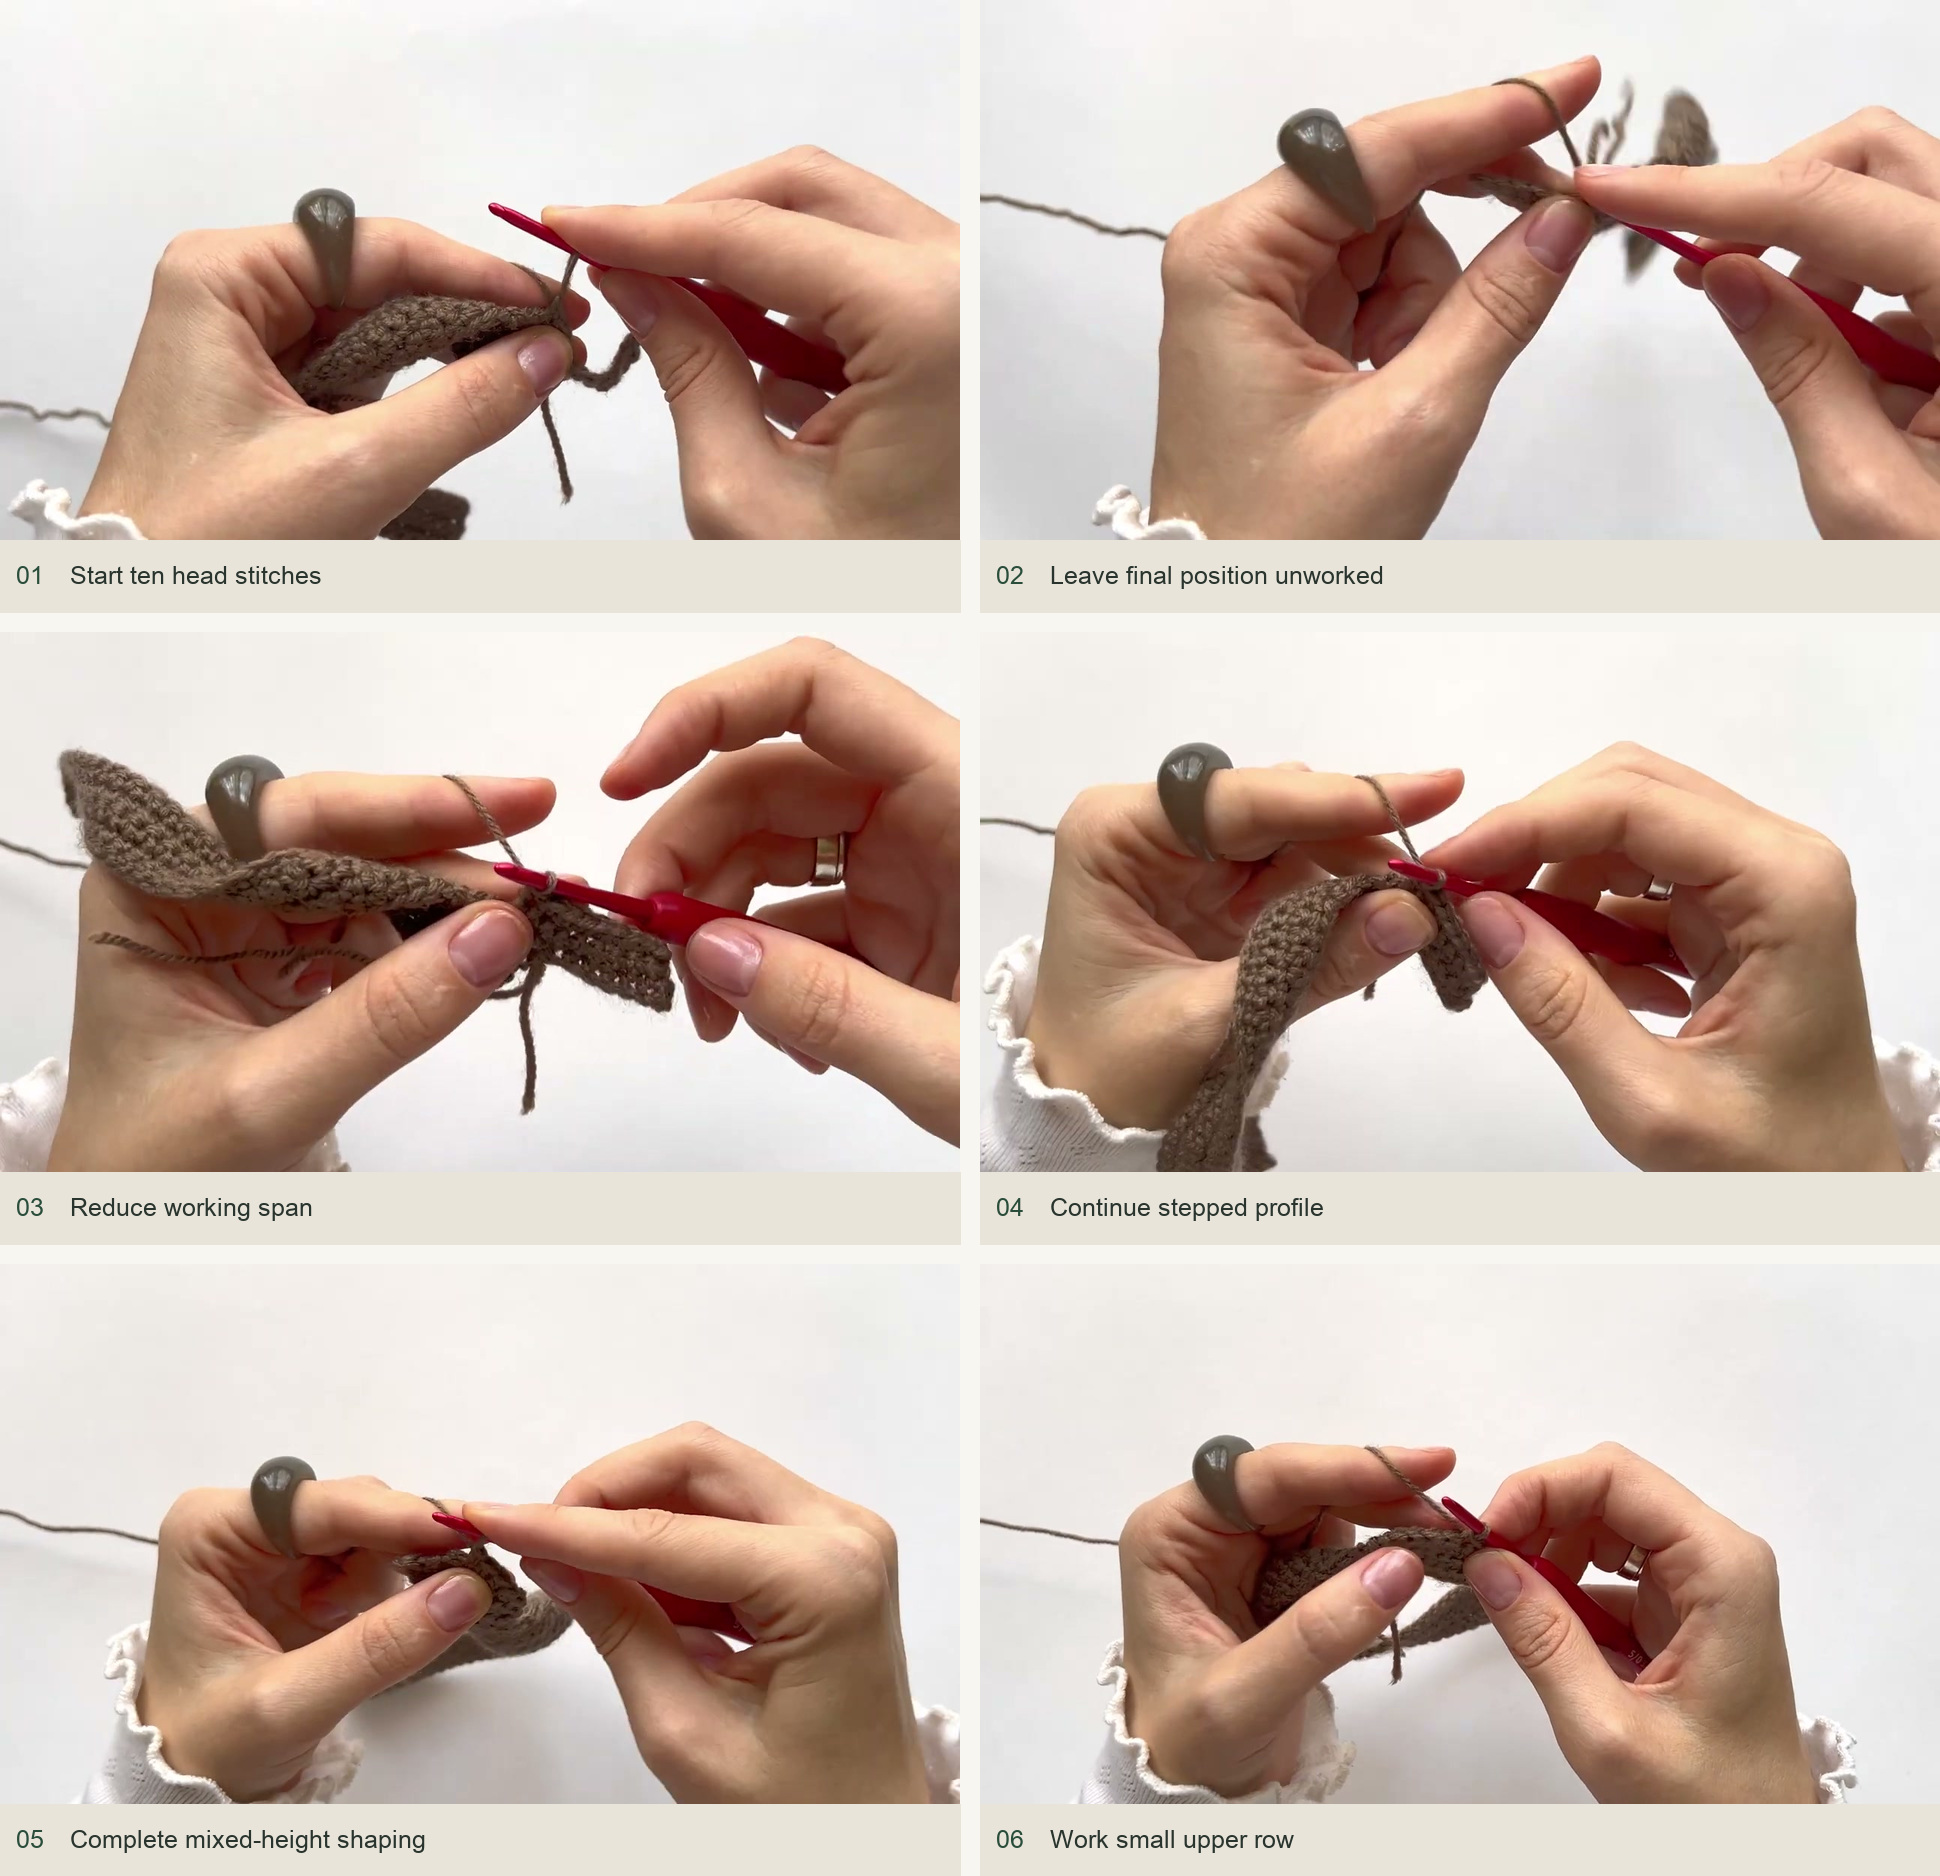
Source demonstration: Start ten head stitches → Leave final position unworked → Reduce working span → Continue stepped profile → Complete mixed-height shaping → Work small upper row -
Outline the head and add the legs
Continue sl st around the head’s row ends, distributing the stitches evenly rather than forcing a fixed count into irregular edges. At the front leg position, ch 4 and work three sc back from the second chain. Anchor it at the body edge as demonstrated, skipping the neighboring edge positions needed to let the leg stand at the corner. Slip stitch along the underside of the body.
At the rear leg position, ch 4 and return with three sc again. Attach at the side of the body and continue around the rear edge. Keep both legs short and flat; they are silhouette details, not standing supports.
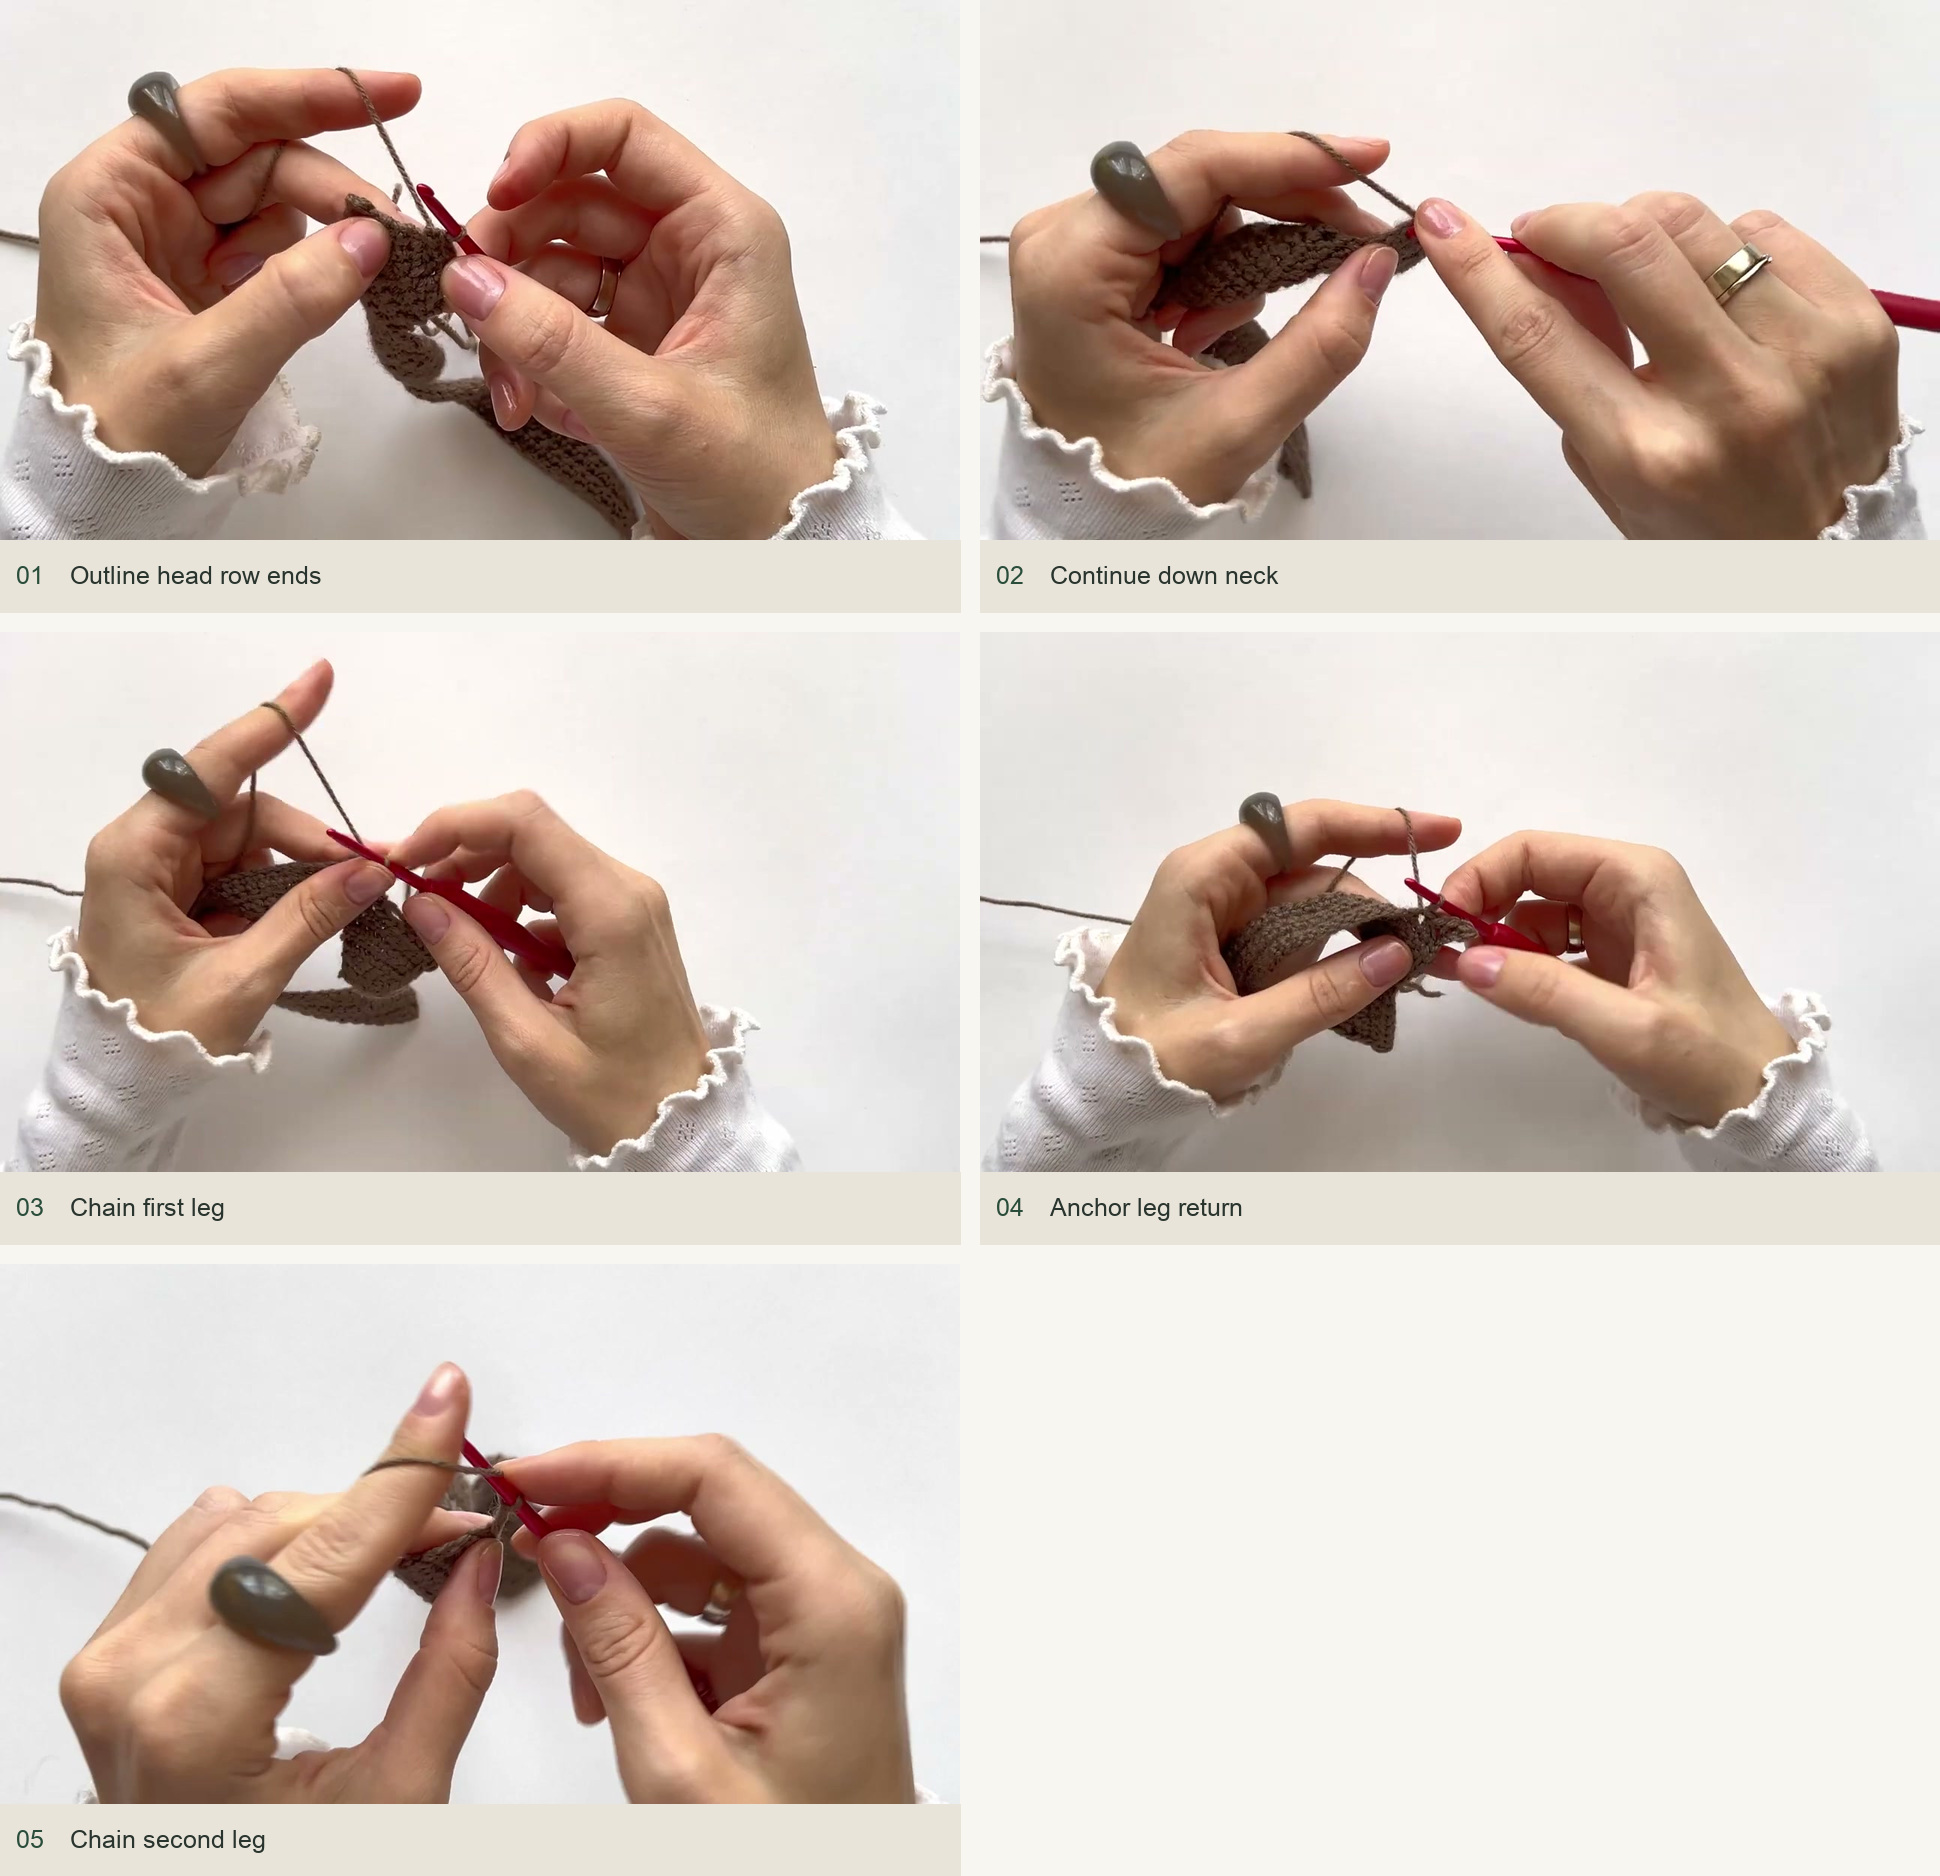
Source demonstration: Outline head row ends → Continue down neck → Chain first leg → Anchor leg return → Chain second leg -
Make the tail and finish the outline
At the rear upper corner, ch 8 and work seven sc back along the chain. Rejoin the body, skip the initial neighboring position as shown and continue sl st along the upper body toward the head. Complete the outline, cut the yarn and imitate the first braid link with the tail so the join blends in. Weave the ends into the reverse.
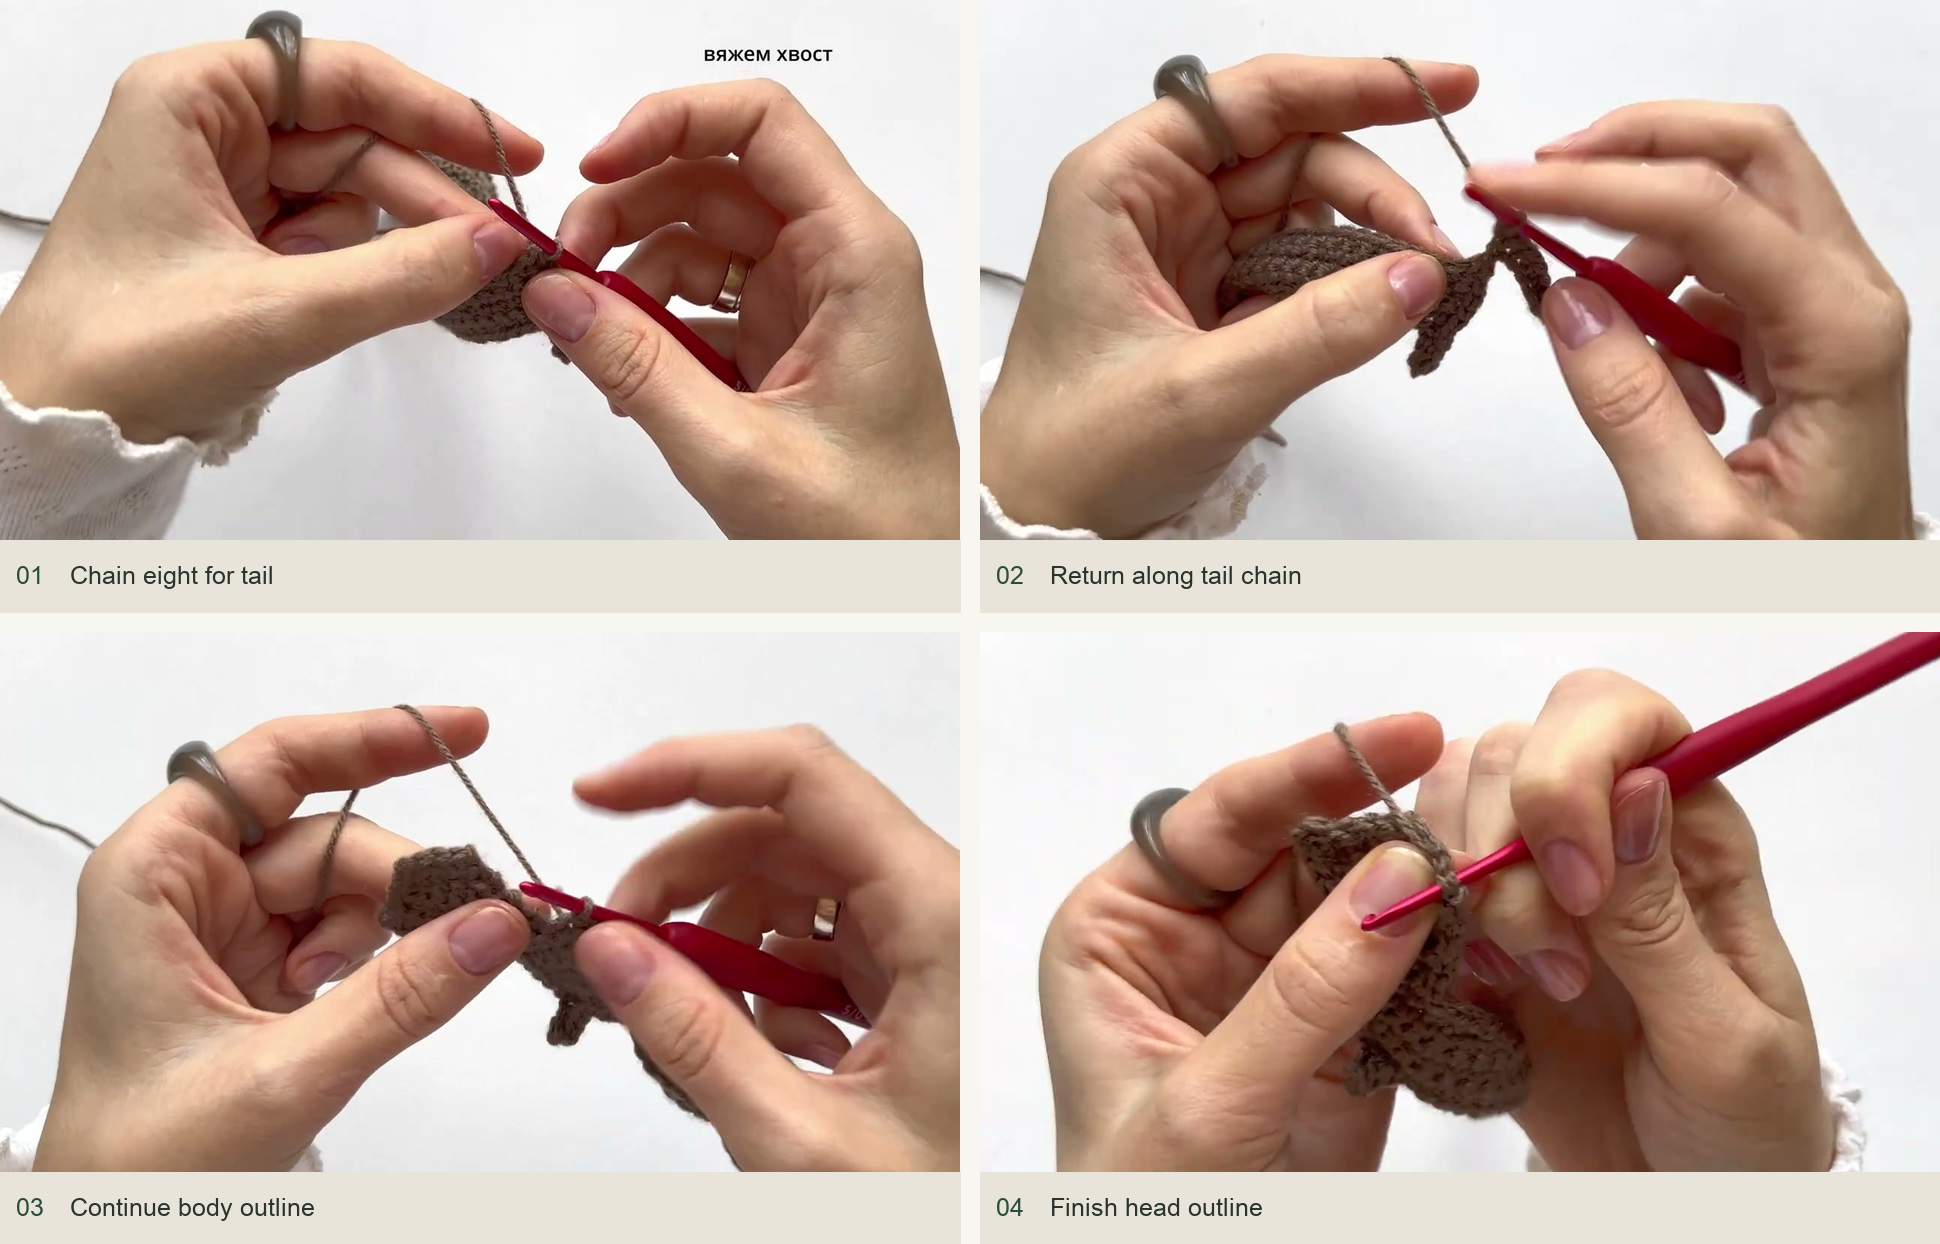
Source demonstration: Chain eight for tail → Return along tail chain → Continue body outline → Finish head outline -
Crochet the separate floppy ear
Ch 10. Starting in the third chain from the hook, work two sc, two dc, two tr, one dc and one hdc into successive chains. In the same final chain as the hdc, work an additional hdc and two sc. This turns the ear around its rounded end. Continue along the opposite side with sl st, following the chain-edge positions, and outline the remaining edge neatly.
Finish with an imitation joining stitch and leave a longer tail for sewing. The mixed stitch heights create a tapered, drooping ear with a fuller rounded end. Do not replace all those heights with sc if you want the same shape.
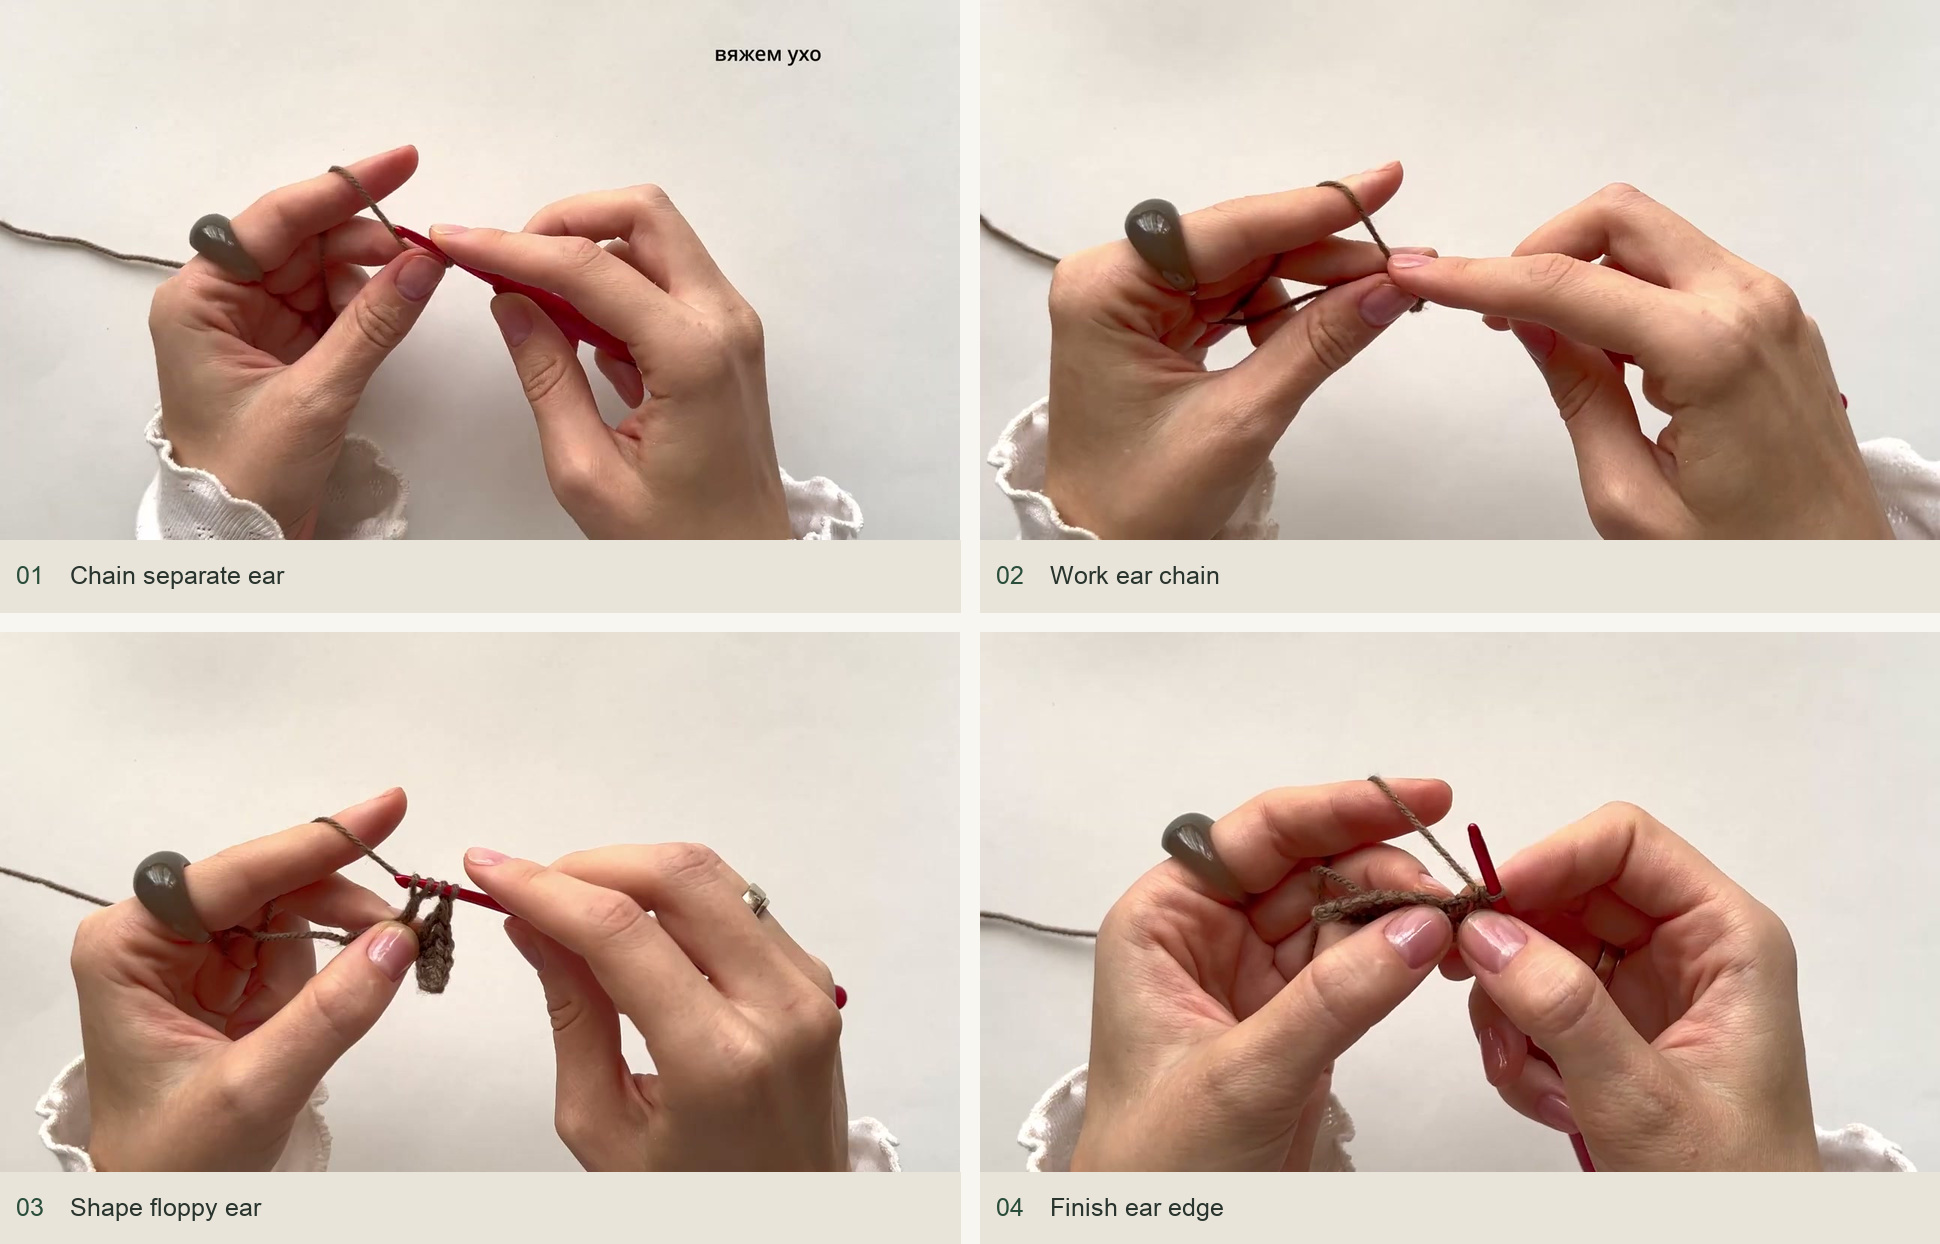
Source demonstration: Chain separate ear → Work ear chain → Shape floppy ear → Finish ear edge -
Sew and embroider the features
Position the ear on the head and sew just its upper attachment area with small brown stitches. Let the lower portion remain free so it reads as floppy. Use black yarn to embroider a tiny eye near the ear, making short stitches back and forth until the size looks balanced. Hide the ends behind the head.
For the collar, ch approximately 10 in pink, secure the chain and tie it around the neck on the reverse. Adjust its length to your yarn and the neck width. Keep the ends small and neat so they do not create a hard lump against the page.
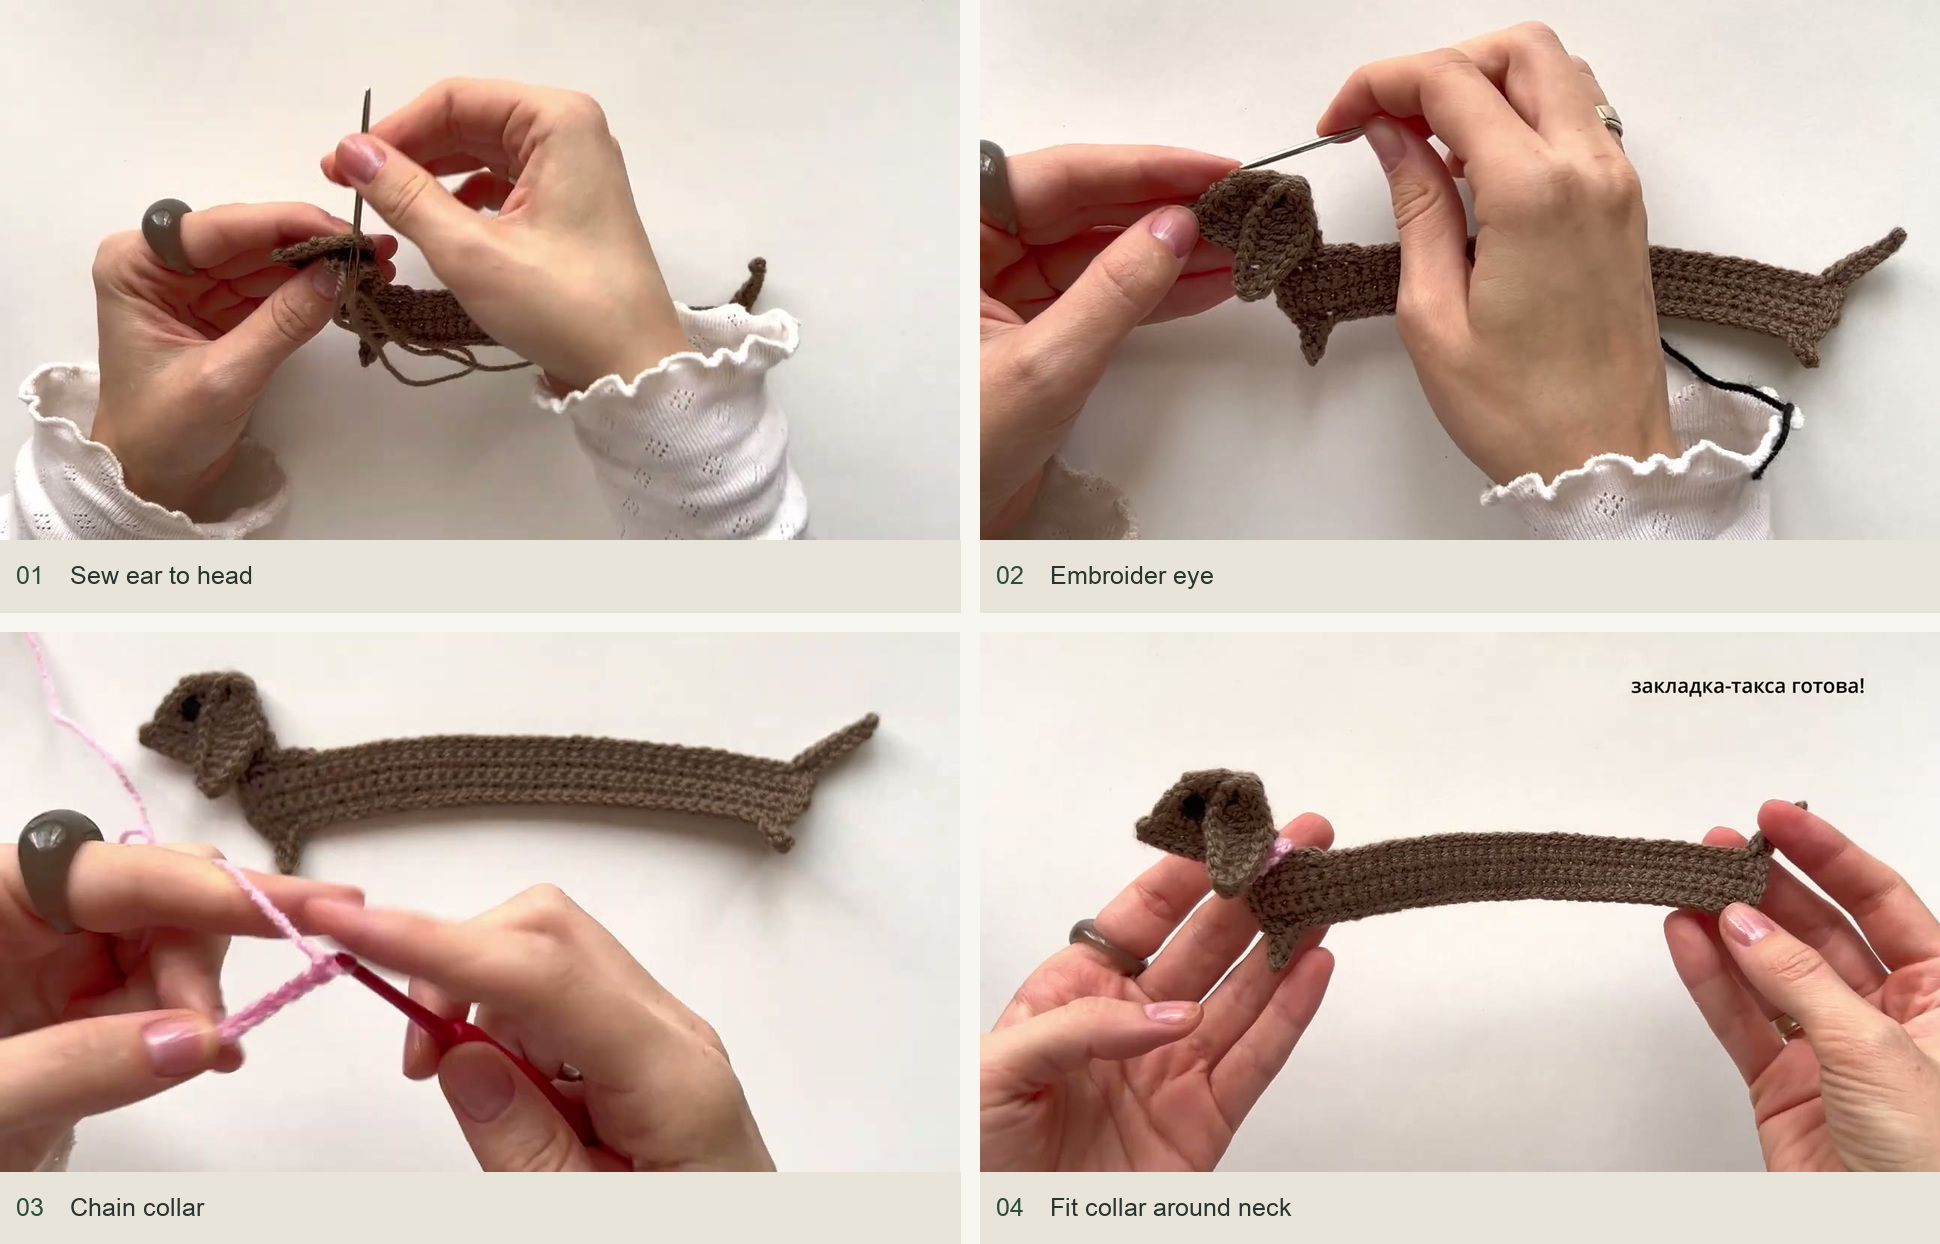
Source demonstration: Sew ear to head → Embroider eye → Chain collar → Fit collar around neck
Finishing the bookmark flat
Smooth the body and separate the legs from the lower outline. If the yarn permits, lightly damp-shape the piece and let it dry flat. The long strip should lie between pages while the head remains visible near the book’s edge. Avoid pulling on the tail to straighten the body; an overly tight slip-stitch outline needs to be loosened instead.
If the head has an unexpected corner, compare its short rows with the close-up before adding more edging. An extra turning chain can look like a bump at the snout. If the ear dominates the head, check that its chain began in the third chain and that the two tallest stitches are trebles rather than additional double crochets.
Inspired by ВЯЗАЛЬЩИЦА КЭТ’s video tutorial.
Save this pattern for later
Pin it to one of your boards so it’s ready when you have a free evening and the right yarn.