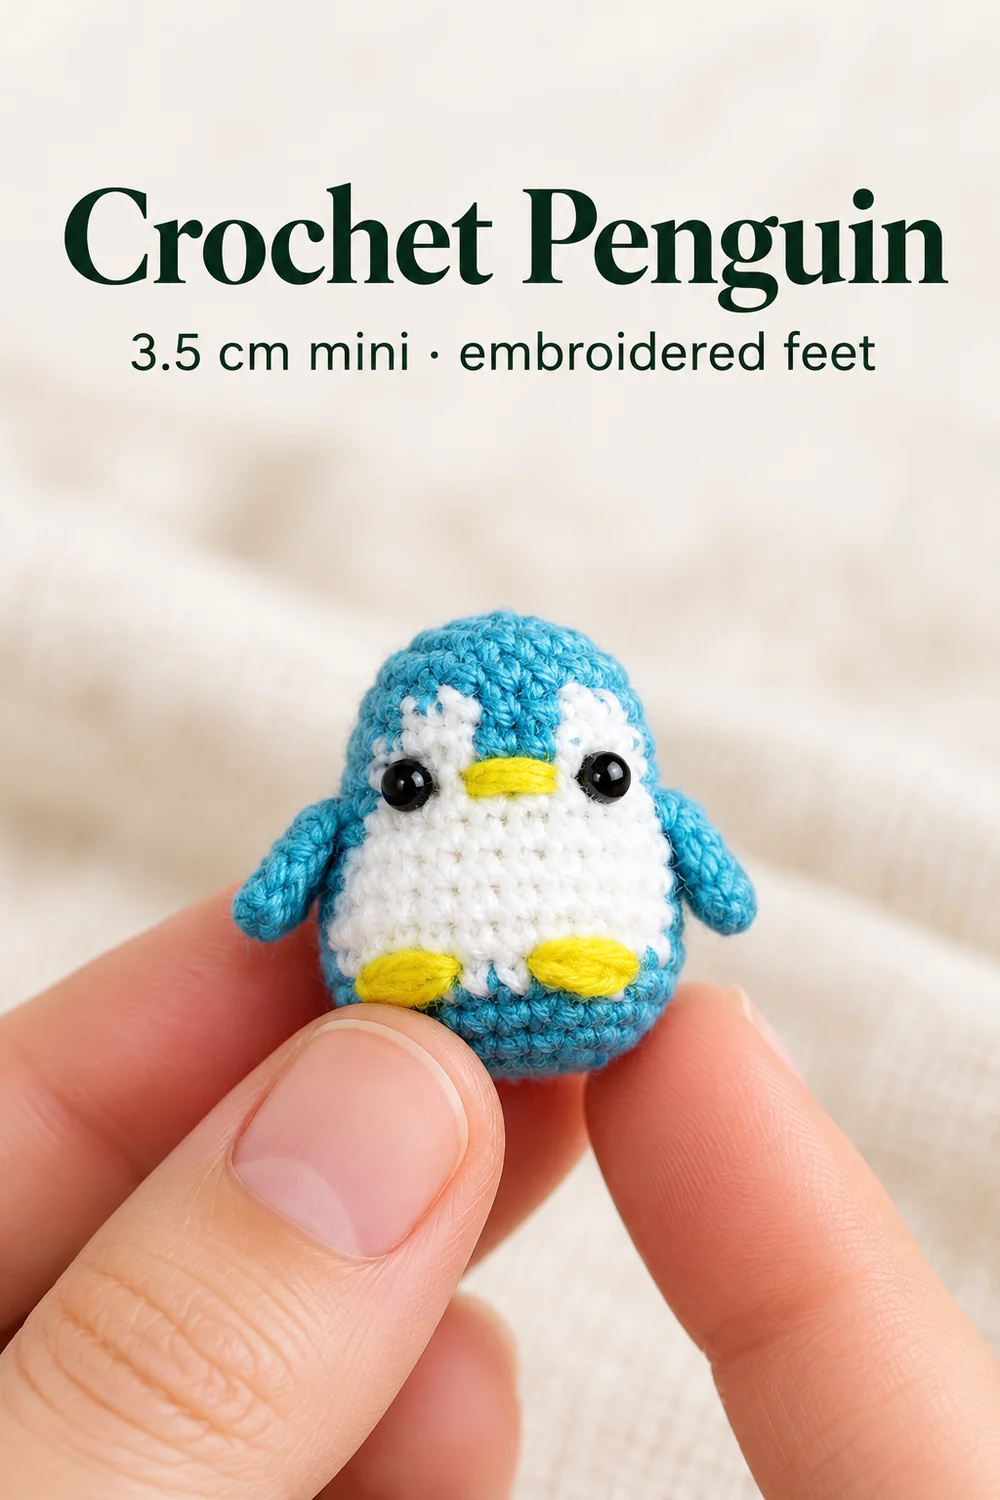
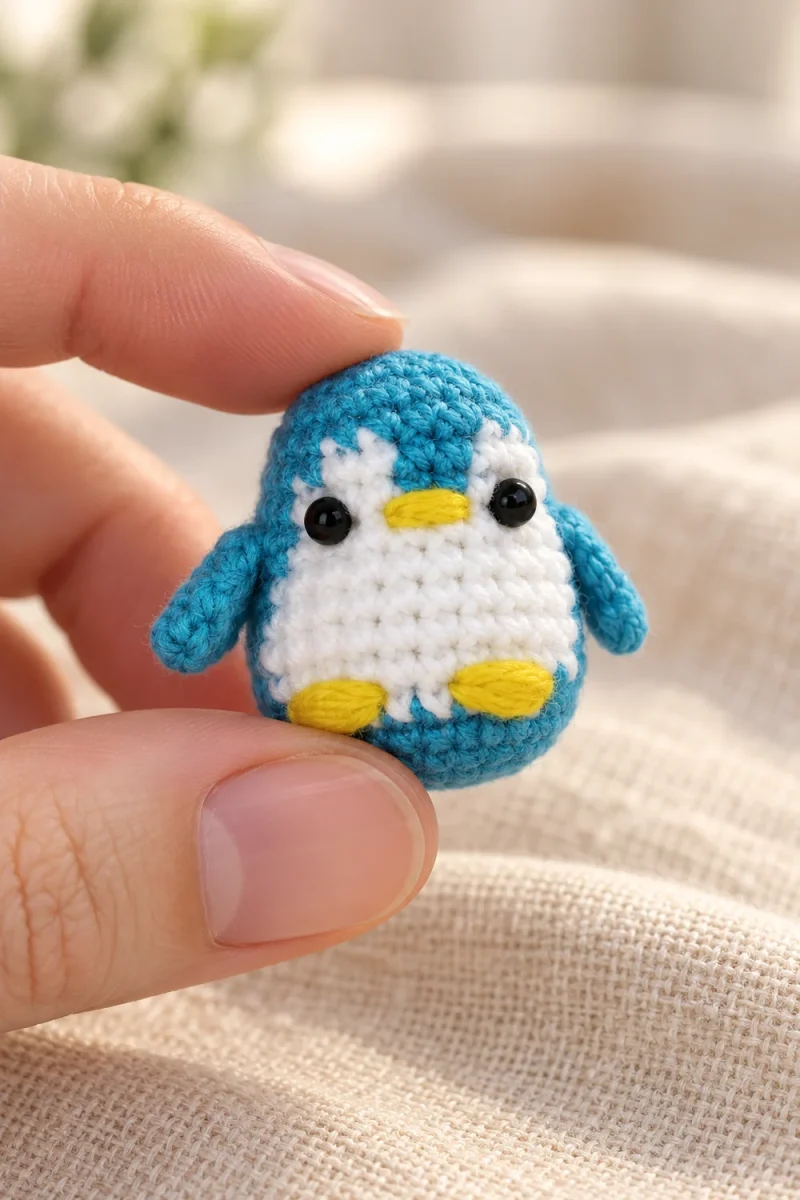
This crochet penguin is a 3.5 cm mini amigurumi, shown on a key ring in the original tutorial. Its turquoise body continues straight into the head, with a white color-work belly, flippers and a tail incorporated into the rounds, plus a yellow embroidered beak and feet.
Before you start this mini crochet penguin
The video does not state the hook size or yarn specification. Gather turquoise, white and yellow yarn, a suitable hook, stuffing, a stitch marker, scissors, a yarn needle and black eye beads. Gauge and resizing are not demonstrated.
These instructions use US terms: ch means chain, sc means single crochet, inc means two single crochets in one stitch, dec means a decrease across two stitches, and sl st means slip stitch. Keep a round marker separate from the color changes. Each flipper ends with a turned row.
The creator recommends X-shaped single crochet for this mini because V-shaped stitches can make the color pattern drift sideways.
Work the mini penguin crochet pattern
This crochet penguin pattern incorporates the tail and flippers into the body. Change color on the last pull-through. For rounds completed between edits, continue the demonstrated repeat to its stated count before moving on.
-
Make the little tail
- Tail Rnd 1 · 6 sc
Start the tail in turquoise with six single crochets in a magic ring. Draw the ring closed gently, keeping the stitch tops accessible.
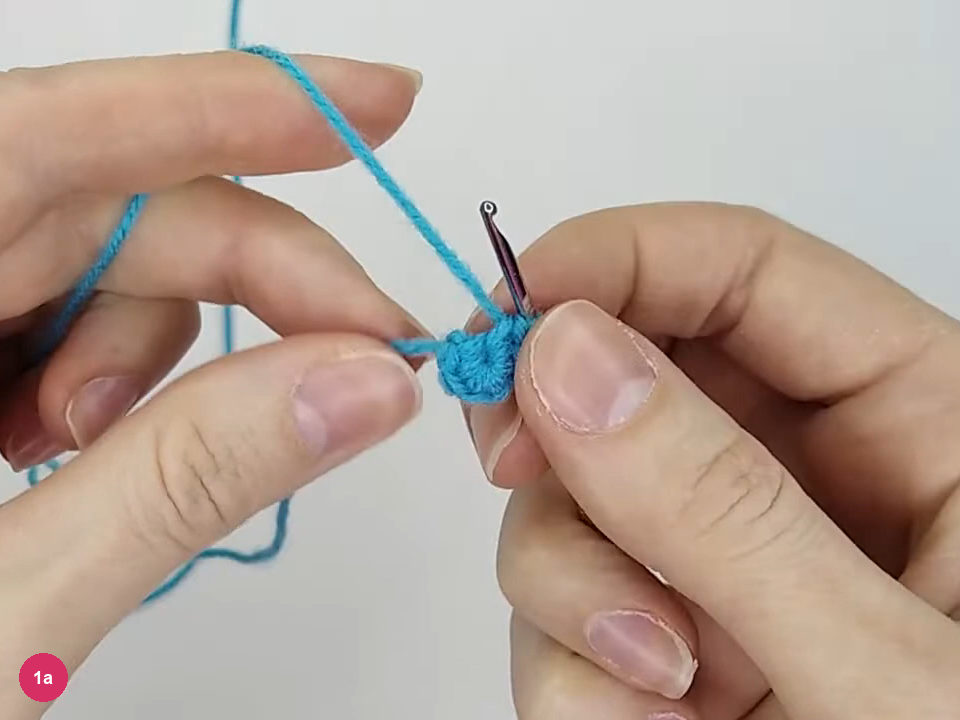
Step 1a: close the six-stitch tail center. - Tail Rnd 2 · (2 sc, inc) × 2 · 8 sts
Repeat two single crochets and an increase twice to reach eight stitches. Finish with a slip stitch in the next stitch, cut the yarn, and keep the tail ready to incorporate into the body.
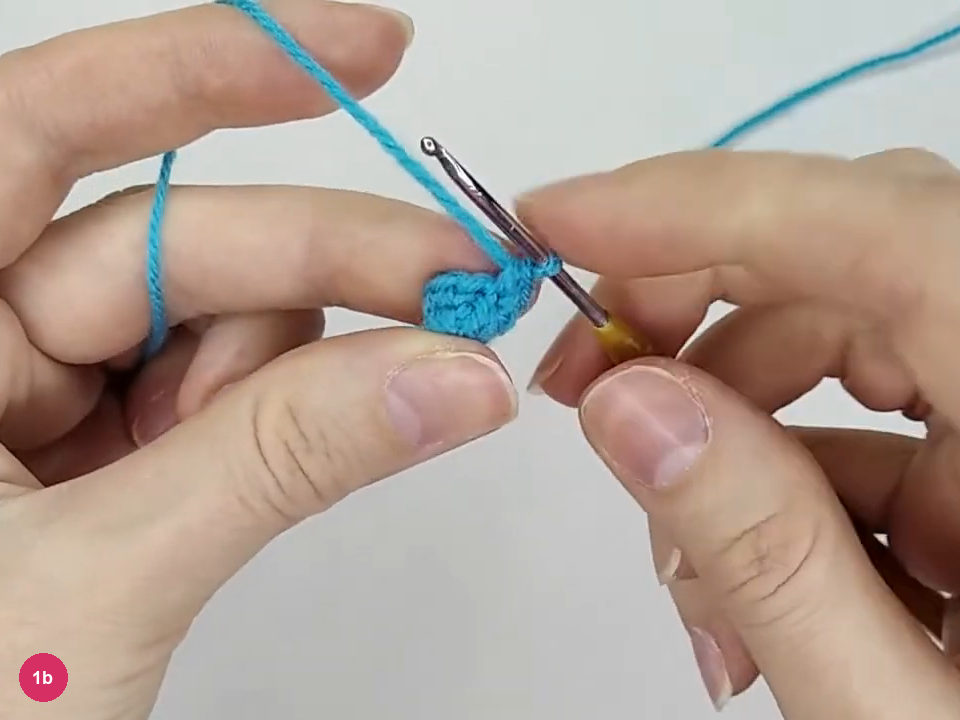
Step 1b: finish the eight-stitch tail. -
Shape the matching flippers
- Flipper Rnds 1–2 · 6 → 8 sts
Make the first two rounds of a flipper exactly as for the tail: six single crochets in the ring, then the increase round that brings it to eight. Continue the repeat to that stated count, but leave out the tail’s finishing slip stitch.
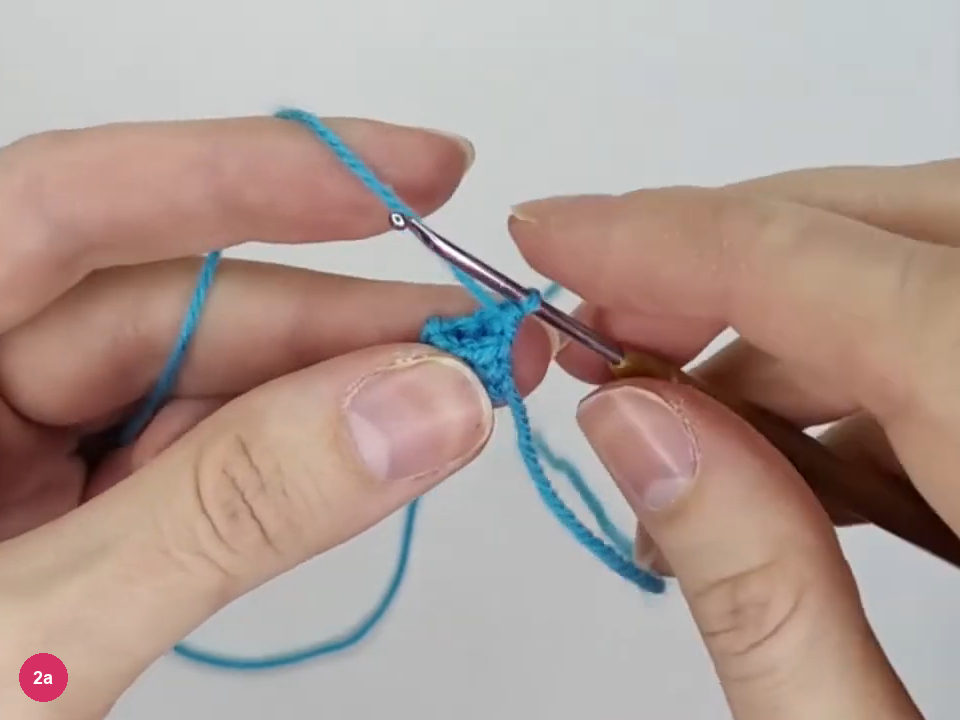
Step 2a: prepare the eight-stitch flipper opening. - Flipper Rnd 3 · 4 sc through both sides
Flatten the flipper so the two sides of its opening meet. Work four single crochets through both sides, catching a stitch from each edge together; this closes the opening into a small flat strip.
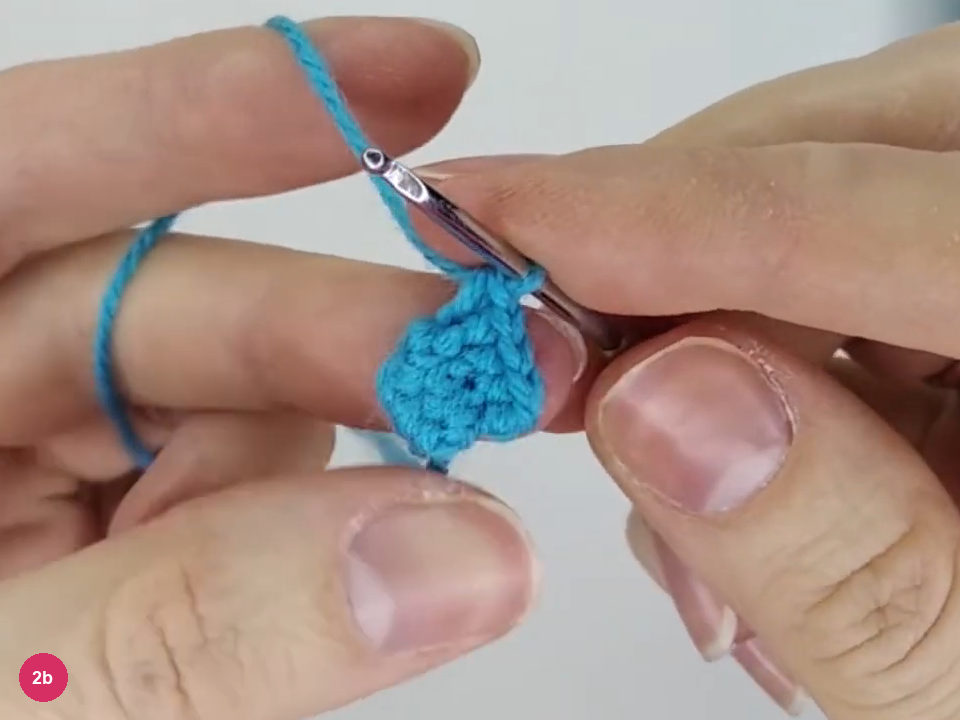
Step 2b: check the closed edge after four stitches through both sides. - Flipper Row 4 · ch 1, turn, 4 sc
Chain one, turn, and work four single crochets across the strip, then cut the yarn. Make a matching second flipper with the same sequence, keeping both closing edges available for the body round that will hold them in place.
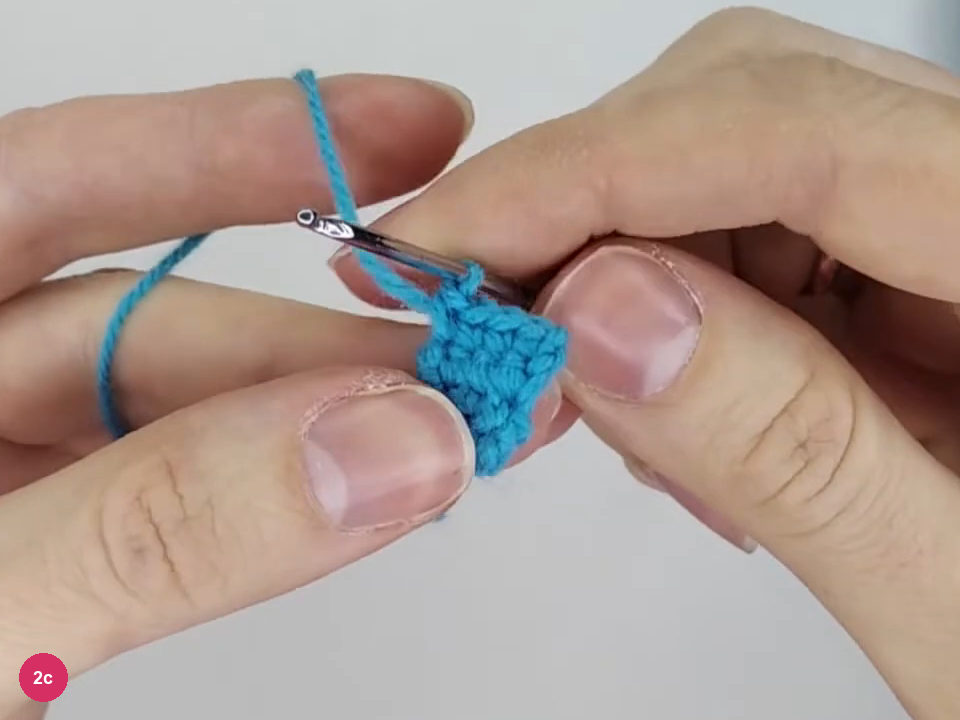
Step 2c: finish the turned flipper row. -
Expand the continuous body base
- Body Rnd 1 · 6 sc
Begin the body in turquoise with six single crochets in a magic ring. Close the center and mark the start of the round; the body will continue upward into the head, so there is no separate neck seam to sew.
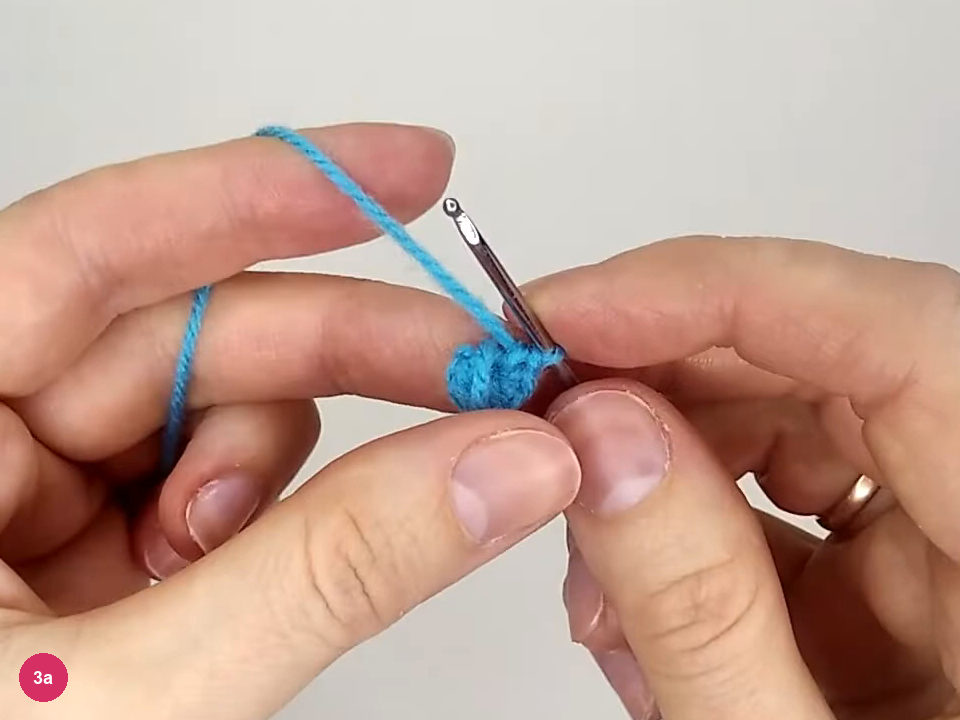
Step 3a: close the body’s six-stitch foundation. - Body Rnd 2 · 6 inc · 12 sts
Increase in every stitch of round two, continuing to twelve stitches. Check the completed circle: each original stitch should have received a pair of single crochets.
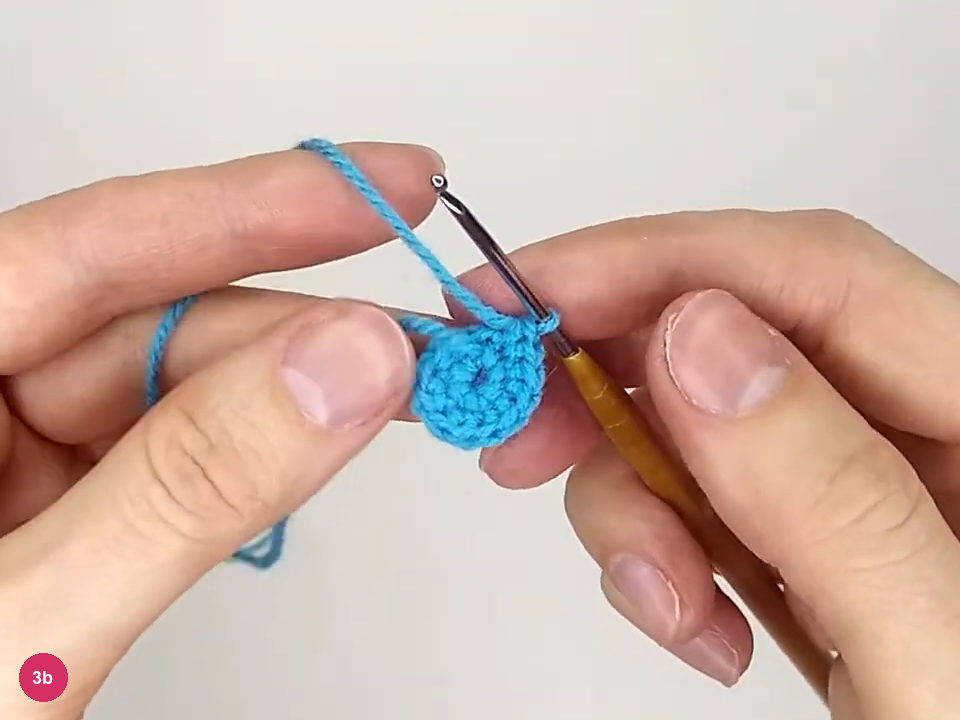
Step 3b: check the twelve-stitch body base. - Body Rnd 3 · (sc, inc) × 6 · 18 sts
For round three, repeat one single crochet and an increase six times to reach eighteen stitches. Continue to the marker and count the completed round.
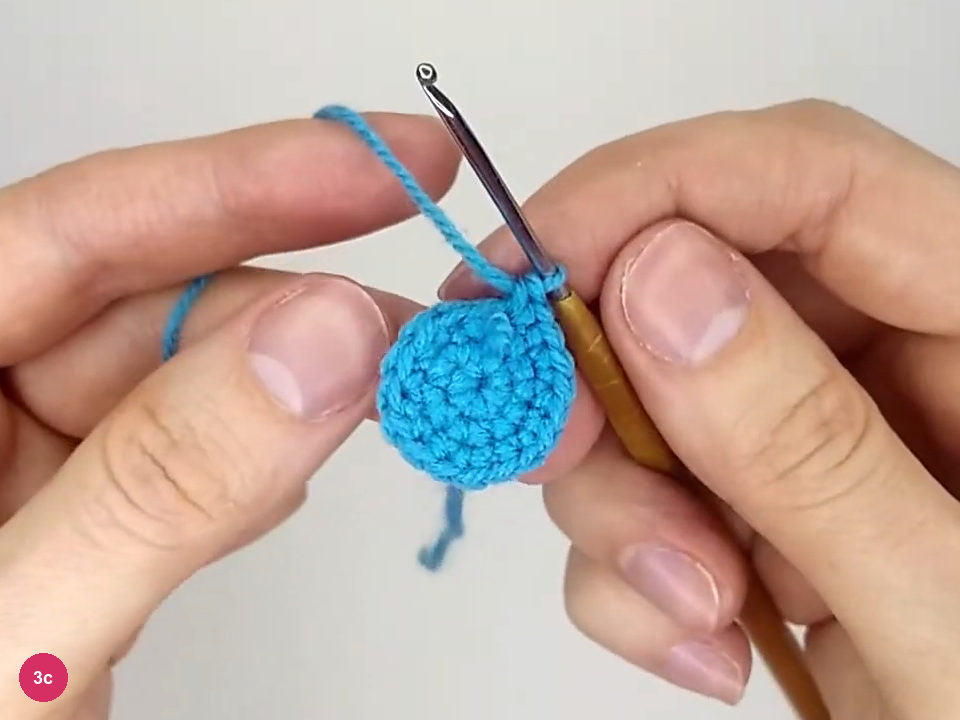
Step 3c: finish the eighteen-stitch increase round. - Body Rnd 4 · (2 sc, inc) × 6 · 24 sts
Repeat two single crochets and an increase around round four to finish with twenty-four stitches. Check the completed base and keep the tail within reach before the next round.
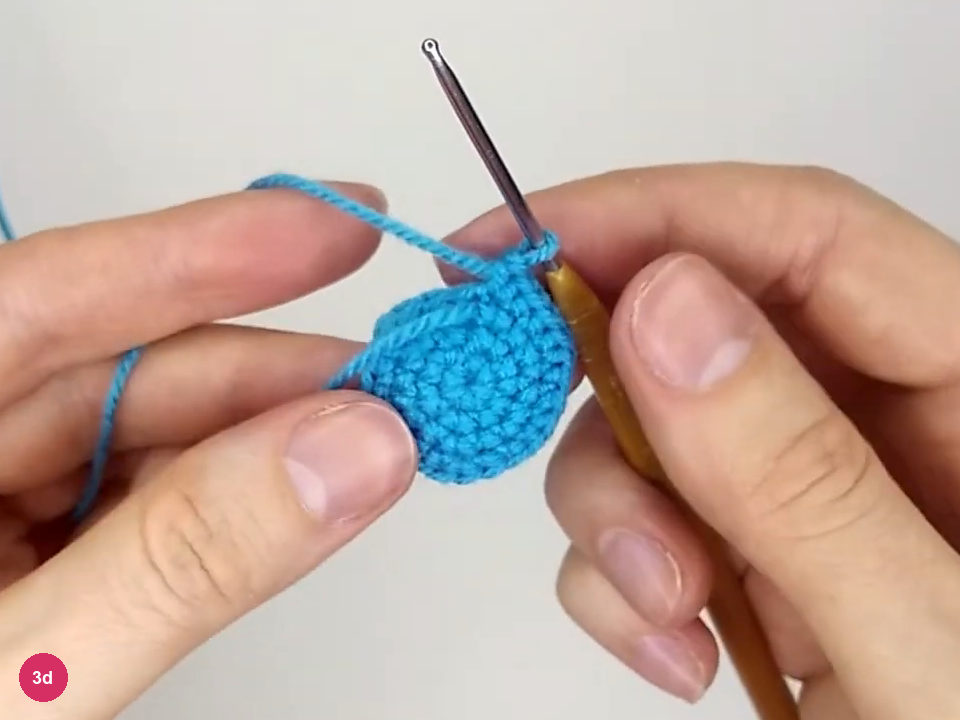
Step 3d: check the twenty-four-stitch base. -
Incorporate the tail and start the belly
- Rnd 5 start · 2 sc, then 4 sc through tail and body
Start round five with two turquoise single crochets. Hold the tail against the body and work the next four single crochets through the tail’s paired edges and the body stitches together, leaving the rounded tail projecting outside the body.
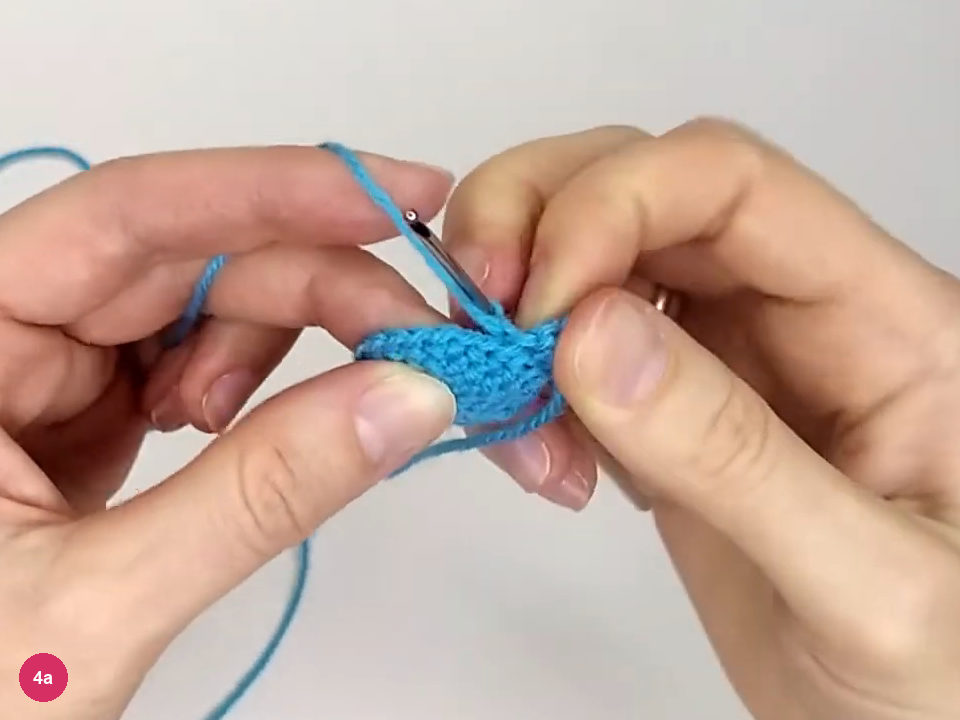
Step 4a: incorporate the tail into body round five. - Rnd 5 middle · 6 turquoise sc, 8 white sc
Continue with six turquoise single crochets, changing to white on the last pull-through of the final one. Work eight white single crochets for the belly; make the next color change on the last pull-through of the eighth white stitch.
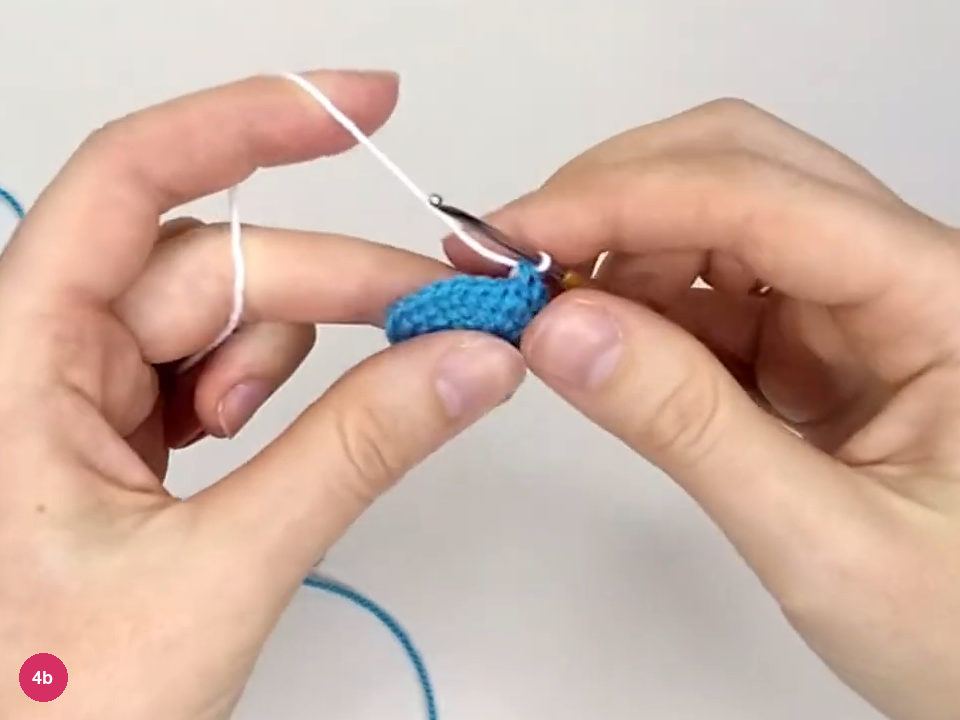
Step 4b: change to white for the belly section. - Rnd 5 end · 4 turquoise sc
Finish round five with four turquoise single crochets. Leave the yarn carried across the inside loose enough to follow the curved body: a tight strand here will pinch the white belly even when the outside stitch count is correct.
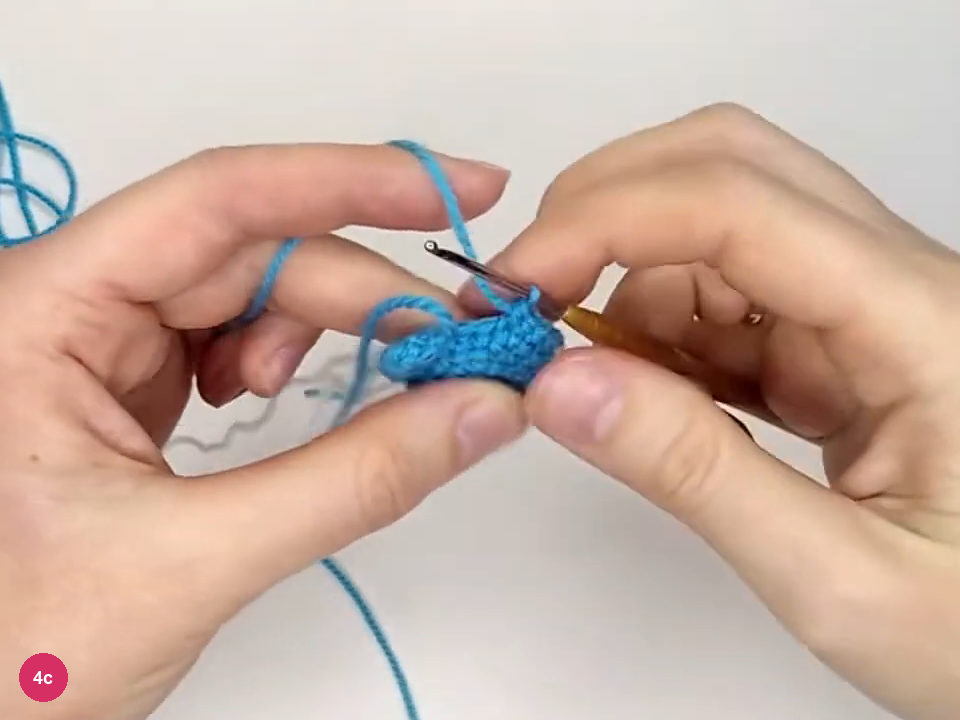
Step 4c: finish the first belly round without tight floats. -
Build the white belly panel
- Rnd 6 start · 11 turquoise sc
Begin round six with eleven turquoise single crochets, changing to white on the final pull-through. Keep the marker at the same starting point; the turquoise sections on either side deliberately have different lengths.
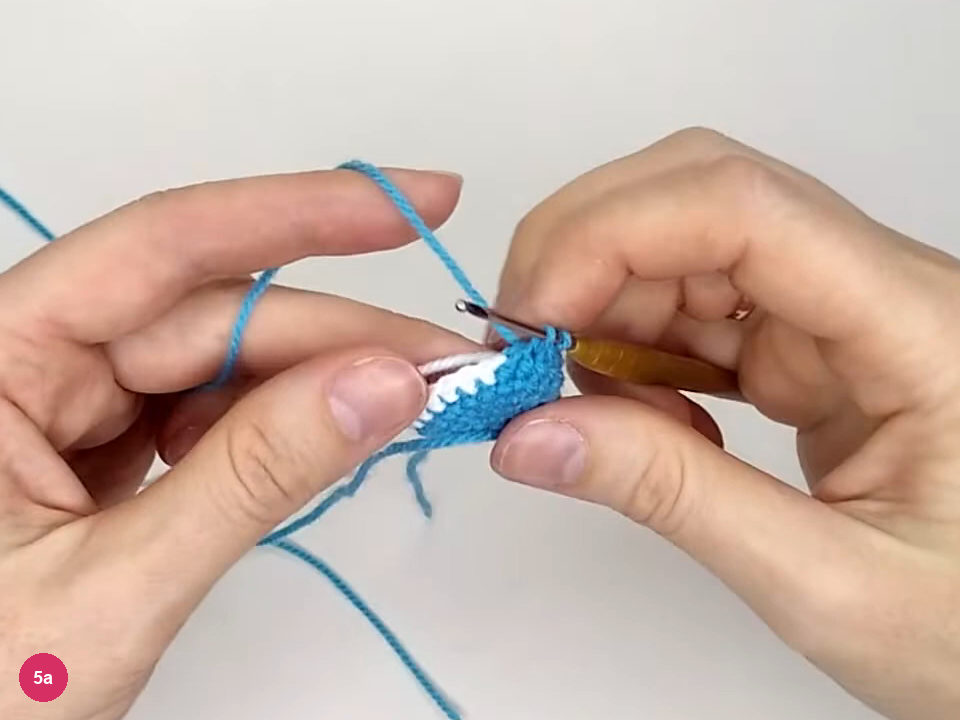
Step 5a: change color after eleven turquoise stitches. - Rnd 6 · 11 turquoise, 10 white, 3 turquoise · 24 sc
Work ten white single crochets, then change back to turquoise and finish with three single crochets. Continue to the stated twenty-four-stitch total, then check the completed belly band before repeating it; the color change should sit at the stitch top.
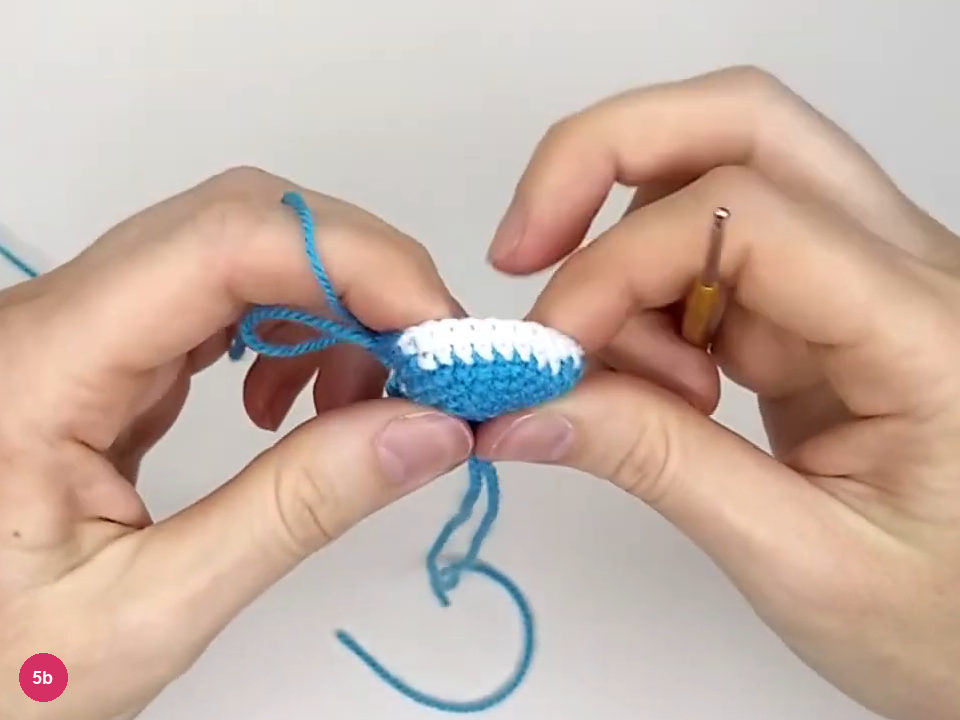
Step 5b: complete the twenty-four-stitch belly round. - Rnds 7–9 · 11 turquoise, 10 white, 3 turquoise · 24 sc each
Repeat that color sequence for rounds seven, eight and nine, continuing each to twenty-four stitches. The completed result has a broad white belly panel; keep the inside strands from pulling it inward.
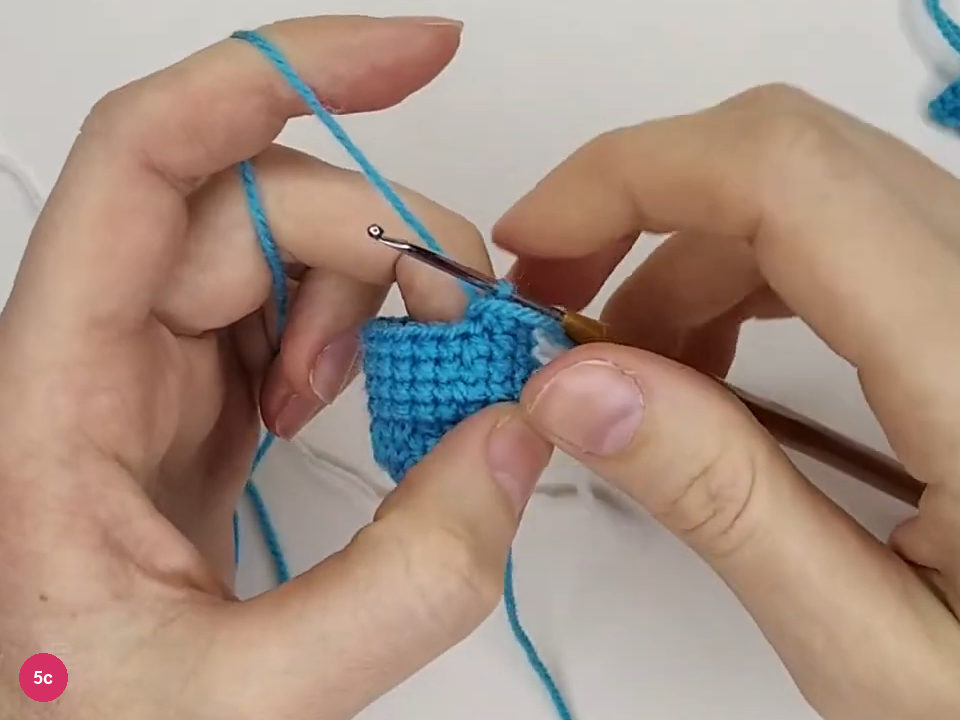
Step 5c: check the body height after repeating through round nine. -
Crochet both flippers into the body
- Rnd 10 start · 8 turquoise sc, 4 turquoise sc joining flipper
For round ten, work eight turquoise single crochets and place the first flipper against the body. Work four more single crochets through the flipper edge and body together, checking that the flipper hangs outside instead of folding into the cavity.
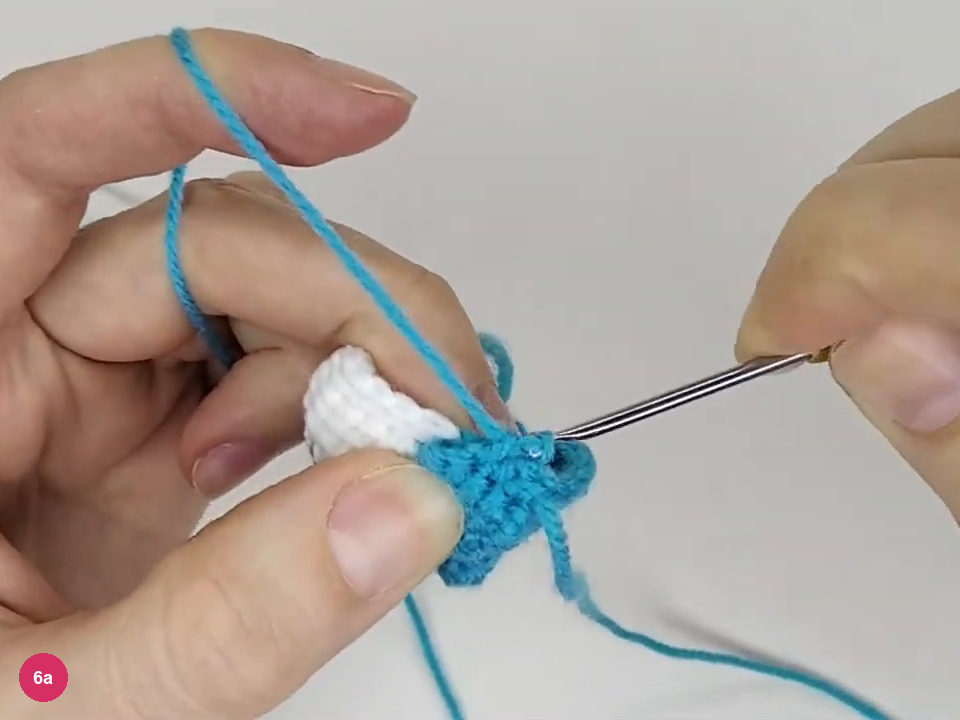
Step 6a: crochet the first flipper into round ten. - Rnd 10 front · 8 white sc
Change to white at the end of the first flipper join and work eight white single crochets. Keep the flipper aside so its edge is not caught again as you cross the belly.
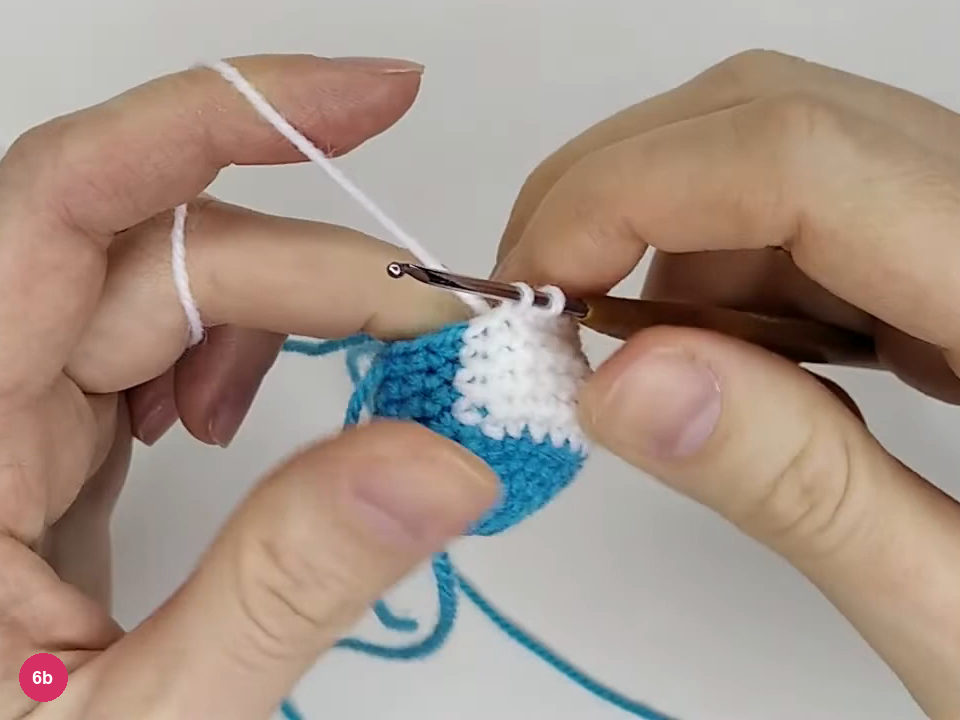
Step 6b: work eight white stitches across the front. - Rnd 10 end · 4 turquoise sc joining second flipper
Change to turquoise and join the second flipper with four single crochets through its edge and the body. This finishes the round; compare the flippers before continuing so you can correct a twisted join before stuffing.
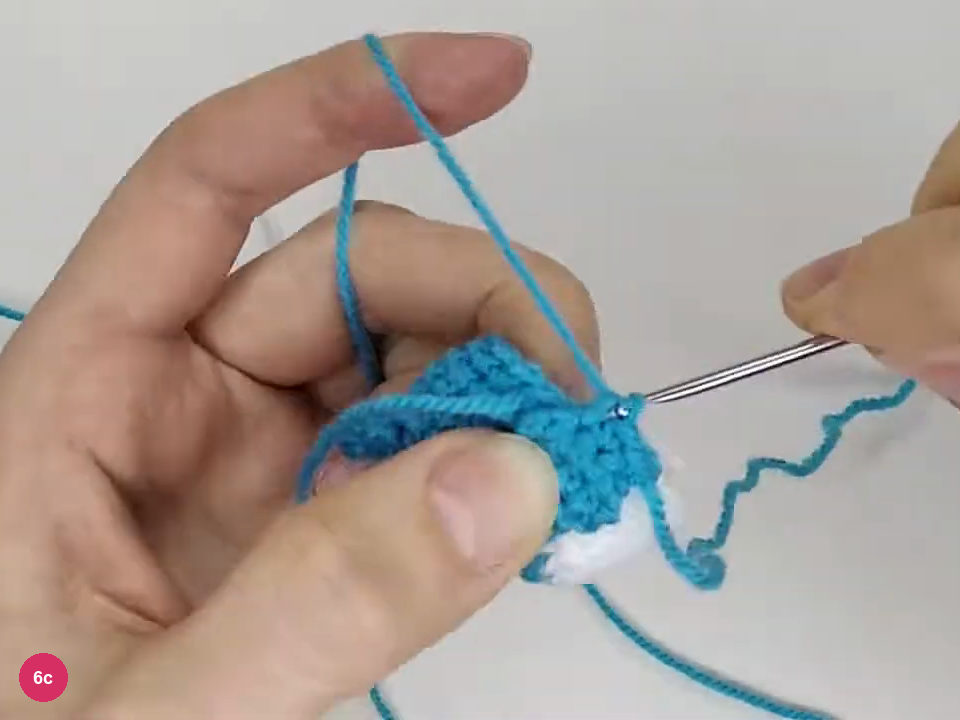
Step 6c: complete the second flipper join. -
Shape the white face groups
- Rnd 11 start · 12 turquoise sc, 3 white sc
In round eleven, work twelve turquoise single crochets and three white single crochets. Change color on the final pull-through as before; these white groups shape the upper face area.
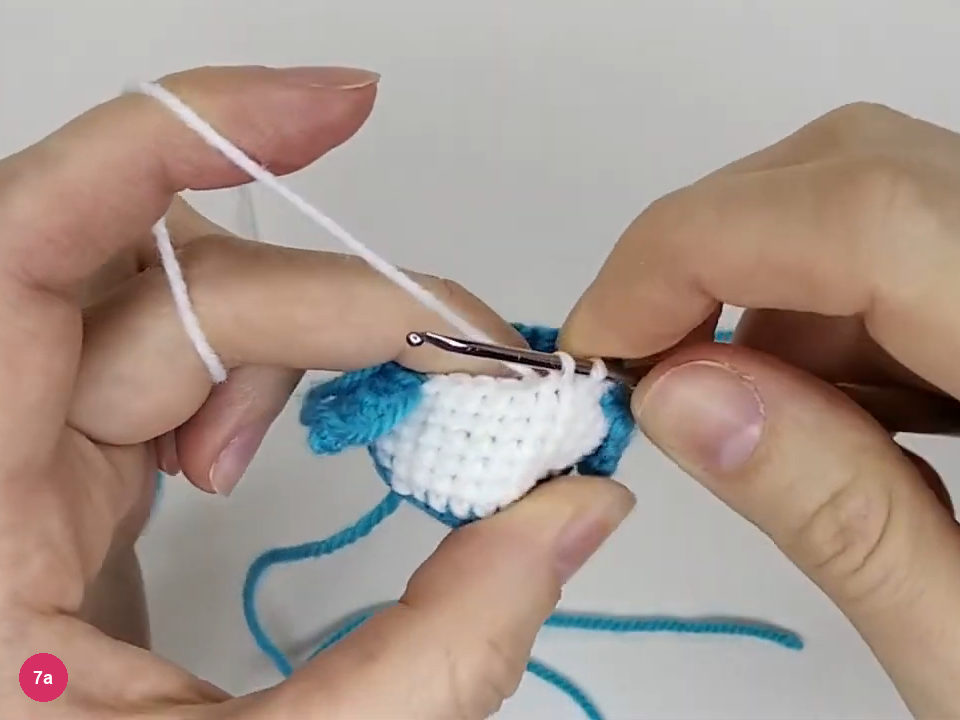
Step 7a: begin the first small white face group. - Rnd 11 end · 2 turquoise, 3 white, 4 turquoise sc
Work two turquoise single crochets, then three white single crochets for the second face group. Finish round eleven with four turquoise single crochets; the narrow turquoise interruption divides the white groups above the belly.
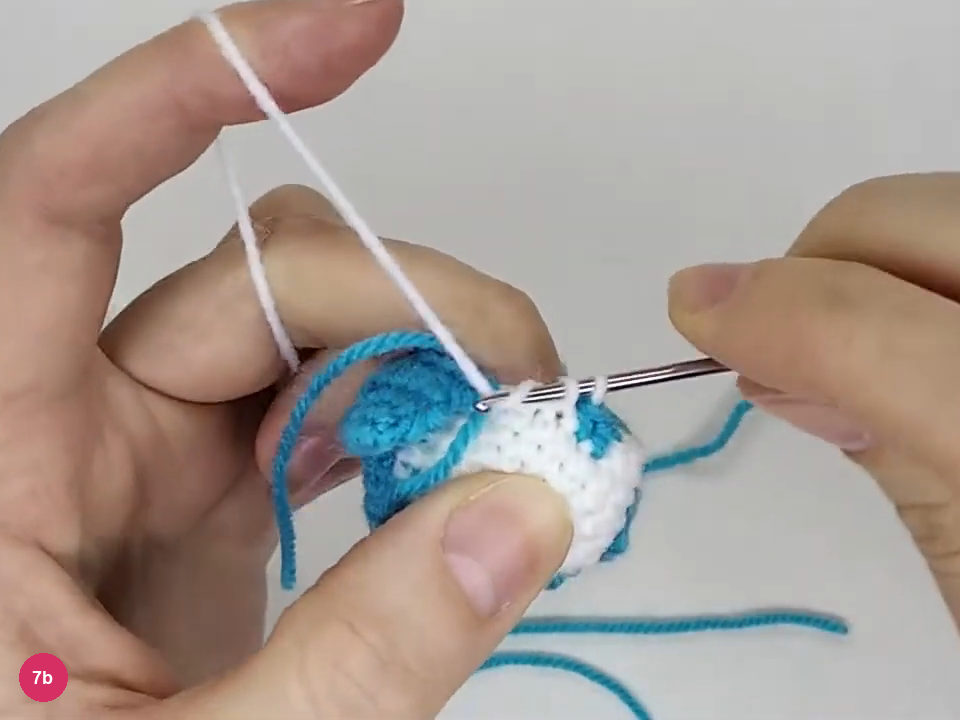
Step 7b: work the second white face group. -
Decrease the upper body and add stuffing
- Rnd 12 start · 5 turquoise dec
Begin round twelve with five turquoise decreases. For each invisible decrease, pick up the front loops of the next two stitches before completing the single crochet; keep the loop relaxed enough to enter them.
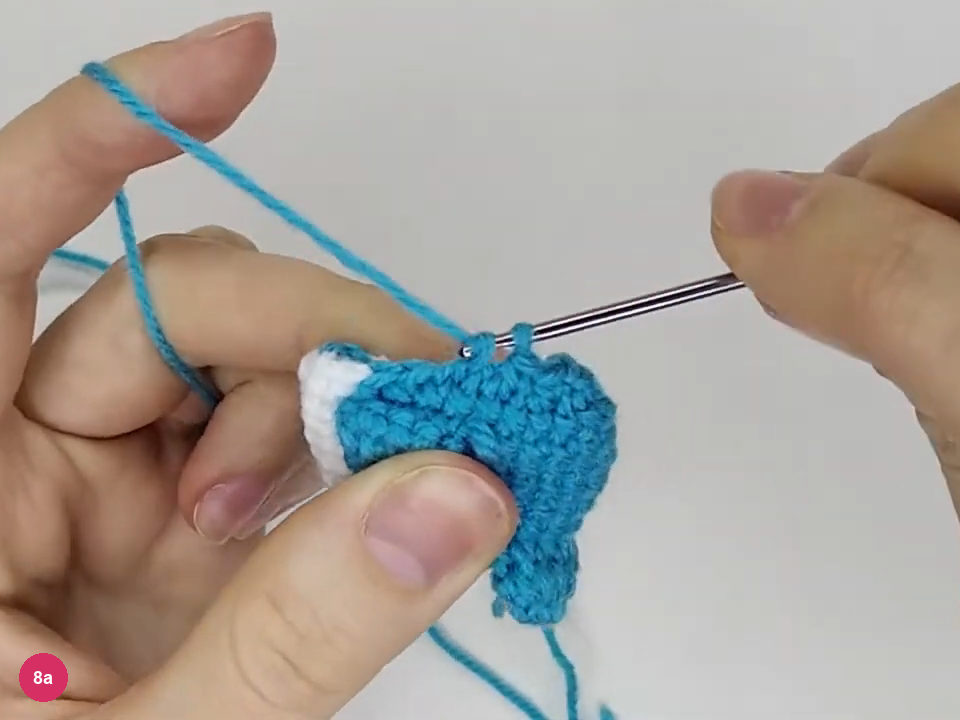
Step 8a: complete the opening invisible decreases. - Rnd 12 end · 3 turquoise, 2 white, 2 turquoise, 2 white, 3 turquoise sc, dec
Continue with three turquoise, two white, two turquoise, two white and three turquoise single crochets, then a turquoise decrease. Follow the full sequence to the end; the completed result brings the colored front together beneath the narrowing crown.
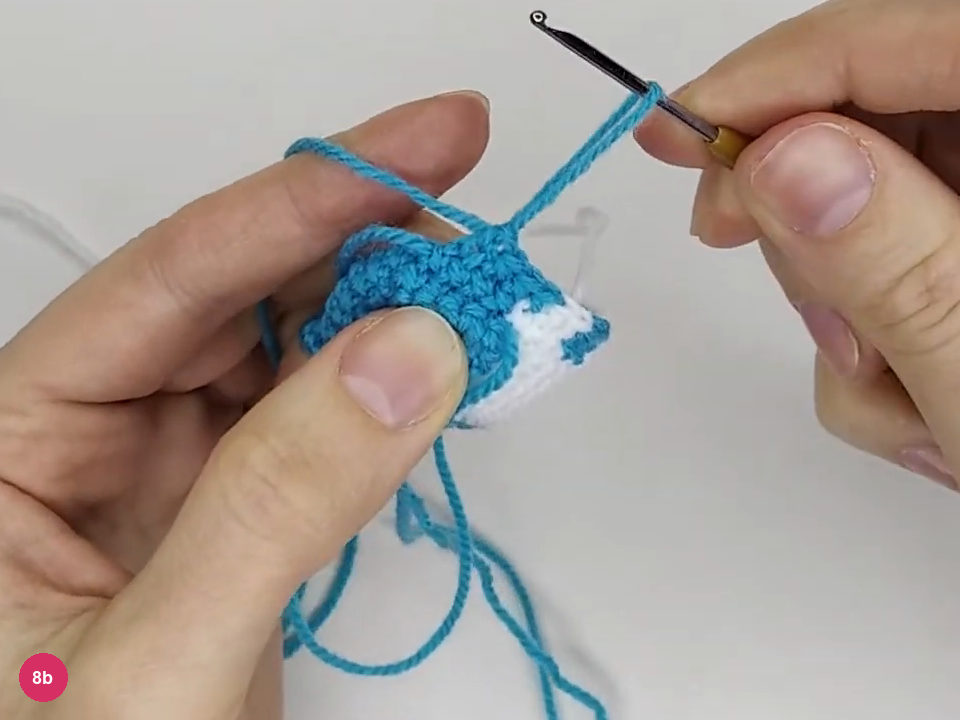
Step 8b: finish the color-work decrease round. - White yarn finished after Rnd 12
Cut the white yarn and bring the loose tail and flipper ends into the cavity, securing the inside ends without cinching the fabric. Add stuffing through the remaining opening, supporting the white front with your fingers so the mini body keeps its rounded outline.
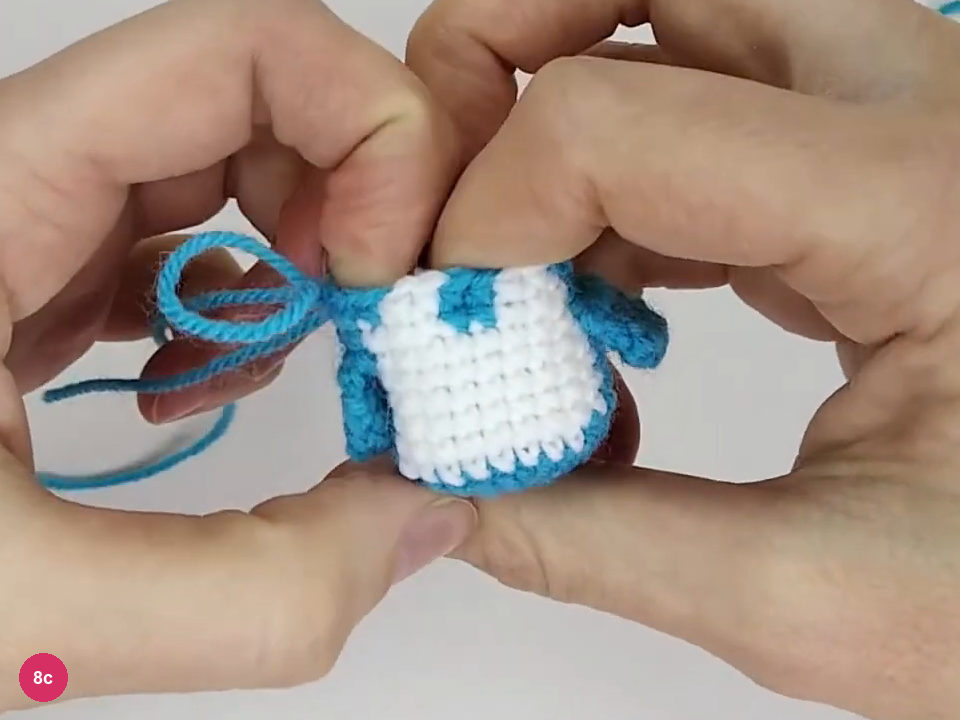
Step 8c: check the body after securing the ends and adding stuffing. -
Narrow the turquoise crown
- Rnds 13–14 · 18 turquoise sc each
Work rounds thirteen and fourteen in turquoise, with eighteen single crochets each. Continue each round to the stated count, then check the completed crown; leave the opening accessible for finishing the face.
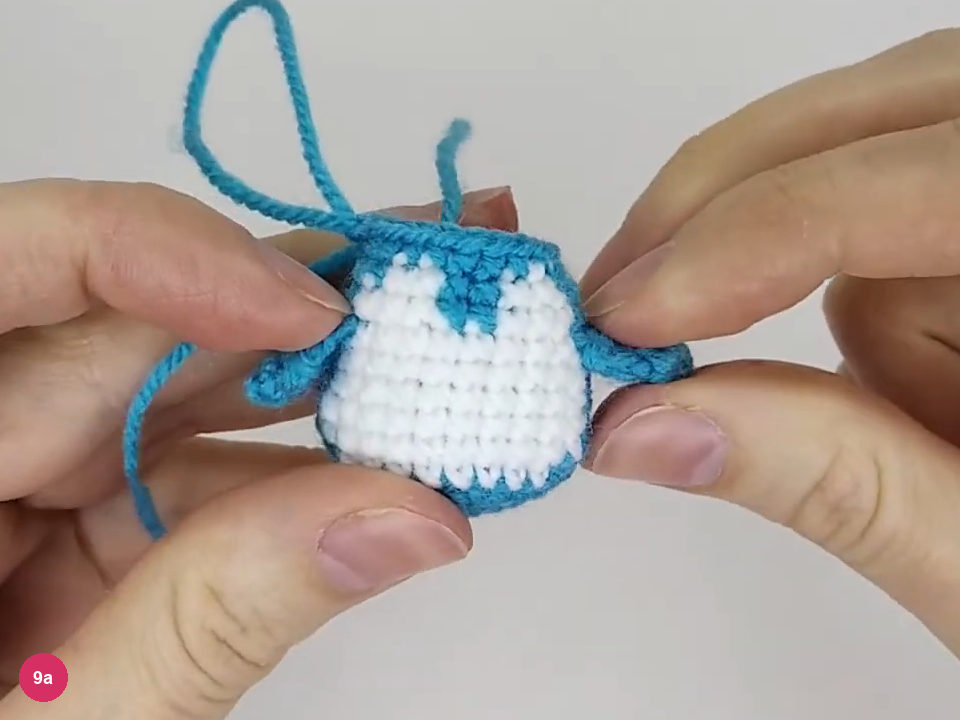
Step 9a: complete the two eighteen-stitch crown rounds. - Rnd 15 · 9 dec
Repeat nine decreases around round fifteen. Keep the working loop available while you finish the features; the opening still gives access for securing embroidery ends.
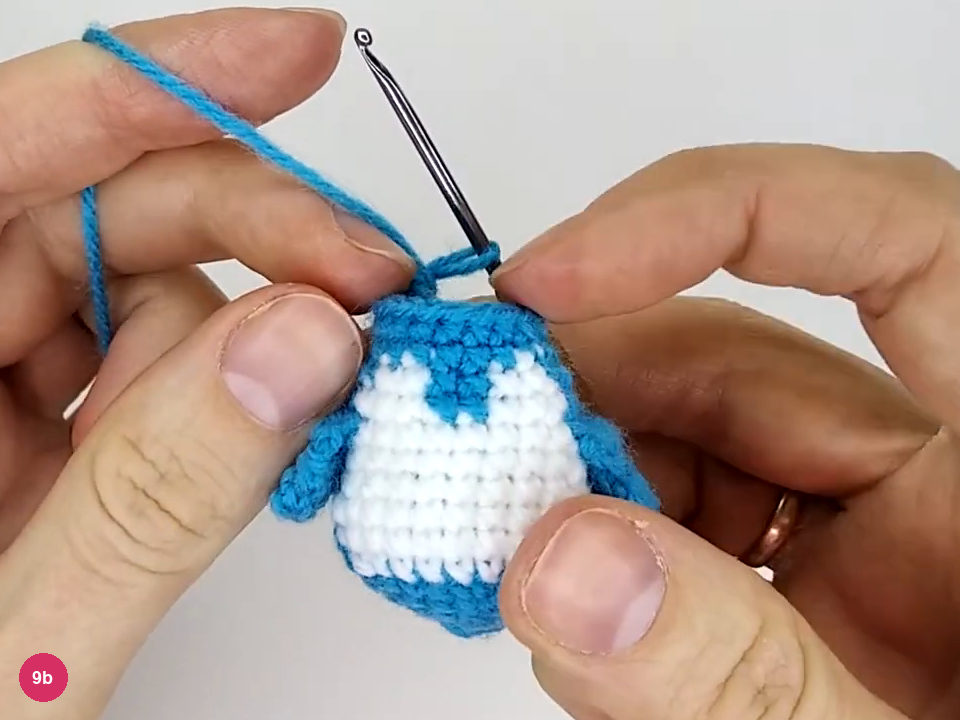
Step 9b: finish the nine-decrease crown round. -
Embroider the beak and feet, then finish the eyes
- Yellow yarn held double
Thread yellow yarn doubled through the needle and embroider a short horizontal beak across the center of the white face area. Repeat the stitch to build the little yellow bar, keeping the tension even so the embroidery sits on the surface without drawing the face inward.
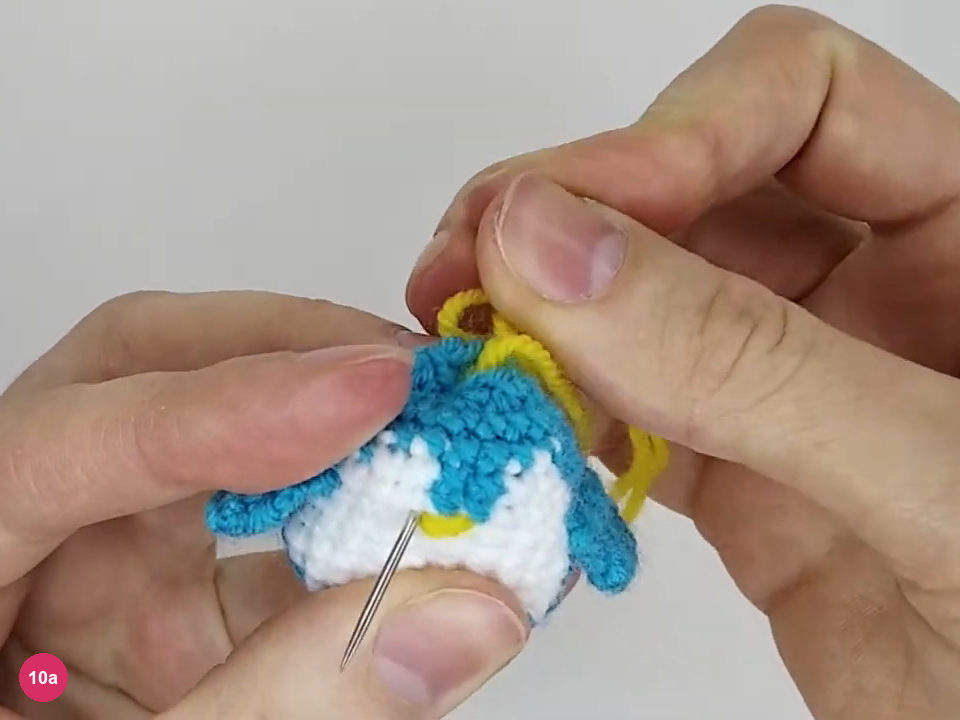
Step 10a: embroider the yellow beak. - Feet · yellow embroidery
Embroider the yellow feet at the bottom of the white belly, using the finished front as a placement guide. Keep the two short yellow details separate and level, and secure their ends inside; these feet are embroidery, with no separate crocheted pieces to attach.
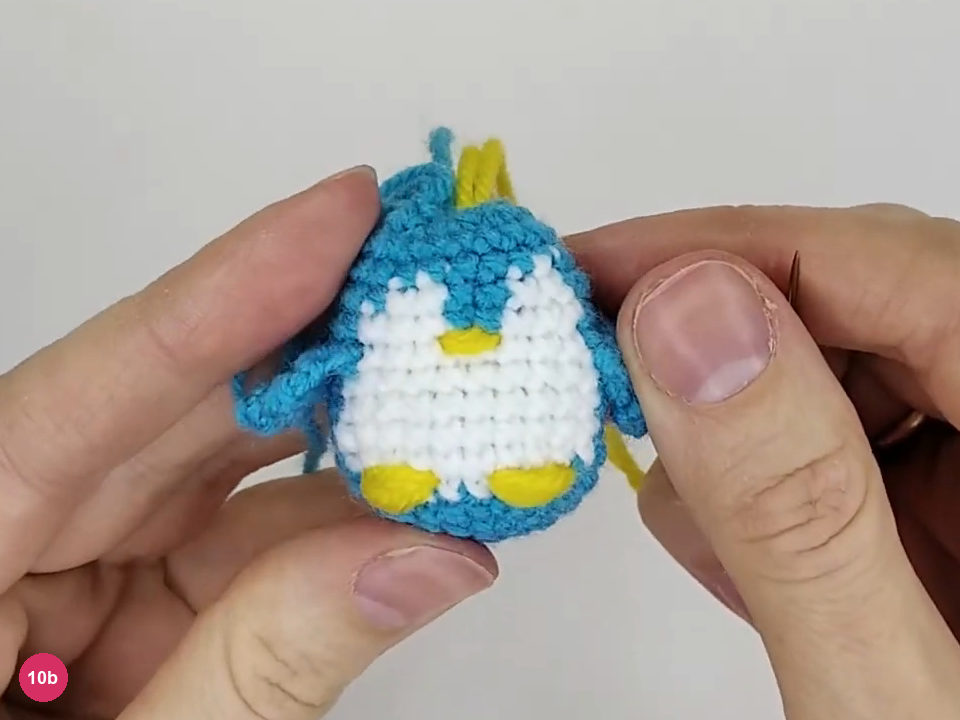
Step 10b: check the completed yellow embroidered feet. - Source sample · sewn black bead eyes
The pictured mini uses sewn black bead eyes, level with the beak and secured through the open top. Embroider eyes for young children; if you chose safety eyes earlier, check that their backs are firmly locked.
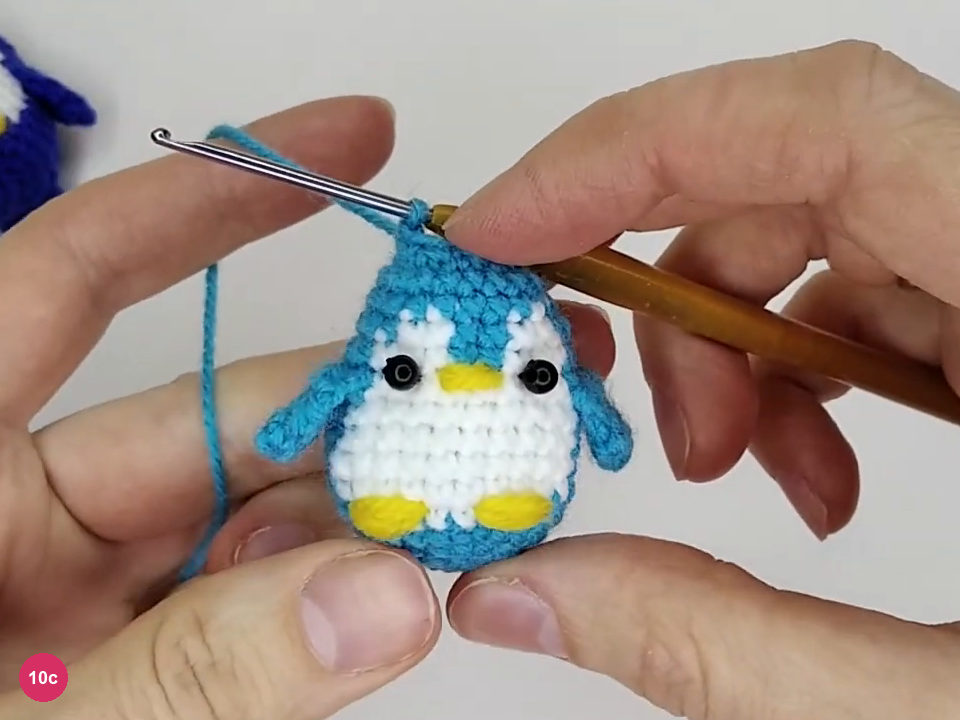
Step 10c: check the eyes and embroidered features. -
Close the crown and check the mini penguin
- Final top closure · 3 dec, then draw through front loops
Return to the working loop and make the three final decreases, then draw out the yarn. Use the hook to pick up the remaining front loops, skipping a stitch between the pickups as shown, and pull the yarn through to close the crown.
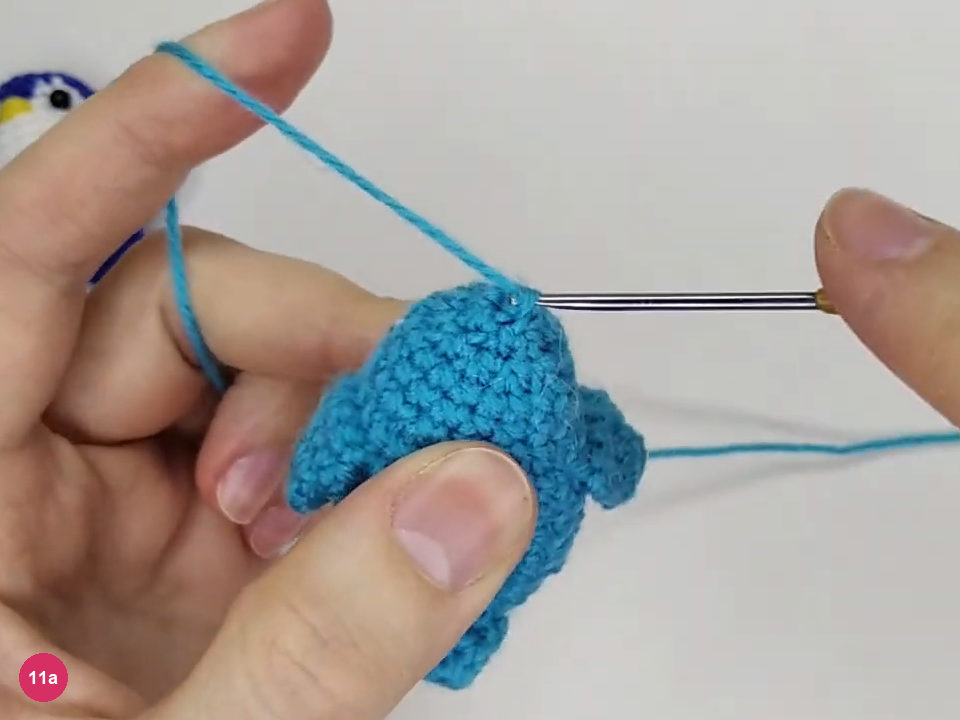
Step 11a: draw the crown loops closed with the hook. - Source example · 3.5 cm
Check that the tail and flippers are incorporated, while the beak and feet are embroidered. The source’s 3.5 cm mini hangs from a key ring; the final trimming and key-ring fitting are not demonstrated.
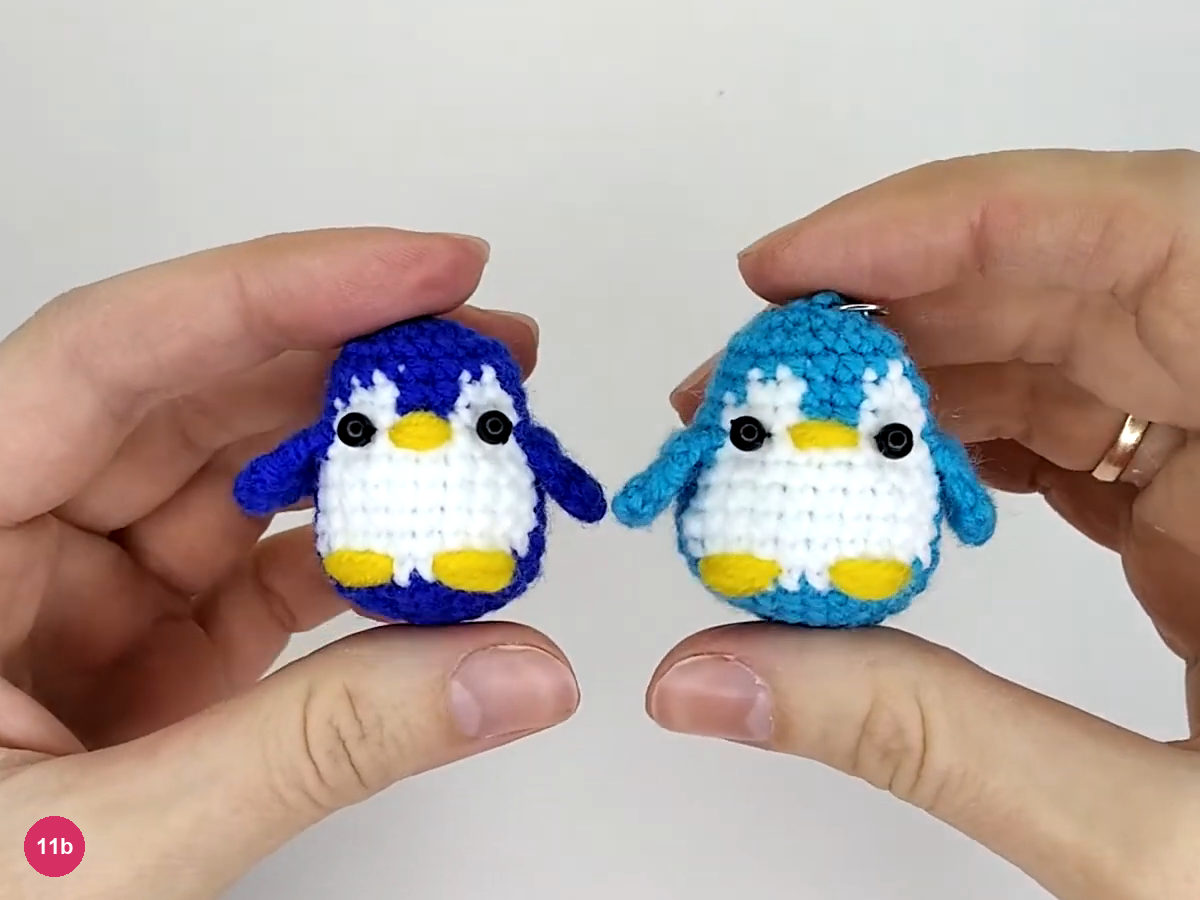
Step 11b: check the finished mini key-ring penguin.
Keep the belly round and the features tidy
Troubleshooting the mini shape
The belly looks pinched: loosen the carried strand before continuing; correct counts can still be distorted by a short float. A flipper points inward: undo its join while the round is accessible, turn it outward and rejoin through its closing edge.
The face looks off-center: check the color groups against the chips before adding eyes, and keep the round marker in place. Embroidery dents the body: ease the yellow strand back before securing it. The top stays open: use the hook to draw the remaining front loops together gently.
Final checklist
- The small ring centers and crown opening are closed, with ends hidden inside.
- The white belly is rounded and the flippers hang outside the body.
- The incorporated tail is secure and the yellow beak and feet are embroidered.
- The eyes suit the recipient, with embroidered eyes used for young children.
- The result is presented as a mini penguin; the source example measures 3.5 cm.
Try another animal project with the crochet dachshund bookmark, or explore a flat color-work project with the textured crochet cup mat.
Inspired by Toys_For_K@ty’s video tutorial.
Save this pattern for later
Pin it to one of your boards so it’s ready when you have a free evening and the right yarn.