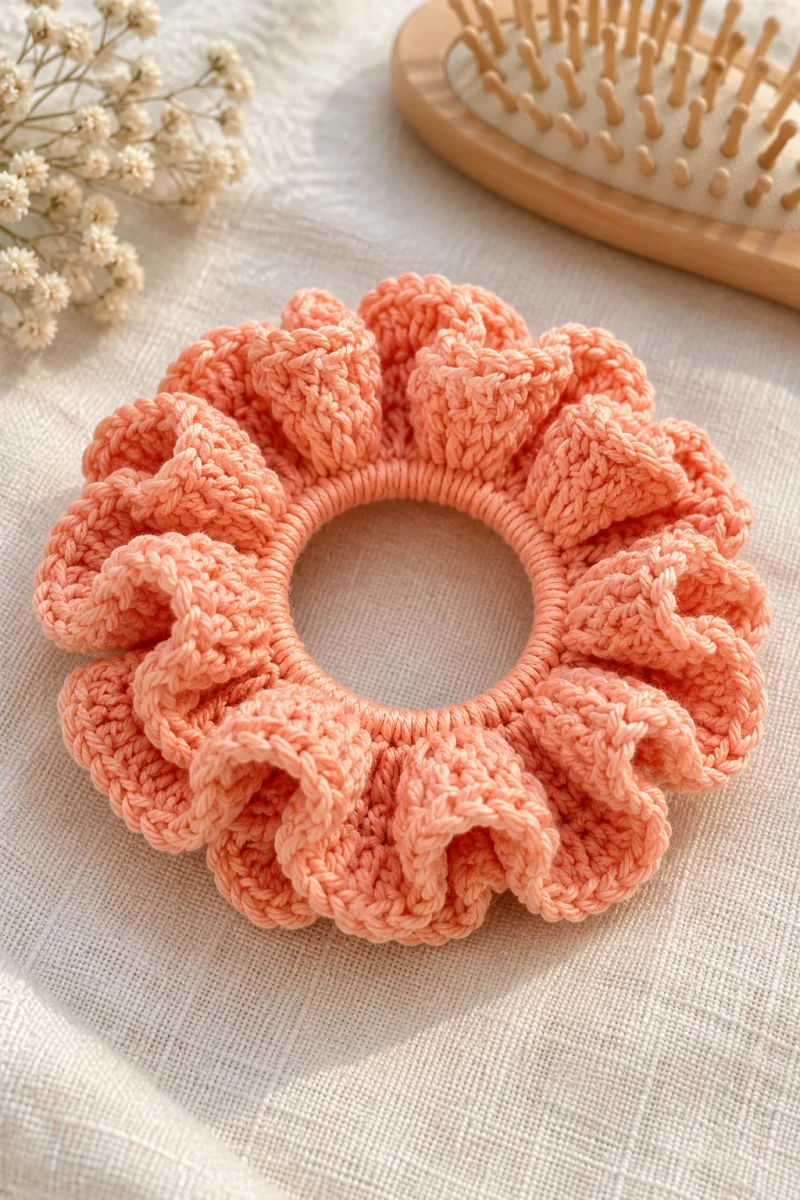
A ruffled crochet scrunchie is a small project with a lot of movement. Instead of making a tube around the elastic, you cover the hair band directly, then increase outward until the crochet folds into soft waves. This peach version uses two double-crochet rounds for a full, frilled edge.
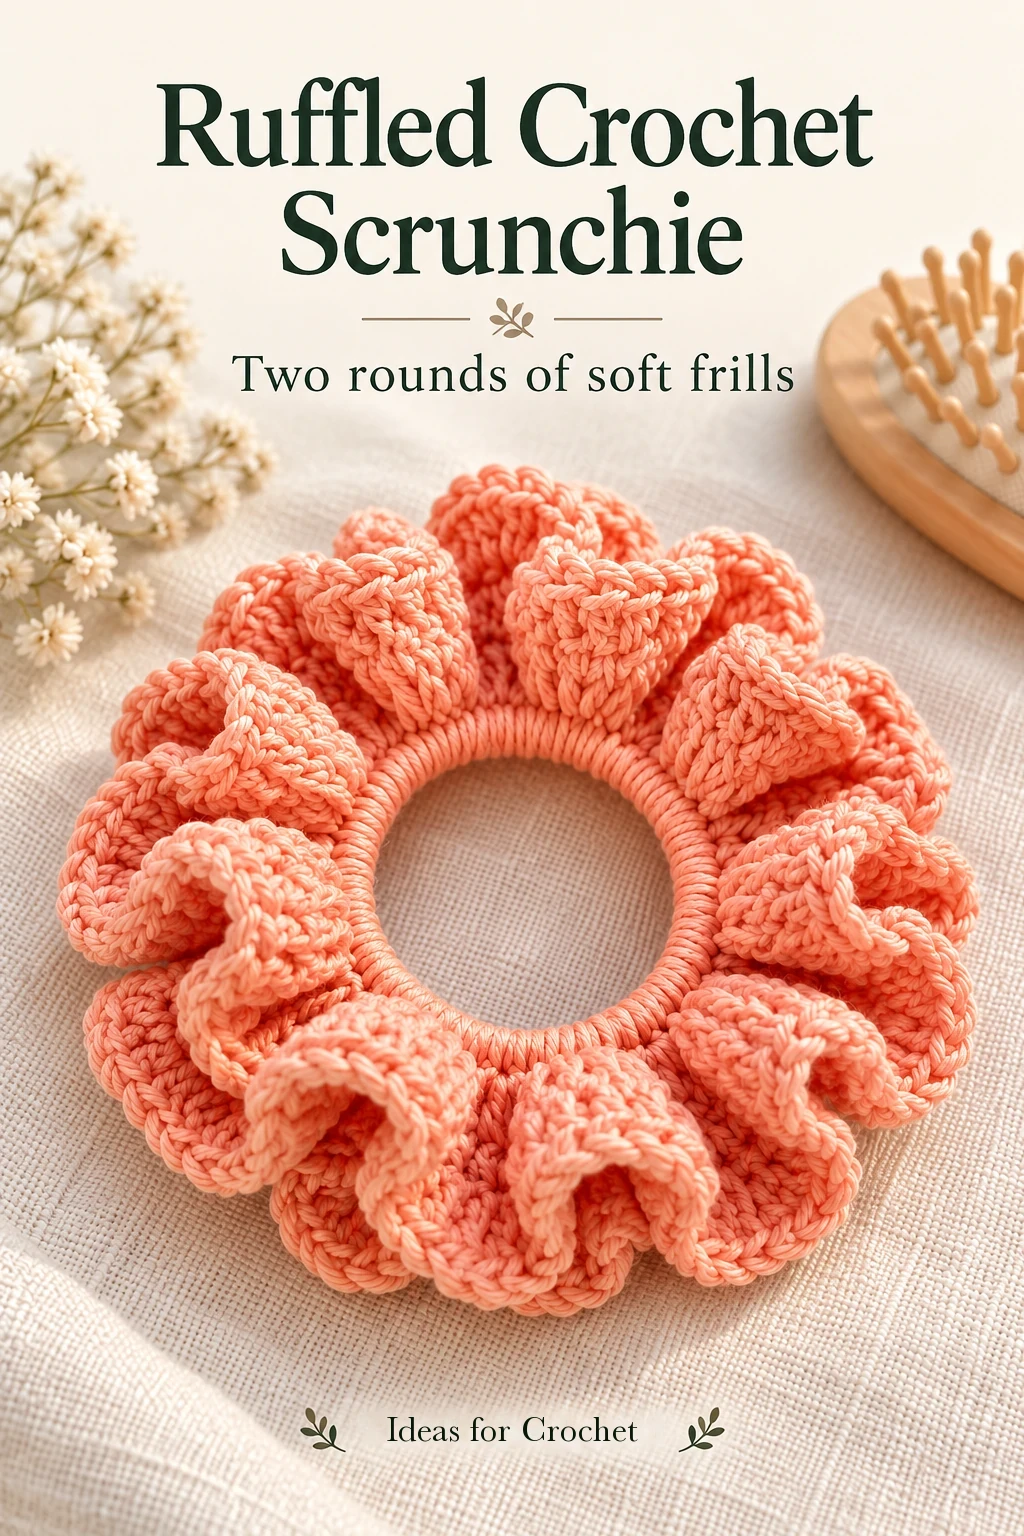
The method comes from Olga Varlamova of FuzzyLook. Her demonstration focuses on a cotton scrunchie, while also showing how other yarns change the weight and volume. Use the steps below with her hand movements in the video, especially when you reach the first and last stitches of each round.
Choose the elastic before the yarn
The elastic supplies the hold; crochet supplies the decoration. Choose an intact hair band with reliable stretch and a secure join. Pull it gently before beginning, and check that it returns to its original size. Covering a worn elastic will not restore its spring.
Olga also shows yarns near 115 m per 50 g and a shiny yarn around 230 m per 100 g. Those are examples of similar, rather than identical, yarns. A plush version becomes bigger and heavier. For a first attempt, a smooth light-colored cotton makes the stitch tops and the join easier to identify.
Cover the elastic completely
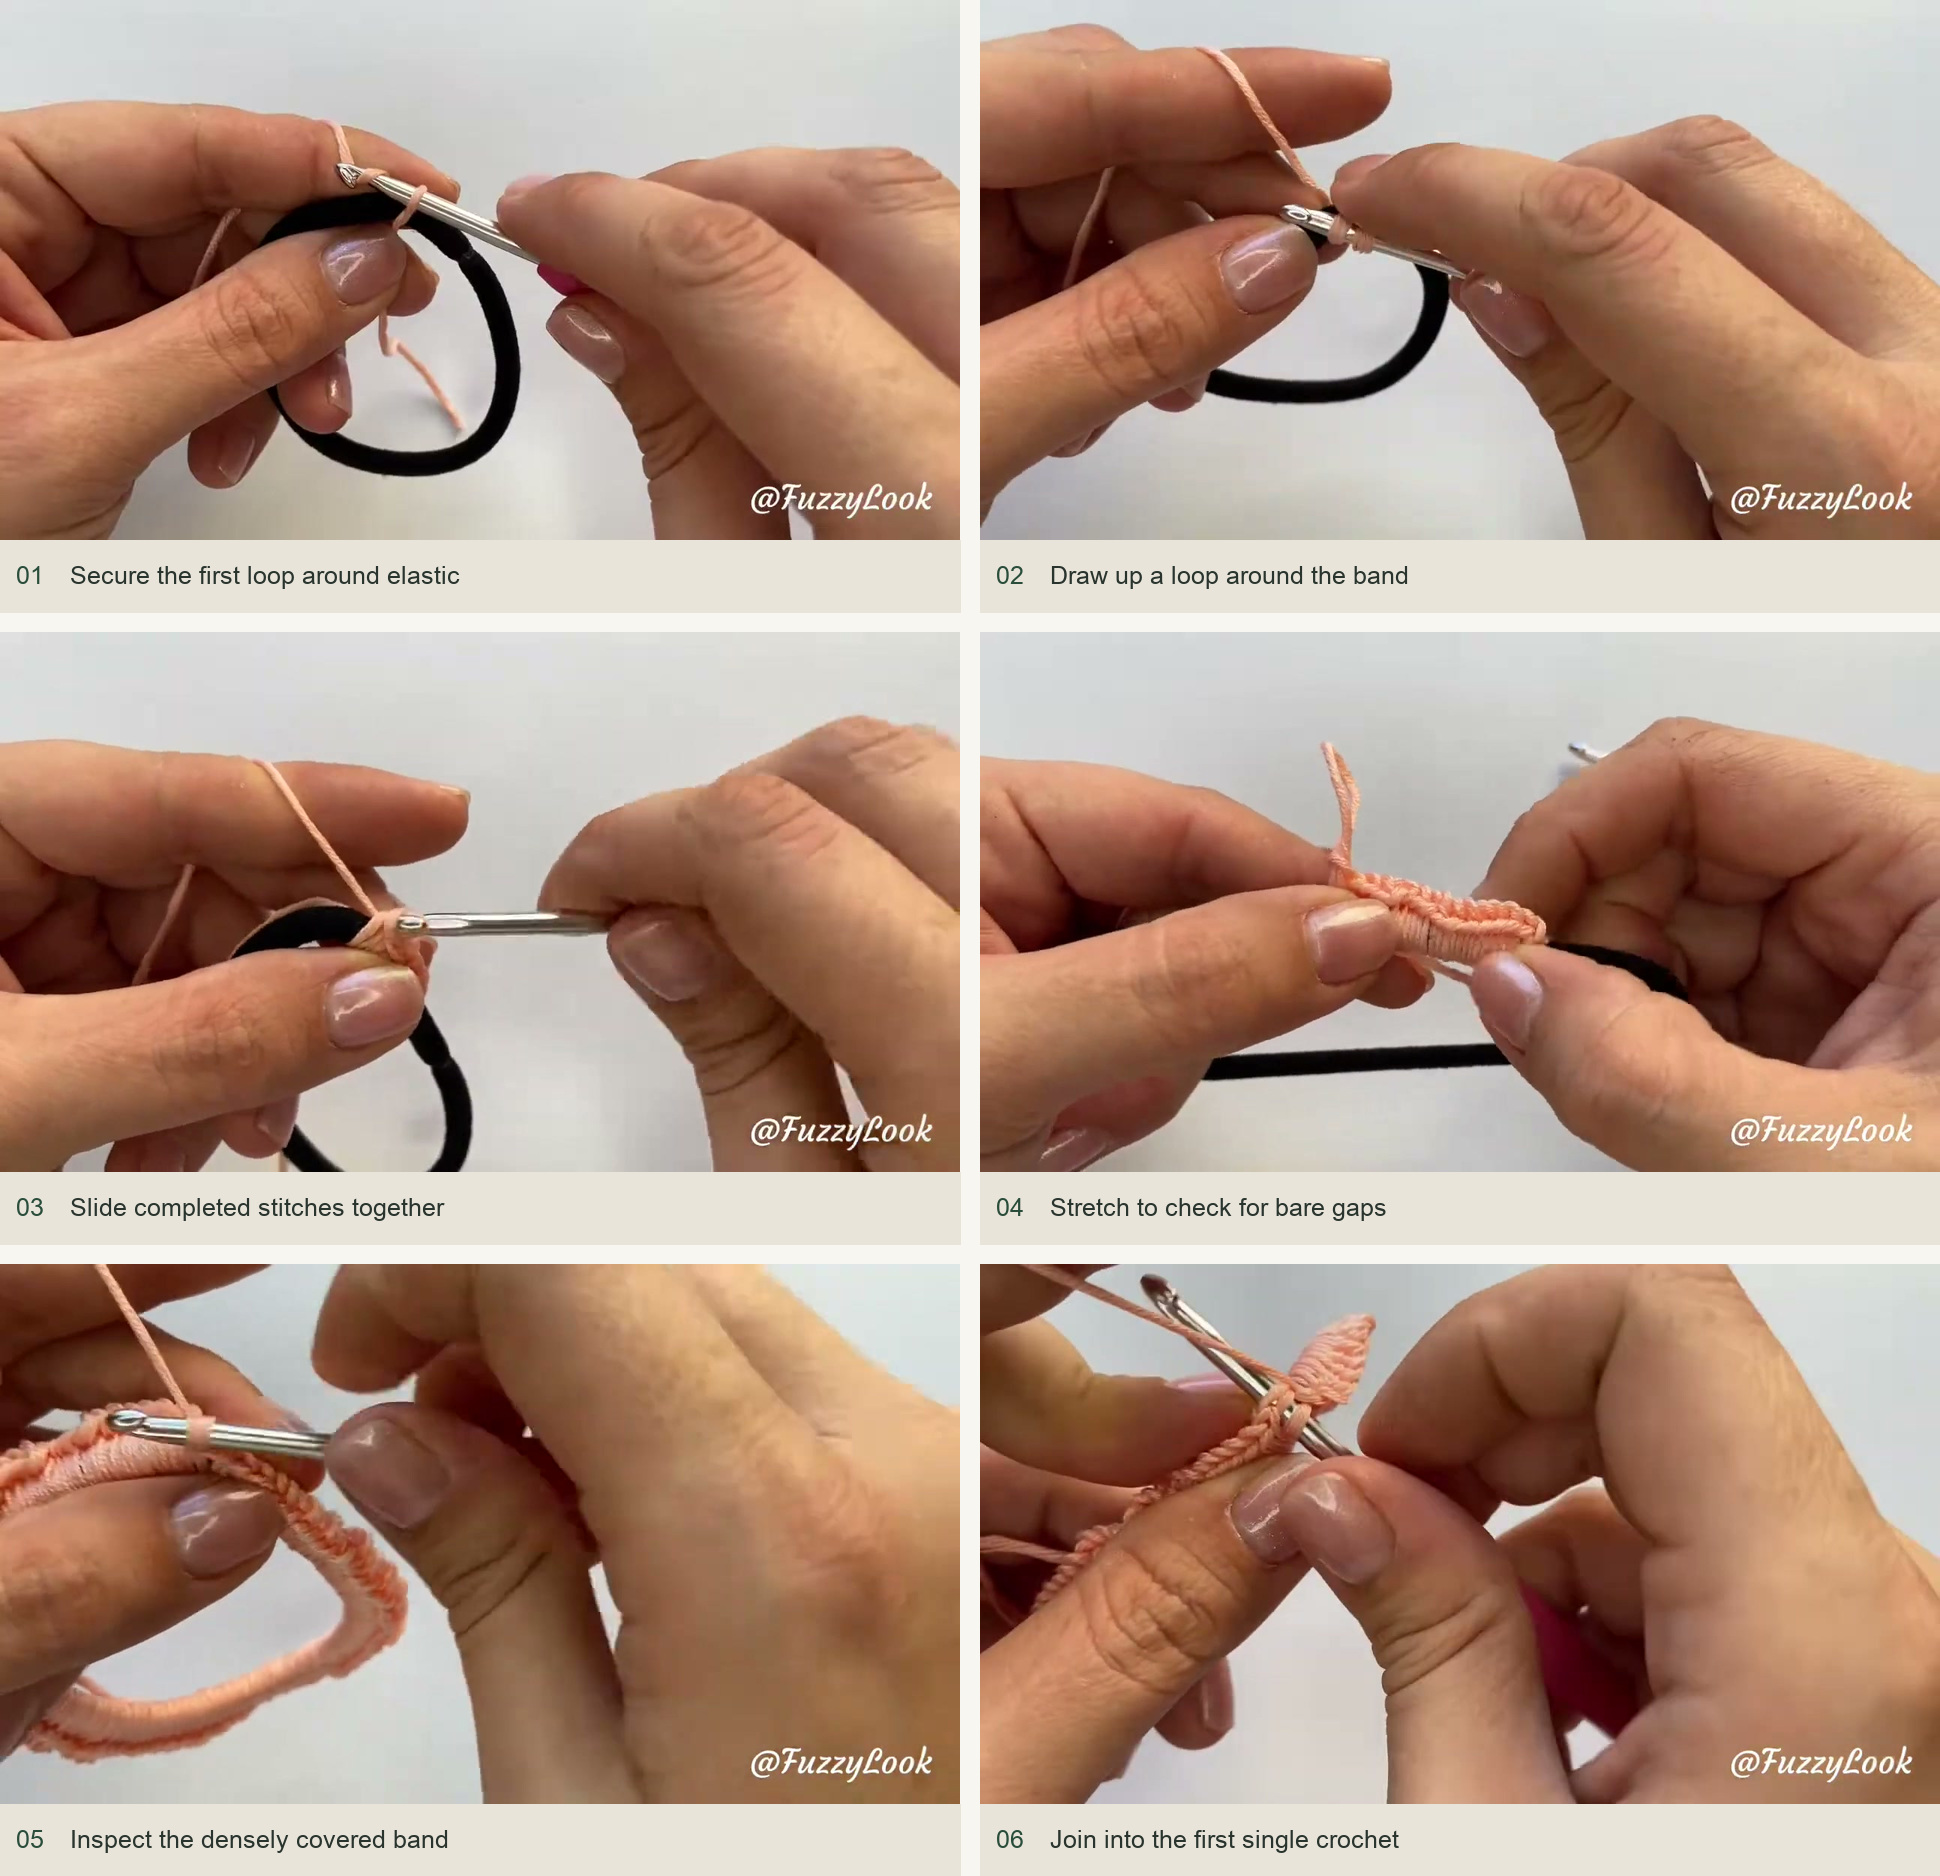
- Attach the yarn. Leave a tail, pass the hook through the center of the elastic, draw the working yarn up, and secure the starting loop. Lay the tail along the band so it can be enclosed while you crochet.
- Work sc around the band. Insert the hook through the center rather than through the elastic itself. Draw up a loop around the band, then yarn over and pull through both loops. Repeat, covering the elastic and the starting tail.
- Slide the stitches together. After a small group of stitches, move them snugly alongside one another. Olga demonstrates adjusting them after roughly five stitches. This frees space for additional stitches without making individual loops tight.
- Check the stretched band. Gently extend the elastic and look for bare gaps. Continue covering until the band has a full, flexible layer. The starting count depends on your elastic; the tutorial does not set one fixed number.
- Join the foundation. Find the first sc and join with a sl st. Make sure the stitch tops face outward and the band has not twisted.
First frill round: two double crochets per stitch
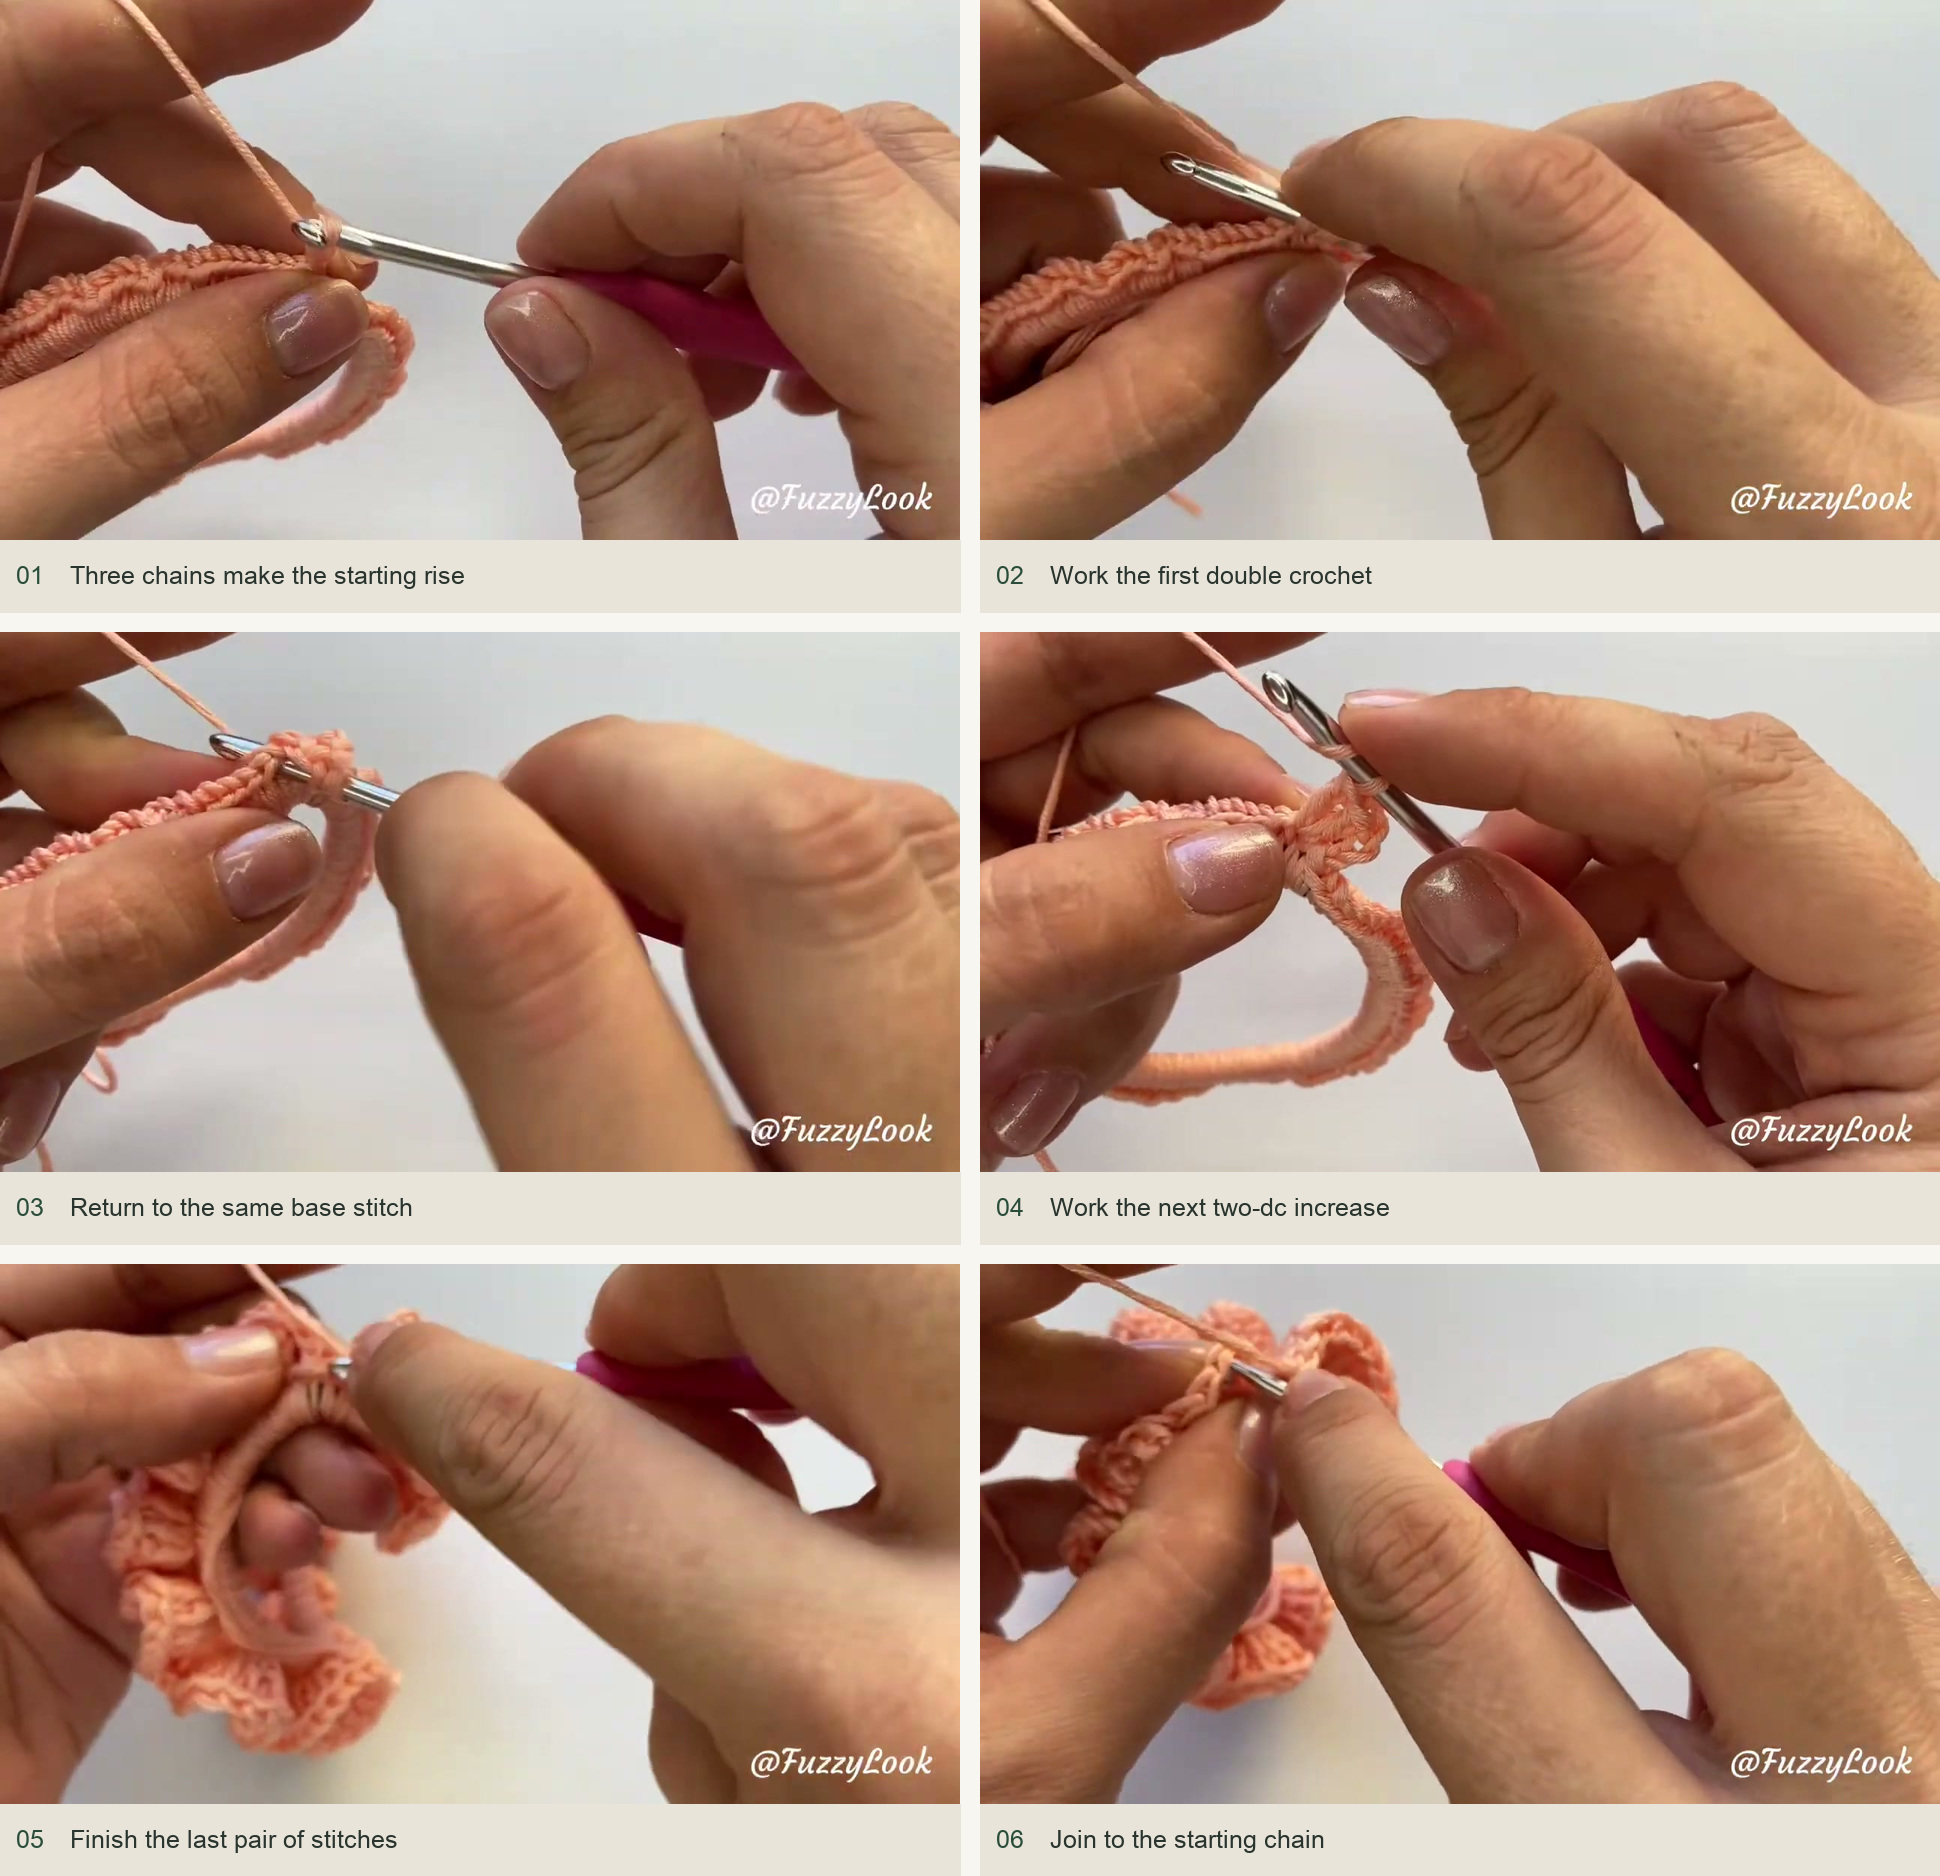
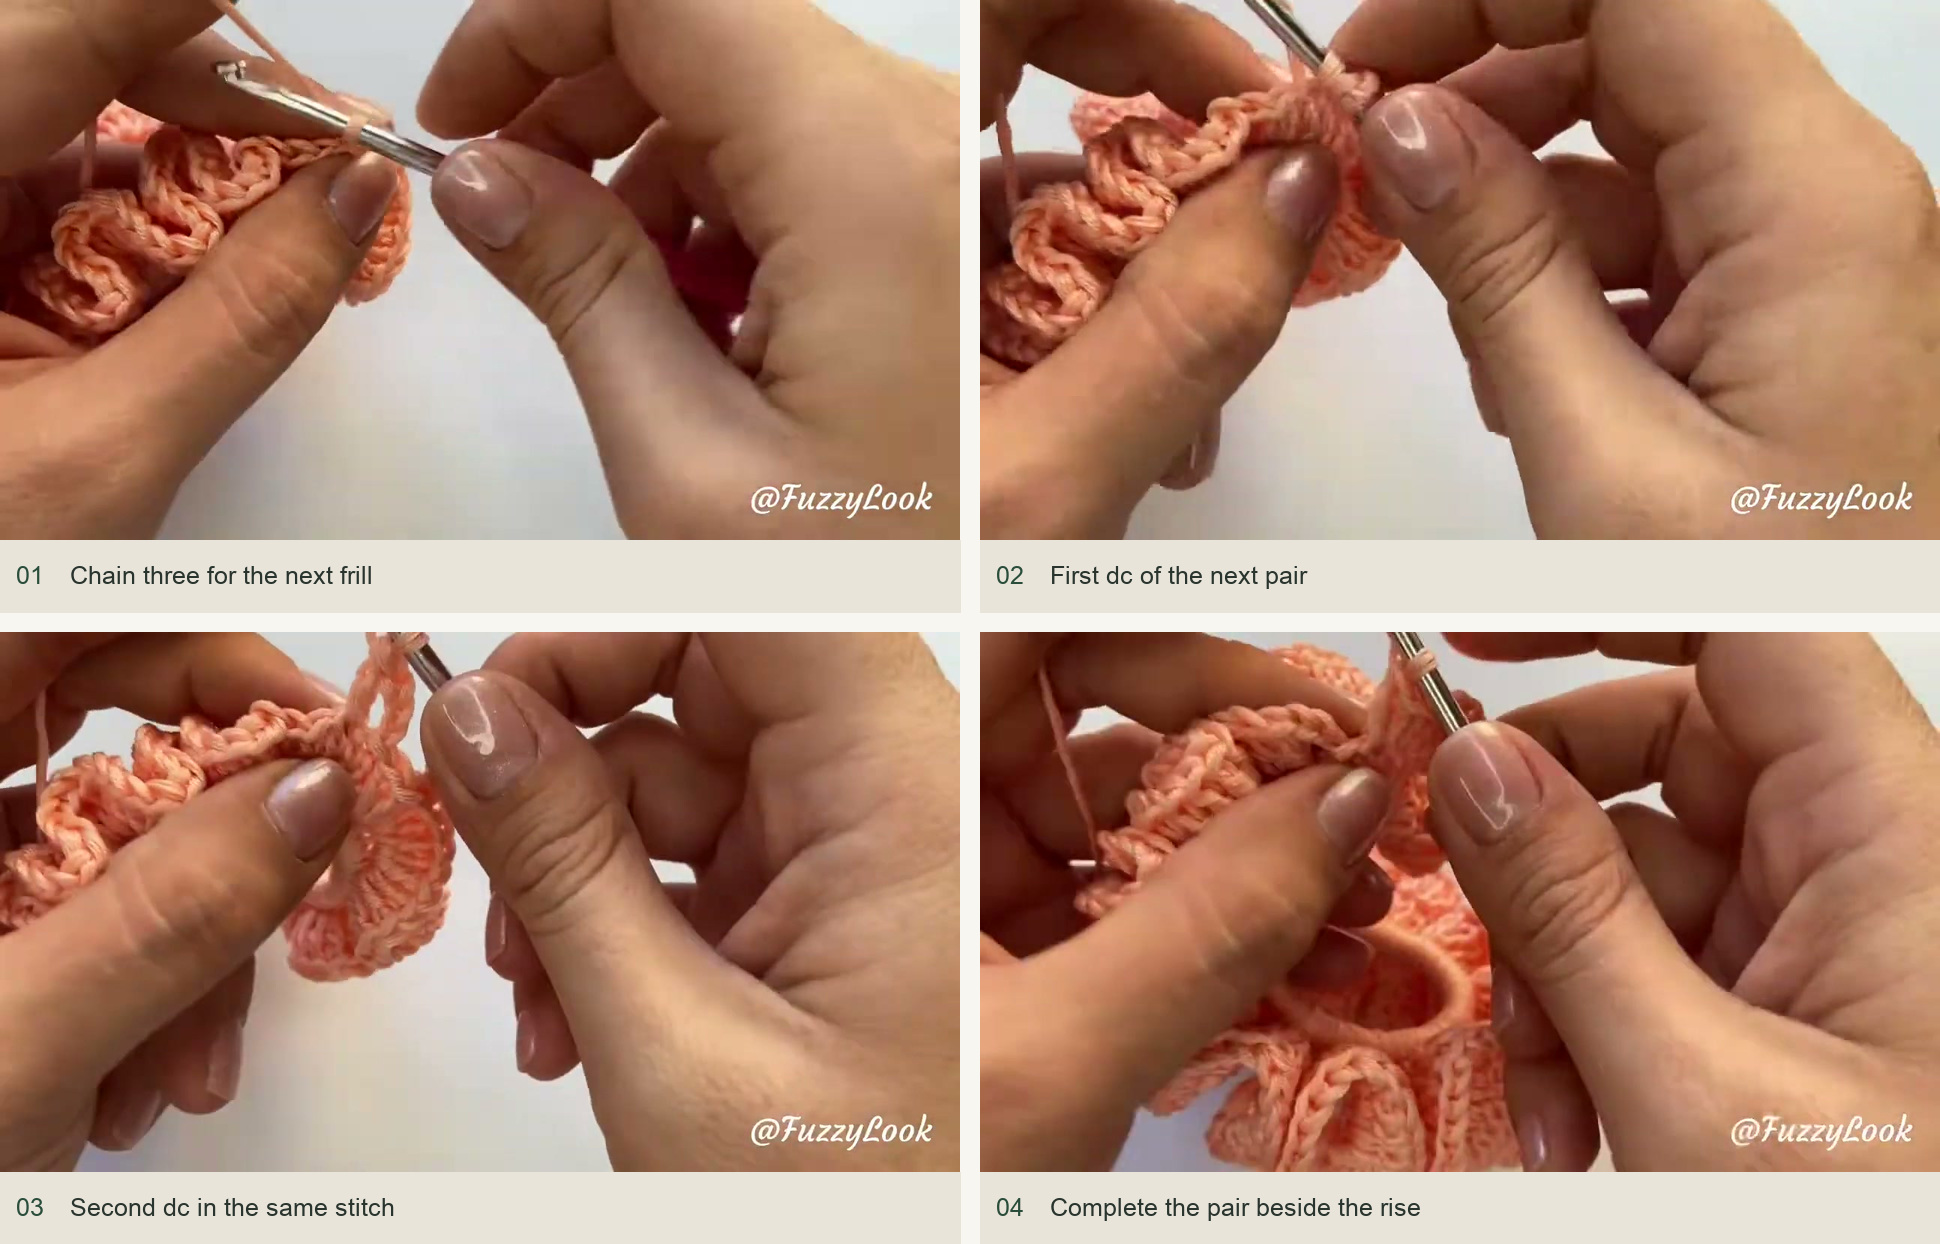
Ch 3 for the starting height. Work around the foundation, making 2 dc into each sc. Keep both stitches in the same top loop before moving into the next one. The crochet should begin to ripple; that is the intended effect of adding more fabric than can lie flat around the elastic.
The beginning chain can be easy to lose among the new stitches. Put a removable marker at the top of it if necessary. At the end, locate that top chain carefully and join with a sl st. Check the join from both sides rather than treating the loose-looking space beside the chain as another foundation stitch.
Second frill round: repeat the increases
Ch 3 again and work 2 dc into each stitch around. Follow the actual stitch tops, not the folds in the ruffle: a fold is a change in direction, not the end of a repeat. Open the fabric gently with your fingers as you work, so hidden stitches do not get missed.
Olga completes the start of the final round with an additional dc beside the beginning chain before finishing. This lets the chain act as one member of the opening pair. The important check is that the join has the same fullness as the rest of the scrunchie, without an unexplained gap or an extra cluster added on top of a completed pair.
Finish without a hard, tight knot
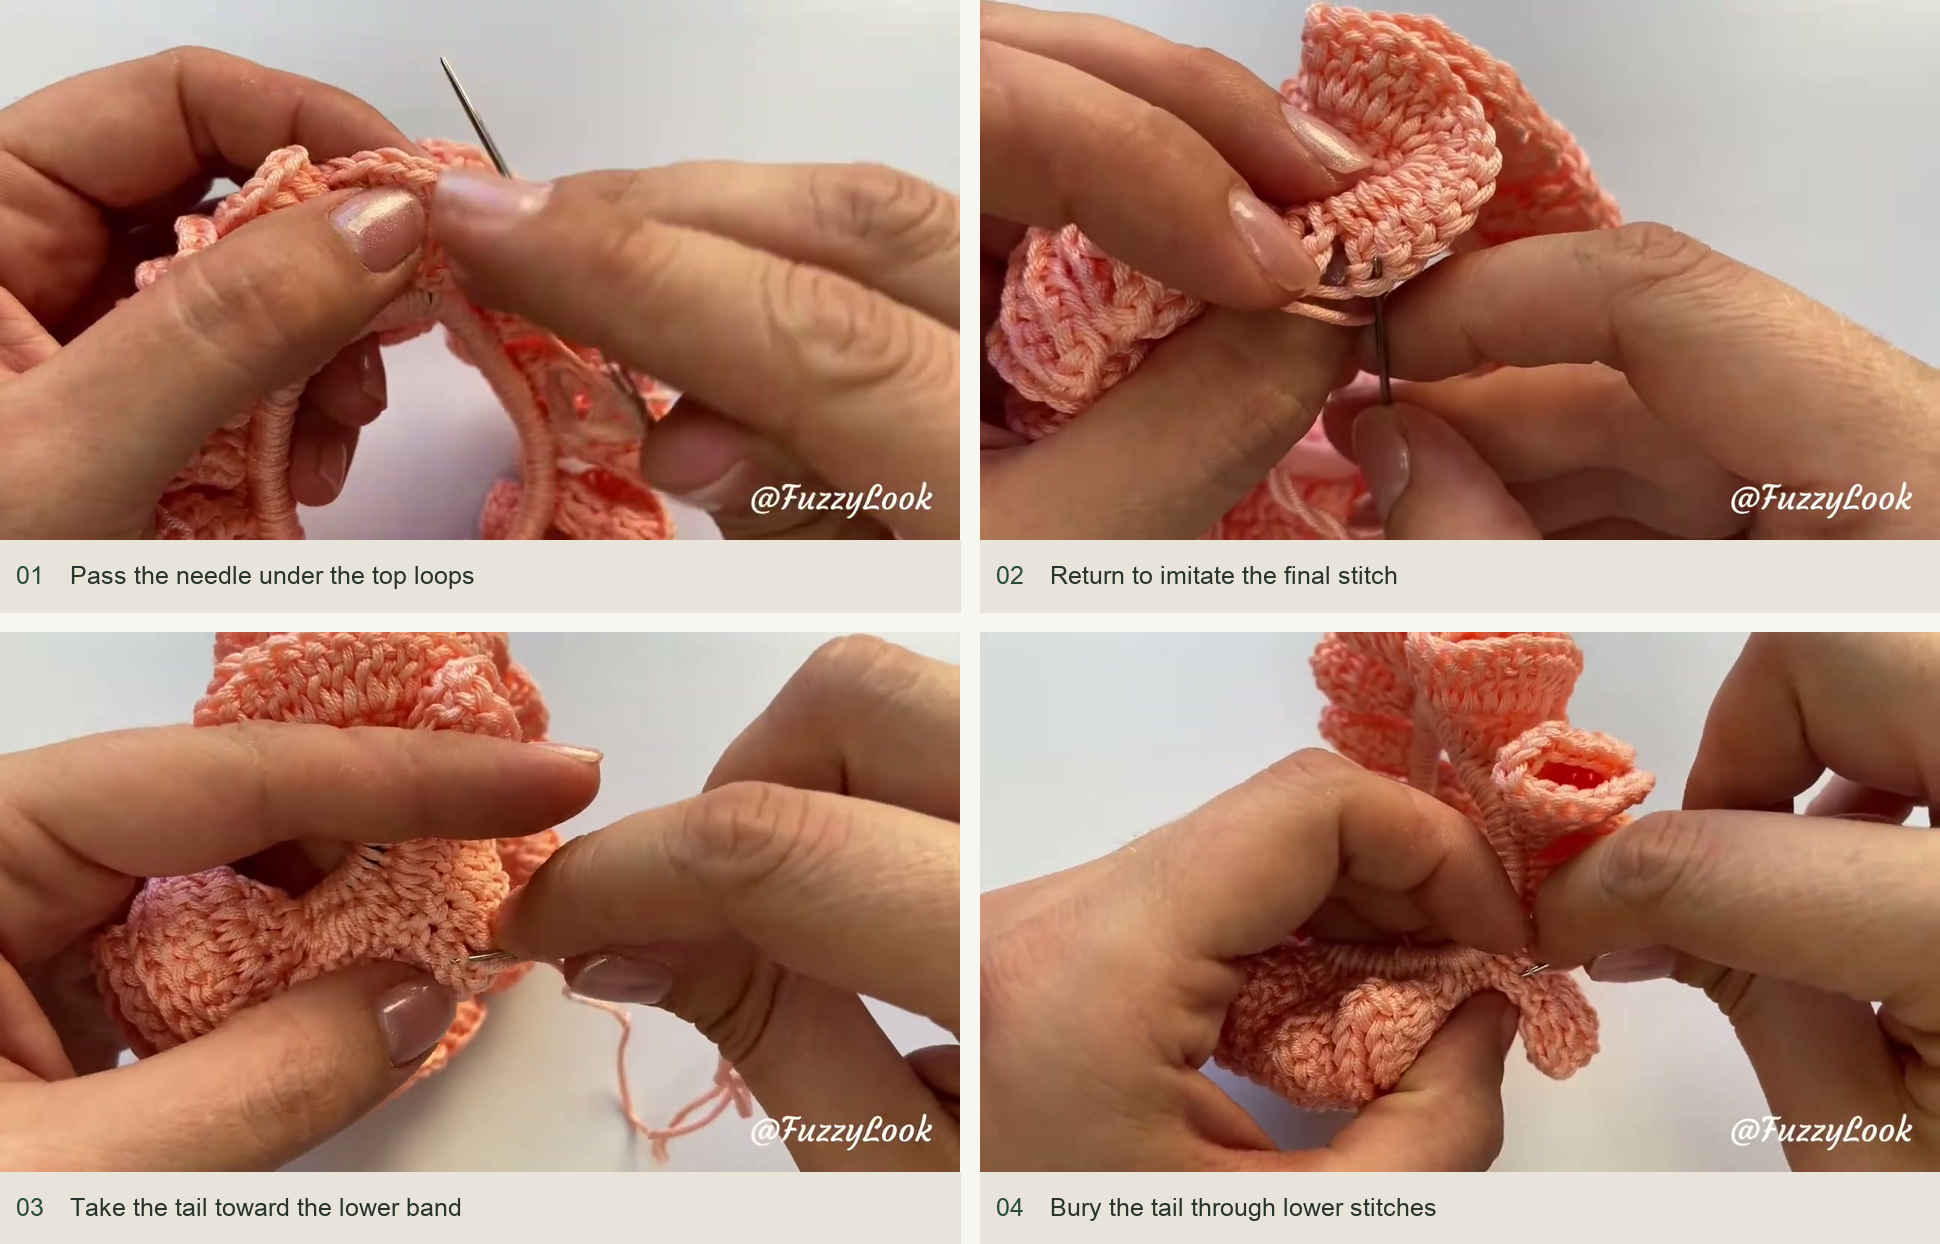
Cut the yarn with a useful tail and draw it through. Thread the needle and imitate a top stitch across the join: pass under the appropriate neighboring top loops, then return to the point where the tail emerged. Adjust until this false stitch matches the surrounding loops.
Weave the tail down through the crochet toward the lower band. Keep the stitching relaxed enough for the elastic to stretch. Olga secures the tail and hides it farther through the stitches; whichever direction you weave, inspect the front so the tail does not form a visible stripe across a ruffle.
Arrange the waves and test the stretch
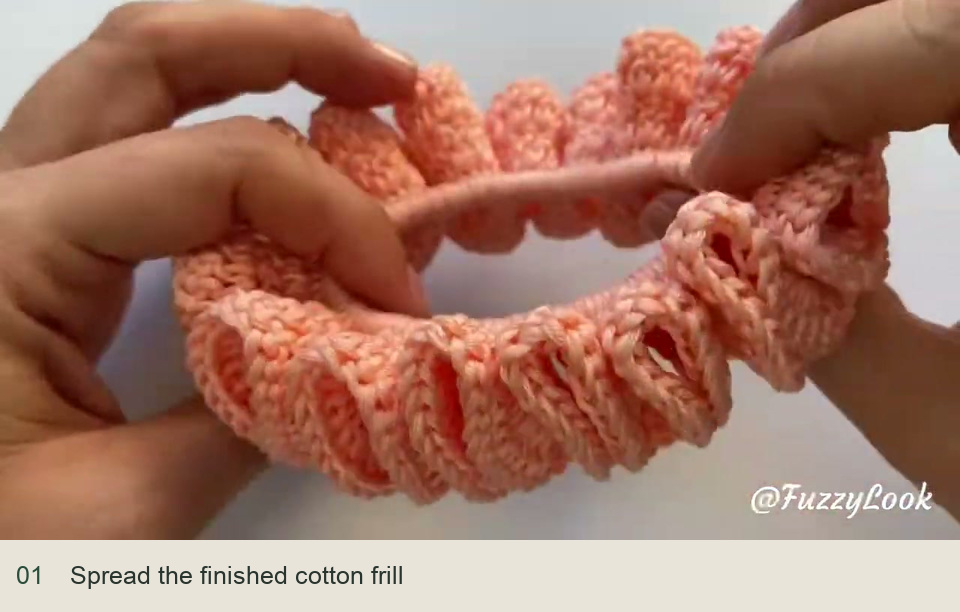
Spread the folds with your fingers so the fullness is distributed all the way around. If your yarn allows damp shaping or gentle steam, follow its care instructions and keep any heat away from the elastic. The accessory should not need a hard crease or a heavily pressed edge.
Stretch and release the finished band again. If the crochet restricts it, check for a finishing tail pulled too tight around the inner circumference. If bare elastic appears, the foundation needed more coverage. A wider hook or heavier yarn changes the frill’s size; it does not remove the need for a sound, fully covered elastic underneath.
Inspired by FuzzyLook’s video tutorial.
Save this pattern for later
Pin it to one of your boards so it’s ready when you have a free evening and the right yarn.