A crochet scrunchie can have a bold edge without a complicated stitch pattern. This version combines a charcoal foundation, black ruffled fabric, and a red-and-black final round. Single crochet does nearly all the work; the volume comes from two carefully placed increase rounds.
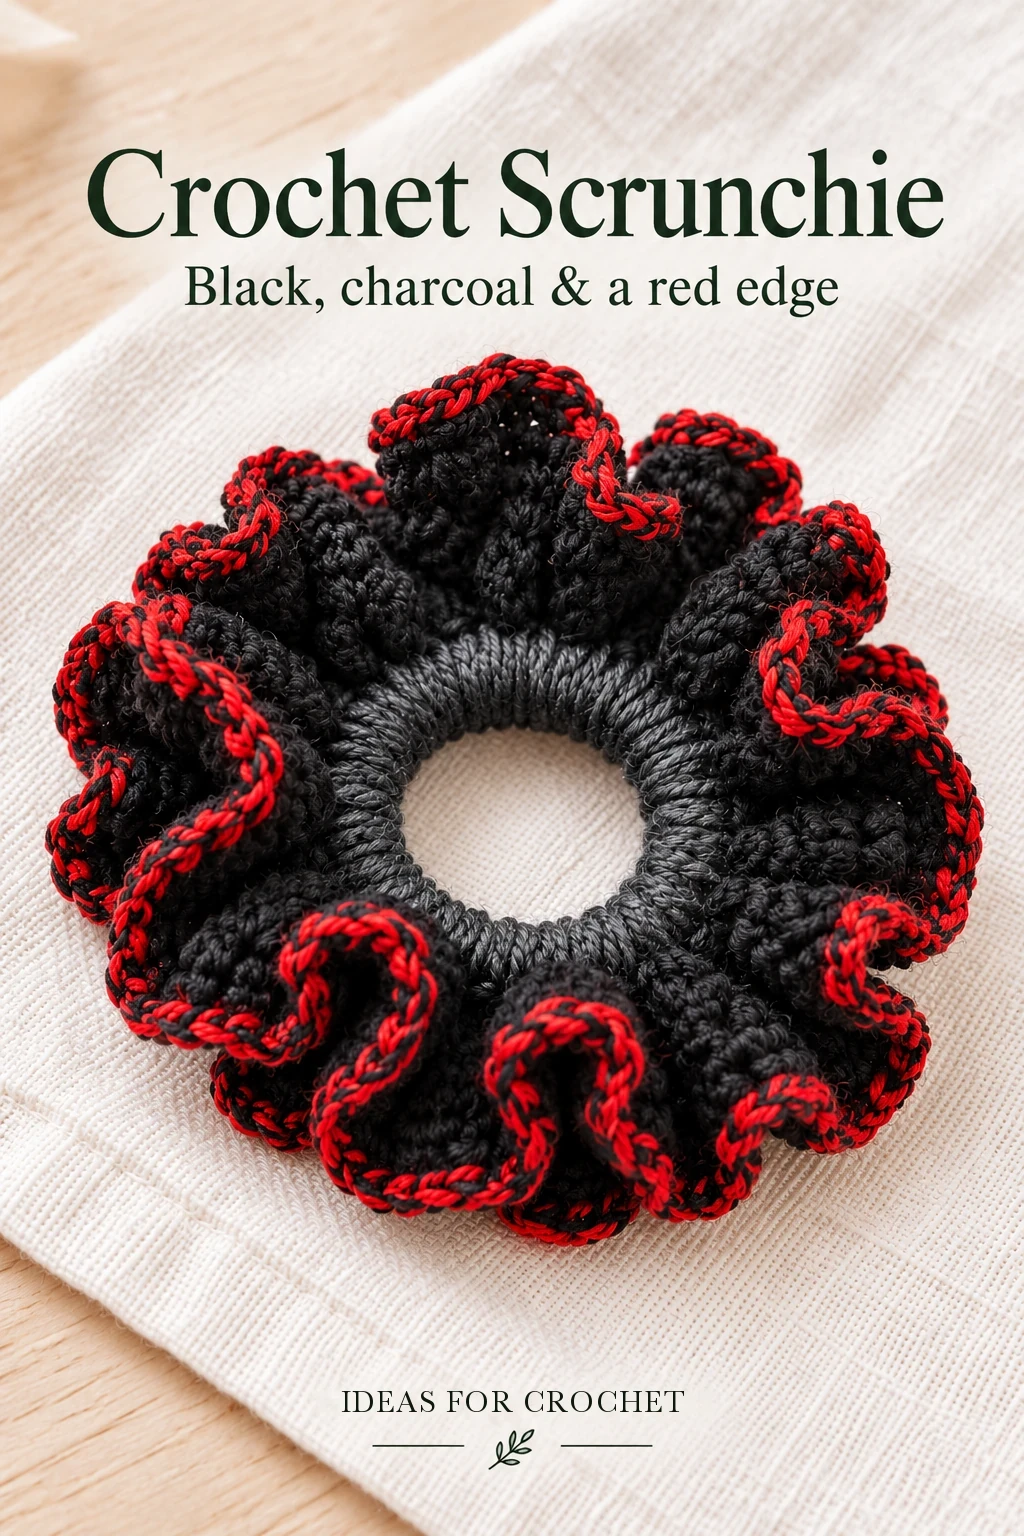
Combining leftover yarns with different textures gives this simple construction a distinctive finish. Keep the working method consistent even if your yarn colors change.
Gather compatible yarns and a firm elastic
The black yarn in the lesson is described as a cotton-acrylic blend; the gray leftover is a little thicker, and the red accent is cotton. The description lists approximately 30 m of yarn among the supplies, but the amount you need depends on the elastic, yarn thickness, and number of foundation stitches. Set aside enough of the accent color to finish the entire circumference.
The creator specifically chooses a firm elastic because the added crochet has weight. Check the band’s join and recovery before covering it. A thin, tired elastic may stretch under the fabric and hold poorly even when the crochet itself looks attractive.
Establish a covered foundation
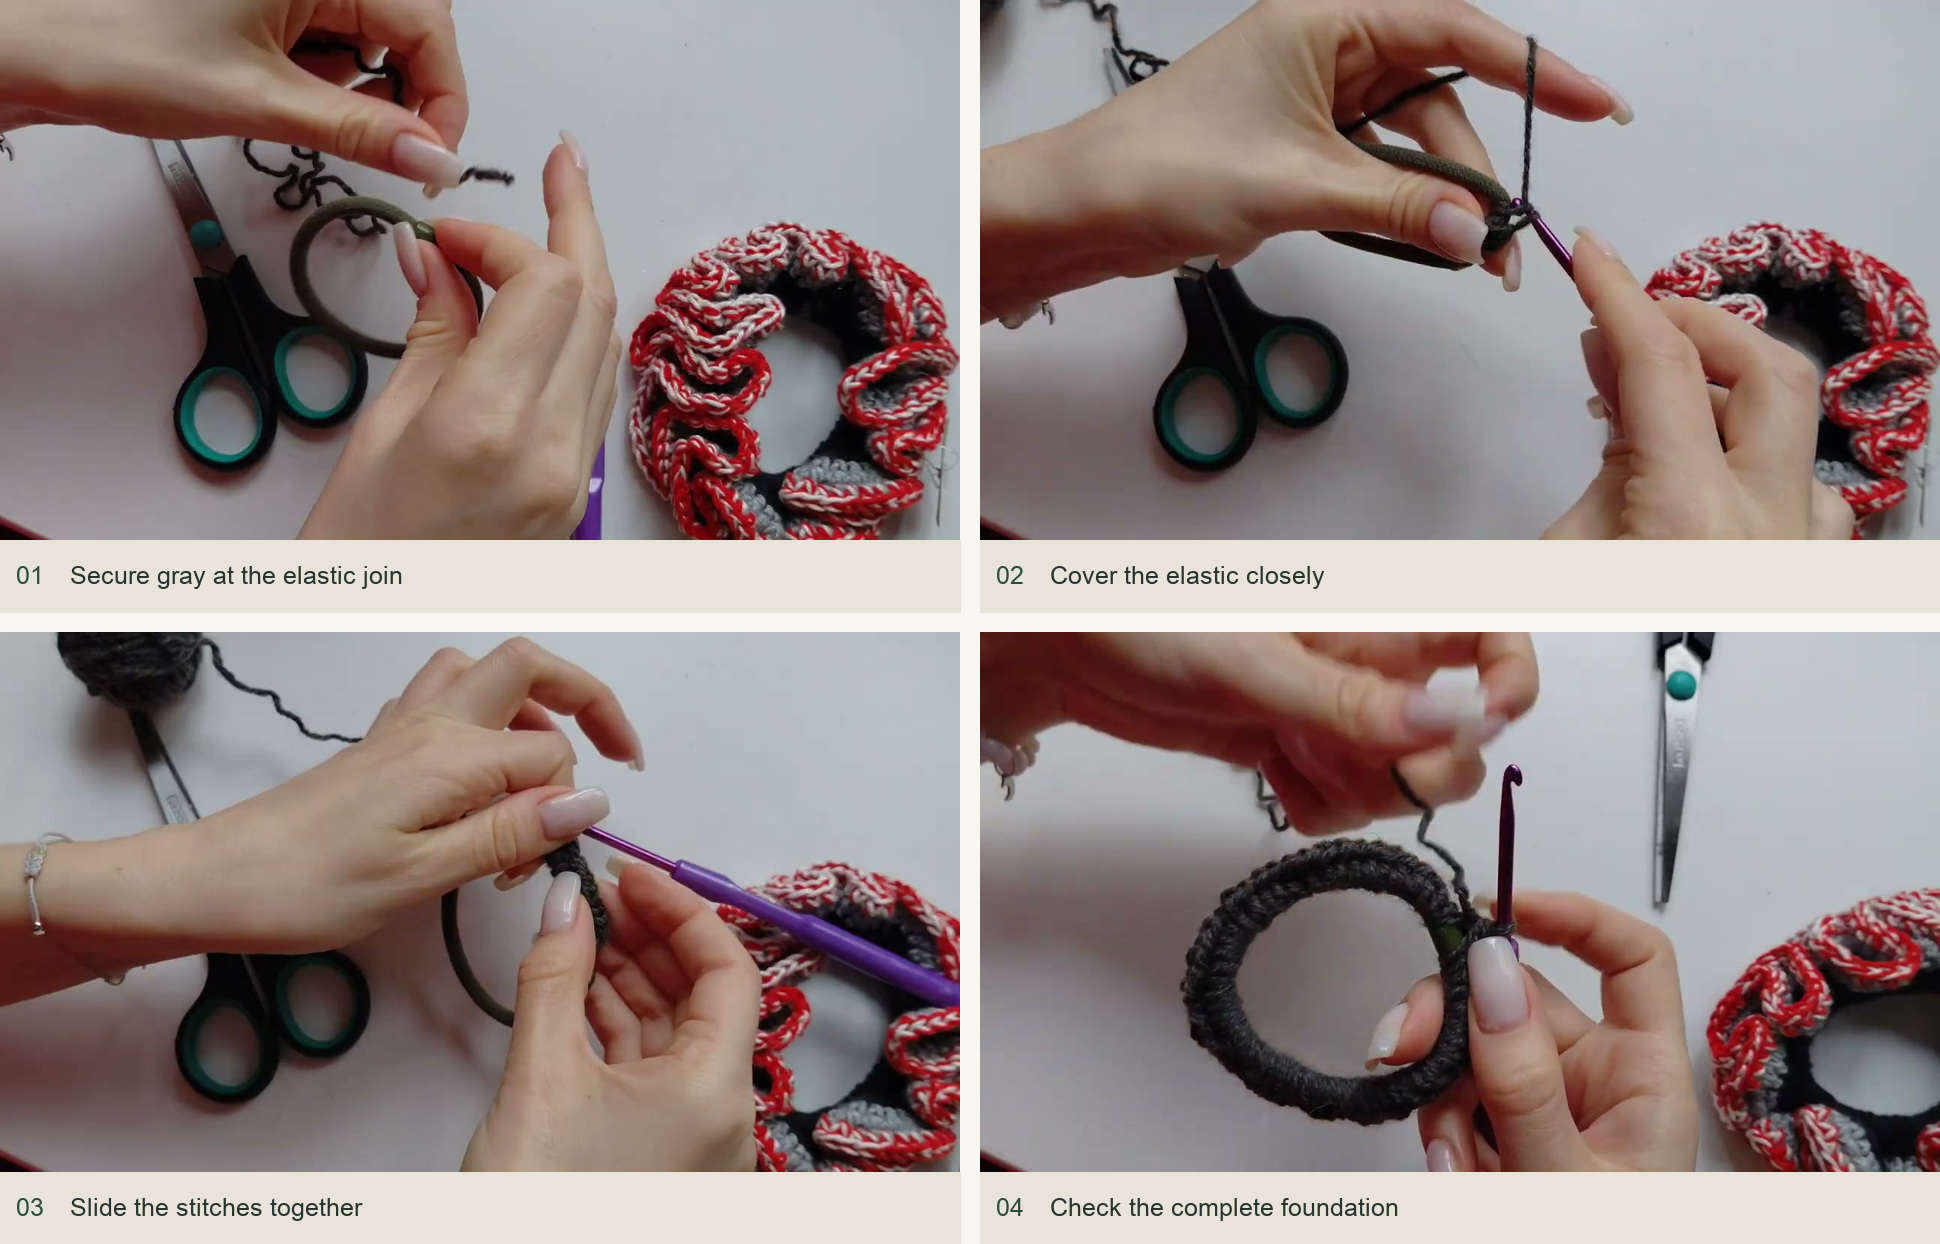
Secure the gray yarn at the elastic’s join, leaving a tail to hide. Work close stitches around the band, passing the hook through the center so the yarn encircles the elastic. Slide completed stitches together as necessary and continue until the elastic is densely covered.
The foundation count is chosen by coverage rather than a prescribed number. More stitches create a fuller ruffle, but they still need to move around the band without becoming a hard mass. Stretch the elastic gently and look at the covering while extended; a relaxed band can conceal gaps that appear only in use.
Identify the first stitch before moving into the next round. A marker can help distinguish it from the bridge near the elastic’s join. The creator calls attention to this area because it must be included rather than leaving an unworked gap in the circle.
Follow the six-round color plan
| Round | Yarn | Action |
|---|---|---|
| 1 | Gray | Cover the elastic densely |
| 2 | Gray | 2 sc in each foundation stitch |
| 3 | Black | 1 sc in every stitch |
| 4 | Black | 2 sc in every stitch |
| 5 | Black | 1 sc in every stitch |
| 6 | Black and red held together | 1 sc in every stitch |
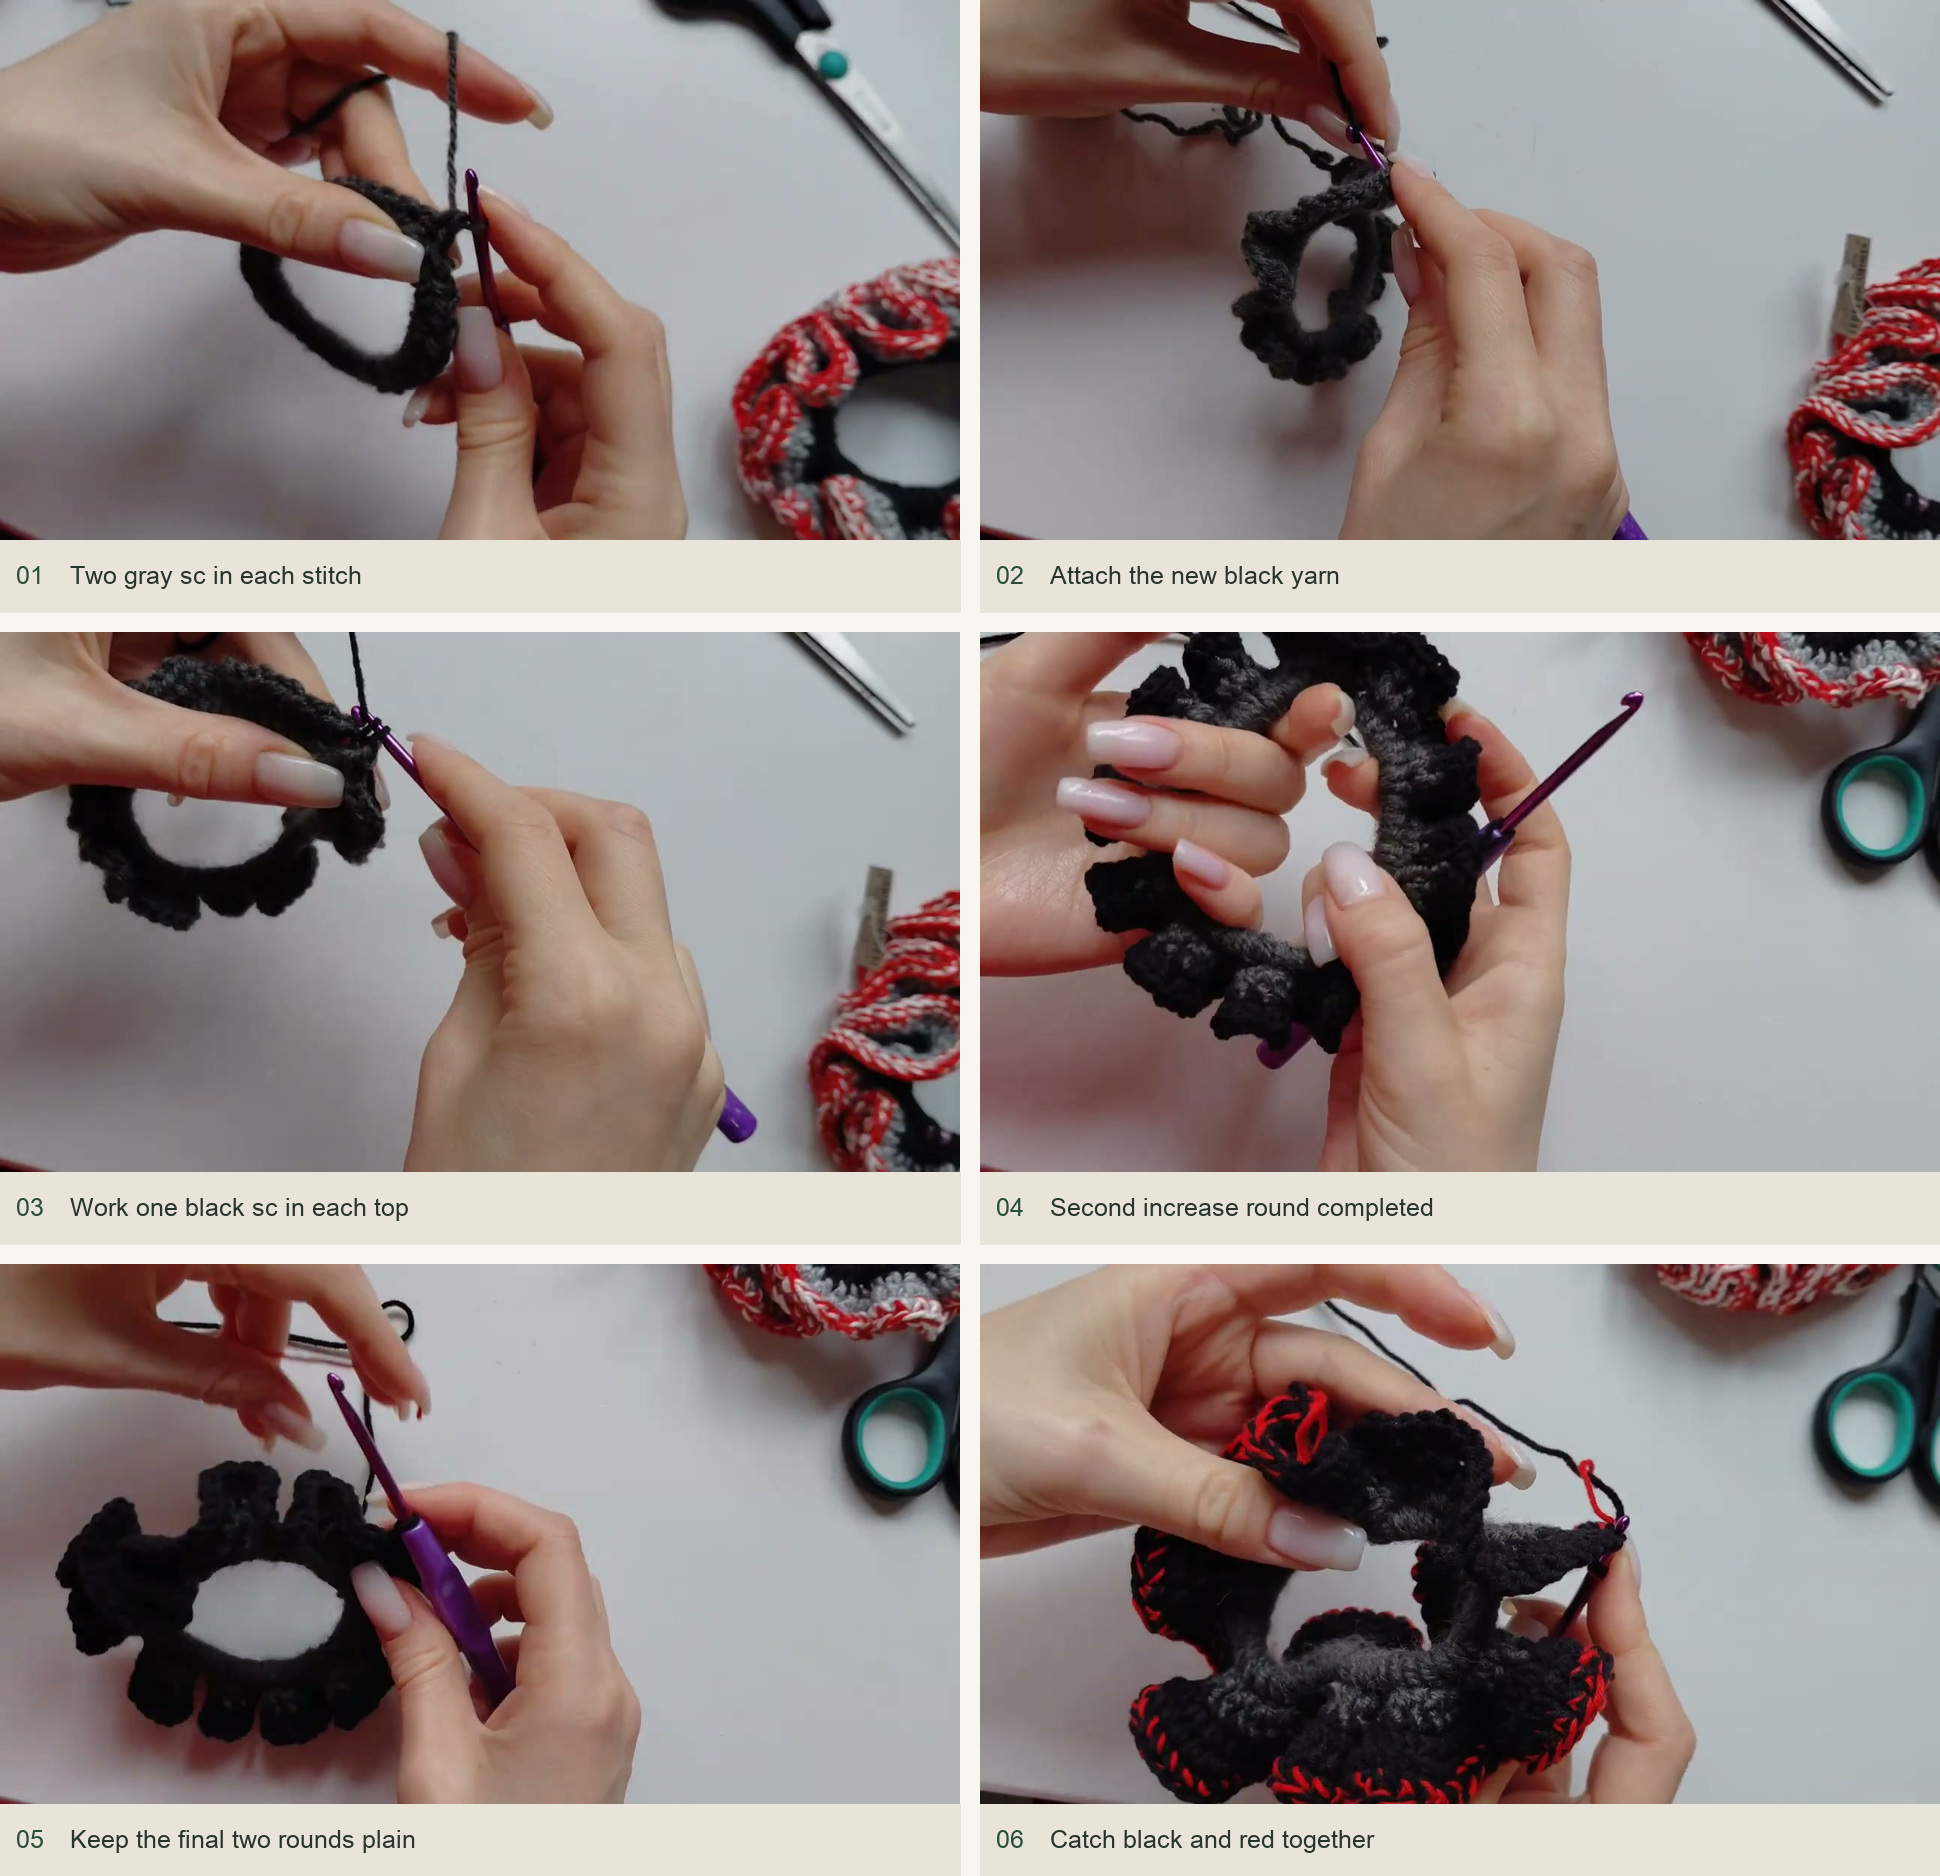
- Double the foundation count. In gray, work 2 sc into each stitch. The outer edge begins to develop fullness. Work both stitches of an increase before moving into the next top loop.
- Change to black and work evenly. Hold the new tail at the back, secure the color change, and make one sc in each stitch around. Do not add extra stitches just because the gray fabric begins to fold.
- Increase once more. Work 2 sc into every black stitch. This second doubling creates the pronounced ruffle. Spread the folds to find any stitch tops hidden inside a valley.
- Settle the ruffle. Work another plain black sc round, then a plain round with black and red held together. Catch both working strands with the hook on every stitch so the red accent stays continuous.
Close the edge and hide the color changes
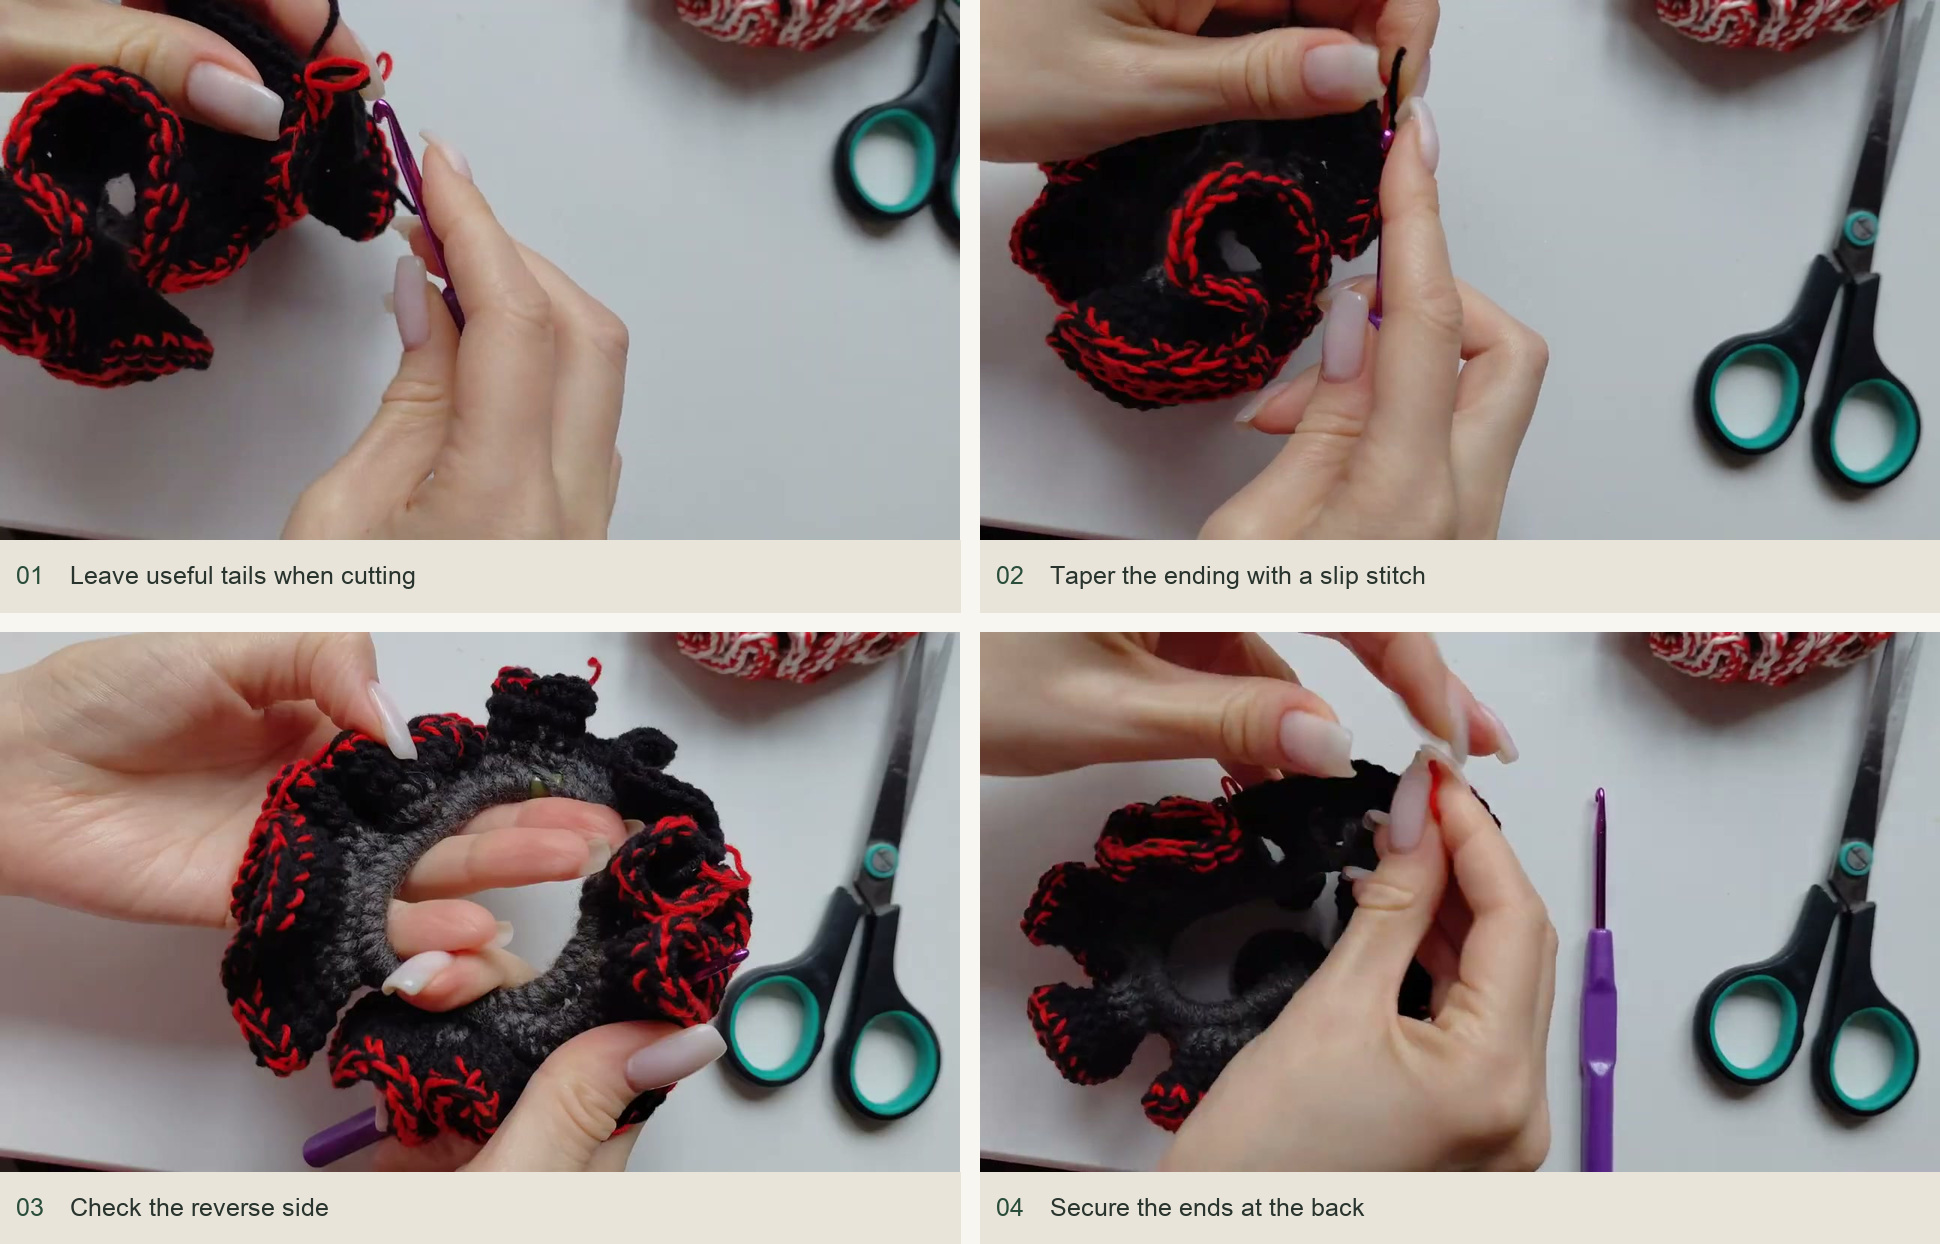
At the end, use a sl st to let the last stitch taper toward the beginning instead of leaving an abrupt step. Cut the working yarns with enough length to secure them, draw them through, and hide the tails through the back of nearby stitches. Avoid tightening a tail across the full circumference of the elastic.
The lesson secures the ends at the back and notes textile glue as an optional extra. A neat woven finish keeps the tails contained without leaving a hard visible spot along the edge. Check the wrong side before trimming; a dark tail can be difficult to see against black yarn.
Check fullness, stretch, and the red line
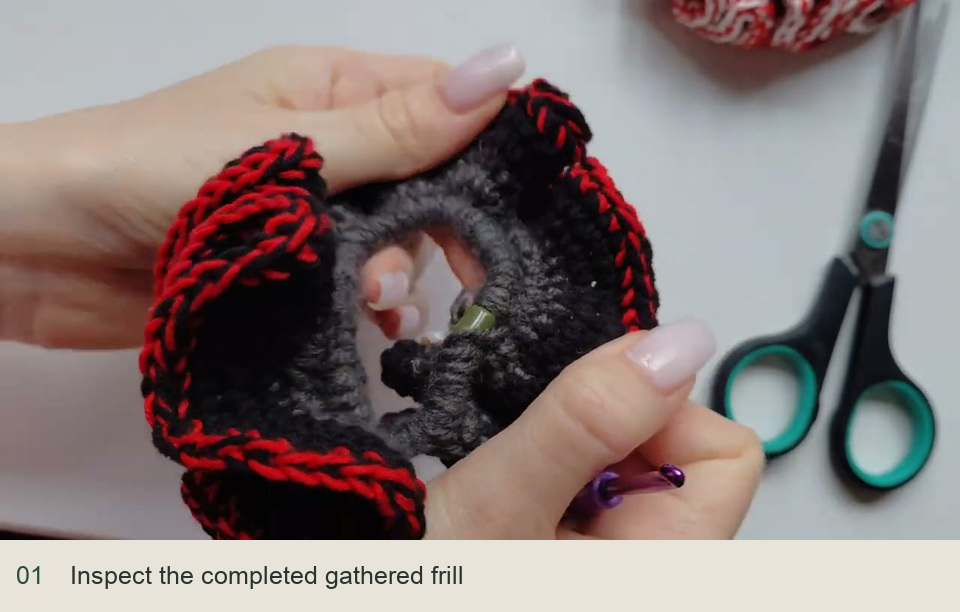
Open the folds with your fingers and redistribute them around the band. The scrunchie should have plenty of fabric outside the elastic, while the central ring stays flexible. If it feels unusually stiff, inspect the foundation tension and the finishing tails before blaming the ruffle itself.
Follow the red strand around the perimeter. If one section looks black only, check whether a stitch caught just one of the two strands. If the edge pulls inward, make sure the final round contains one sc per stitch rather than accidental decreases hidden in the folds. Consistent coverage and a continuous accent are more useful checks than copying an unstated finished diameter.
Inspired by Lolita Shamro ’s video tutorial.
Save this pattern for later
Pin it to one of your boards so it’s ready when you have a free evening and the right yarn.