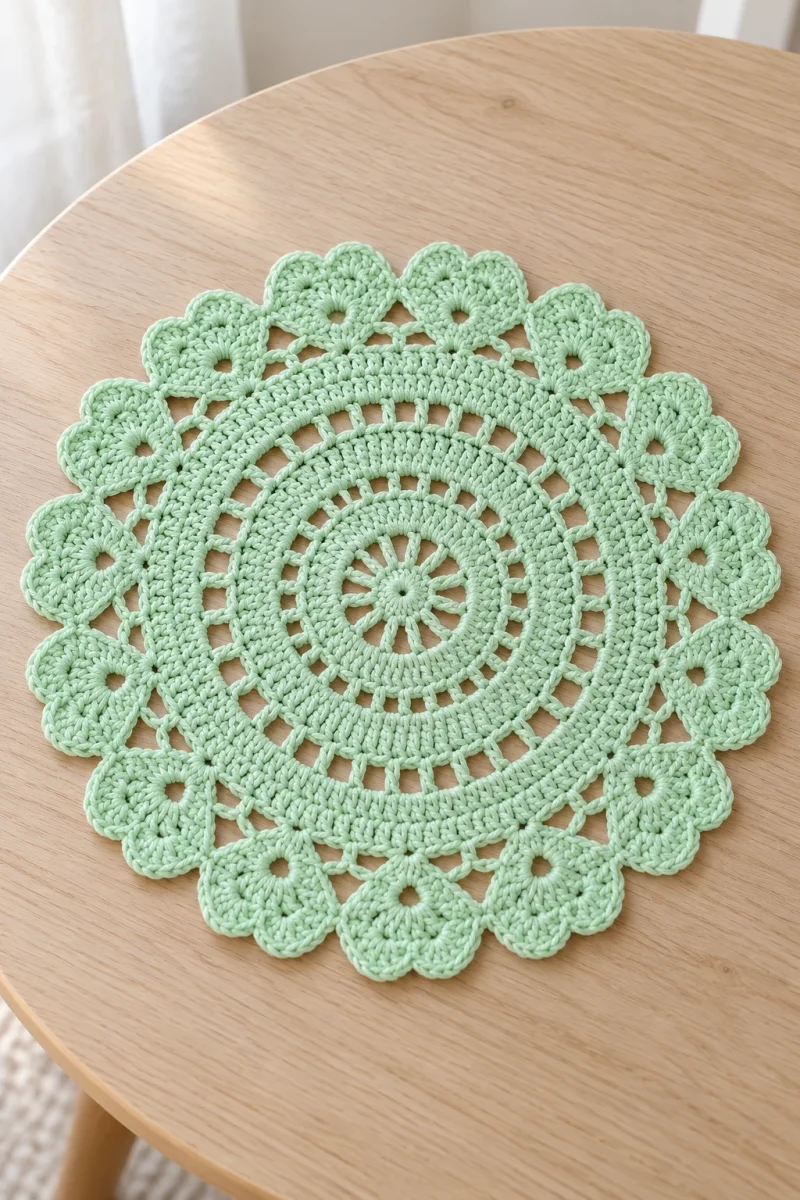
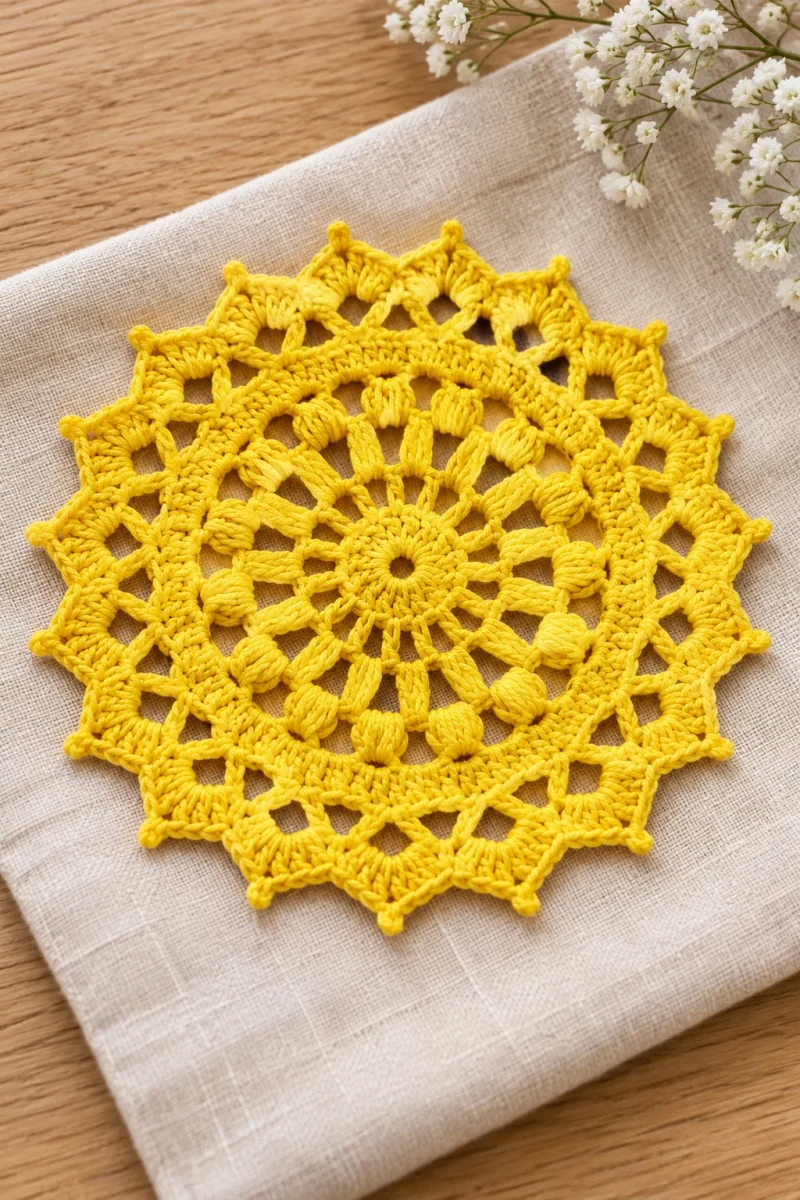
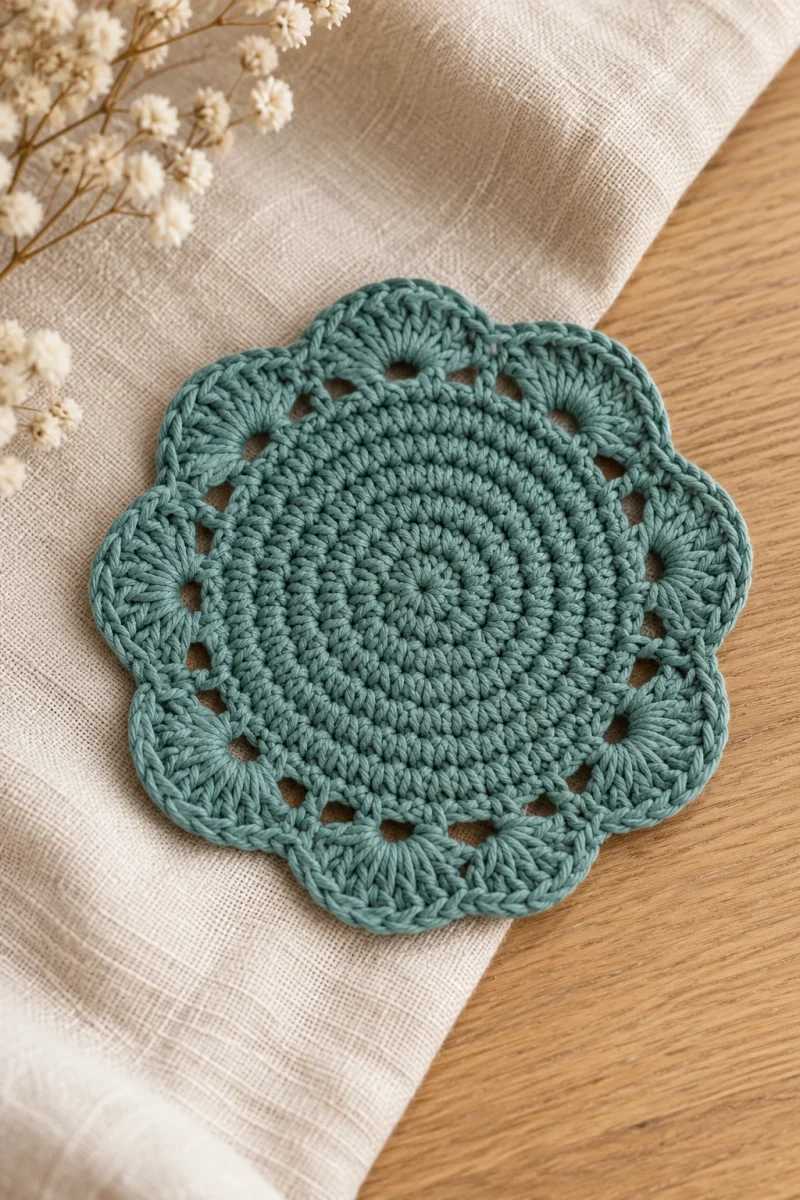
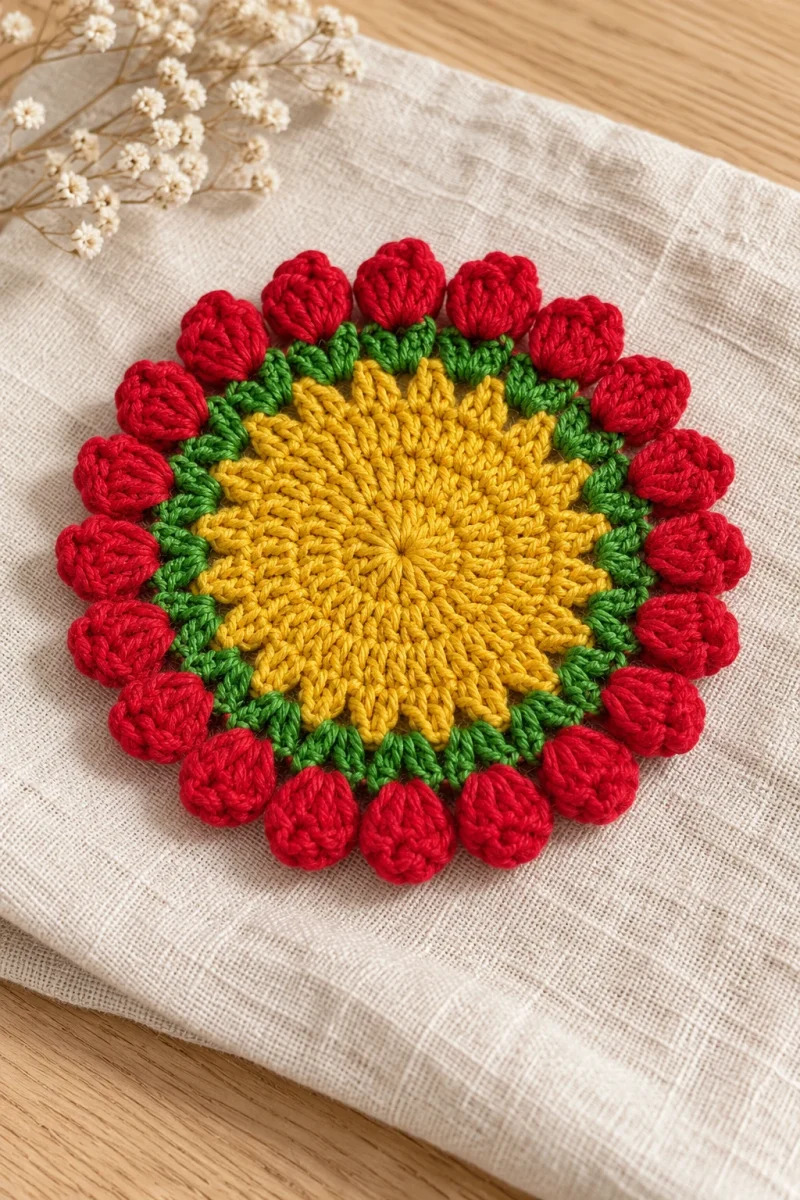
A ring of tiny red roses gives this crochet coaster its cheerful garden look. The central disk is mustard yellow, followed by green shell stitches and a red folded-flower edge. Each rose is crocheted directly into the border, so there is no pile of miniature flowers to sew on separately.
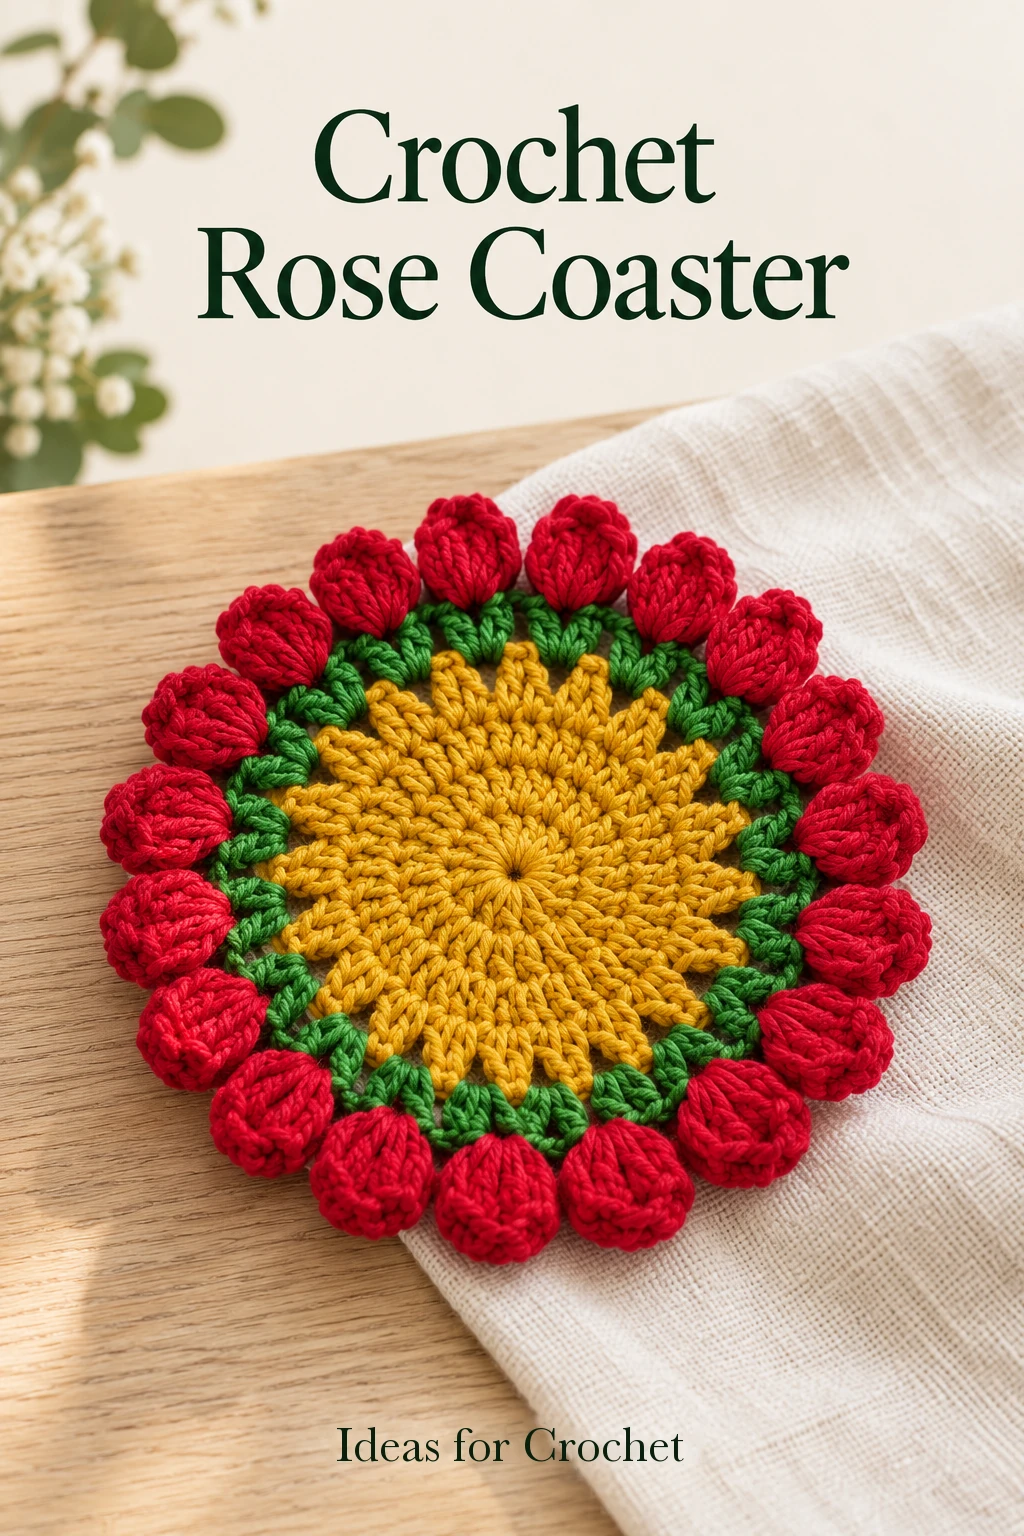
The creator’s finished coaster is about 14–15 cm across with a 3 mm hook. The center could also be ivory or beige, but keeping the green and red border makes its flower construction easy to read. This is a good project to work slowly through the first rose, then repeat the same compact movement around the rim.
Materials and abbreviations
- Three coordinating yarn colors of similar weight: center color, green and red. The creator uses Himalaya yarn; the precise line and amount are not specified.
- 3 mm crochet hook.
- Scissors and a yarn needle.
US terms: ch = chain, dc = double crochet, sc = single crochet and sl st = slip stitch. A starting ch 3 counts as one dc. The rose edging includes turns within each motif, even though the main disk is worked in joined rounds. Keep the right and wrong sides in mind as you follow the fold.
Crochet the center and leaf ring
-
Round 1: fourteen double crochets
With the center color, make a ring. Ch 3 and work 13 dc into it for 14 dc in total. Close the center and join to the third chain of the starting ch 3. Check that the first chain column has been included once in the count.
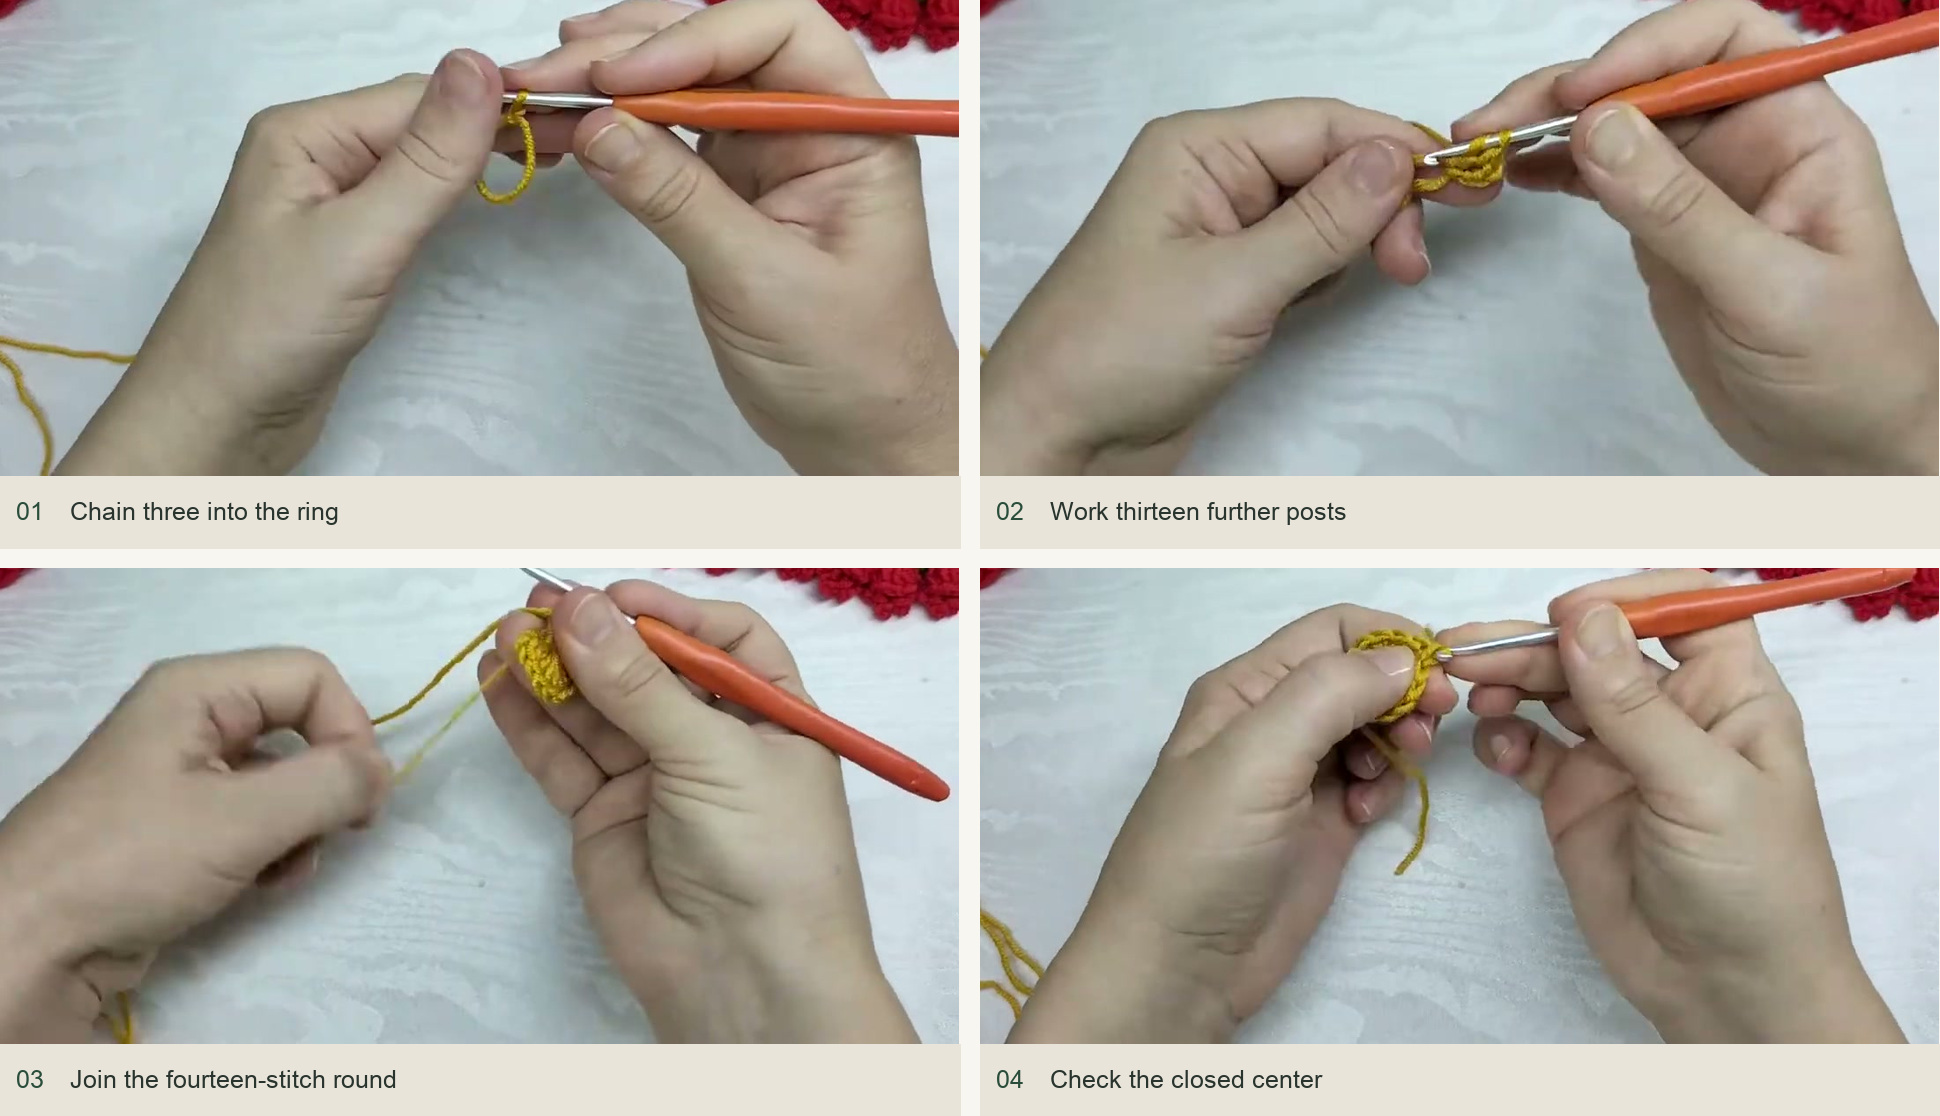
Chain three into the ring → Work thirteen further posts → Join the fourteen-stitch round → Check the closed center. Source: original creator tutorial. -
Round 2: double each stitch
Ch 3 and work a dc into the same joining position to form the first increase. Work two dc in each remaining stitch around. Join to the top of the starting chain. The round has 28 dc. Spread the increases evenly so the circle opens flat.
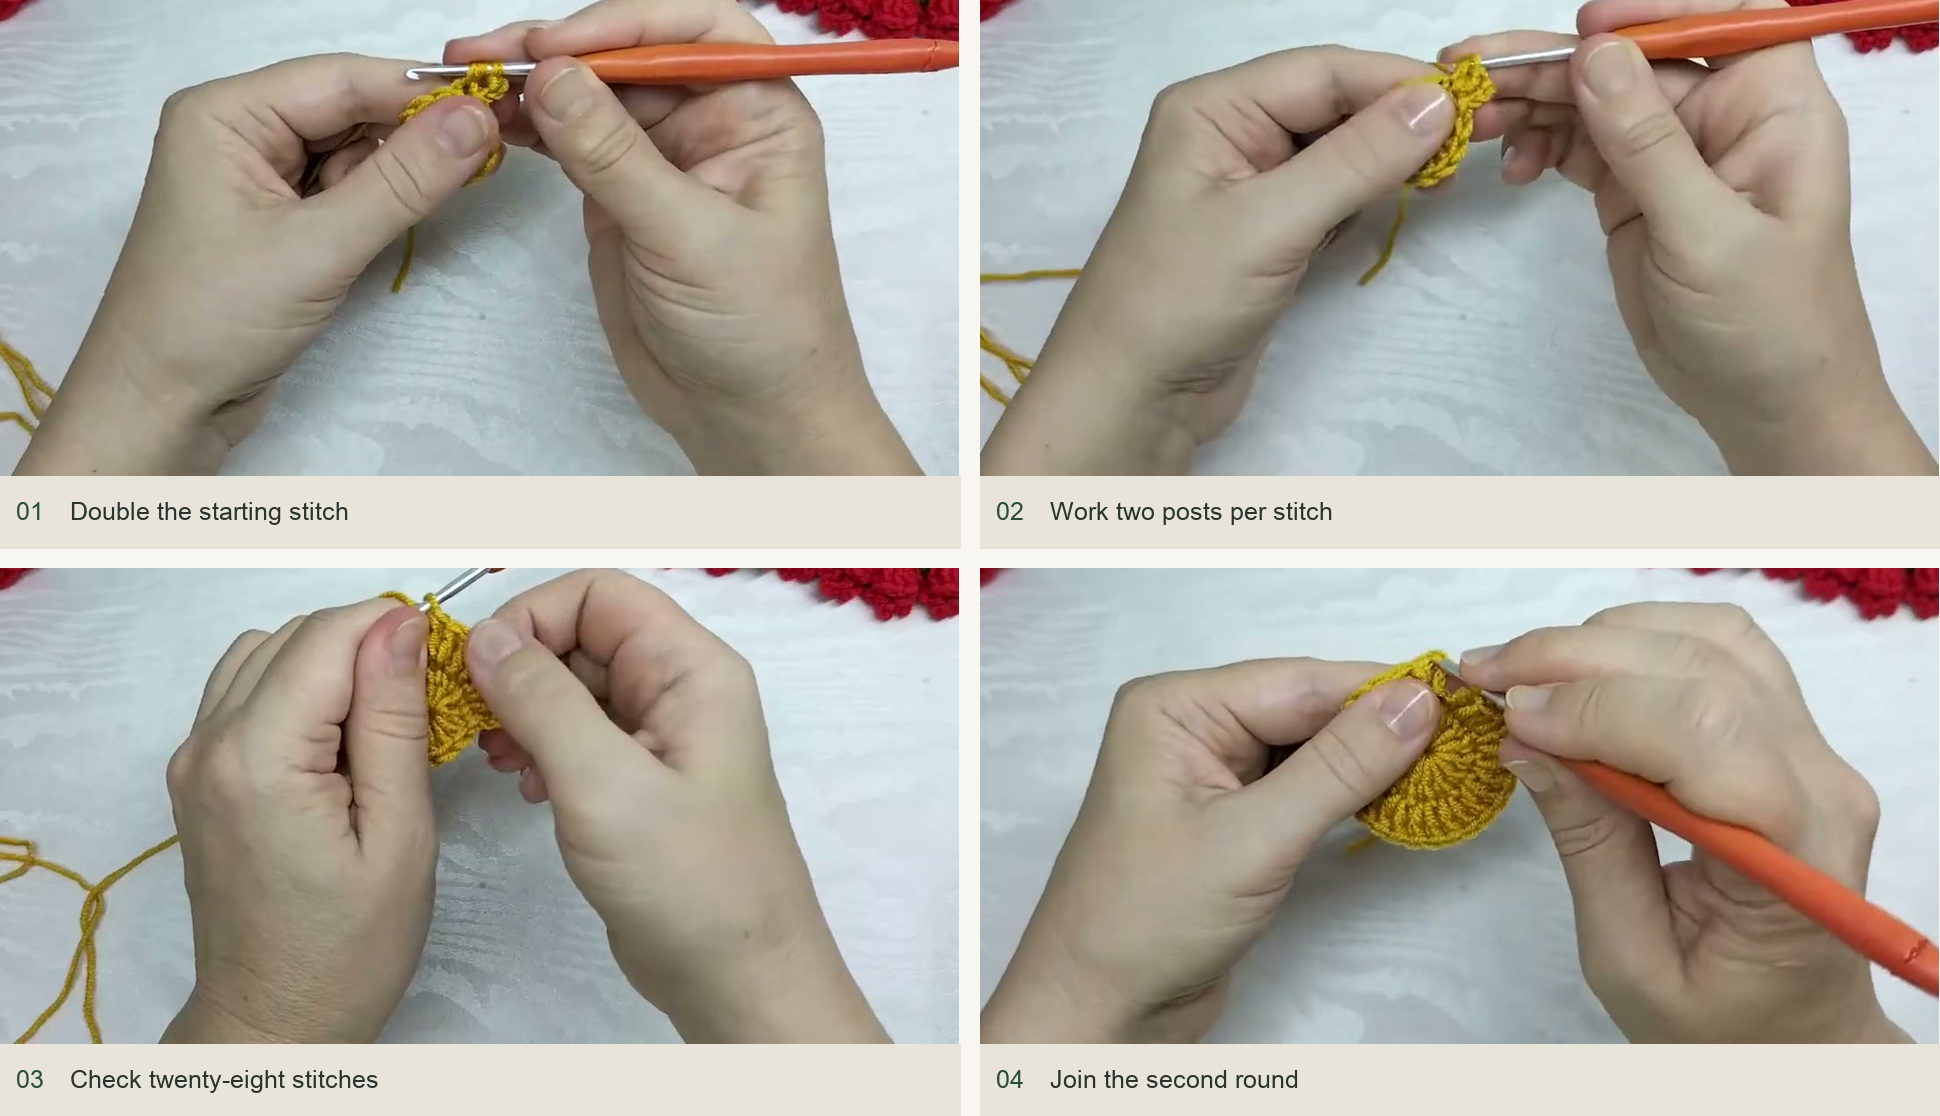
Double the starting stitch → Work two posts per stitch → Check twenty-eight stitches → Join the second round. Source: original creator tutorial. -
Round 3: grow to forty-two stitches
Ch 3 for the first ordinary dc, then work two dc in the next stitch. Continue alternating one dc and two dc around. Join to the starting chain. You should have 42 dc. This count matters for the evenly spaced flower border, so correct it now if necessary.
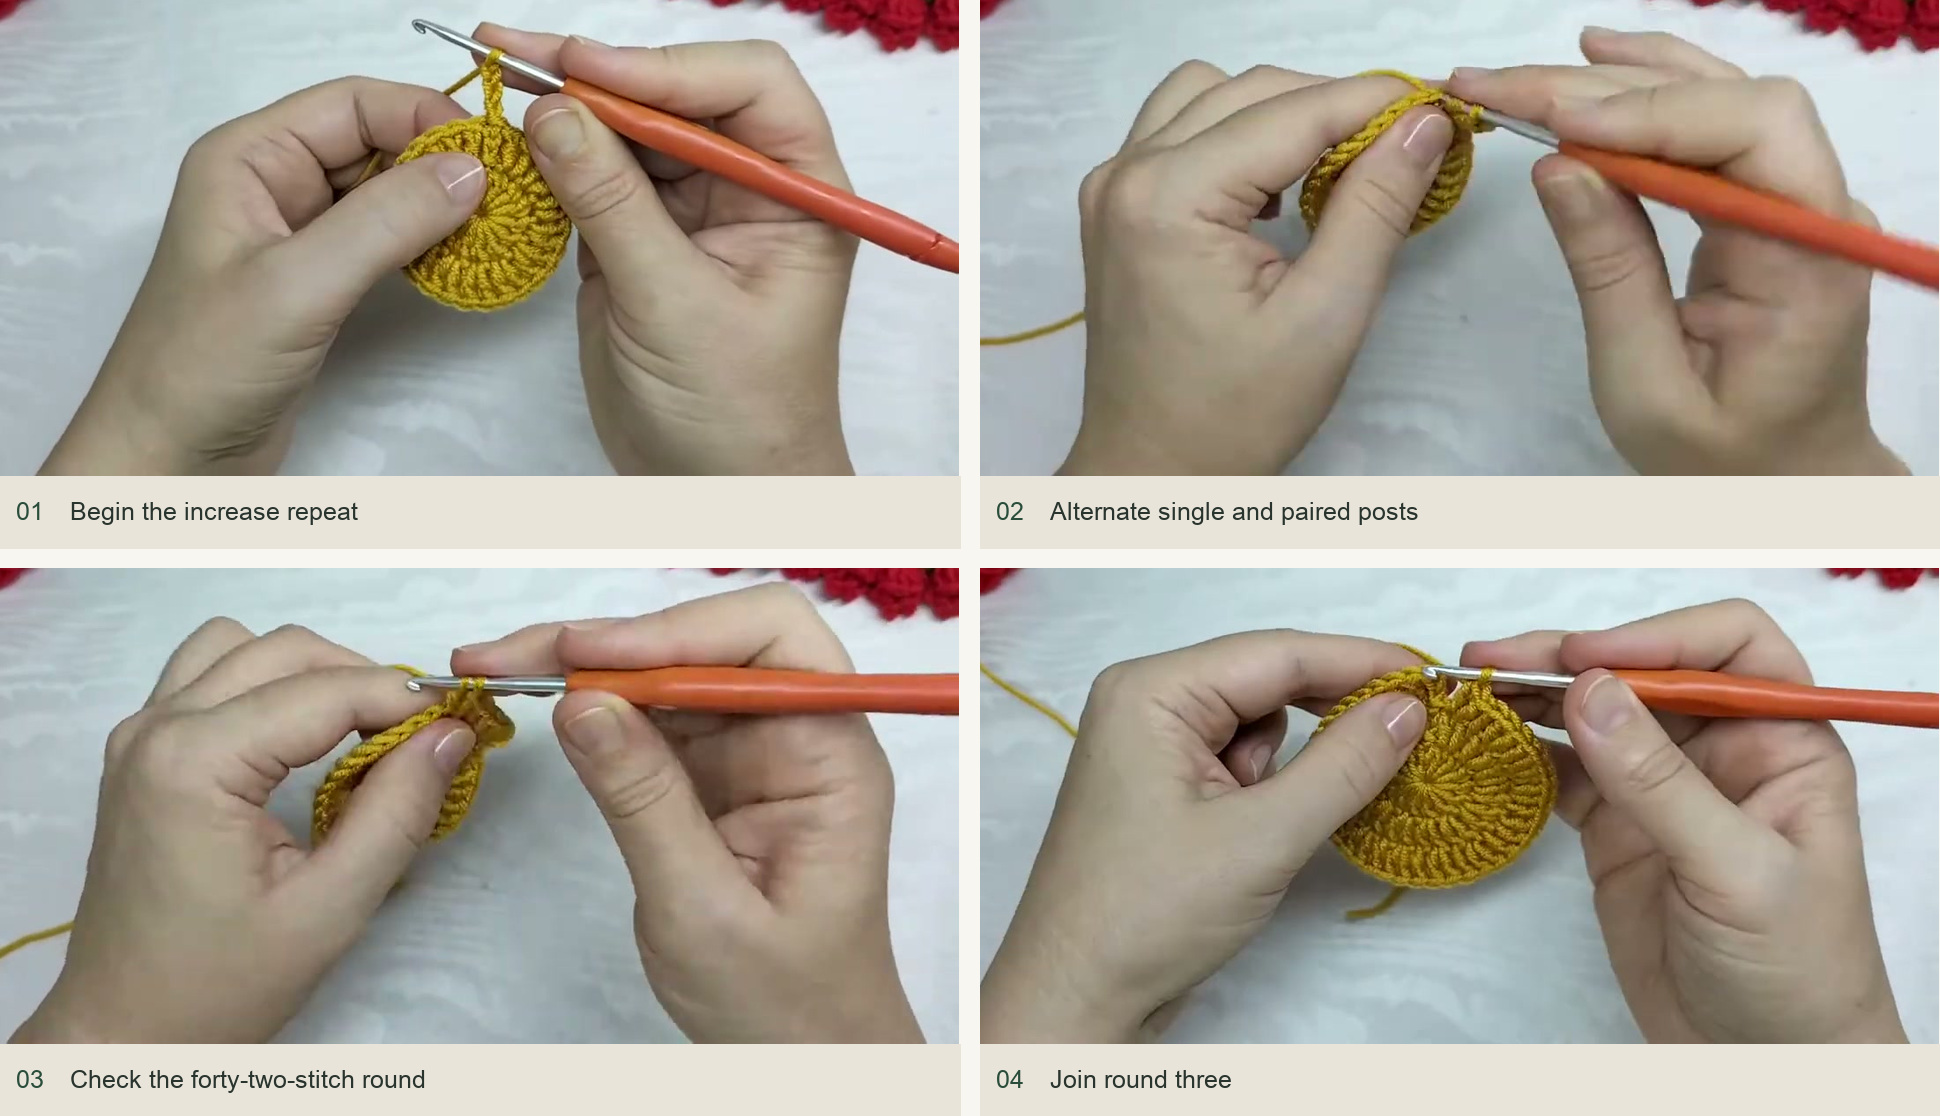
Begin the increase repeat → Alternate single and paired posts → Check the forty-two-stitch round → Join round three. Source: original creator tutorial. -
Round 4: add chain-one spaces
Ch 3, work a dc in the next stitch and ch 1. Repeat one dc in each of the next two stitches, ch 1, around. The 42 dc remain arranged as 21 pairs, separated by 21 ch-1 spaces. Join, slip stitch into the next stitch as demonstrated, cut the center-color yarn and weave the ends securely into the reverse.
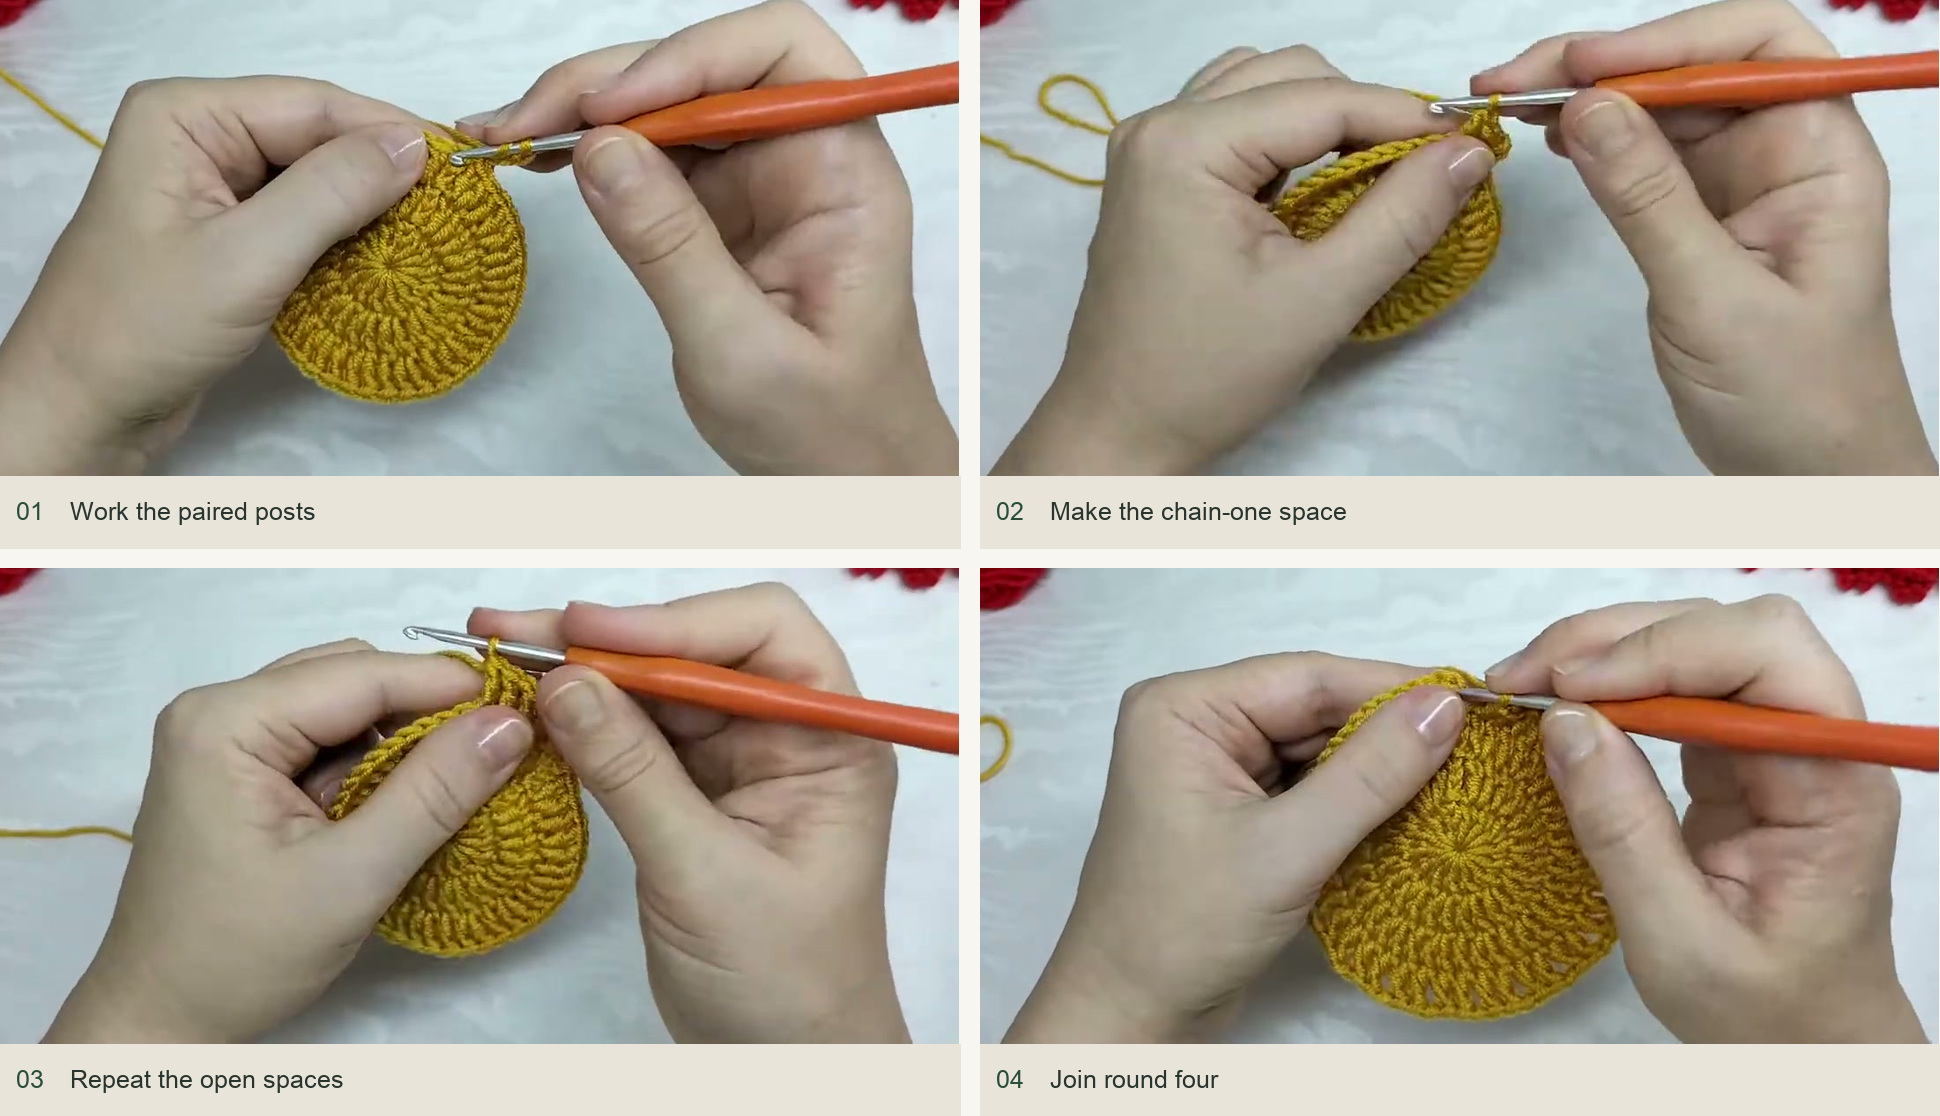
Work the paired posts → Make the chain-one space → Repeat the open spaces → Join round four. Source: original creator tutorial. -
Round 5: make the green shells
Join green yarn in a ch-1 space. Each space receives (2 dc, ch 2, 2 dc). The creator divides the first shell across the beginning and end of the round: ch 3 for its first dc, ch 2 and work two dc, leaving the remaining dc until the round returns to that space. Work complete shells in the other twenty spaces, then add the final dc to the starting space and join.
There are now 21 green shell centers, each with a ch-2 opening. Finish the green yarn and weave in the ends. Keep the joins tucked behind the work so they do not interrupt the red motifs.
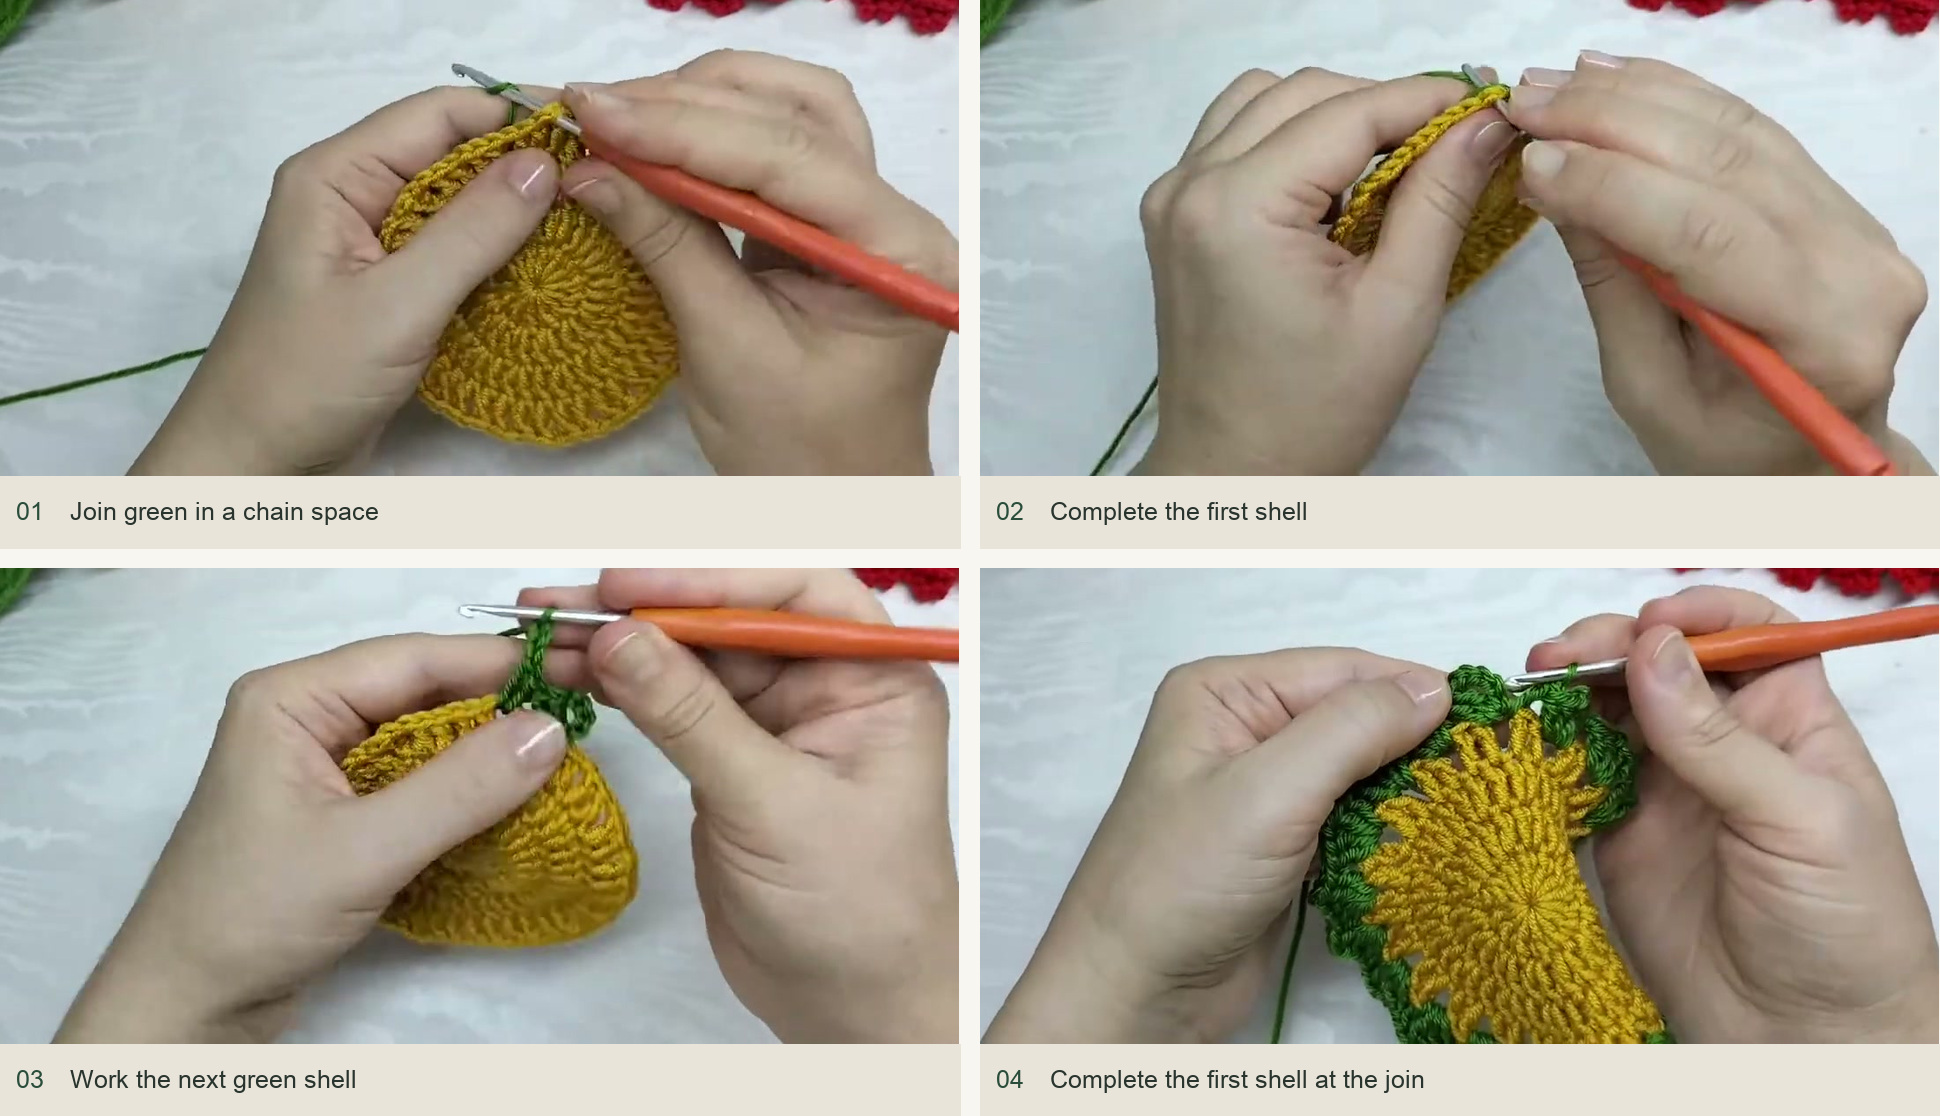
Join green in a chain space → Complete the first shell → Work the next green shell → Complete the first shell at the join. Source: original creator tutorial. -
Begin the first rose in red
Join red between the neighboring green shell posts where there is no chain space. Ch 2. Work six dc into the next green ch-2 center. This fan is the body of the little flower; do not spread it into a flat outer scallop and continue immediately.
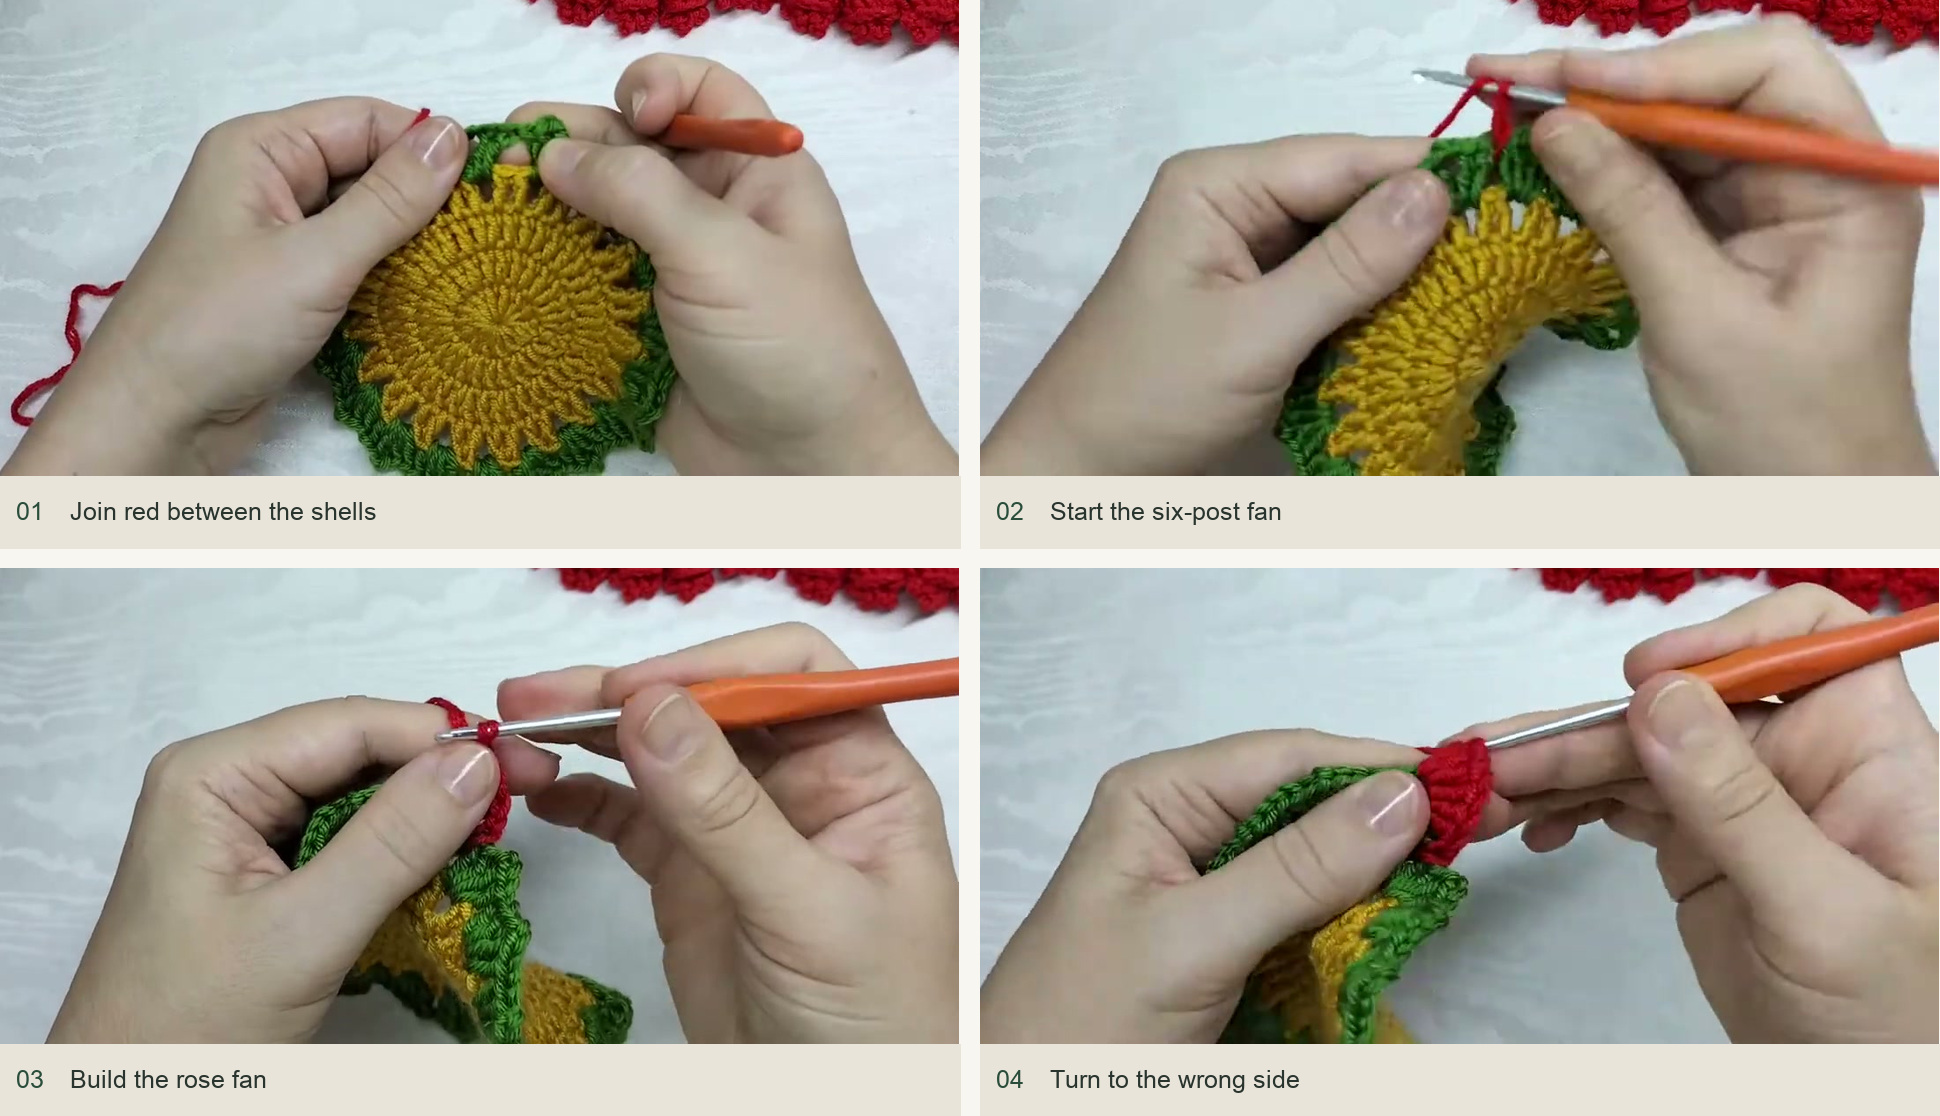
Join red between the shells → Start the six-post fan → Build the rose fan → Turn to the wrong side. Source: original creator tutorial. -
Turn, fold and detail the rose
Turn the work so its wrong side faces you. Slip stitch under the initial ch-2 column of the red motif, pulling the fan into its folded shape. Ch 2 and turn the right side toward you again. Into the little center formed by that fold, work sc, ch 2, sc, ch 2, sc. Together with the initial ch 2, this gives the three tiny chain teeth described in the demonstration.
Ch 2 and slip stitch into the next valley between the green posts, where there is no chain arch. The first rose is complete and attached at both sides. Use the embedded close-up for the first folded center; the direction of that small turn is the main difference between a rose and an ordinary fan border.
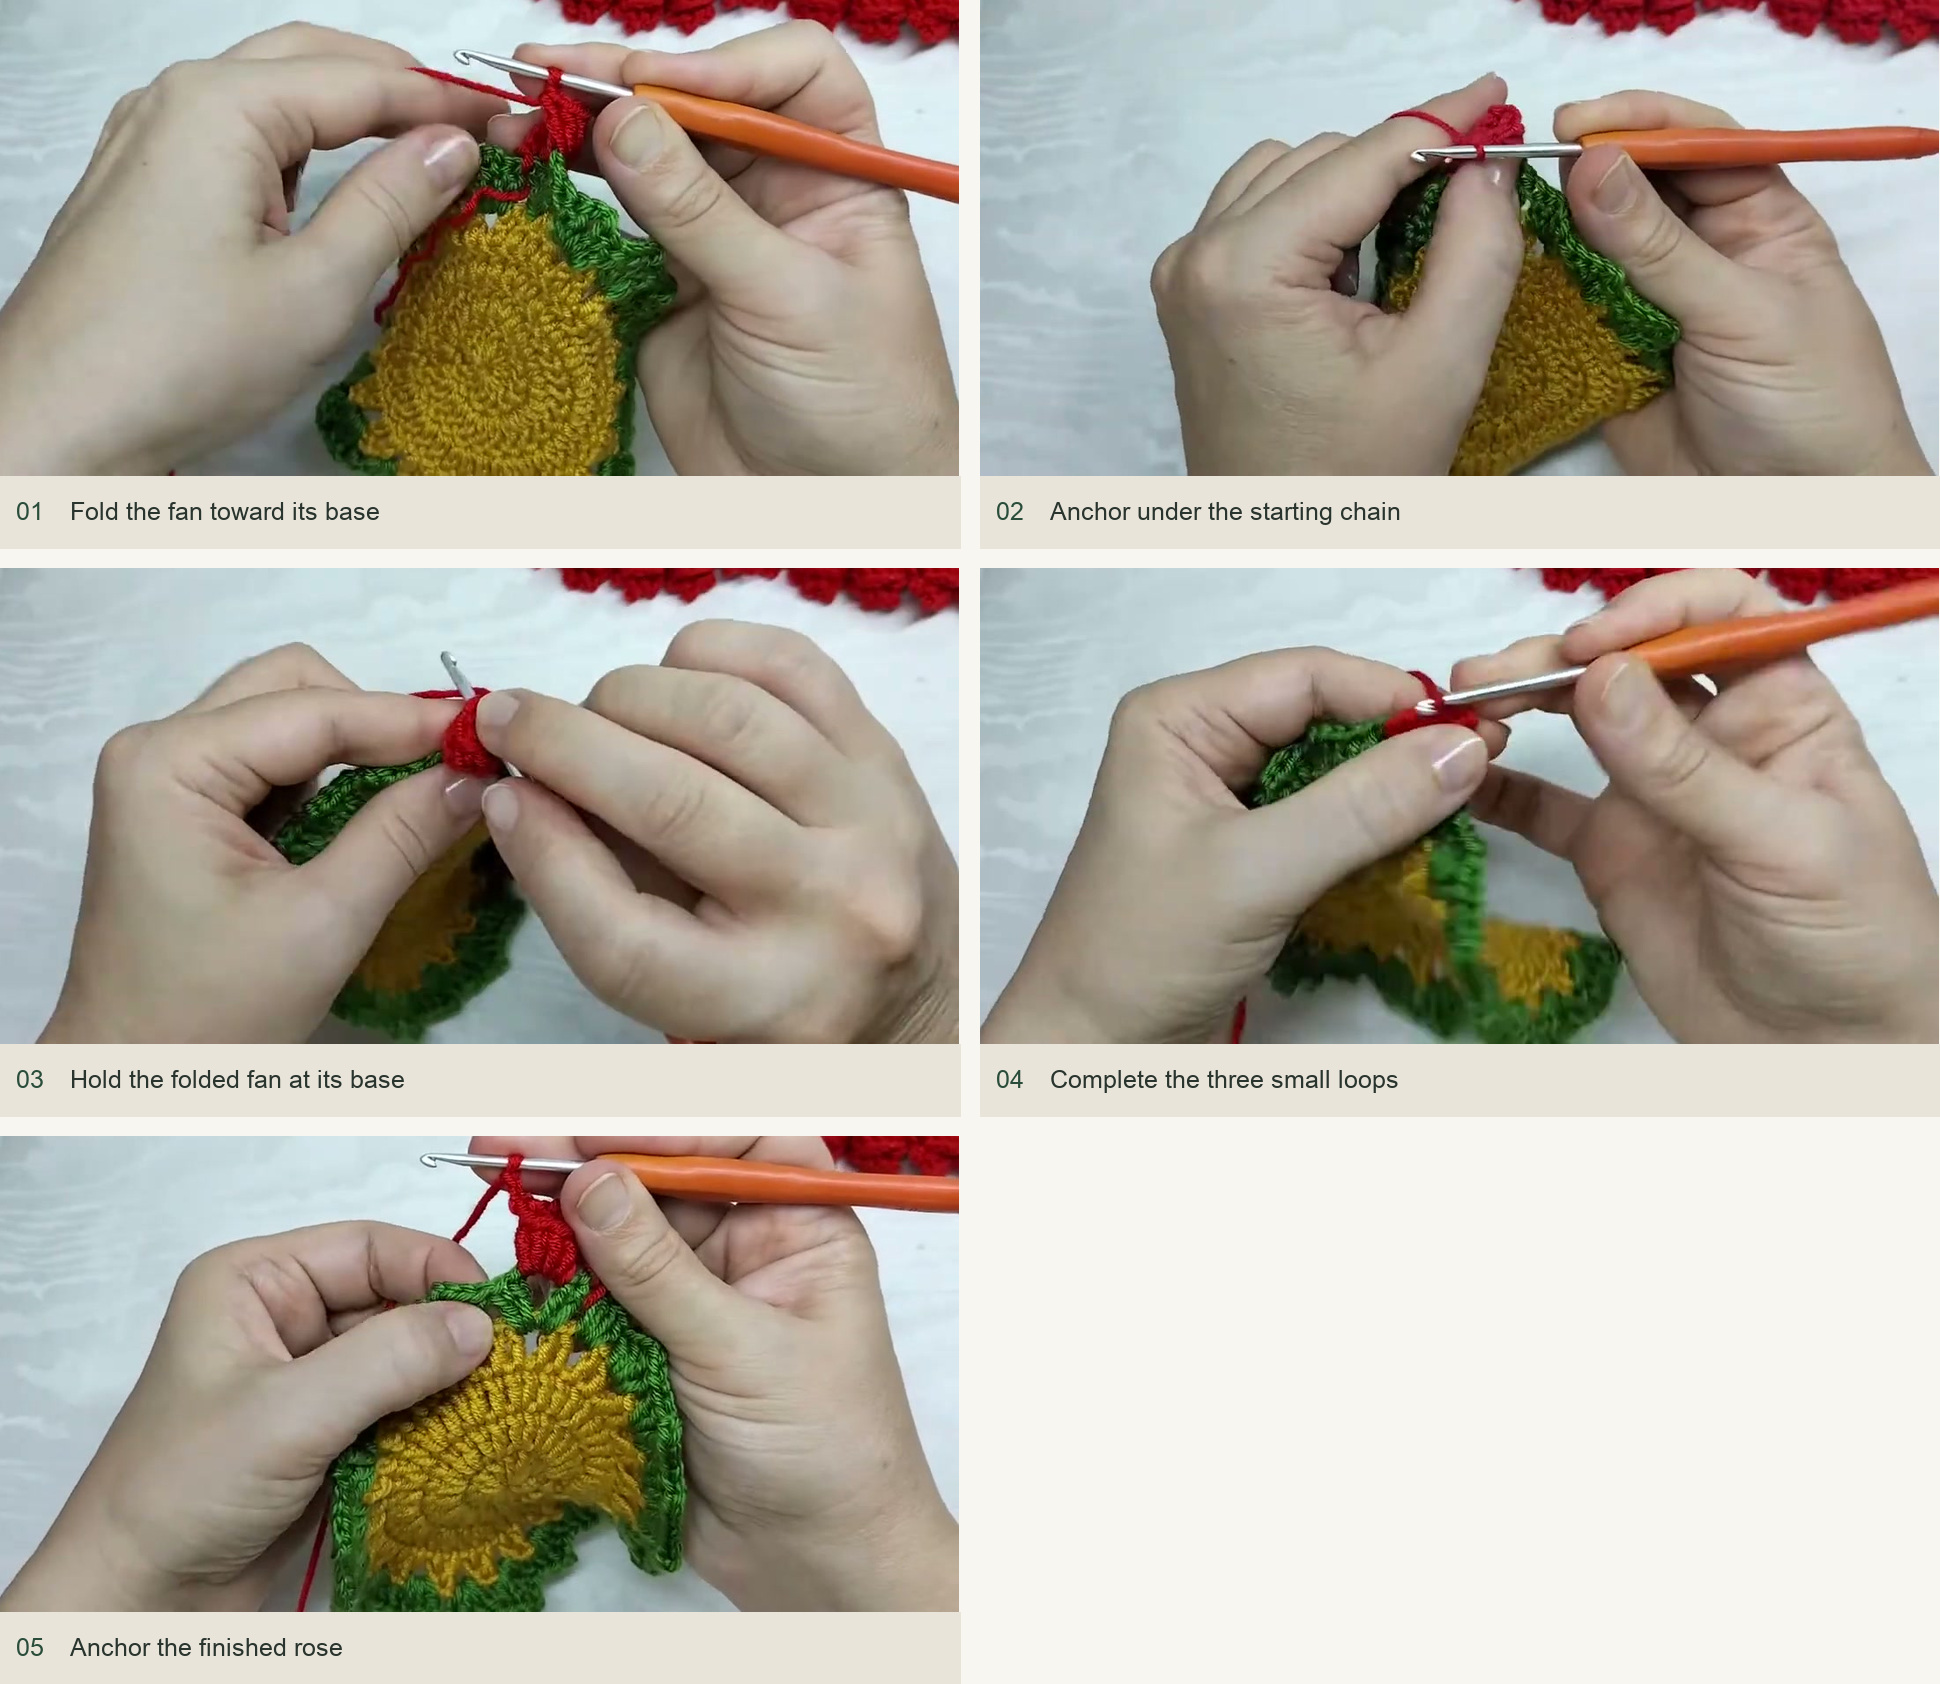
Fold the fan toward its base → Anchor under the starting chain → Hold the folded fan at its base → Complete the three small loops → Anchor the finished rose. Source: original creator tutorial. -
Repeat the flower border
Ch 2, work six dc in the next green ch-2 space, turn to the wrong side and slip stitch under the starting chain column. Ch 2, turn back, then work the small sc-and-chain detail into the formed center. Ch 2 and slip stitch into the next valley. Repeat until all 21 green shells carry a rose. Join neatly where the red round began, fasten off and weave in the ends.
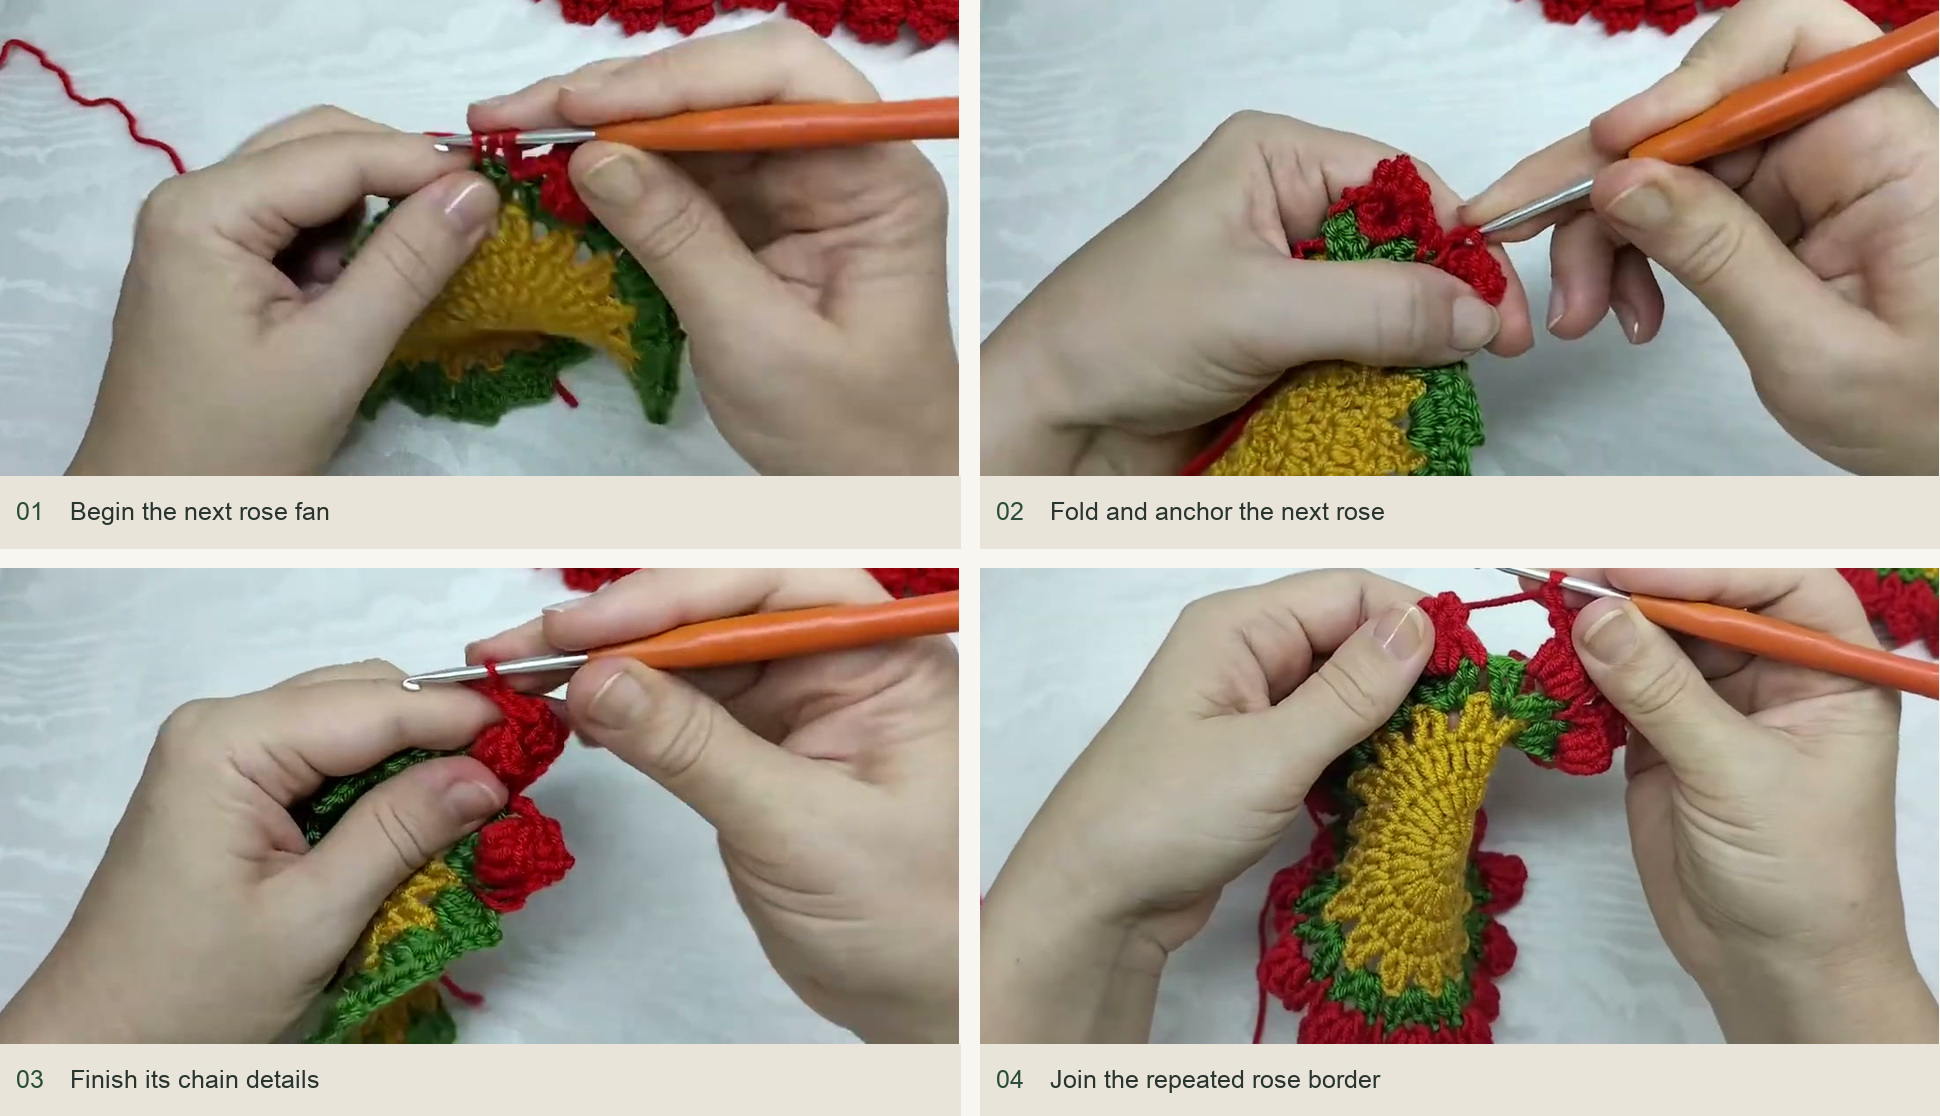
Begin the next rose fan → Fold and anchor the next rose → Finish its chain details → Join the repeated rose border. Source: original creator tutorial.
Finishing without flattening the roses
Set the yellow center flat and arrange the green ring evenly around it. The red motifs should remain slightly dimensional. If you damp-shape the coaster, follow the yarn’s care instructions and avoid pressing the folded flowers flat. A coaster that is mostly flat through the middle is easier to use than one with extra fullness trapped beneath the cup.
If a rose points backward, check that you turned to the wrong side to make its closing slip stitch, then turned back for the tiny chain detail. If there are too many flowers at one side, recount the green spaces rather than adding another motif to fill a visual gap. A tidy set depends on repeating the same six-dc fan and the same turn for every flower.
Inspired by Crochet Oli’s video tutorial.
Save this pattern for later
Pin it to one of your boards so it’s ready when you have a free evening and the right yarn.