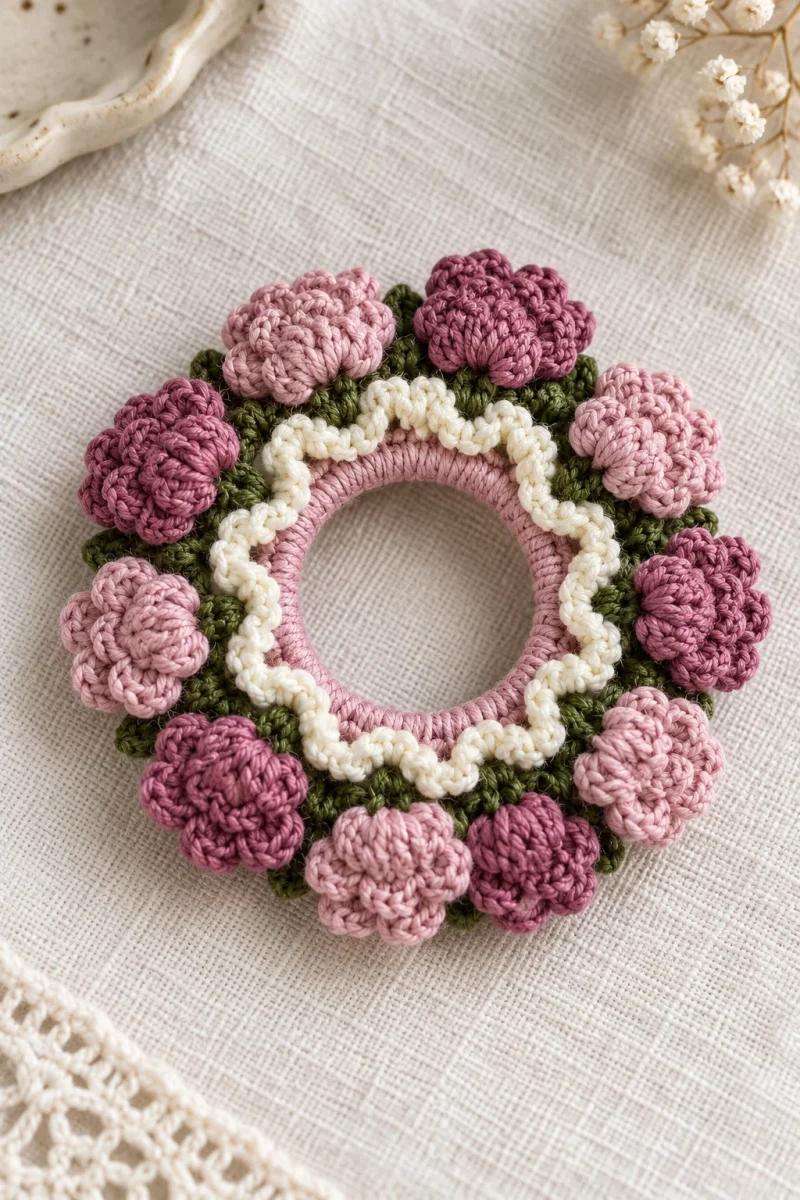
A crochet flower hair tie turns an ordinary elastic into a small wreath of raised blossoms. Pale pink and mauve flowers sit outside a white frilled ring, with green bases tucked beneath them. The color changes make this more detailed than a plain scrunchie, but the work breaks naturally into a foundation, a green framework, and one flower at a time.
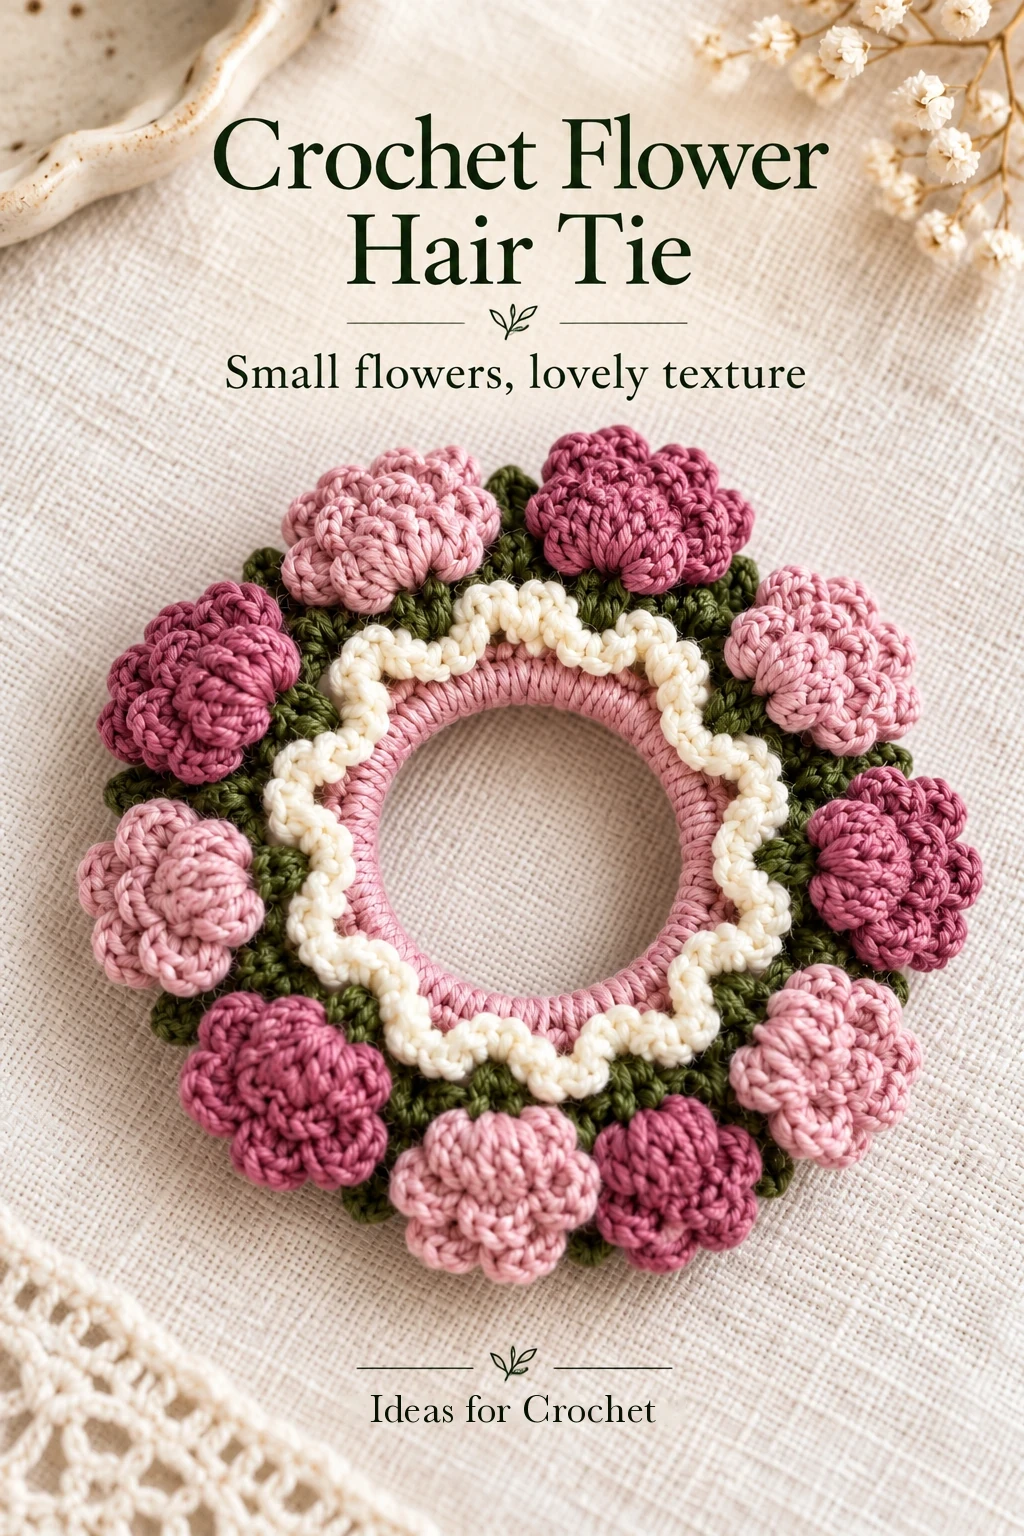
The design reserves the front and back loops of the same foundation for two different layers. Keep those layers separate from the beginning: the white loops use the front loops, leaving the back loops free for the green flower supports.
Materials and useful stitch language
Choose an elastic color that blends with the foundation. The sample uses a beige band under pale pink, so the base is less conspicuous between the stitches. Exact yarn weight and yardage are not established in the lesson; keep the yarns similar enough in thickness for the white frill and green framework to sit comfortably together.
Make the fifty-stitch foundation
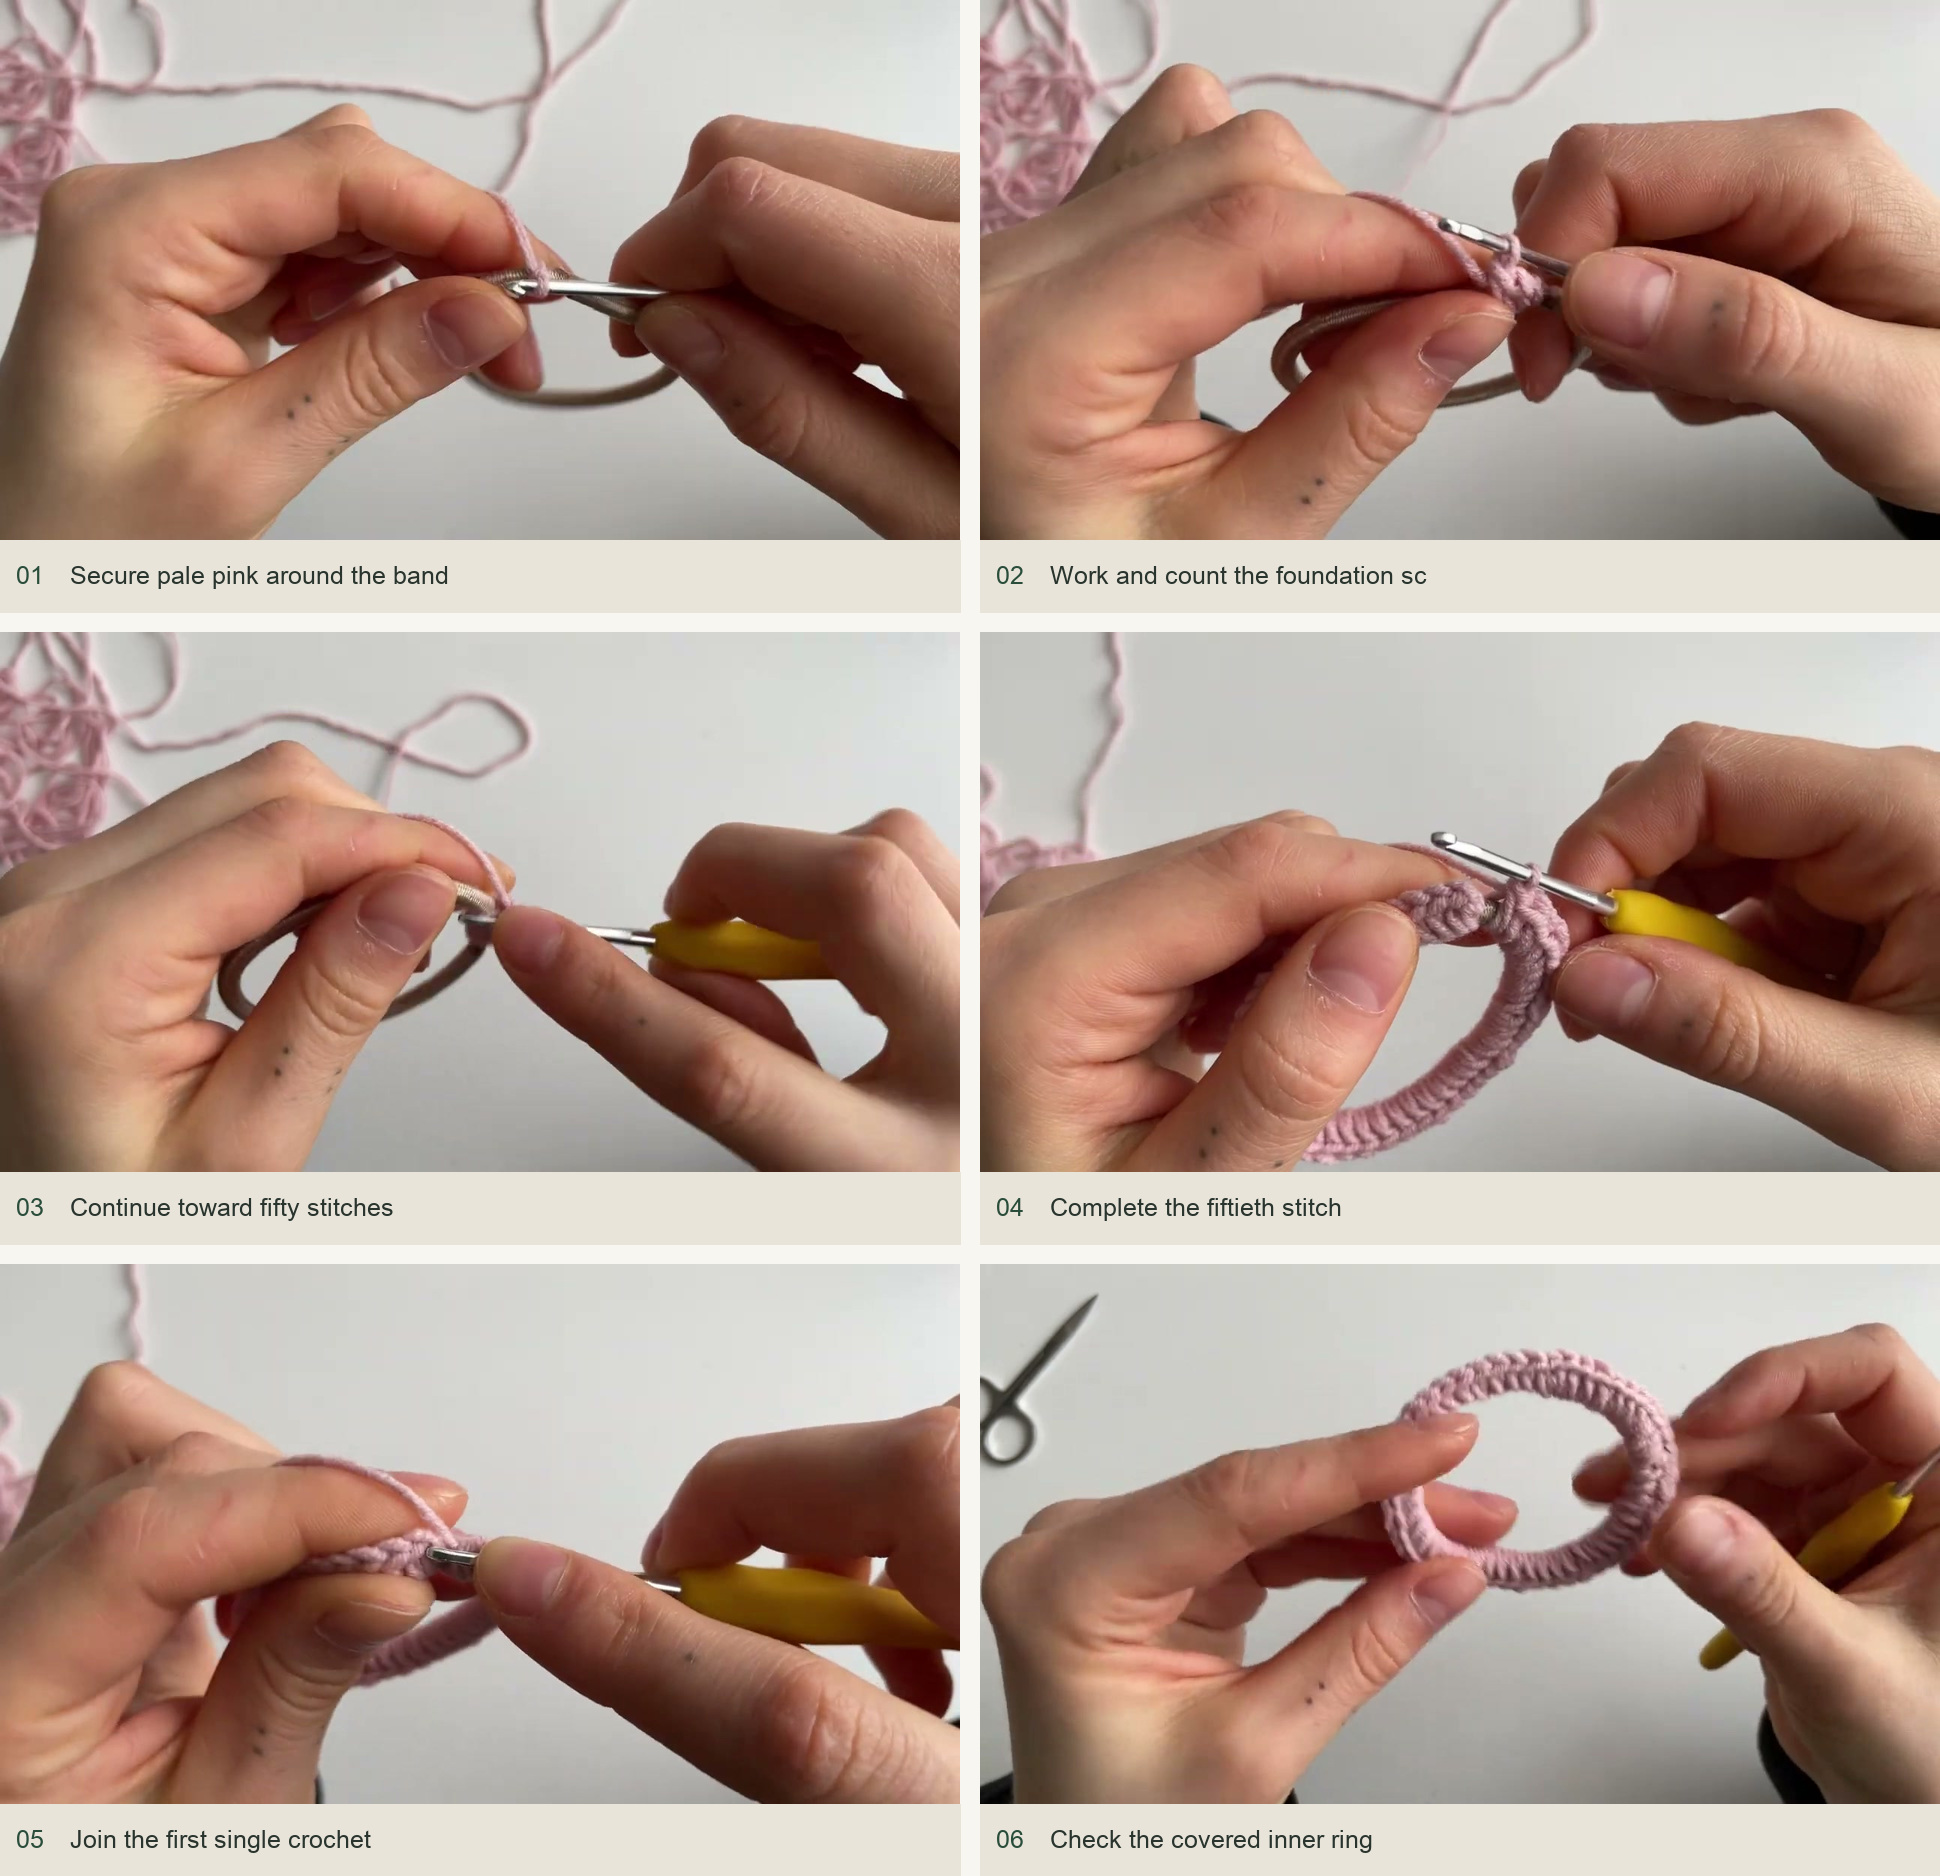
- Attach pale pink to the elastic. Secure the yarn, ch 1, and begin working sc around the band. Hold the starting tail along the elastic so the stitches enclose it.
- Work exactly 50 sc. Count carefully; these stitches will be divided into ten five-stitch flower bases. Move the stitches evenly around the elastic while allowing the band to extend.
- Join and secure. Sl st into the first sc, cut the pink yarn, and draw the tail through. Tuck it toward the back without pulling the inner ring tight.
Unlike an uncounted ruffle, this design needs its foundation count to support the next layer. If 50 sc cannot cover your chosen elastic adequately while still stretching, reconsider the elastic or yarn combination before adding the decorative rounds.
Add the small white frill
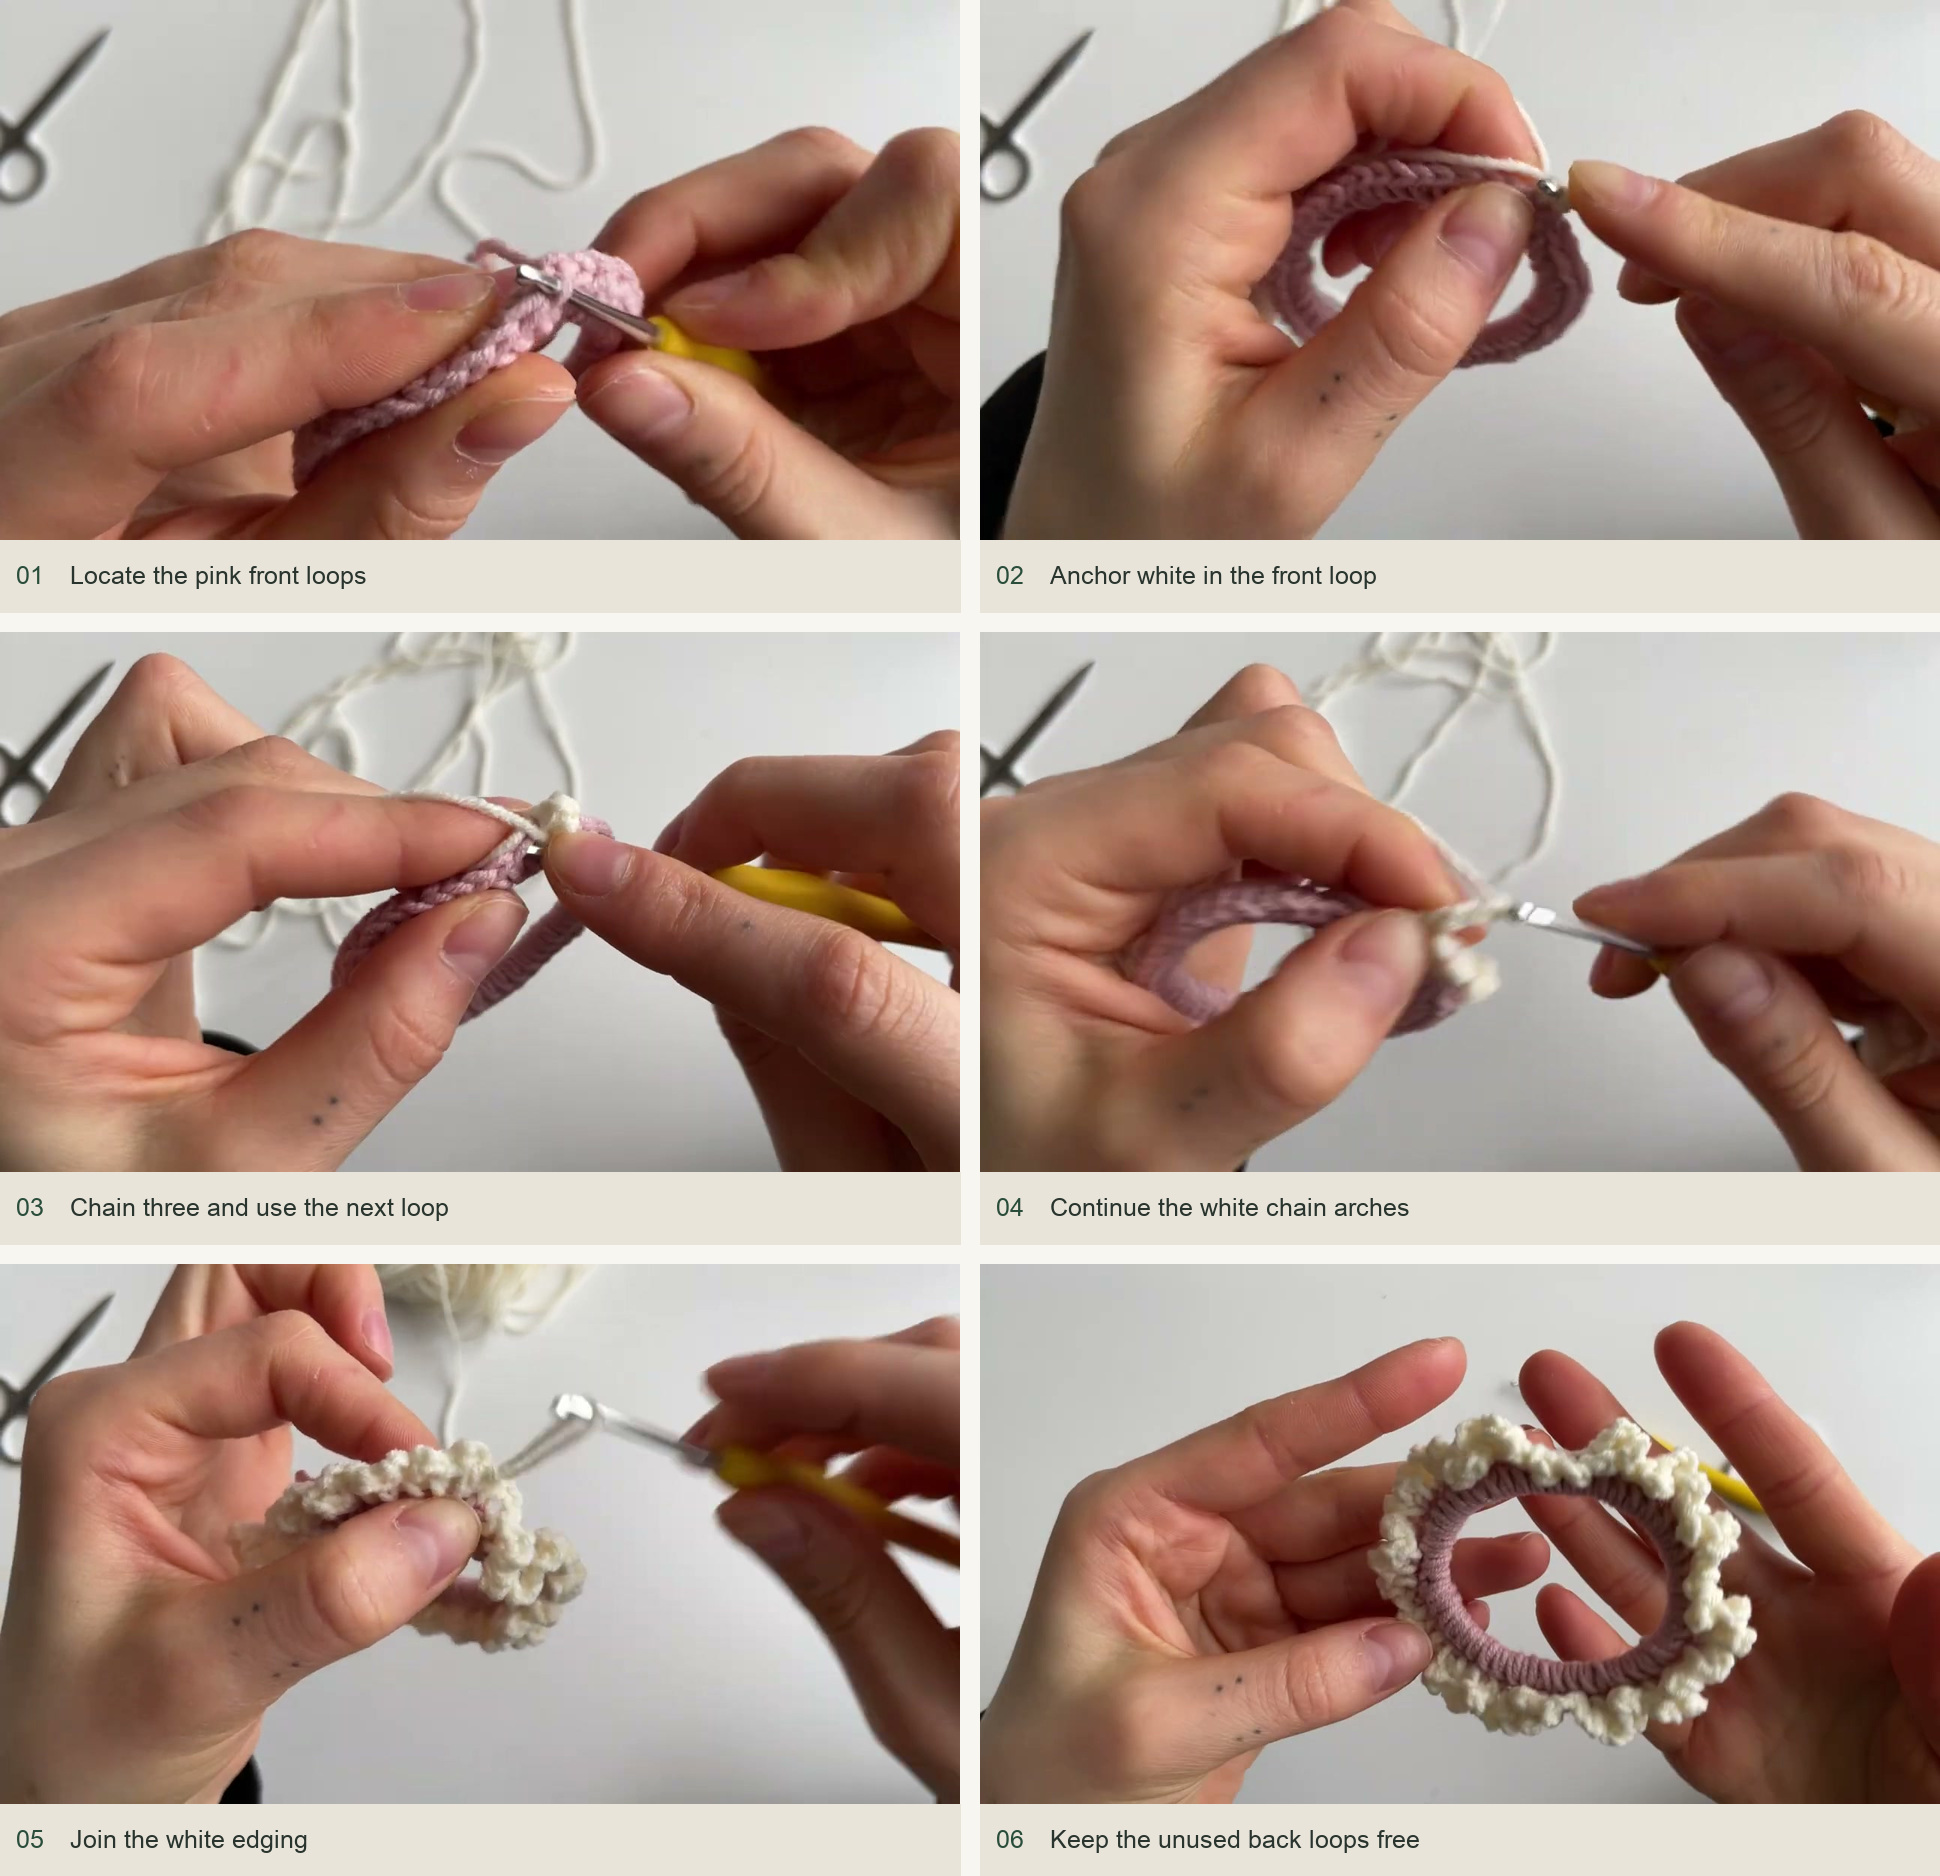
Join white into a front loop of the foundation and work sc into that same front loop. Ch 3, then sc into the next front loop. Continue making ch-3 arches anchored in the front loops around the ring, then join to the first white sc.
Keep the unused back loops clear behind the white edging. It can help to spread the little arches forward as you work, so the hook does not accidentally catch both loops of the pink foundation. Secure the white tails through the stitches; do not leave loose ends crossing the central opening.
Build the green flower supports
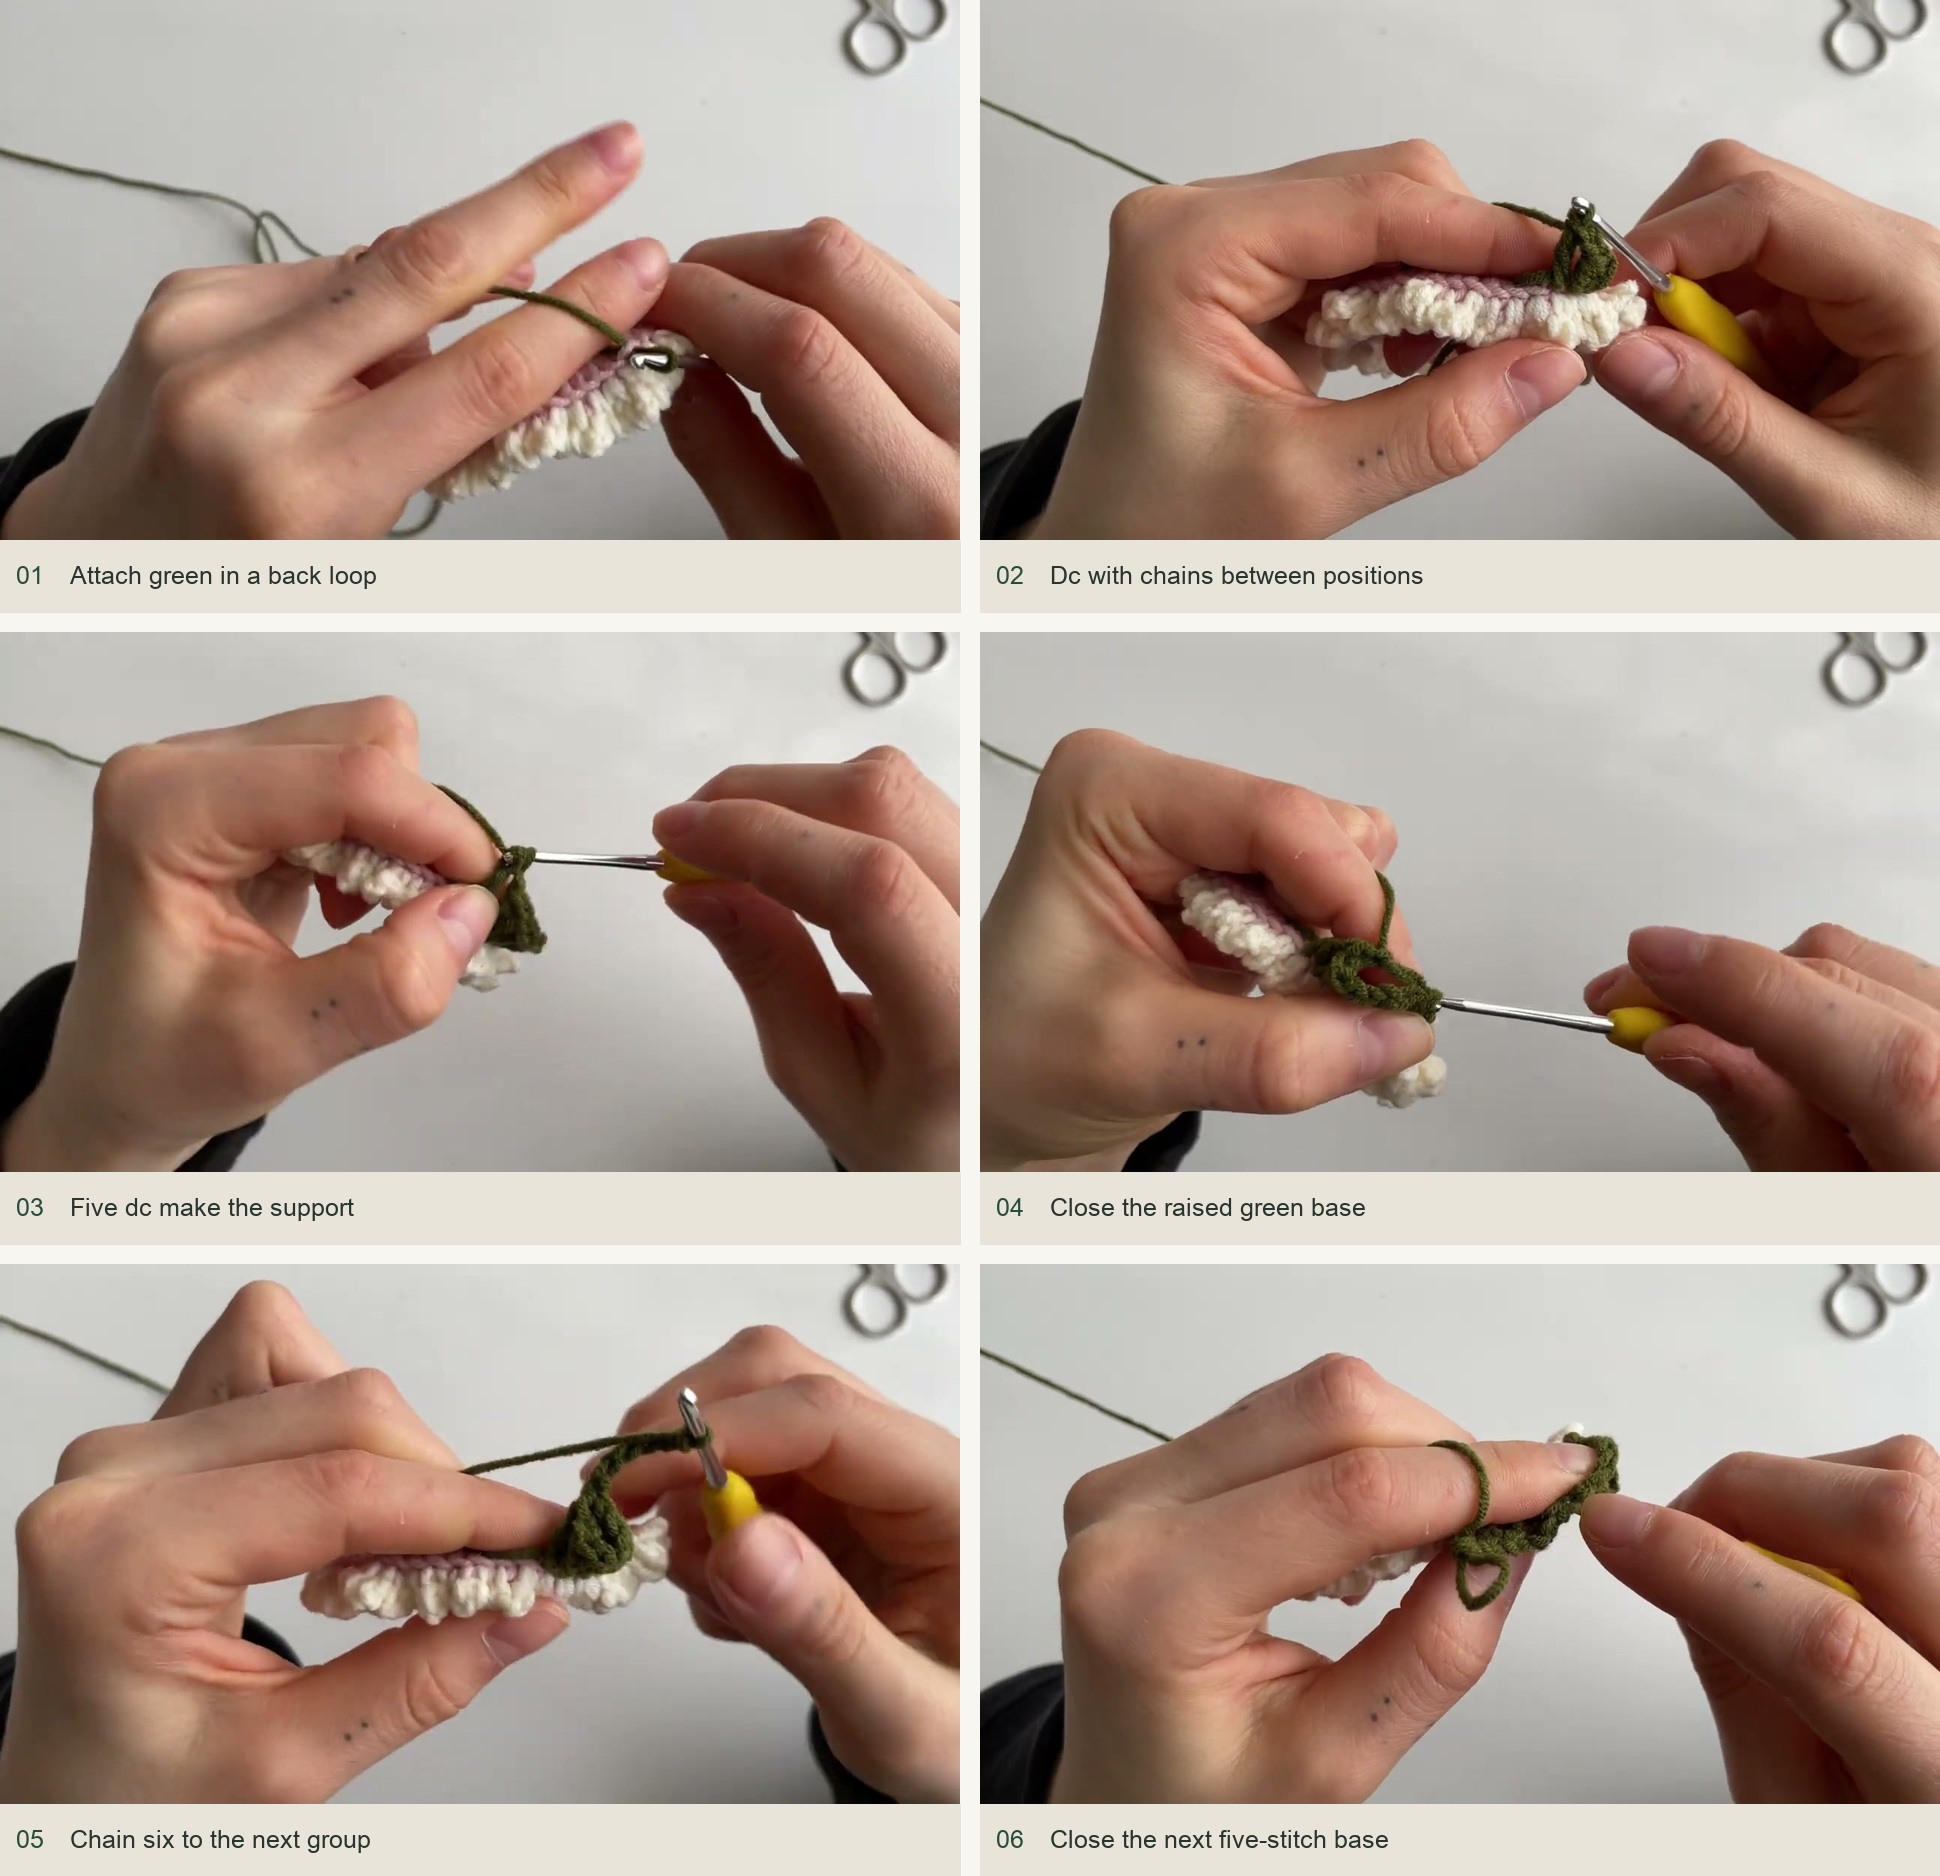
Join green into an unused back loop. The first support begins with ch 2 for height and a dc at the start, then continues with dc separated by ch 1 across a group of five back-loop positions. Close this five-dc section back to its first dc as demonstrated, so it gathers into a raised base.
Ch 6 to travel to the next group, then repeat the five-dc support across the next five back loops, again with ch-1 spaces and a closure to the first dc of the group. Continue around the ring. Fifty foundation stitches provide ten groups of five; the six-chain connectors join the raised bases around the outside.
Before cutting green, check that every base has five dc positions and that none of the pink back loops has been left unused between groups. Arrange the supports outward so the flowers will sit outside the white frill rather than inside the elastic opening.
Make the raised flower centers
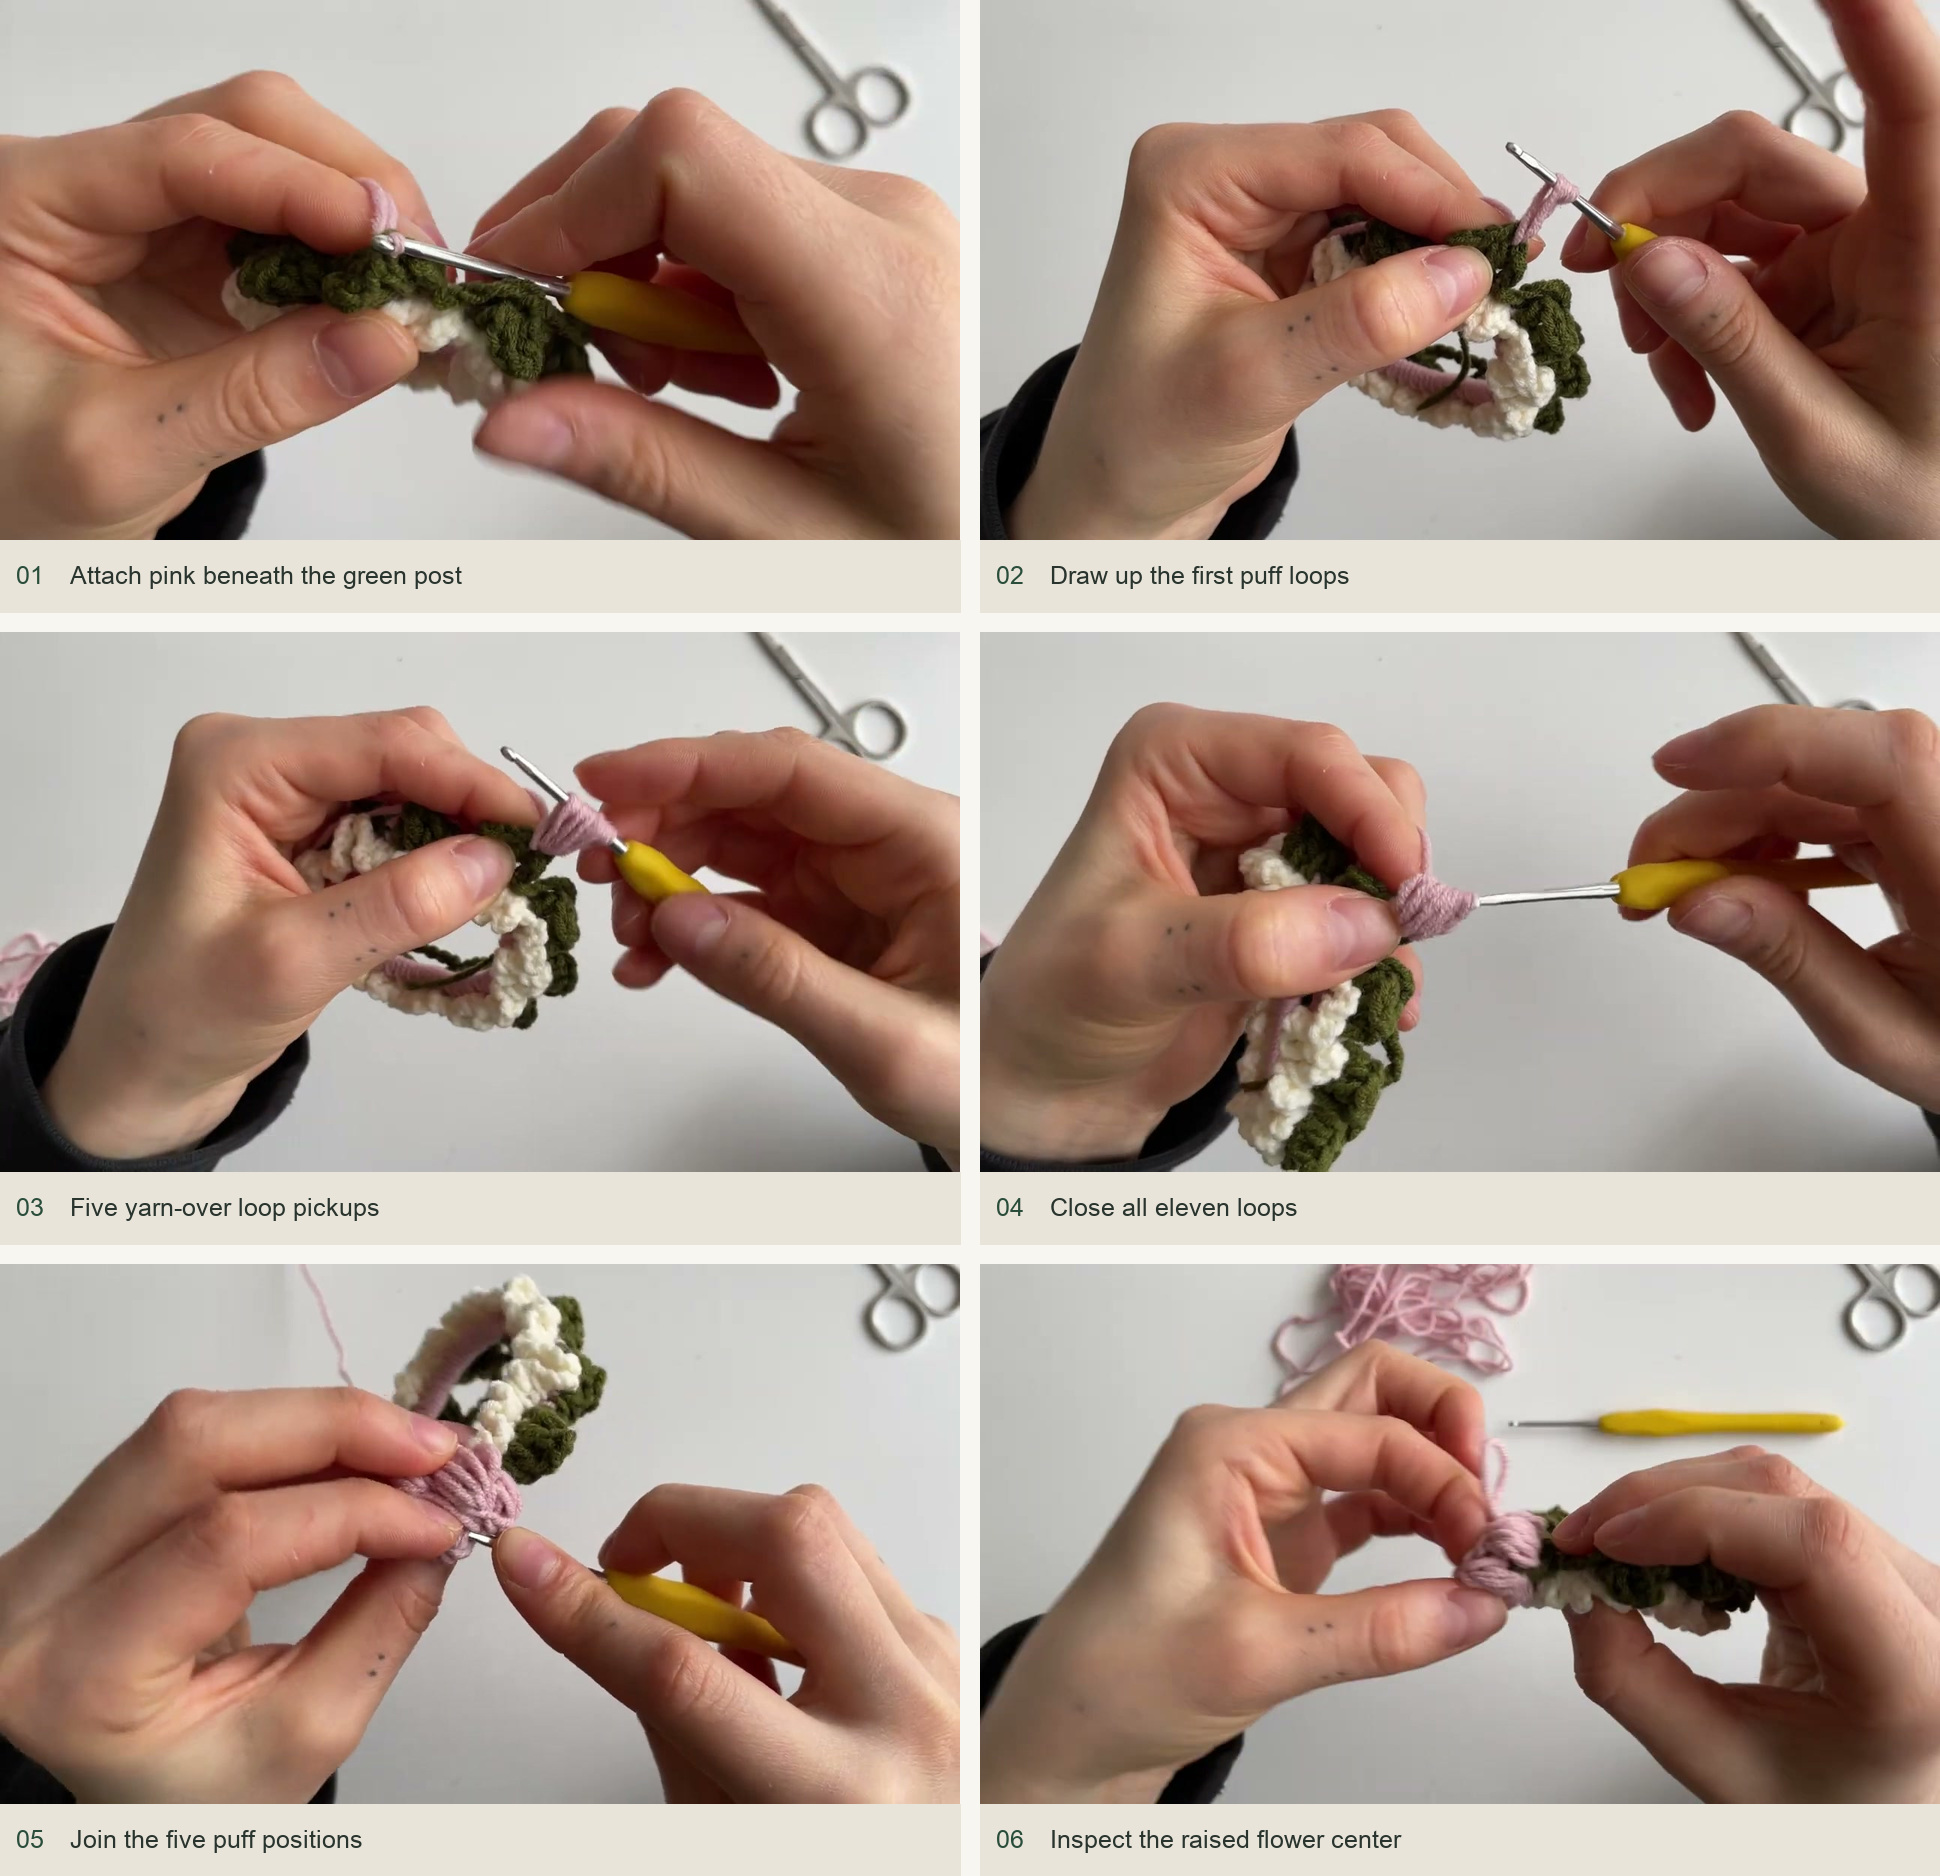
Join one pink shade under the first dc of a green support. Ch 2, then make a puff by repeating yarn over and draw up a loop five times at the demonstrated insertion point. There should be 11 loops on the hook before pulling the working yarn through them together.
Repeat this puff action around the five positions of the green support, then join to the beginning. Hold each drawn-up loop at a consistent height; short loops are difficult to pull through and give a cramped center. Open the support with your fingers so the hook goes under the intended green post rather than through neighboring white stitches.
Give each flower ten little petals
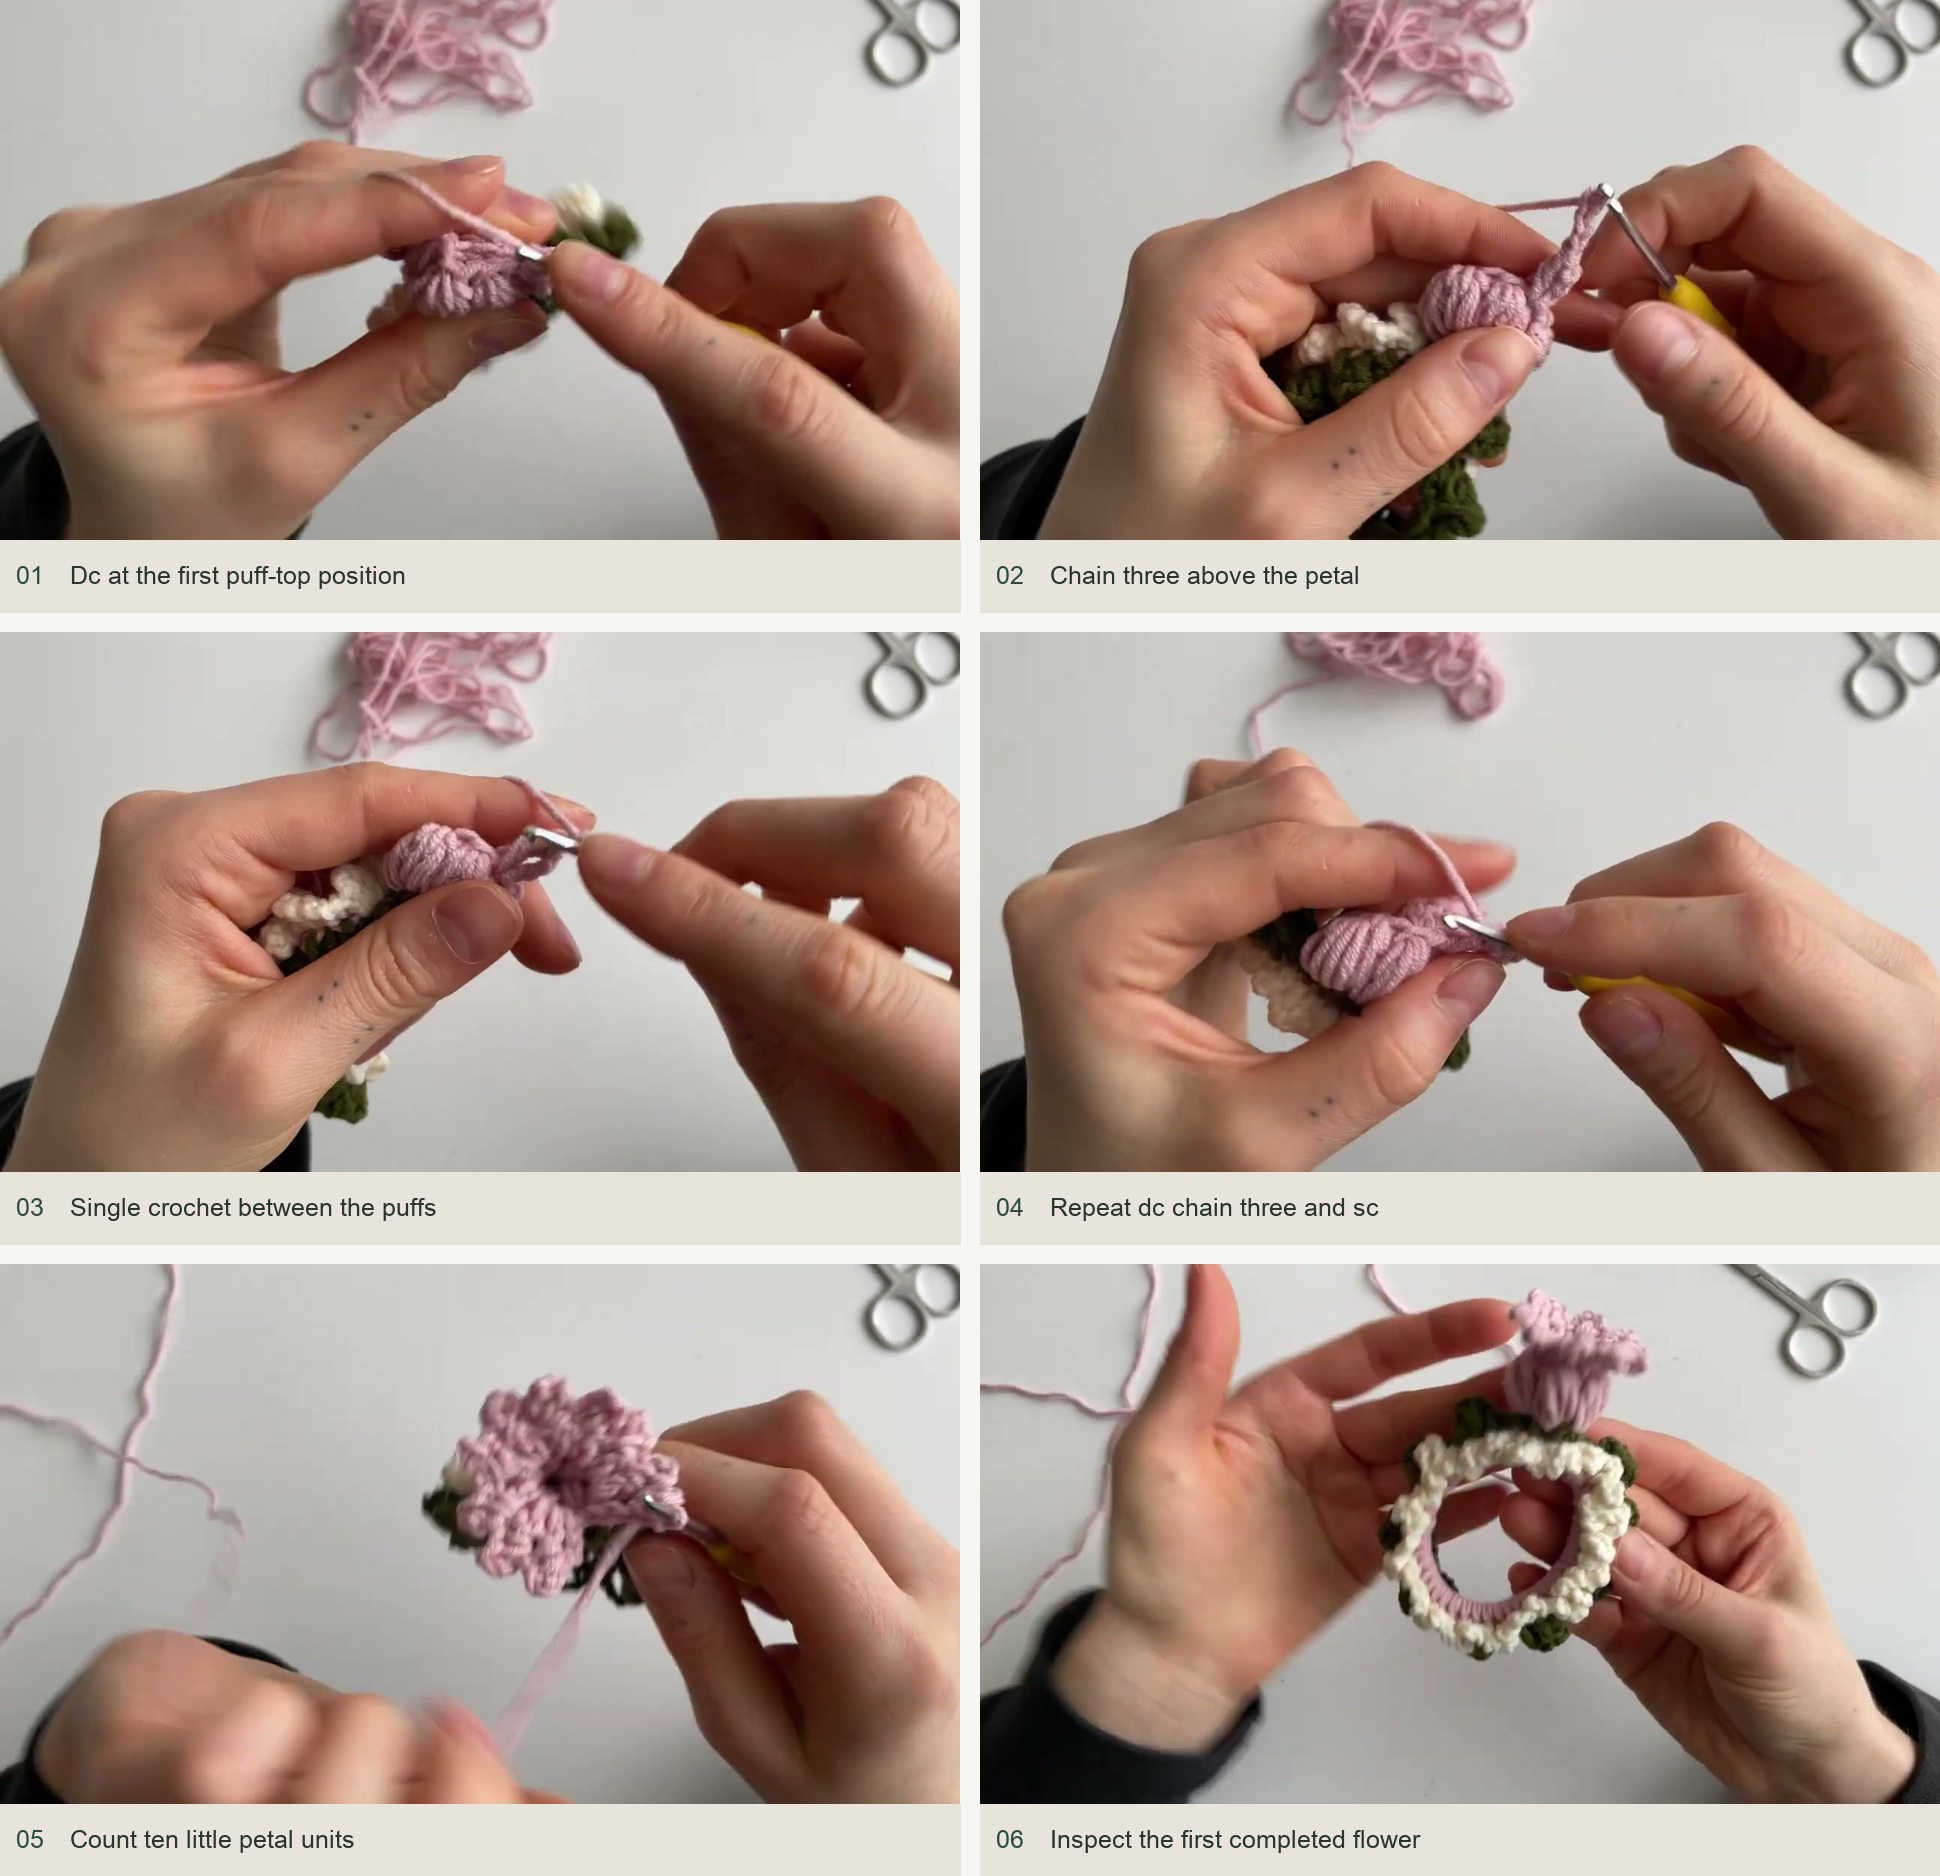
The petal round works around the tops of the puffs. Begin with ch 3 and dc at the first top position, then ch 3 and anchor with sc between the puffs. Continue around the available top positions: dc, ch 3, then sc in the intervening point. The completed flower should have 10 small petal units, as counted in the lesson.
Join to the start, cut a tail, and secure it through the flower so the circle stays closed. Check that no finishing yarn has tightened the base against the elastic. Make the next flower in the second pink shade and continue alternating colors around all ten supports.
Finish with movement in mind
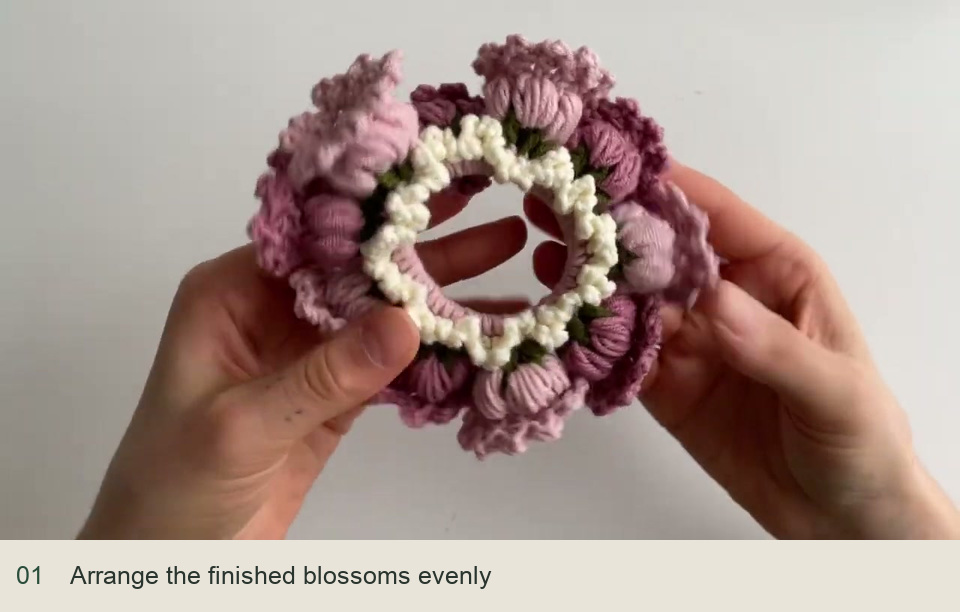
Spread the blossoms evenly and lift the white arches away from the green supports. Stretch the elastic gently and check that the connecting chains move without straining. If the floral ring pulls to one side, look for a short connector or a tail that has accidentally caught two layers together.
Every color change creates an end to secure. Inspect the back of each flower as carefully as the front, because these ends sit near the hair. The finished accessory should have a clear central opening, a flexible covered band, and blossoms that remain attached when the elastic is gently extended.
Inspired by cvety dari’s video tutorial.
Save this pattern for later
Pin it to one of your boards so it’s ready when you have a free evening and the right yarn.