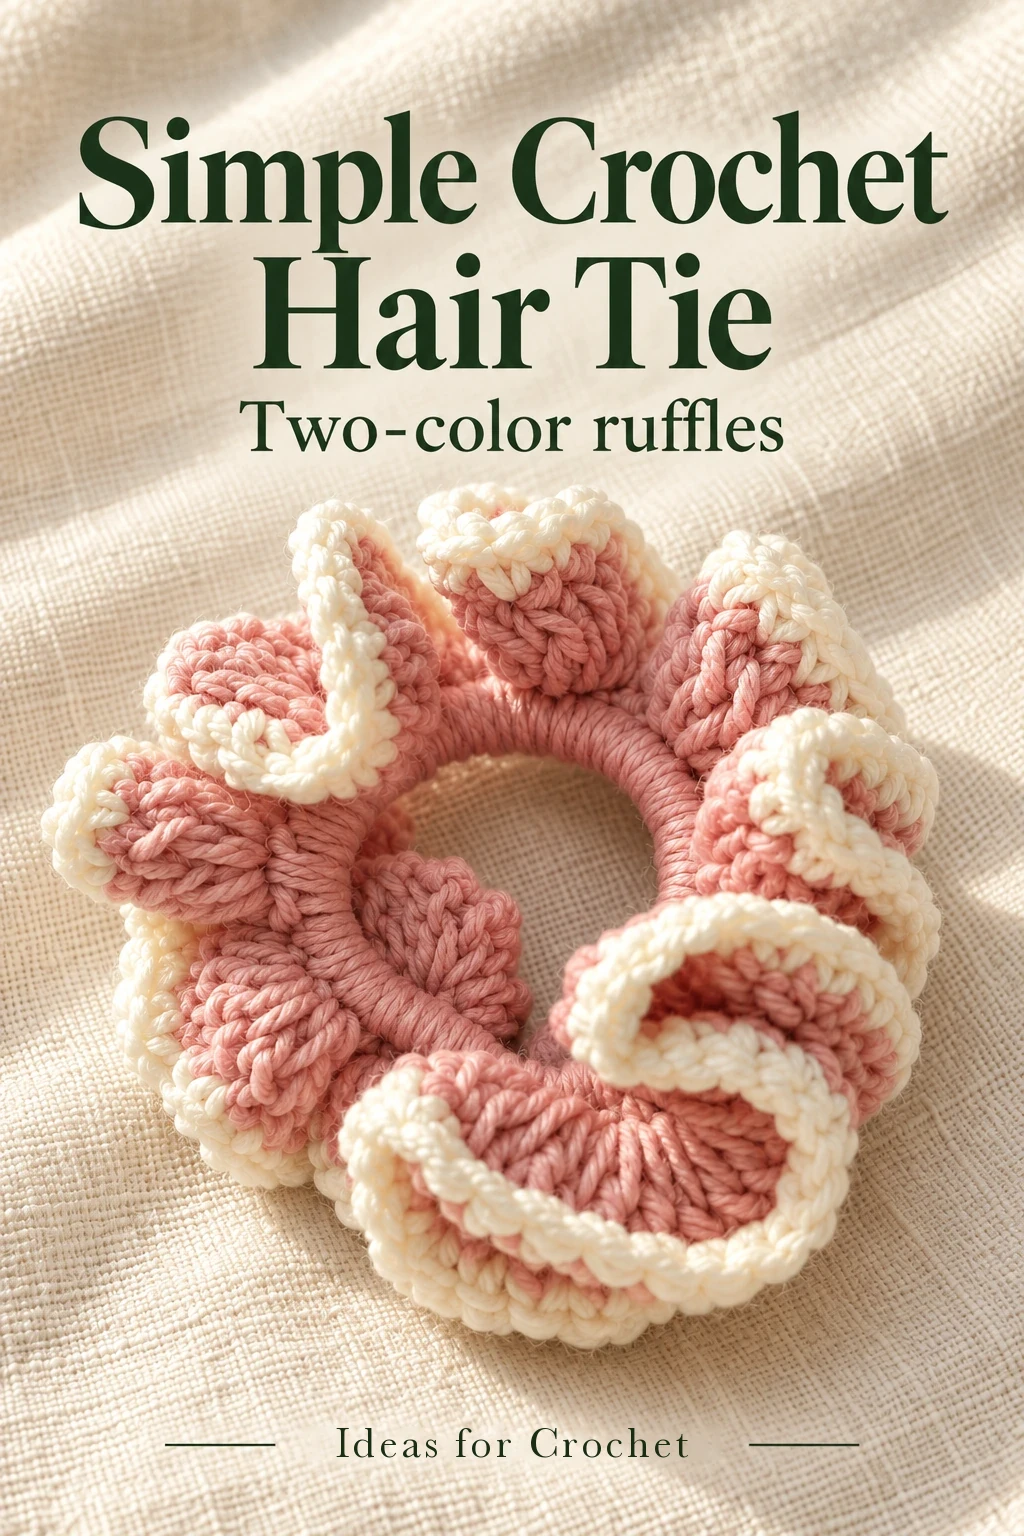
This simple crochet hair tie turns an ordinary elastic into a soft, two-color ruffle. A close-fitting single-crochet base covers the elastic, groups of double crochet add fullness, and a narrow contrasting edge outlines the waves. The construction uses three rounds and needs only small amounts of yarn.
Materials and stitch guide
- Small amounts of two compatible yarns: one for the base and ruffle, another for the edge. The creator demonstrates pink with white and also shows a blue version.
- A comfortable, undamaged hair elastic.
- A 4 mm crochet hook; the creator also mentions 4.5 mm as an option.
- Scissors, a yarn needle for hiding ends, and an optional stitch marker.
The video does not specify a yarn weight or fixed yarn allowance. Choose two yarns of similar thickness so the border remains in proportion to the ruffle. Keep the elastic’s stretch when checking your tension.
US abbreviations: ch = chain; sc = single crochet; dc = double crochet; sl st = slip stitch. To make a dc, yarn over, insert the hook, draw up a loop, then yarn over and pull through two loops twice.
Make the two-color hair tie
-
Attach the main color to the elastic
Make a slip knot with the main yarn. Put the hook beneath the elastic and draw the working loop through to the front. Chain one to secure the yarn around the elastic. Leave a starting tail long enough to hide securely later.
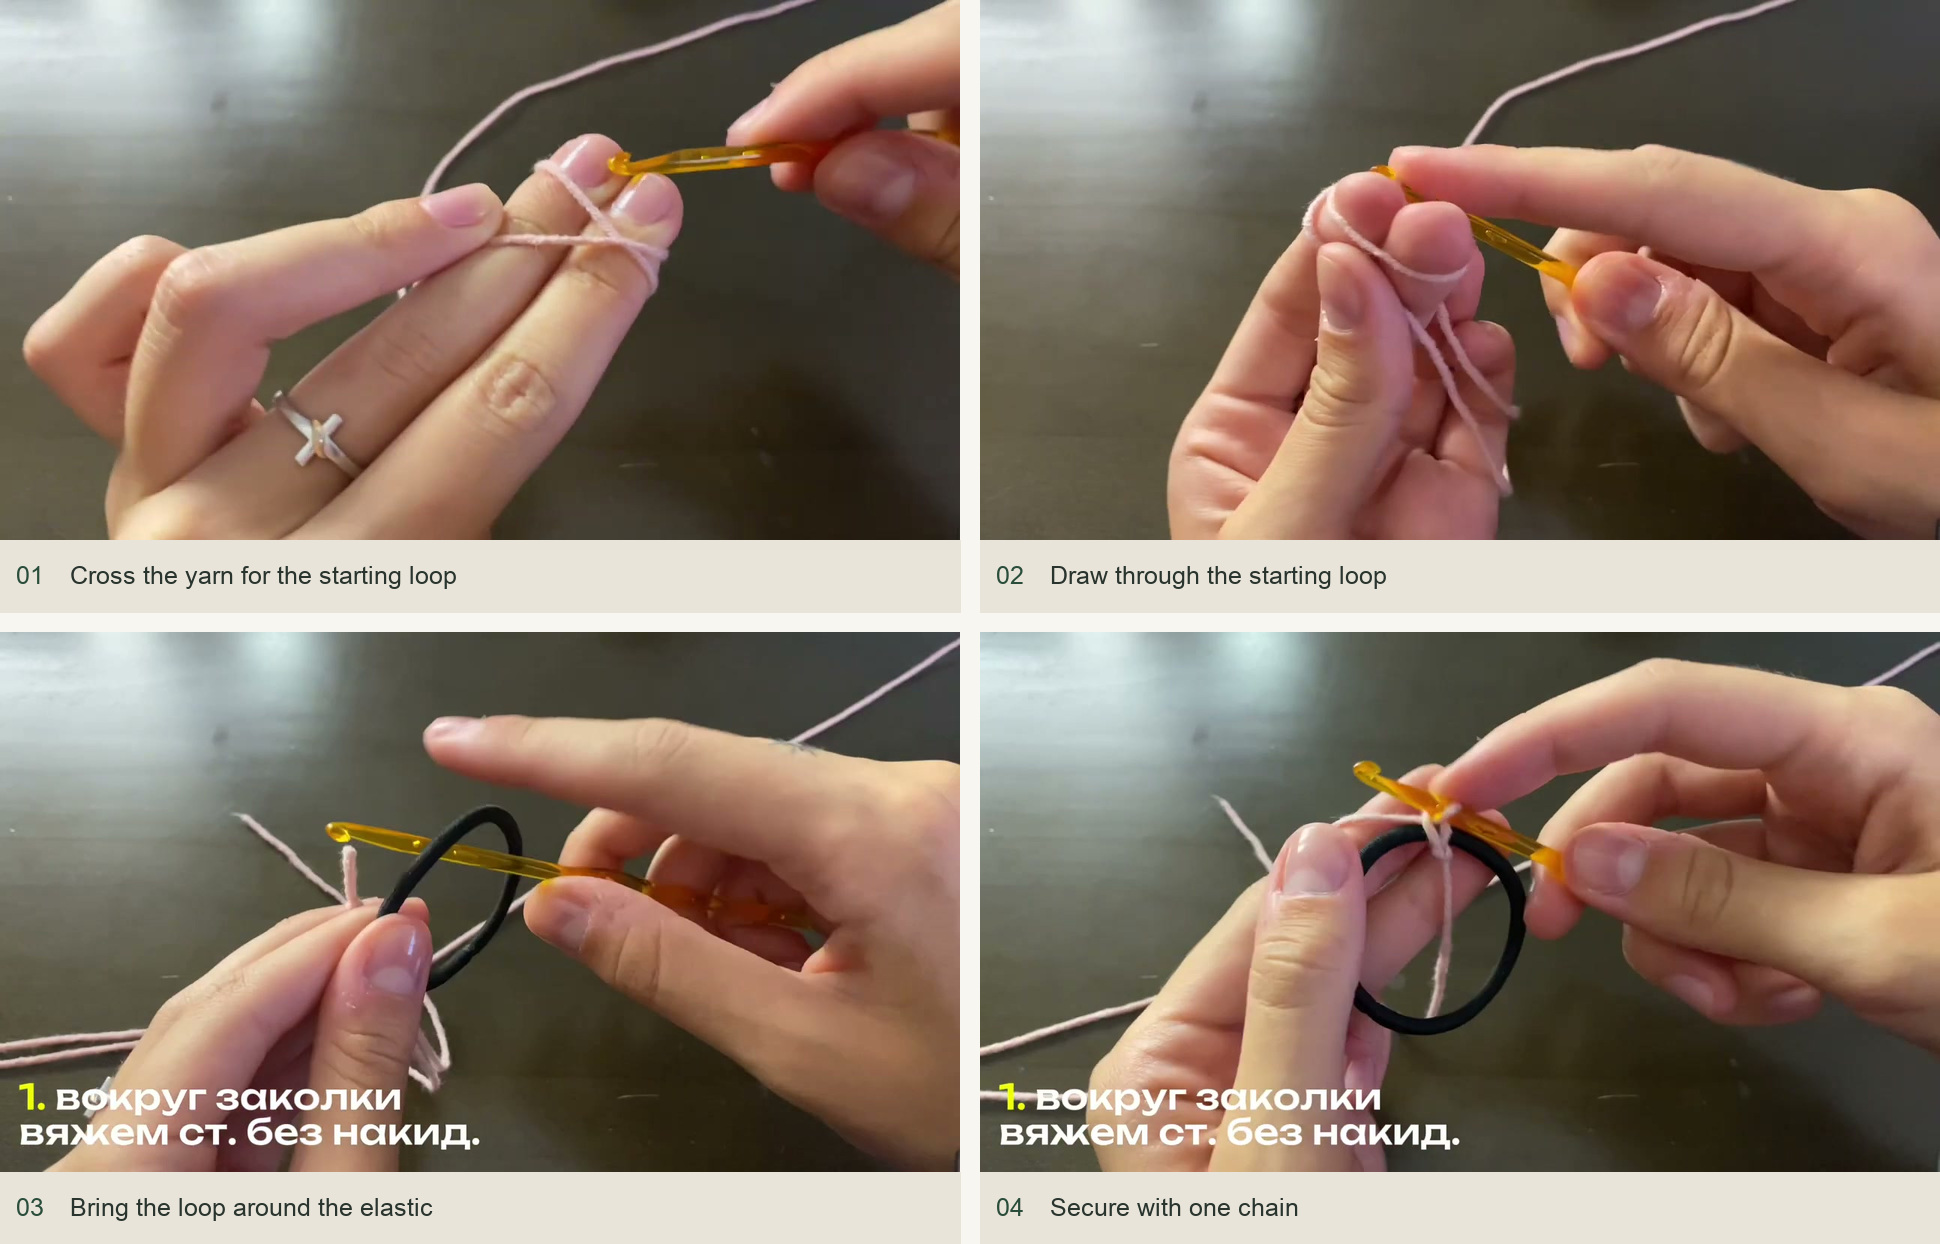
Follow the numbered views from left to right, then down. -
Cover the elastic with single crochet
Work sc around the elastic itself, rather than into its surface. Insert the hook beneath the elastic, draw up a yarn loop, then yarn over and pull through both loops. Repeat around the ring. Slide the completed stitches together as you work so the elastic is covered instead of leaving bare spaces.
Gently stretch the elastic to inspect the coverage. The stitches should be close enough to conceal the band, while still moving with it. Keep their top loops accessible for the next round.
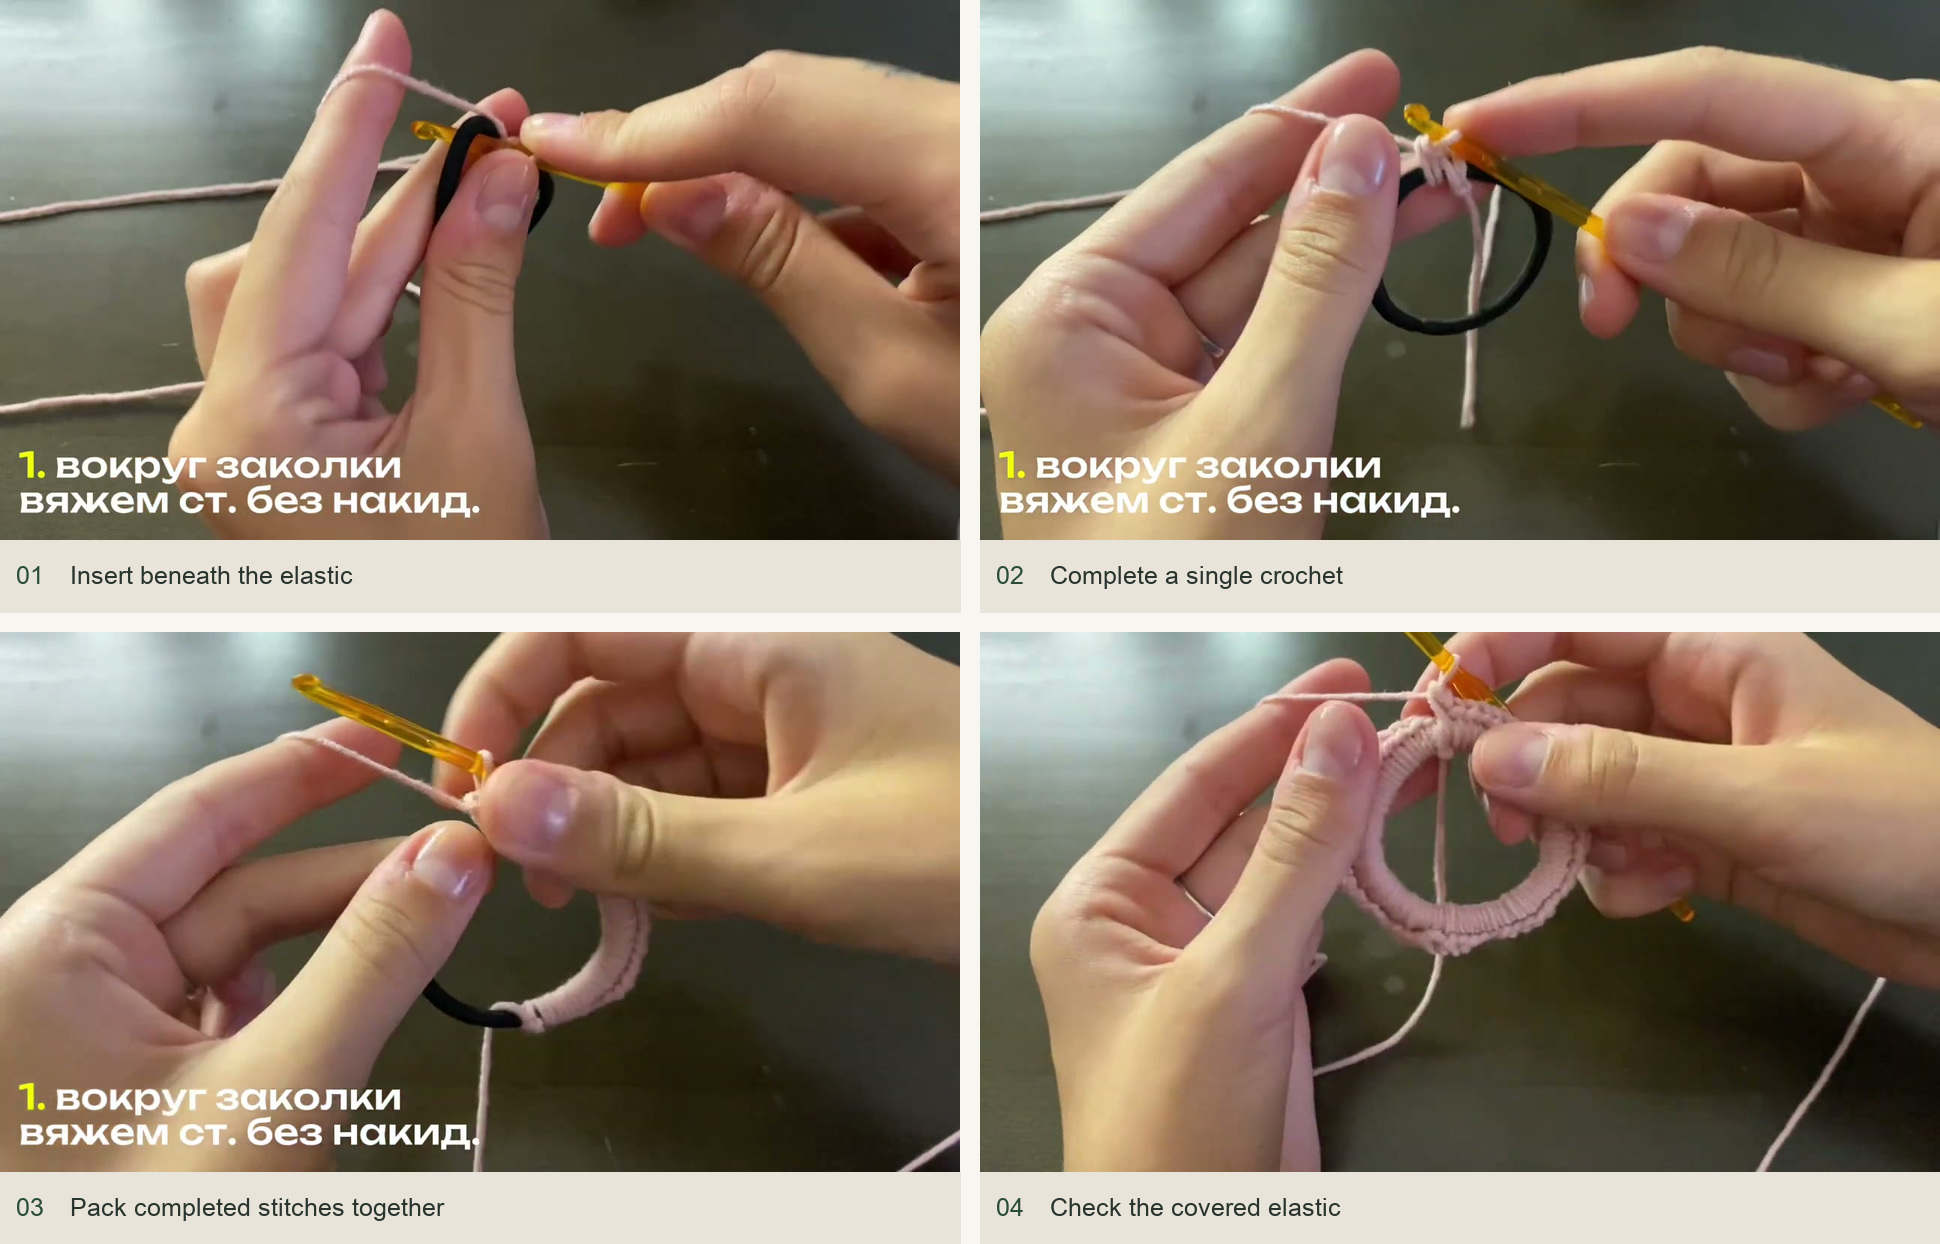
Follow the numbered views from left to right, then down. -
Join the covered base
Find the first sc and make a sl st into its top loops. Avoid catching the loose starting tail or joining into the initial securing chain by mistake. A marker in the first stitch can help if the covered band becomes crowded.
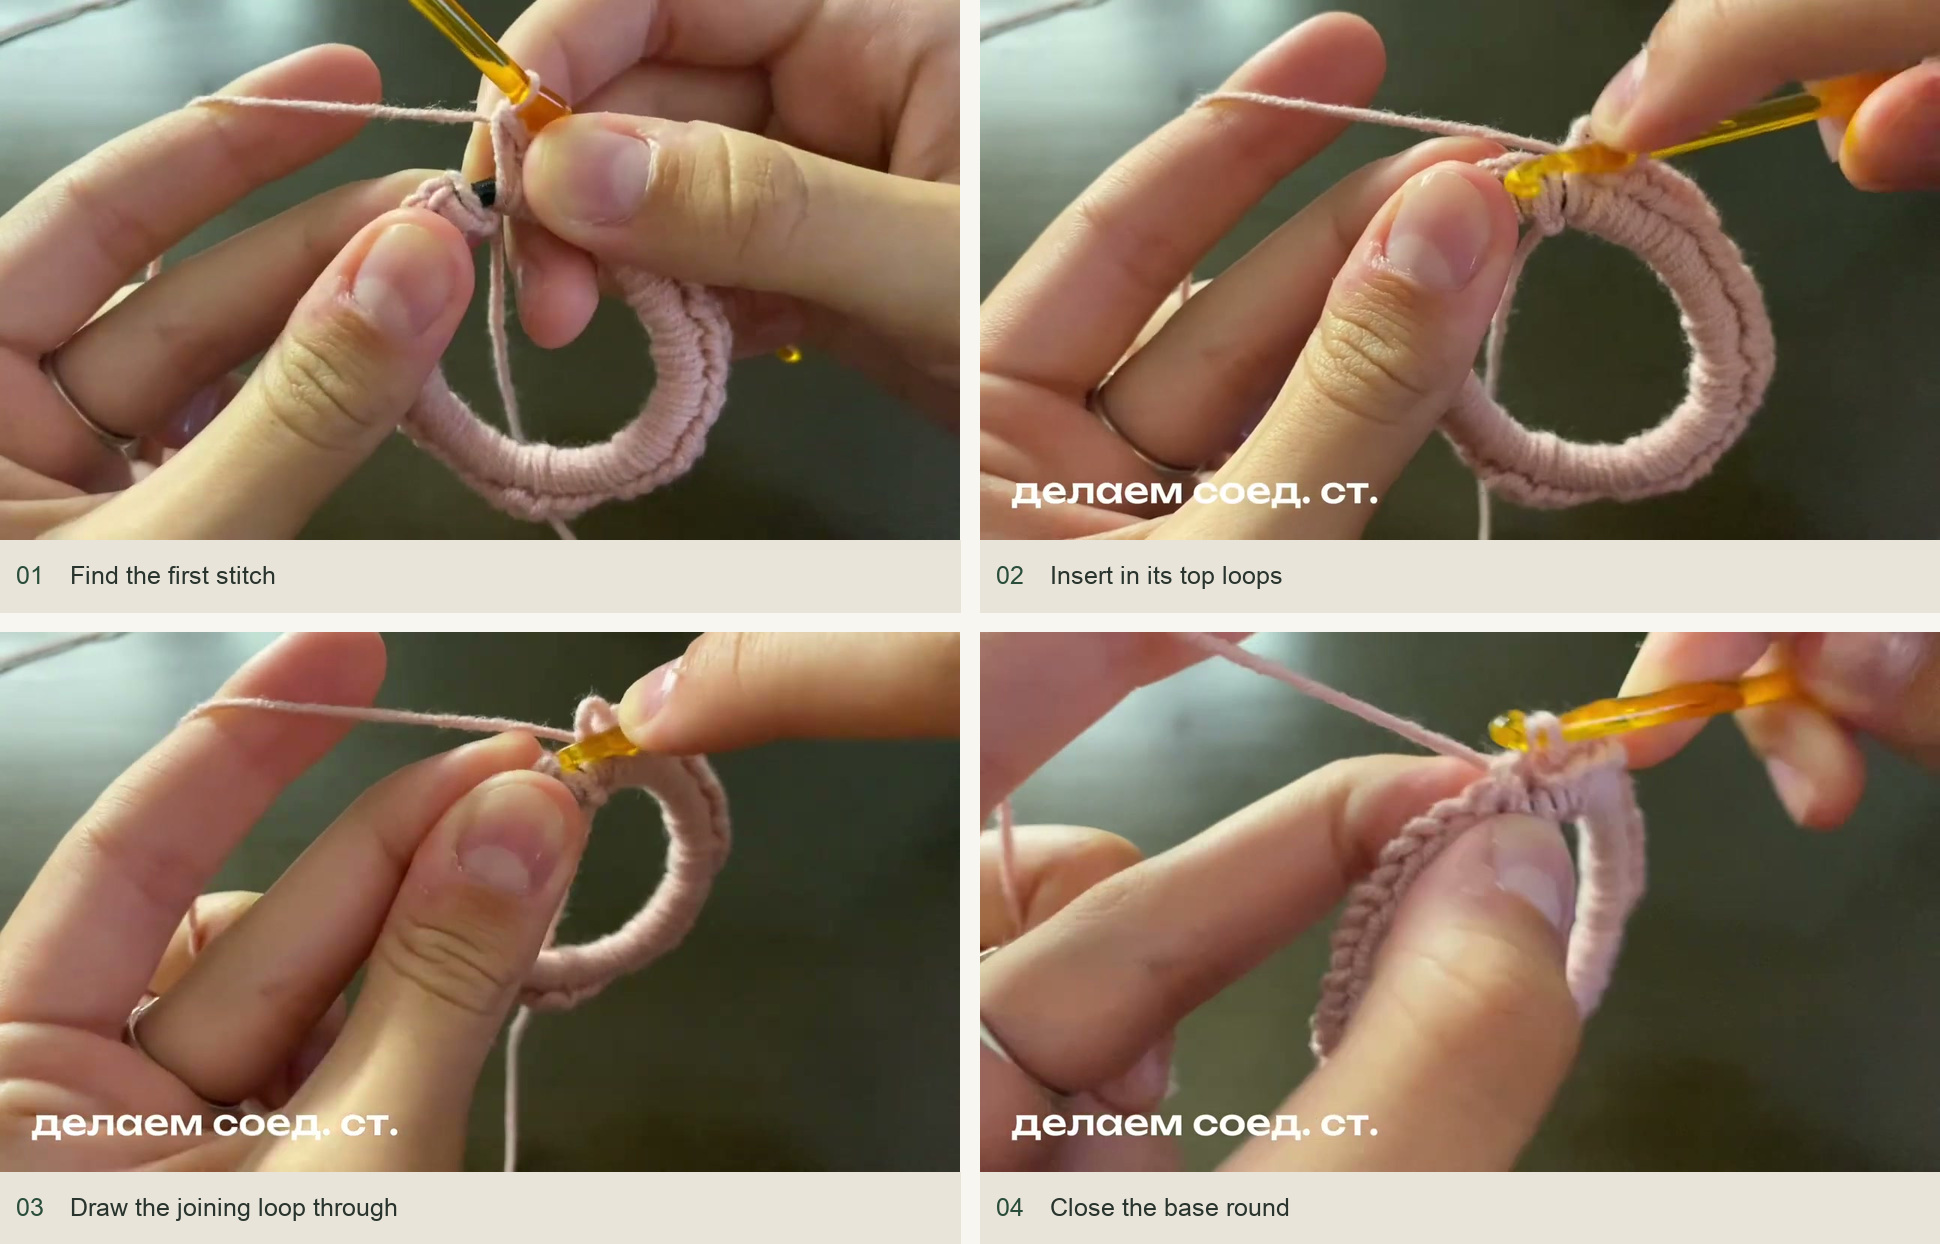
Follow the numbered views from left to right, then down. -
Build the double-crochet ruffle
Chain three. Following the demonstration, begin in the next base stitch and work three dc into that same stitch. Move to the next base stitch and make another group of three dc. Continue placing three dc in each remaining sc around the elastic. These extra stitches give the edge its soft waves.
Keep all three stitches of each group in the intended base position. Do not mistake the space between groups for a new base stitch. Let the fabric ruffle freely rather than trying to force the expanded round flat.
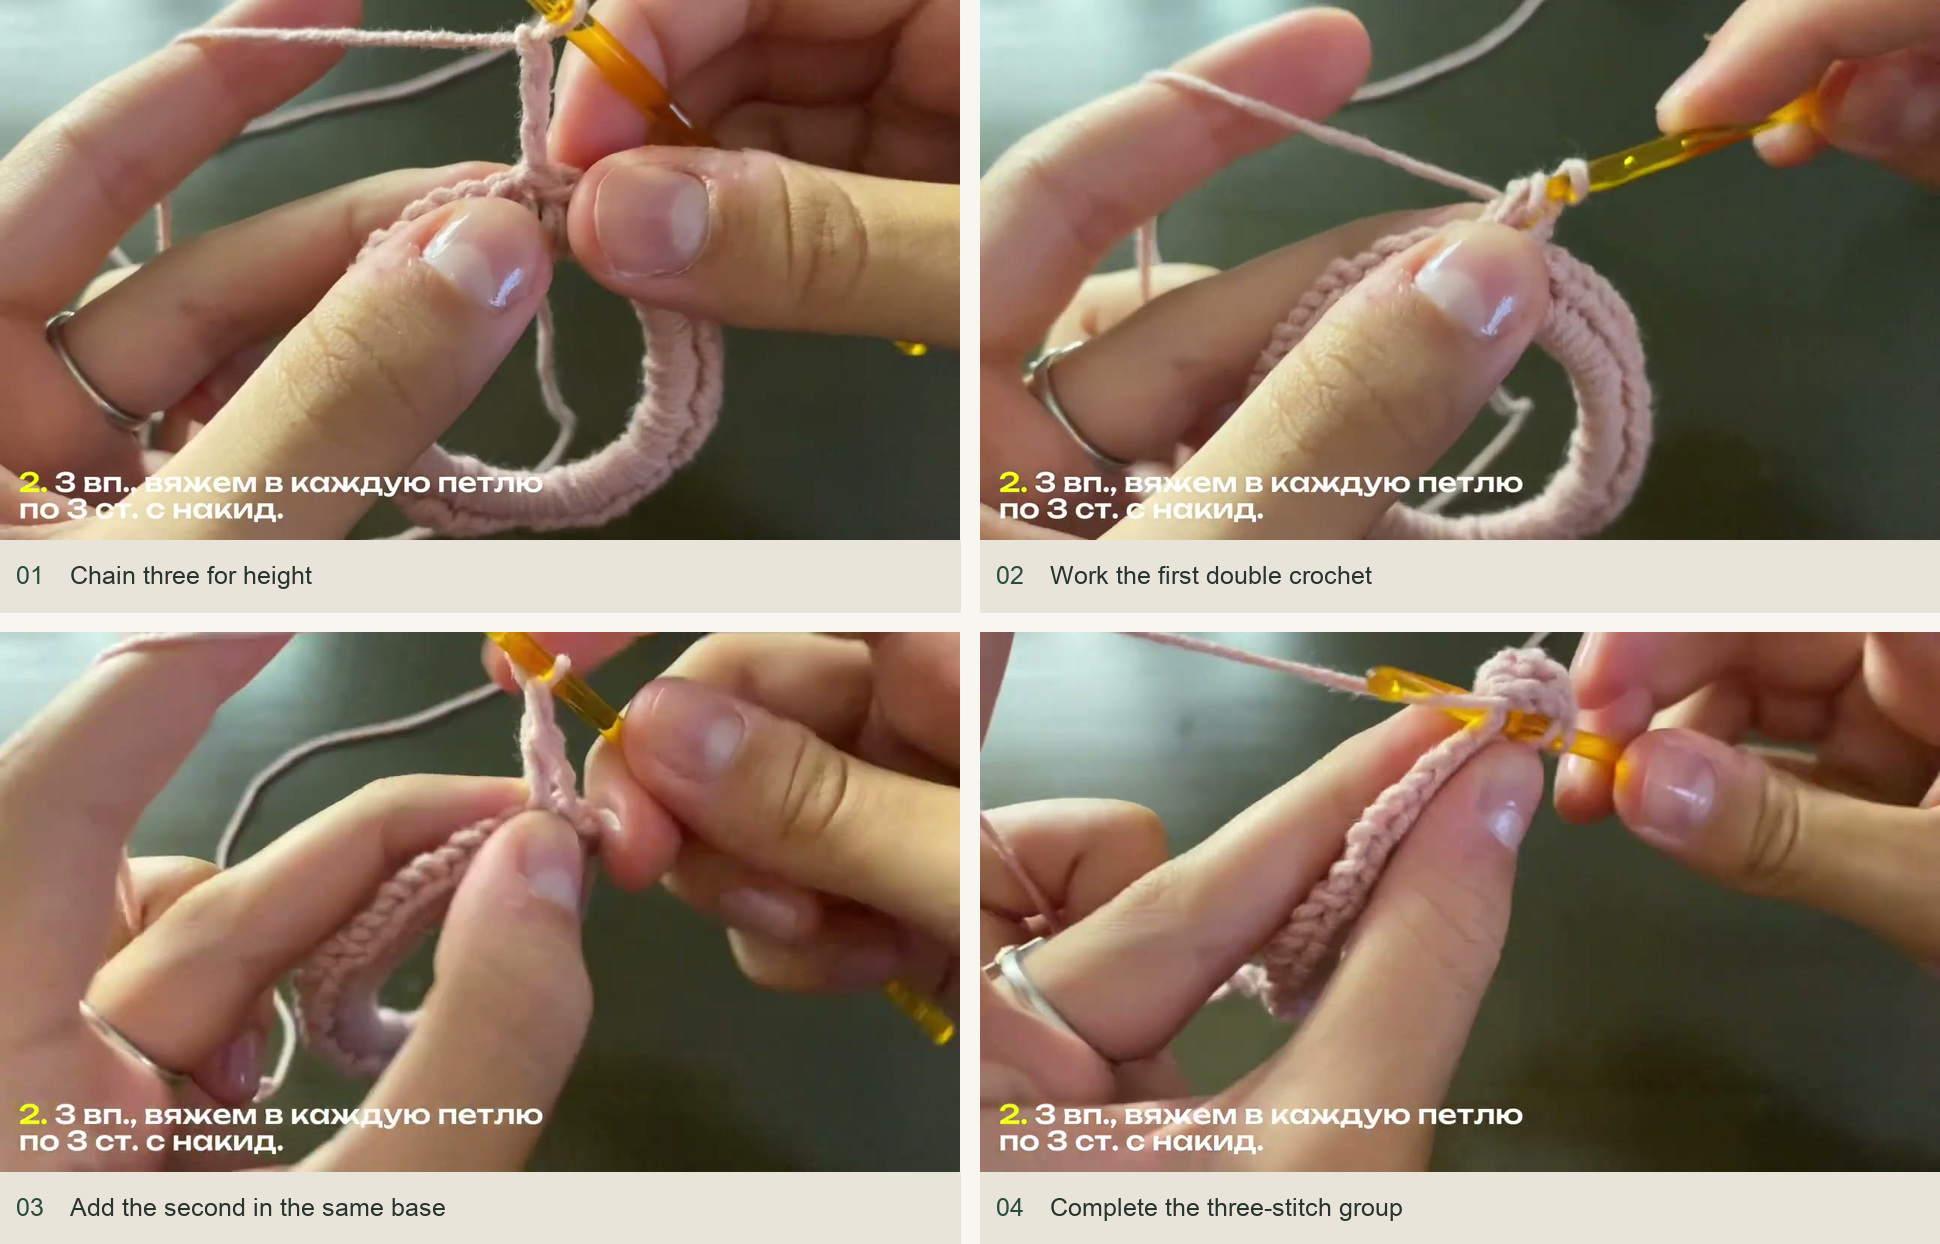
Follow the numbered views from left to right, then down. -
Close the ruffle round
At the end, locate the third chain of the beginning chain-three and join there with a sl st, as the creator demonstrates. Chain one, cut the main yarn with a finishing tail, and draw the tail through to secure it. Check the join before adding the border: a loose gap is easier to correct now.
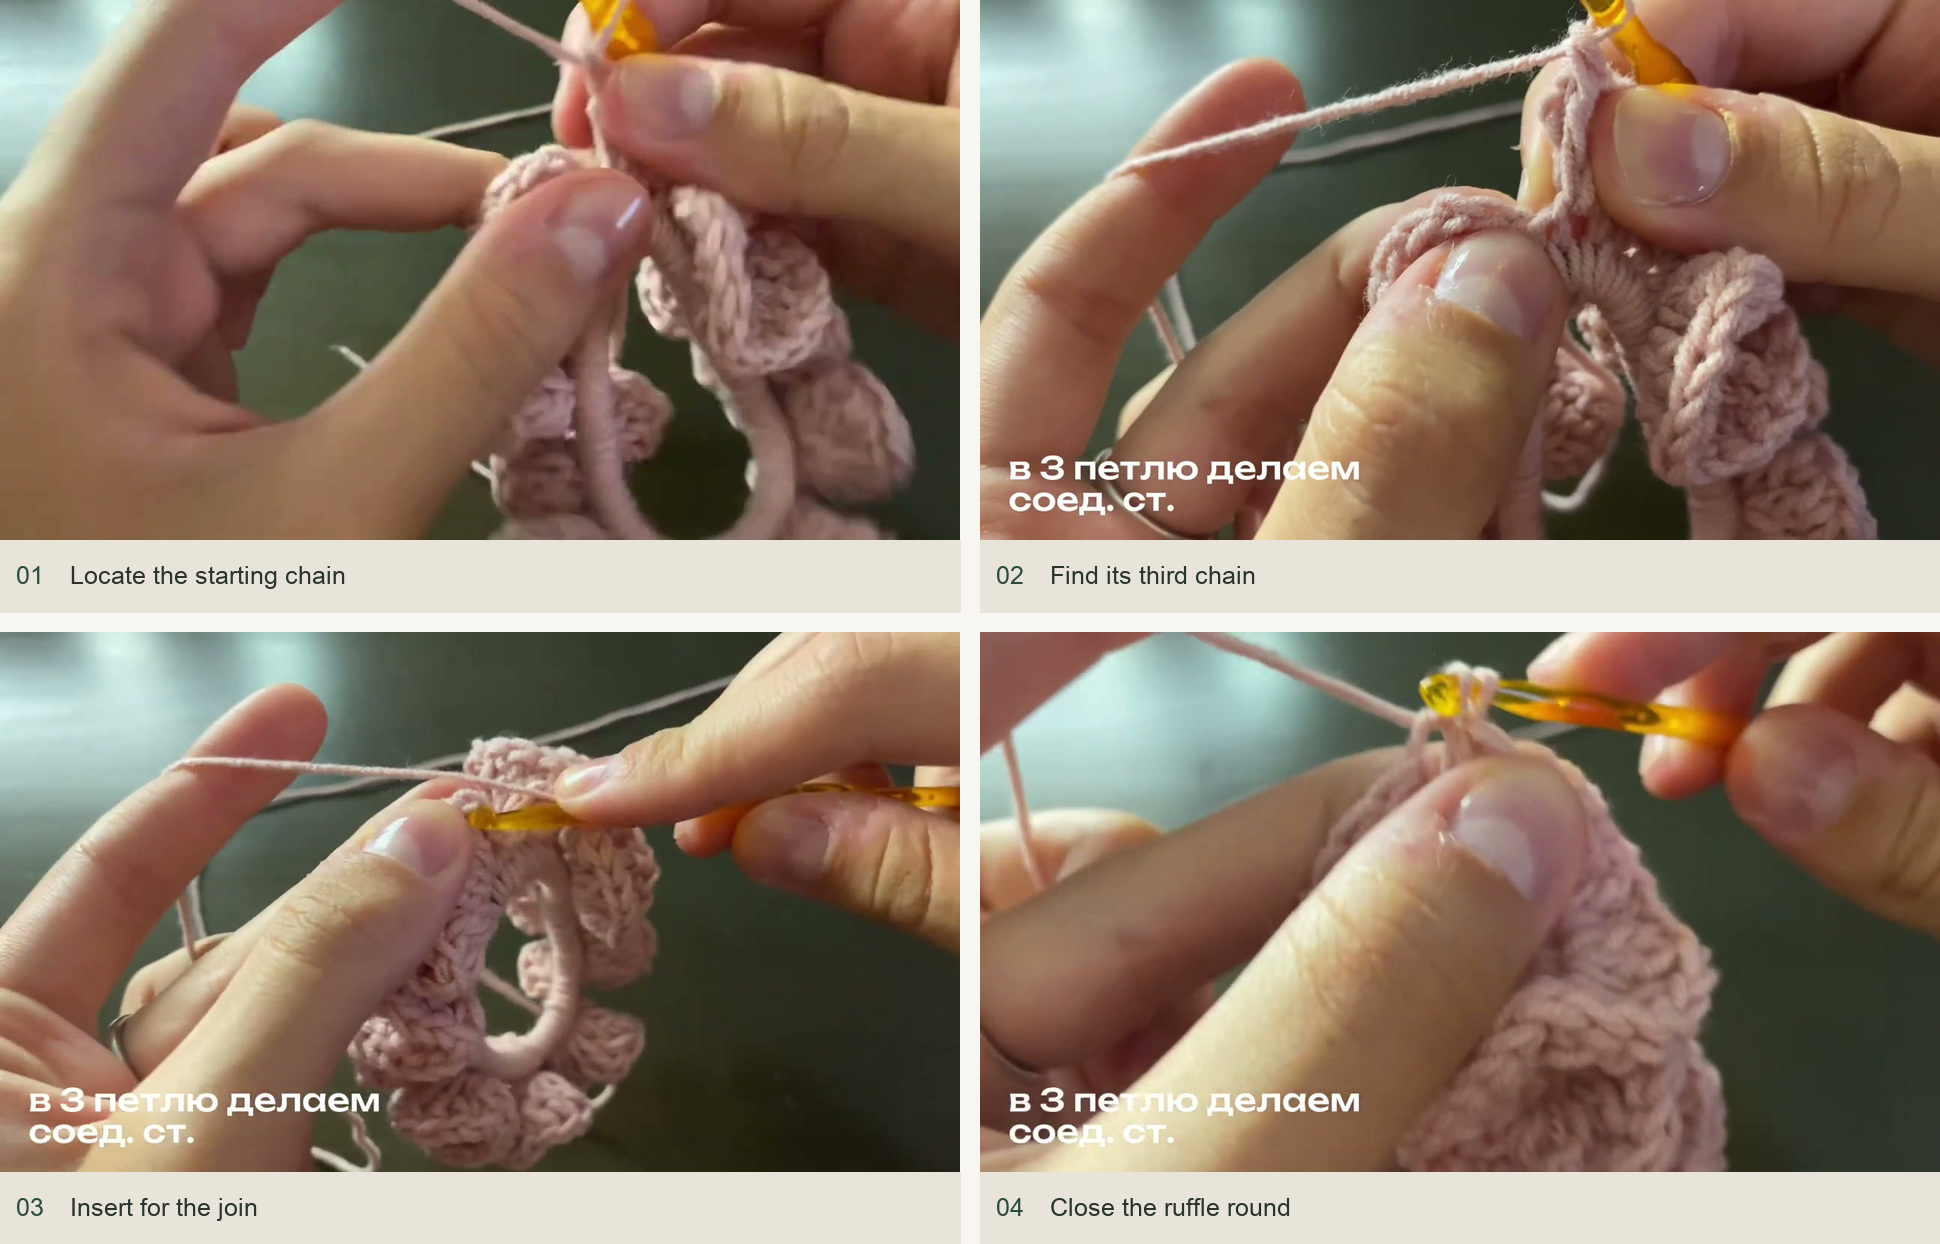
Follow the numbered views from left to right, then down. -
Add the contrasting single-crochet edge
Attach the contrast yarn in a stitch along the outer edge and chain one. Work one sc in each successive stitch around the ruffle. The contrast round follows the existing edge; it does not add another round of three-stitch groups. Turn the scrunchie in your hands as needed so a folded wave does not hide an unworked stitch.
Keep this narrow border relaxed. If it is much tighter than the main fabric, it can draw the ruffle into a stiff, crowded shape.
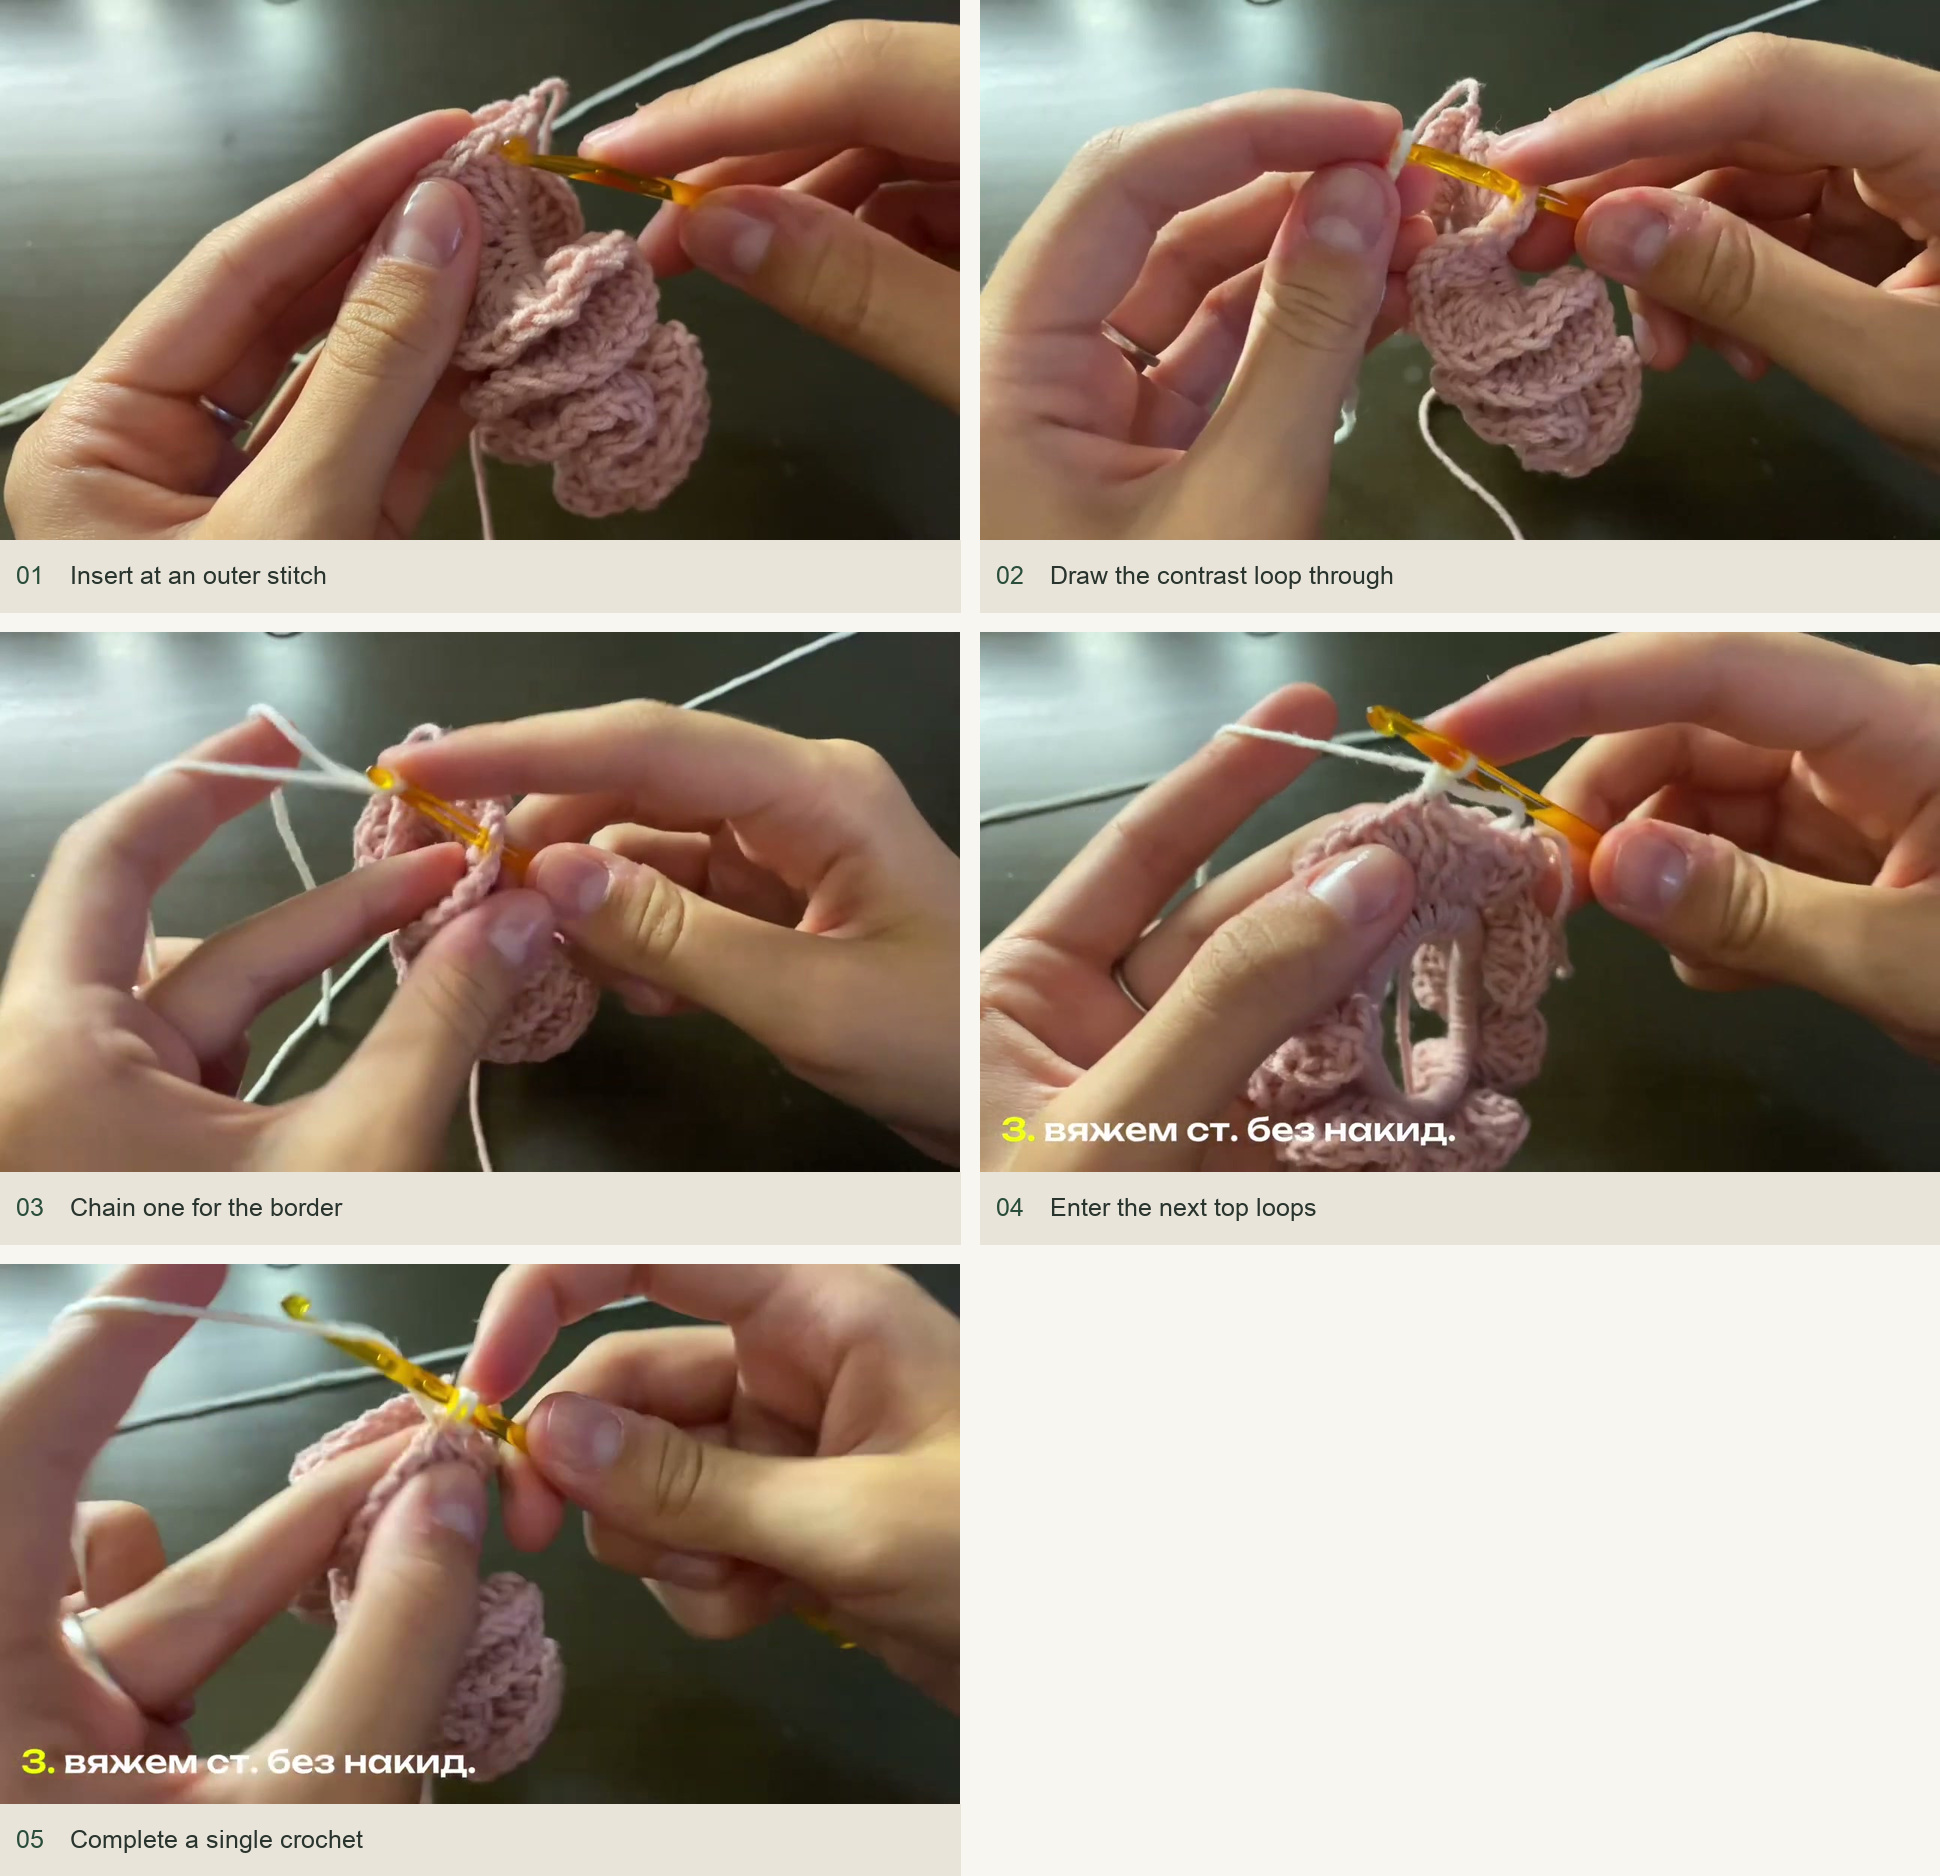
Follow the numbered views from left to right, then down. -
Finish the border and hide the ends
Join to the first border stitch with a sl st, chain one, and cut the yarn. Pull the tail through and weave the loose ends into their matching colors on the underside. The creator shows the completed result after hiding the ends; the video does not show every needle pass. Keep the finishing tails out of the elastic’s central opening.
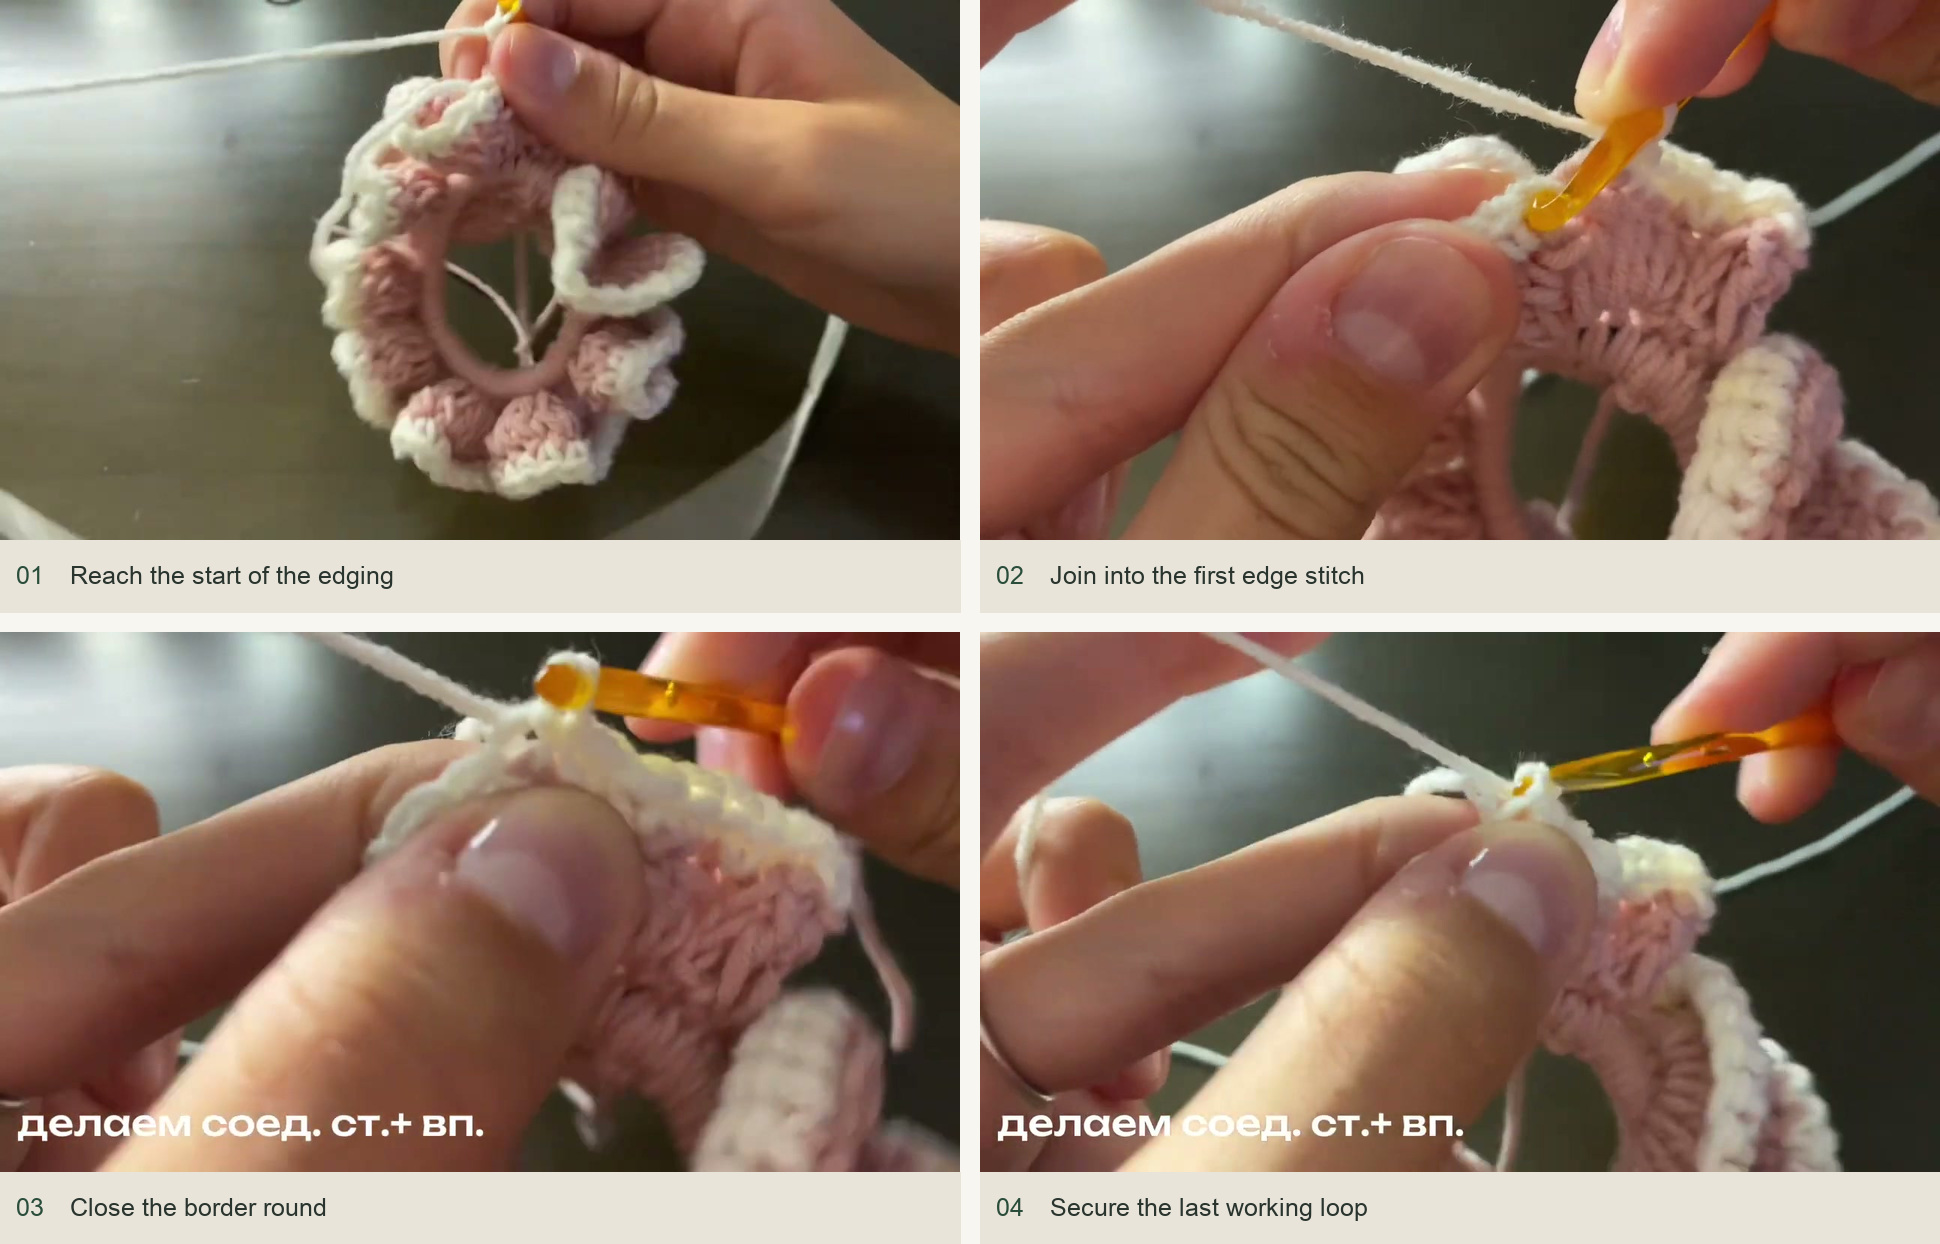
The panels show the final border join and securing loop. The detailed weaving-in is not demonstrated. -
Arrange the waves and check the stretch
Separate any folded-over waves with your fingers and compare the border all the way around. Gently stretch the elastic and let it recover. The crochet should move with the band, the contrast edge should remain continuous, and no loose tails should catch on your fingers. The soft ruffle is meant to have depth; it is not a flat flower or lace coaster.
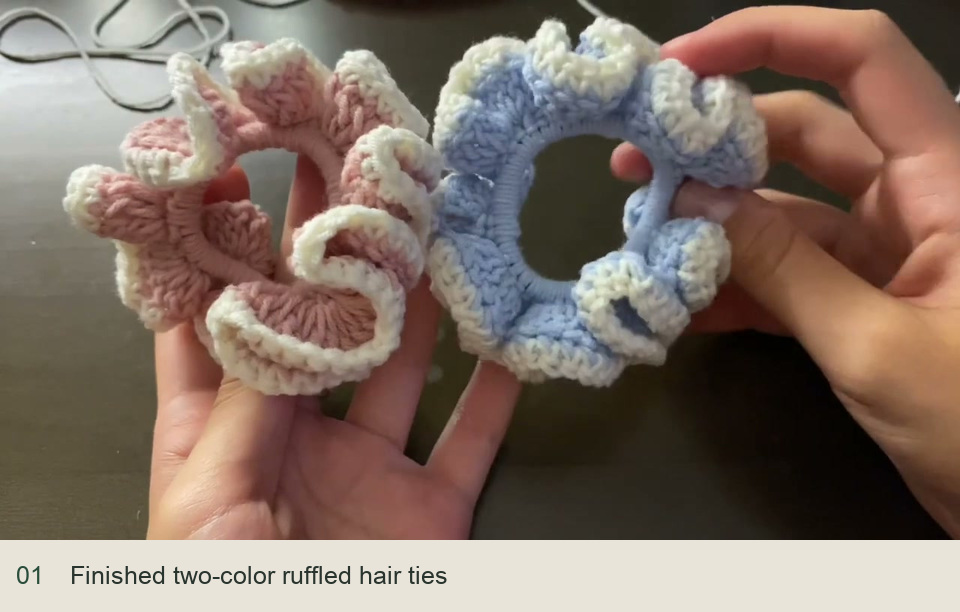
Pink with white and blue with white show the same ruffled construction.
Small fixes before you finish
| What you see | What to check |
|---|---|
| Elastic shows through | Slide the base stitches together and check coverage under gentle stretch. |
| An uneven section of ruffle | Look for a missed base stitch or a group with fewer than three dc. |
| The edge feels tight | Relax the contrast-round tension and check that every outer stitch was worked. |
Inspired by Katee Knits’ video tutorial. Watch the first design for the ruffled hair tie described here.
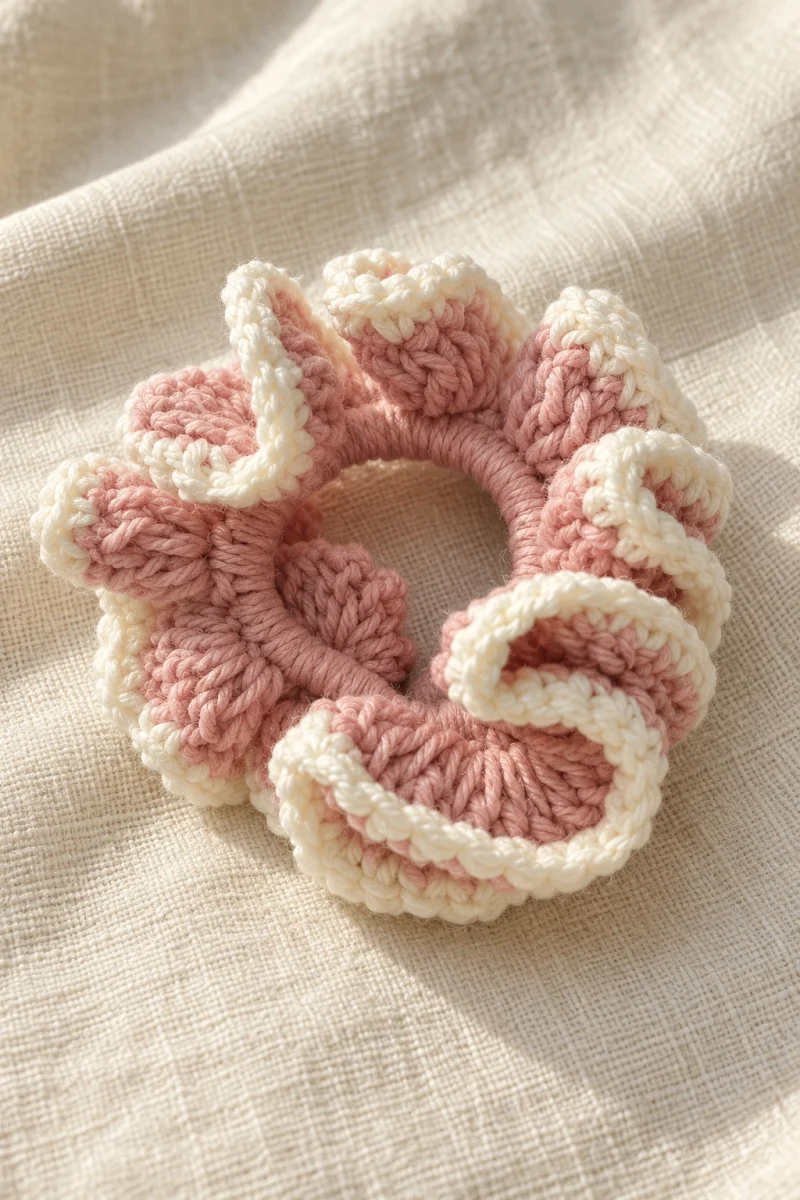
Save this pattern for later
Pin it to one of your boards so it’s ready when you have a free evening and the right yarn.