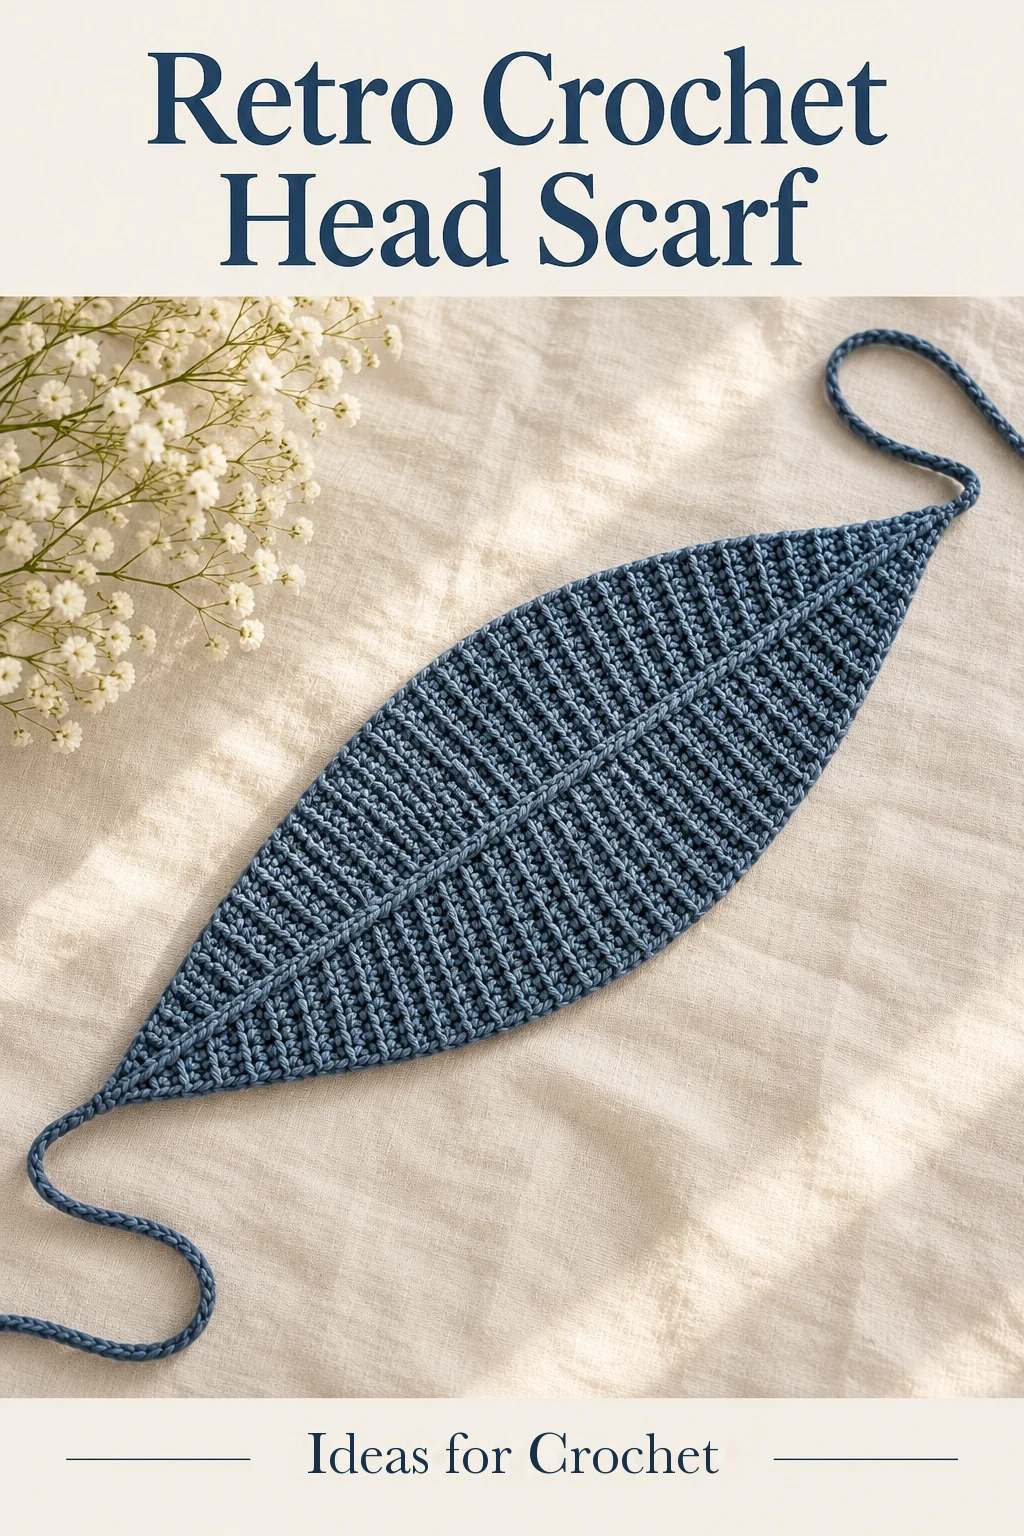
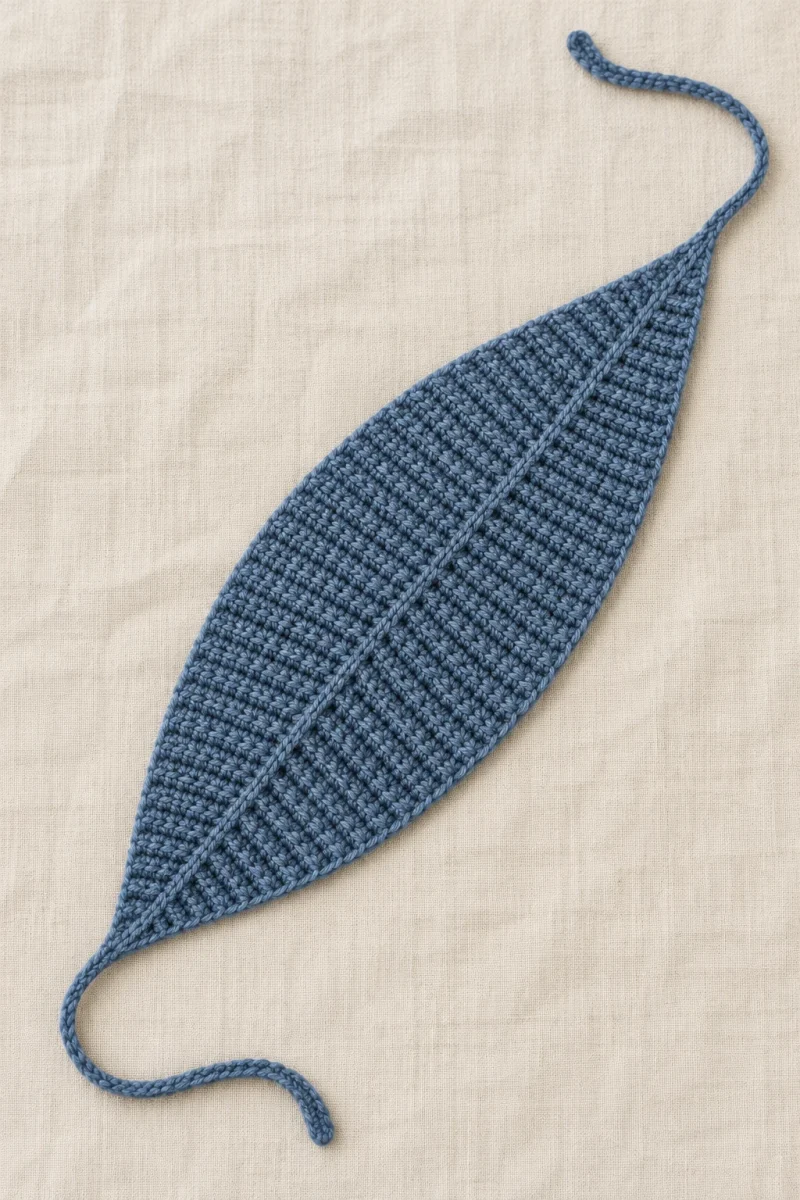
This retro crochet head scarf is a shaped ribbed panel that covers the crown and ties beneath the hair. It grows from three stitches to a broad center, runs straight for a short section and then narrows symmetrically.
Materials and measurements
The tutorial uses Alize Lanagold yarn and a 4 mm crochet hook. You also need a measuring tape, scissors, a yarn needle and a written row tally. The creator recommends marking each row on paper because the shaping happens on alternating rows. The optional surface detail uses the same yarn held double.
Measure from one earlobe over the crown to the other earlobe along the place where you want the scarf to sit. The sample measurement is 39 cm. This is not the full circumference around the forehead and nape. Allow for the volume of your hair and try the panel against your head during construction; the creator suggests adding roughly 3–4 cm if needed rather than treating her sample as a universal fit.
| Stage | Sample checkpoint |
|---|---|
| Foundation | Ch 4, then 3 sc |
| Increasing section | 31 rows, ending with 33 sc |
| First shaped section | About 17 cm long, 15.5 cm wide during construction |
| Straight center | 20 rows in the sample; fit by measurement |
| Start of decreases | Row 52 in the demonstrated count |
| Finished main panel | About 39–40 cm long and 17 cm wide |
| Ties | 45–50 chains, returned with slip stitches |
Increase from the first narrow end
-
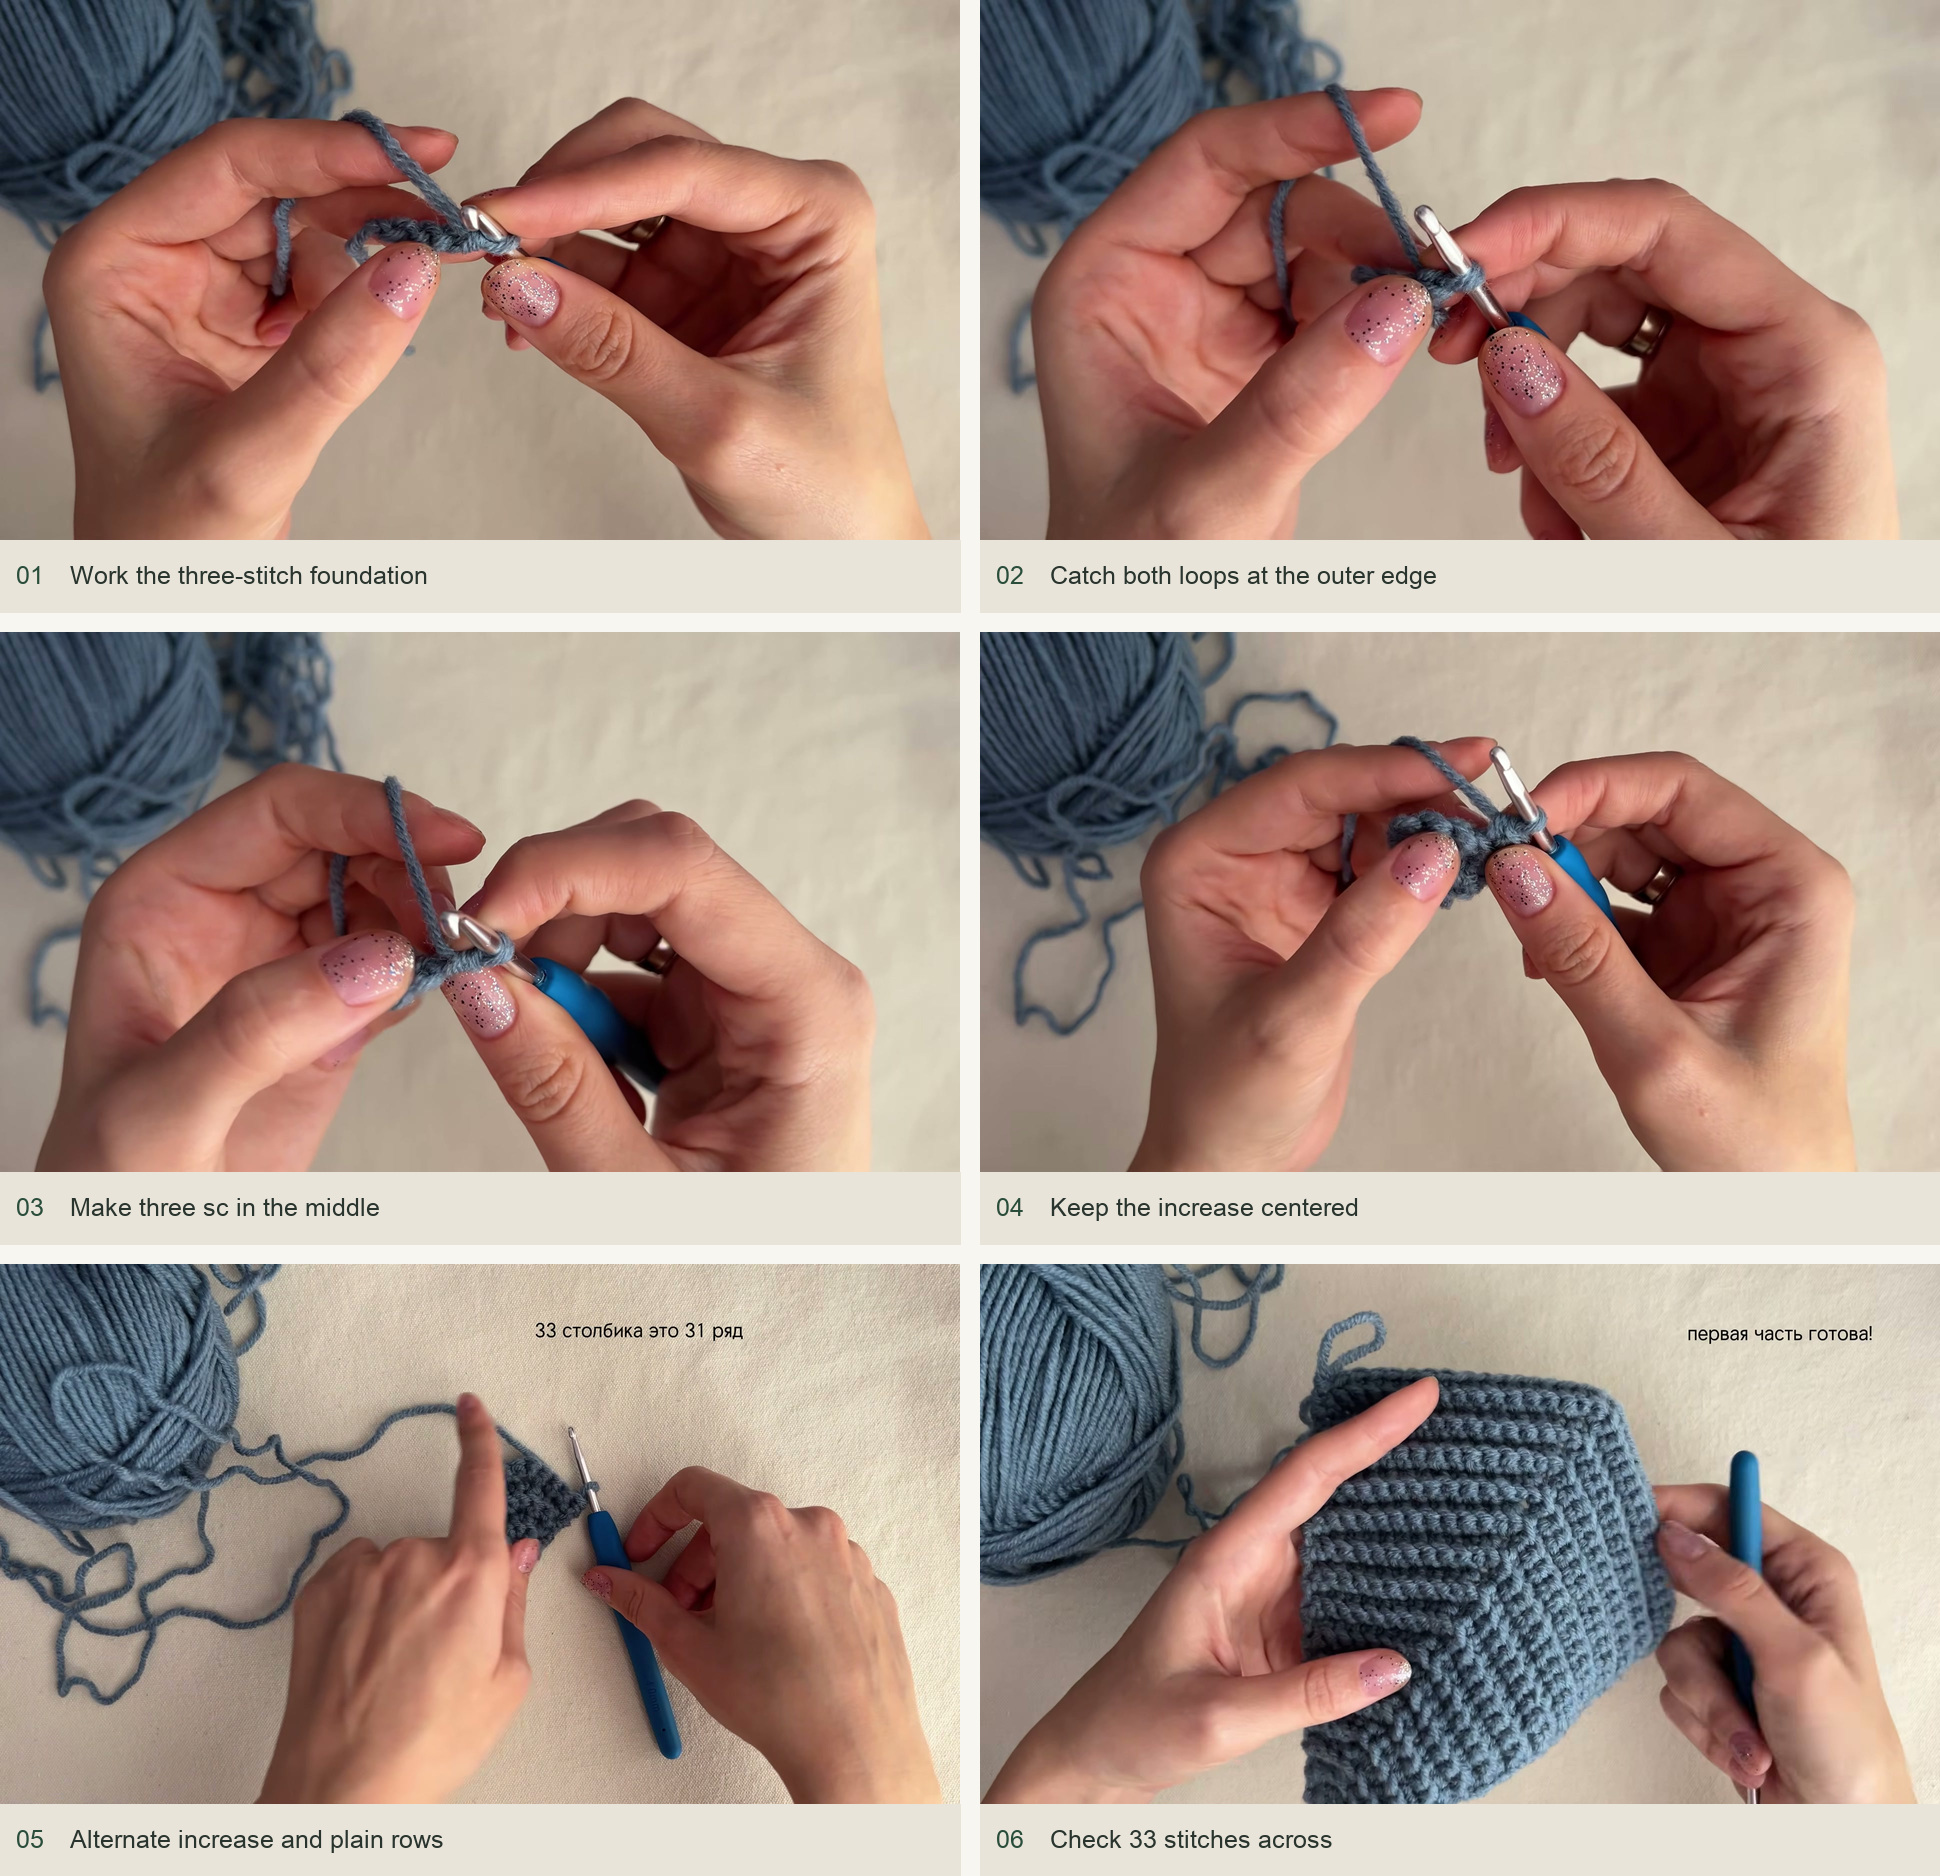
Make the three-stitch foundation
Ch 4. Starting in the second chain from the hook, sc into each back bump for 3 sc. Mark this as row 1. Turn without adding a chain. Keep the foundation tail accessible so you can recognize the starting end later.
-
Increase in the center
For row 2, sc through both loops of the first stitch, make 3 sc through the back loop of the middle stitch, then sc through both loops of the last stitch. There are now 5 sc. Making three stitches in one adds two stitches; this is the increase used throughout the first section.
-
Alternate plain and increase rows
Row 3 is plain: sc across 5 stitches, both loops at the edges and back loops inside. On row 4, work to the exact middle stitch and make 3 sc there, giving 7 sc. Continue increasing by two in the center of each even-numbered row. Work the odd-numbered rows without shaping. Move a center marker as needed; every row should have an odd stitch count.
-
Reach the demonstrated width
At row 30, the sample reaches 33 sc; row 31 is the plain return across those 33 stitches. The shaped section measures about 17 cm long and 15.5 cm across at this point. If you need a wider scarf, continue the alternating center increases before starting the straight section, and note the new stitch count for the matching decreases later.
Fit the straight center section
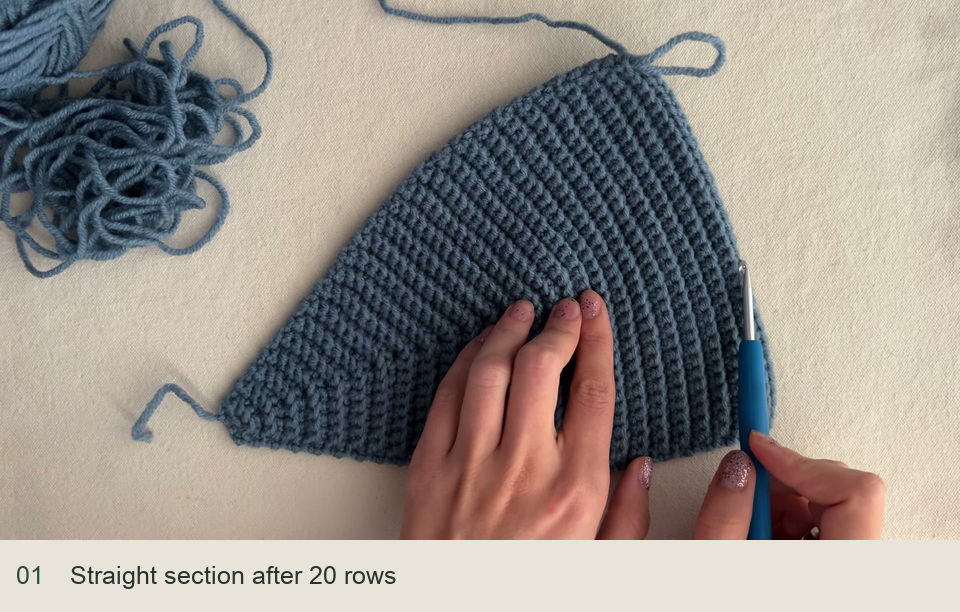
Work back and forth across the established 33 stitches without increases or decreases. Keep the same edge treatment and back-loop interior. The sample adds 20 straight rows, ending at row 51 overall. Row count is secondary here: the creator measures the first and final tapered sections as approximately 17 cm each, leaving roughly 5–6 cm between them for her 39 cm crown measurement.
Try the panel over the crown before beginning the second taper. Consider its stretch and how much hair will sit underneath. Do not add the whole remaining head measurement to the straight portion: the matching taper will contribute another section at the far end. Finish the straight section after an odd-numbered row so the decreases begin on the same even-row rhythm as the increases.
Decrease to the second narrow end
-
Center the first three-stitch decrease
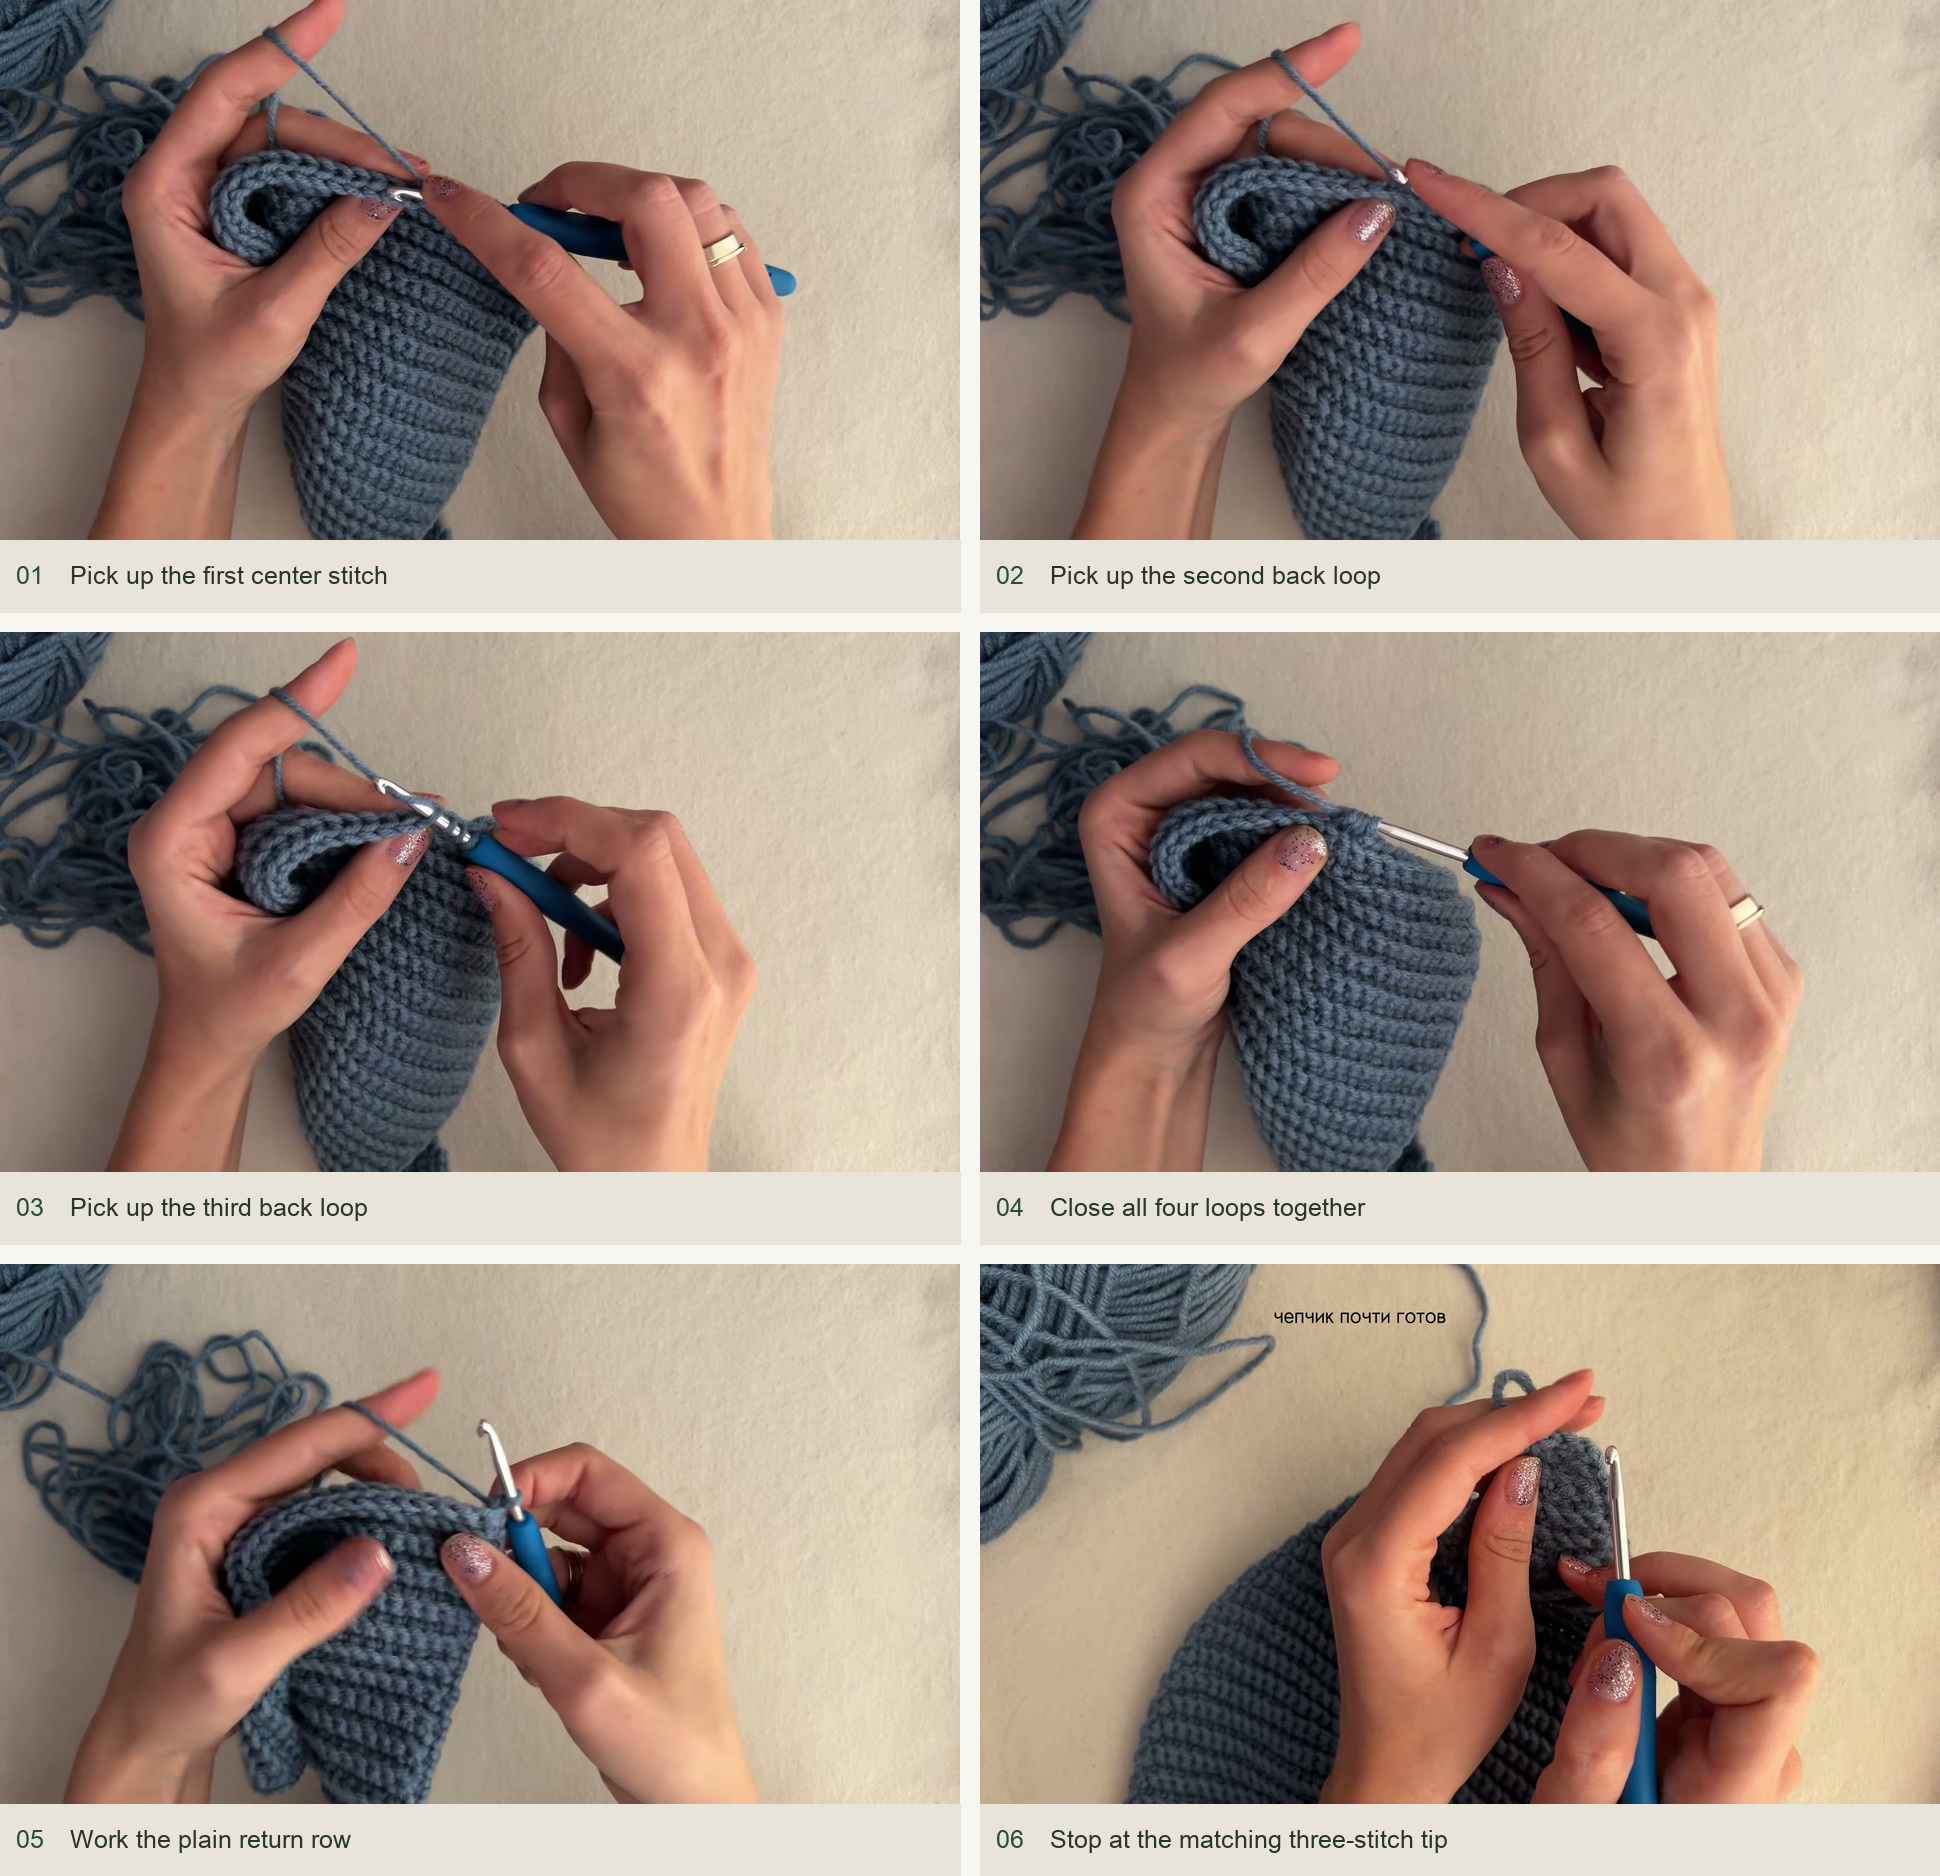
In the 33-stitch sample, sc across the first 15 stitches. Draw up a loop through the back loop of each of the next three stitches, leaving all loops on the hook. Yarn over and draw through all four loops together. Sc across the final 15 stitches, using both loops for the last edge stitch. There are now 31 sc.
-
Work the plain return
Turn without a chain and sc across all 31 stitches. Keep the center decrease compact without pulling the whole row into a puckered point. Record this plain row before turning again.
-
Repeat on alternating rows
On the next decrease row, work 14 sc, decrease the central three stitches to one, then work 14 sc. Continue placing the decrease in the three middle positions of every even row, alternating with a plain row. Each decrease row removes two stitches. Stop when 3 sc remain, matching the first end.
Edge the panel and add the ties
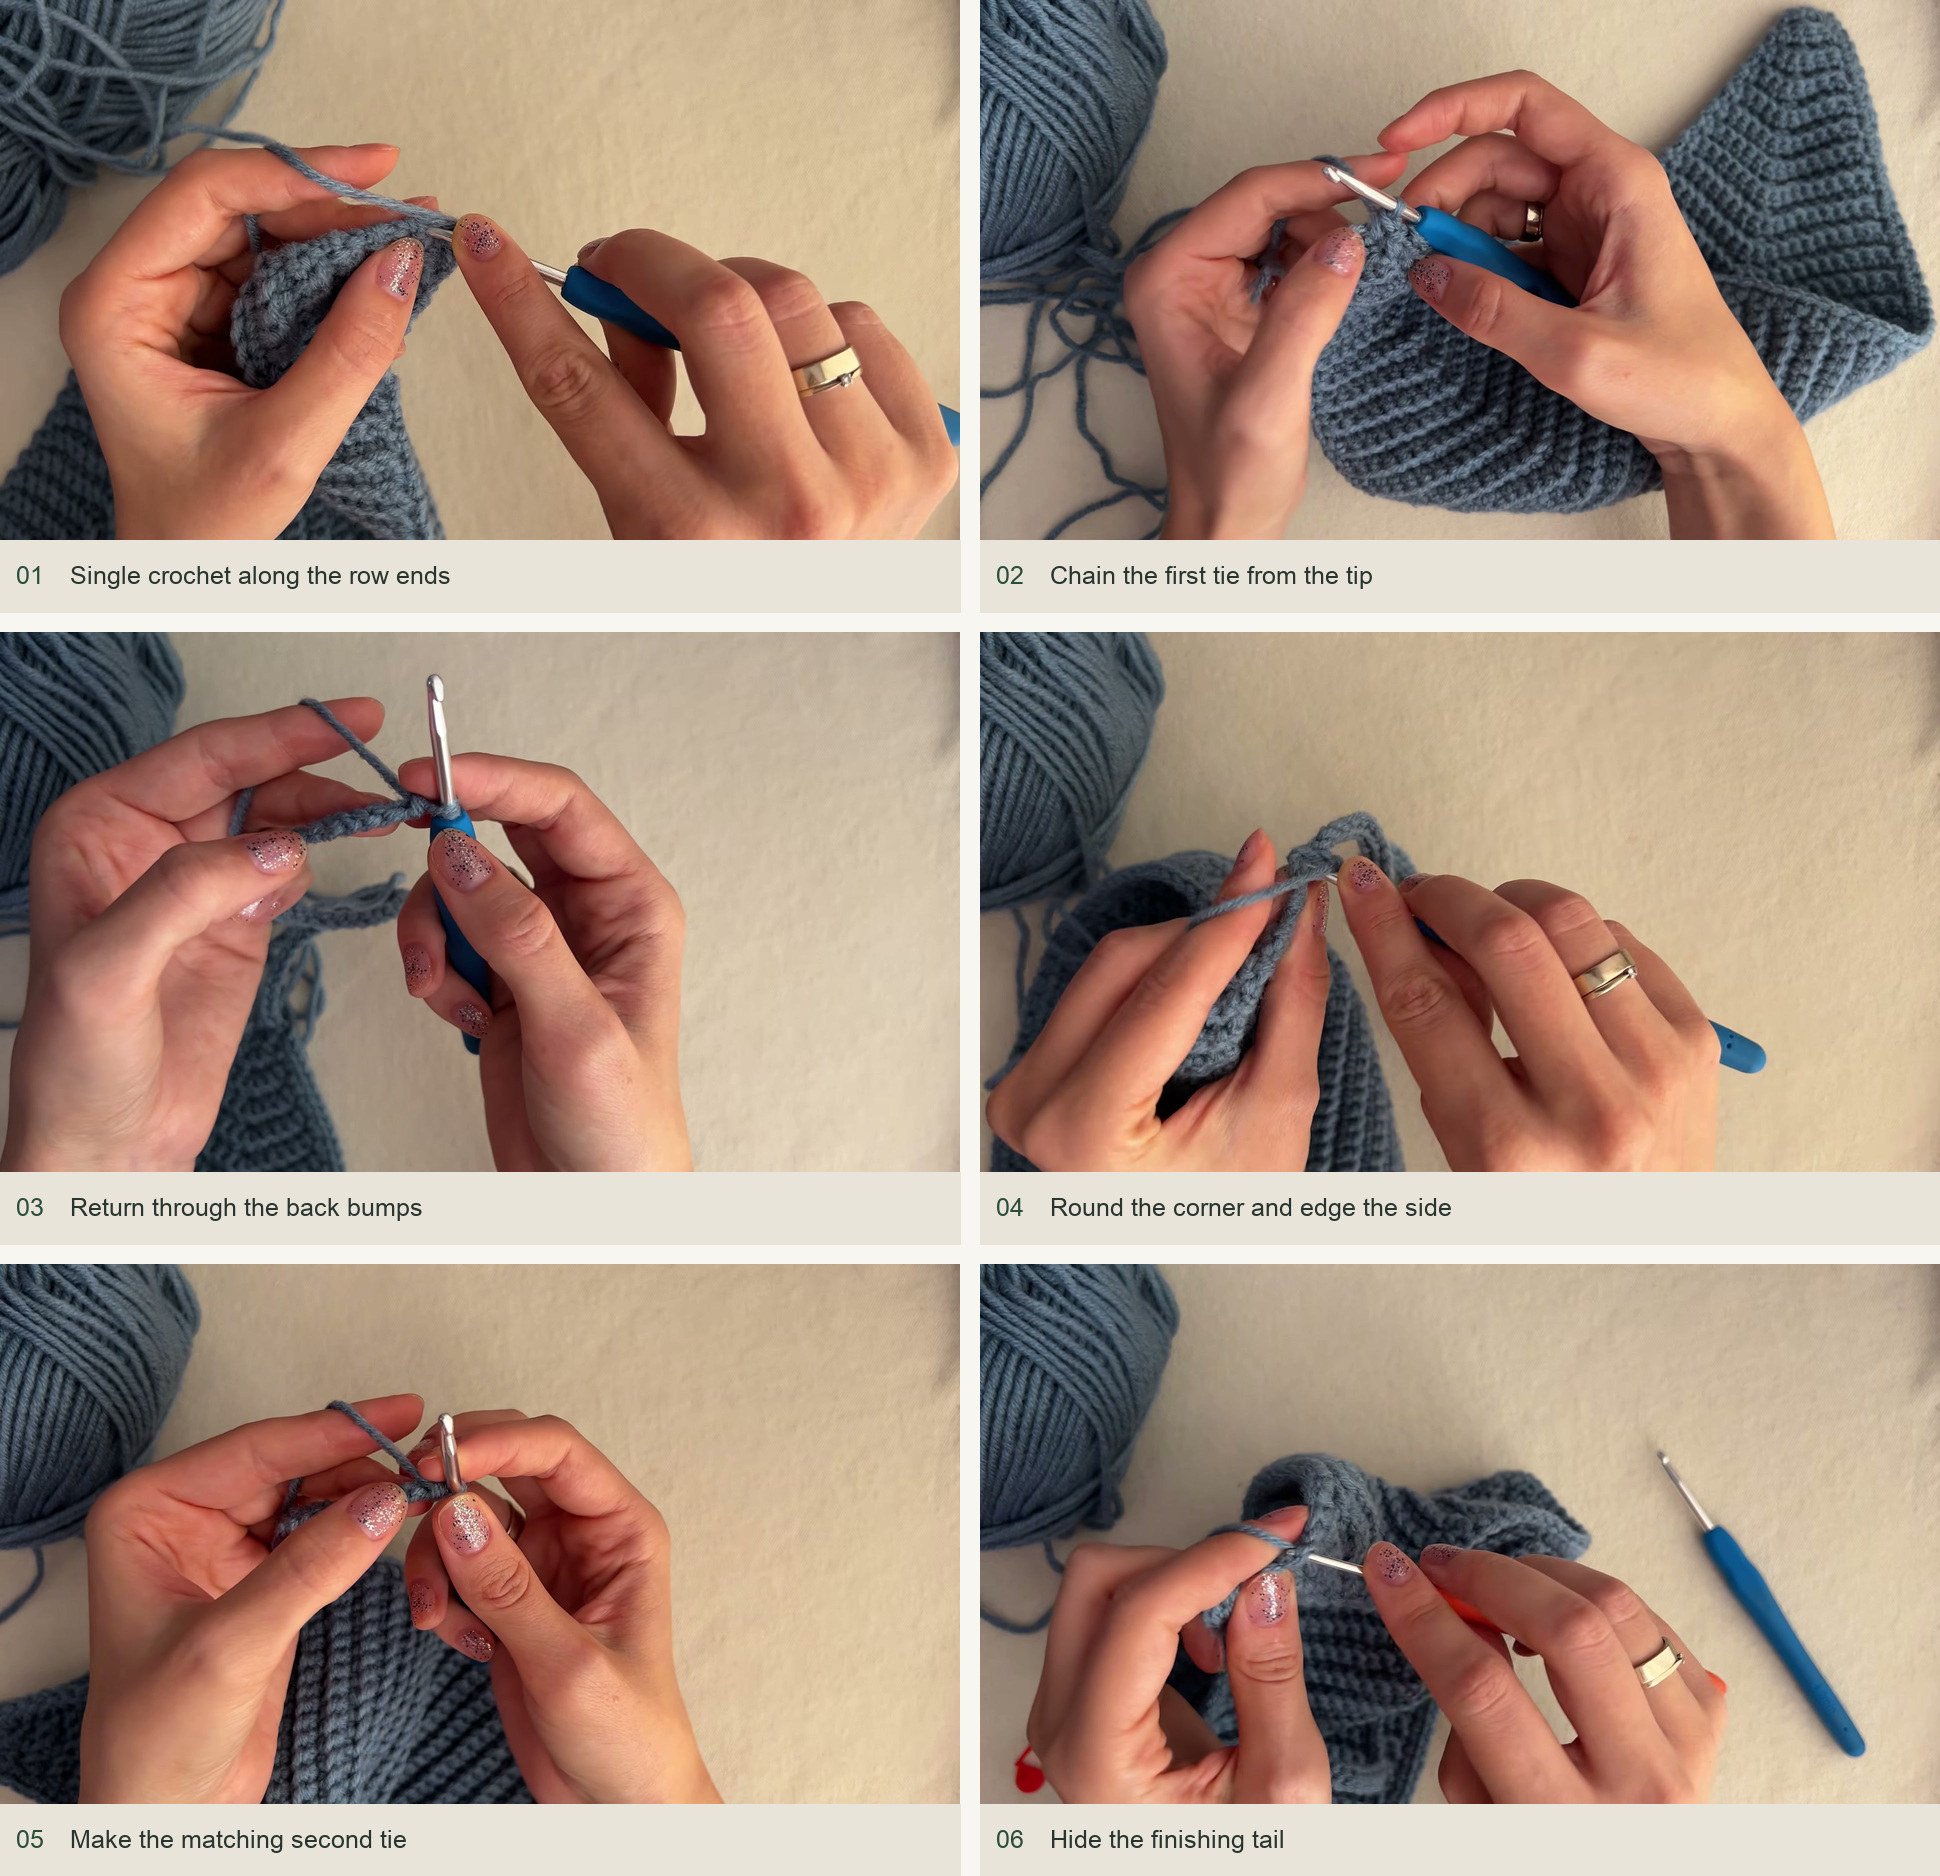
Keep the yarn attached. Ch 1 and work sc into the visible side openings along the first long edge, following the row ends. Use even tension so the border does not shorten the panel. At the opposite tip, add the demonstrated ch-1 corner turn and another sc in the same corner position to round it. Incorporate the beginning tail into the edge as practical.
From this narrow end, ch 45–50 for the first tie. Turn the chain over, skip its first back bump and slip stitch into the following back bumps all the way back to the panel. Keep these slip stitches relaxed; tight stitches make a hard, curling tie. Work the matching sc and ch-1 corner turn into the panel, then edge the other long side. At the far tip, repeat the tie; the sample’s second tie has 50 chains. Match your two ties before fastening off.
Make a neat imitation finishing stitch and bury the tail along the inside edge. Stretch each tie gently with your fingers to settle its stitches. Try the scarf on, knotting beneath the hair, and check that both narrow tips sit evenly rather than pulling one side forward.
Optional center line and final checks
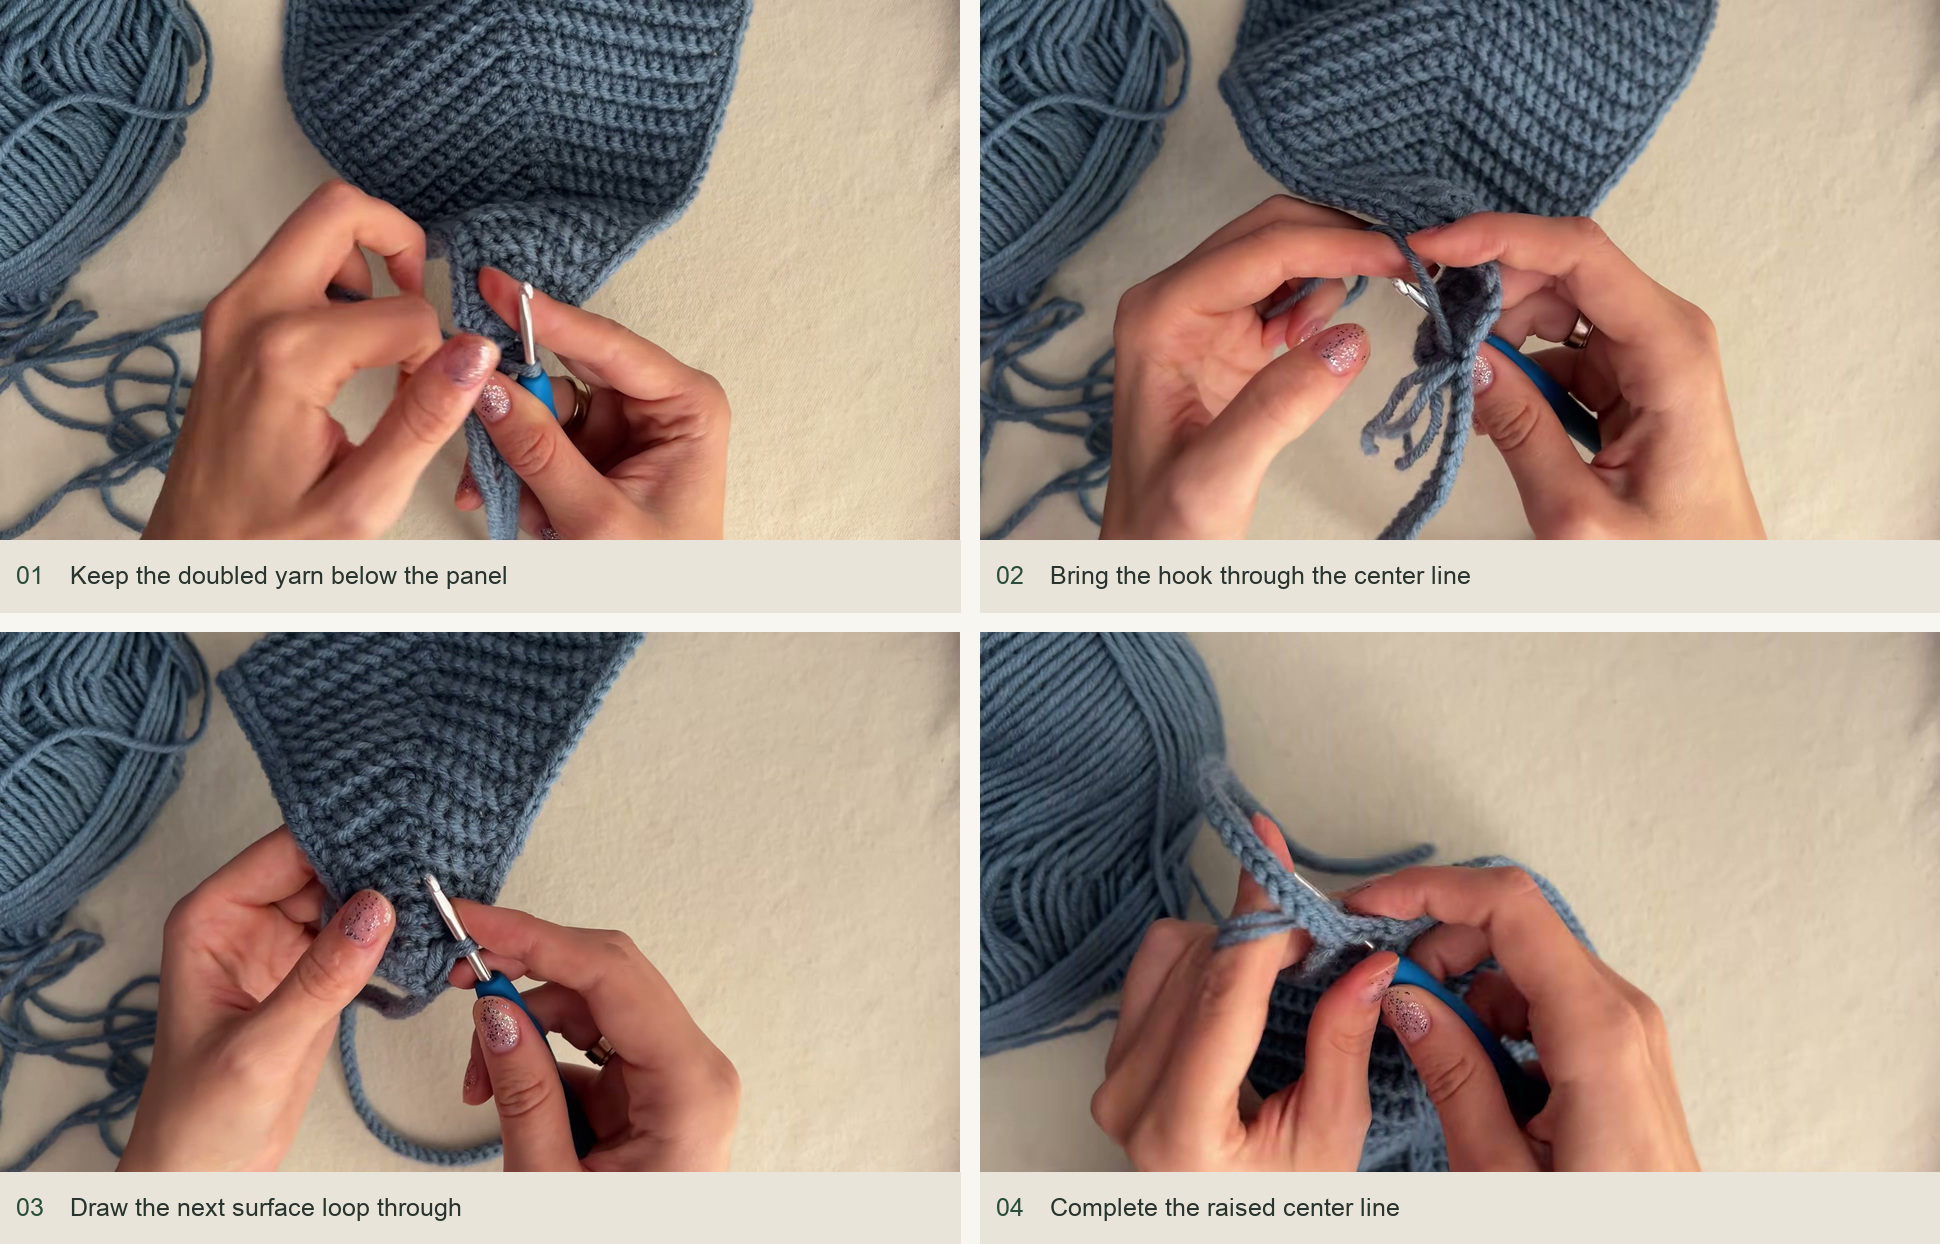
For the raised center detail, use the same yarn held double. Keep that yarn beneath the panel and insert the hook from the front through the central line formed by the increases and decreases. Draw a loop up to the surface and continue surface slip stitches toward the other end. The creator spaces hers about half a centimeter apart, sometimes skipping an opening to keep the spacing regular. Leave enough slack for the ribbed panel to stretch.
If the two sides look unequal, check whether an increase entered the wrong middle stitch. If the edge tightens after bordering, undo the tight sc rather than forcing the fabric to stretch. If the scarf feels snug over thick hair, increase the straight center length before finishing the second taper and use the actual fit to guide the change.
Inspired by ВЯЗАЛЬЩИЦА КЭТ’s video tutorial.
Save this pattern for later
Pin it to one of your boards so it’s ready when you have a free evening and the right yarn.